You don't really need a new app to write. You could write a book in your email drafts, Notepad, your phone's notes app, or even in SMS messages if you're desperate. All you need is a blank space to type your thoughts.
What would be nice, though, is a tool that makes editing your text, organizing your thoughts, and formatting your final copy into a publishable eBook or print document. Perhaps something that'd help break a chapter into smaller pieces, let you find every mention of a character in seconds, or hide distractions and force you to write.
Microsoft Word is great for formatting your resume and shorter essays, as is Google Docs for writing within a team. Plain-text apps like iA Writer and Byword keep things focused on just your text. Adobe InDesign is state-of-the-art for turning text into beautiful print books and one-pagers.
For everything else—books, longform documents, blog posts, theses—there are two other great apps: Ulysses and Scrivener. Here's how Ulysses and Scrivener compare.
Ulysses vs. Scrivener:
Scrivener, This is Ulysses. Ulysses, Scrivener.
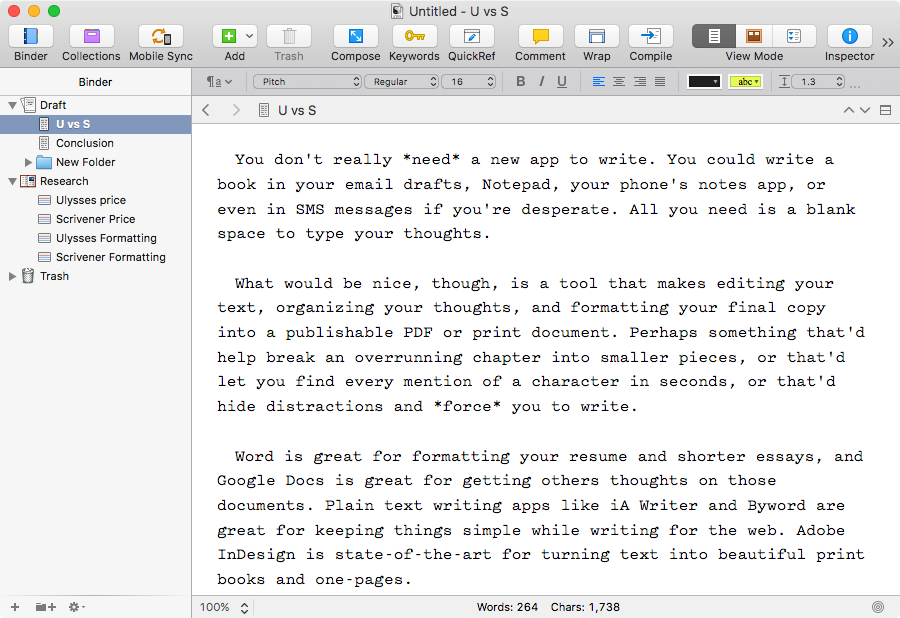
This is Scrivener. It's somewhat similar to Word at first glance, with a formatting toolbar where you can choose your font, format your text, and tweak other settings.
The sidebar makes the difference—that's where you organize your document with Draft and Research groups. Here you can: Add extra folders and documents to your draft to organize your project into books, chapters, and even individual paragraphs. Split a long document or combine sections in a new folder. Keep your notes, outline, and broader ideas in the research folder, with a card view to preview each while you're writing. And when you're done, export it all for print or into a PDF, rich text Word document, Final Draft screenplay, ePub or MOBI eBook, or an HTML webpage.
Scrivener costs $45 on macOS, $40 on Windows, and $19.99 on iOS.
Dig into Scrivener's best features with our in-depth Scrivener guide.
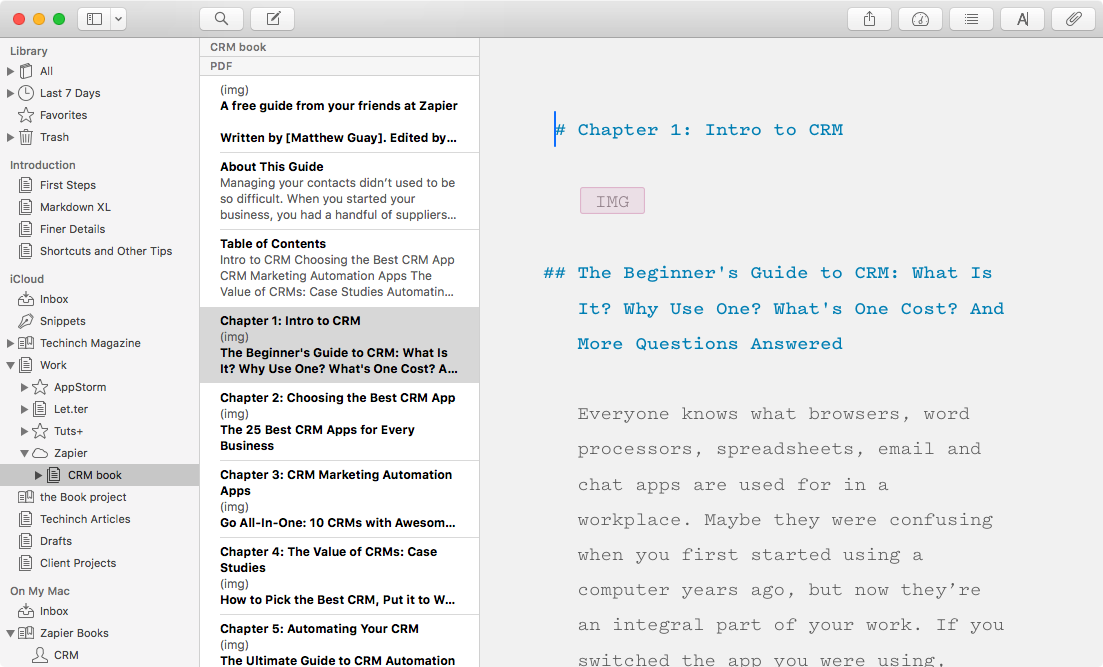
And this is Ulysses. It looks a bit simpler, perhaps like a notes app with 2 smaller left columns and a larger writing column. It accommodates Markdown formatting—so instead of tapping a button to bold text, you'll add two asterisks like **this** to bold it. Or, you could just press CMD + B like normal; Ulysses does its best to hide Markdown formatting and make it easy to use.
In addition to the main document view, you can add and view notes and references in a different sidebar or just add each note to its own document, expand it later with your final copy, and then merge individual documents into one larger file. And you can export your finished work for print or in PDF, Word document, ePub, or HTML formats—or can publish directly to WordPress and Medium blogs.
Ulysses costs $4.99/month for both its macOS and iOS apps—and it doesn't run on Windows.
Dig into Ulysses' best features with our in-depth Ulysses guide.
Both apps let you save notes, organize documents, write, and export your finished work—at a similar price. So what makes them different beyond their user interface?
Research and Outlining in Scrivener and Ulysses
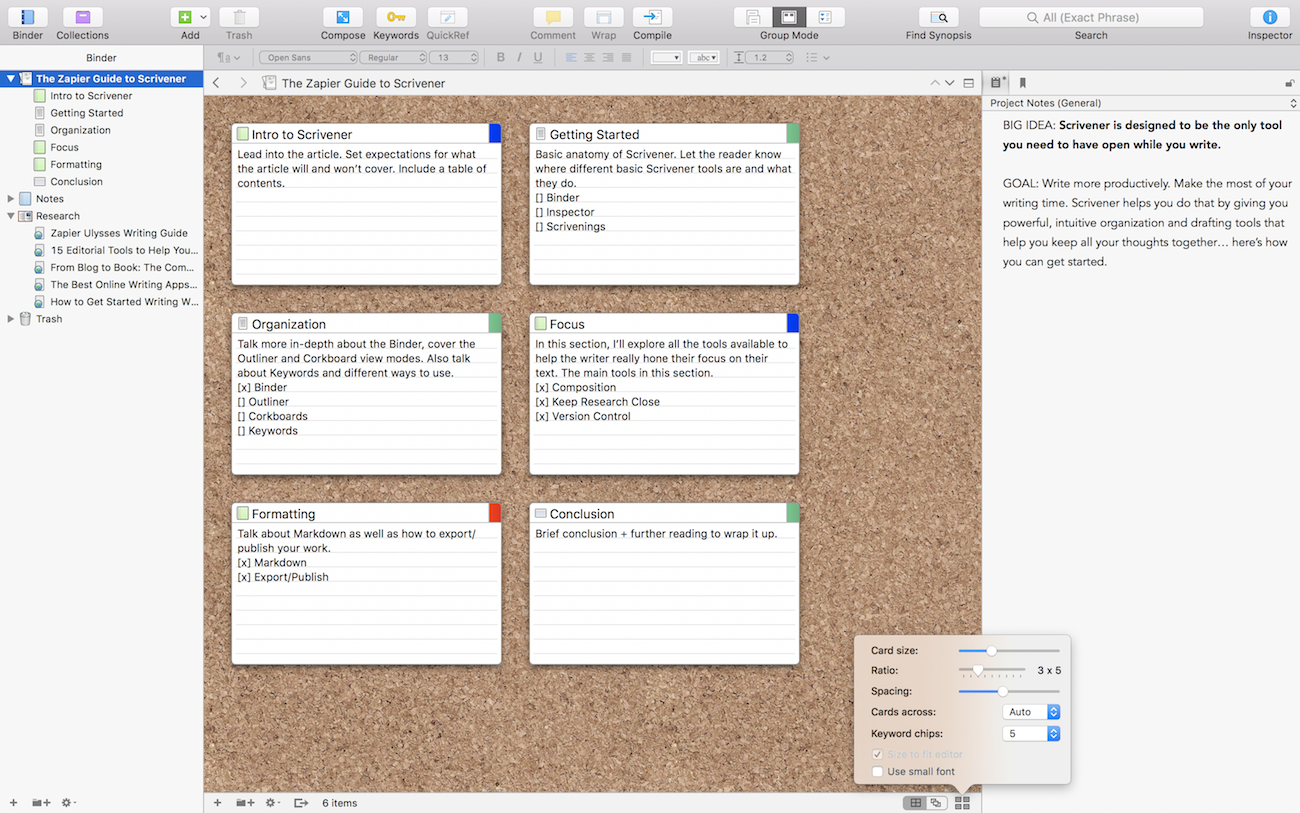
You have to start somewhere, and Scrivener hopes you'll start out with research. Each writing project includes a Research folder where you can add text notes or import full web pages and files from your computer for future reference.
Each document and note includes a title, the core text section, along with slightly hidden description and notes fields. Tap the i button to preview the description in a sidebar—a great place to list that document's main points and sketch out what it'll cover.
With your Research notes or your Draft documents, you can view the full documents with the default writing view. Or you can use the Corkboard view to preview just the title and description or the Outline view to see all your document metadata—perfect for organizing your document notes.
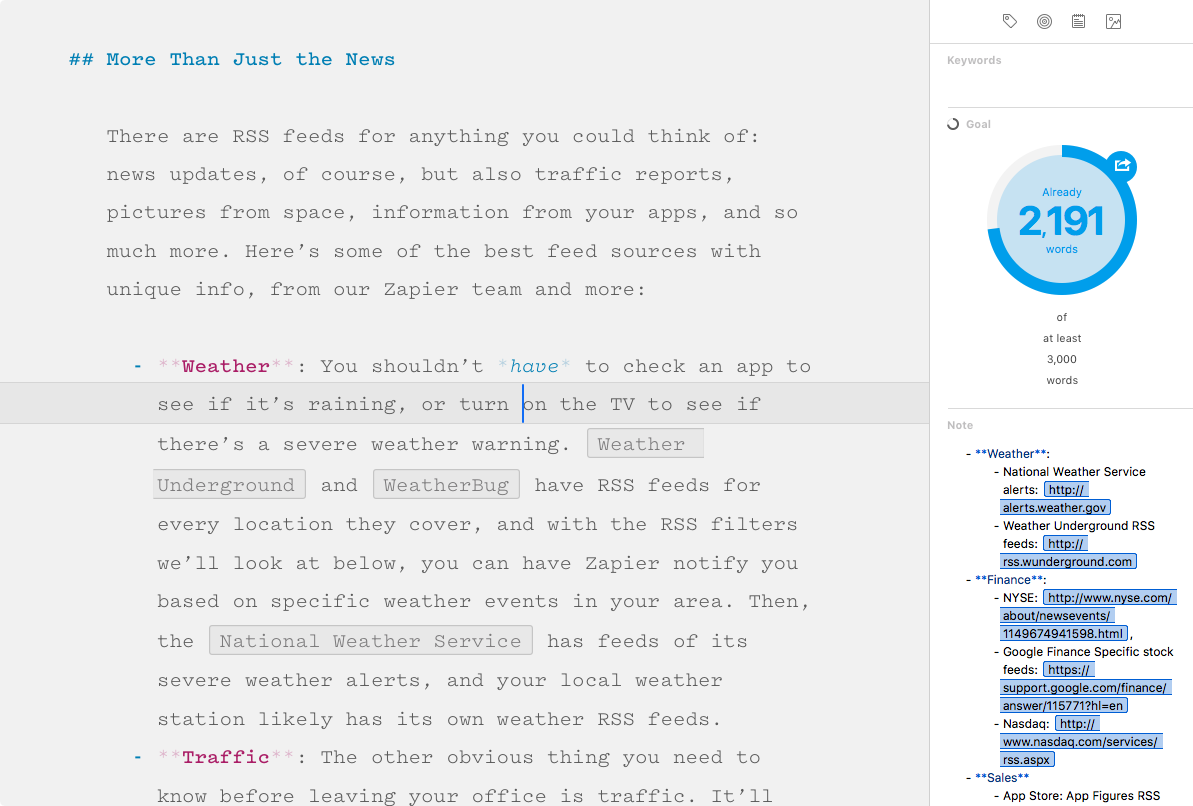
Ulysses is a bit more focused on your documents themselves. There's always the core writing pane visible. So, instead of adding notes separately, you could add your write your ideas in new documents and just manage them in a separate folder from your actual draft documents.
Or, you could add notes to your documents via Ulysses' slightly hidden right sidebar. Tap the paperclip icon in the toolbar to open that sidebar, where you can drag in files for reference and add notes panes with the details you need for each document. Those notes will only be visible if you open the sidebar, as a great way to add reference to your documents that guide your writing.
That means it might make sense to plan out your full writing project first, making new documents for every section. Then, when you're ready to write, open the notes pane in each document, and paste in your quotes and references there.
Writing in Scrivener and Ulysses
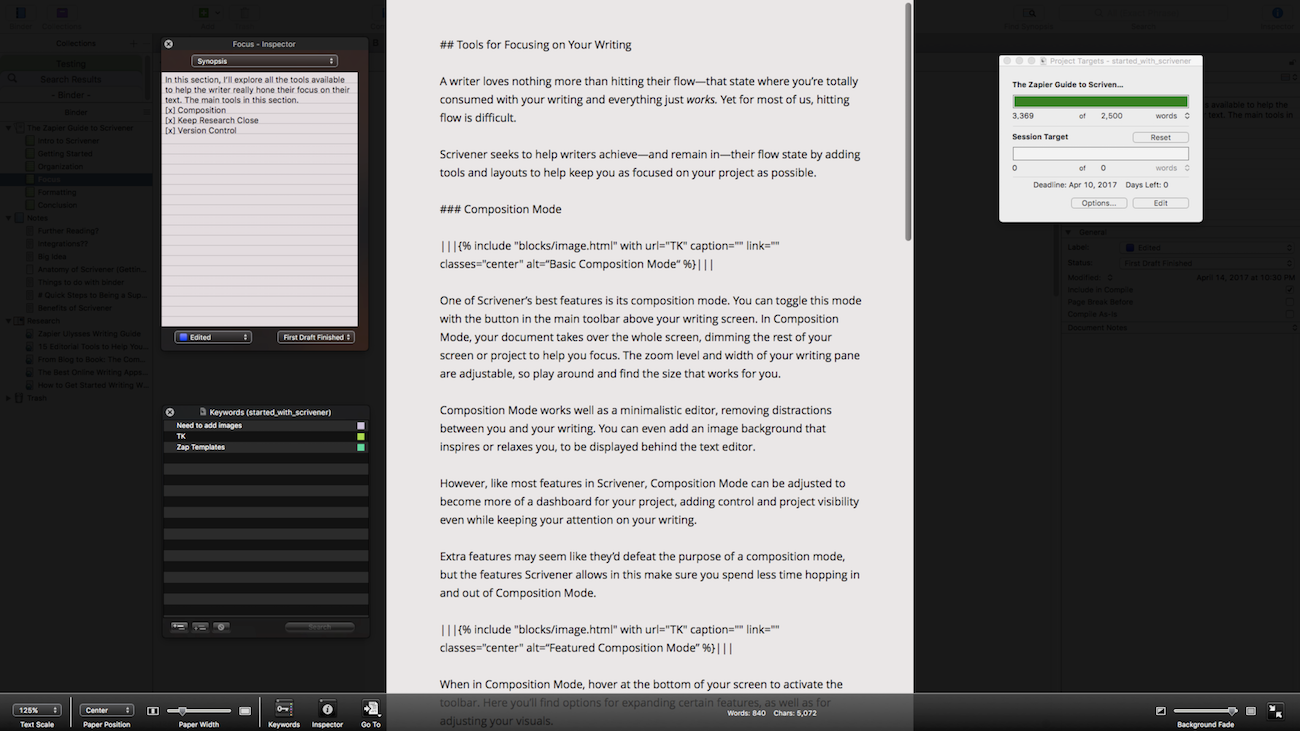
Now it's time to turn those notes into copy—something both Scrivener and Ulysses are great at. In Scrivener, just select the document you want to write in and start writing. To help you stay focused, tap the Compose icon to go full-screen. That can hide everything, with a black background and a paper-like space to write—or it can show your notes and more in floating panes.
You can use rich text or Markdown to format your document—though rich text is the default. If you write in Markdown, just make sure to MultiMarkdown export options in Scrivener's Compile screen.
You'll find a wide number of Scrivener templates online—as well as a handful you can choose from when making a new Scrivener project. These will include text formatting, page layouts, and folder structures that will help you make a document in that style—perhaps to write a college essay, screenplay, or book draft in a format that looks correct from the start.
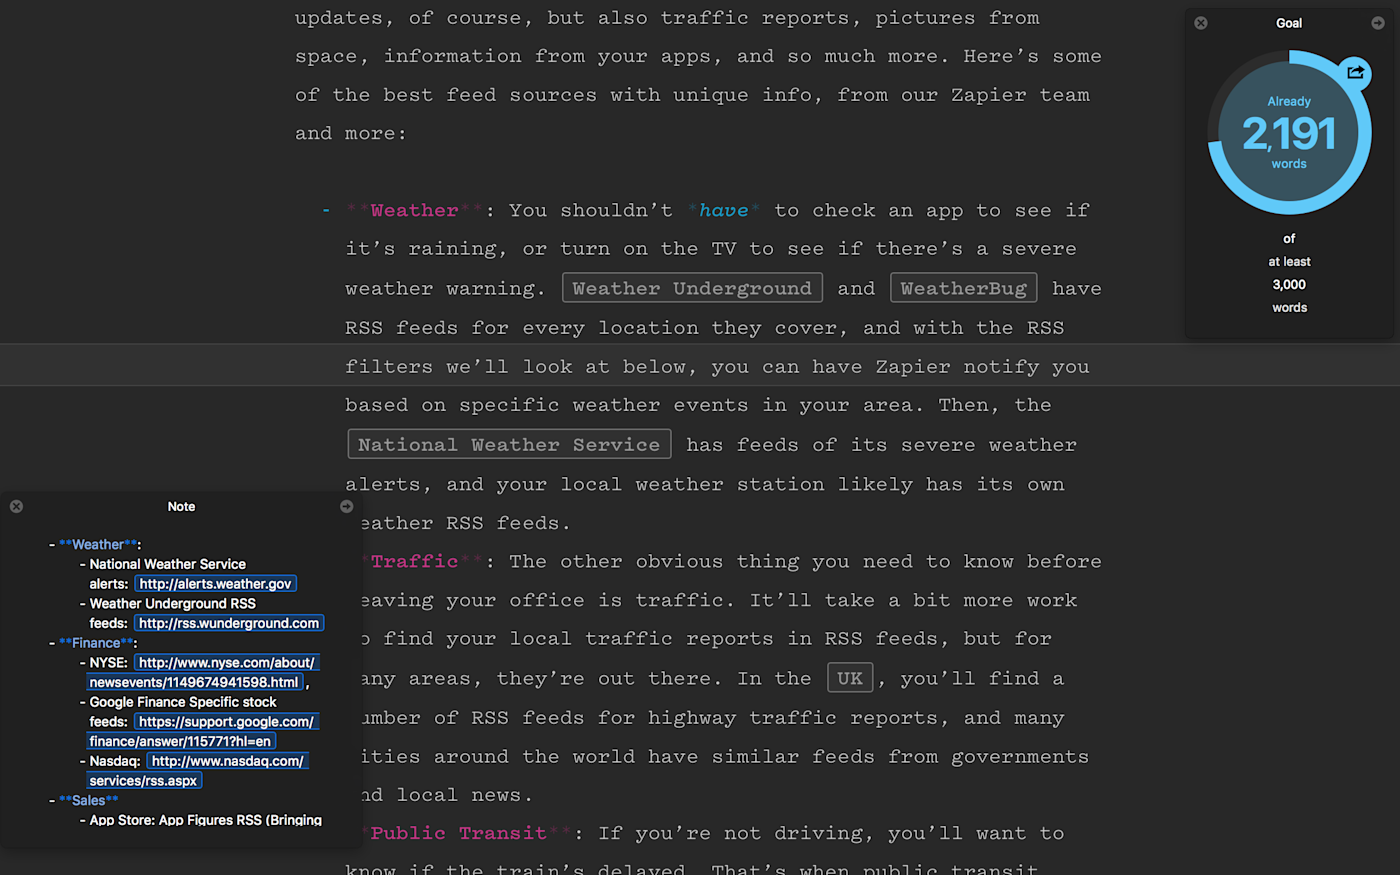
Ulysses gives you a number of ways to focus on writing as well. You can hide the left sidebars by swiping to the left with your trackpad—or press CMD + 3 to hide them all at once. The toolbar will hide automatically as you're writing. Use the macOS full-screen button (the green one in your top toolbar) to hide everything else—or open the sidebar and drag out your attachments and notes into floating panes for reference while writing.
For even more focus, the Typewriter Mode options in the View menu can highlight your current line, sentence, or paragraph, and keep your typing centered on the screen like a typewriter (Scrivener includes that latter feature, too).
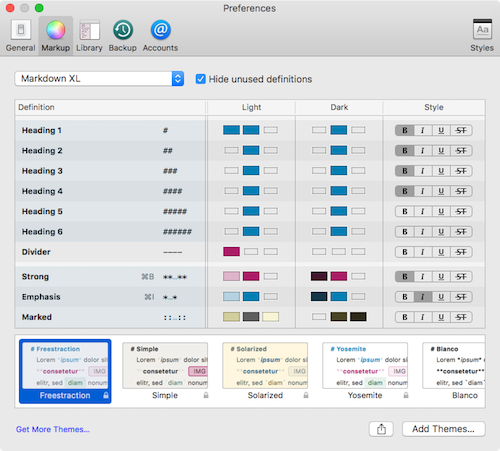
Since Ulysses uses Markdown formatting, there are no options to format your text style and colors in the main app. Instead, you'll set a typeface for all your documents in Ulysses' settings. You can also choose a theme (or download a new one) to style your text in any colors you want—since it's just plain text, none of that will be included in your final document. You'll use export themes, instead, for that (more on that later).
Both Scrivener and Ulysses help you focus on your writing. Their main difference is in how your format your text. Scrivener's best if you prefer using rich text formatting; Ulysses' is better if you want plain-text with Markdown formatting without a toolbar of options.
Organizing Documents in Scrivener and Ulysses
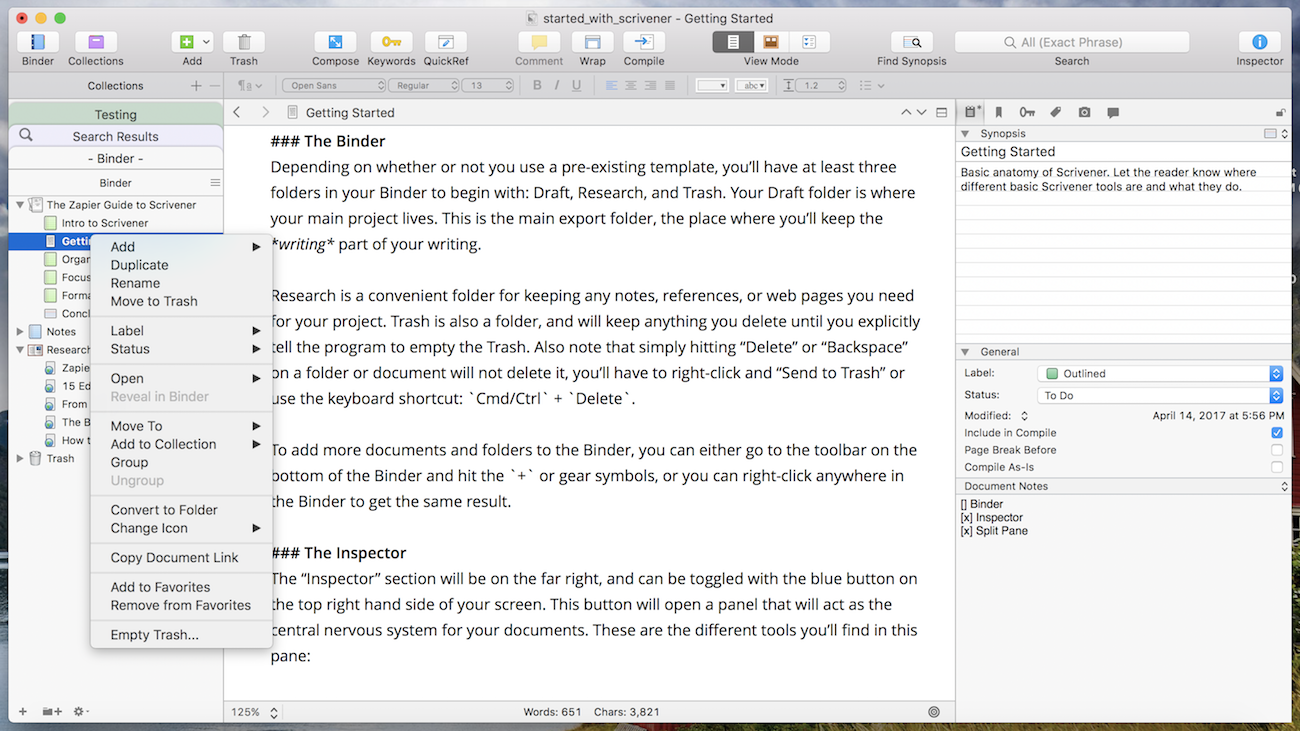
Scrivener's reference folder and multiple view options make it great to visualize your entire work at once. You can zoom out and view everything on a virtual corkboard, where you can drag-and-drop notes, webpages, images, and more into the order you want. Then select anything to dive in and write in full-screen. It's your real content in a mindmap, just like Sherlock would do on his living room wall.
You can also group documents more logically into folders, or add labels, status indicators, and colors to keep as much data in each document as you want. View it all together in the spreadsheet-like Outline view, or use smart Collections to group documents in any way you want.
Scrivener Tip: Select a folder or multiple documents in the sidebar to read them all together.
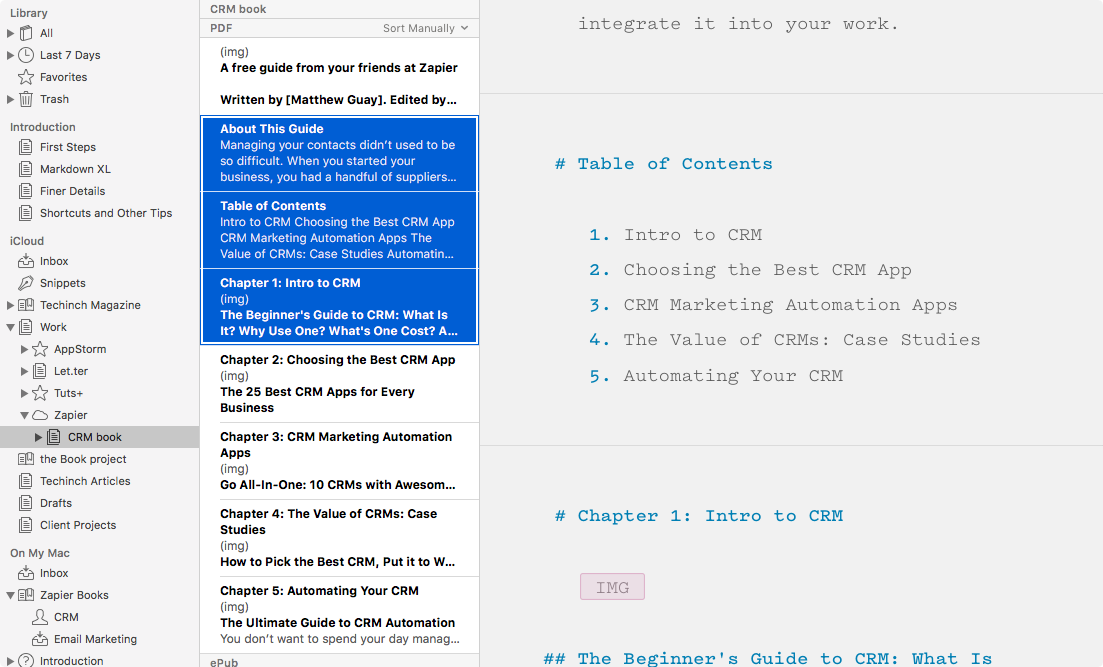
Where Scrivener lets you arrange your documents in free-form boards, Ulysses keeps things a bit more orderly with your documents in lists. It includes default folders and document lists, which you can drag-and-drop into the order and hierarchy you want. To move notes between documents, you'd need to copy/paste. There are tags—called keywords in Ulysses, hidden in the right sidebar—which you can uncover via search or from the small keyword icon in the center document pane. And there are smart folders that can group documents by keyword, text, the date they were updated, and more.
Where Ulysses shines is in splitting and merging your documents. Decide a chapter's running a bit too long? Press CMD + Shift + B to split everything below your cursor into a new document. Want two documents together? Drag them together in the document list, select them both, right-click, and select Glue Sheets to link them together or Merge Sheets to turn them into one single document. It's a great way to reorganize your text.
Ulysses tip: Press the down arrow two times at the bottom of a document to jump to the next one—or select multiple documents to read them all together.
Publishing in Scrivener and Ulysses
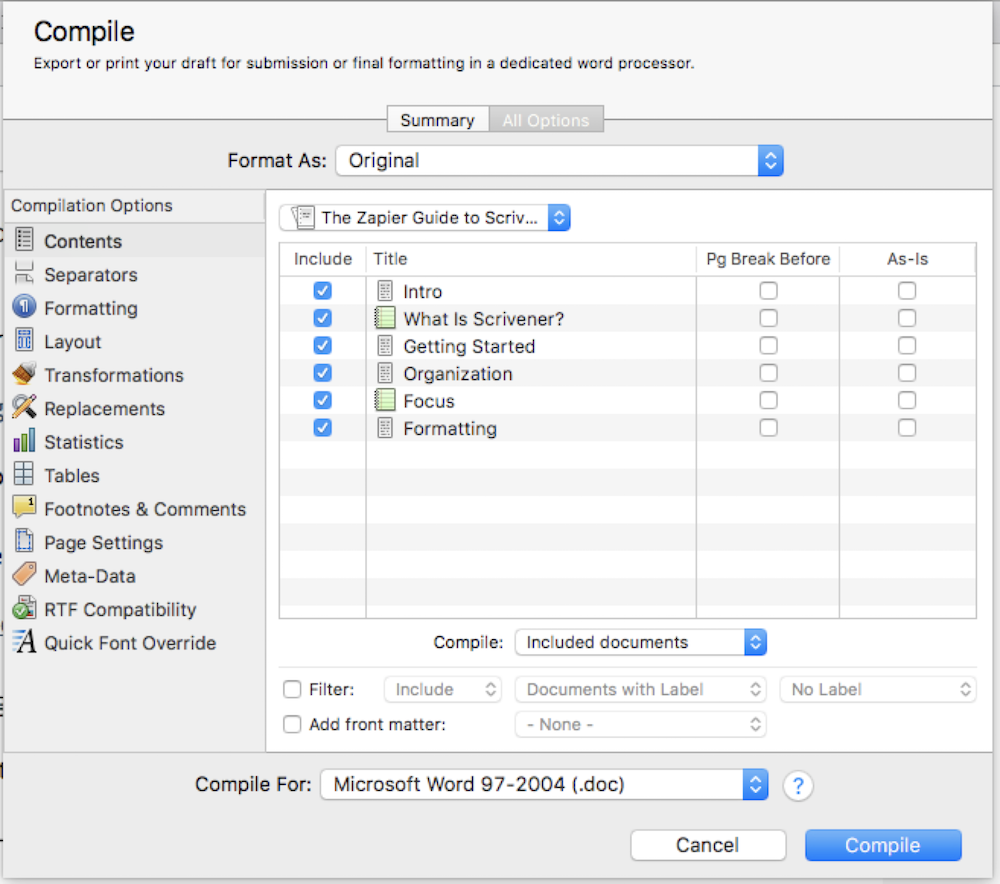
Scrivener's Compile screen is Scrivener at its most powerful. There are dozens of options to export your finished work however you want. You can select the documents and folders from a project to be exported, choose which have a page break and which are treated as a single document, and filter out documents with specific keywords if you want. It can format out your smart quotes, remove comments (something else Scrivener's document editor offers) and other formatting, and add the precise print layout you want. Then it can export your work in 17 formats.
It's complicated but powerful.
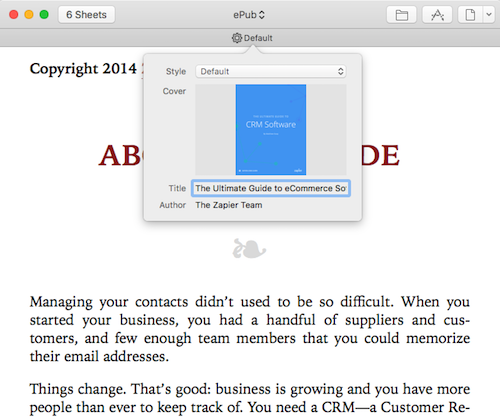
Ulysses makes things quicker—literally, its main export tool is called Quick Export. Select the documents or folders you want to publish, tap the iOS-style Share button in the toolbar, then choose the format you want to export and select Preview.
There, you can choose a theme for your published document—something else you can download from Ulysses. See how everything looks, then save the document in the format you want. There are few options other than a setting to include a cover and title with ePub exports. Or, if you want to publish online, you can add your Medium or WordPress account and publish your selected documents in a click.
Should You Use Scrivener or Ulysses?
Scrivener's the big brother. It's been around since 2007 and has helped an incredible number of authors write their books. It's powerful, with more features than you'll likely ever use. It's flexible enough to work with rich text or Markdown, with tools to arrange documents in a free-form corkboard or a detailed list and enough export options to get your book looking just like you want.
Ulysses is a bit newer to town. While its older versions date back over 14 years, the current version is a redesigned tool first launched in 2013—and so it feels a lot newer. It's simple, easy to use, with few features to tempt you to tweak. As such, it's a bit less flexible, a bit more reliant on you following its writing style—and quite a bit easier to quickly write and export your work.
Still can't decide? Check our detailed guides to both Scrivener and Ulysses—and try each app's trials. Truth be told, you can't go wrong with either one.
Do you use Scrivener, Ulysses, or another app to manage your longform writing? We'd love to hear what makes your favorite writing app the best for you.
Now that you've written a masterpiece, here's how to get it published with our complete guide to writing, editing, and publishing your first eBook.
