It's not enough to write compelling content. Author the shortest and sweetest post—or the longest longform—and it's still only one post. A one-time shot. The best you can hope for is a spurt of interest when it's published, viral traffic as it hits social networks and gets quoted on other sites, then long-tail traffic as Google starts ranking your article for relevant keywords. With a bit of luck, your article is the buzz of the week day—and that's about it.
Or, you could do more than just write a blog post. You could plan an entire series of related content, get each post ranked high for its own keywords and shared for its own benefits—and then turn all that content into a book.
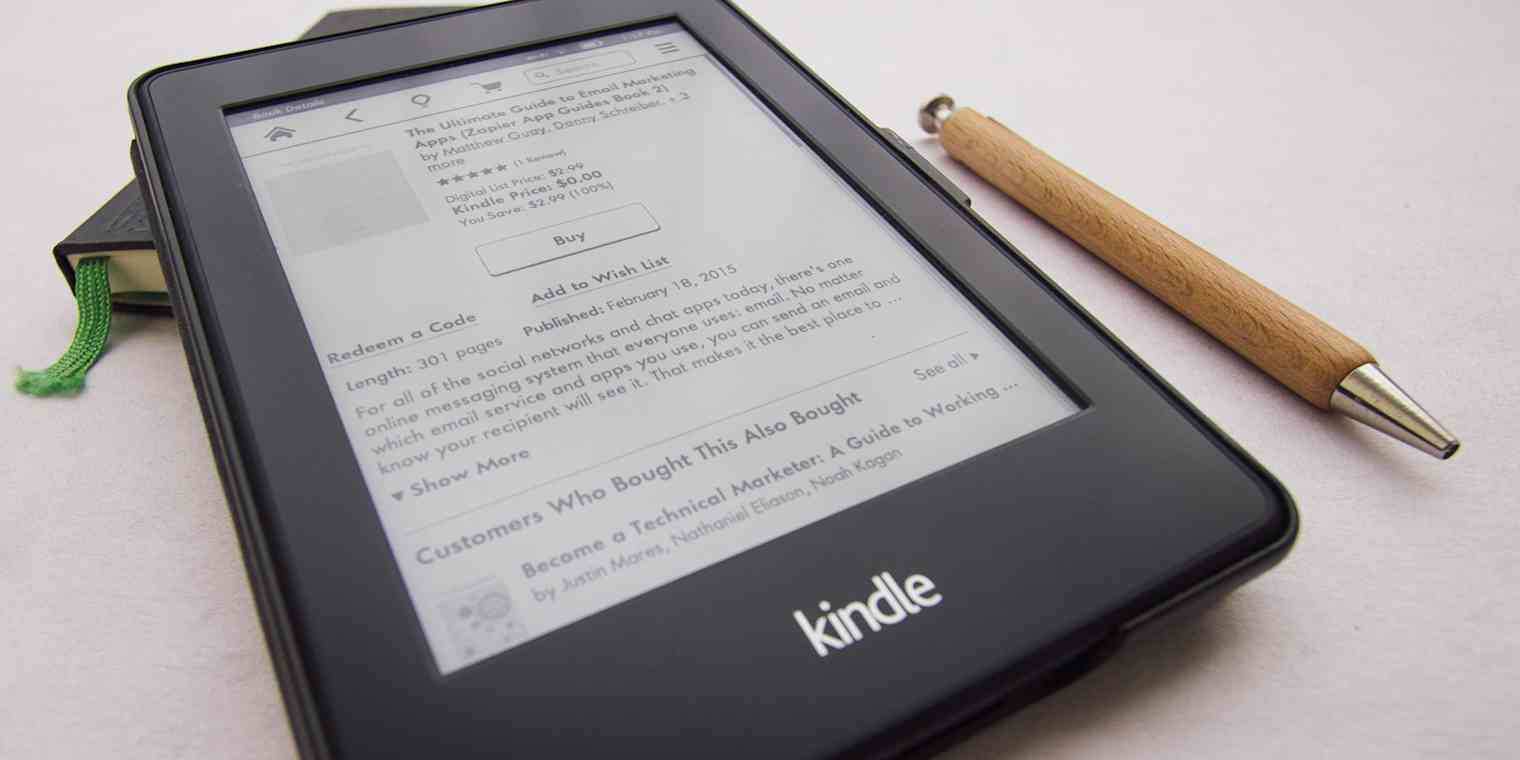
Publishing a book—in this case an eBook—is perhaps the most extreme content marketing idea possible. Books must extensively cover a topic and typically include over 10,000 words, two tasks that take considerable time to complete. But it's worth it.
Over the past year, the Zapier team has on average published one book every 90 days. These books have been downloaded more than 15,000 times, have helped us gain more than 10,000 new email subscribers and grow our Learning Center from around 10,000 pageviews per month in July 2014 to more than 100,000 page views in July 2015—and our books in the Kindle and iBooks stores have on average brought in over a dozen new readers per day.
Books work. Here are 10 of the best tips we've learned about how to effectively write and self-publish eBooks, so you can promote your content and grow your audience organically.
Five Steps to Self-Publish Your First eBook
1. Plan Your Content
You could set out to write a book, jotting down words page by page until you have enough content to publish on its own. That's the typical way to write a book, and it works. But it's incredibly tough to find the time to research, write, and edit, and then turn all that into a book.
That's why blogging is such a popular marketing medium. It's easy, requiring only a few hundred words and perhaps a few images, and is a reliable way to generate traffic. Writing a book is too much work for less concrete results. But the authority and new distribution channels a book brings makes it hard to rule out.
So combine the two. That's what we've done at Zapier. We have an active blog with new articles every week, plenty of which are in-depth enough to stand alone as book chapters. For our first blog-powered eBook, The Ultimate Guide to CRM Apps, that's just what we did: we pulled together a meager four blog posts and turned them into a book. That was our first try, and it worked.
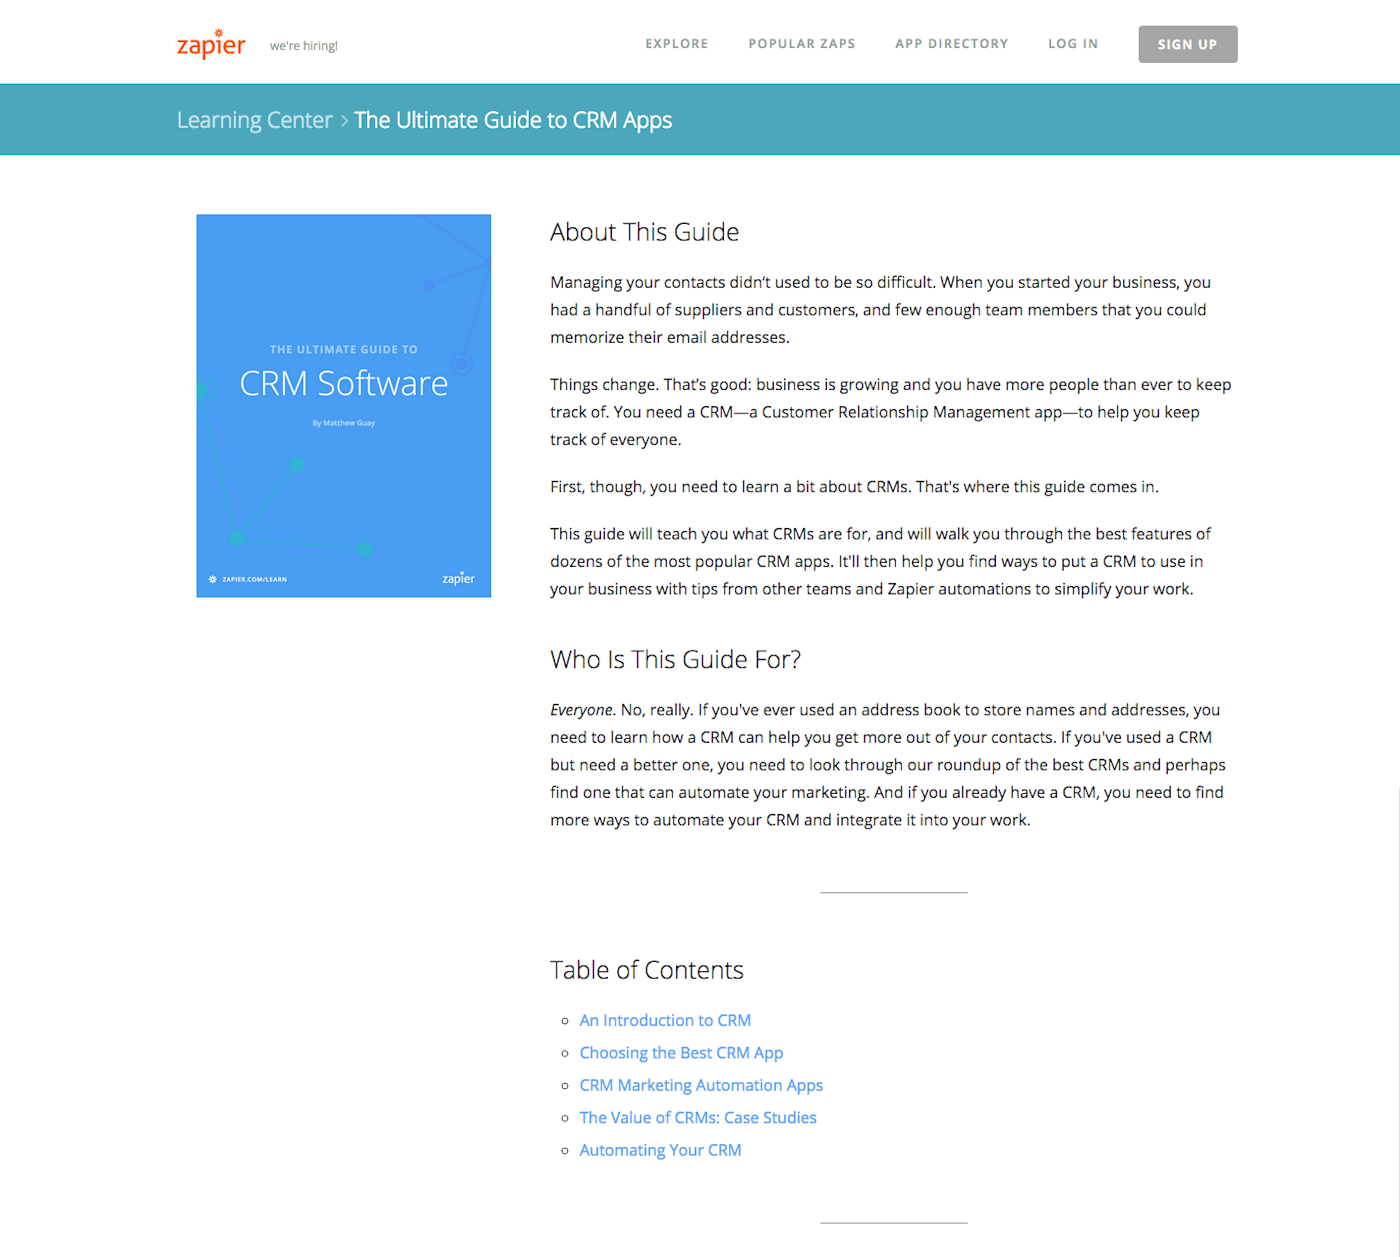
It wasn't perfect, though—we had to edit articles extensively to turn them into book chapters, and didn't have as much unique content as we'd have liked. That's where we learned planning comes into play. With our later books—especially our recent nine-chapter The Ultimate Guide to Forms & Surveys—our marketing team of four met and outlined the content we'd like to see in the book. We then pulled our best resources together—with writing commitments from a survey expert and our on-staff statistician—and set out to make an authoritative guide to forms and surveys.
Planning helped us make a better book, one with over a dozen chapters that in just over a month has been read by more than 36,000 people.
Sound like an idea you'd like pursue? Before you start writing, you must identify topics worth expanding into book chapters—information that will not only be relevant to your readers but will also help your team accomplish its marketing goals, too. At Zapier, for example, the content that fits best in with our marketing strategy involves writing about apps that integrate with Zapier, tips on automation and coding, and information on running a remote team.
Then, you'll need to pull the topics together into a cohesive outline, give each one a deadline, and assign out the tasks you'll need to get them written. Your book's still an idea at this point, but it's an accomplishable one. You've set your goals, and now it's time to write.
Related: Sound like a process you already implement? Help Scout marketer Gregory Ciotti calls this topics method the "Table of Contents" approach to content strategy.
2. Publish Chapters as Blog Posts
Turning your book outline into complete chapters is going to take time, time you'd otherwise spend on your blog and other content marketing efforts. That doesn't have to feel like a waste, though. With the approach we've used, you first write each chapter as a blog post, publish it on your blog, and then turn it into a chapter of your completed book.
This method takes a bit of extra writing—you'll write different introductions and conclusions for your blog posts than you would for book chapters, and you might want to conduct additional editing before you turn it into a book chapter. A blog post, for example, may need links to previous posts in the intro, and its conclusion might ask readers to add feedback in the comments—neither of which are needed in a book. But in general, you'll write the same content once, and use it twice.
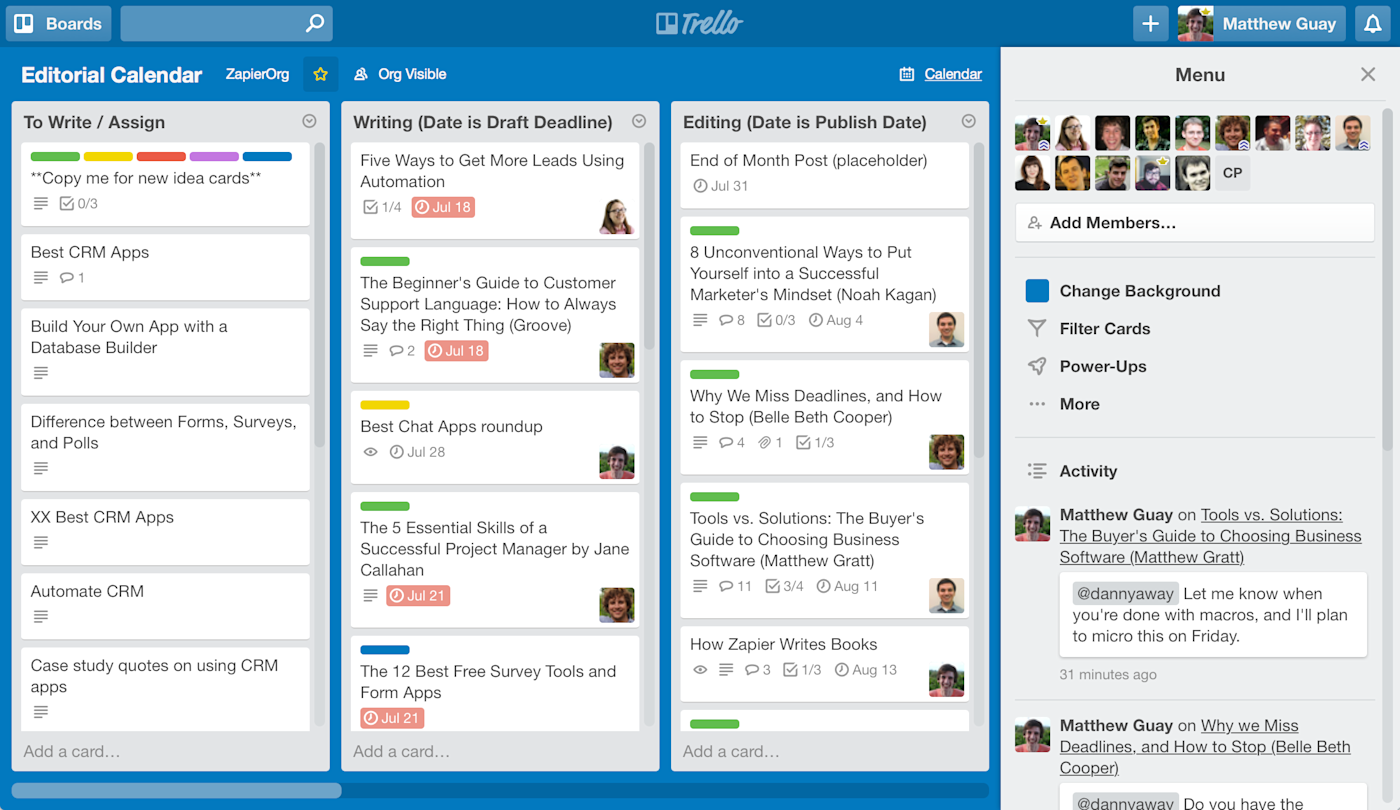
At Zapier, we house our editorial calendar on a Trello board, listing blog posts in the same column as upcoming book chapters. Each piece of content is written in Google Docs (the tool we use for collaborative editing), edited by two other team members, and then published on our blog, shared on social media and emailed to our newsletter subscribers. Just like any other blog post, we do our best to promote each chapter as it's published on the blog—and then we promote it all over again once it's part of a shiny new book.
3. Pull Everything Together in a Book

With a bit of work, your blog becomes a cog in the machine, faithfully publishing the articles that your team puts through your planning, writing, and editing process. Soon enough, you'll have enough published chapters to start assembling your first eBook.
To do so, you could just open each page in a separate tab, hit Print, export the page as a PDF, then merge them all together and you're done—but that's far from ideal. It'd look amateurish, and ruin your chance of making your content look more professional in a book.
Instead, carefully edit each blog post again, making sure each can stand alone as a chapter and pulling them together in an order that will make sense in a book. You can then fire up a book generator tool, and turn your blog posts into a nicely formatted book that looks great on any device—not just something that looks like a printout.
All you'll need are your posts in a Markdown format—a simple markup language, think HTML but easier to use—the images in a folder and an app to build your book.
Why Markdown? You could write your blog posts in Word or other rich text formats, or hand-code them in HTML, but it'll take more work to make them each look consistent in your book. Markdown formatting—a simple markup where you add asterisks for italics and dashes for bullet points—makes it simple for the best eBook builder tools to style your text beautifully for a book while still keeping your original formatting.
Edit Blog Posts into Chapters
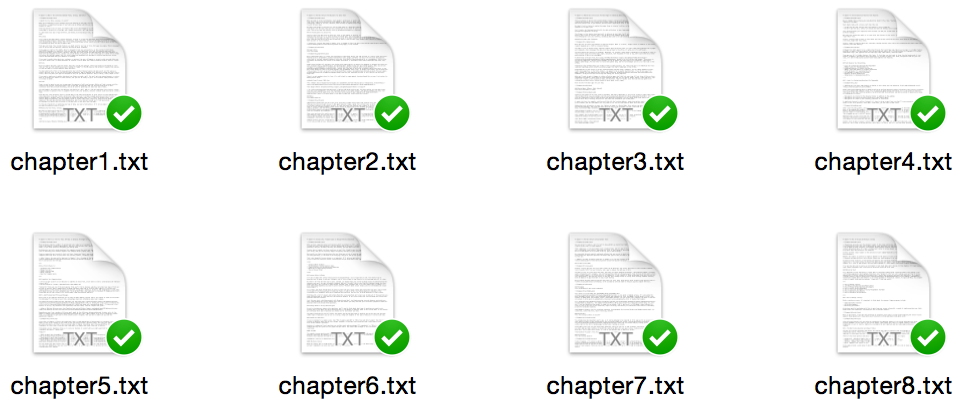
The first task is to get your blog posts turned into book content. Each post should be in its own Markdown-formatted text file, with all the images for your book in their own folder and referenced in your articles. For example, if you have all your images in an /images folder, you'll then reference them in your book with  style links. Make sure your images aren't linked to websites, either; ePub books cannot include linked images.
Note: Any text editor can work well for editing, but a code editor like Sublime Text or Atom can be helpful with their advanced find/replace tools and colored text for code.
Image links aren't the only thing to watch out for; you'll have to edit out any other HTML code (unless you actually want HTML code samples in your book, in which case be sure to set it off with four spaces or a tab so it'll be printed as HTML code). If your CMS uses any HTML formatting—as ours does for quotes, tables and references—make sure to search for that text and replace it with Markdown. Keep a list of the things you usually include in articles, search for them in each chapter and make sure they're all edited out. If you're using advanced tables, buttons or other HTML layouts where Markdown doesn't quite cut it, take a screenshot of the element on your site and include that in your book instead.
Then, you should edit the intros and conclusions of each article to make sure your content flows together. Most blog post intros include extra details to help new readers understand the topic. Blog post conclusions often ask readers to add comments or share the article, something that wouldn't make sense in a book. Read your articles as chapters, and then edit each chapter's intro and conclusion into something that'd make more sense in a book.
Finally, search for any mentions of blog-related terms, such as post, entry, and comments, along with calls-to-action that wouldn't make sense in a book. Turn them into something that sounds more correct for an eBook. If your articles each have different authors, you may also want to pick a standardized way to list the author, perhaps at the end of the chapter.
Optimize Your Images
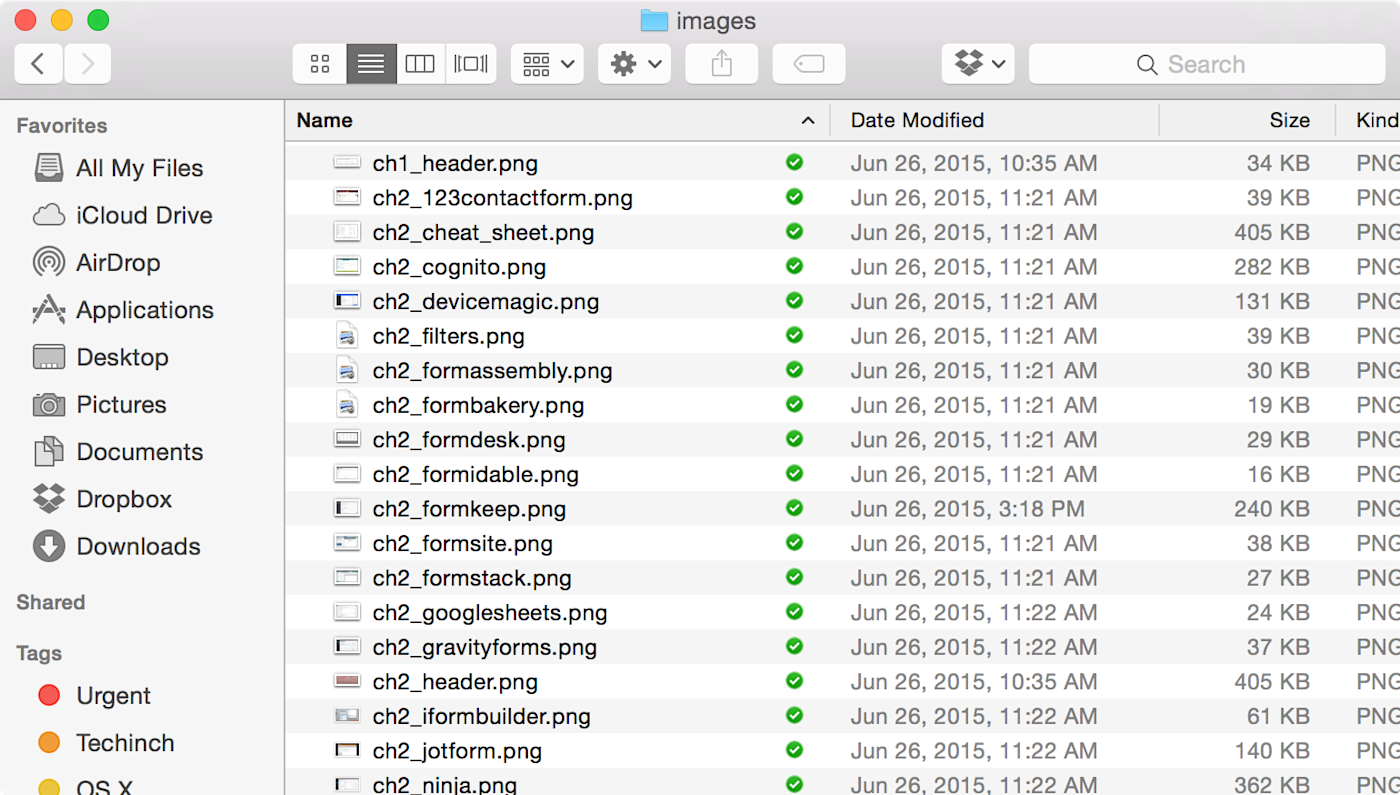
Now, time to work on your images. Smaller images from your blog posts will work fine in the book, but if your posts include full-sized photos you'll need to scale them down before including them in your book. The iBooks store, for example, doesn't allow books with images larger than 4 megapixels—or around 2,000px per side. Amazon's Kindle store is more relaxed, but they charge around $0.15 per megabyte for each eBook sale. Free books don't incur download fees, but you'll still want to keep your book small so it won't take too long for your readers to download it.
Thus, it's best to downscale your images before turning your content into a book. Sort your images by size, scale down the largest ones (Preview is a simple tool for this on the Mac), and cut as much unnecessary weight as possible.
Want to squeeze out more space? TinyPNG and ImageOptim are great free tools for just that.
Finally, make sure your image file names don't include spaces or start with a number—really. It seems archaic, but if an eBook includes an image with a filename like this picture.png or 01chapter.jpg, many eBooks apps and stores will reject it. Make sure your file names look like they're ready for DOS, and they should work just fine.
Tweak Your Links to Track Visits
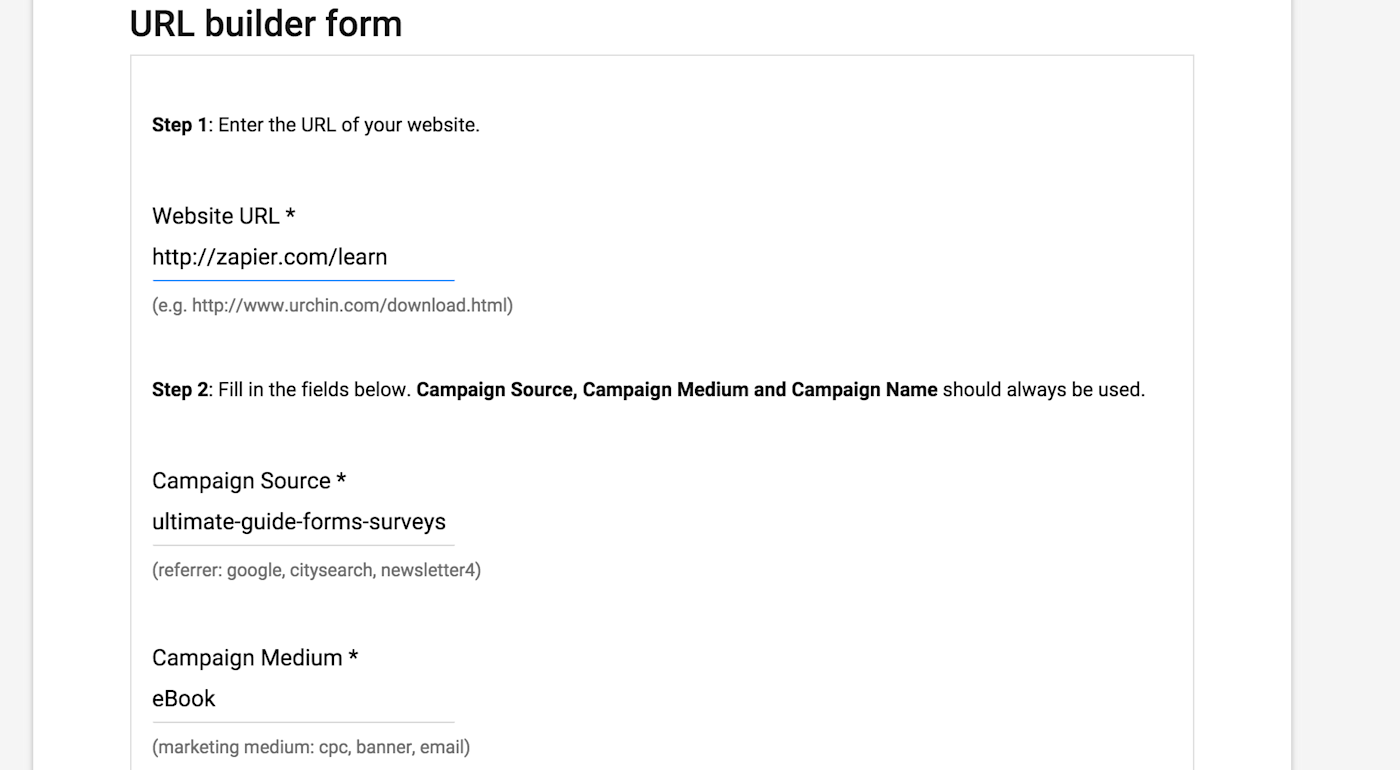
Before you do a final read-through of your text, there's one more thing you should think about: UTM codes on the links in your book. Whether you're publishing a book to raise brand awareness or directly market your products, you'll surely want to know if people actually visit your site because of your book. Plenty of people may just type in links by hand or remember to visit your site later after reading the book, and you can't track those clicks easily. But, you can track anytime readers tap a link in your eBook copy with a bit of extra work.
To have visits from your book tally in Google Analytics or your site's analytics system, you'll want to create a unique UTM or tracking code and append it to the end of every link in your book. If your links already include UTM codes, a simple find/replace in your text editor will do the trick for you. Otherwise, you'll need to search for every link to your site, and add the code manually. Here's an example of a link with a UTM code that'd identify a visitor from our Form and Survey eBook:
https://zapier.com/?utm_source=zap&utm_medium=ebook&utm_campaign=formsurvey
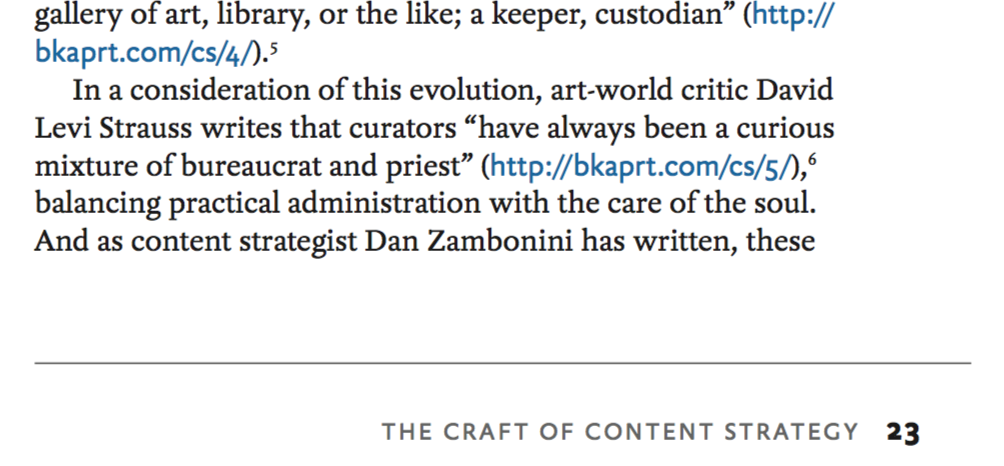
If you're planning on turning your eBook into a printed book, you'll need to create short links using a tool like Bitly—something you might have seen before in other books, including those from A Book Apart. Just put each link with the correct UTM code into Bitly or another link shortener, and paste the short link into your text. That way, readers can easily visit your site without having to type in an insanely long link, and you'll still get to track the visits from the book.
Export Your eBook
It's time for the fun stuff: turning your text into a real book. Exporting a nicely formatted eBook used to be an incredibly difficult process—and it still can be—but there are many tools that can simplify it. There are also many formats you could export your book in, but here are the 3 you should be sure to create:
PDF: Adobe's portable document format is the de-facto standard for saving documents that'll look the exact same on any device. It's great for richly formatted eBooks on larger screens—perhaps to be read on your laptop or tablet.
ePub: The default "real" eBook format, ePub files work in iBooks, Google Play Books, Nook, Sony Reader, and other popular eBook reader apps and devices. ePub text will reflow to fit nicely on any screen, and while it might not look as perfect as a PDF, it will be readable on almost any device.
MOBI: A somewhat less popular cousin of ePub, MOBI files are used by default on the Amazon Kindle apps and devices, though the Amazon Kindle store now accepts ePub files as well.
While most eBook exporter apps today can generate PDF files and many support ePub, there's one tool we recommend above all after trying 8 of the most popular: Leanpub. Upload your book text and images via Dropbox or GitHub, and it'll turn them into perfectly formatted ePub, PDF, and MOBI files in minutes, ones that will work in every eBook store. Every other tool requires hours of hand-tweaking obscure code inside ePub files to get the iBooks Store to accept the files—Leanpub just works for the most part. And it's free.
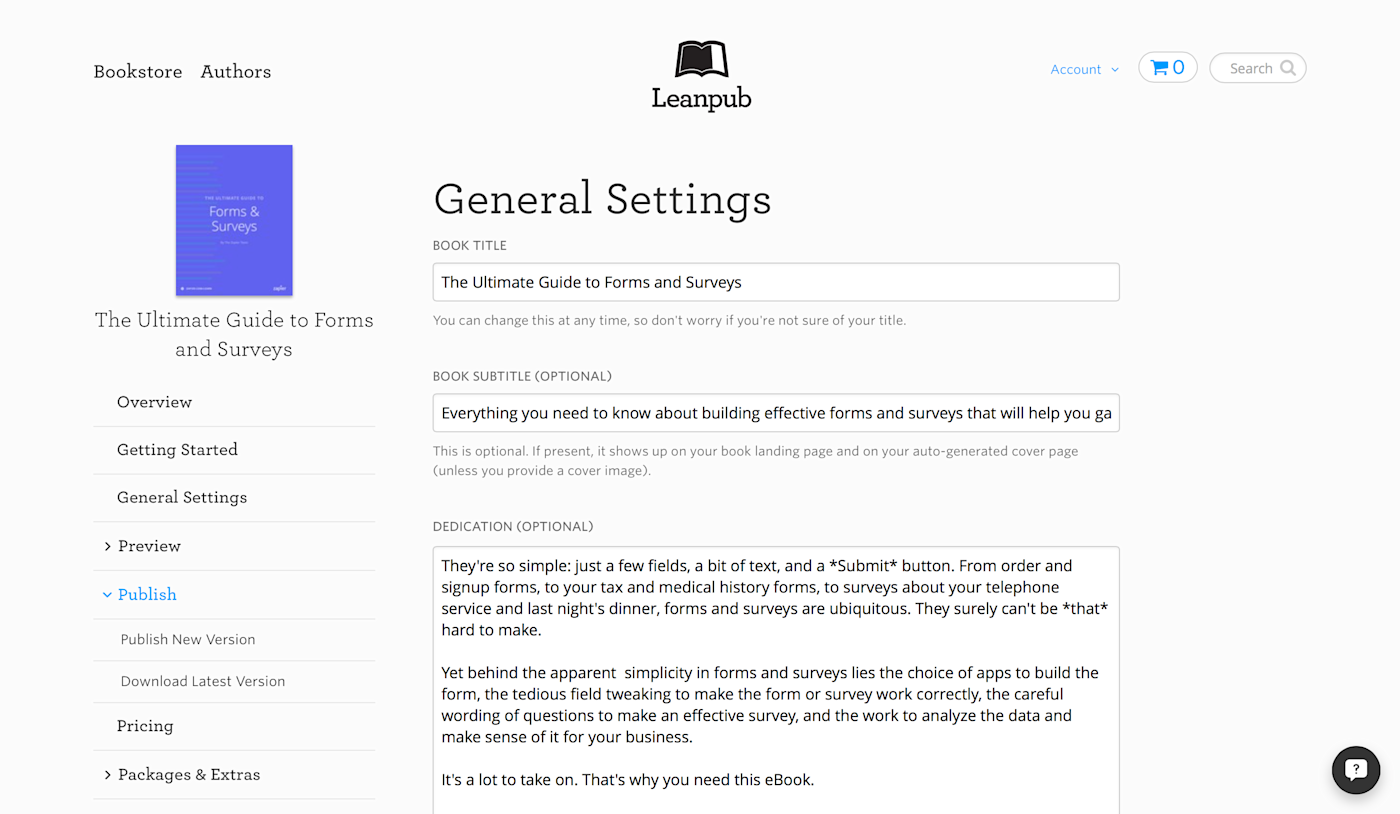
Once you've got your eBook text in individual files with your images in the same folder, creating a book in Leanpub is simple. You'll create a new book in your account, then link it to your Dropbox account or GitHub repository. Add your book chapters and images to their respective folders, list your chapter files in the correct order in your book.txt file, and tweak your cover image for Leanpub. Then, open your Leanpub book page, click the Preview link in the menu, and generate a preview of your book. You'll get PDF, ePub, and mobi copies of your book saved to Dropbox in minutes.
Leanpub is free to generate new eBooks, and it lists your books in the Leanpub store and lets you download completed eBook files to upload to other eBook stores. The books generated by Leadpub are basic—you won't find fancy PDF layouts or dozens of typeface options—but their book exports are laid out nicely and most importantly work in the iBooks and Kindle stores without any extra editing. That's a huge advantage, since almost every other eBook export tool left some small errors that we had to fix before we could upload to iBooks.
If you want something else, there are a number of other tools to export your book, each with their own special features and benefits. Here are some of the best:
The Best eBook Exporter Apps
Icon: | App | Best Features: | Platform: | Price: |
|---|---|---|---|---|
If you want a simple way to turn Markdown text into eBooks, this is your best option. Sync text files and images via Dropbox or GitHub, and it'll turn them into polished eBooks for free. It's a great way to make books, and another eBook store where you can list your books. | Web (via Dropbox or GitHub) | Free; 20% of each eBook sale in the Leanpub store | ||
For tighter control over your eBook exports—and the ability to turn your text into dozens of different formats—the command line tool Pandoc is a geeky powerhouse. It'll take you a bit more time to learn to use if you're not used to using the Terminal, but your eBook exports will be exported error-free and precisely like you want—and you can even automate the process. | Mac, PC, Linux | Free Open Source | ||
Want to write your blog posts, organize everything into chapters, and export your eBook files all from the same app? Ulysses is an easy-to-use writing app designed for just that. Write in Markdown, drag your files into the order you want, and export to ePub, PDF, and Rich Text formats with a click using customizable templates. With its latest updates, its ePub exports should work error-free with iBooks, too. | Mac, iPad | $4.99/month | ||
Keeping track of all your notes, outlines, and more can be difficult at best. Scrivener helps keep everything together, so you can go from scattered notes to finished blog posts to a published eBook in one consistent workflow. It, too, supports exports in a wide variety of formats, and integrates with mobile apps like Simplenote for writing on the go. | Mac, PC | $45 | ||
Want a print copy of your book—or want to write you book in a rich text editor like Word? Lulu is the tool for you. You'll upload your Word or rich text document, and Lulu will turn it into an eBook for free. You can then create print books in a variety of formats. Even if you use another tool to generate your eBook files, Lulu's a great option to get a paper copy of your book. | Web | Free eBook export; print books from $2.45 each | ||
Apple's word processor might look like just a simplified version of Word, but its ability to export in ePub and PDF formats makes it a nice tool for creating eBooks, too. You can write in rich text in Pages, or just export in rich text format from other apps and use Pages to layout your PDF and ePub copies. Oddly enough, though, the iBooks Store won't accept its ePub files without extensive, tedious edits. | Mac, iOS, Web | Free with Mac and iOS devices | ||
For the most professional book layouts, Adobe InDesign is still the standard. If you're really picky about how your eBooks look, want to embed custom typefaces and use hand-designed graphics, and need copies ready for a printing press, InDesign is what you'll need. If you write in Markdown, just export in rich text first then import your content into your InDesign templates. Then, download the Kindle Plugin to export your book in mobi format. | Mac, PC | $20.99/mo. or $52.99/mo. with full Creative Cloud | ||
Want to take your book beyond being just words and text? iBooks Author lets you make beautifully formatted eBooks for the iPad and iPhone, complete with animations, embedded videos, and much more. You can even export your book in PDF formats for other devices. Only catch: your PDFs are watermarked, and you can only sell your book on the iBooks store. | Mac | Free | ||
An eBook reader and editor in one, Calibre can import all of your eBook files and export them into any format you like. It's a great option to make Kindle-ready mobi files from your ePub exports in Pages, or to add metadata to an older eBook file. Or, if the iBooks Store is giving errors when you upload your book, you can take apart the ePub file in Calibre and edit its XML code to hand-fix your book's problems. | Mac, PC | Free | ||
Want to make perfect eBooks for the Kindle, or just curious how your book would look on one? Amazon's Kindle Previewer is a handy tool to keep around for just that. It can turn PDF and ePub files into Kindle-ready mobi formats, and show you how your book will look on a Kindle. Or, for a simpler companion to Pandoc, you can use KindleGen to create Kindle eBooks from Terminal. | Mac, PC | Free |
4. Add Your Book to eBook Stores
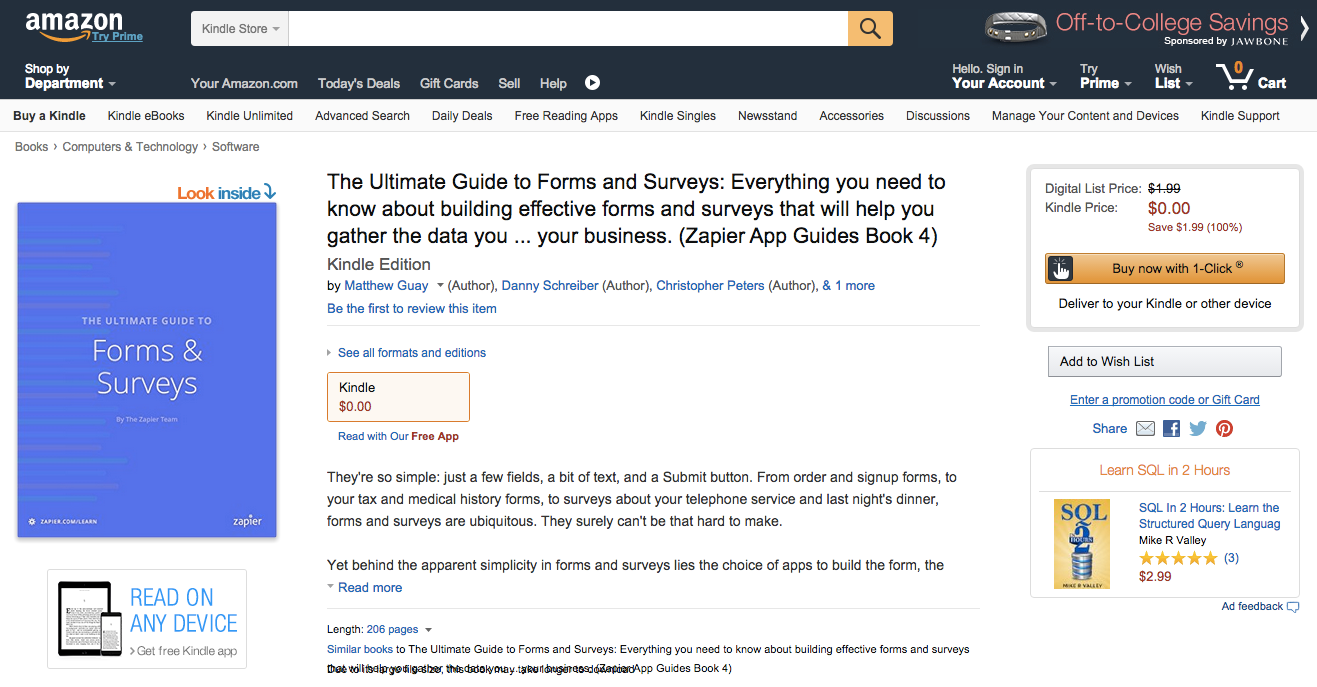
Now that you've turned your blog posts into an eBook, it's time to distribute your book. Put your book in the Kindle and iBooks stores, and new readers will discover your content while they're searching for related topics in those stores. It's your best way to give your brand a place in the app-driven mobile world, where readers may be more likely to search an eBook reader app for information than to look up a topic on Google.
The best part is, you don't need a publisher—all you need are a handful of online accounts, and enough patience to navigate Apple and Amazon's bureaucracies. It's both easier and harder than it looks, so be sure to note these points before you publish your first book.
Note: if you're uploading books for your company, be sure to make new Apple, Amazon, and other accounts specifically for your company's books. That'll ensure anyone on your team can publish or edit the books in the future.
Amazon Kindle Store
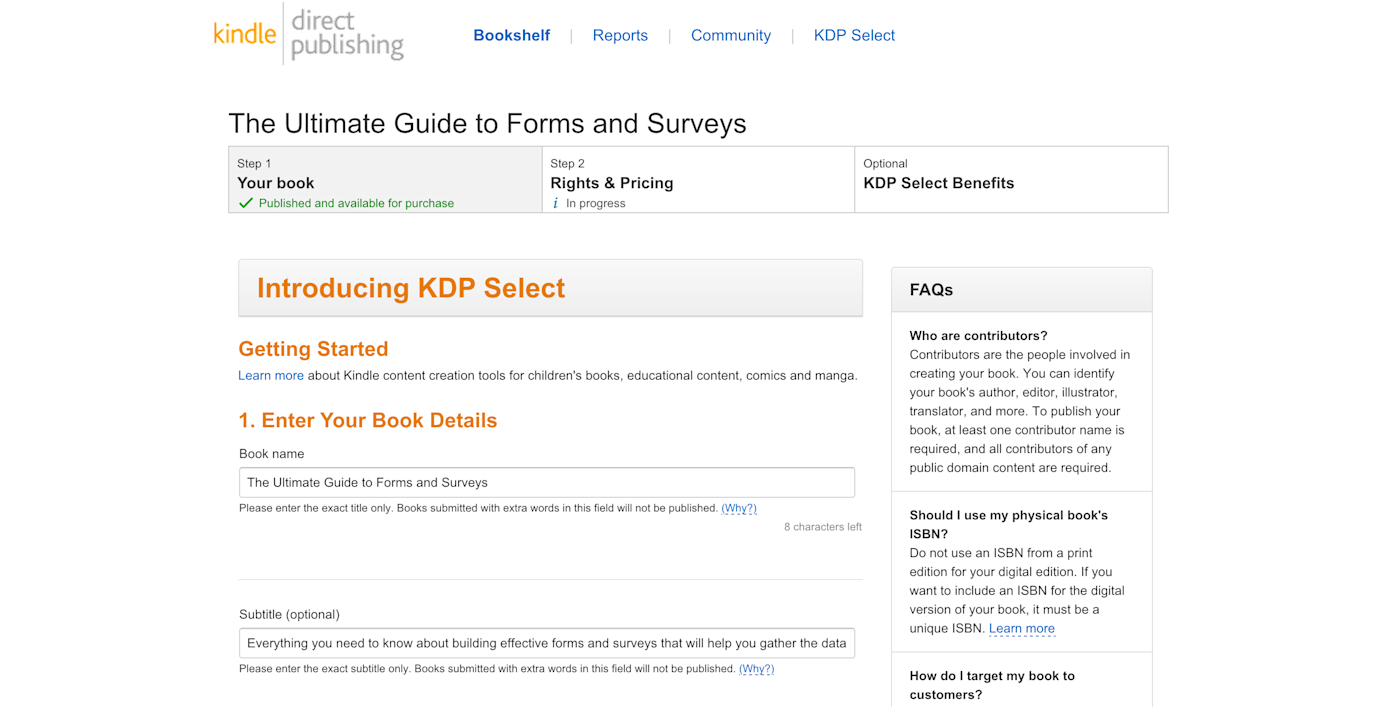
If you only want to list your book on one eBook store, make it Amazon's Kindle Store. It's hard to pass up the most popular online store, one with eBook apps on almost every platform (not to mention the Kindle devices). And Amazon's made it decently simple to list your book.
What You Need
An Amazon account
Your eBook in mobi format
A cover image file, 2500x1562px in jpeg format
A few days for the book to get listed
How to Add Your Book to the Kindle Store
To get started, go to the Kindle Direct Publishing site, login with your Amazon account, and start making a new book. You'll need to enter the book's name, description, author's name (or authors' names), and categories, then can upload your book and cover image. Amazon will notify you of any spelling mistakes it finds in your book—it's worth looking over the suggestions quickly, as it'll likely find things you've missed.
Save that, and on the next page you'll get to pick your revenue percentage and set the price for your book. If you're listing your book only on the Kindle store, you can get 70% royalties; otherwise, you'll get around 30% royalties in most markets. For paid books, that makes it worth considering if it's worth listing your book elsewhere; free books are best listed as many places as possible.
But you'll notice one other snag—there's no option to list your book as a free book. Instead, you'll have to list your book with a price for now. Save everything, and Amazon will email when they get your book listed on the Kindle store. If your book is made from blog posts, though, Amazon will first email telling you they found content from your book online, and will ask you to confirm the copyright. Just click the link, tab through your book's settings again, check the copyright box, and save again.
With that done, your book should be on the Kindle store around 2-3 days after you first uploaded it. If you want it to be listed for free, you have one more task ahead of you. First, proceed to the next step and get your book on iBooks, where it's easy to list a book for free. Then, have your team and followers click the "tell us about a lower price" link on your Kindle listing, and share your free book link. Alternately, email Amazon directly from the Kindle Direct Publishing site, and they'll usually price match your book to free within a day.
Create an Amazon Author Profile
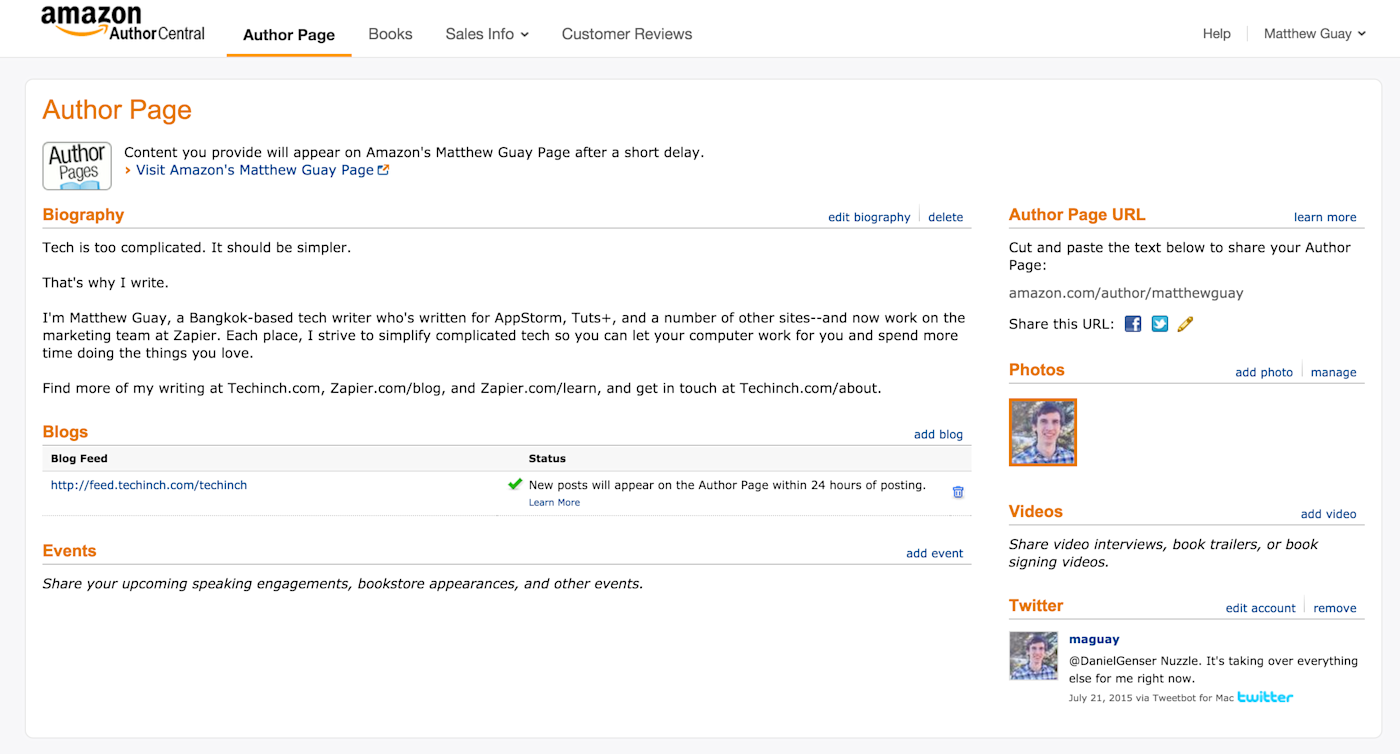
There's one final thing you should do on Amazon: create an author profile on Amazon Author Central. There, you can write a quick bio, link to your blog and Twitter account, and claim yourself as an author on every book you publish. That's a great way to make your book's listing look more authoritative and get more traffic to your own sites.
Apple iBooks Store
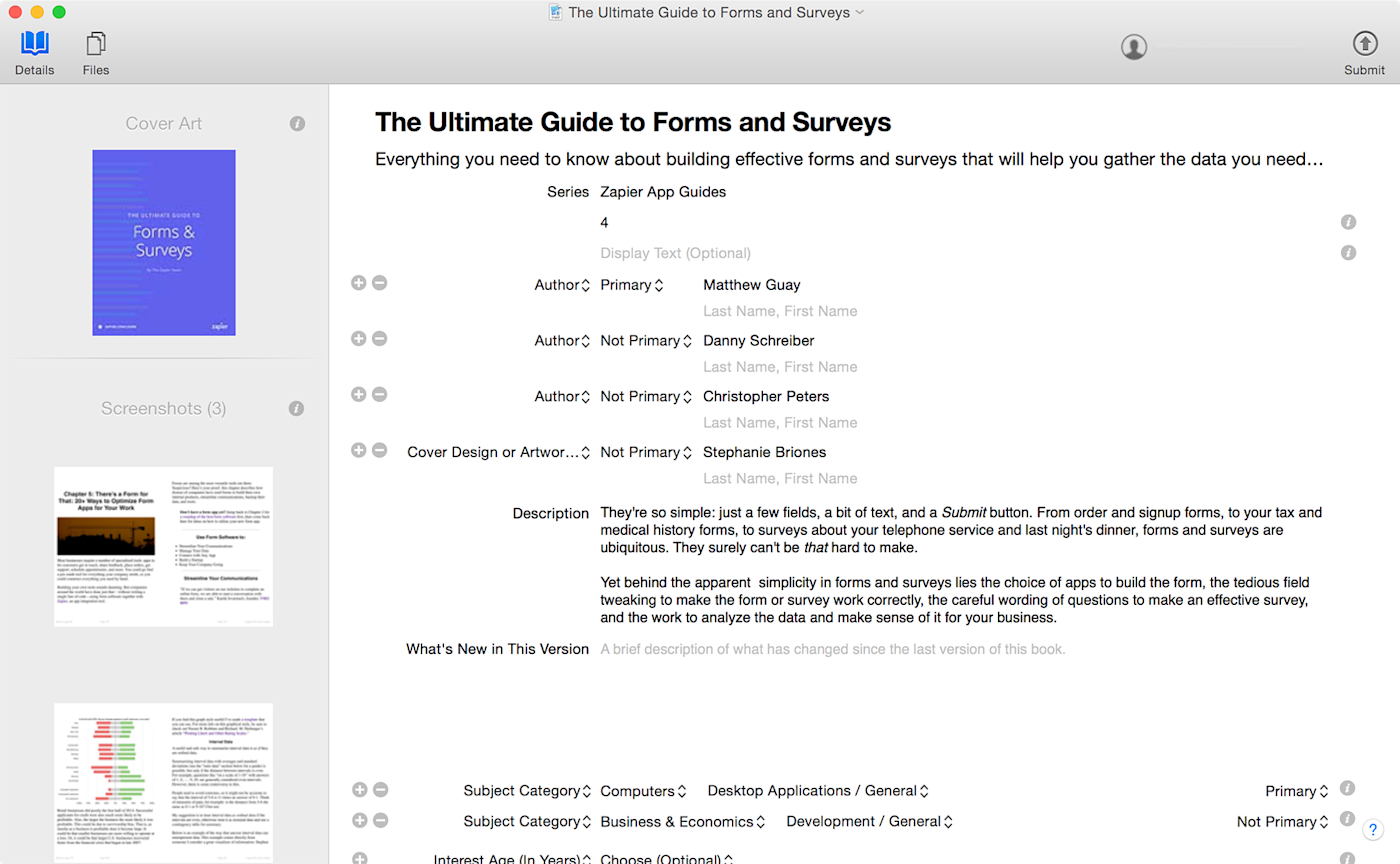
For an easy way to get your book on iPads and iPhones, the iBooks Store is a great option—and it's easy to list free books. The only trick is that iBooks is extremely picky with the ePub files you upload, enough that I spent half a day hand-editing XML code in our ePub books to get our first books uploaded. If you use Leanpub or iBooks Author to make your book, you can almost guarantee your book will work on first try; Pandoc is nearly as good, and recent versions of Ulysses and Scrivener should work, but your mileage may vary.
What You Need
An Apple ID with an iTunes Connect account
A copy of iTunes Producer installed on a Mac
An ePub formatted file
Screenshots of your book (2048x1496px PNG) and its cover (at least 1400px on the shortest side, PNG format)
A few hours for it to show up in the iBooks Store
How to Add Your Book to the iBooks Store
To get started, create an iTunes Connect account with your existing Apple ID, then download iTunes Producer. If you don't have a Mac, you'll need to instead use an eBook aggregator service like Smashwords or BookBaby to upload from PC—or ask around for someone you know with a Mac.
From iTunes Producer, enter the info about your book, and drag in your cover image and screenshots of the inside of your book (we use 2048x1496px images; that's the largest size iBooks allows). Make sure the file names for your book cover, screenshots, and eBook file do not include underscores, as otherwise iTunes Producer will show a cryptic java.net.malformedurlexception: unknown protocol error.
Then, click the Files button near the top, drag in your ePub file, and click Submit. Minutes later, you should get a confirmation that your book was uploaded, and within a day your book will be live in the iBooks store.
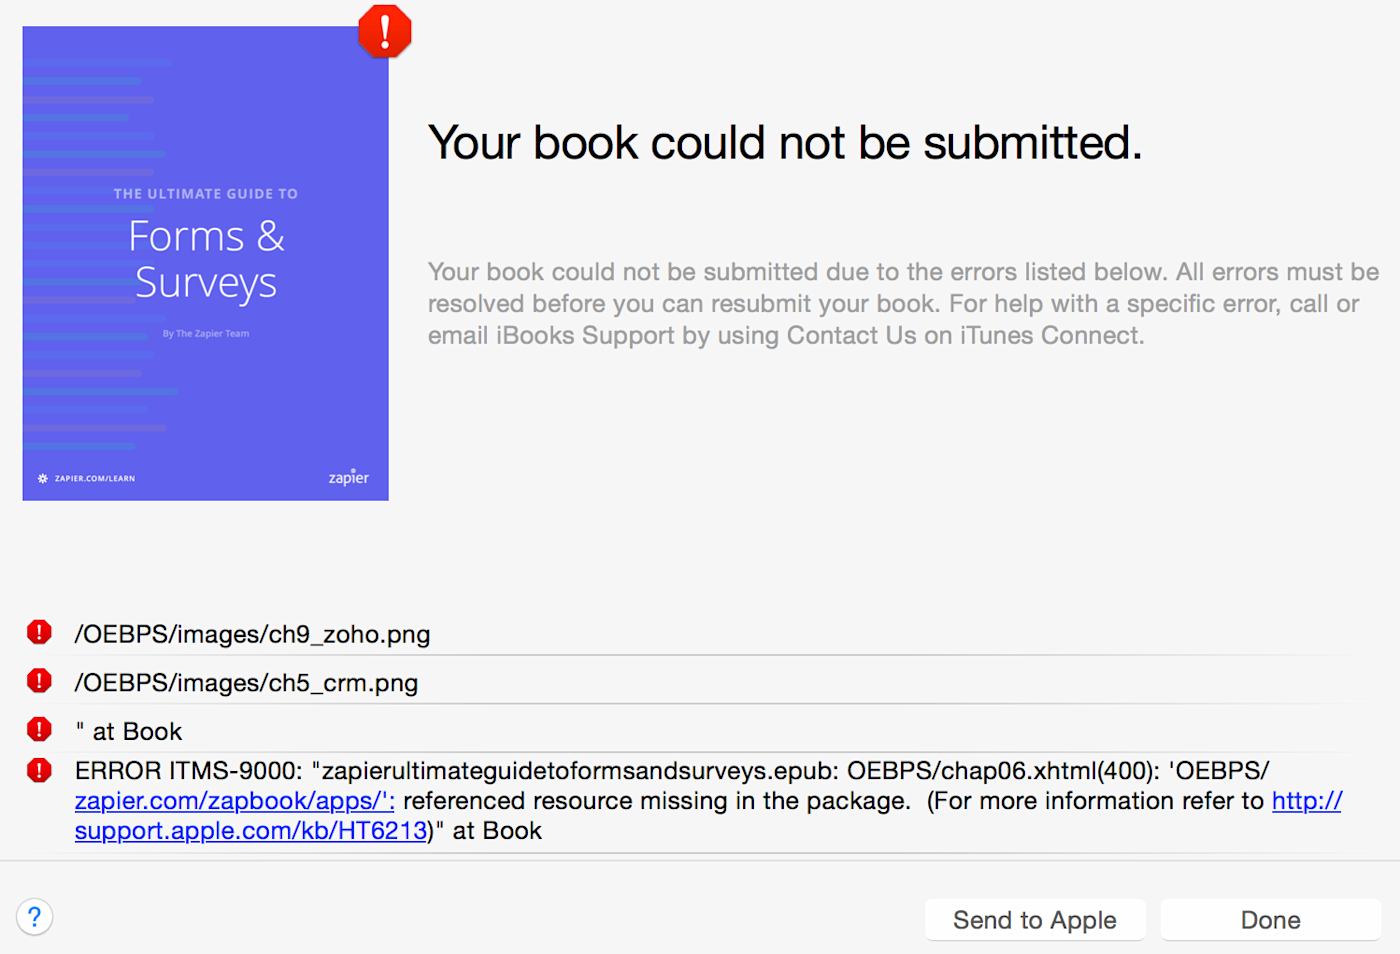
Or, you might get an error screen. The iBooks Store only accepts absolutely perfect ePub formatted books, and will reject books for any number of reasons. Uploads will fail if your book includes images larger than 4 megapixels, as mentioned previously, so be sure to scale your images down. It will also fuss if there's spaces in your file names, images linked to another site, image file names beginning with a number, <figure> or <section> blocks, URLs that don't include http://, and much more.
The good news is, iBooks will tell you each of the errors. If it's just images or simple text formatting errors, you can likely correct them in your original files, re-export the ePub file, and try again. Rinse and repeat until you get your book uploaded. If you get more cryptic errors with <section> blocks or other XML/HTML problems, you'll need to edit your ePub's file code. You can extract the files manually, or just use Calibre to dig into your ePub, find the offending file, edit out the wrong code, and export the book to try again. A common problem is that Leanpub's default book cover size is larger than iBooks' accepted limits, so you may need to use a smaller image in Leanpub or manually edit the cover image file from Calibre.
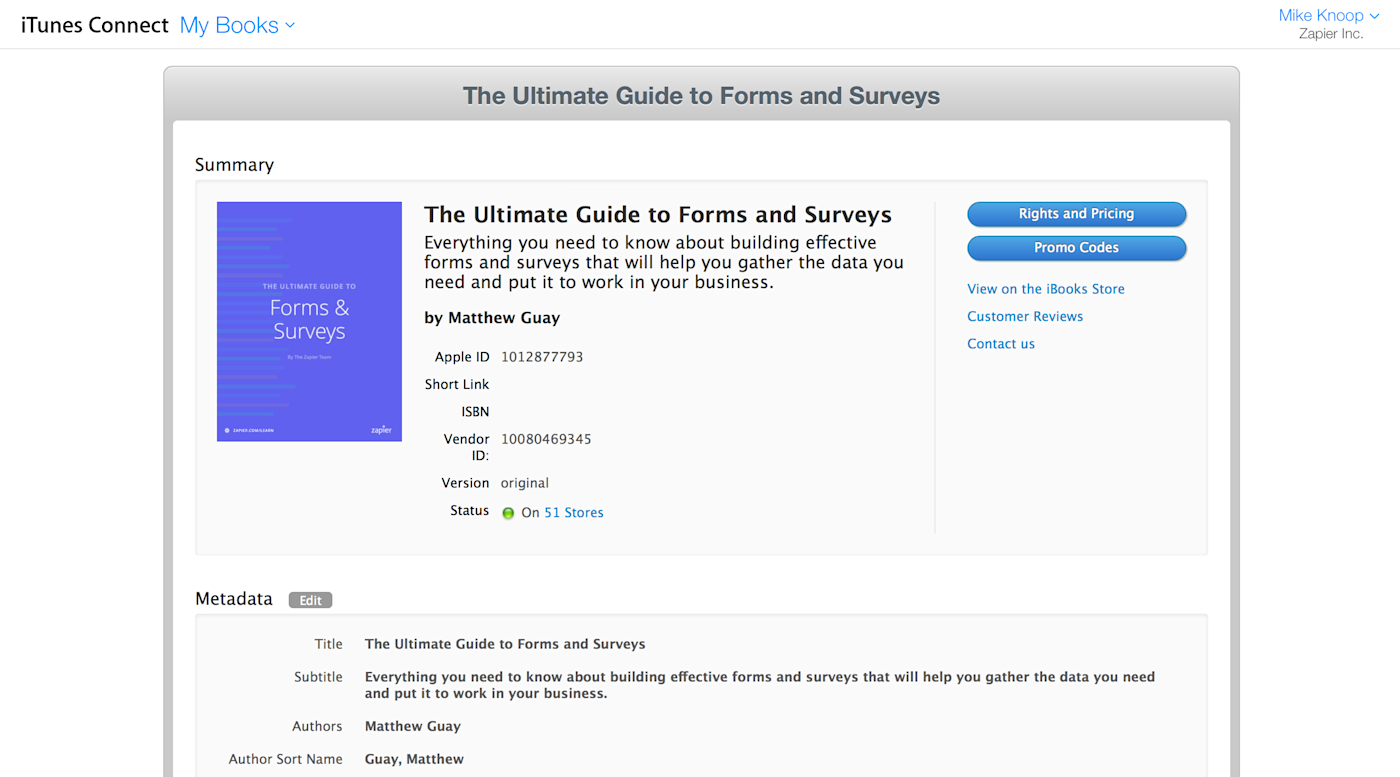
If you wanted to list your book for free, you're all finished since Apple lists new books as free by default. If you'd rather sell your book, though, you'll need to log back into iTunes Connect. There, you can change your book's availability, edit basic metadata about the book, and set its price. You can also check your download stats from iTunes Connect once your book's been uploaded for a while. If you ever need to update your book, though, you'll need to upload changes via iTunes Producer again.
Listing your book in Google Play Books would also seem smart so you can reach Android users, but Google isn't accepting new publishers right now.
Leanpub, Lulu, and More

The traditional eBook stores are far from the only place to list your book. You want as many people as possible to read your book—whether it's a paid book or a lead magnet for your site—so list your book wherever people are looking for new reading material. If you generated your eBook files with Leanpub or Lulu, it's only natural to list your book in their stores. If your readers are more likely to use the Kobo eBook reader or Barnes & Noble's Nook, list your book in their store.
Once you have your eBook in ePub and mobi formats, you'll have everything you need to get your book listed just about anywhere. Just copy the description text you already used on the Kindle store, make custom graphics if needed from your cover art, and upload your book as many places as you can. We've included our books in a bundle from Paddle, and have listed them on the new eBook marketplace Publi.sh—there may be different bundles, sites, and stores that make sense for your book and industry, so be sure to explore far and wide for opportunities to share your book.
There are diminishing returns to listing your book on too many places, since Kindle and iBooks already command so much of the market, but especially when you're just starting out, you might as well try and see which places work best for your book.
Your Own Book Site
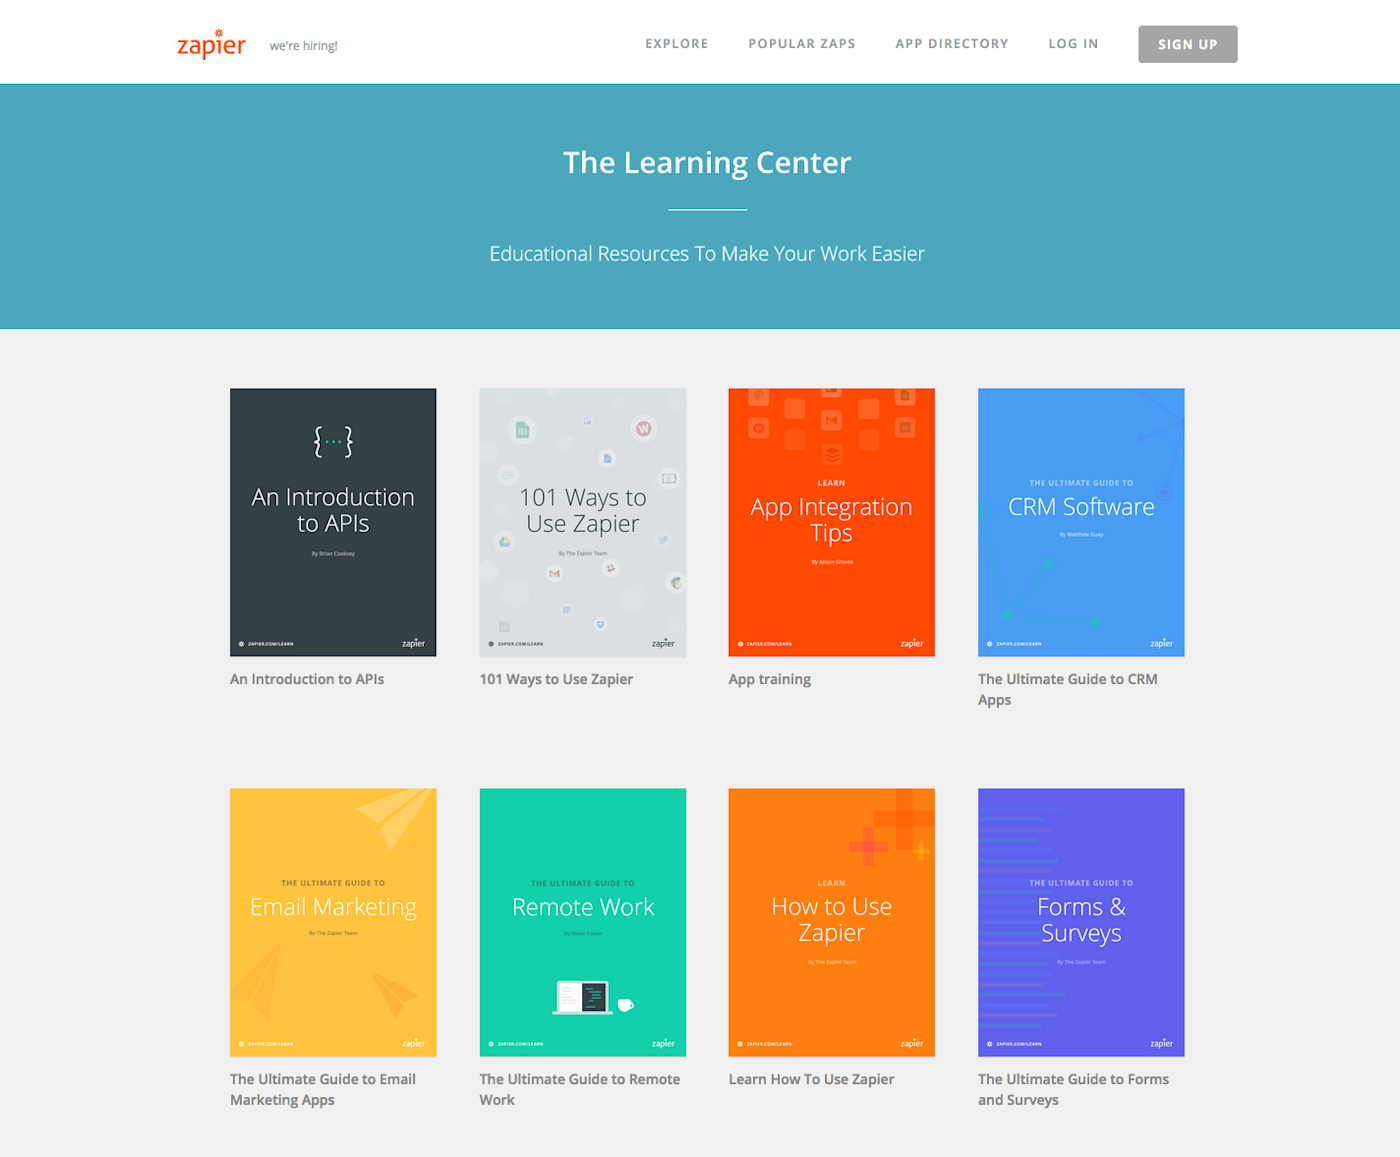
Then, especially if you're listing your book for free, be sure to have an online copy of your book on your site. You could just leave the initial blog posts up, perhaps with an "index" post that links them all together, but an online book that's formatted into chapters with a landing page for the table of contents is much nicer. It'll be an easy way to share your book, and you can list your eBook download files there too for yet another distribution method.
The simplest option is to just have a landing page where readers can fill out a form and download your book. Gumroad is a great option for this—you can upload your book, give it away or sell it, and gather email addresses of everyone who downloads your book.
Learn more about (https://zapier.com/learn/email-marketing/].
The more difficult option is a new online home for your book. We use a tweaked version of our Django-powered blog for our books, while others use WordPress templates designed just for books. Or you could use a "book CMS" like Pollen, which is an open source tool to make your text look and feel like a web-ready book. Add in your book copy and eBook download links, and you'll have a new landing page to share whenever anyone ask for info about that topic.

If you do this, though, there's one very important thing to note: you've already published the content on your blog, and Google doesn't like duplicate content. So, before you publish the new online book, make sure each chapter uses the same permalinks (or slugs, as some CMS refer to them) as your original blog posts. Then 301 redirect the original blog posts to their new homes as chapters in your book. The Moz team has a great guide to redirects, well worth a read to make sure your content is redirected properly.
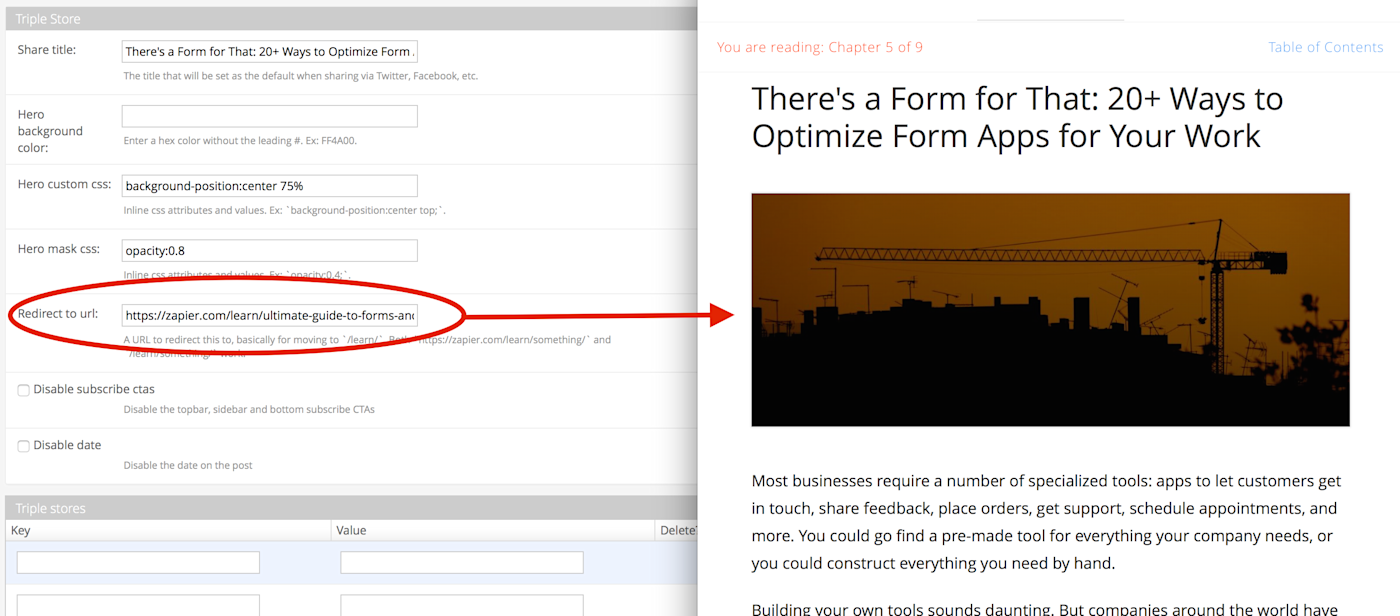
Double-check and make sure each original blog post redirects to its new home in your book CMS—it's that important. It'll will keep your Google ranking for your original content, while making sure all new readers see the newly formatted book.
5. Promote, Promote, Promote
You've finally done it: you've planned quality blog posts, turned them into a book, and published it on the world's most popular eBook stores—and maybe even have paper copies of your book. That's quite an accomplishment, one you should be proud of.
Pop the champagne—your team deserves it. Then, tomorrow, it's time to get back to work on this same content.
I know. By now, you're tired of seeing the same articles over and over, and the subject that originally seemed like such a good idea for a blog series now sounds dull and boring. But you've still got work to do to make sure people see your book.
For that, your best bet is to go back to where it all started: email conversations and blogging. You should email everyone that's mentioned in the book—every individual and company you linked to, every expert you quoted, every user whose story you included. Let them know they are featured in your book, thank them for their help, and politely ask them to share the book. In my experience, most people are excited to be featured and glad to help.
You might even ask new people for quotes specifically about your book, to help promote it with endorsements. That's how the Intercom team helped promote their book, Intercom on Product Management, with an entire page filled with expert endorsements.
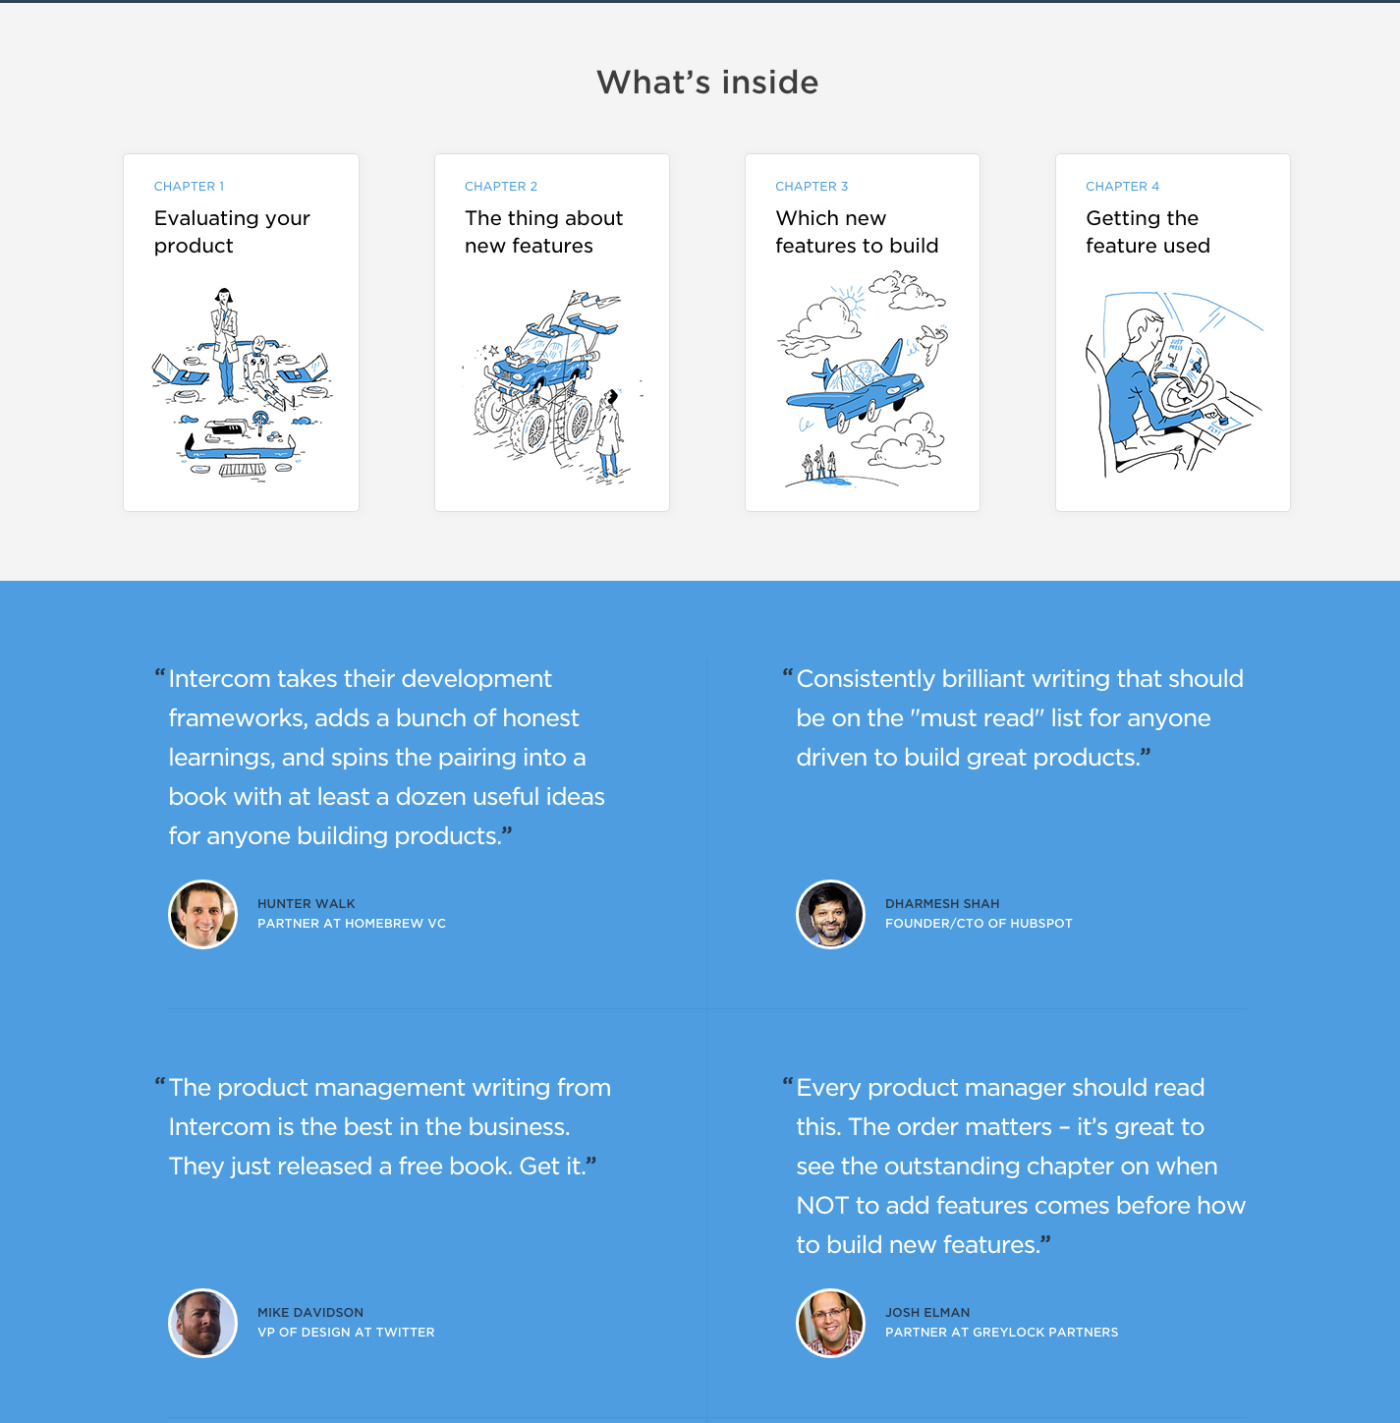
"Reaching out for third party endorsements in advance of publication really helped with the marketing of the book," said John Collins, managing editor at Intercom. "Having quotes on the landing page from the likes of Ryan Singer, Hunter Walk, Dharmesh Shah and David Cancel really added credibility."
Finally, do the same things you'd do to promote anything else your team does. Share the book on your social networks, write blog posts about your writing process, and send it out to your mailing lists. You can even write new blog posts that summarize some of the best tips from your book, and share them as guest posts on relevant blogs.
Perhaps even find free bundles and promotions that would like to include your book—a downloadable item for free always gets interest. Longform sites might be more interested in your content now that it's a book, and free eBook sites might help promote it where they'd have seldom been interested in your blog posts.
You're a published author now—a self-published one, mind you, but a published author all the same. Make the most of it, and you'll find your content going further than you ever expected.
Or maybe it'll just promote your brand and help your most engaged users get more out of your app. That's fine too.
Wrapping it All Up
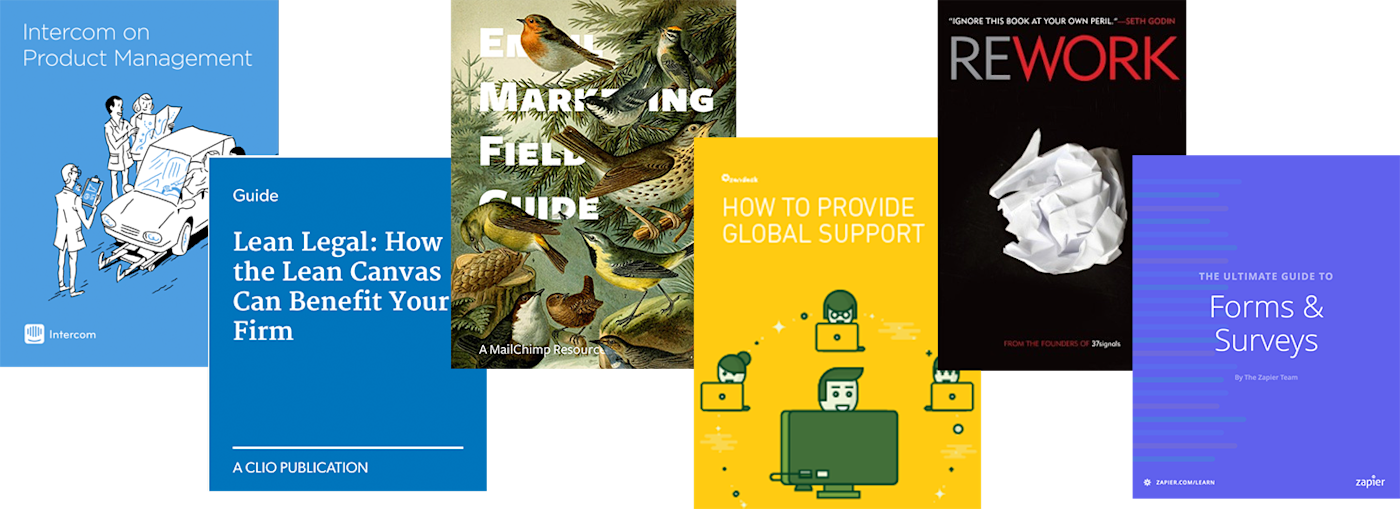
Writing a book just to promote your app or service might sound like the most far-fetched thing you could do. But, it really can work, and it's not all that hard nowadays with a bit of planning and a little extra time to make your blog posts really shine. MailChimp, Intercom, Basecamp, Clio, Zendesk and many others use eBooks as part of their marketing, and you can too.
We hit so many problems our first time around, though, that it seemed like it was more trouble than it was worth getting our books on the iBooks and Kindle stores. Each time got easier, though, especially once we started using Leanpub. If you follow the steps in this article, you should be able to get your book published without too much trouble.
But if you do have trouble—or had problems with eBook publishing in the past—we'd love to hear about it in the comments below. Otherwise, we'd love to hear about your successes with eBook publishing, and how it's helped take your content marketing further.
Long live the book!
Updated 3 Apr 2019 with new pricing and some details on potential errors you may encounter.
