
I remember the first time I saw a coworker's Slack app. I'm partially embarrassed to admit that I thought the number of Slack channels she was in directly reflected how important she was to the company. Which is to say, I, too, wanted to be part of as many Slack channels as possible.
Three remote jobs later—all of which operated in Slack—and I've learned a few things; namely, more Slack channels does not equal more importance. And be choosy about creating, joining, and ruthlessly leaving Slack channels.
For when you want to do any of the above, here's everything you need to know about how to create and manage a Slack channel.
Table of contents:
What is a Slack channel?
Slack channels are dedicated spaces where you can chat, share files, and start video and audio calls.
Every Slack workspace starts with a #general channel, which is the only channel that members are automatically added to and unable to leave. At Zapier, we reserve the #general channel for company-wide announcements only. The #general channel is also the only channel that can't be archived, deleted, or made private.
Beyond that, you can set up Slack channels for any kind of project, topic, or team, making it easier to focus conversations and stay productive in Slack.
How to create a Slack channel
If you just need a refresher, here's a quick summary of how to create a Slack channel from your desktop. (Keep scrolling for a more detailed breakdown with screenshots.)
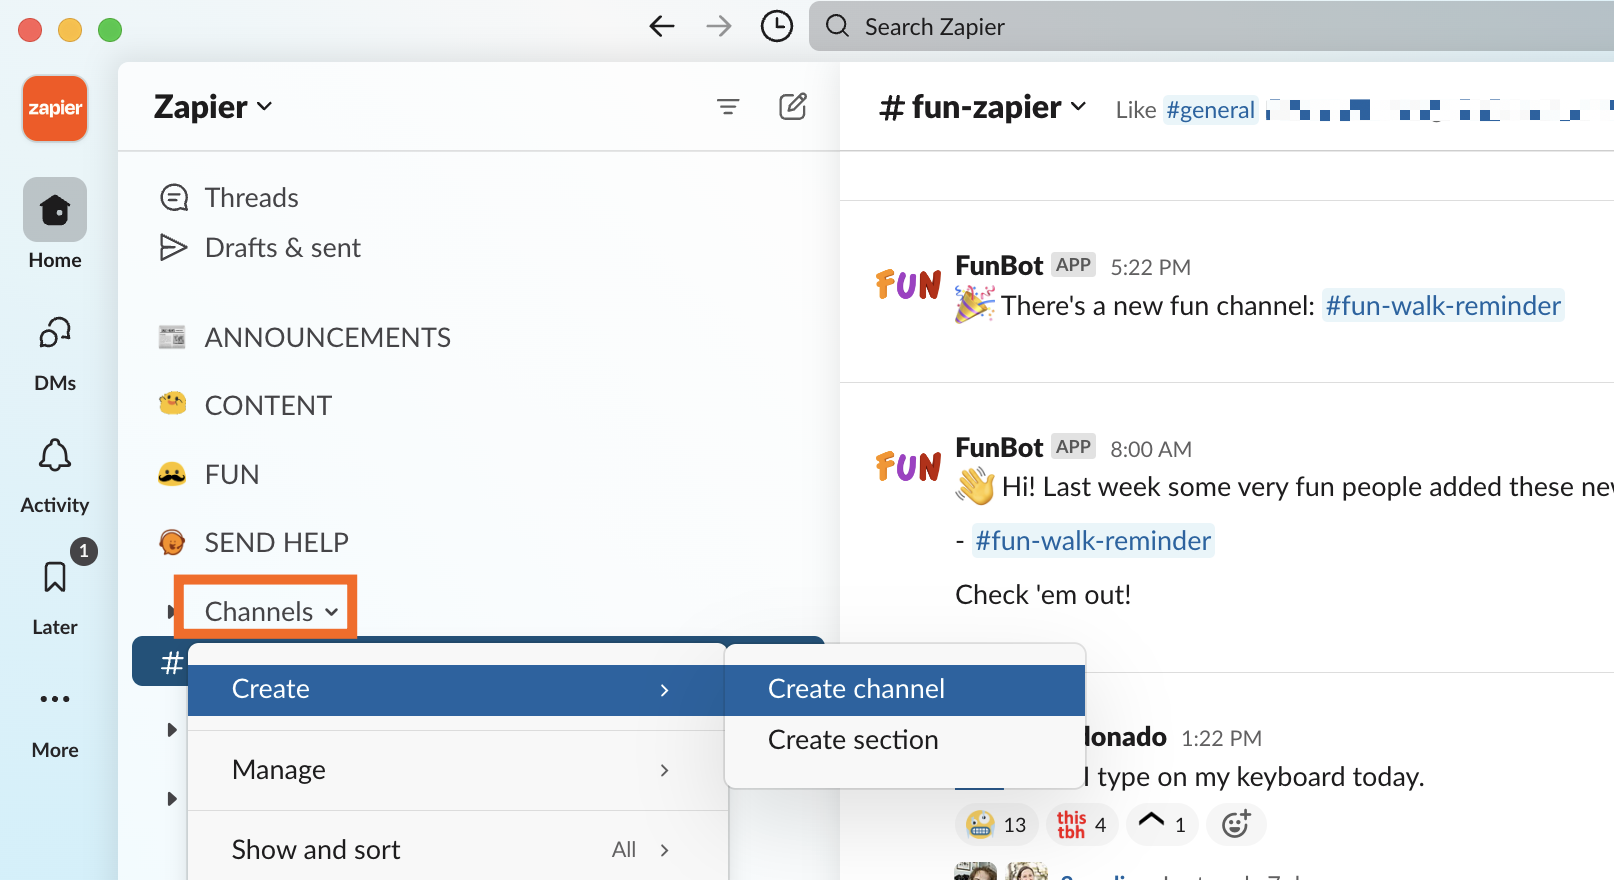
From your sidebar, click Channels > Create > Create channel.
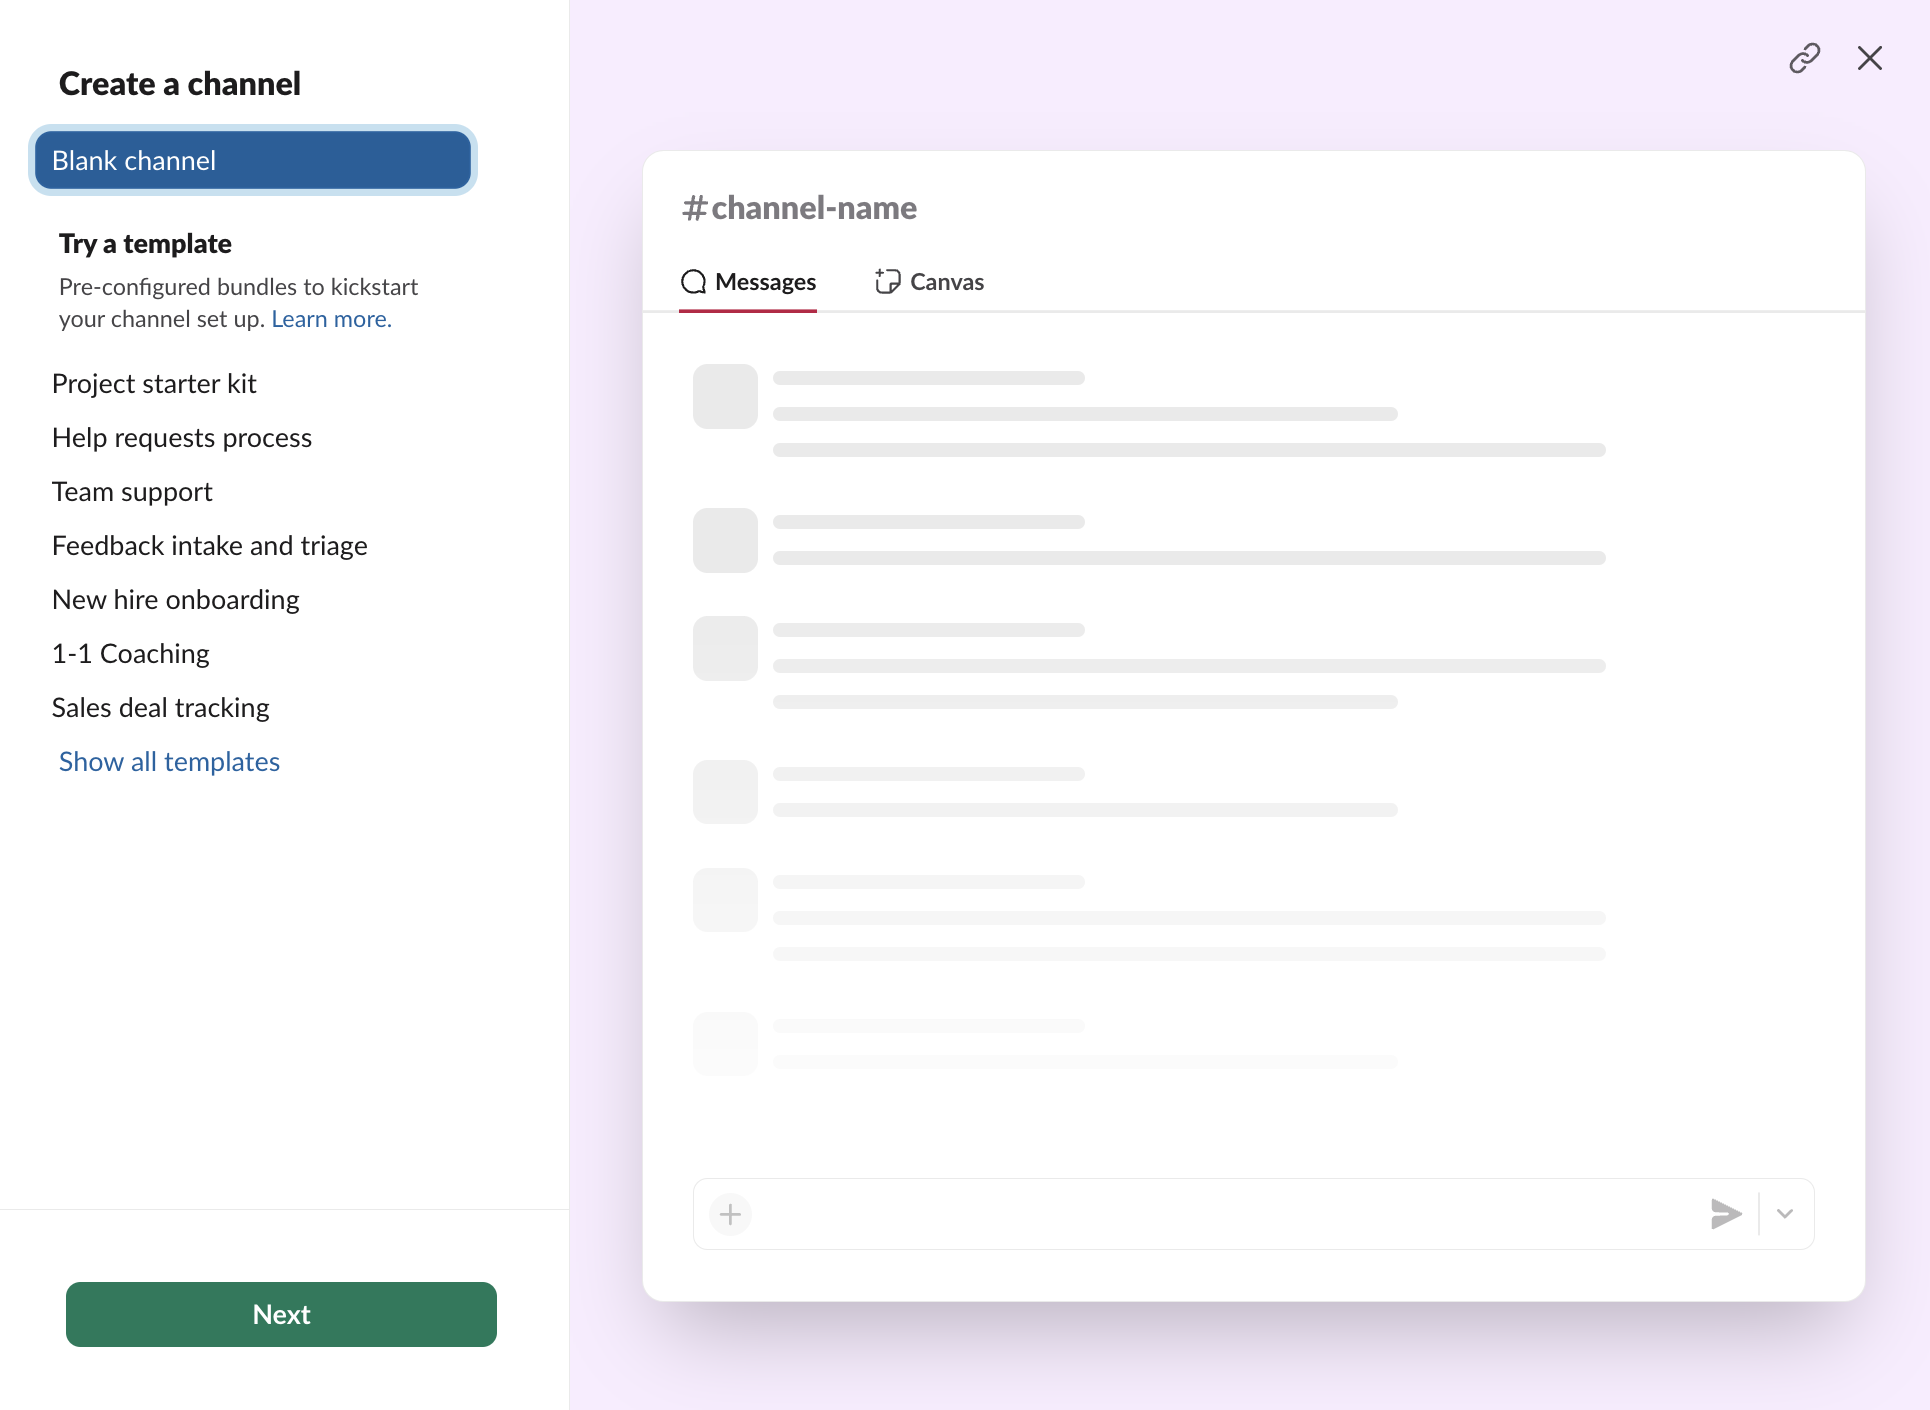
Choose how you want to create a channel: from scratch or a template.
Click Next.
Enter a channel name and set the visibility to Public or Private.
Click Create.
That's it. Now for the details.
From your sidebar, click Channels > Create > Create channel.
Choose how you want to create a channel: from scratch or using a Slack channel template.
Enter a channel name and set the channel visibility.
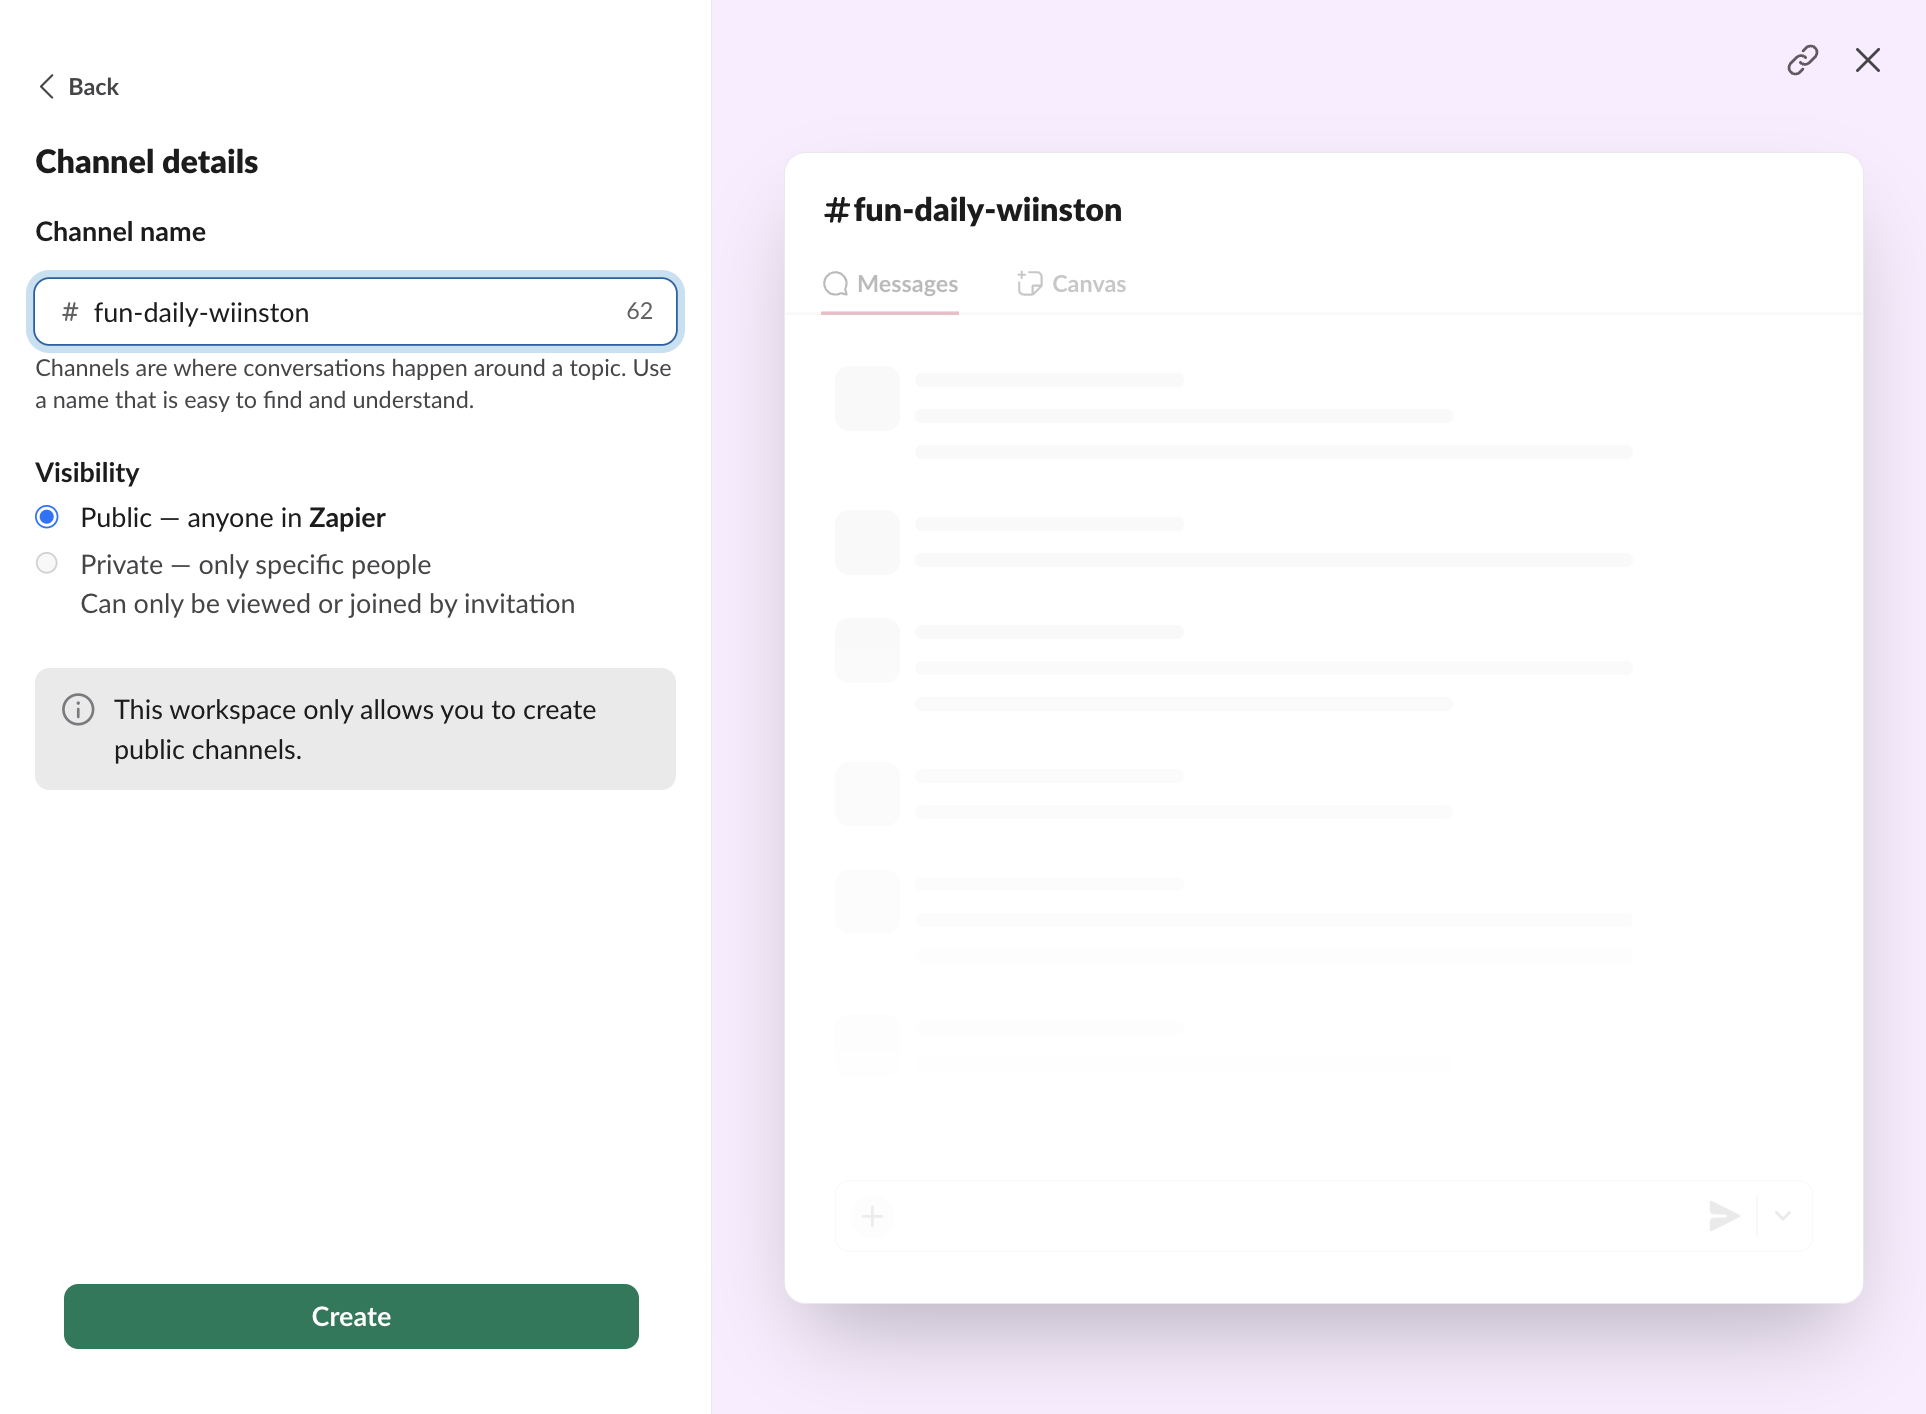
Public: Open to any member in your workspace to view and join. Messages or files shared in a public channel can also be searched by other members of your workspace.
Private: Members in your workspace can only view or join by invitation. Messages or files shared in a private channel can only be searched by members of that channel. Note: Your account administrator may limit you from creating private channels, so if you don't have that option, that's probably why.
Click Create.
Optionally, invite members or guests to the channel by entering their name or email address. Or click Skip for now.


That's it. Your new Slack channel is live and automatically gets listed in the sidebar under Channels.

How to create a Slack channel in the mobile app
If you want to create a Slack channel from the mobile app, here's how. It's worth mentioning that you can't use channel templates in the mobile app—you have to create your channel from scratch.
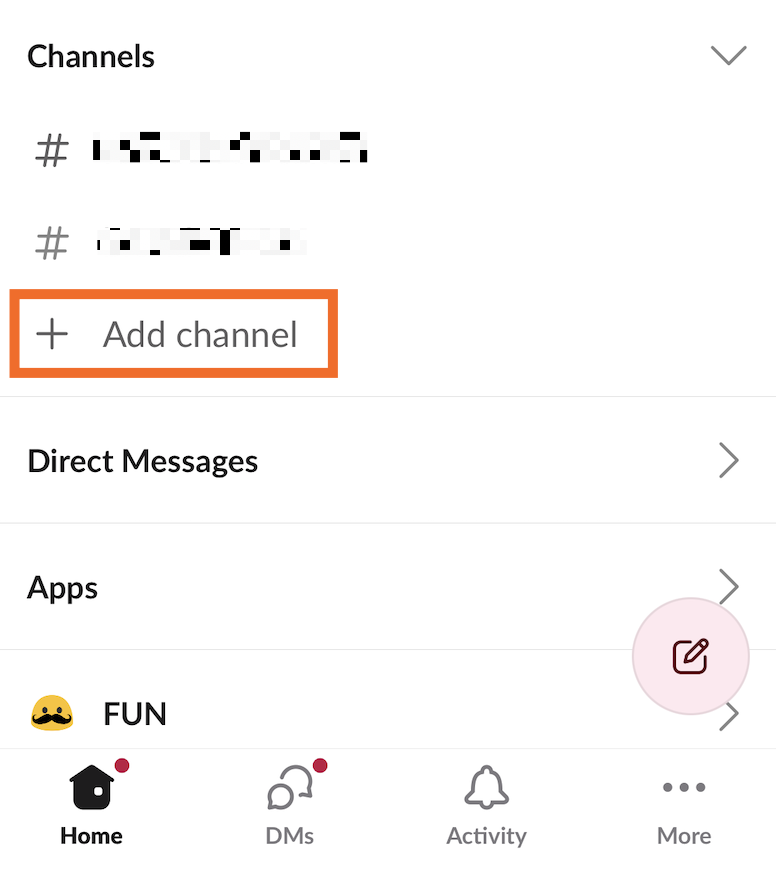
From your Home screen, tap Channels
Tap Add channel.
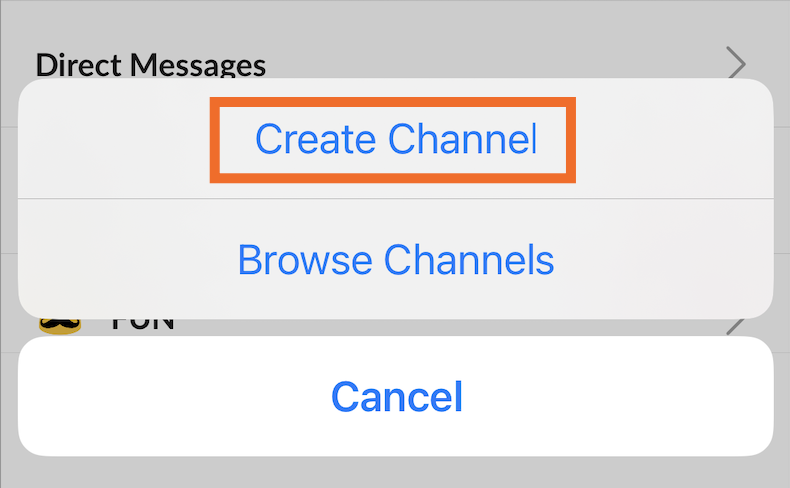
Tap Create Channel (on iOS) or the plus icon in the bottom-right corner (on Android).
Enter a channel name.
Tap Next.
Set the channel visibility: Public or Private.
Tap Create.


How to add someone to a Slack channel
Now that you've created your Slack channel, here's how to roll out the welcome wagon and add others.
Click the channel you'd like to add people to.
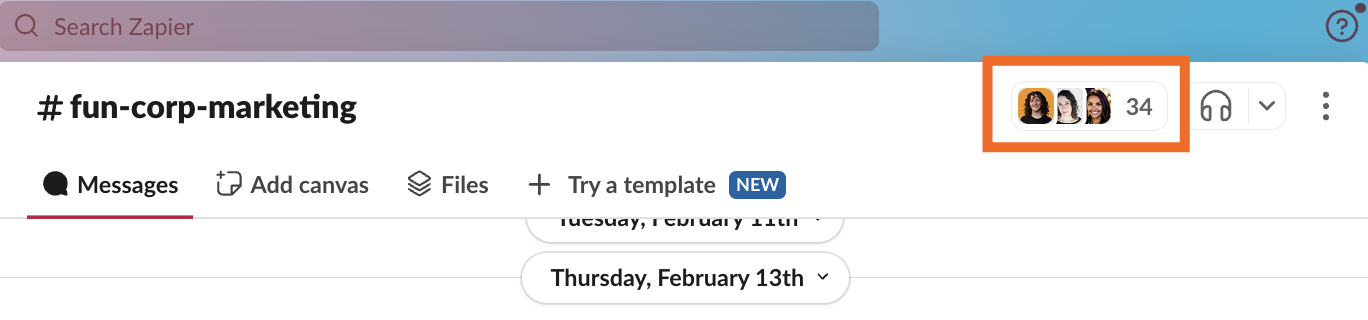
Click the View all members of this channel icon in the top-right corner, which looks like a cluster of profile pictures.
Click Add people.
Enter the names or email addresses of those you want to add, and select them (you can add multiple people at a time).
Click Add.

How to make a Slack channel private
Need to convert a public channel to a private one? By default, only workspace owners, admins, and channel managers (the person who created the channel) can make a Slack channel private.
Open the channel you want to make private.
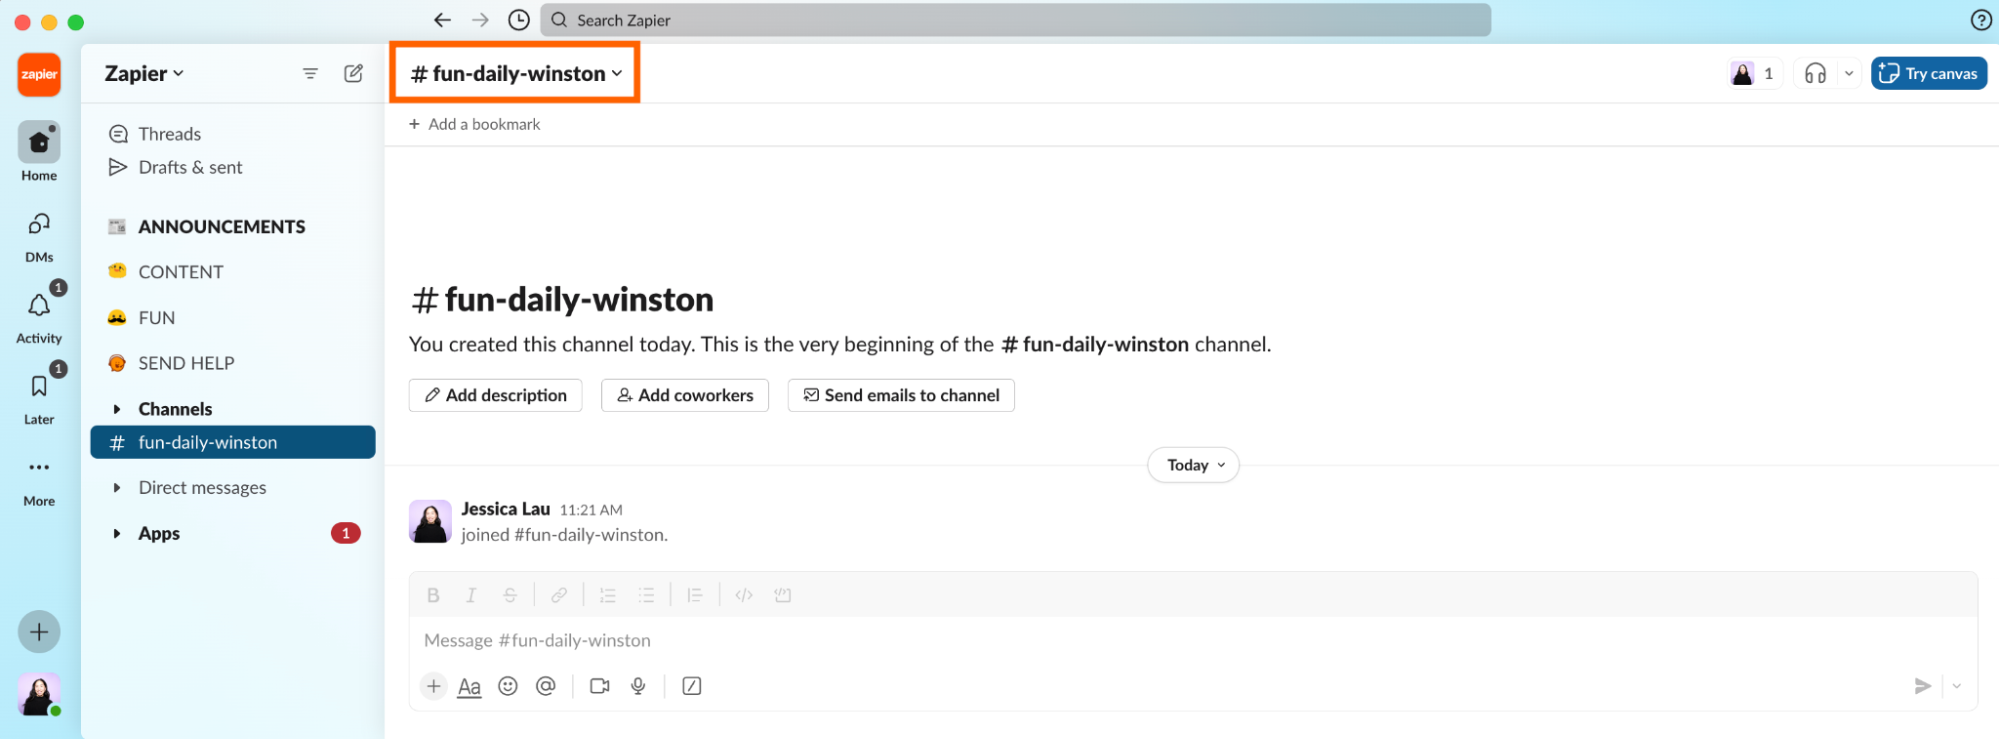
Click the channel name in the conversation header.
Click Settings.
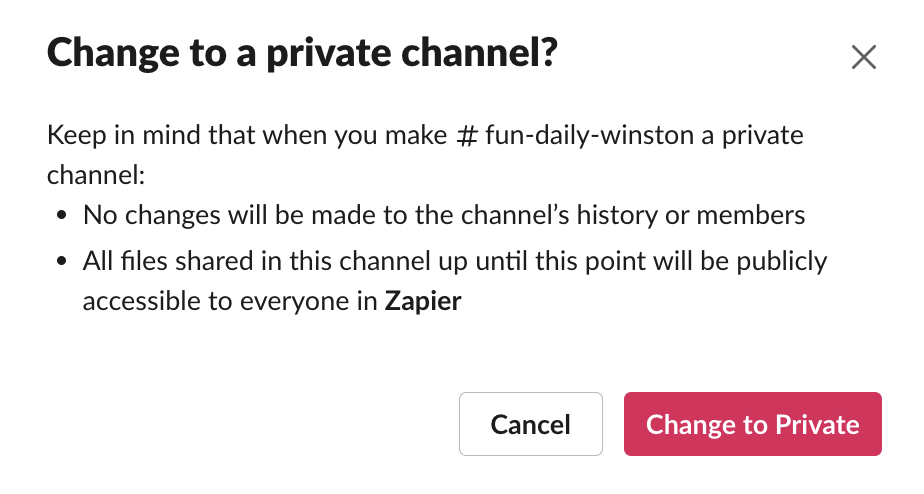
Scroll down and click Change to a private channel.
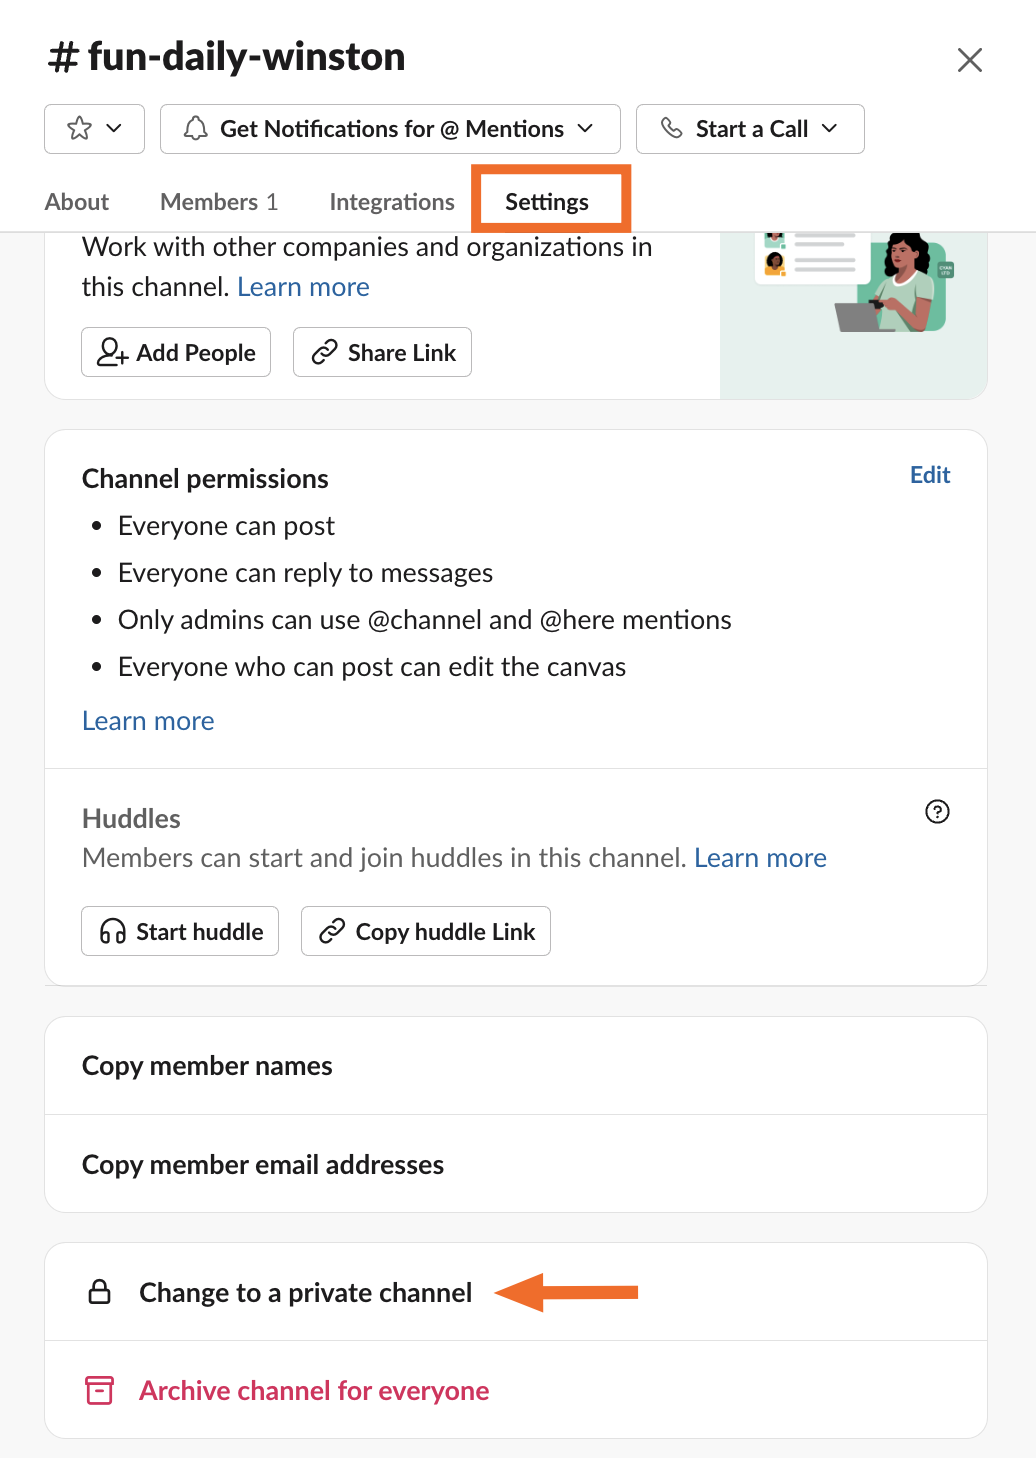
Click Change to Private to confirm.


How to rename a Slack channel
Same thing here: only workspace owners, admins, and channel managers (the person who created the channel) can rename a Slack channel.
Open the channel you want to update.
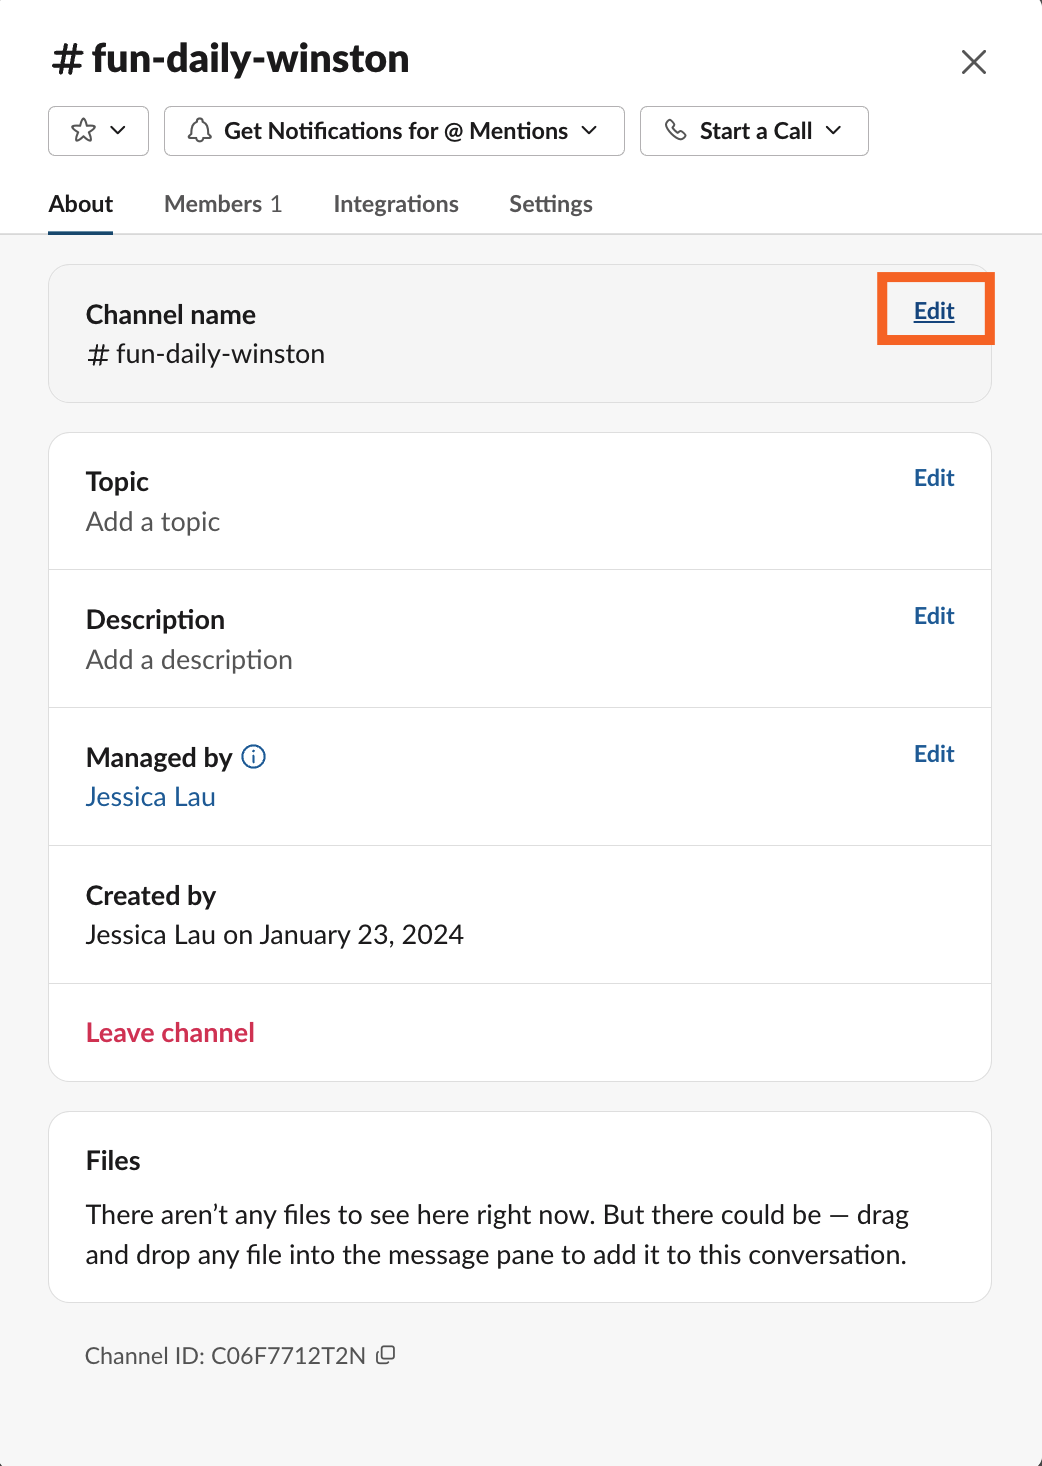
Click the channel name in the conversation header.
Click Edit next to the channel name.
Enter a new channel name.
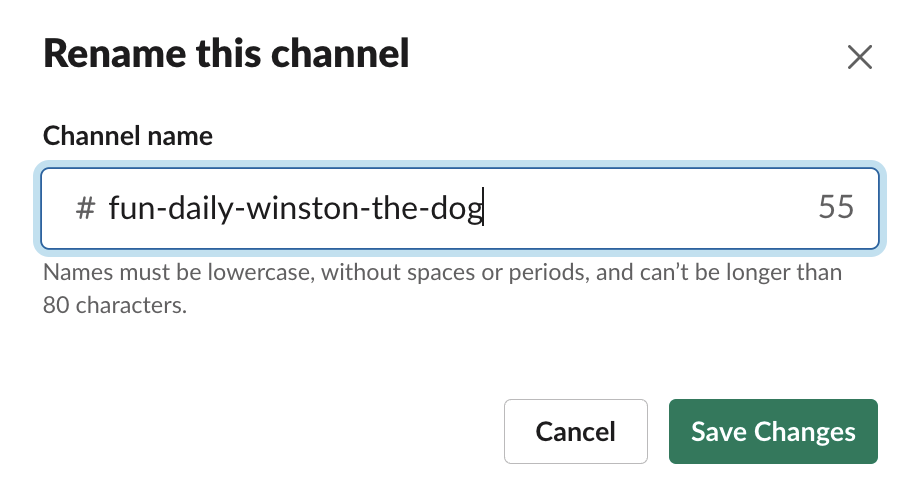
Click Save Changes.


How to join a Slack channel
If you're a member of a Slack workspace, you can browse and join any public channel. If you're a guest, however, you'll need a channel invite.
Click Channels > Manage > Browse channels. By default, Slack will list channels in alphabetical order. But you can change this to list them by recency, by the number of members, or by most recommended.
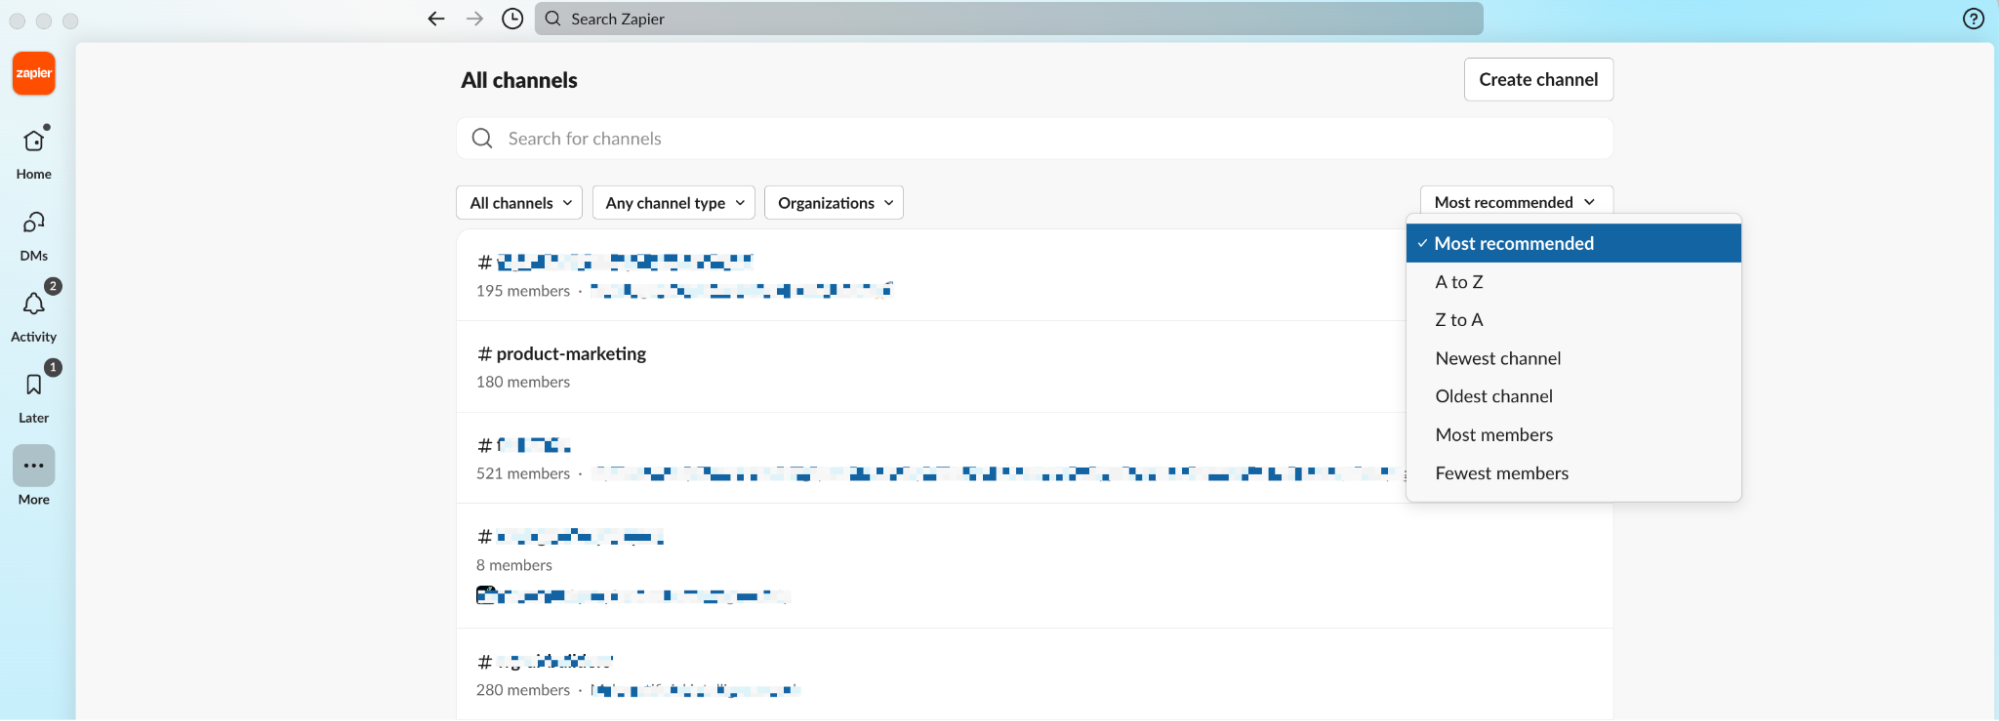
Scroll through and click the channel you want to join. Or use the search bar to search by channel name or description.
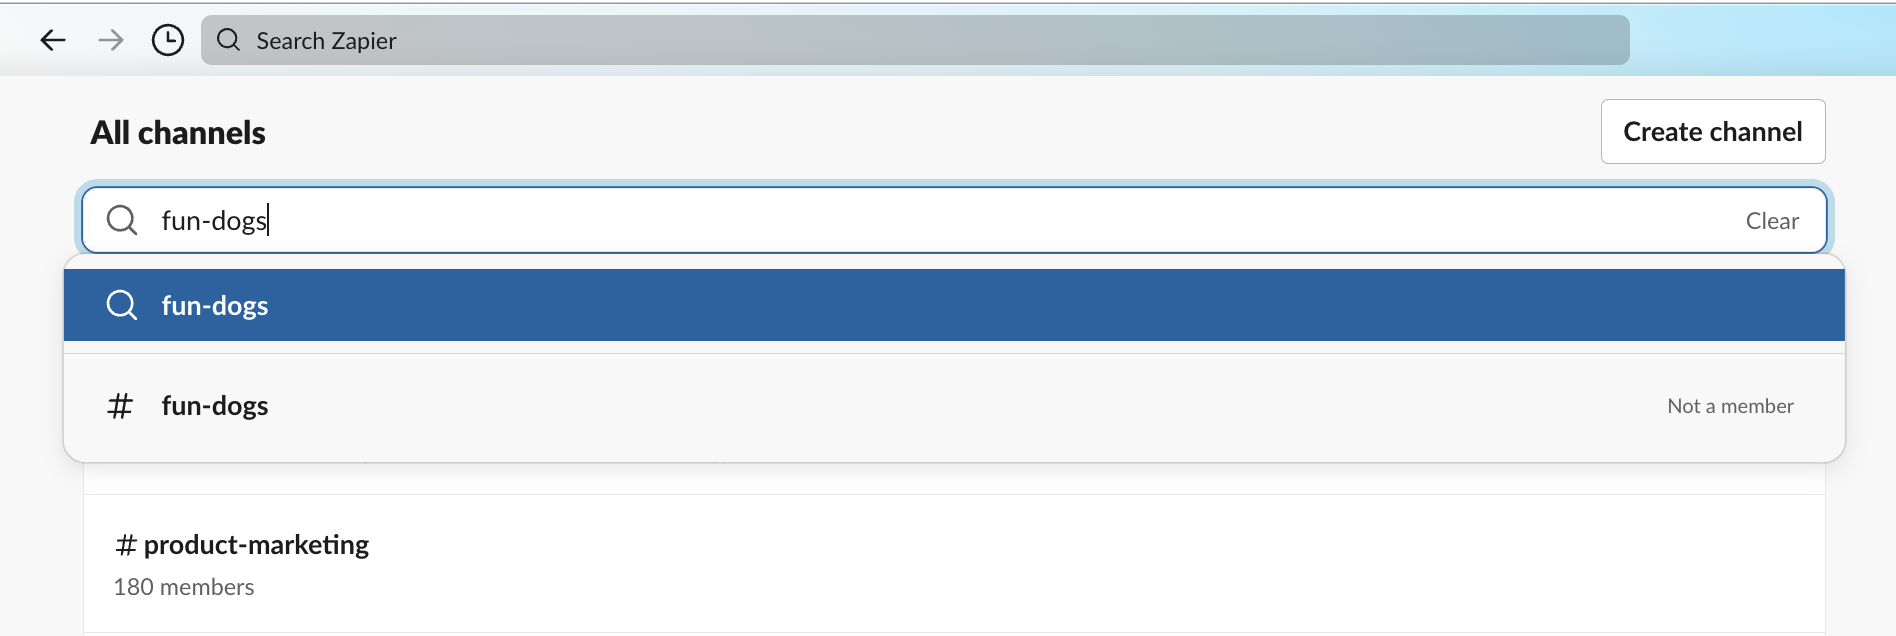
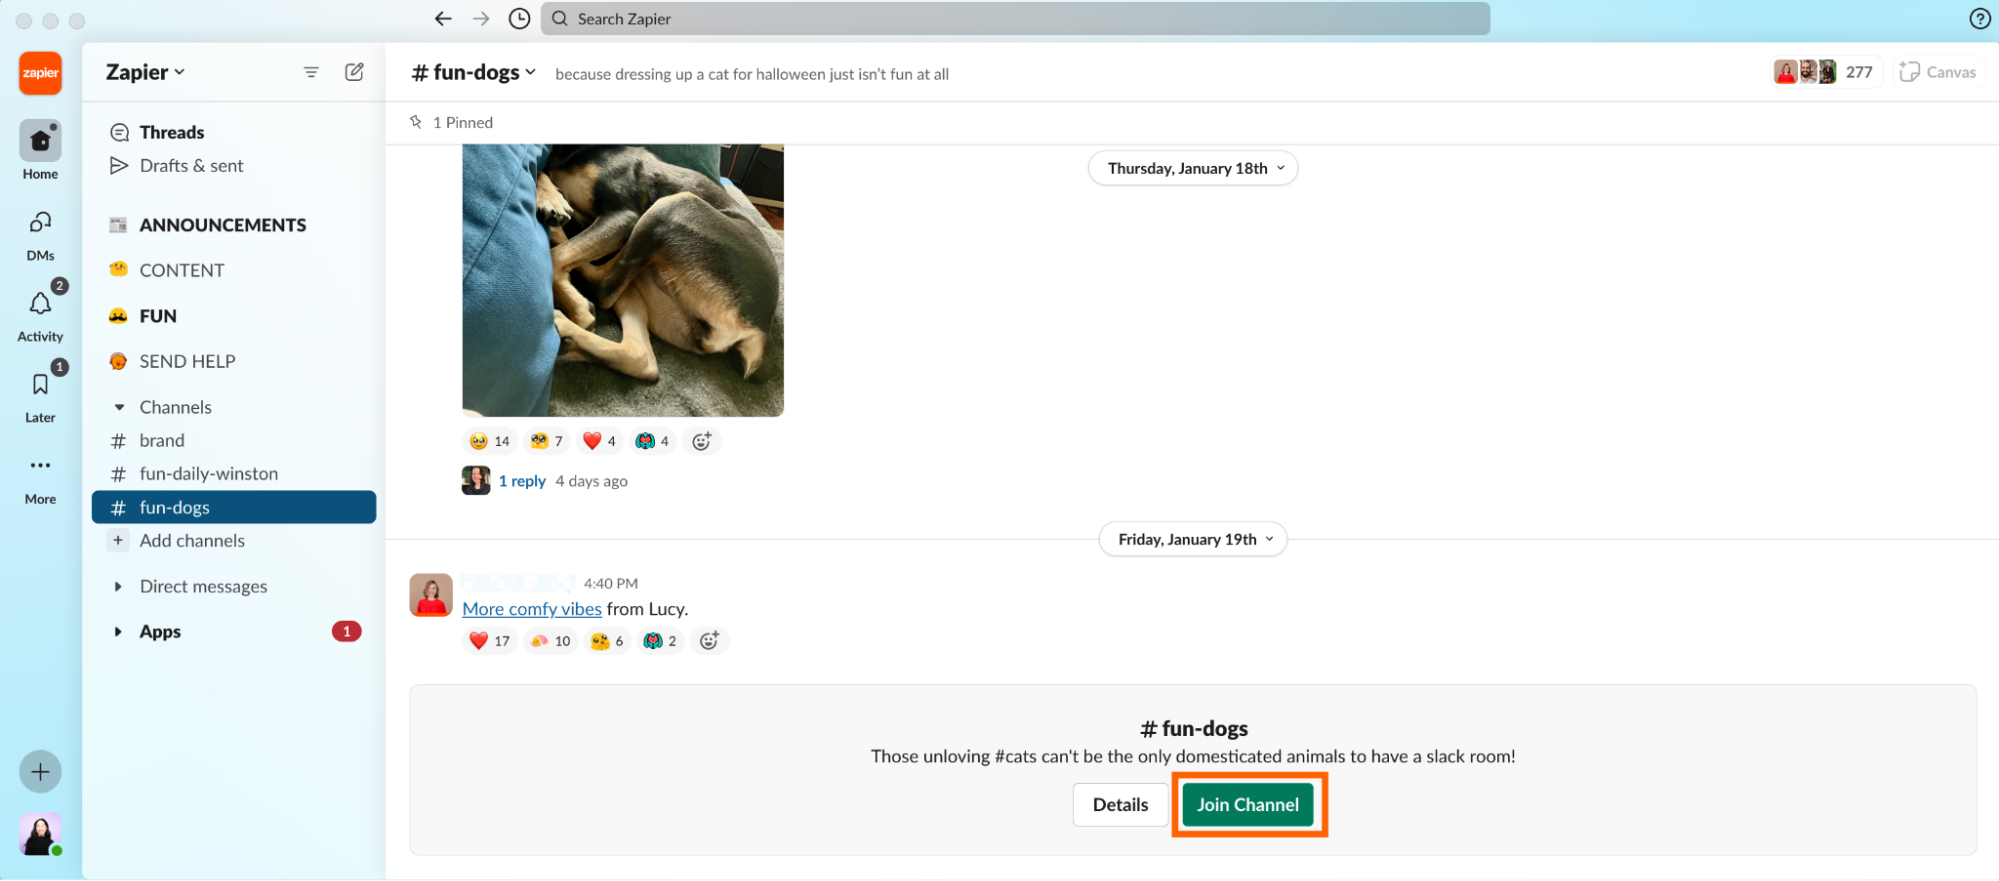
Click Join Channel.


How to group channels in Slack
As you join more channels, I recommend grouping them into sections. This makes it easier to find the channel you need. But more importantly, in my experience, sections are a useful way of quickly gleaning which notifications I should check right away and which ones can wait. For example, all my high-priority channels are grouped under Announcements. And just-for-fun, low-priority channels are grouped under Fun.

Here's how to group Slack channels into sections.
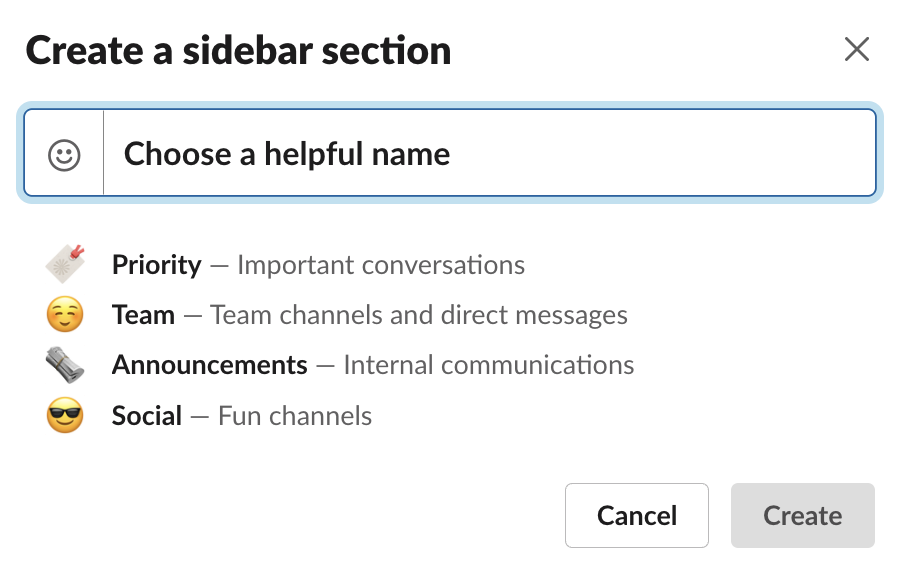
Click Channels > Create > Create section.
Enter a descriptive channel name.
Click Create.

How to leave a Slack channel
If you, like me, were once a little too join-happy, and now you're inundated with more channels than you can count in your sidebar, there's a good chance it's time to leave some of them. Trust me—you won't miss anything.
Right-click the channel you want to leave, and then click Leave channel.

How to mute a Slack channel
At a previous company, our Slack workspace would automatically notify the entire channel whenever someone left. The unnecessary attention was enough to make me never want to leave the channel. So I found a happy medium to manage the notification overwhelm: I muted the channel.
Right-click the channel you want to mute, and then click Mute channel. Alternatively, click Change notifications to get alerted only when you're tagged in a message.

How to delete a Slack channel
Ready to say goodbye forever to a Slack channel? If you're a workspace owner or admin, here's how to delete a channel.
Open the channel you want to delete.
Click Settings.
Click Delete channel.
Scroll down and click Delete this channel.
Click Delete channel to confirm you want to permanently delete the channel.
Note: If there's a chance you might need to access the channel's message history or revive it in the future, you're better off archiving it instead.
How to archive (and unarchive) a Slack channel
One of the benefits of archiving a Slack channel (instead of outright deleting it) is that you can still search through its message history and unarchive it at any point. Here's how to archive a Slack channel.
Open the channel you want to delete.
Click Settings.
Click Archive channel for everyone.
Need to revive an archived channel? Here's how to unarchive it.
Open the channel you want to unarchive.
Click the channel name in the conversation header.
Click Settings.
Click Unarchive this channel.
Note: If the channel you've unarchived is public, you'll have to manually re-add its previous members (they're not automatically restored. But if it's private, Slack will retain the previous channel members.
How to remove someone from a Slack channel
Perhaps you invited a guest to temporarily join your Slack channel, but they no longer need to be there. Here's how to remove someone from a Slack channel.
Open the channel you want to remove someone from.
Click the channel name in the conversation header.
Click Members.
Hover over the person you'd like to remove.
Click the three dots stacked vertically icon (
⋮) next to their name, and then select Remove from channel.Click Remove to confirm.
Automate Slack
Slack can make for an unwanted distraction, especially if you let your channels and notification settings run amok. But when you connect Slack with Zapier, it can offer a huge boost in productivity. For example, you can automatically create tasks from saved messages or use ChatGPT to reply to messages. Learn more about how to automate Slack, or get started with one of these workflows.
To get started with a Zap template—what we call our pre-made workflows—just click on the button. It only takes a few minutes to set up. You can read more about setting up Zaps here.
Related reading:
Multiple Slack workspaces? 5 tips to manage your notifications
Automatically send a Slack message for new Google Sheets activity
This article was originally published in January 2024. The most recent update was in February 2025.


