
You open your laptop in a public space—perhaps an airport, a coffee shop, or your hotel room. You sit down to work, select the correct Wi-Fi network, and ... nothing. Your Wi-Fi icon shows it's connected, but your browser says, "You are not connected to the internet." No matter how hard you try, that pop-up login screen never loads.
We've all been there. As a remote team that has spent a lot of time working from co-working spaces and coffee shops, we at Zapier have wasted far more time than we'd like to admit trying to get online.
There's no magic button to connect to a public Wi-Fi login page, but these five tips will do the trick most of the time.
Table of contents:
When in doubt, connect to a secure network
When you try to connect to the internet in a public space, the first thing you usually need to do is create an account or enter a code from a receipt on a custom login screen. And this is where you run into the most common problem: the login screen won't appear.
This usually happens on open, public Wi‑Fi (no password when you connect), but VPNs, DNS tweaks, or network problems can sometimes cause similar issues.
But let's say you bypassed this problem. You're now connected to a public Wi-Fi network. There are a few security concerns you should be aware of.
Your private information is accessible to the public. By default, anything you enter on a non-secure, non-HTTPS site can be viewed by anyone else on the network.
You're more susceptible to hackers. Unlike encrypted networks with WPA2 passwords, open networks are easier to hack, giving hackers access to your data.
That's why the best way to connect to the internet in public spaces also happens to be the most secure one: opt for only encrypted Wi-Fi connections. Some networks offer both an encrypted and public network option, allowing you to log in to either one. If you have the option, always choose the encrypted network.
In your Wi-Fi menu, encrypted networks appear with a padlock icon beside the network name. Encrypted networks will always prompt you to enter a password before you join for the first time.

Unless the password changes after you first log in, or you've chosen to forget the network, you won't have to re-enter the password if you try to reconnect in the future.
Use a password manager app to securely store your passwords and keep your data safe. Any good password manager app will also create complex and unique passwords for each account, so you don't have to.
How to force a public Wi-Fi network login page to open

No encrypted network available? Here are five ways to get that pesky open network login screen to load.
1. Turn off alternative third-party DNS servers
If there's one trick that usually gets login pages to load, it's this: turn off your alternate DNS server.
DNS servers, or domain name servers, match domain names such as zapier.com to its server's IP address. This way, you can visit Zapier's website by entering zapier.com instead of some long string of numbers.
If this is your first time hearing about DNS settings, you're fine—and this tip probably doesn't apply to you (skip ahead). By default, your computer automatically picks up a DNS server from the Wi-Fi router, which is what the public Wi-Fi expects you to use. This makes it more likely that your login page will load.
If you've ever added Google DNS, OpenDNS, or any other alternative DNS to your network settings, though, that may be your connection problem. Many public Wi-Fi networks use their DNS server to tell your computer which login page to open. But this doesn't work when you're using an alternative DNS server.
Here's how to remove any alternate DNS servers.
On a Mac
Open your System Settings.
In the sidebar menu, click Network.
Click Wi-Fi, and then click Details beside the network you're trying to connect to.
In the window that appears, click DNS. Then select any alternate DNS servers, and click
–to remove them.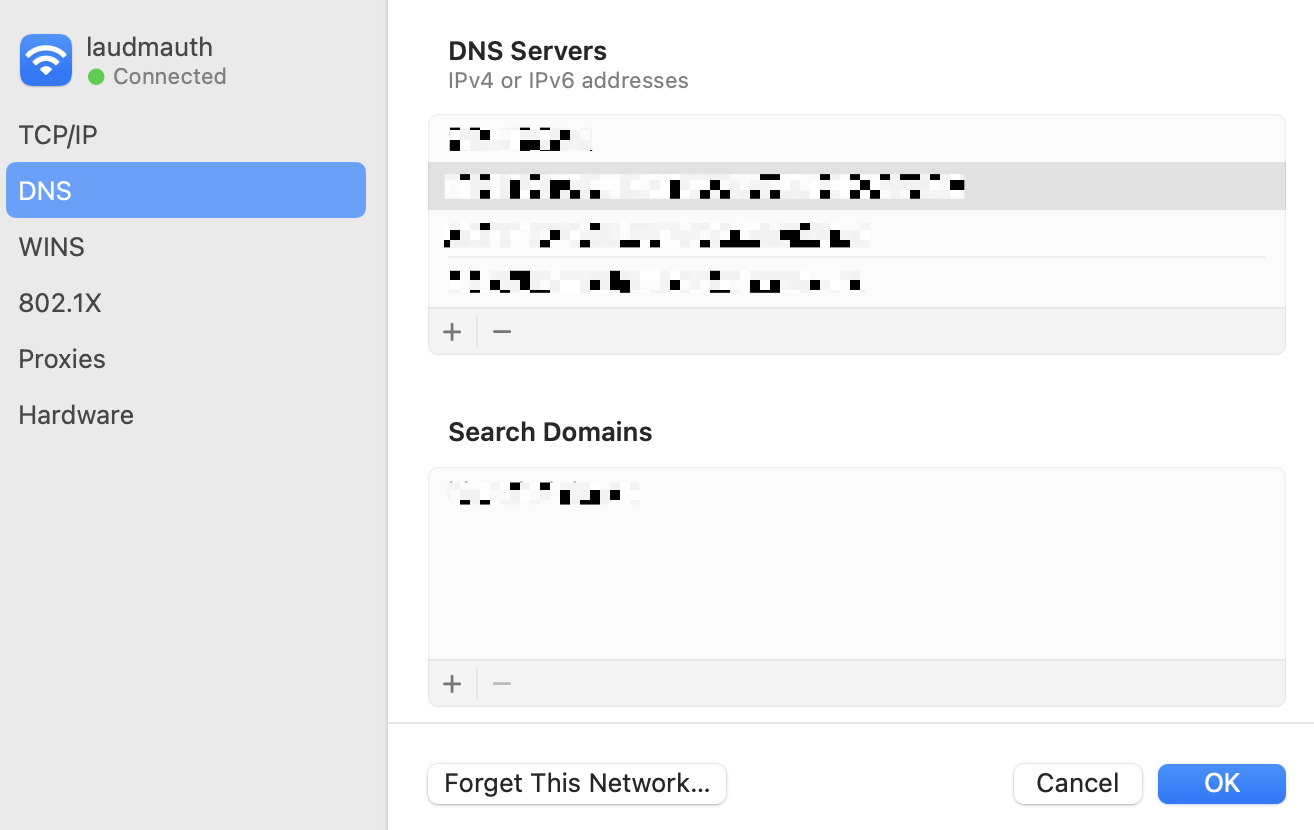

In Windows
Open your Settings.
In the sidebar menu, click Network & internet.
Click Wi-Fi.
Click Hardware properties.
Click Edit next to DNS server assignment.
If you previously changed your DNS server, the DNS setting is likely Manual. Click the down caret (
⋁), and then select Automatic.Click Save.
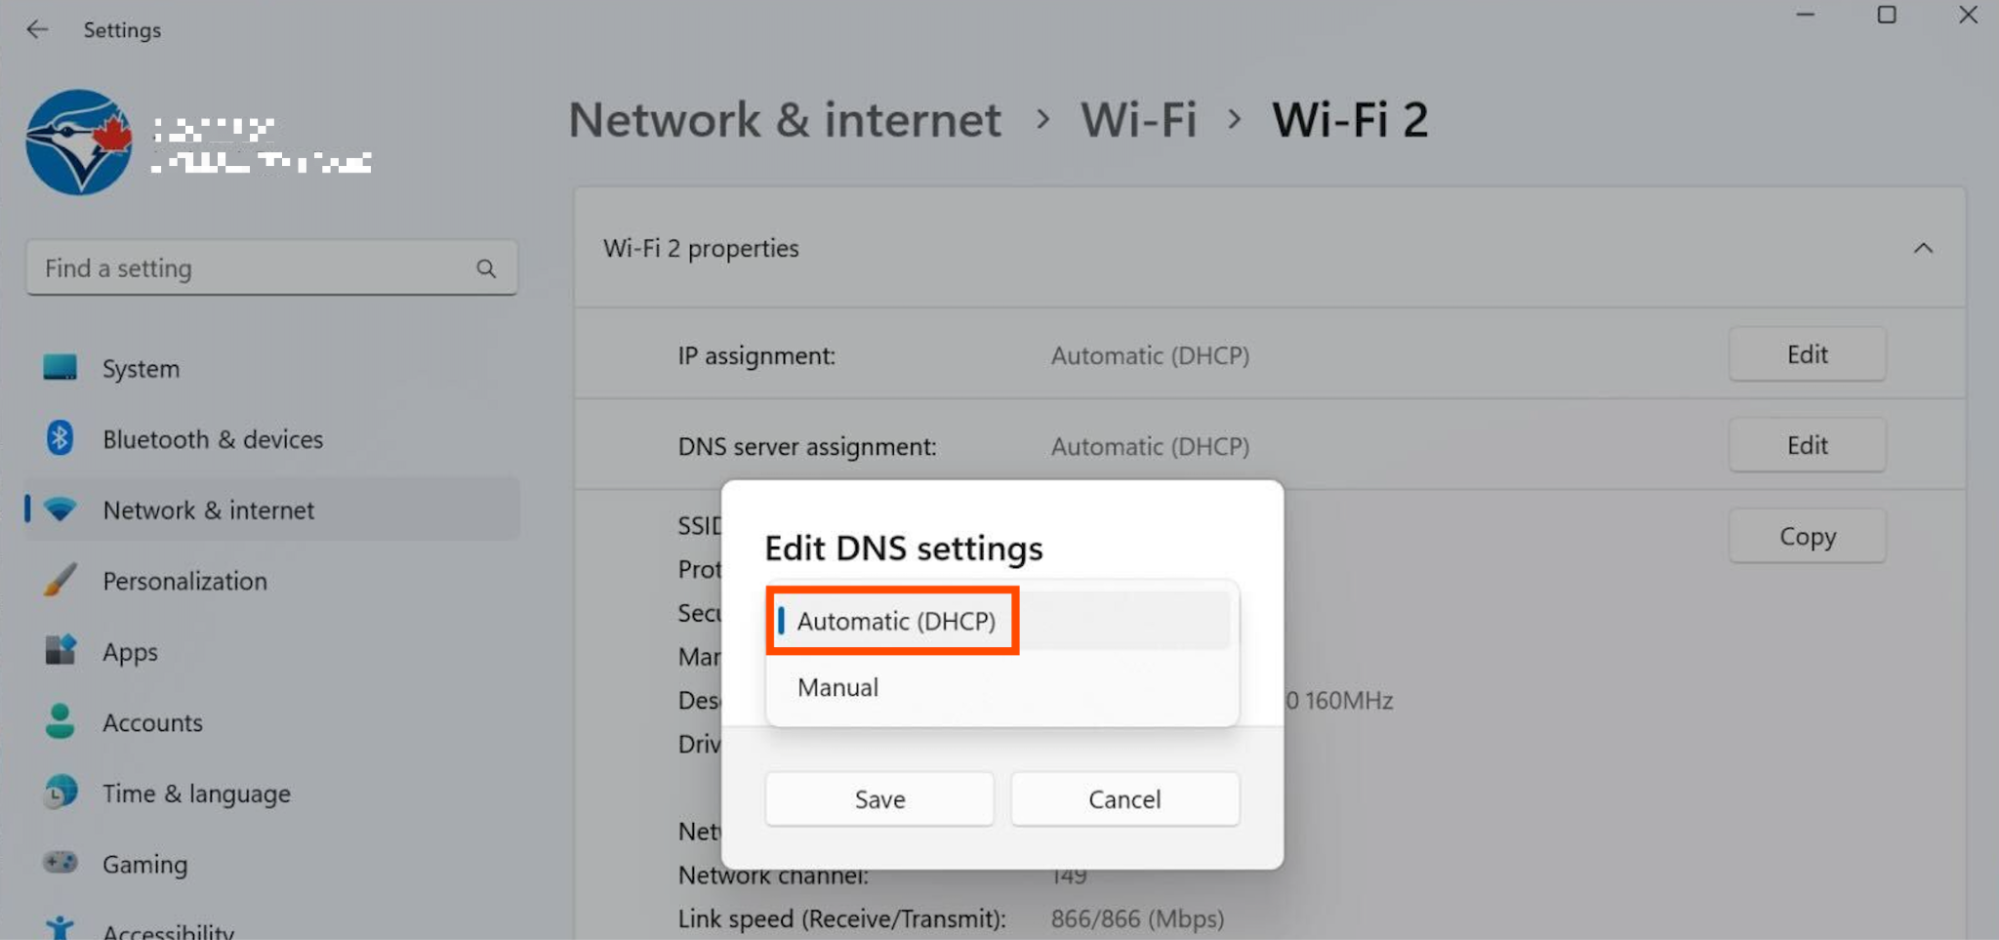

Note: The instructions will differ depending on which version of Windows you're using. I'm using Windows 11.
On iOS
Open your Settings.
Tap Wi-Fi.
Tap the information icon (
i) beside your network name.Tap Configure DNS, and then select Automatic.
On Android
Open your Settings.
Tap Connections.
Tap More connection settings.
Tap Private DNS, and then select Automatic.
Note: The instructions will differ depending on which Android device you're using. I'm using a Samsung Galaxy S23.
Once you've removed the alternate DNS server, turn your Wi-Fi off and then back on. Your login screen should now open.
If it's still not working on your computer, you might need to clear the DNS cache. Here's how.
Windows: Open Command Prompt, and enter
ipconfig /flushdnsMac: Open Terminal, and enter
sudo killall -HUP mDNSResponder
Once you're connected, you could add your custom DNS server settings again to speed up your page load time and get around some content restrictions. For that, Google DNS (8.8.8.8 | 8.8.4.4) and OpenDNS (208.67.222.222 | 208.67.220.220) are two great options to use.
2. Use your browser to open the router's default page
Still not connected? It's time to try to force your browser to open the login page. The easiest way to do this is to load the router's default page.
Open your browser. In the address bar, enter 192.168.1.1, 192.168.0.1, or 10.0.0.1.
This should load the default login page. But if you see a router settings login page instead, don't log in unless you're at home.
If the easy way doesn't work, you can try a slightly less easy way.
Open your network settings, and note your computer's IP address. The IP address in the example below is blurred out, but yours will be a string of numbers separated by periods.
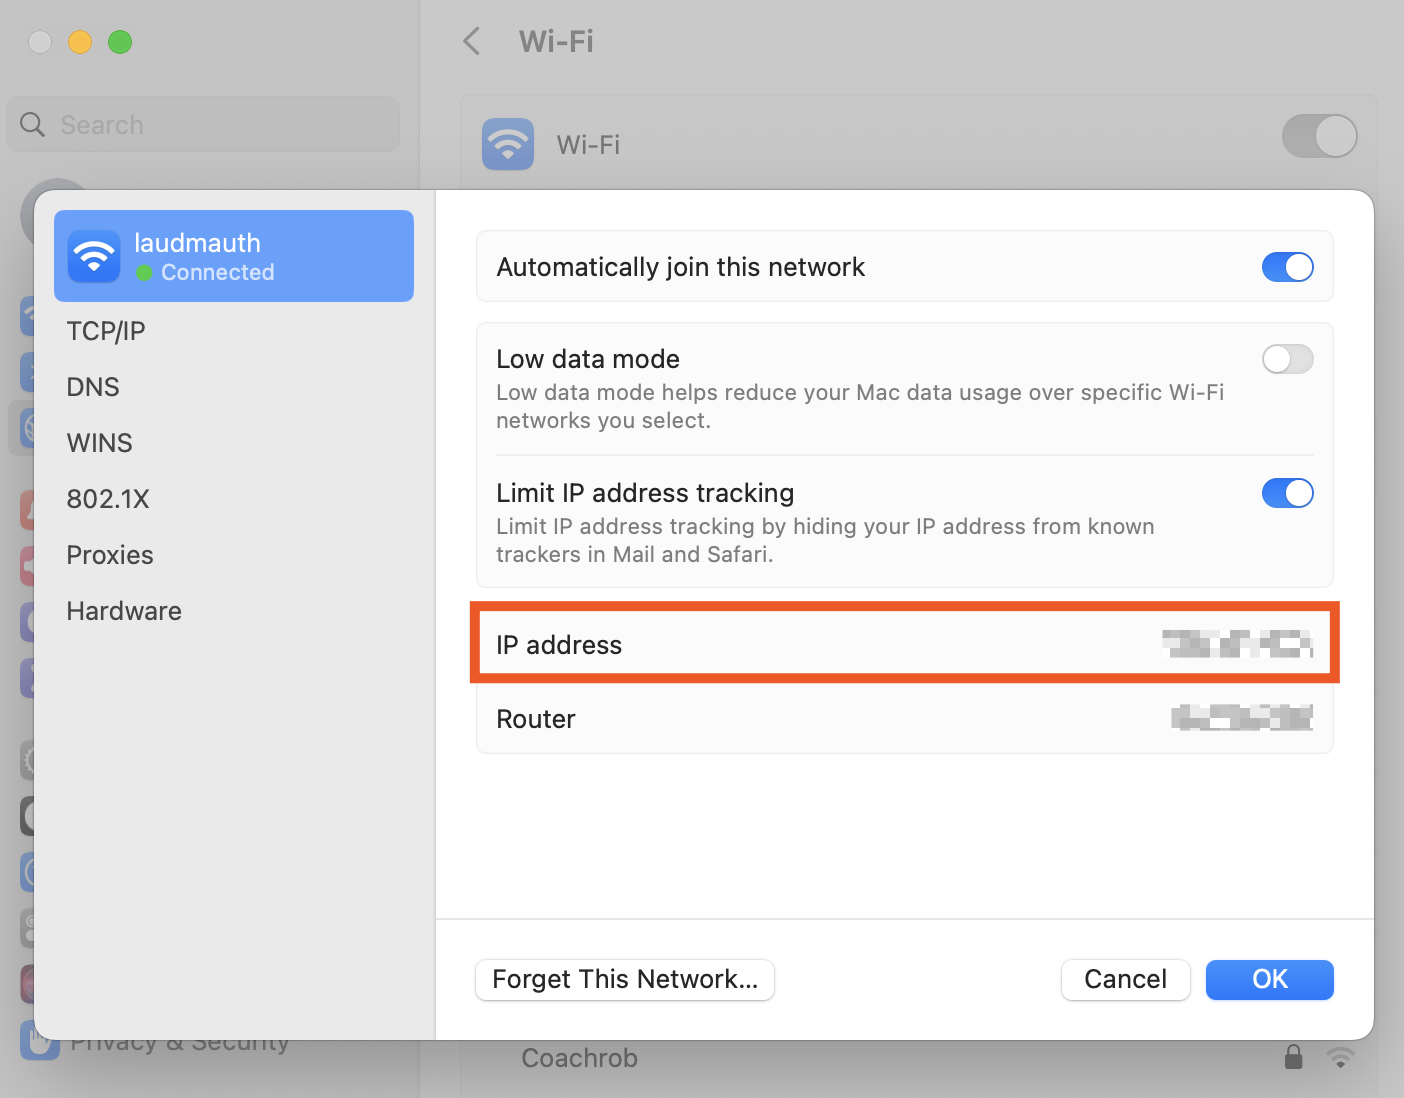
Enter that IP address in your browser, replacing the last number with
1. For example, if the IP address is192.168.88.113, you would enter192.168.88.1.

Alternatively, you can note the router's IP address (in the TCP/IP tab of your Wi-Fi settings) and enter that exact IP address into your browser.
Or, if you're trying to connect to a company's public Wi-Fi network, try opening that company's website. Most public Wi-Fi networks let you browse their company site without logging in, and they often have a link to their Wi-Fi login page.
3. Open a plain HTTP test page in incognito
Still nothing? The problem could be that your browser cache is still trying to use the DNS info it knows to access sites instead of loading the Wi-Fi login page. And sometimes, you can break it out of that loop by visiting something new.
You could clear your browser data, but that's a hassle, and clearing cookies or site data (not just the cache) is what usually signs you out of websites. . Instead, open an Incognito or Private window in your browser, which loads with a clean slate. Then enter a deliberate HTTP test page, like http://neverssl.com, in the address bar.
The reason you need to load a non-HTTPS (not secure) site is that if you try to visit a secure site and your network tries to redirect your browser to a login screen, your browser will prevent the redirect to keep your data secure—something that will also keep you from logging in to that Wi-Fi network.
Another good option is to manually enter the site your device tries to open in the background when connecting to new Wi-Fi networks. Here are the default pages. Any of them will work, regardless of the device you're using.
Apple iOS and macOS: captive.apple.com
Microsoft Windows: www.msftncsi.com/ncsi.txt
Google Android and Chrome: google.com/generate_204
4. Create a new network location
Network locations store your network settings for different locations—perhaps to make your computer use a different DNS at home than at the office or for an easy way to change which networks you connect to by default.
If you're using a Mac, there's a simple way to clear your network settings and get the login screen to load: create a new network location.
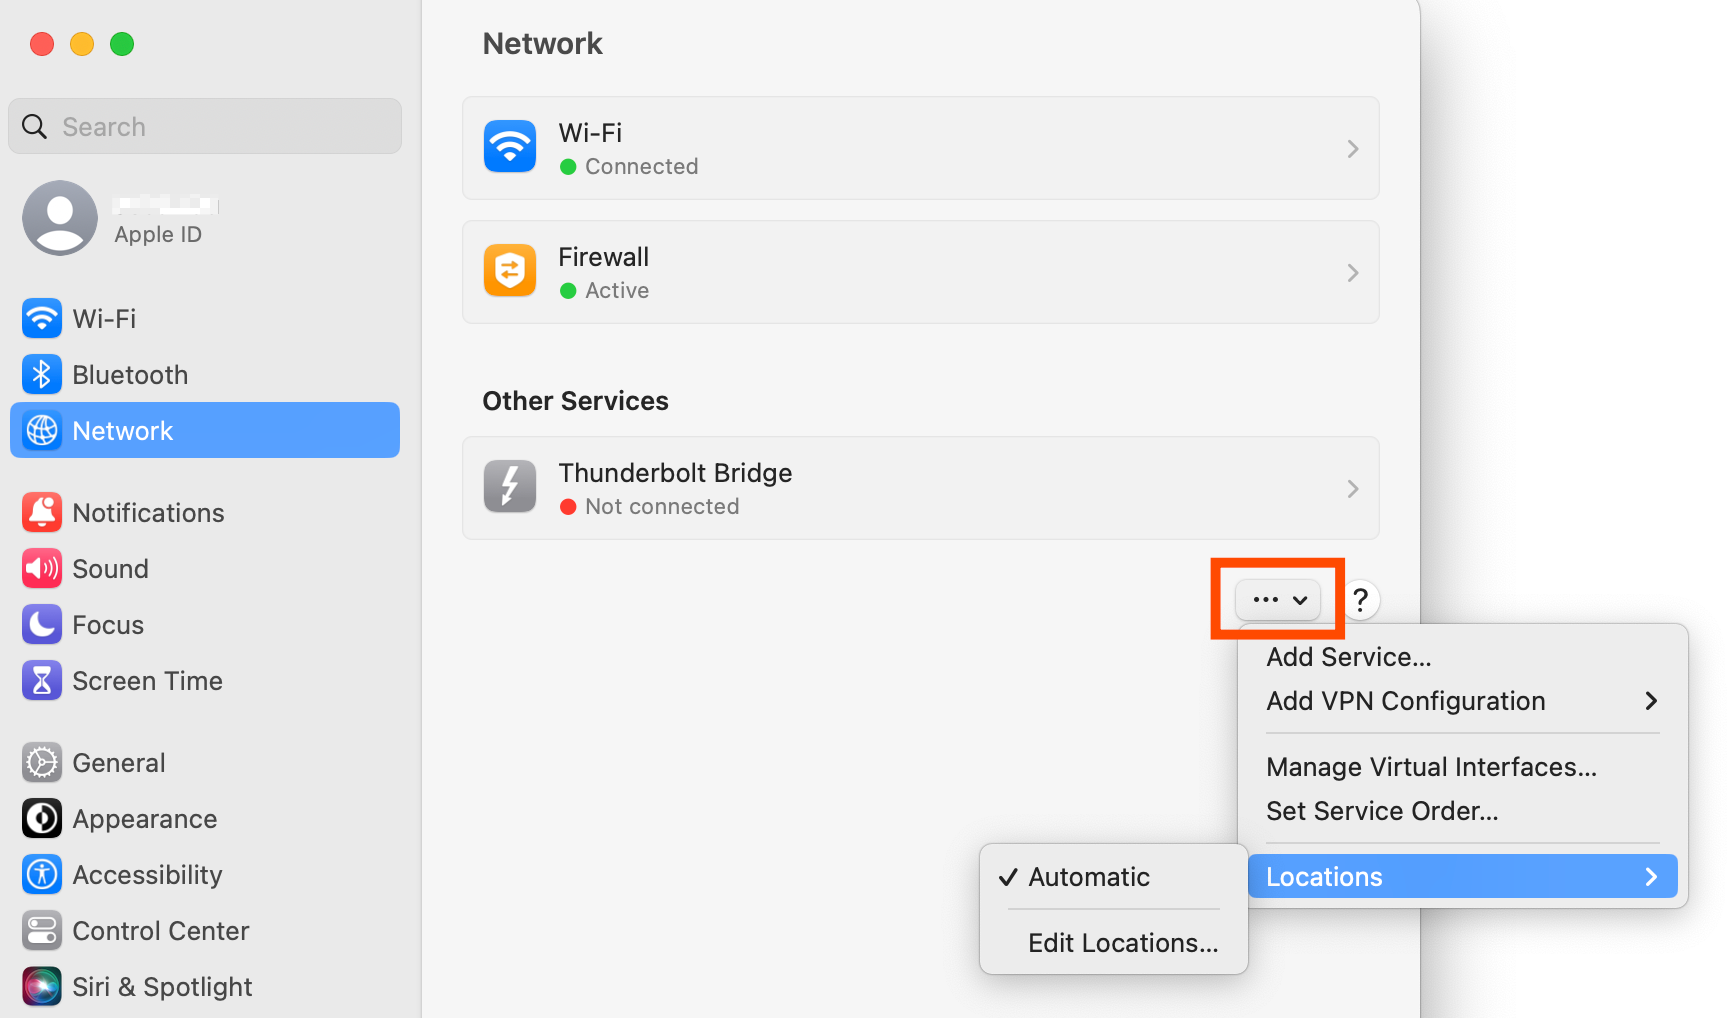
Open your System Settings.
Click Network.
In the Network area, click the ellipsis (
...). Then click Locations, and select Edit Locations.In the Locations window that appears, click the add icon (
+). Then enter a location name.If the new location name isn't already highlighted, select it, and then click Done.

Just remember to switch back to your default network location when you're back at your office or home.
5. Restart
When all else fails, do the one thing that usually fixes every electronic device, ever. Restart it.
Before you restart your computer, try turning your Wi-Fi off and then back on. If that doesn't work, try any of the following resets.
Log out of your account on your computer, and then log back in.
Restart your device.
And if, after all that, you're still staring at a You are not connected to the internet message, it might be time to ask if anyone else around you has access to the internet. If not, perhaps that Wi-Fi connection is down, or the router needs to be restarted.
With any luck, you should be able to get the Wi-Fi network screen to load and can get back to work—hopefully without trying everything in this list.
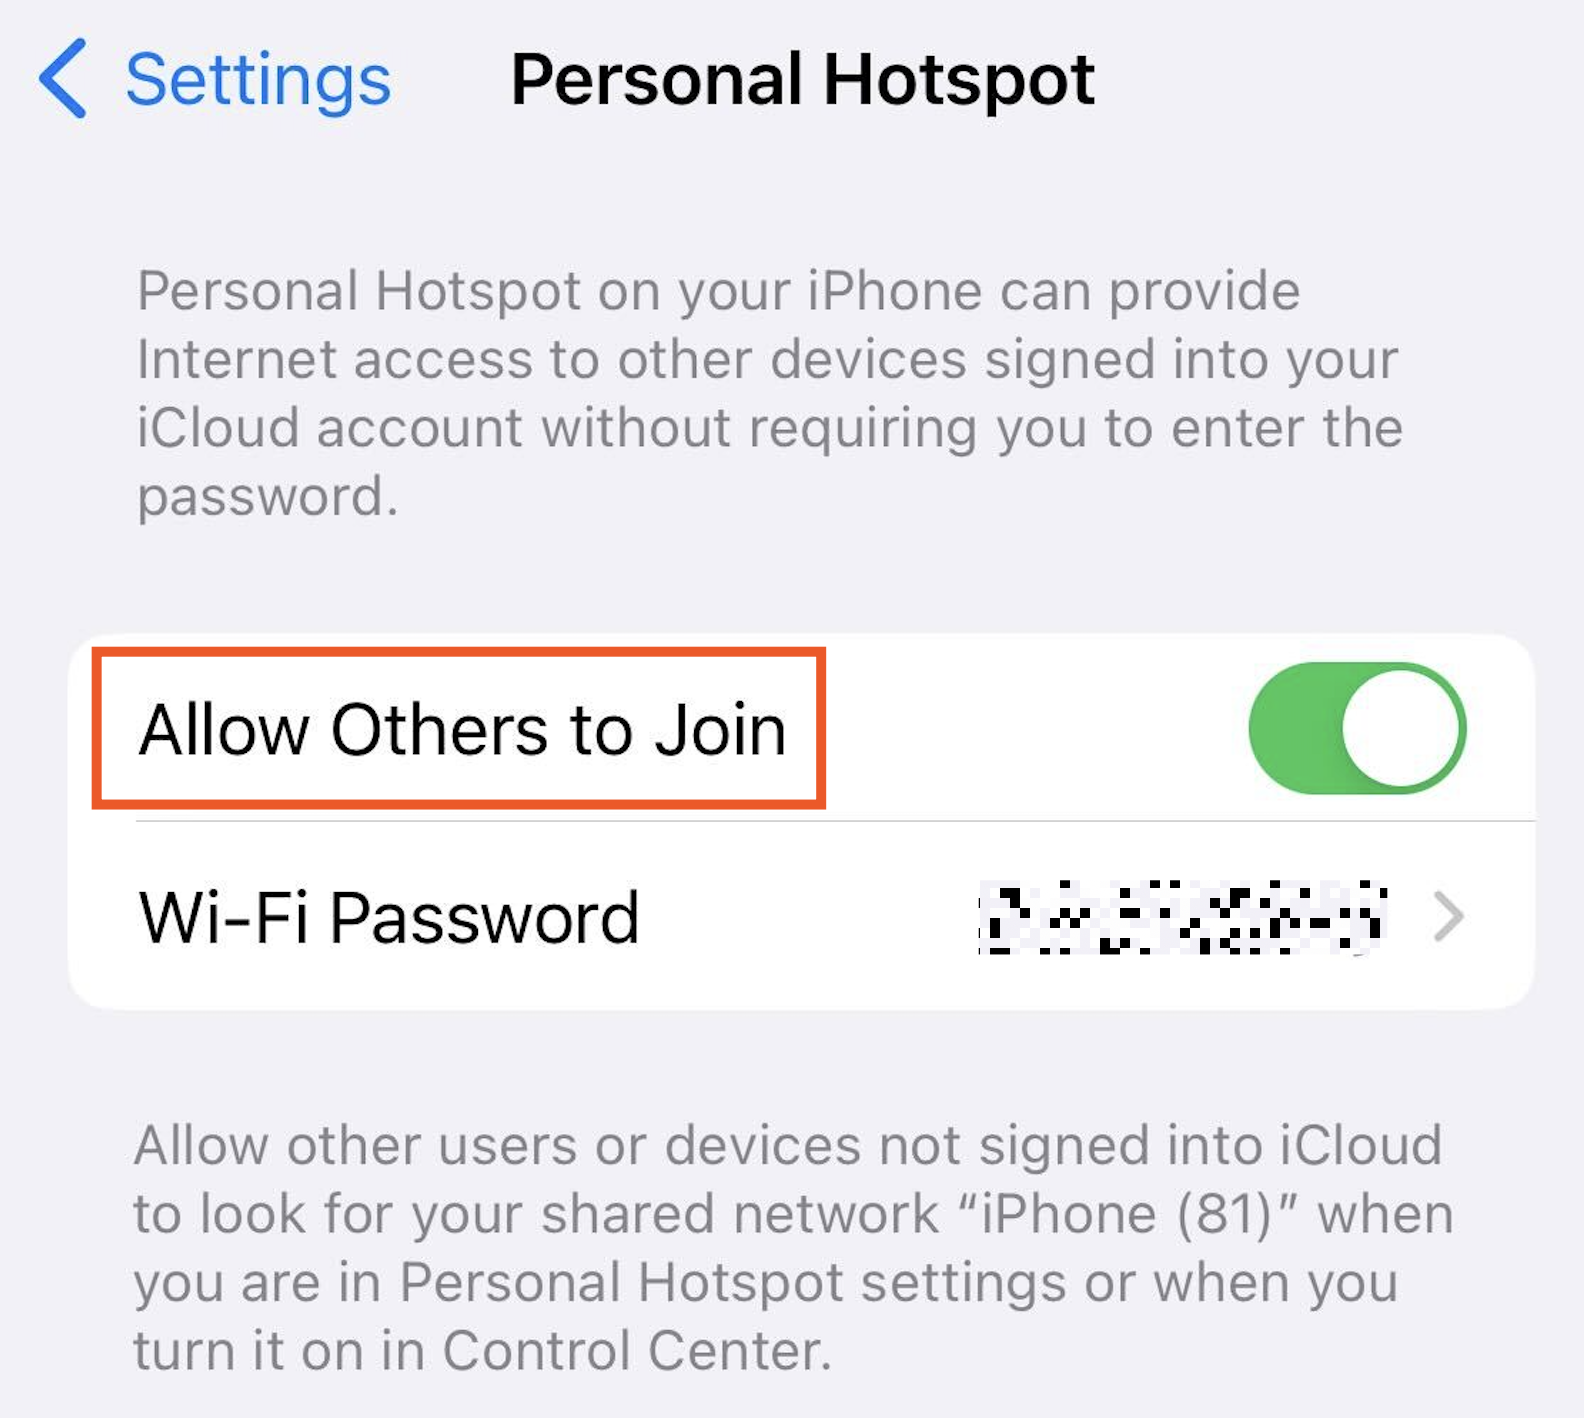
How to get online with a personal hotspot
If the public Wi-Fi isn't working, there's still hope for getting online. You can make a personal hotspot from your smartphone, allowing you to share your 4G or LTE connection with any of your other devices. (Note: your cellular plan has to include this feature, which costs more, in order for it to work.)
On iOS
Open your Settings.
Tap Personal Hotspot.
Tap Allow Others to Join.

On Android
Open your Settings.
Tap Connections.
Tap Mobile Hotspot and Tethering.
Next to Mobile Hotspot, tap the toggle. If you want to change your hotspot settings (change the name and add a password), tap Mobile Hotspot.

Stay secure on public networks
I would be breaking the hearts of every member of the Zapier security team if I didn't make one final plea for you to practice safe browsing.
Now that you've gone through all that trouble to get connected to a public Wi-Fi network, there's one last thing to do. Use a virtual private network (VPN) to encrypt your data and keep it secure from prying eyes. You may also need to use a VPN to access your company's internal data and services.
For around $5-10 per month, you can get a VPN connection, typically with apps that make it easy to use on your computer and mobile devices. Services like TunnelBear, NordVPN, and ExpressVPN make it easy to use a VPN—and TunnelBear even offers 2GB of free data per month if you only work outside of your office or home occasionally. Or you could set up a VPN server on your own hosting account or server using OpenVPN or a similar tool.
Either way, remember to turn on your VPN whenever you're on public Wi-Fi—as soon as you've gotten past the login screen, at least. Free Wi-Fi is not worth compromising your security.
Related reading:
This article was originally published in January 2017 by Matthew Guay. The most recent update was published in April 2026.


