If you've used Microsoft Teams, you know how useful it can be for communicating with your coworkers.
But you probably also know that, without the right guardrails, Teams can eat up a lot of your time. Between replying to messages and catching up on everything that's happening, staying on top of chat can become more work than your actual work.
Automation can help you reclaim some of that lost time. Luckily, Microsoft makes it easy to create Zaps—Zapier's automated workflows—right within Teams. That means you can use Zapier to automate anything from an alert about a new lead to an automatic reminder to an out-of-office autoresponder, all within Teams.
Here's how to set it up:
Log in to your Zapier account (or sign up if you don't have an account yet).
Install the Zapier app in your Microsoft Teams workspace.
Connect your Microsoft Teams account to Zapier.
Start making Zaps!
Zapier is a tool that helps you automate tasks between web apps. Our automatic workflows, which we call Zaps—send information from one app to another so you can stop worrying about copying and pasting and focus on more meaningful work. Check out this Zapier demo to learn more about how it works.
Before you get started: Install the Zapier app in Microsoft Teams
In your Microsoft Teams workspace, click on the three little dots located on the left-hand navigation bar. Type in Zapier in the search bar to find the app and click on it.
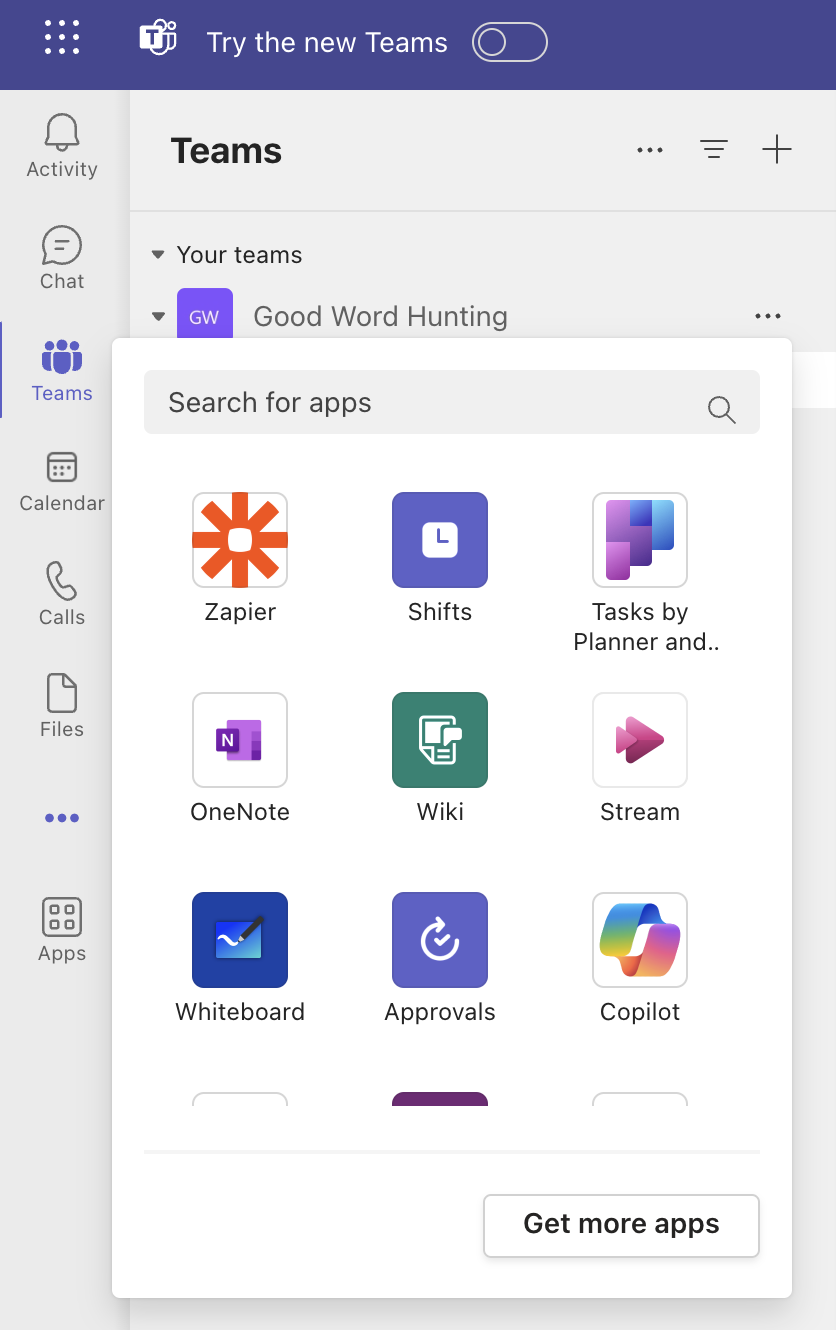
Once you click on the Zapier app, it'll bring up a pop-up window allowing you to install the app for yourself. Click Add.
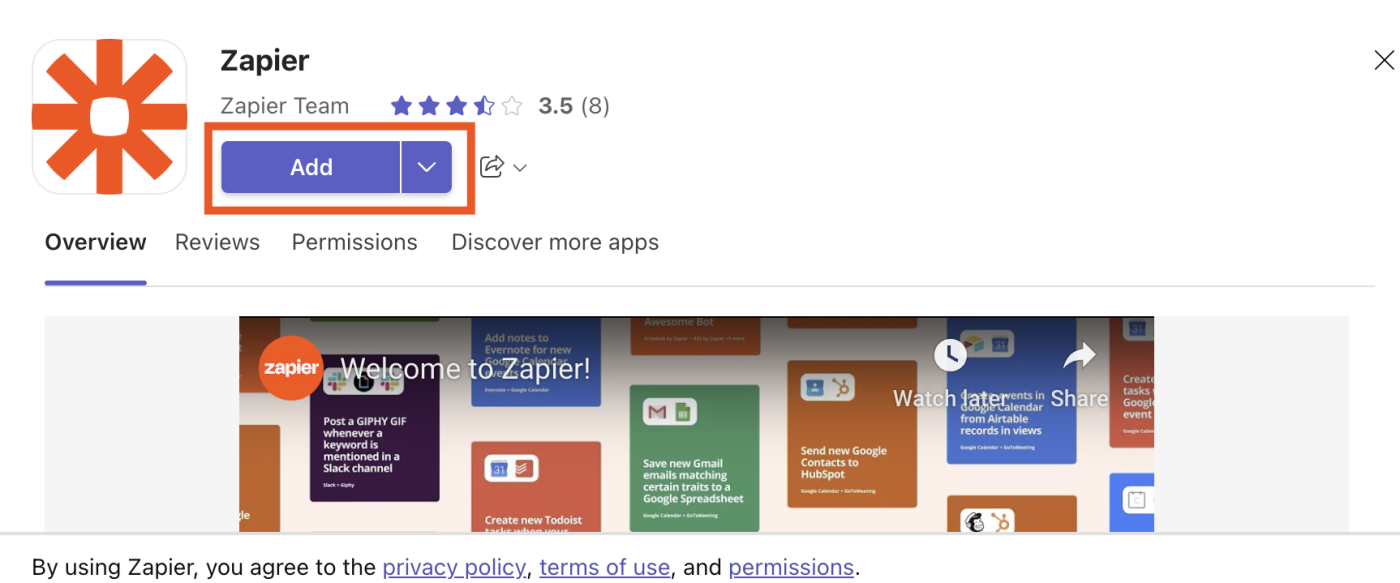
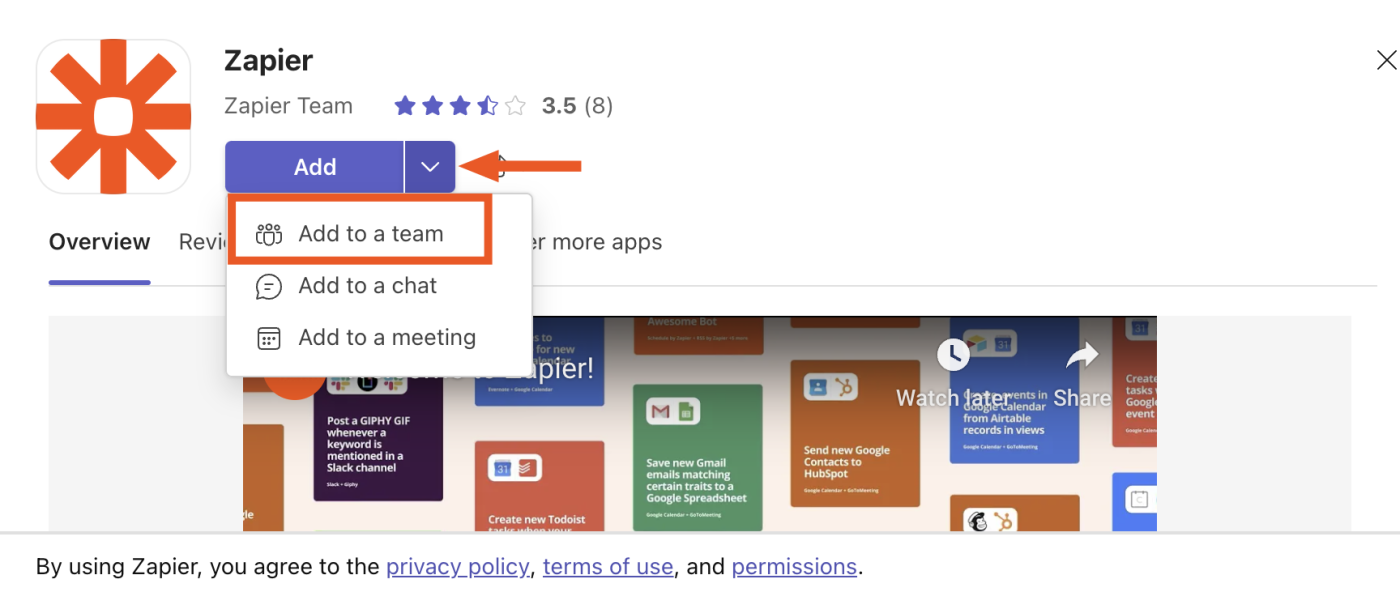
If you're an admin for your team workspace, click on the down caret, then click on Add to a team if you'd like to install the app for your entire workspace.
After you've added the Zapier app, it'll direct you to the app page, where you can start creating a Zap from scratch or pick from suggested Zap templates—our pre-built automated workflows—to start automating tasks in Microsoft Teams.
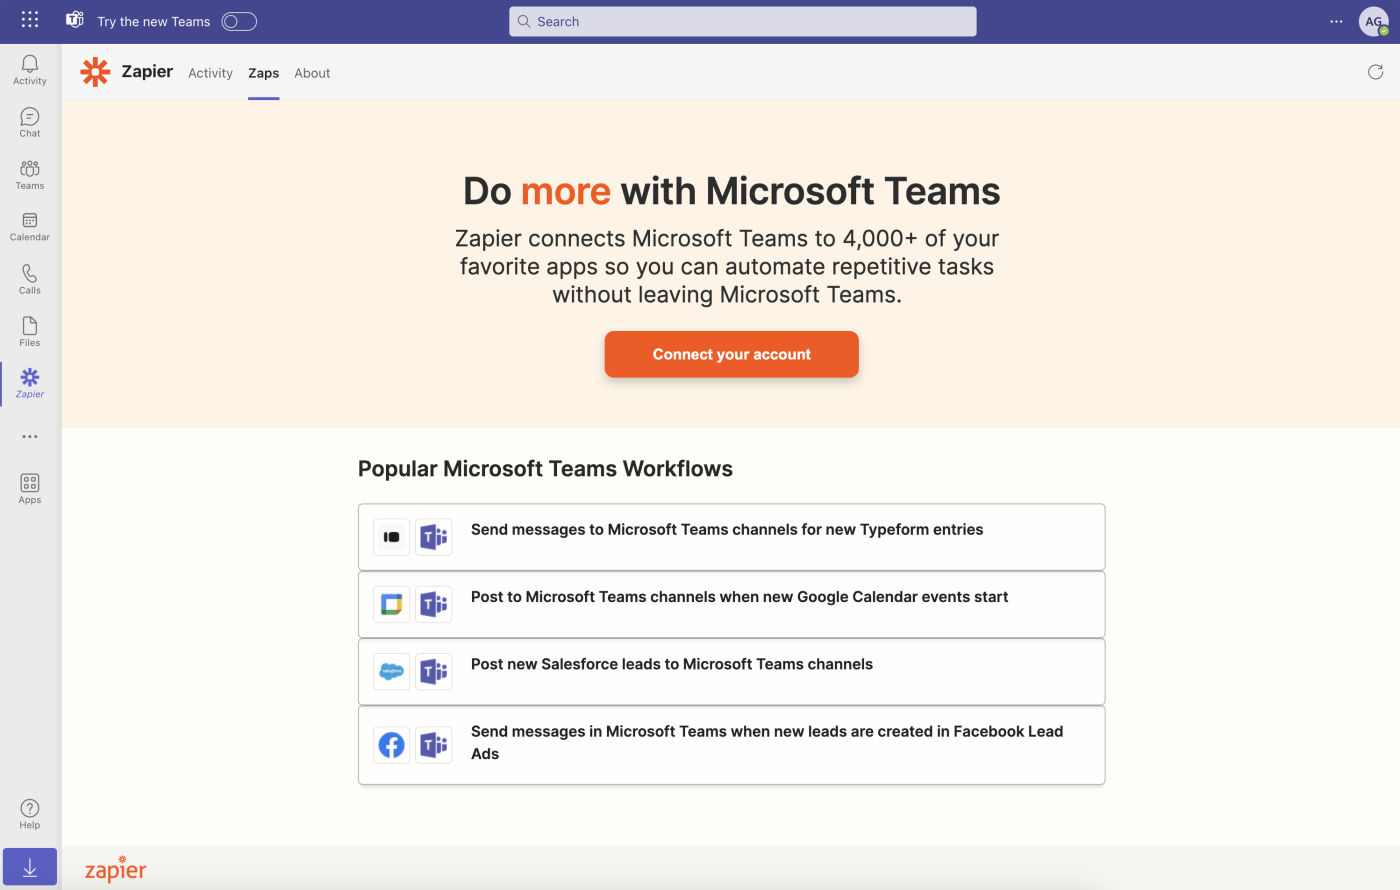
How to create Zaps within Microsoft Teams
If you've created Zaps before, making them within Microsoft Teams will look just like the Zap Editor on our site. You just don't have to exit the Teams app to do so.
If you're new to Zapier, keep reading to walk through how to create a Zap that will post a notification to a channel whenever there's a new Typeform submission.
If you'd like to get started quickly, we have a template to help you get started. Click the button below and you'll be ready to set up your Zap. You'll need to create a Zapier account if you don't already have one.
Send messages to Microsoft Teams channels for new Typeform entries
Here's how it works:
Click on the button to get started.
Connect your Typeform and Microsoft Teams accounts.
Select the form you want to use as your trigger.
Select the channel where you'd like the alerts to appear and customize your message.
Test your workflow and turn it on.
Or, if you'd like more control over the information in your Zap or would like to add additional actions, you can click here to create a new Zap from scratch.
Connect and customize Typeform
Click on the Zap template to get started or create a new Zap. If you're starting from the Zap template, the trigger app and event are already selected. A trigger is an event that starts your Zap. If you're starting from scratch, select Typeform for the trigger app and New Submission as the trigger event, then click Continue.
You'll now need to connect your Typeform account. If you've already connected Typeform to Zapier before, just click on the dropdown menu to select your account.
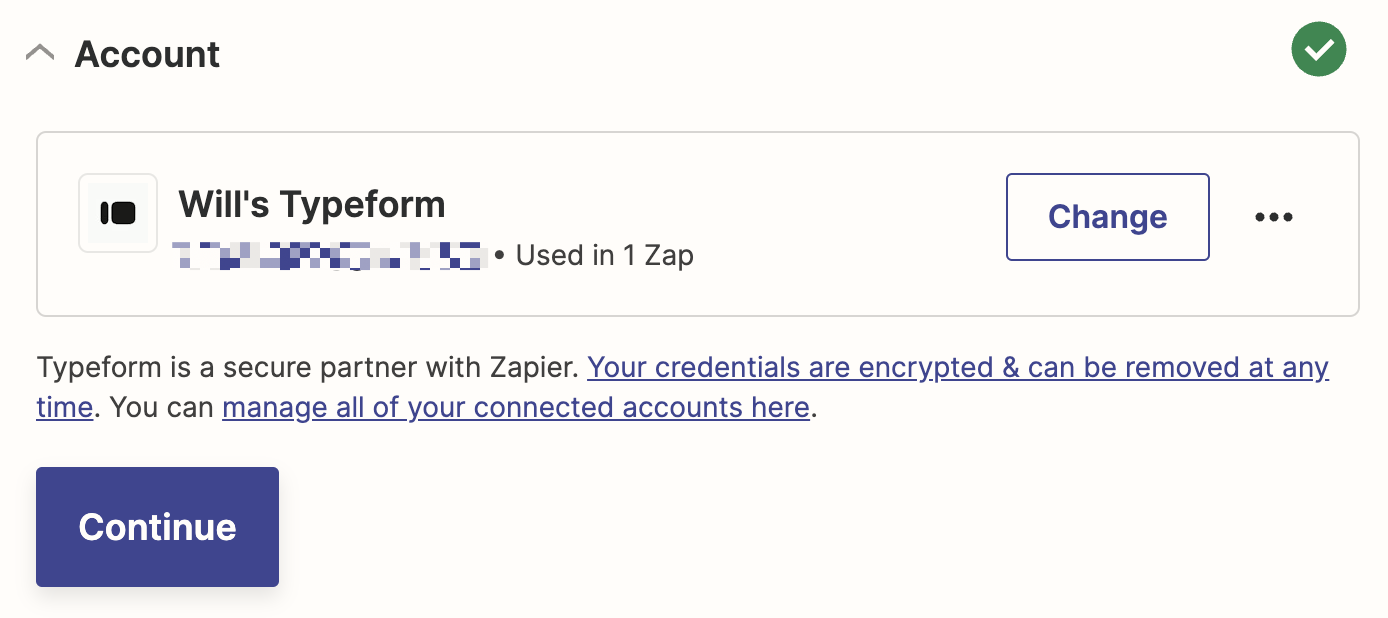
If you haven't, you'll click + Create a new account. You'll then be directed to your web browser to give Zapier permission to access your Typeform account. Once you've connected your account, click Continue.
For each app you connect, Zapier will ask for a general set of permissions which allows you to be flexible with your Zaps. The only actions Zapier takes on your app accounts are those a given Zap needs to accomplish what you've set up.
The great thing about the Zapier app is that you can continue building your Zap from your web browser—or go back to the Microsoft Teams app and continue where you left off.
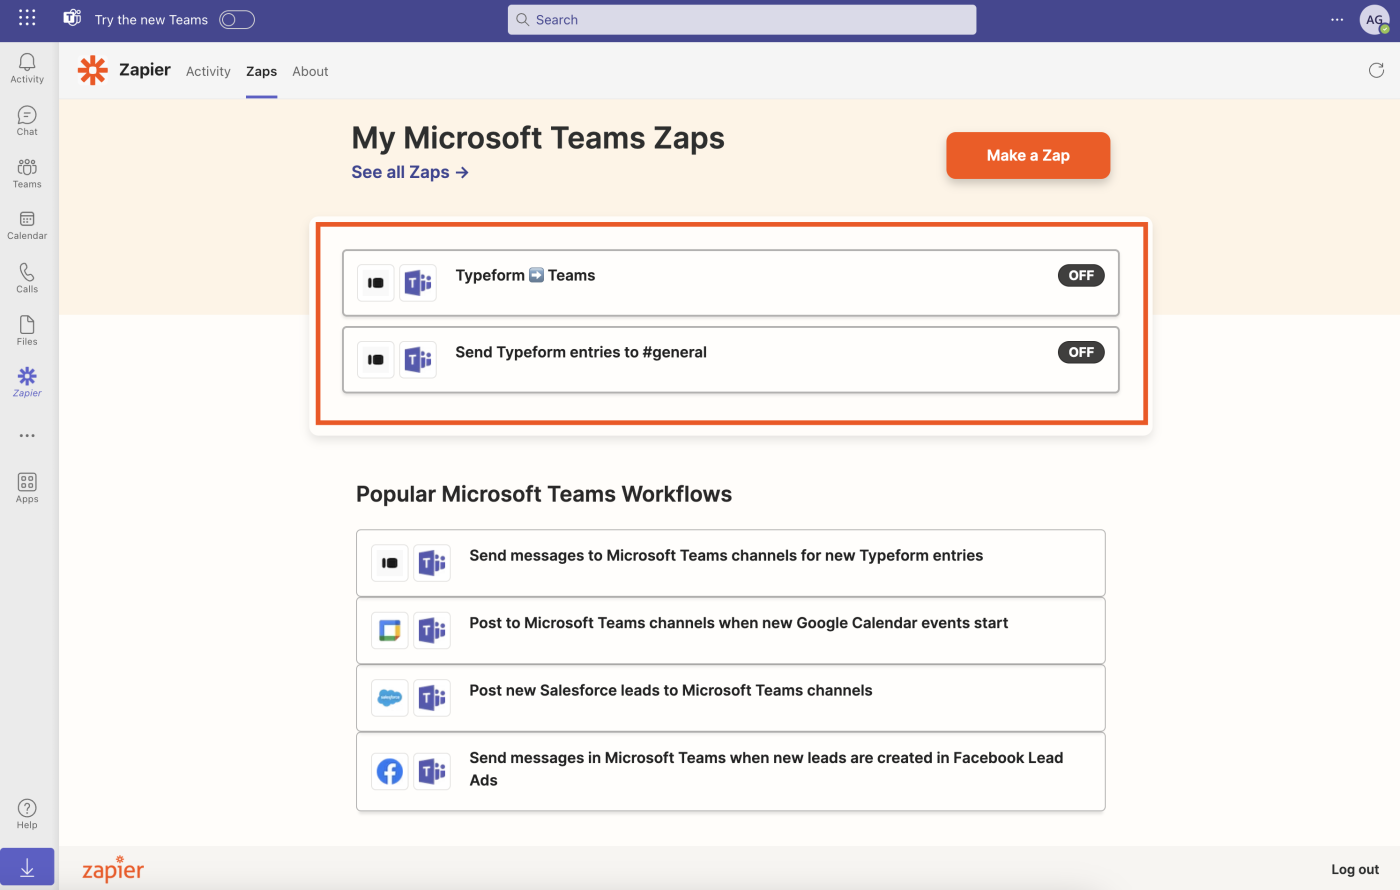
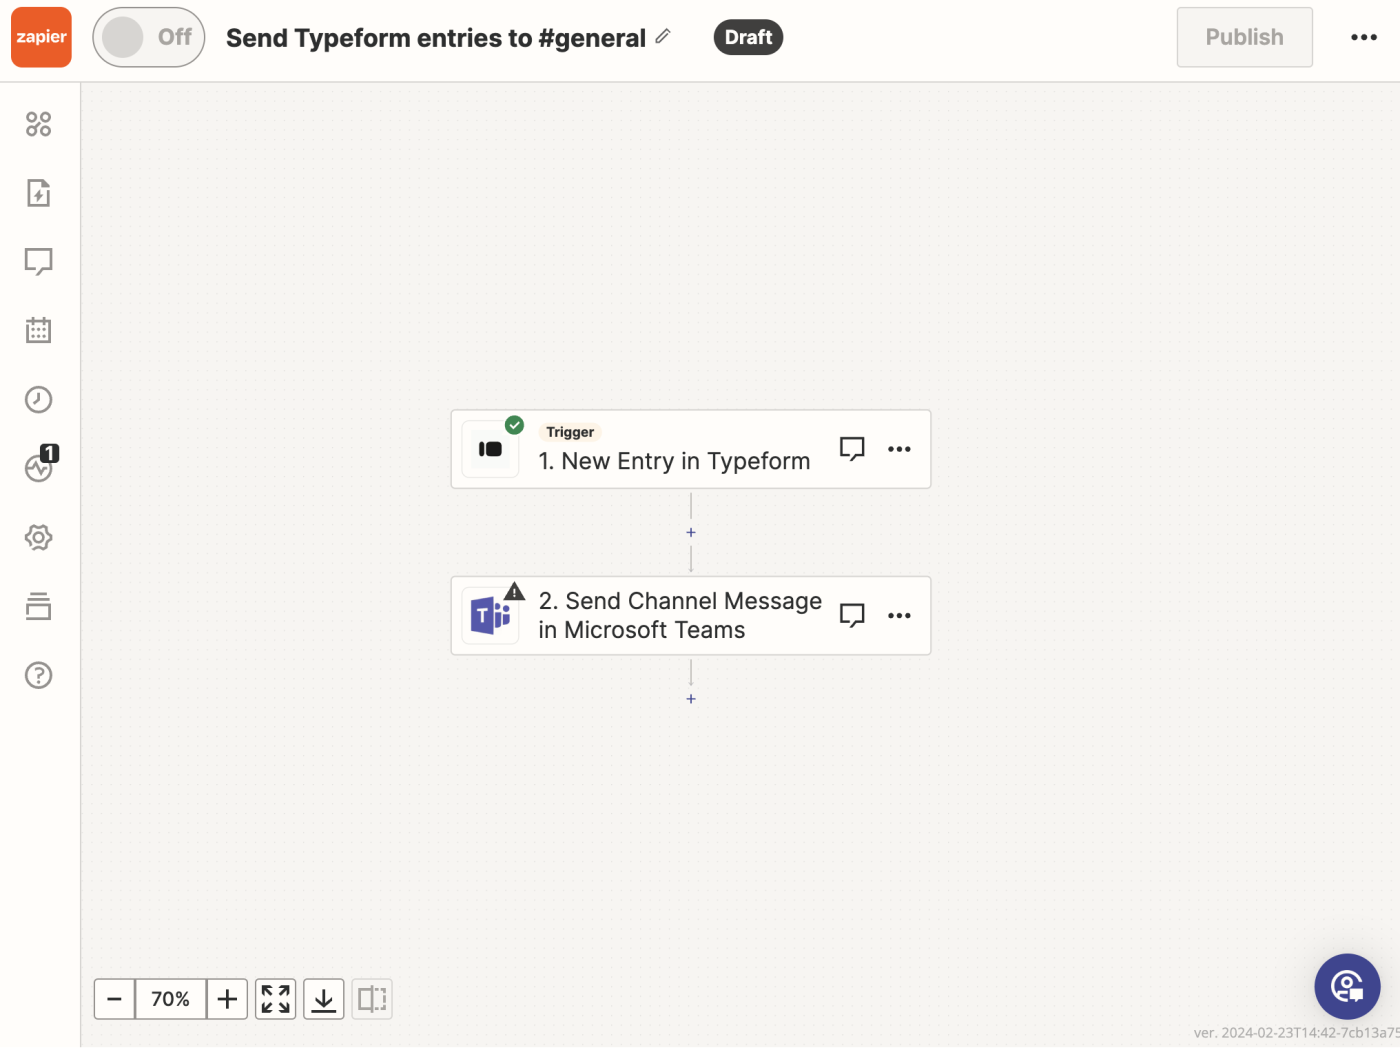
Select the form you want to use, click Continue, and then test your trigger. Zapier will look for a recent form submission, which we'll use to create the rest of our Zap. Once your test is successful, click Continue to move on to the next step.
Connect Microsoft Teams
Now we'll create our action—the event our Zap will perform once it's triggered. If you're working off of a Zap template, the action app and event will be pre-selected. If you're building a Zap from scratch, select Microsoft Teams as your app and Send Channel Message as the event. Click Continue.
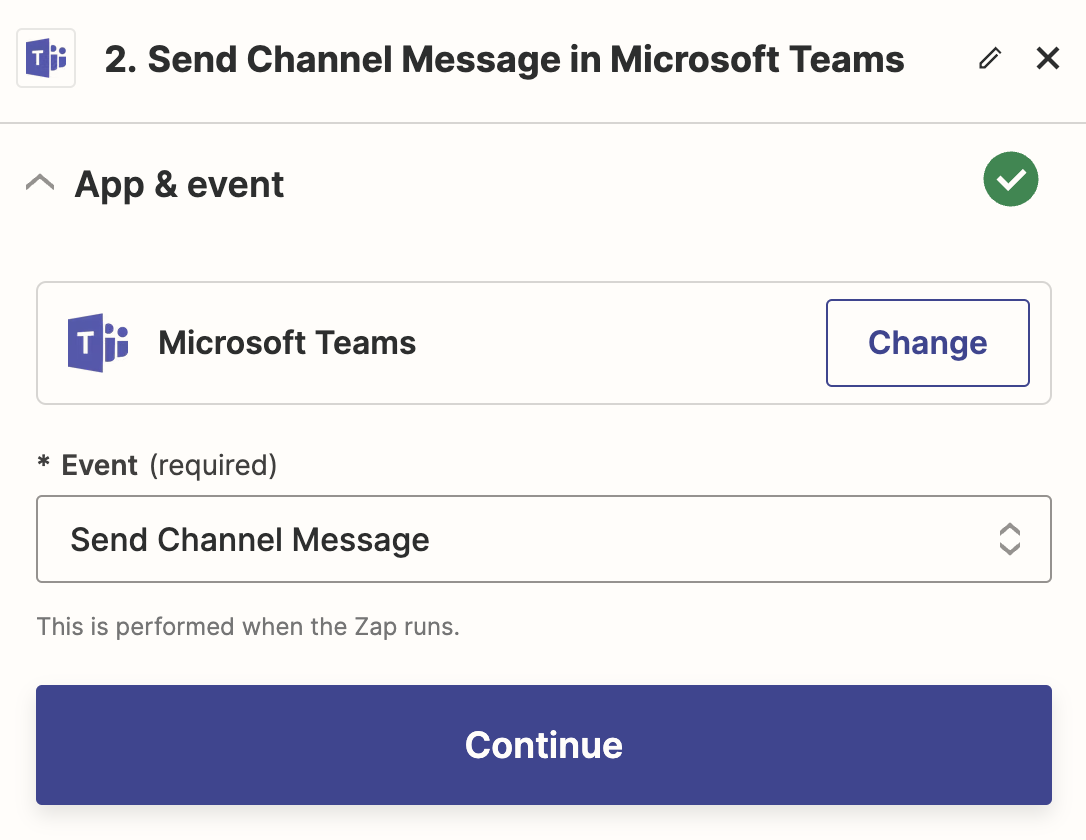
If you've connected your Microsoft Teams account to Zapier before, you can select your workspace from the dropdown menu. (This is not the same as installing the app to your workspace.)
Since this is our first time connecting Teams to Zapier, we'll need to click on + Connect a new account. Again, Zapier will request permission access to Microsoft Teams. Click Accept.
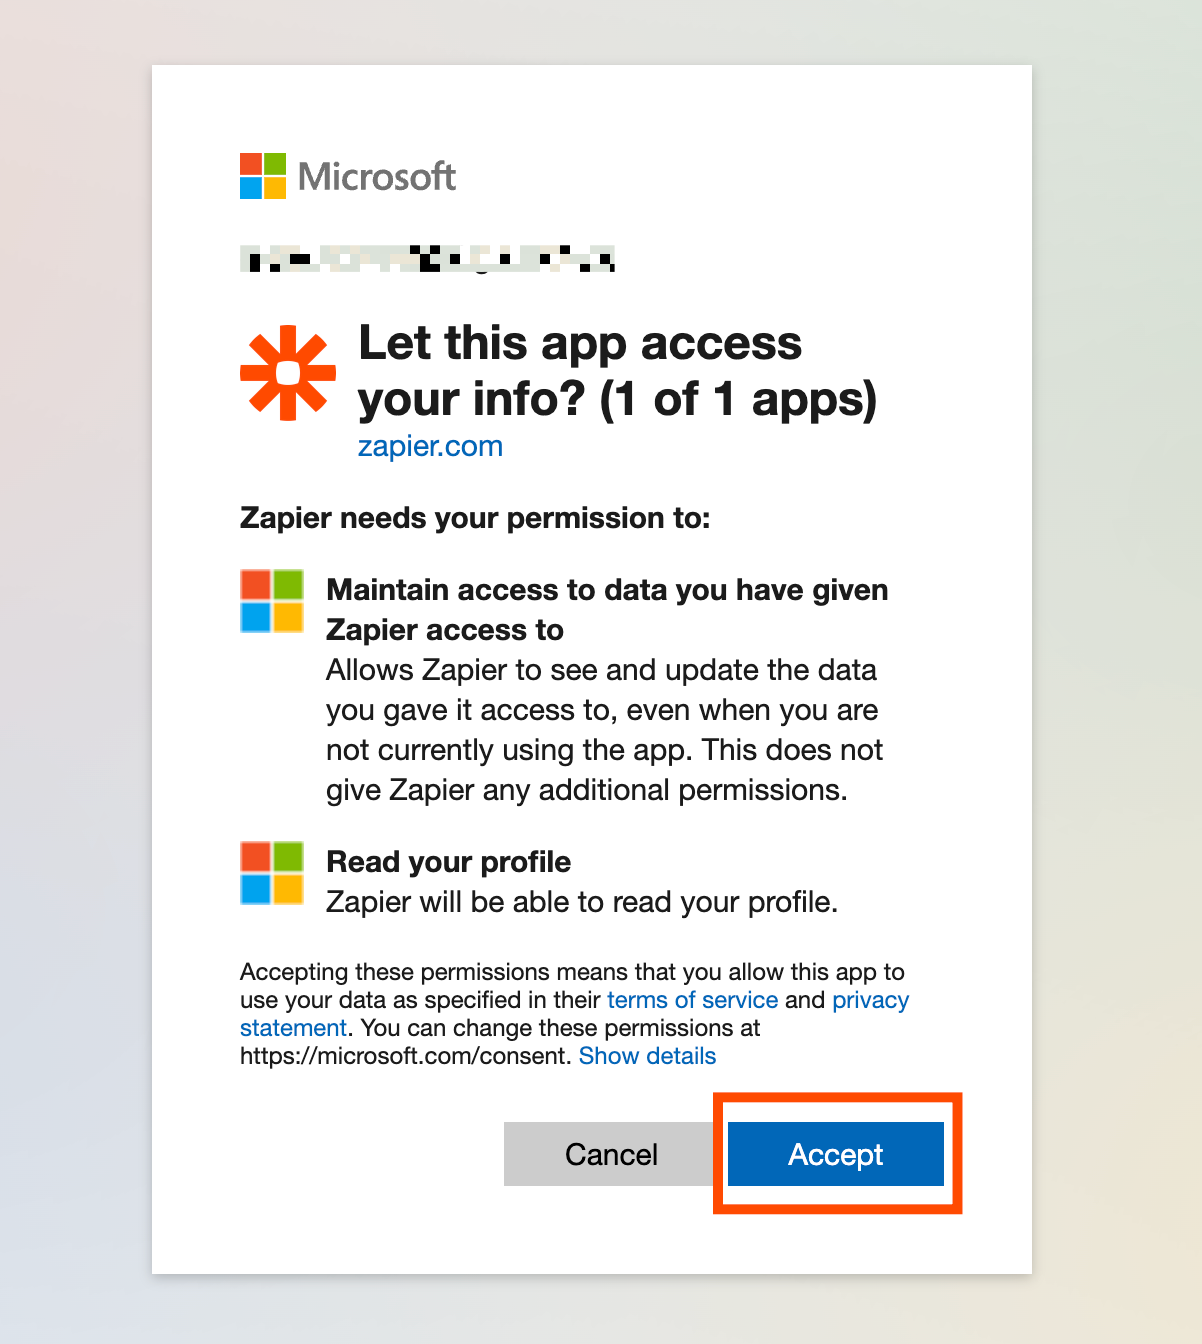
Your Teams account will now be selected in the dropdown menu. Click Continue.
Customize your channel message
Click on the dropdown under Team to select your workspace.
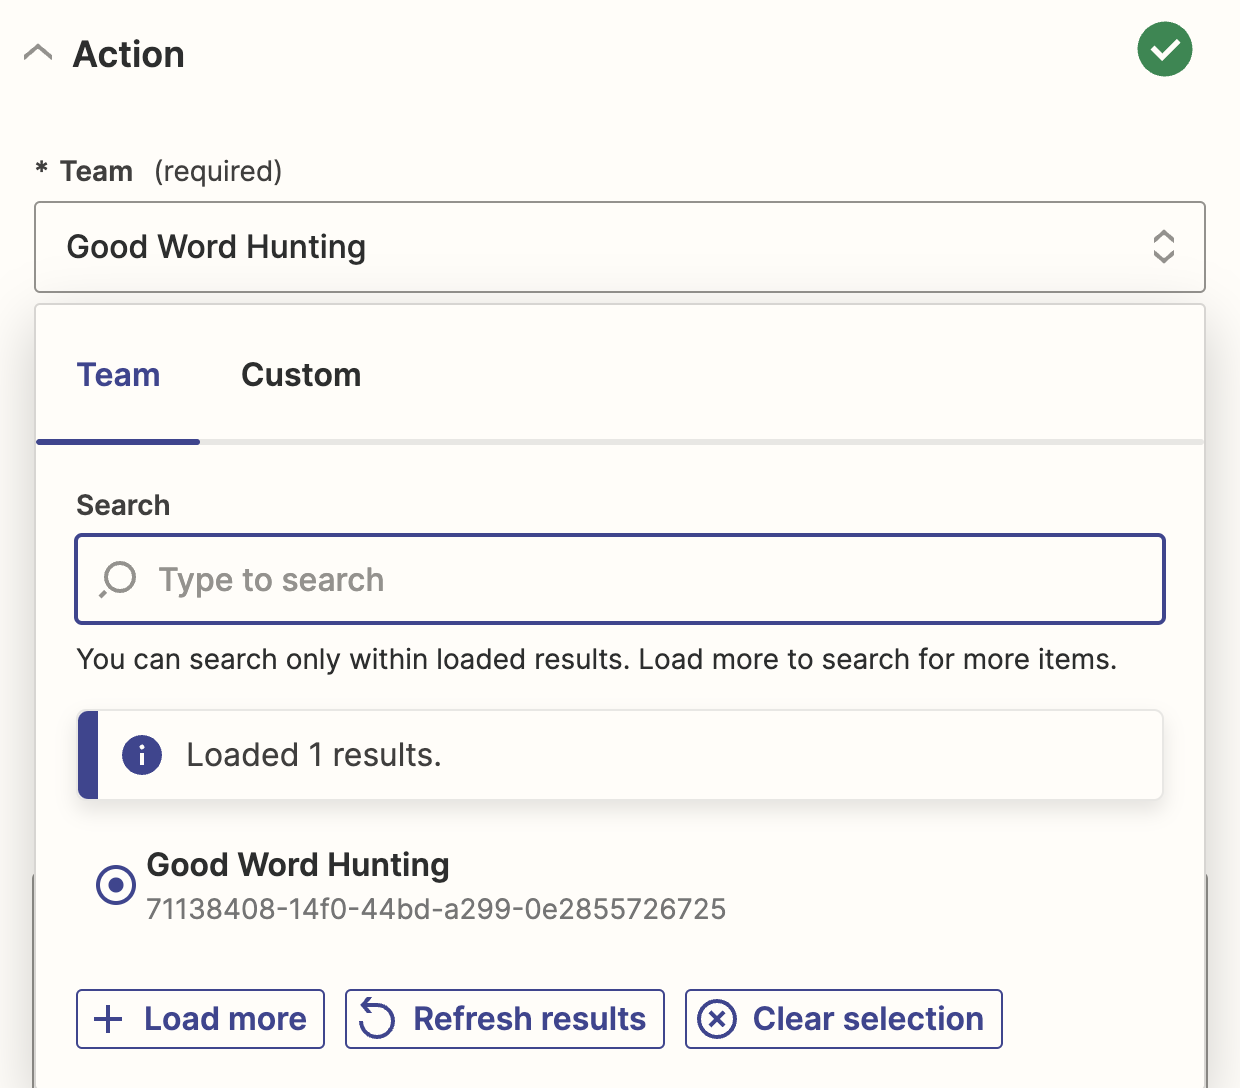
Under Channel, click on the dropdown menu to select the channel you want your Zap to send messages to.
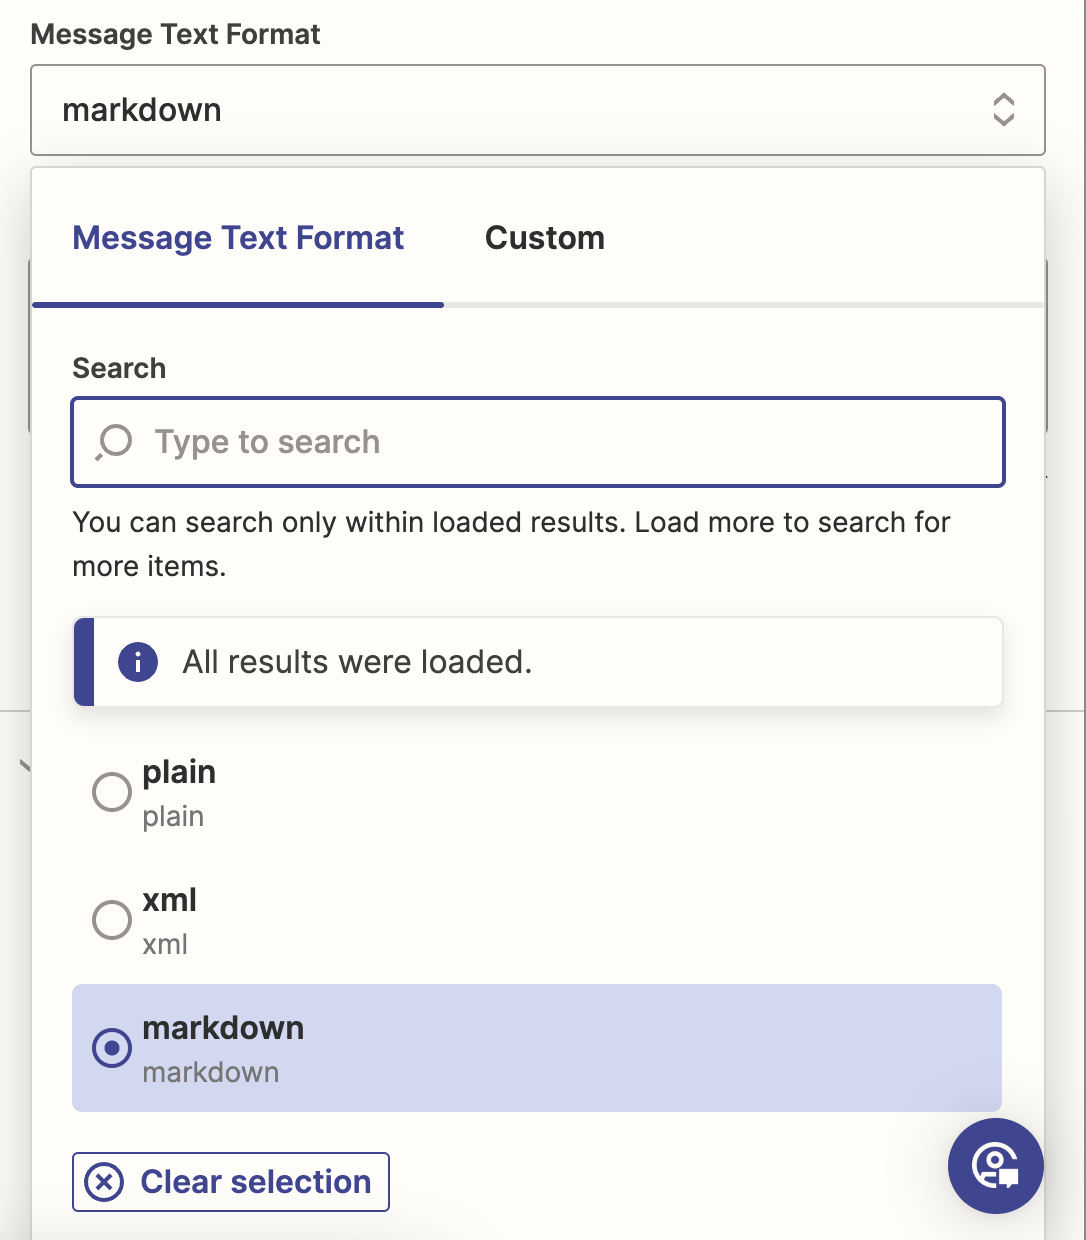
You have several options for Message Text Format: Plain, XML, and Markdown. If you don't need any special formatting, such as links or bolded text, Plain will be fine. Since we want to bold and hyperlink text, we're going to select Markdown.
Now it's time to customize our message text. Click inside the Message Text field to start formatting your message.
Since we want to send the latest form submissions to our channel, we want some of the submission information from the form to show up in our message.
You can use Typeform information as placeholders, type in your own text that will appear each time your Zap runs, or a combination of the two.
Scroll down to review all the data options Zapier found when it tested the Typeform trigger, and select responses to individual questions. (The first Form Responses option will include all your form questions and answers on one line. Most people will want to select certain questions instead.)
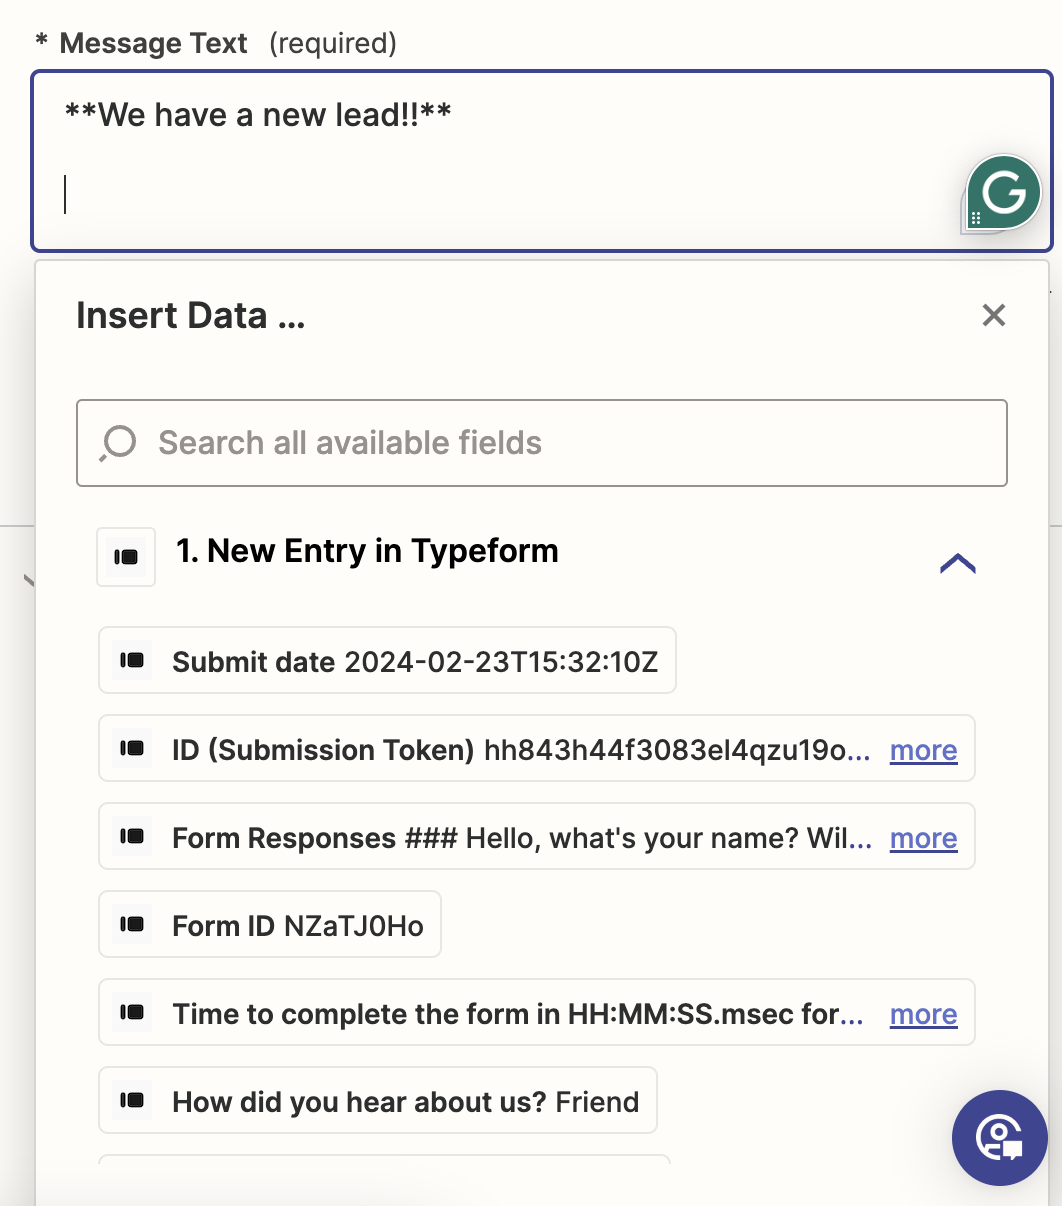
When you select data from the dropdown menu, it will act as a placeholder field; any time our Zap triggers before an event, Zapier will dynamically populate our chosen fields with the latest form responses.
You can also type in text that will show up every time your Zap runs. In our example, I added field text in a bulleted list—with some Markdown included.
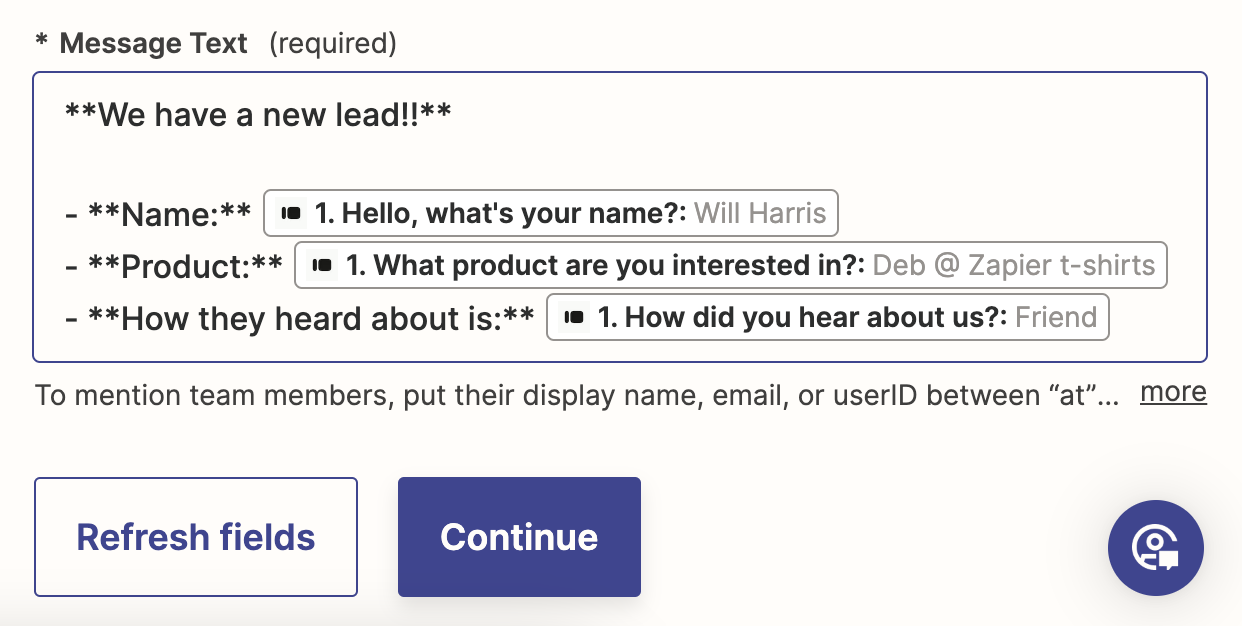
Markdown is a formatting language that's simpler to write and read than HTML code. New to Markdown? Check out our guide.
When you're done formatting your message, click Continue.
Test your Zap
It's time to test our Zap. Zapier will create a new message in Microsoft Teams, according to how you've set it up in previous steps.
You can always skip the test by clicking Skip test, but if you want to make sure your Markdown is showing up properly, you're better off testing. Click Test step to continue.
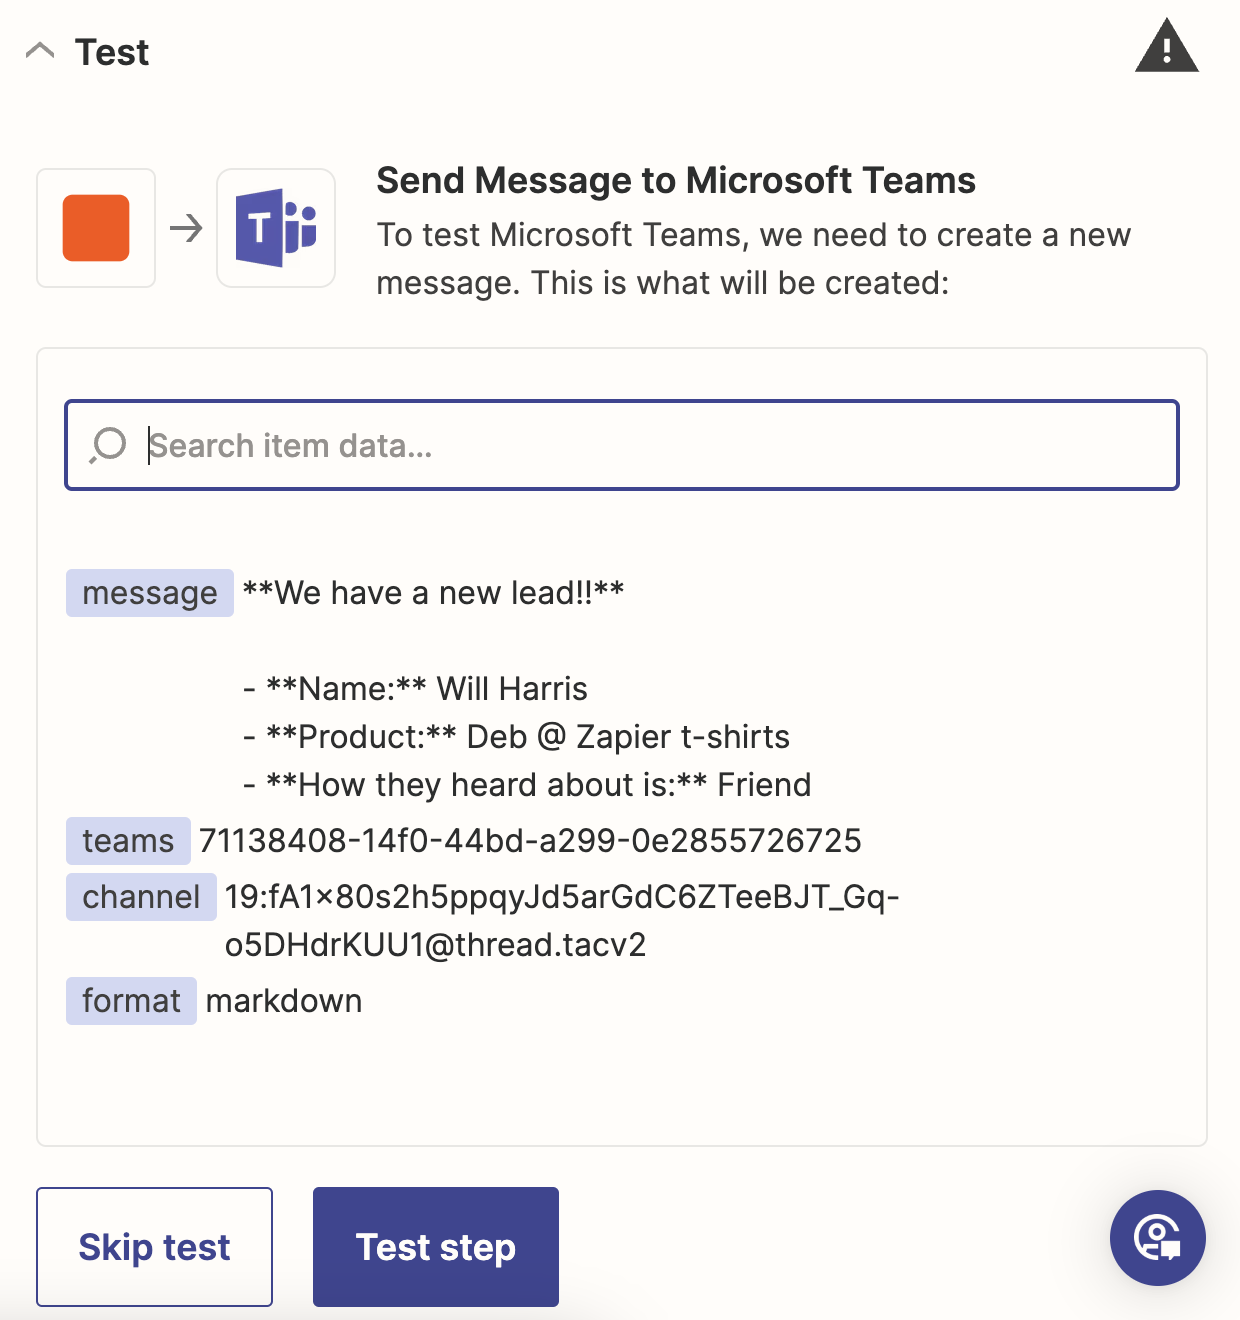
And this is how our message looks:

If something doesn't look right, you can go back, make changes, and re-test. Once everything is set up correctly, you're ready to begin using your Zap.
Now you've created a Zap—within Microsoft Teams. Whenever you want to create a new Zap from your Teams workspace, just visit the Zapier app and start building.
Related reading:
This article was originally published in October 2020 and was most recently updated in February 2024 by Will Harris.
