Your customer relationship management (CRM) tool is your source of truth for sales, leads, and customer information. With all that information to track, sometimes it's easier to check that information in a spreadsheet first before it goes into your CRM.
Using a spreadsheet as a part of your lead management process doesn't have to slow down the sales pipeline. With Zapier, you can automatically create and update CRM contacts from a spreadsheet—so you don't have to sacrifice speed for accurate customer records.
In this tutorial, we'll show you how to create a Zap—what we call our automated workflows—that will automatically create or update HubSpot contacts from a Google Sheet.
This workflow requires a multi-step Zap, which is available on a paid Zapier plan or during a free trial. Learn more about multi-step Zaps.
Before you begin
We'll be using HubSpot and Google Sheets for this tutorial, but the general idea will apply if you use a different spreadsheet app or CRM tool.
If you're using Google Sheets, make sure you have a spreadsheet with your columns labeled. This Zap will not work unless your columns are labeled. Your spreadsheet should include contact information you'd track in HubSpot, such as an email address or phone number.
If you anticipate that a cell in your Google Sheet will change between two values often—for example, if a cell changes from yes to no, then back to yes—include a separate timestamp column in your spreadsheet.
Additionally, you'll need administrator privileges in HubSpot in order to connect to Zapier, so check your HubSpot settings to verify your permission level.
Note: You can quickly enter a timestamp while working in Google Sheets using the following keyboard shortcuts: Ctrl + Alt + Shift + ; to insert date and time on Windows machines; or Cmd + Alt + Shift + ; to insert date and time on a Mac. Using the formula =TODAY in Google Sheets will not trigger the Zap, because it changes automatically, rather than by manipulating other cells in the spreadsheet.
How to update HubSpot contacts from a Google Sheet
If you're new to search actions—available with certain Zapier integrations—this tutorial will be a gentle intro. Search actions can help prevent duplicate records and update existing data, cutting down on the actual human time you spend on managing leads.
If you're the DIY-type, you can create your own Zap from scratch with our point-and-click editor, but we also have quick templates to get you started.
To get started with a Zap template—what we call our pre-made workflows—just click on the button. It only takes a few minutes to set up. You can read more about setting up Zaps here.
Update or create HubSpot contacts from a Google Sheet
Here's how to set it up:
Set up your Google Sheets trigger
First, set up your trigger—the event that starts a Zap.
If you're creating a Zap from scratch, select Google Sheets as the app, New or Updated Spreadsheet Row as your Event, and click Continue. (If you're using our Zap template, you'll skip this part.)
Note: If you're using a spreadsheet located in a Team Drive, use the New or Updated Spreadsheet Row (Team Drive) trigger instead.
Next, connect your Google Sheets account to Zapier. If you haven't connected Google Sheets to Zapier before, sign into your Google account when prompted. Otherwise, select your Google Sheets account from the dropdown menu and click Continue.
For each app you connect, Zapier will ask for a general set of permissions which allows you to be flexible with your Zaps. The only actions Zapier takes on your app accounts are those a given Zap needs to accomplish what you've set up.
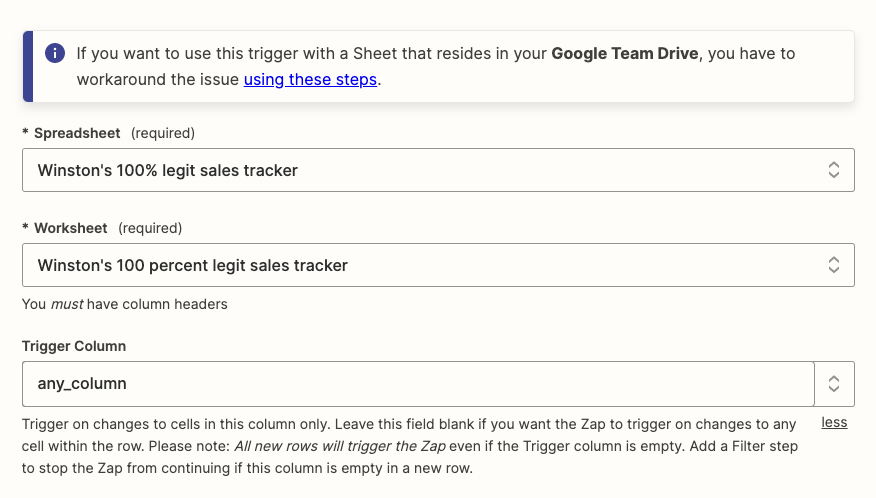
Now, select the spreadsheet and specific worksheet you'd like to use. If you want Zapier to watch out for changes in a specific column, click on the dropdown under Trigger Column and select the Google Sheet column you want to use.
If you want your Zap to pay attention to new spreadsheet rows, leave the Trigger Column set to any_column.
Click Continue.
Next, test your trigger. Zapier will look for a recent spreadsheet row in your Google Sheet, according to how you set up your trigger earlier. You'll use whatever Zapier finds to set up the rest of your Zap.
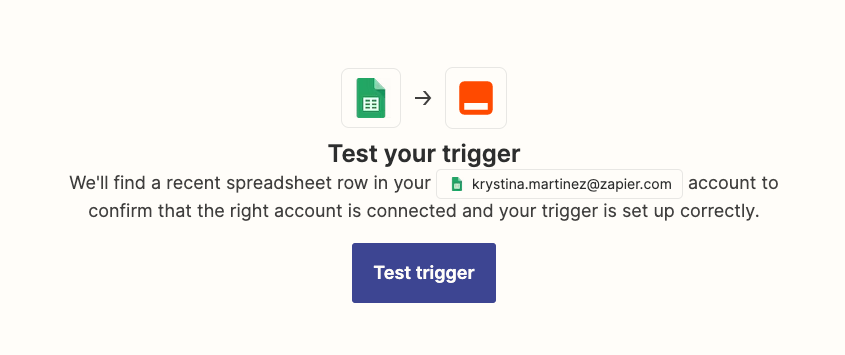
Once you see a success message, check the results and make sure you have the data you want. If something looks off, make adjustments to your trigger criteria if needed and retest until you get the information you want.
Once you're happy with the results, click Continue.
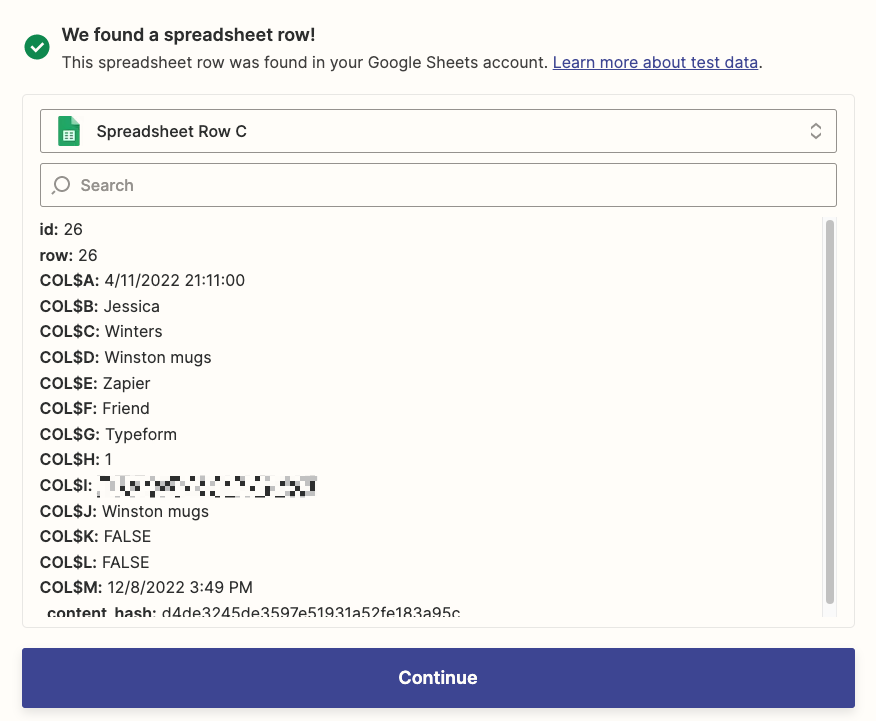
Review your test data for the Google Sheets rows Zapier found.
Set up your HubSpot search action
Next, set up your HubSpot search action, which will check for existing contacts that match your Google Sheets trigger.
Check out our guide on how to get the most out of Zapier search steps.
If you're creating a Zap from scratch, search for and select HubSpot as your app, Find Contact as your event, and click Continue. (The Zap editor will do this for you if you're using our Zap template.)
Next, connect your HubSpot account or select an existing HubSpot account from the dropdown and click Continue.
Now you need to specify what you want Zapier to look for within your HubSpot contacts.
Click on the dropdown beneath First search property value, then search for and select the HubSpot contact property you want your search to focus on.

I find it easier to pick a contact property that is less prone to human error, such as an email address or a phone number. For example, if your spreadsheet contains leads from forms or newsletter signups, the chances are low that your lead will enter their email address incorrectly. While most people don't misspell their name or company affiliation, those can change!
Once you've selected your HubSpot contact property, Zapier will ask for a search value, which is the actual information your Zap will be looking for.
In order to pass information from your Google Sheet to HubSpot, you need to map a dynamic value to the First search property value field. Click on the dropdown and map a field from your Google Sheet trigger.
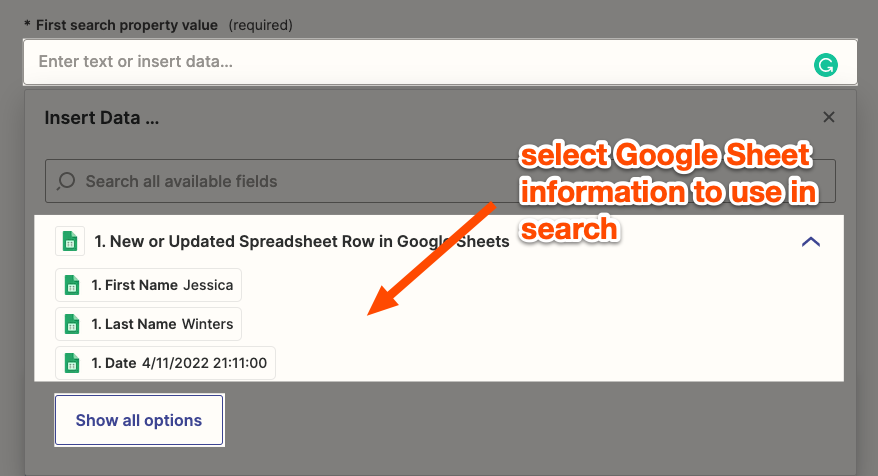
A dynamic value is any data from a previous Zap step that you've mapped to a field in the Zap editor. When you map a dynamic value—such as a contact name—what you see in the editor is a placeholder. Field mapping dynamic values are how you pass data from one app to another. Once your Zap is turned on, Zapier will send the information that the field contains every time your Zap runs.
In the example below, I've mapped the Email column from my Google Sheet as my search value since I want this Zap to search my HubSpot contacts by email.

HubSpot gives you the option to set backup properties and values to search in case your first search fails. If you'd like to set this up, repeat the same steps above to set up your backup search properties.
In the example below, my Zap will search for my lead's company information in HubSpot if it doesn't find anything in the Email contact property.

Optional: Customize your new HubSpot record
If you're using our Zap template, you'll notice that Create HubSpot Contact if it doesn't exist yet? is checked.

Certain apps, like HubSpot, allow you to search for existing data and create new items in the same step, which saves you setup time.
Since this option is checked, the Zap editor will prompt you to customize what you want in your new contact record in the event you don't have an existing HubSpot contact.
To pass information from your Google Sheet to HubSpot, map fields from your Google Sheets trigger to the corresponding HubSpot contact properties. You don't need to fill out every field listed in the Zap editor—just the ones you need.
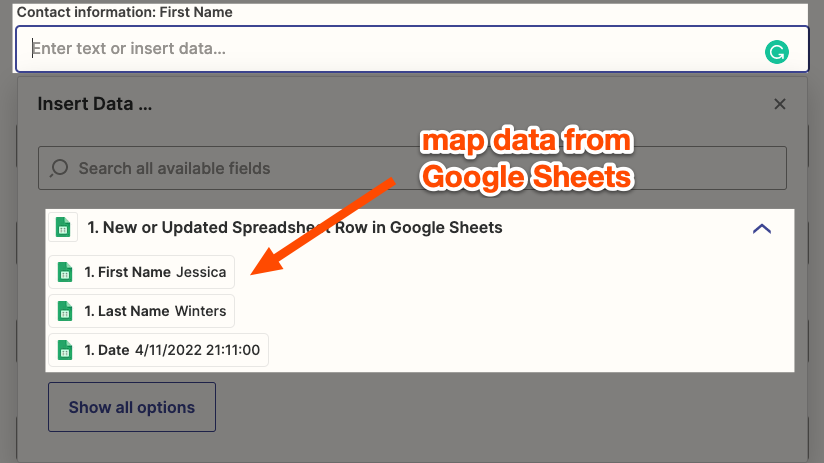
Once you've customized what will go in your new contact record, click Continue.
Now test your search action. Zapier will search for an existing HubSpot contact. If one doesn't exist, it will create a new contact if you've set it up to do so.
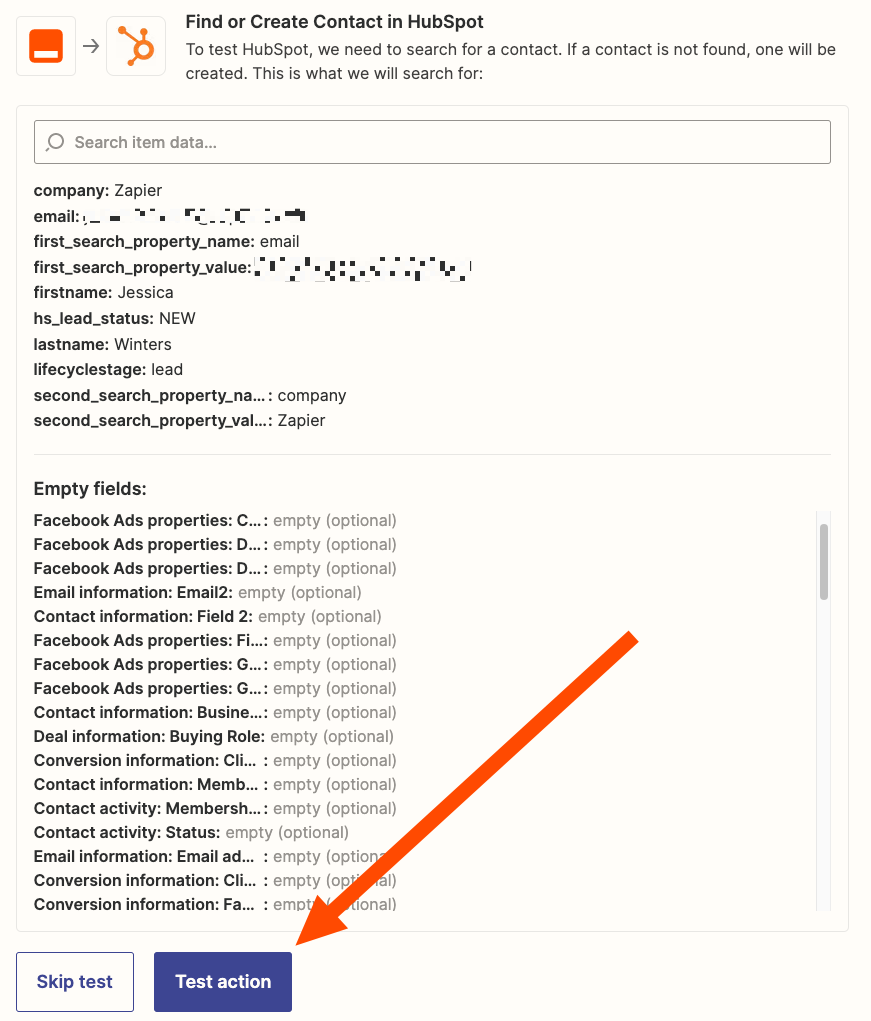
When you see a success message, check your test data carefully.
If Zapier found a HubSpot contact, _zap_data_was_found will be true. If Zapier didn't find anything, this will be false. And if you've set up your search action to do so, it will create a new contact record as well if your test is false.
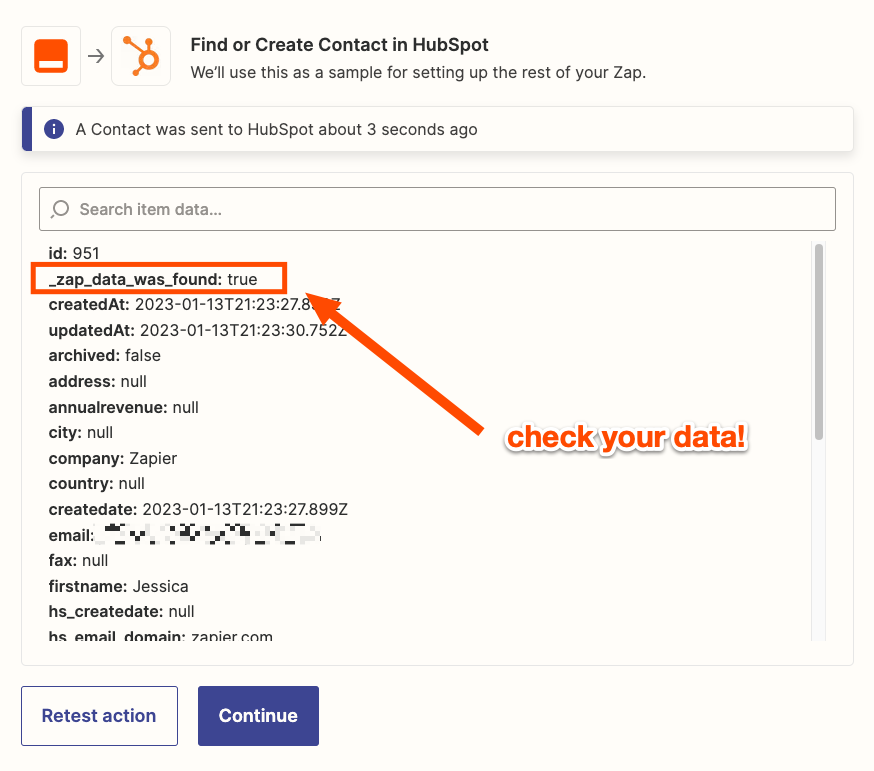
Click Continue.
Test your filter
If you're using our Zap template, a filter step will already be set up for you. This filter ensures that this Zap will only continue to the next step if Zapier finds an existing HubSpot contact.

If you're setting up this Zap from scratch, click on the Choose field… dropdown and select Zap Data Was Found from your search step.
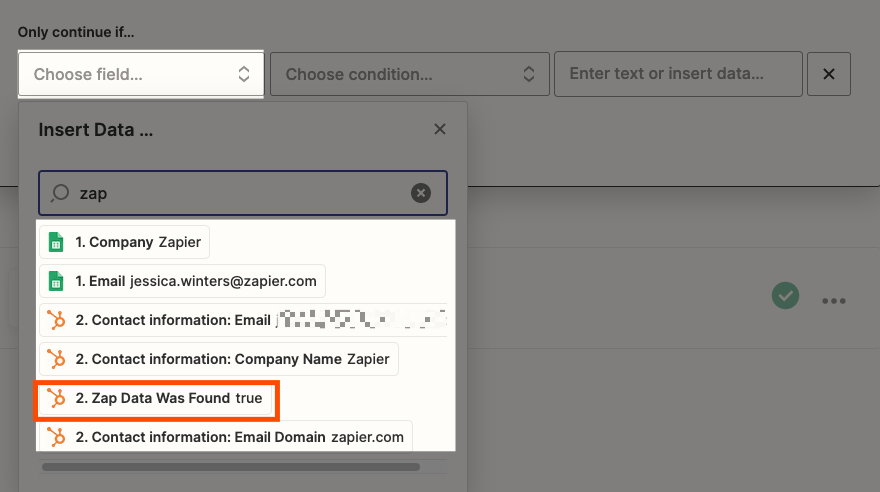
Then, click on the Choose condition… dropdown and select (Boolean) Is true.
You can add additional filters, if you'd like. In the example below, I added an additional filter to ensure that this Zap only continues on new non-empty spreadsheet rows.

Click Continue to test your filter. If your filter behaves how you expected it to, click Continue again. If not, adjust your filters and retest until you get the result you expected.
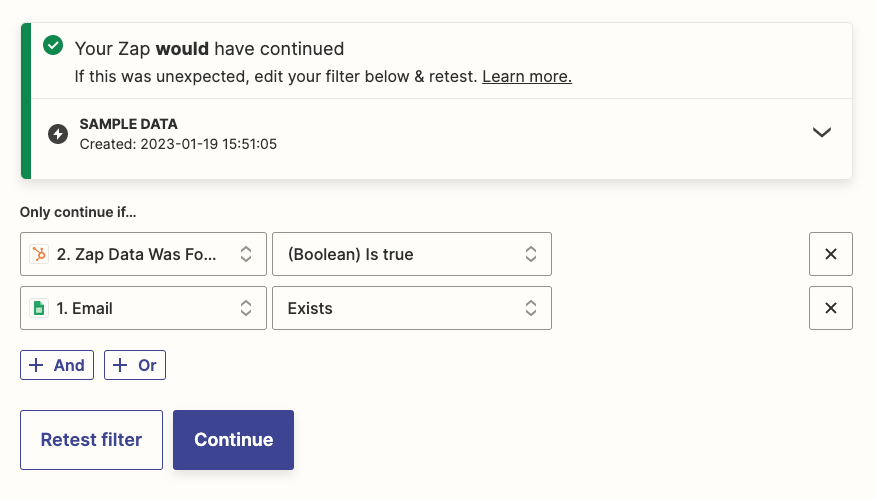
Note: You can replace this filter step with Paths—available on Zapier's Professional plans and higher—if you want your Zap to update your HubSpot contacts in a specific manner depending on Google Sheet information. Learn more about using Paths with search steps to create conditional workflows.
Set up your update action
Now you'll set up the final step in this Zap. If Zapier finds an existing contact in HubSpot, this action will update that contact record.
If you're creating this Zap from scratch, search for and select HubSpot as your action app, Update Contact as your action event, and click Continue.
Next, select your HubSpot account from the dropdown menu and click Continue.
The Zap editor will prompt you for an Object ID. This is the piece of information Zapier needs in order to know which HubSpot contact to update.
Click on the field beneath Object ID and click on the down caret next to your search step.
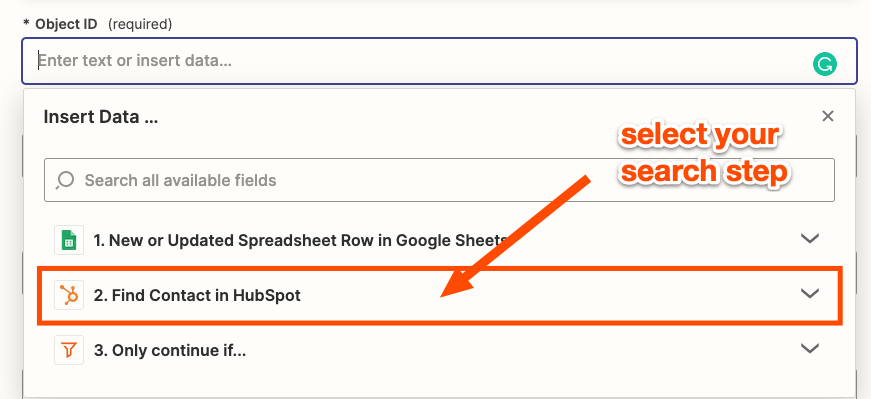
Then, select the ID value.

Remember, dynamic values are how you pass information from one app to another. The value will change depending on the information your Zap receives. Do not enter static text in the required fields, unless you want your Zap to update the same record each time.
Now you can customize the rest of this step according to the contact properties you want to update in HubSpot. When you're done, click Continue.
Finally, test your update action.
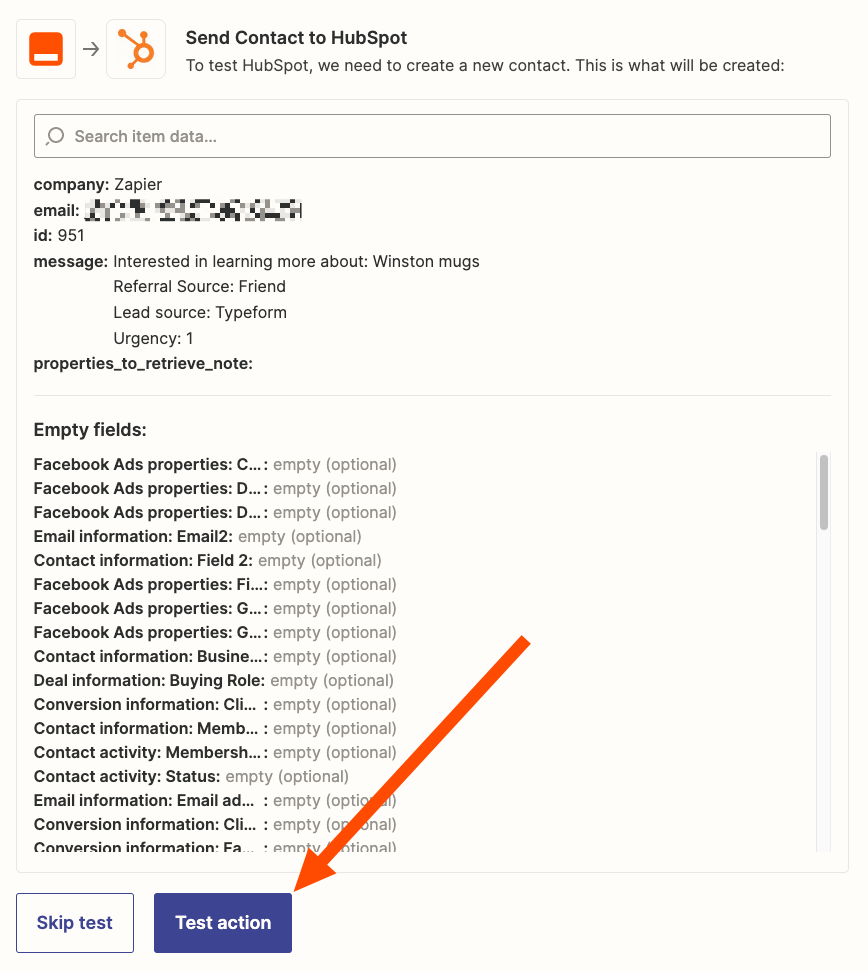
Once you see a success message in the Zap editor, check your contact record in HubSpot.
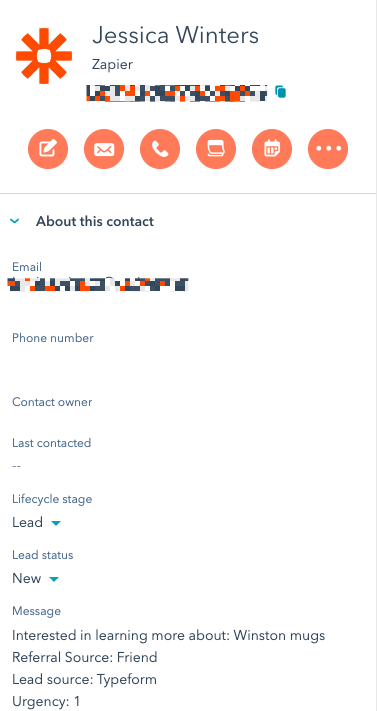
If everything looks good, you're ready to use your Zap!
Automation for speedy (and accurate) lead management
You don't have to choose between speed and accuracy in your lead management processes. Automation with Zapier lets you benefit from the easy scannability of a spreadsheet and the advanced tools from your CRM—without slowing down your sales pipeline.
Update or create HubSpot contacts from a Google Sheet
Zapier is the leader in workflow automation—integrating with 6,000+ apps from partners like Google, Salesforce, and Microsoft. Use interfaces, data tables, and logic to build secure, automated systems for your business-critical workflows across your organization's technology stack. Learn more.
Related reading:
