When customers call your support center, they're often already frustrated. The last thing they want is to feel blocked or ignored—it creates a terrible experience. But when call volume spikes, even the best teams can struggle to keep up.
AI agents built on Synthflow AI can help you engage with your customers and track, prioritize, and resolve issues faster. But manually categorizing AI calls then creating follow-up support tickets eats up valuable time.
In this tutorial, I'll show you how to automatically create categorized Zendesk tickets whenever a call completes in Synthflow AI, using ChatGPT to classify each conversation. If you use different tools, you can easily swap them out using the same setup. Let's get started.
Zapier is the most connected AI orchestration platform—integrating with thousands of apps from partners like Google, Salesforce, and Microsoft. Use forms, data tables, and logic to build secure, automated, AI-powered systems for your business-critical workflows across your organization's technology stack. Learn more.
Create Zendesk tickets from Synthflow AI calls automatically
Zapier is an AI orchestration platform that lets you streamline your work by connecting your work apps into automated workflows. These workflows are called Zaps, and they can do lots of tasks for you—including automatically categorizing and ticketing customer calls. You can create your own Zap from scratch without any coding knowledge, but there are also lots of pre-built templates to help you get started quickly.
You can build a call-to-ticket automation from scratch in the Zap editor or click the template below to get started. The template will save you some clicks by automatically populating your trigger and action steps. If you don't already have a Zapier account, you'll need to create one. Then just follow the directions below to set up your Zap.
Create AI-categorized Zendesk tickets from Synthflow AI calls
Set up your Synthflow AI trigger
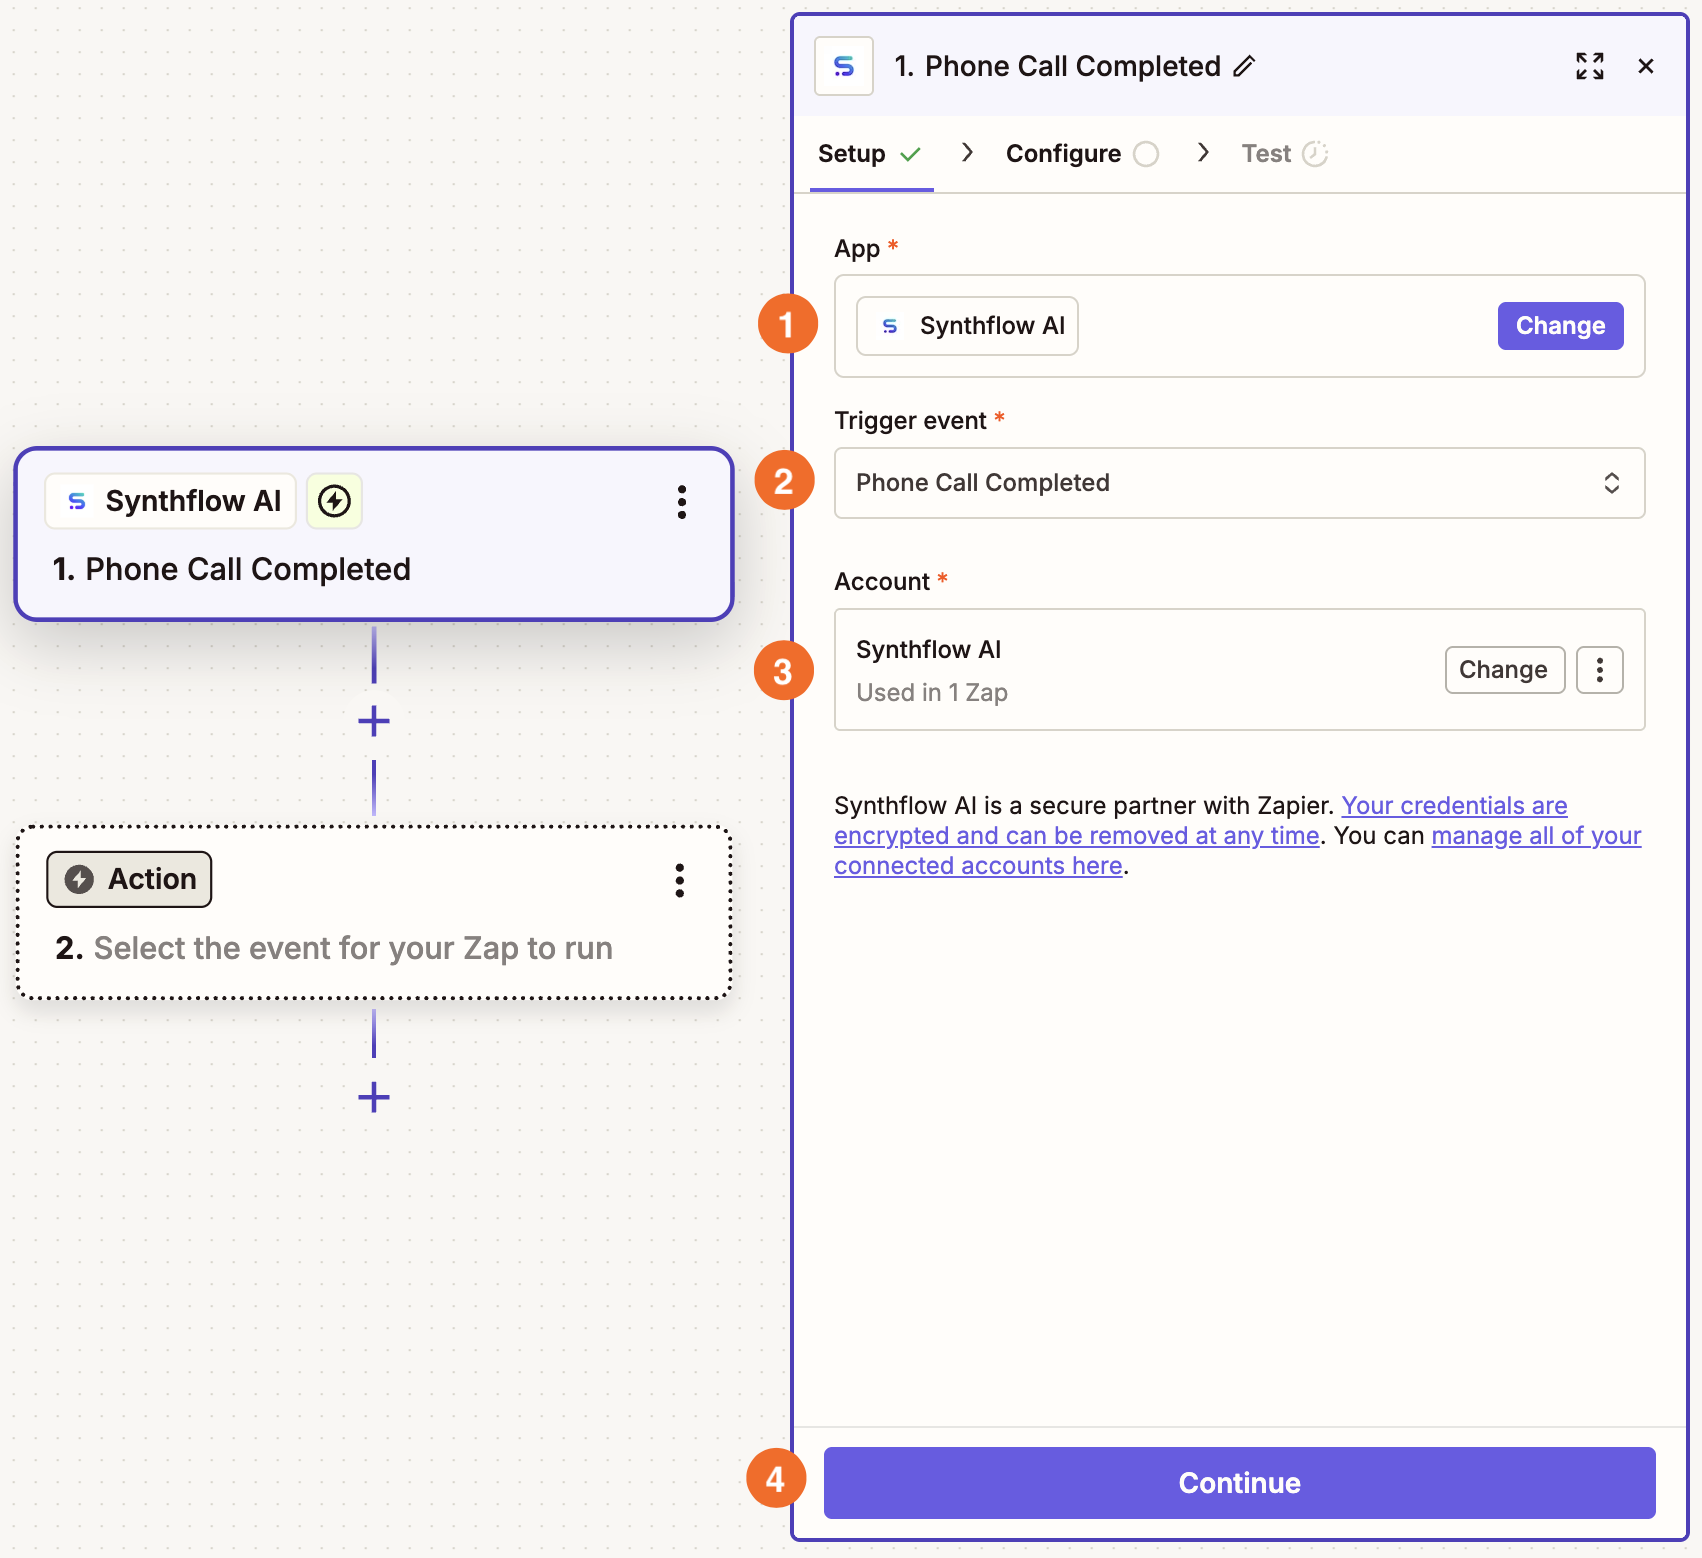
Create your trigger, choosing Synthflow AI as your app and Phone Call Completed as your trigger event. If you started with the template, this will already be done for you. Connect your account and click Continue.
In the Configure tab, you'll need to replace the placeholder Agent ID. To find your Synthflow Agent ID, navigate to the Synthflow site, go to the Agents tab, and copy the ID for the agent you want to use.

Paste that ID into the Zap editor, then click Continue.
Now you'll need to test this step—and to do that, you'll want to complete a test call in Synthflow AI so Zapier can pull a sample transcript.
Once that's done, return to the Zap editor and click Continue with selected record.


Set up your ChatGPT action
In your next step, choose ChatGPT (OpenAI) as your app and Analyze Text as the action event. Then connect your OpenAI account and click Continue.
Pro tip: Consider using AI by Zapier instead—our built-in tool for adding AI steps to your Zaps. It lets you connect to the latest AI models, create and optimize your prompts with a built-in assistant, and pull in knowledge sources from tools like Google Drive, Notion, and Confluence. Learn more in our AI by Zapier feature guide.
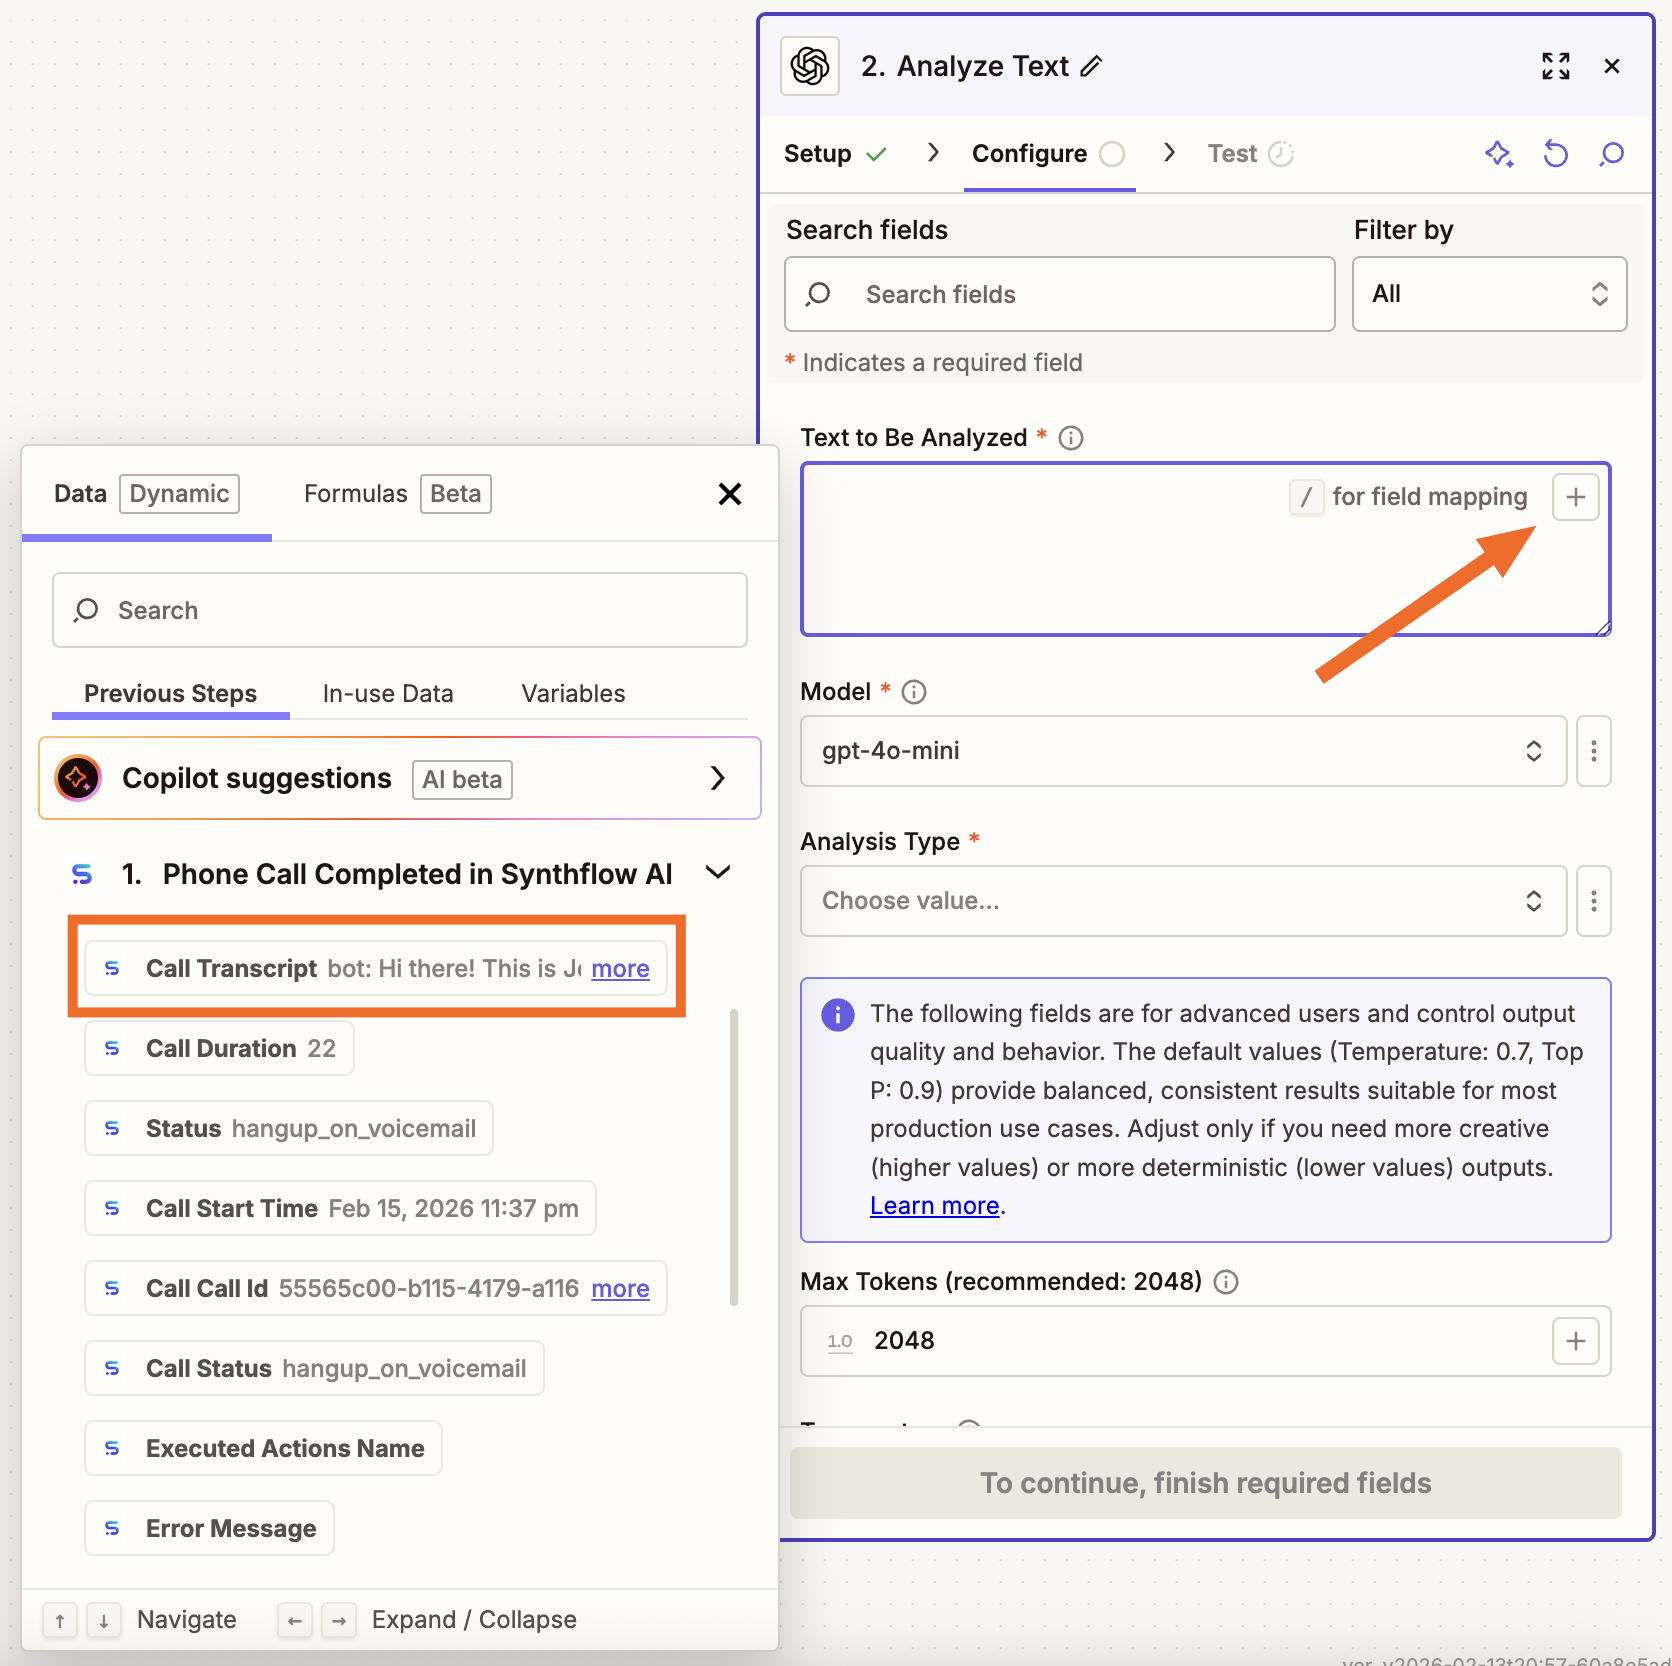
This step will classify the call transcript—so in the Configure tab, you'll need to map the test call transcript from your Synthflow AI trigger. To do this, click the plus sign (+) in the Text to Be Analyzed field and select Call Transcript.
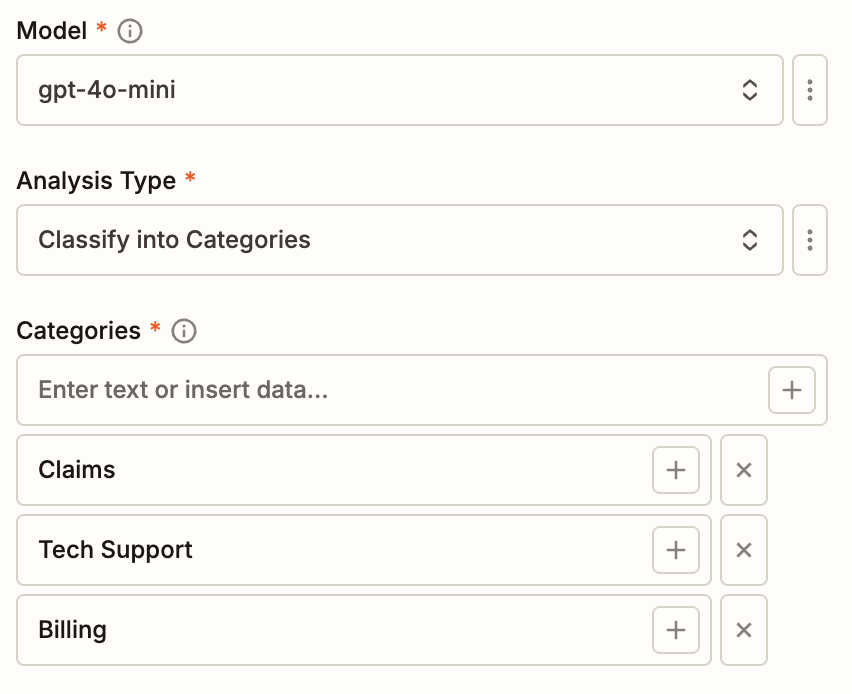
Now select your preferred model, choose Classify into Categories as your analysis type, and enter as many categories as you want.
Below those fields, you'll see additional fields to control token usage, temperature, and Top P. Modify them or leave them as is. (You can click the information icons to learn more if these are unfamiliar to you.)
Click Continue, then Test step to see how ChatGPT would classify your test. Then click Continue again.


Set up your Zendesk action
In your final step, choose Zendesk as your app and Create Ticket as the action event. Connect your Zendesk account and click Continue.
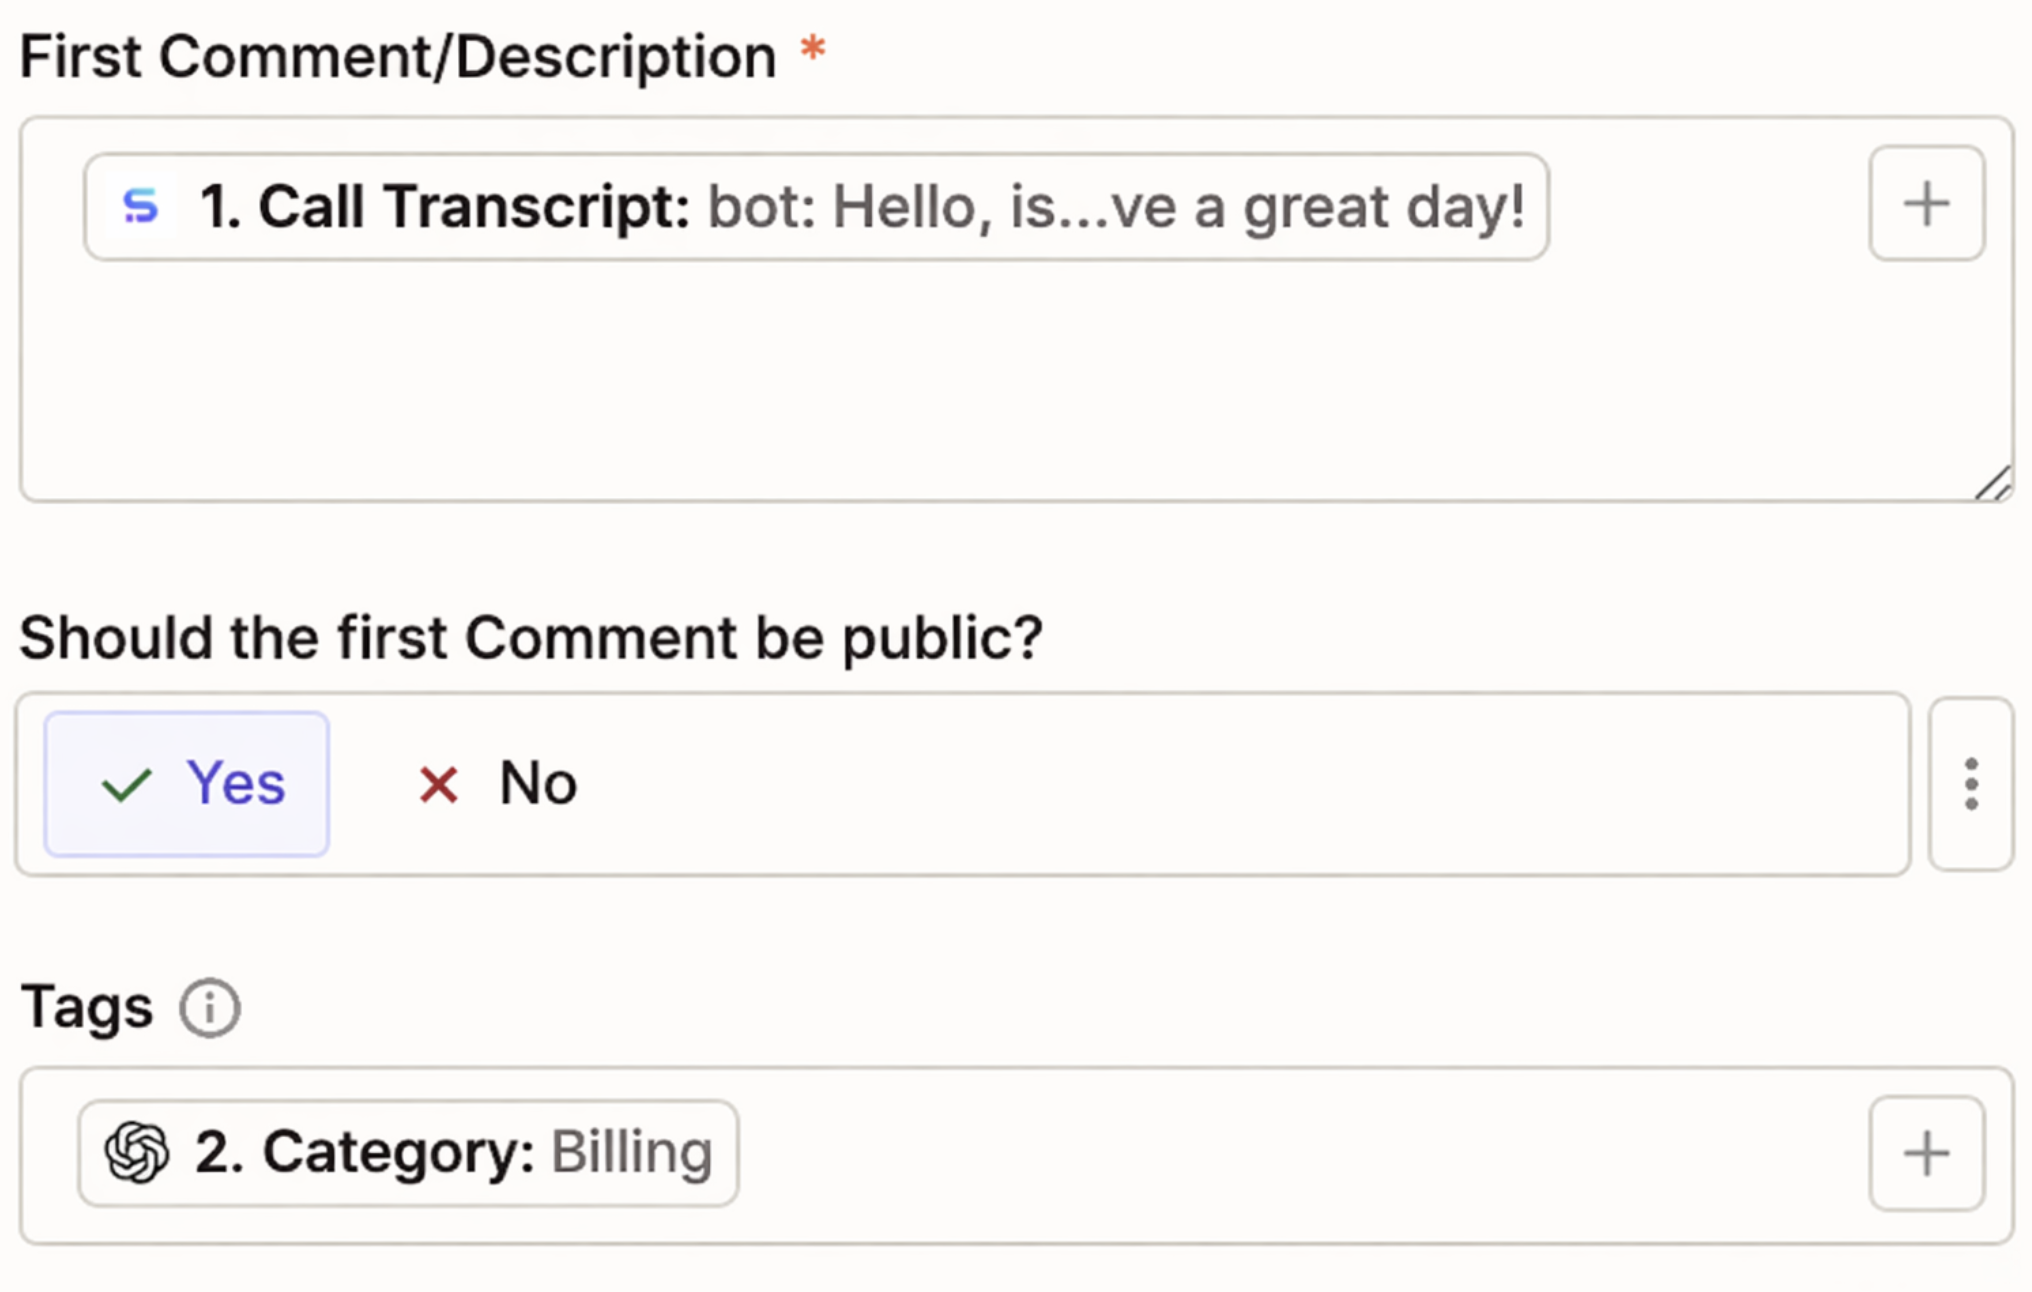
There are many fields you can fill out in the Configure tab, but two are required: Subject and First Comment/Description.
Set the Subject to something descriptive like
Call from [Customer Phone Number], mapping the phone number from your Synthflow AI trigger.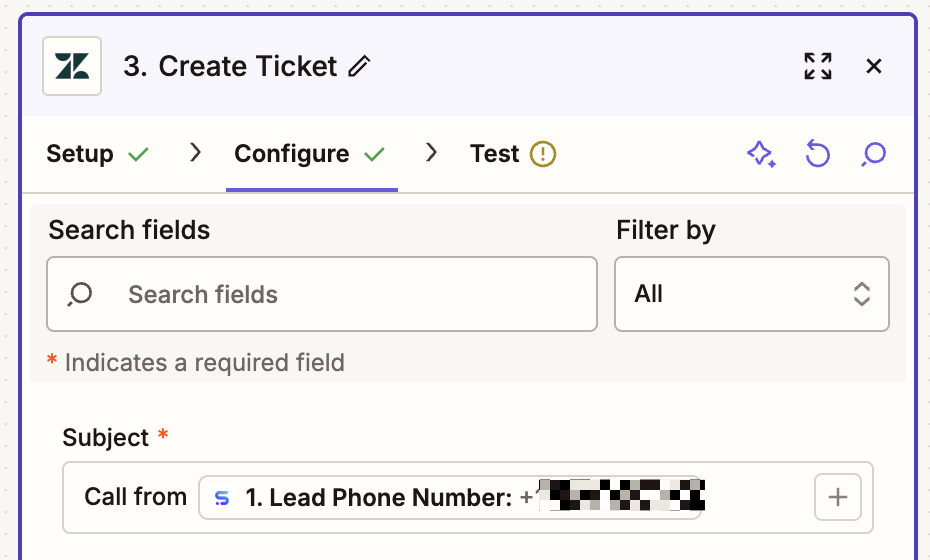
In the First Comment/Description field, map the full transcript from Synthflow AI—that'll give your support team complete context into the call. And in the Tags field, map the category that ChatGPT assigned to your transcript.
Modify any other fields to your liking. When you're done configuring your ticket settings, click Continue, then test the action to make sure your ticket is created correctly in Zendesk.
If everything worked as expected, just remember to click Publish to turn your Zap on.