Dropbox, by default, syncs everything in your Dropbox to all of your computers. There are reasons you might not want that: You could have limited bandwidth, for example, or limited hard drive space. Here's how to choose which Dropbox files sync to your computer and which do not.
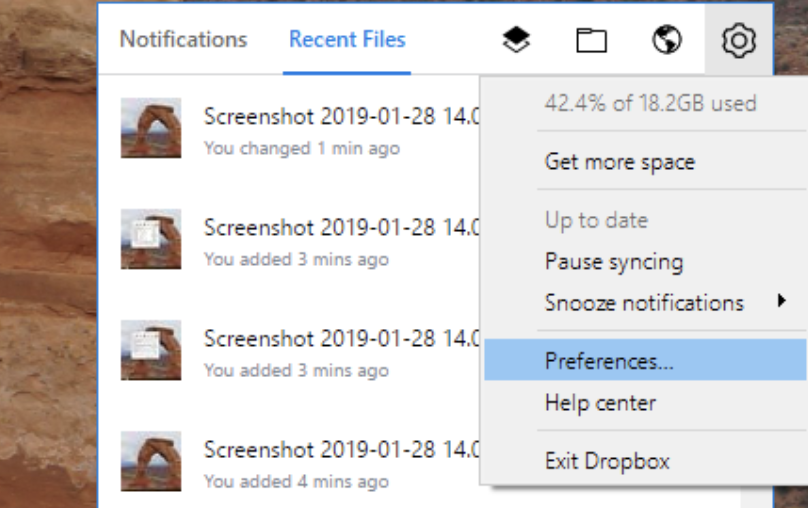
First, find the Dropbox icon in your system tray or menu bar. Click it, and a window will pop up. Here's how that looks on Windows:
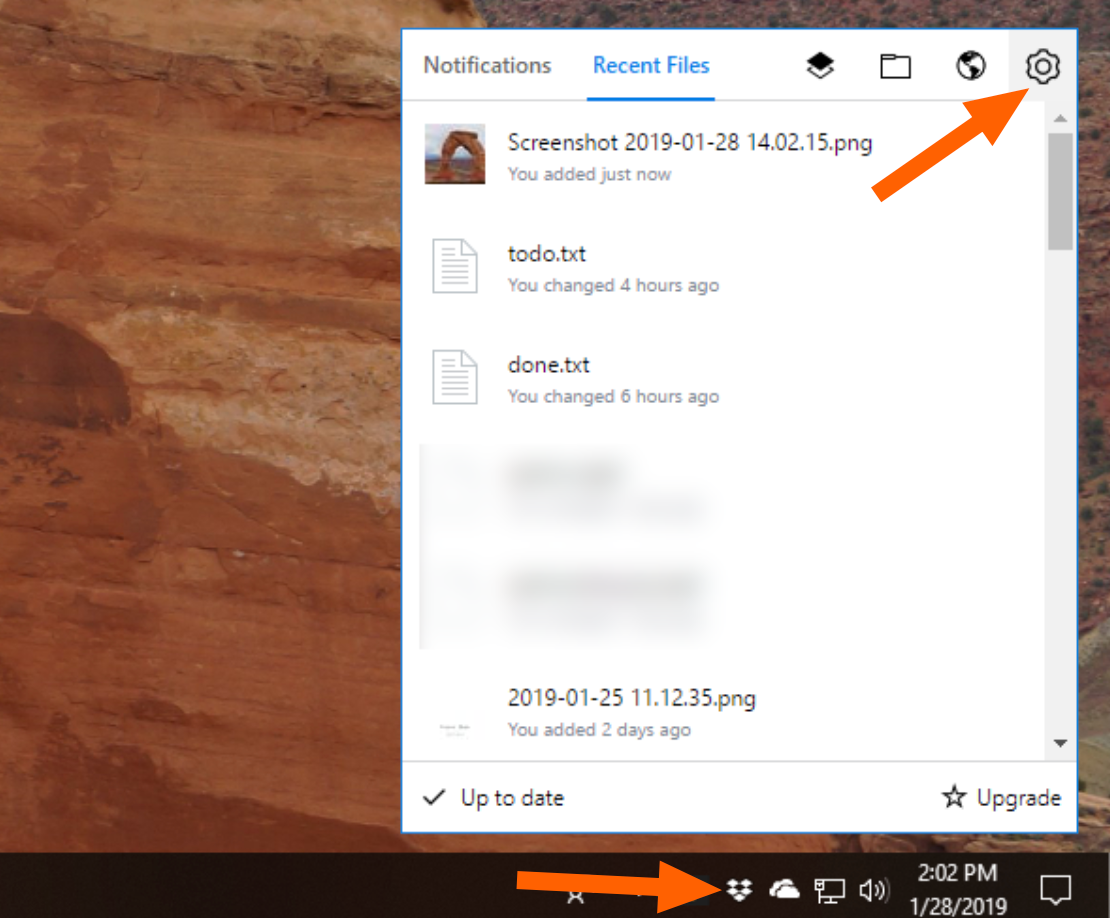
Click the gear at top-right, then click Preferences.
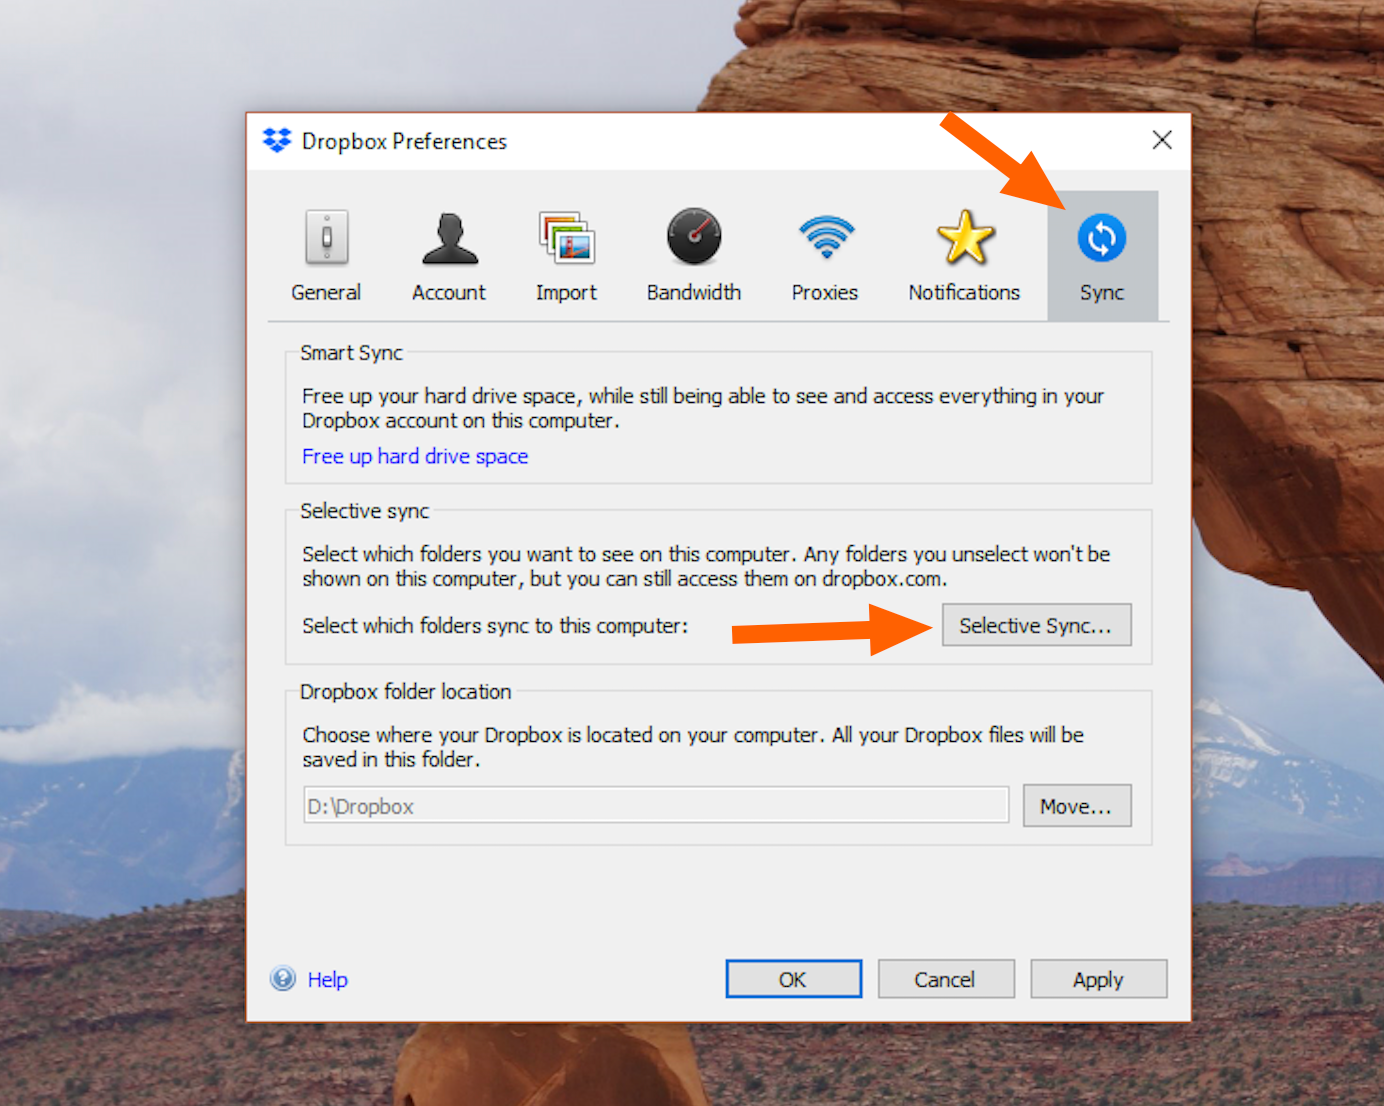
This will open the Preferences window. Click the Sync tab, then the Selective Sync button.
A new window will open allowing you to choose which files should and shouldn't sync to your computer.
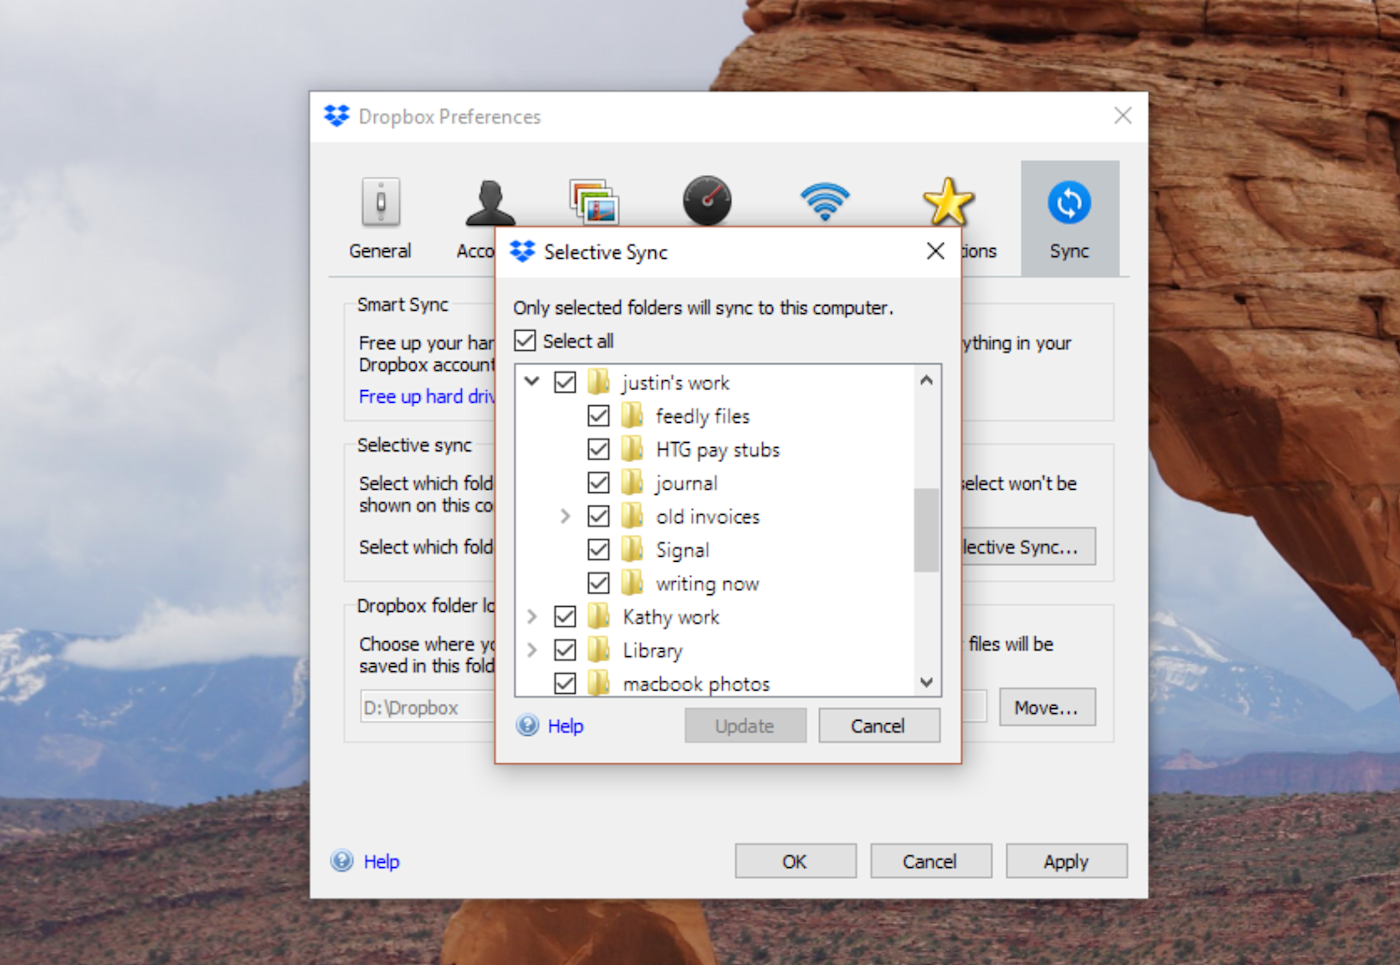
Simply uncheck any files or folders you don't want to be synced to your computer. Dropbox will delete them from your computer and not sync over any future changes to them. These files will still be in your Dropbox, however, meaning you can find them using the web or mobile version of Dropbox.
Do you have multiple computers connected to your Dropbox account? Note that Selective Sync settings are tied to each individual computer, not your account as a whole. This means you can decide which files do and don't sync to specific computers—simply change the settings on each individual device.
Want more Dropbox tips like this? Check out our Dropbox overview.

