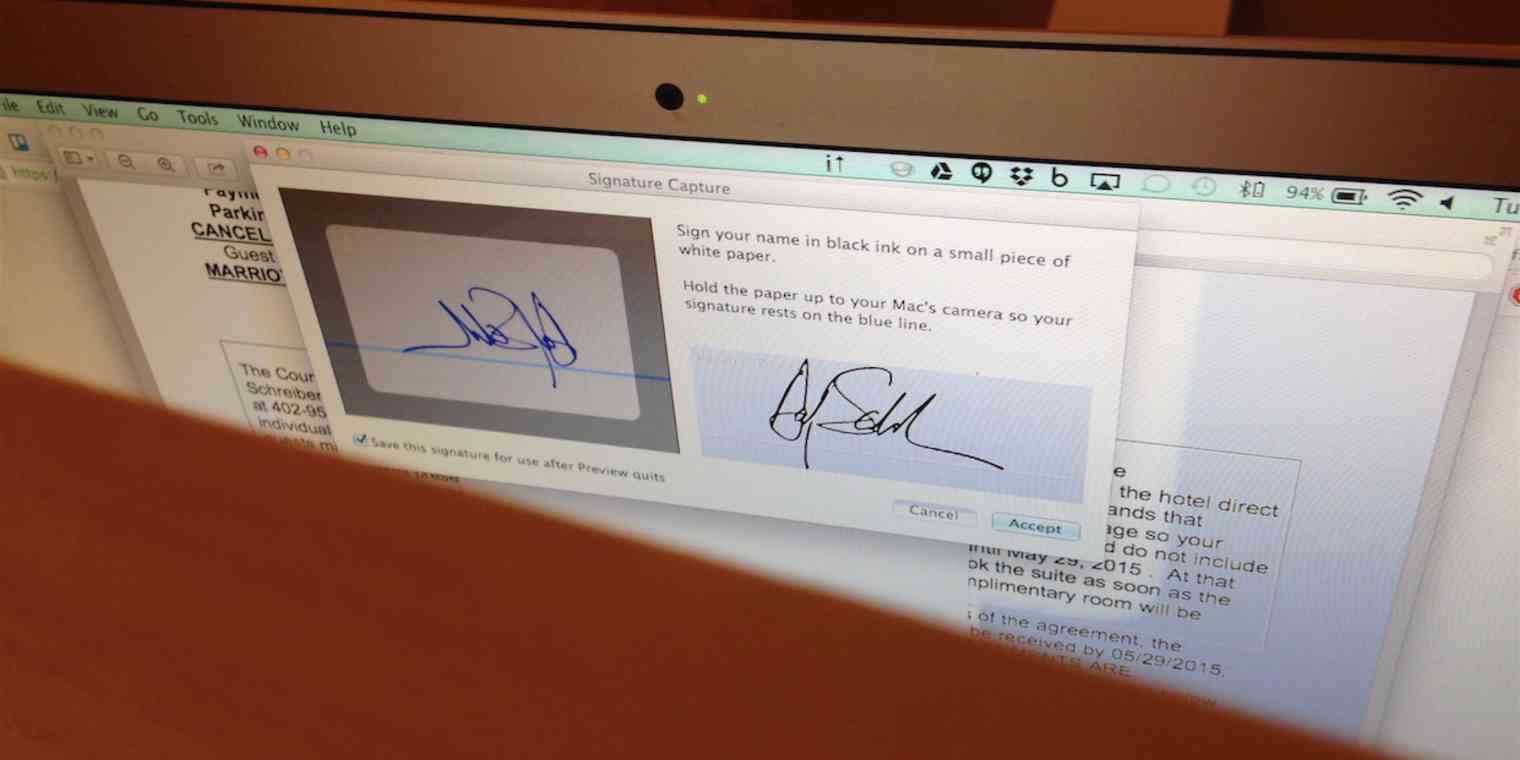
If you're a Mac user, you may be surprised to learn one of your most-used apps, Preview, has a powerful set of hidden features. Best known as the default PDF and image viewer, Preview can also be used to digitally sign documents, remove backgrounds from images, add annotations to a PDF and merge multiple PDFs into one.
Once you discover these tricks and others, you'll be going back to Preview again and again (I certainly do). The app is free, familiar and full of easy editing features.
Digitally Sign Documents
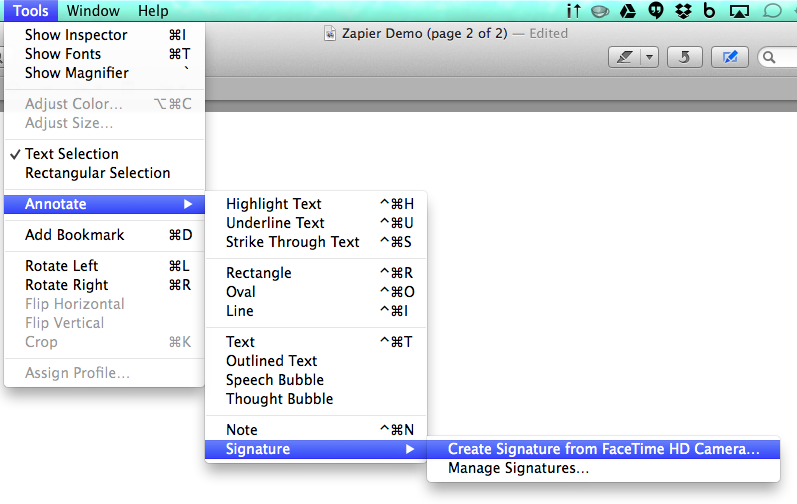
With the help of your Mac's built-in camera, Preview can assist you in fulfilling a signature request in a matter of minutes—no need to print a document, sign it, scan and reply. Instead, with the document open in Preview, click "Tools" in the menu bar, select "Annotate," then "Signature" then "Create Signature from Facetime HD Camera".
You'll then be prompted to hold up to your computer's camera a white piece of paper that you've signed—use a thick blue or black pen to guarantee success.
Once you've added your signature to Preview, it'll save it in the application for use again at a later time. You're also able to add more signatures, or extend the use of this capture feature by adding your initials, the day's date and really anything you'd like.
Signing a document via Preview is a convenient feature, but do be aware that this type of signature won't suffice for many business or legal matters. When you're in need of a digital signature in those cases, check out apps HelloSign, DocuSign or EchoSign.
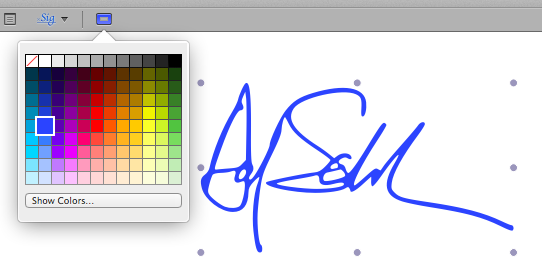
Tip: When your signature is selected in a blank PDF file, you're able to change the color of your signature using the line color tool in the toolbar.
Use Your Digital Signature Elsewhere
In less than 10 steps, Jason Cipriani of CNET shows how to take the digital signature you've saved in Preview and use it elsewhere, too. This is a handy trick when you want to add a digital signature to your emails, blog posts or about page.
Download this blank PDF file (or create one yourself following Jason Cipriani's tutorial)
Open the blank PDF file and insert your signature, enlarging it on the page when it's open
Take a screenshot of your signature (press Shift-Control-Command-4 to activate the screenshot crosshairs)
On the Preview menu bar, click "File", then "Open…" and select the latest screenshot you've taken (found on your desktop, by default)
With the screenshot open, click to "Show Edit Toolbar" (1), then "Instant Alpha" (2), which brings up a crosshair—use the crosshair to select the body of the signature (3) and click "Crop" (4).
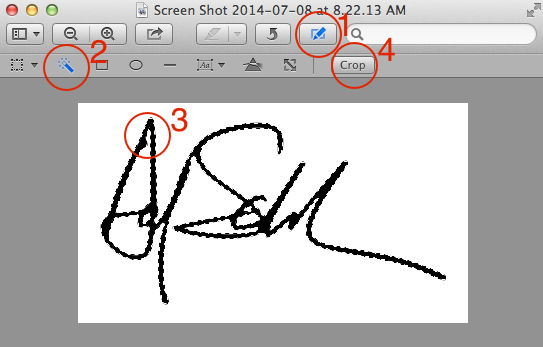
All that's left is to save the signature file, which now has a transparent background, and use it where you please.
Tip: When requesting a signature, try Signals by HubSpot to receive a notification when your recipient opens your email. And hook up Signals to Zapier to send those notifications to the app of your choice.
Annotate PDFs and Images
Apps such as Glui, Snapnote and Skitch by Evernote are awesome to quickly annotate a screenshot, PDF or image, but for the sake of one less app, Preview can do much the same, too.
Once again, click "Tools" from the menu bar and select "Annotate." There, on top of the "Signature" option, you'll find an array of annotation tools, such as arrows, ovals, text, speech bubbles and notes, along with their keyboard shortcuts.
Highlight Text - Control-Command-H
Underline Text - Control-Command-U
Strike Through Text - Control-Command-S
Rectangle - Control-Command-R
Oval - Control-Command-O
Line - Control-Command-I
Text - Control-Command-T
Note - Control-Command-N

Tip: To quickly share the annotations you've made in Preview, use a screenshot upload tool like Cloud, Jumpshare, TinyGrab or Imgup.
Delete, Add or Rearrange PDF Pages
As you're finding out, Preview is much more than a PDF viewer. If fact, this next trick allows you to go beyond annotations and modify the page order of a PDF. To do so, open Preview's menu—the icon in the upper right corner—and select the "Thumbnail" view.
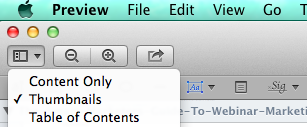
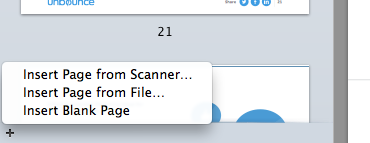
If you have more than one page, you'll now be able to click-and-hold a page and drag it any where you please. Or select a page and click "delete" on your keyboard to remove that page from the PDF. And if you'd like to add a page, click the "+" icon in the lower left corner and make your selection.
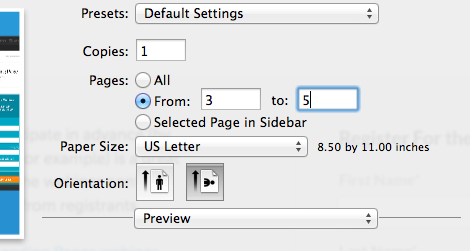
Tip: If you don't want to modify your document's pages but only want to print or export a selection, in the printing options select the pages you'd like to print. Or instead of printing, click "PDF" in the lower left corner to export as a PDF.
Merge PDFs
If it's adding more pages to a PDF from another PDF you're after, Preview can help you, too. To do so, simply open the two PDFs in two separate Preview windows, view the "Thumbnails" and then drag and drop pages from one window to the other—that's it.
If you want to insert an entire PDF in another, instead of selecting all the pages, grab the proxy icon (the icon in the title bar) and drag it to where you'd like the document placed in the other PDF.

Crop, Resize and Rotate Images
Aside from annotating and modifying PDFs, Preview's editing powers can also be used on images.
To crop an image, have the crosshairs tool selected, which is selected by default, click and drag it around the area of the image you'd like to keep. To get a perfect square when doing so, hold down the "shift" key.
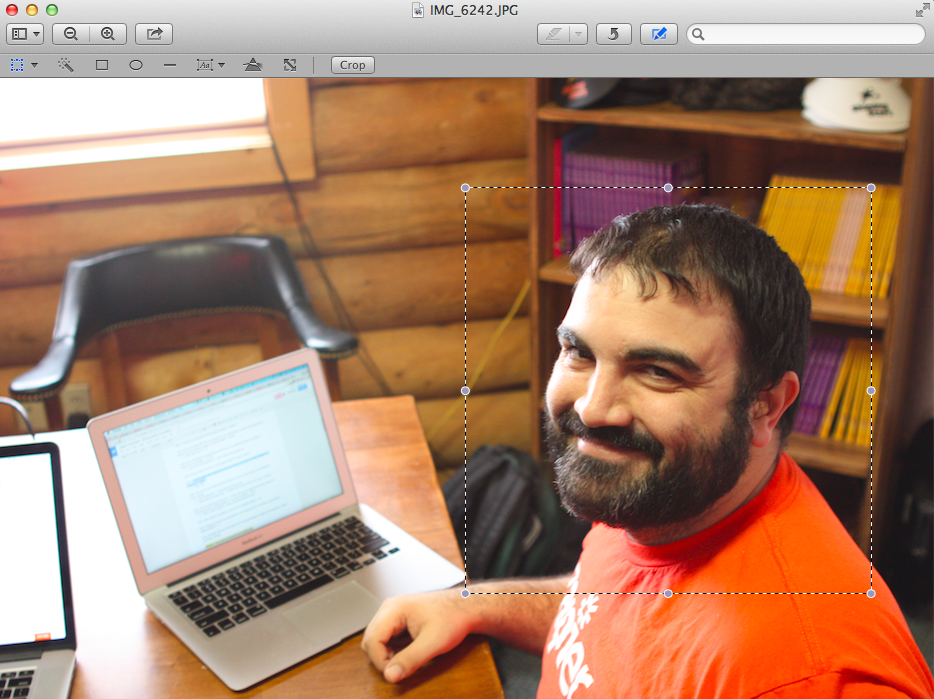
When ready, click "Crop" or hit command-K on your keyboard.
Aside from the default rectangular selection tool, you can also crop using either an elliptical or lasso (custom) selection.

Now that you have the area of photo you want, you can manually adjust the size—under "Tools" in the menu bar, select "Adjust Size" (or click far right icon with a double-arrow line in the tool bar). Here you're given the option to adjust the size using pixels, percentage or another measurement, such as inches. You can also select to scale the image proportionally and "resample image", which means the pixel density of the image will change, too. (For more on the difference between "resize" and "resample", check out the explanation from PhotoshopEssentials.com).
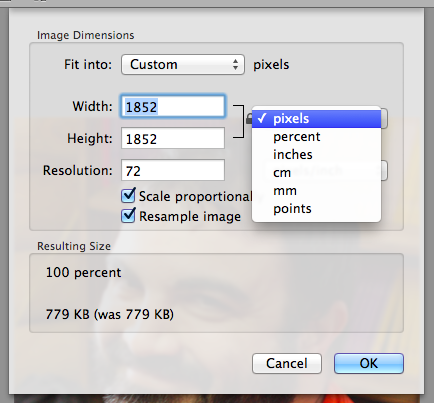
Finally, you're able to rotate the image left (command-L) or right (command-R) or flip it horizontally or vertically. Find these actions in the menu bar under "Tools".
Tip: To batch edit resize or rotate images, open more than one image with Preview (see how below) and select multiple thumbnails from the menu sidebar (hold down command when clicking on images). Then either use the keyboard shortcut, such as command-L to rotate left, or go to "Tools" and select the orientation.
Quickly Mask Part of Your Image
One of the most powerful features of Preview is the ability to remove parts of images without using a sophisticated imaging editing tool like Photoshop.
Preview gives you two options:
Instant Alpha - Click anywhere on an image with the crosshair and it'll guess what you're trying to pull out from the image. This works great for taking background away from logos (and we used this feature above for creating a digital signature to use elsewhere).
Smart Lasso - Draw around the area you want to keep, and Preview will automatically extract that part of the image.
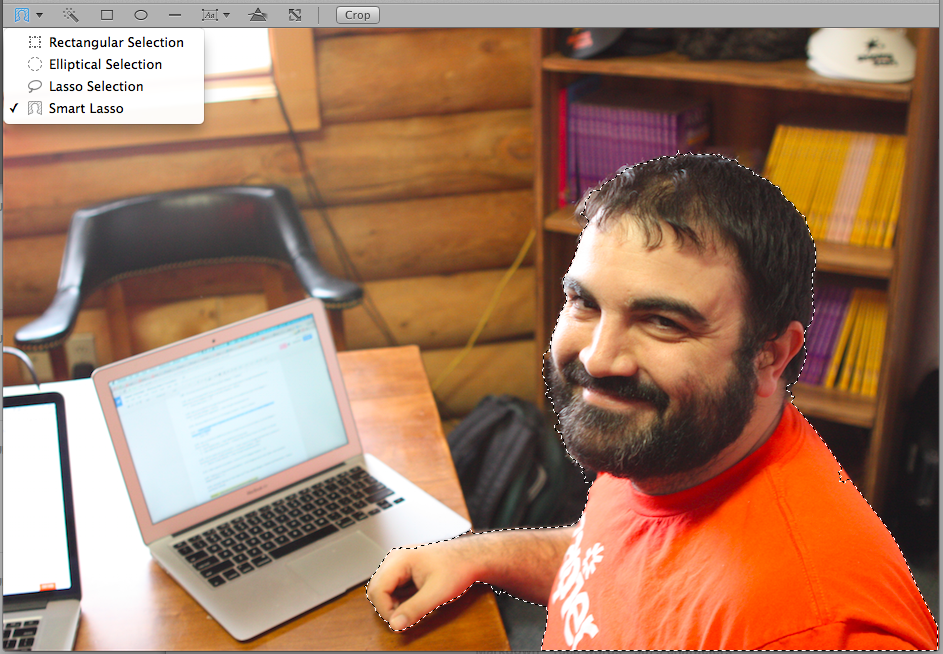
These features aren't better than what you'd find in a serious image editing tool like Photoshop, but they are much easier to use and quicker to access.
Adjust Image Color
Once again, instead of opening up a heavy duty image editor, you can rely on Preview to make image adjustments on the fly. To modify the color of an image, click on "Tools" on the menu bar and select "Adjust Color…" or use the keyboard shortcut option-command-C to bring up the color editor.

Open More than One Image at a Time
To have access more than one image at a time in the same Preview window, go into Finder, select multiple image files (this won't work for PDFs) and right click, selecting "Open with"-"Preview".

Revert to Old Version
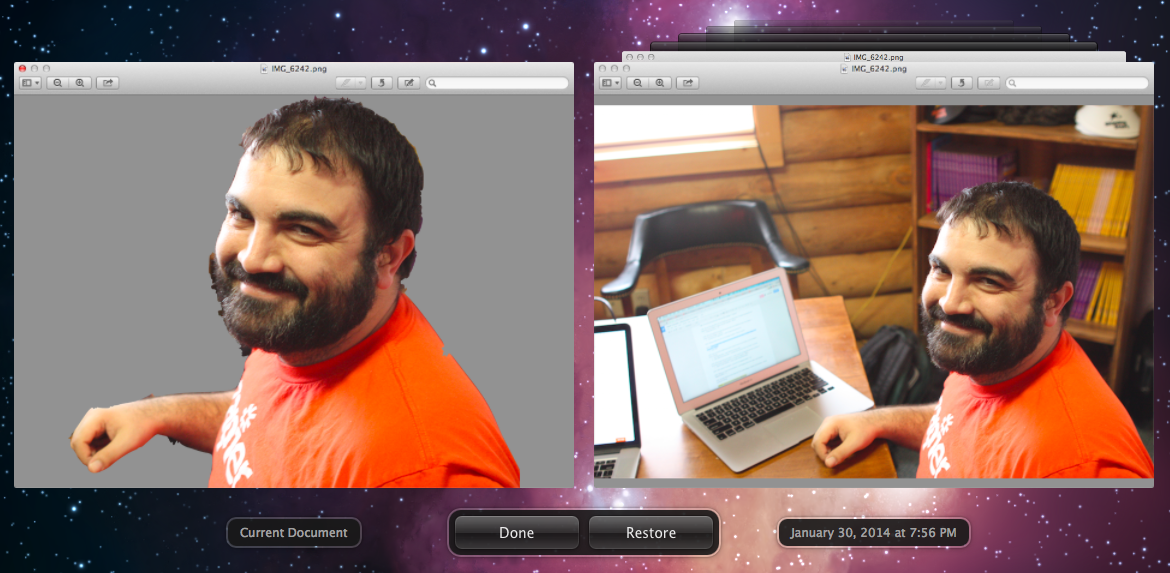
Oh no! You've edited an image and accidentally closed out of Preview, saving your changes. But there's no need to fear, as the app keeps a log of your revisions to a file. To access this history and revert back to an older version, click "File" in the menu bar and select "Revert To"-"Browse All Versions".
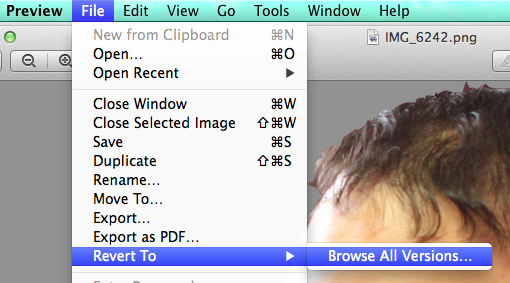
This opens a Time Machine-like experience, in which you're able to go back to the version of your choice.
Convert Files
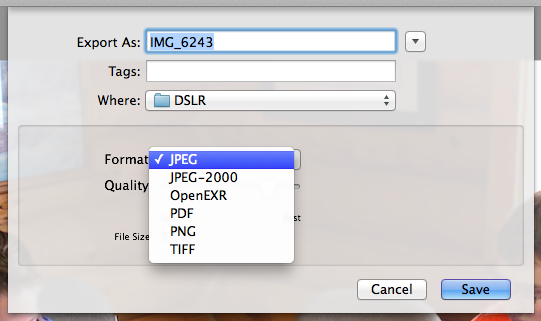
If you've saved your image as intended, however, and your next step is to convert it from a JPEG to a PNG, for example, Preview can help you here, too. With the image open, click "File" from the menu bar and select "Export", which gives you the option to convert the image to a JPEG, PNG, PDF, TIFF and more.
Reduce File Size
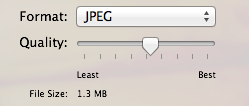
If exporting as a JPEG file, you're able to manually reduce the file size of an image with an easy-to-use meter that displays the new file size.
Take Screenshots
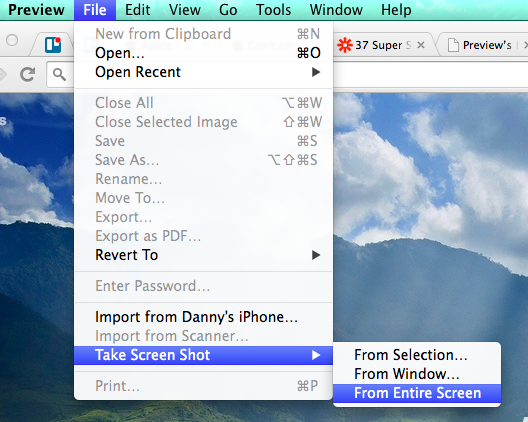
Though screenshots can be done with a variety of other apps, you can rely on Preview as your screenshot tool, too. Right after you've taken the screenshot, it'll open the file in Preview, making it easy to annotate, crop or resize before you export it as the file type of your choice.
More Preview Power
Have you relied on Apple Preview for another quick and common task? If so, please let others know if the comments below!
You might also enjoy this article: "Google Chrome for Marketers: 10 Setup Tips, 20+ Extensions You Need to Know".
