When you want to build a simple website, it can be tricky to find a website builder app that's affordable (read: free) and balances that fine line of offering just enough customization tools without overwhelming you with options.
As usual, Google has a solution: Google Sites.
Here, I'll show you how to use Google Sites to create a website for free.
Table of contents:
What is Google Sites?
Google Sites is a web-based platform that allows you to create websites for free. It's a simple website builder, but it offers enough features to host your blog, portfolio, or even classroom learning materials.
Is Google Sites free?
Yes! It's free to build and host a Google Site using your Google account. But if you want to use a custom domain, you'll have to pay for that.
How to create a Google Site
Here's a step-by-step guide for how to use Google Sites to create your first website.
Go to sites.google.com.
Click Blank site to create a new site. Alternatively, you can choose a premade template to kickstart the process.

Note: If you choose a standard theme, you're limited to what you can edit. For example, if you want to change the button color, you have to change the theme color, which may impact other color settings. And you can't change the button size––everything is predefined.
A blank page will automatically appear in the Google Sites editor.
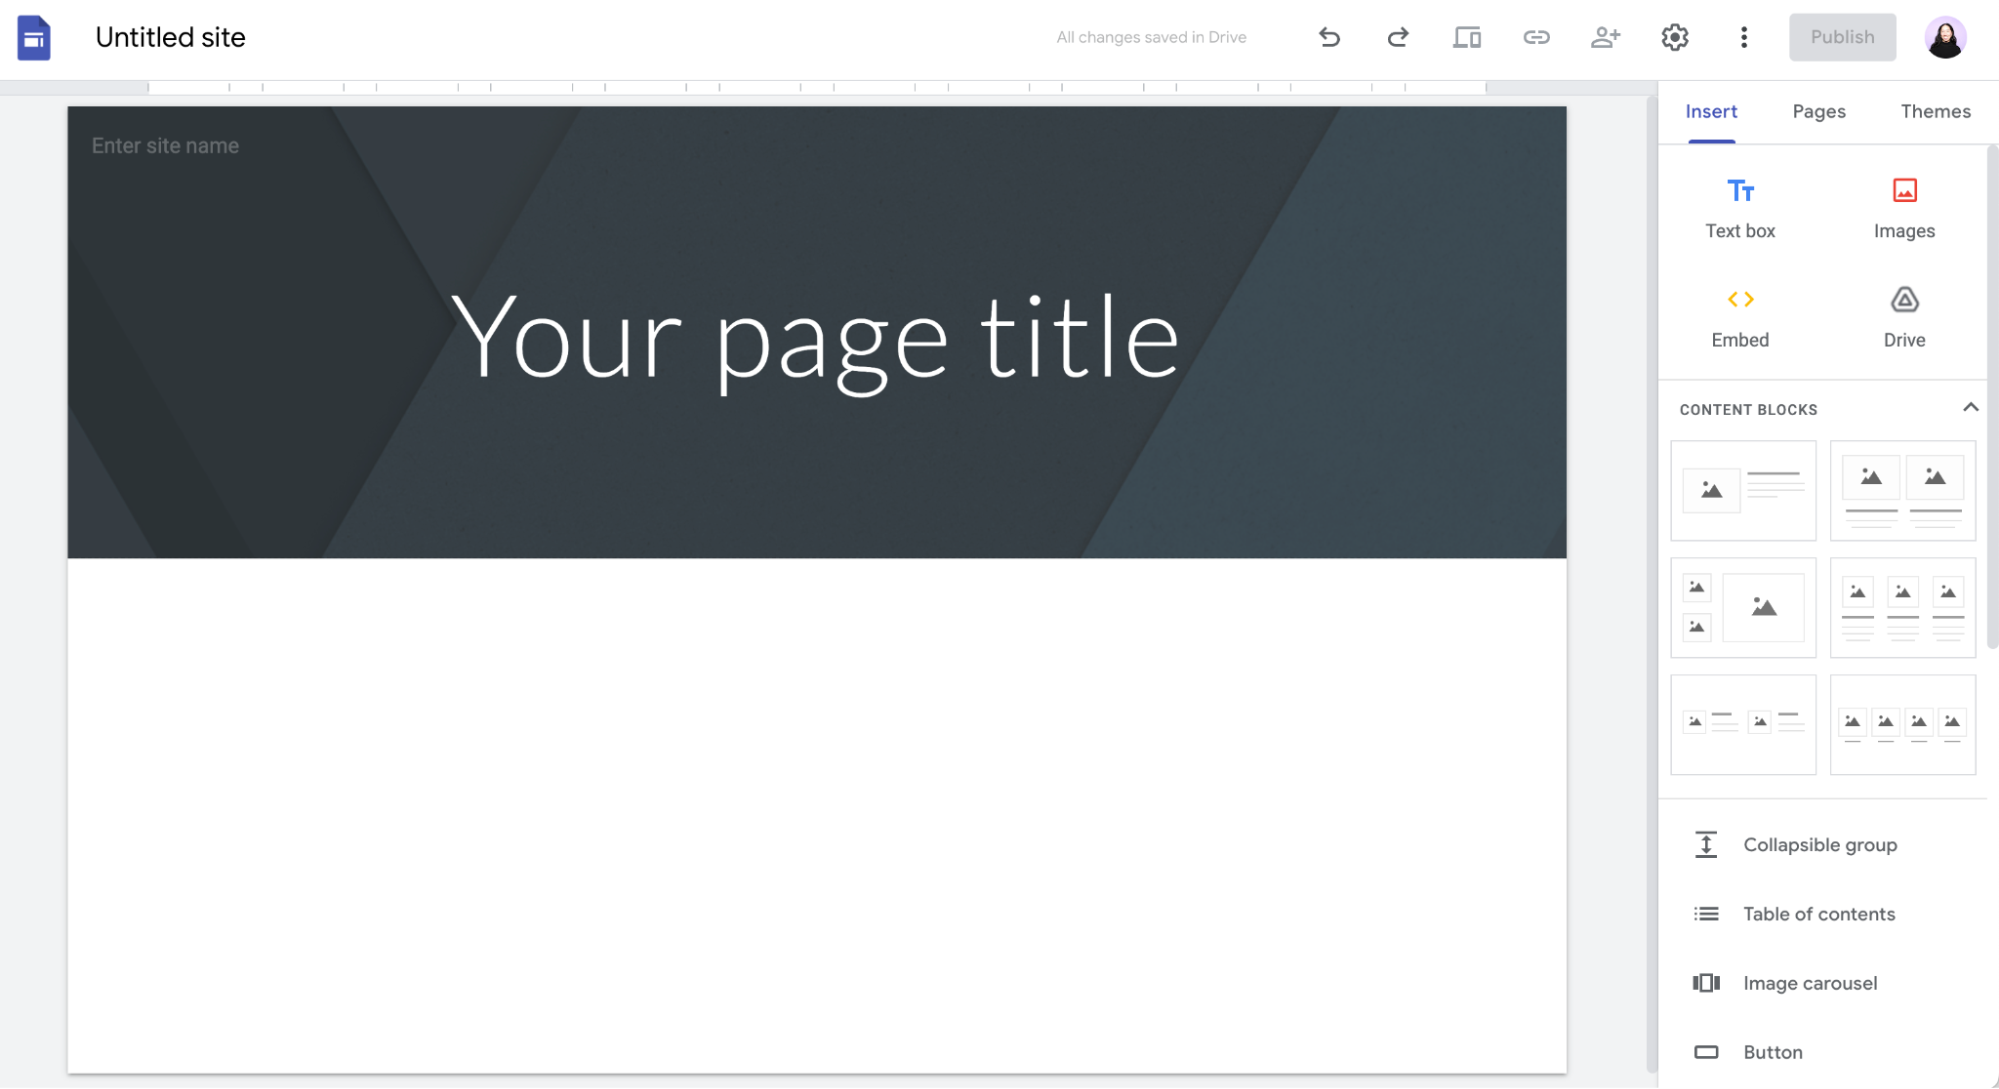
Now let's add and edit all the elements of a basic website. If you only need a quick refresher on how to manage a certain element, feel free to jump around. Otherwise, keep scrolling.
Note: At any point, you can click the Preview icon above the editor to make sure your site is appearing the way you want. Google Sites offers previews for large screens, tablets, and phones.
Create a header
The header is the menu banner at the top of most web pages—the spot where you might see a company's logo and a series of navigation tabs like About, Services, and Contact us.
Note: If you created a blank site, the header block in the editor allows you to change the site name, add a page title, and customize how the header appears. For most of the premade templates, your changes are limited to only editing the text fields and adding a logo.
Enter your site name in the Enter site name field. If you're working from a premade template, this might already have a name, like
Project Name, but you can change it. The name you enter here will also appear on your website.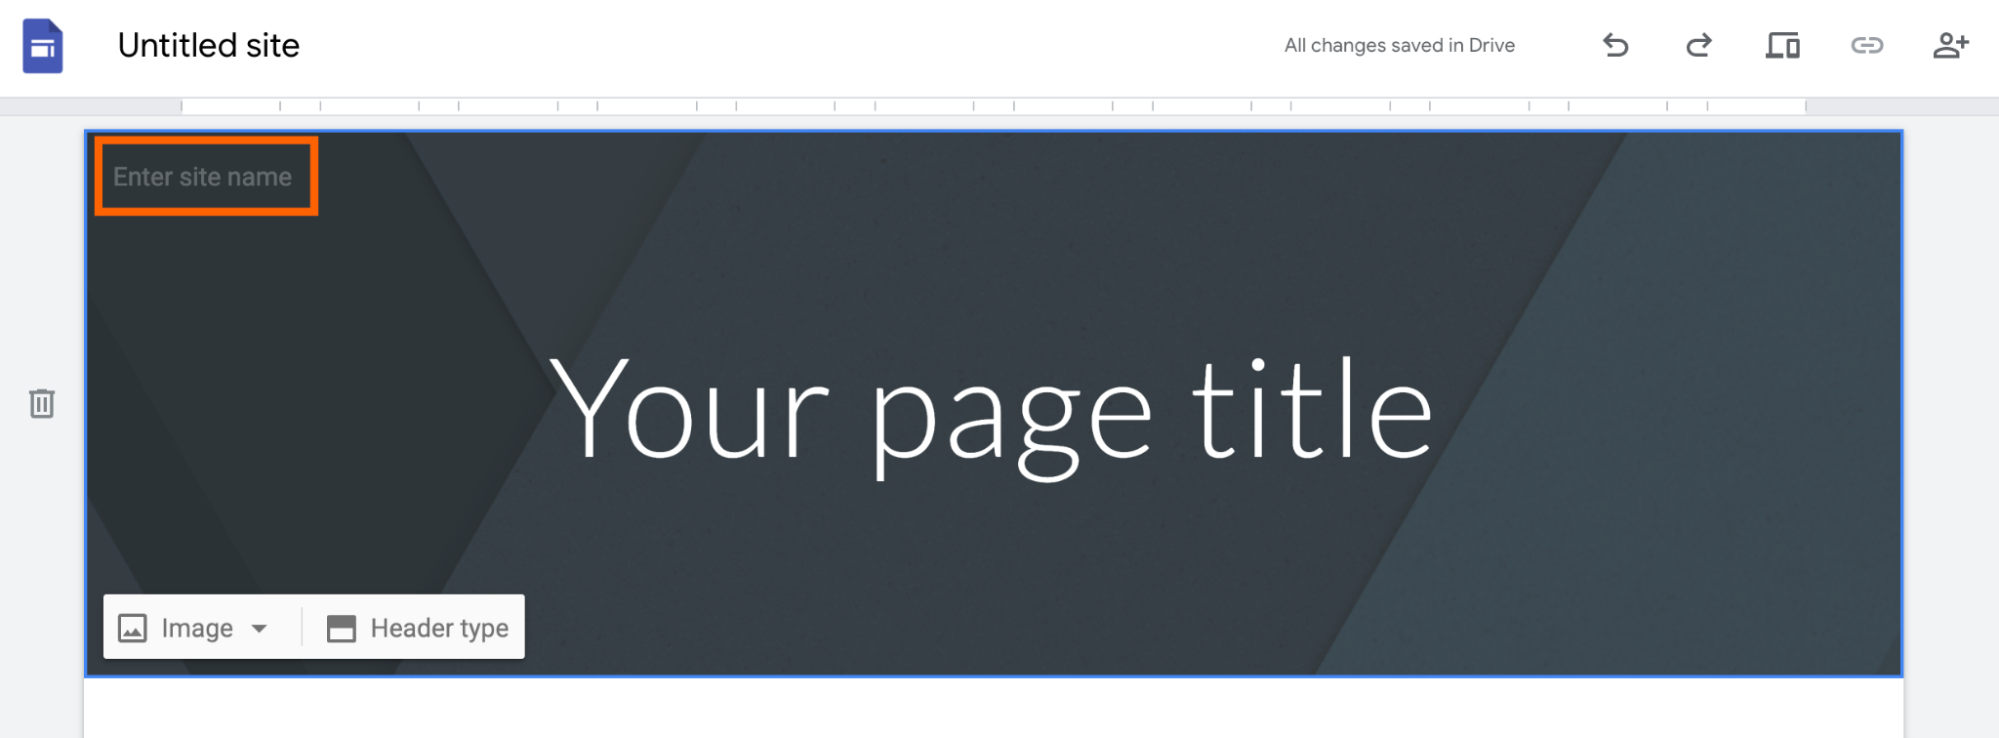
Click Header type, and select how you want your header to appear: Cover, Large banner, Banner, or Title only. The first three options present your background image in various sizes, while the last displays only header text.

If your header type includes an image, click Image to upload a background image. Note: Your Google Sites banner image can be any size and aspect ratio, but in my experience, 1600 x 1068 pixels works well.
To reposition your banner image, click the Anchor image icon, which looks like an anchor, to adjust your image. The editor will also automatically adjust your header image for better readability. I recommend letting the editor do its thing, but if you want to restore the original image, click the Remove readability adjustment icon, which looks like a series of stars.

To add a logo, hover over the site name and click Add logo. Google recommends uploading an image that's at least 112 pixels tall.
Click the header text to enter your header title and edit its style, size, font, and alignment. Or delete the box if you don't want any text. To reposition the text box, hover over any corner of the text box until a four-way arrow appears. Then drag and drop the box to where you want.

Choose a design theme
By default, the theme for a brand new Google Sites web page is simple—literally. That's the design theme name. Here's how to modify the theme to add a little personality or match your branding.
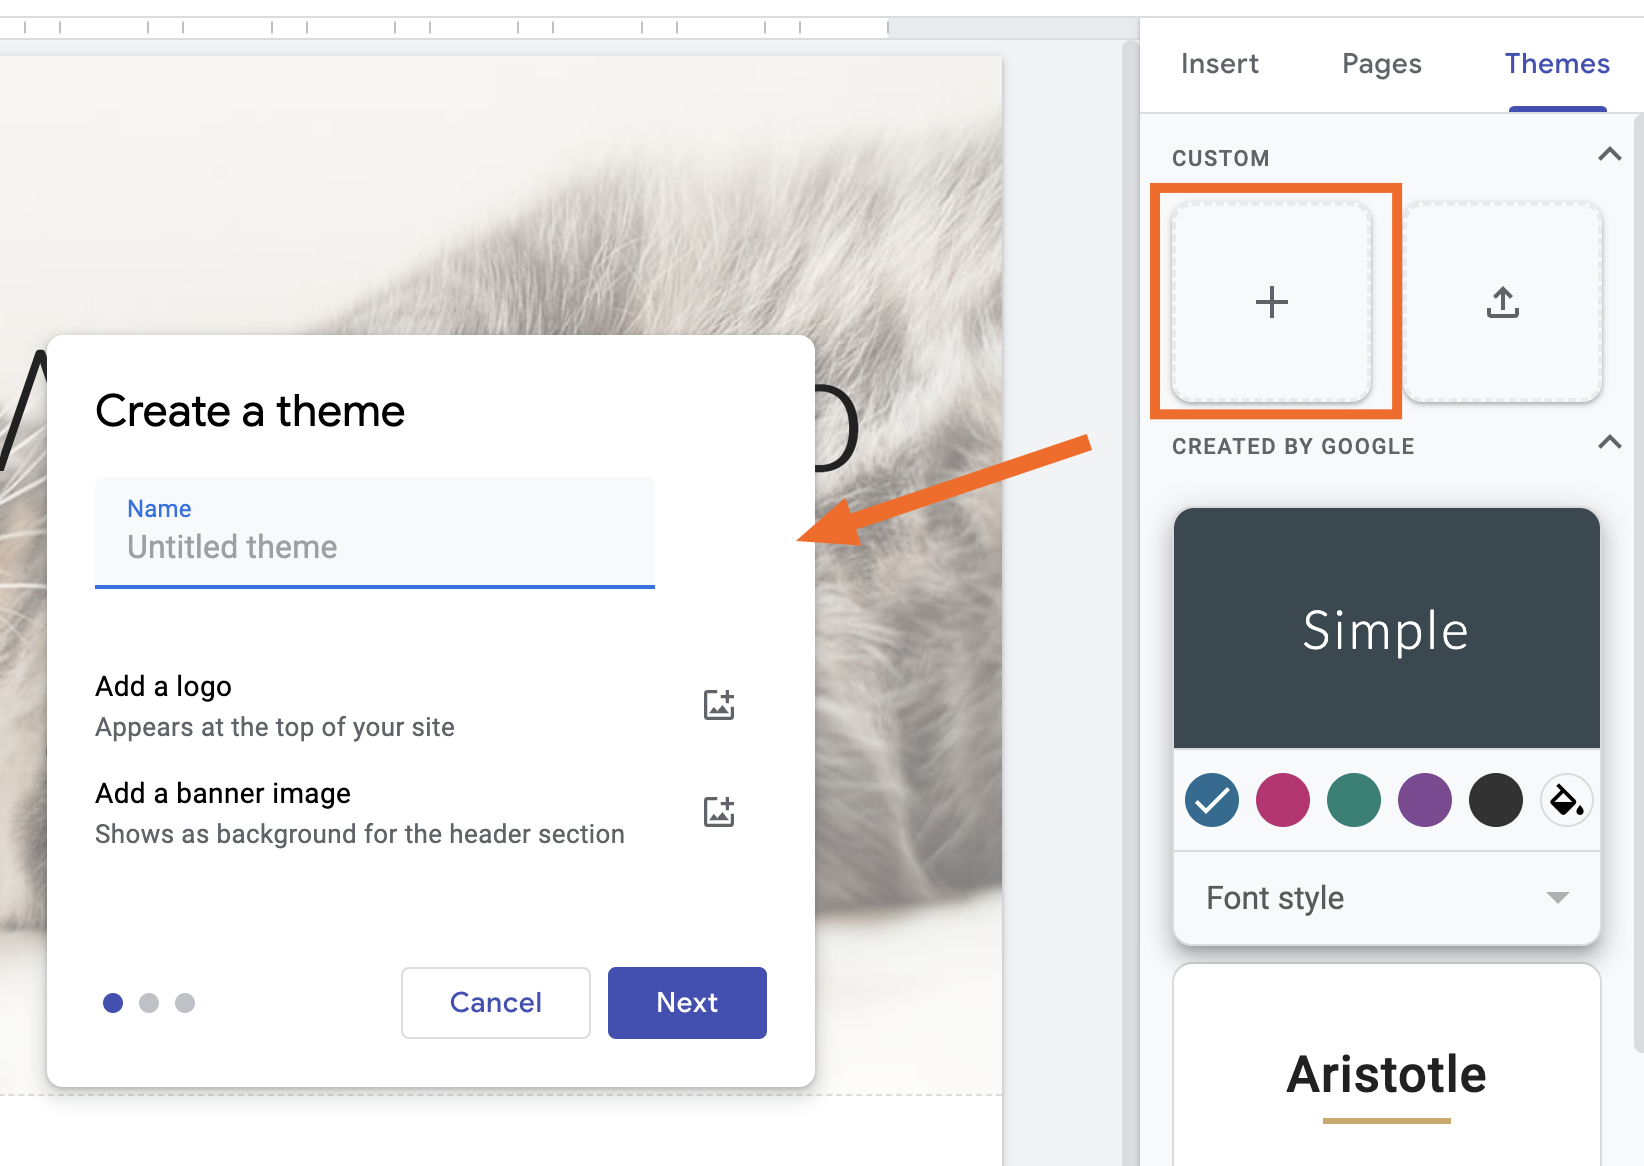
In the side menu, click Themes.
Click one of the other theme options. Each theme comes with a few preset color schemes and fonts.

If the five premade themes aren't cutting it, click the Create theme icon, which looks like a plus sign (+), to make your own theme. Google Sites will save these designs for later, too.
Add text and media
Time to dig into Google Sites's website-building elements. First, click Insert in the side menu to access all your options.

There are a lot of options, so let's review what each one lets you do.
Basic elements: The first set of elements lets you insert a text box and images, embed HTML code, or upload files from Google Drive. You can also access these options by double-clicking anywhere in the editor.

Content blocks: Drag and drop any of the prearranged blocks of text and images directly onto your page, which you can edit afterward.
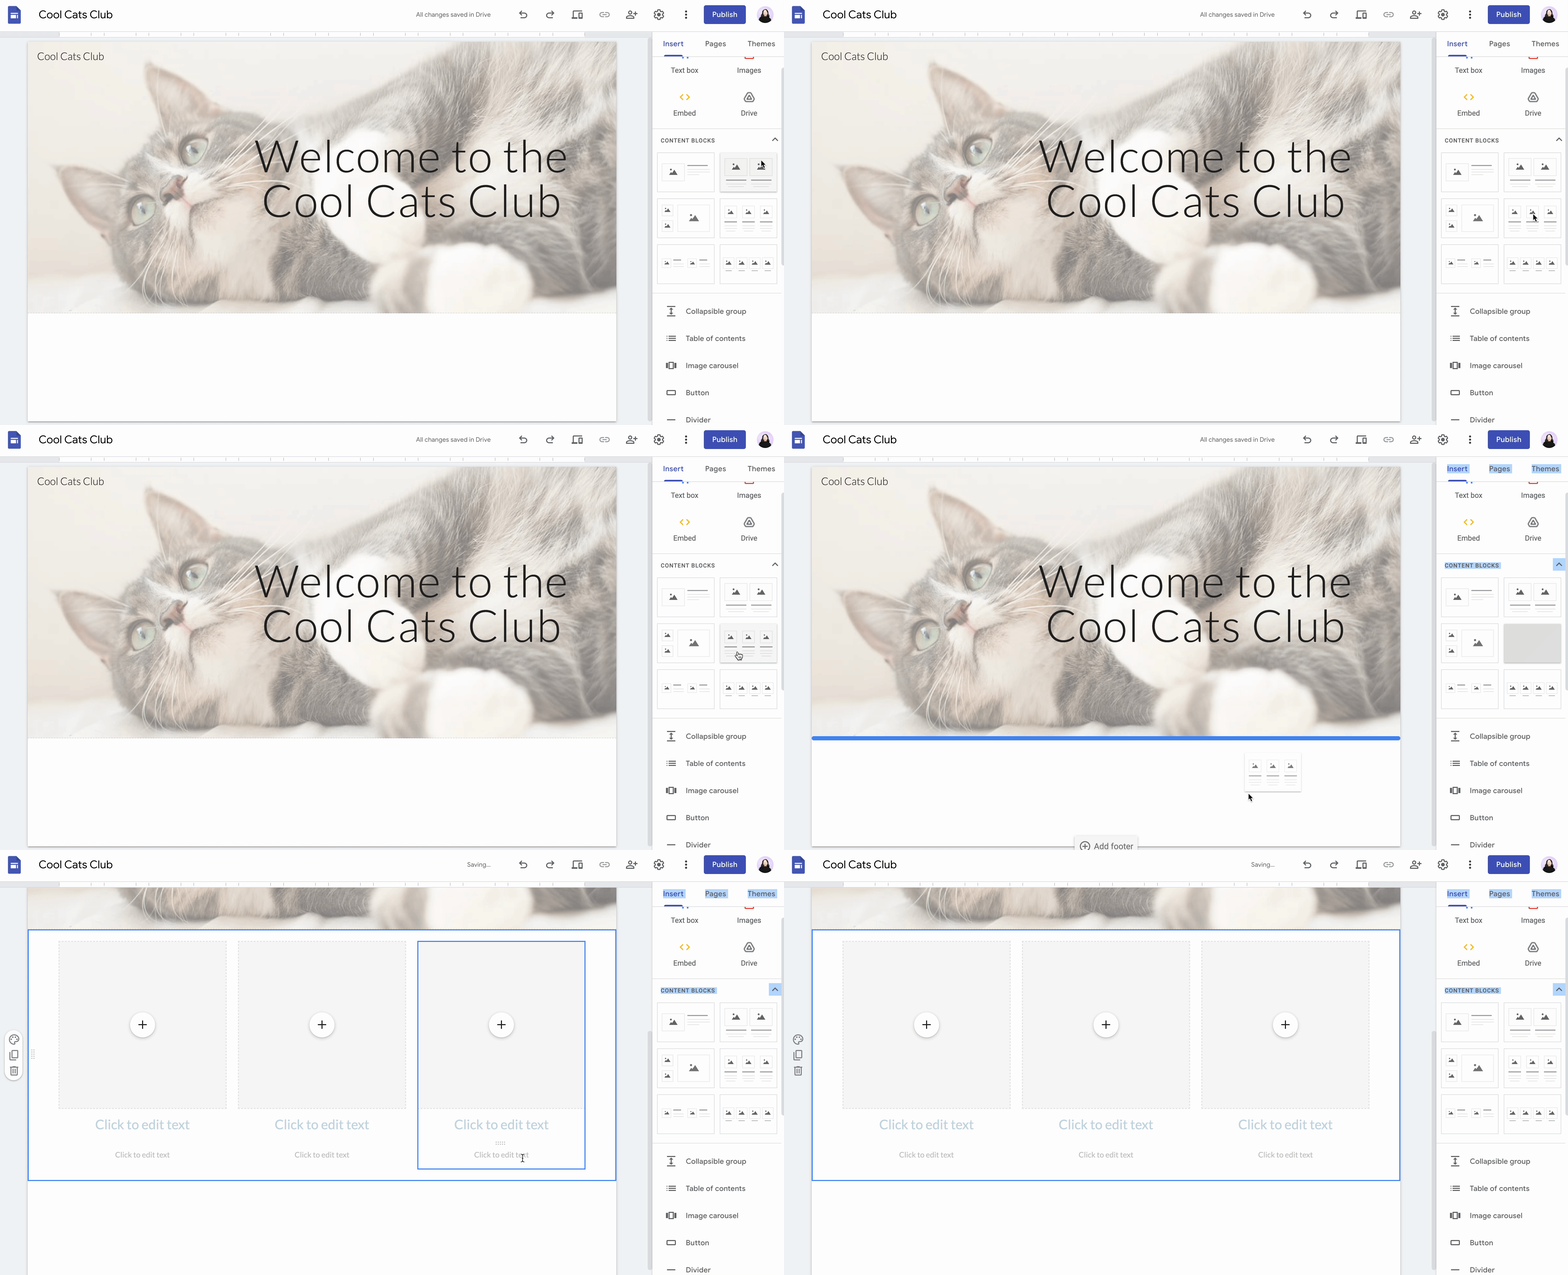
Collapsible group: Add a header with collapsible text lines underneath. If you don't want the text group to collapse, click the toggle next to Collapsible in the editor.

Table of contents: Automatically turn your page's section headings into a table of contents with clickable links that jump to the appropriate section. You can't manually add other section headings to your table of contents, but you can hide them. Hover over any section header, and click the Hide icon, which looks like an eye.
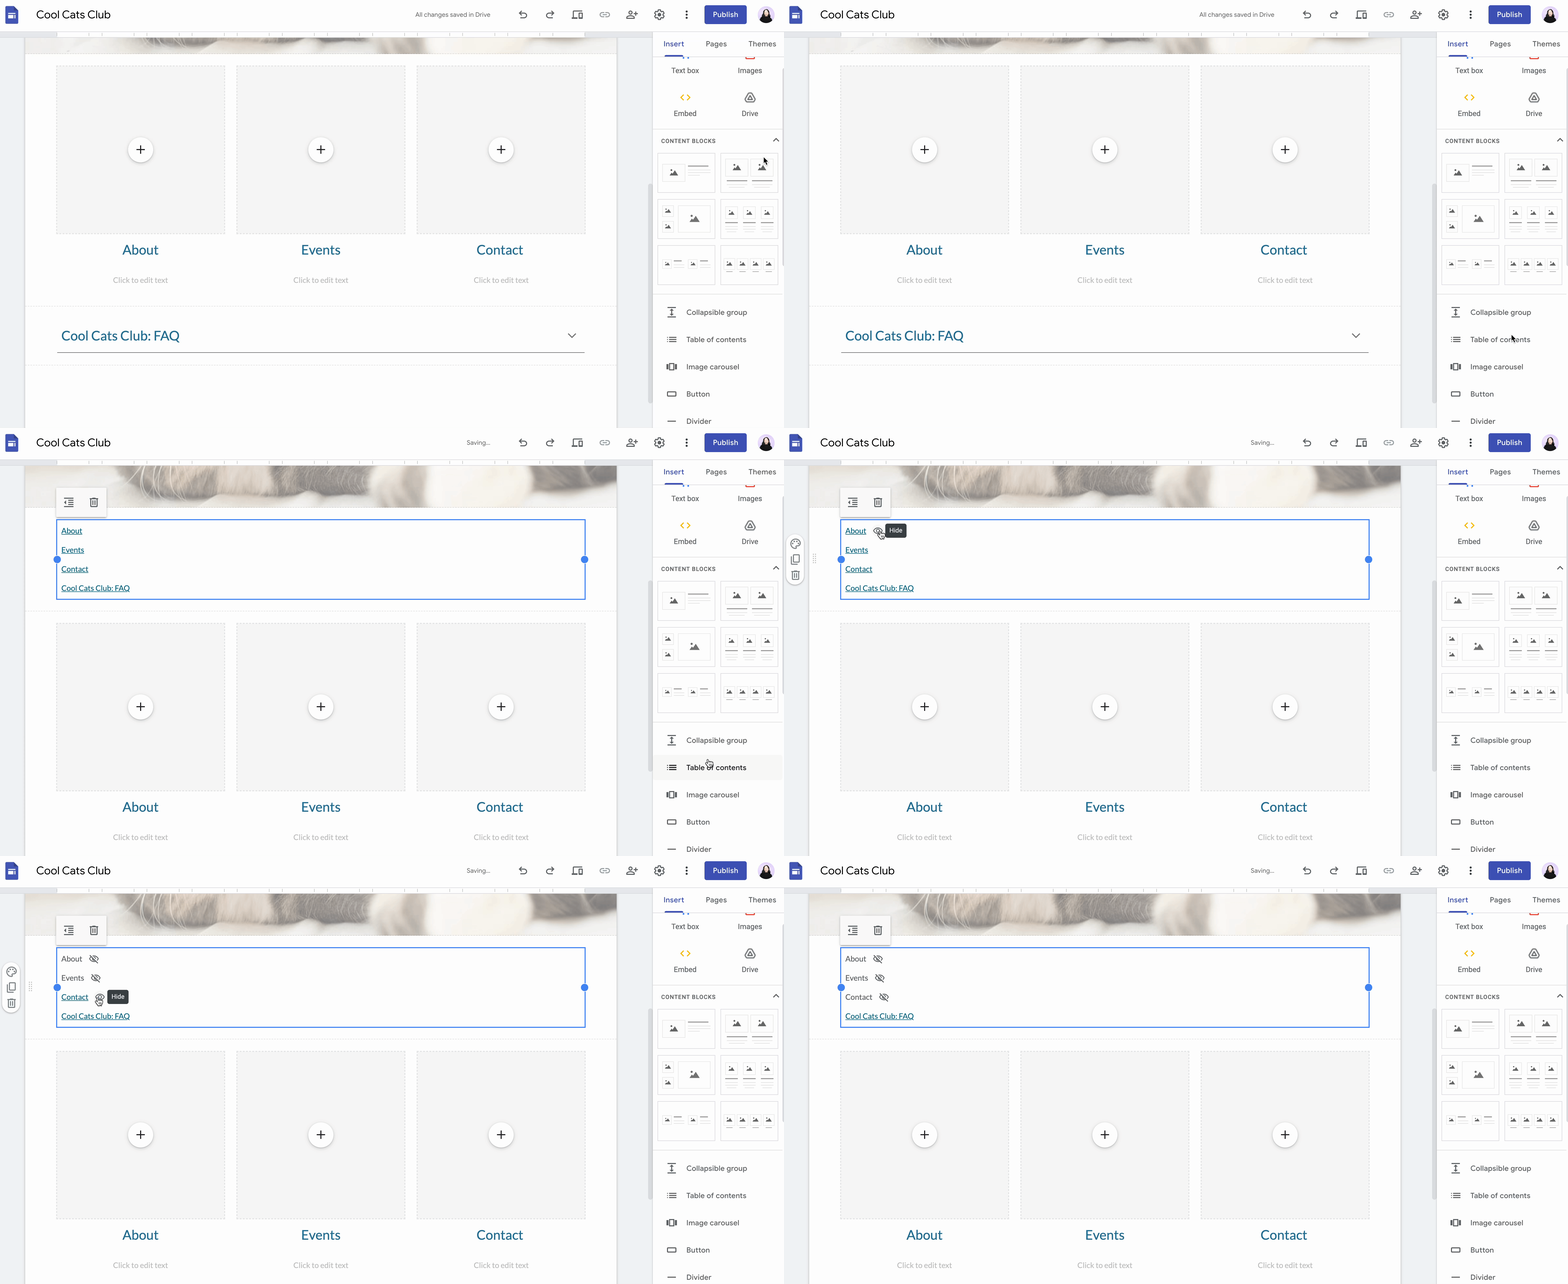
Image carousels: Upload two or more images to display in an image carousel.
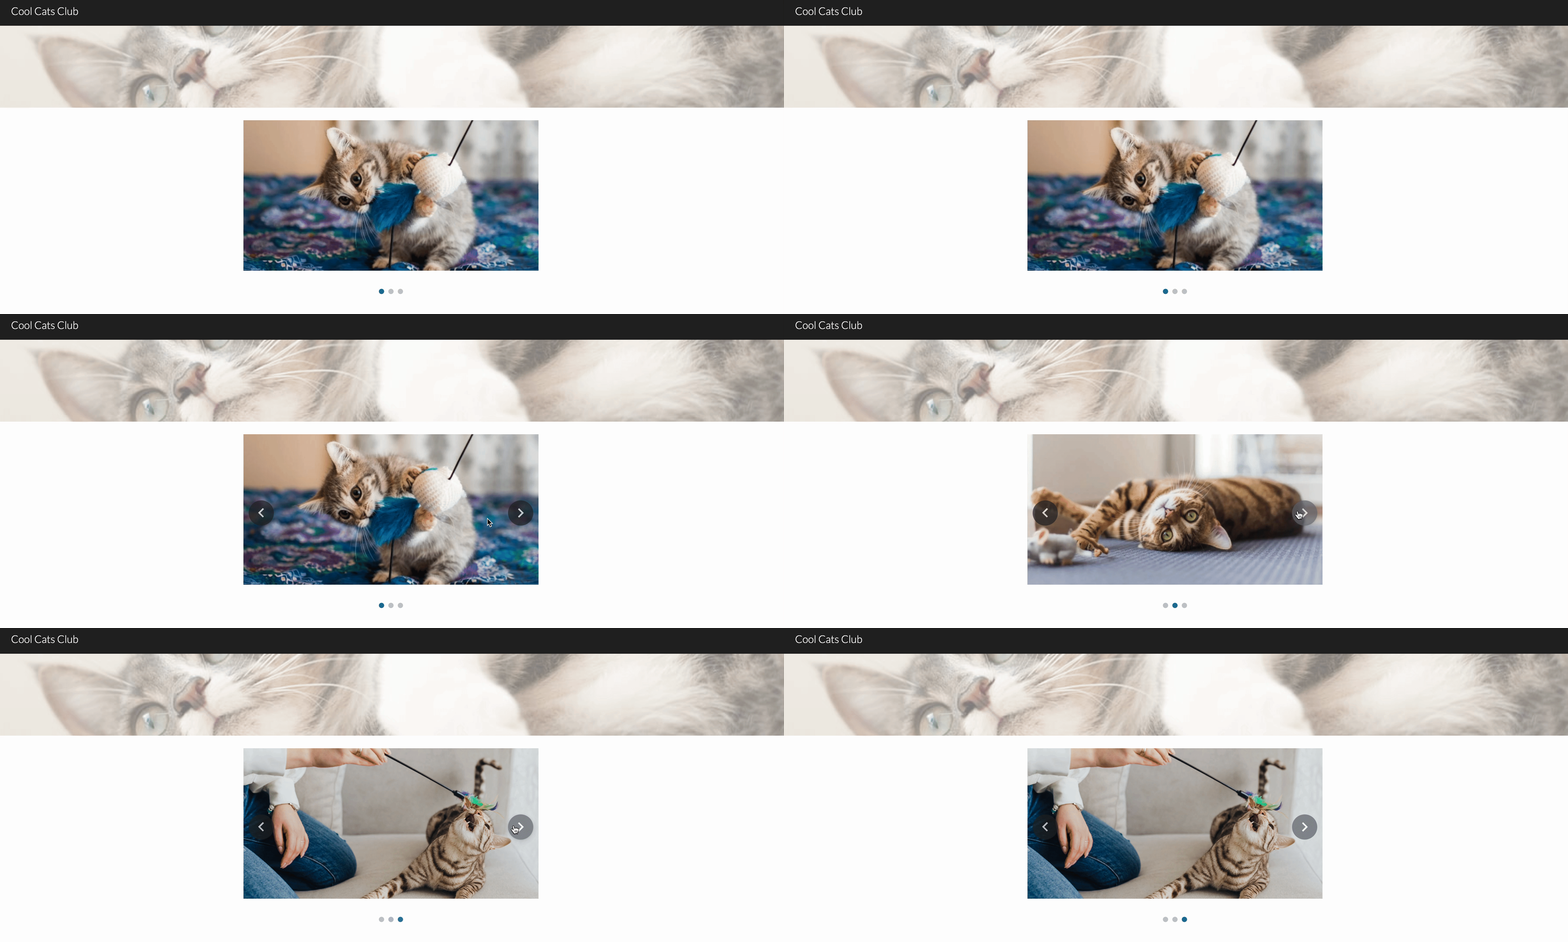
By default, users have to manually click through the photos. If you want the carousel to automatically cycle through, however, you can change this. Click the Settings icon in the Edit carousel window.

Click the checkbox next to Auto-start and select the Transition speed. Then click Update.

Buttons: Create a link button. By default, the button font and colors are automatically drawn from your design theme.
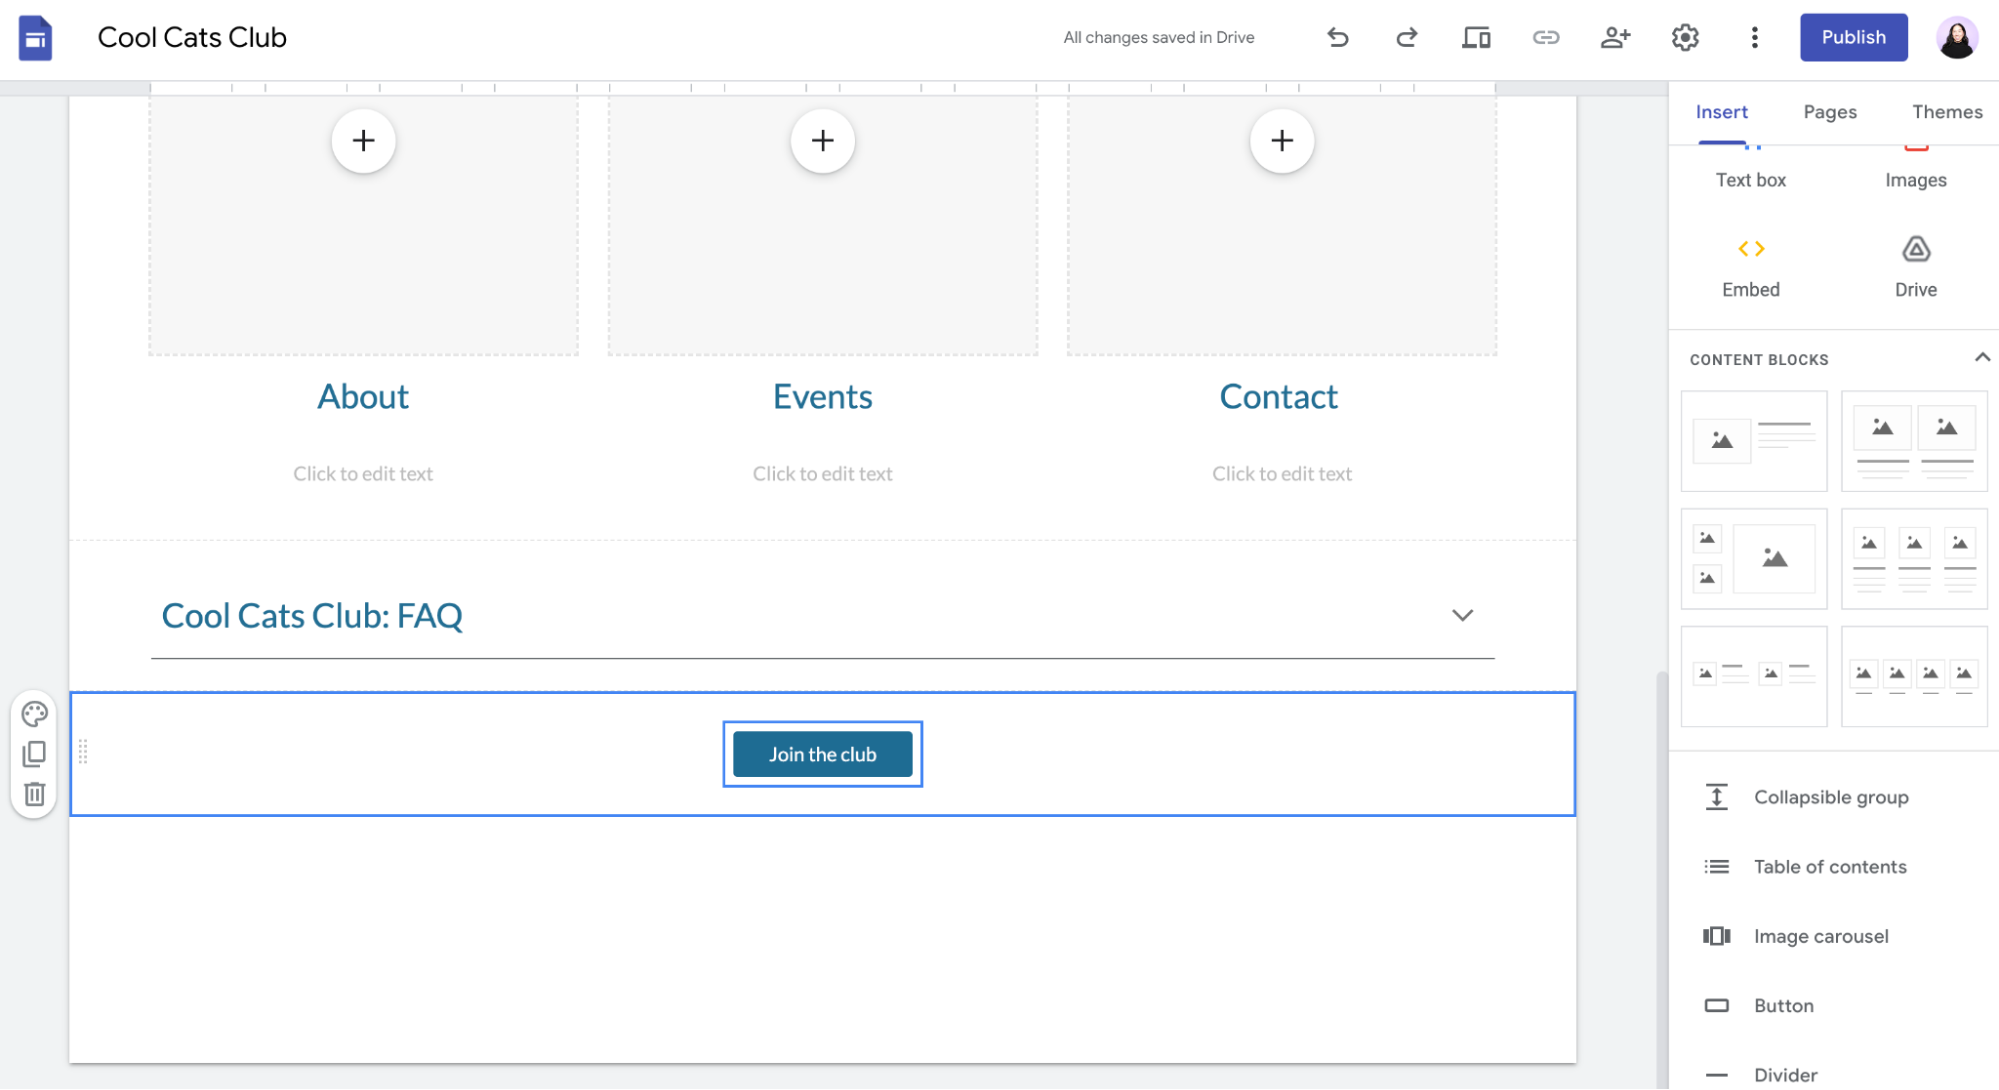
Dividers: This inserts a simple horizontal line onto your page. You can't edit the style in any way.
Spacer: This inserts a thick, rectangular block. To change the color—you have only three choices predetermined by your design theme—click the Section colors icon, which looks like a paint palette, next to the block. Then choose your style or upload an image.

Social links: Similar to button links, these allow you to add links to your social media pages. Let's say you add your Instagram profile. Google Sites will automatically use the Instagram logo as your button link. If you want to use a different design, click the Add image icon next to the Link field.

Accidentally remove a website element or add one too many? Press command+Z on a Mac or Ctrl+Z on Windows to undo.
Incorporate Google apps
It wouldn't be Google if it didn't integrate well with other Google apps, and sure enough, Google Sites lets you add content from other Google tools. With your Insert side menu still open, scroll down to access these interactive elements:
YouTube: Embed a playable YouTube video into your website.
Calendar: Share your calendar in weekly, monthly, and agenda views.
Map: Insert an interactive Google Map of the address you choose.
Docs, Slides, Sheets, and Charts: Add a Google file to your page in View mode.
Forms: Display a Google Form that visitors can fill out on your site. This is also a good option if you want to add a contact form.
Want to insert a contact form using a different app? Check if your form app or scheduling app offers an embed code. If it does, add it to your page by clicking Embed in the Insert side menu.
If you incorporate Google apps into your website, use Zapier to connect your Google apps with your other apps. This way, you can automatically do things like follow up with someone after they submit a form or add their responses to a spreadsheet. Learn more about how to automate Google apps, or get started with one of these workflows.
Send email via Gmail for new Google Forms submissions
Add Google Sheets rows for new Google Forms responses
Quick add events to Google Calendar from new Google Forms responses
To get started with a Zap template—what we call our pre-made workflows—just click on the button. It only takes a few minutes to set up. You can read more about setting up Zaps here.
Arrange and edit columns and sections
How to arrange columns and sections
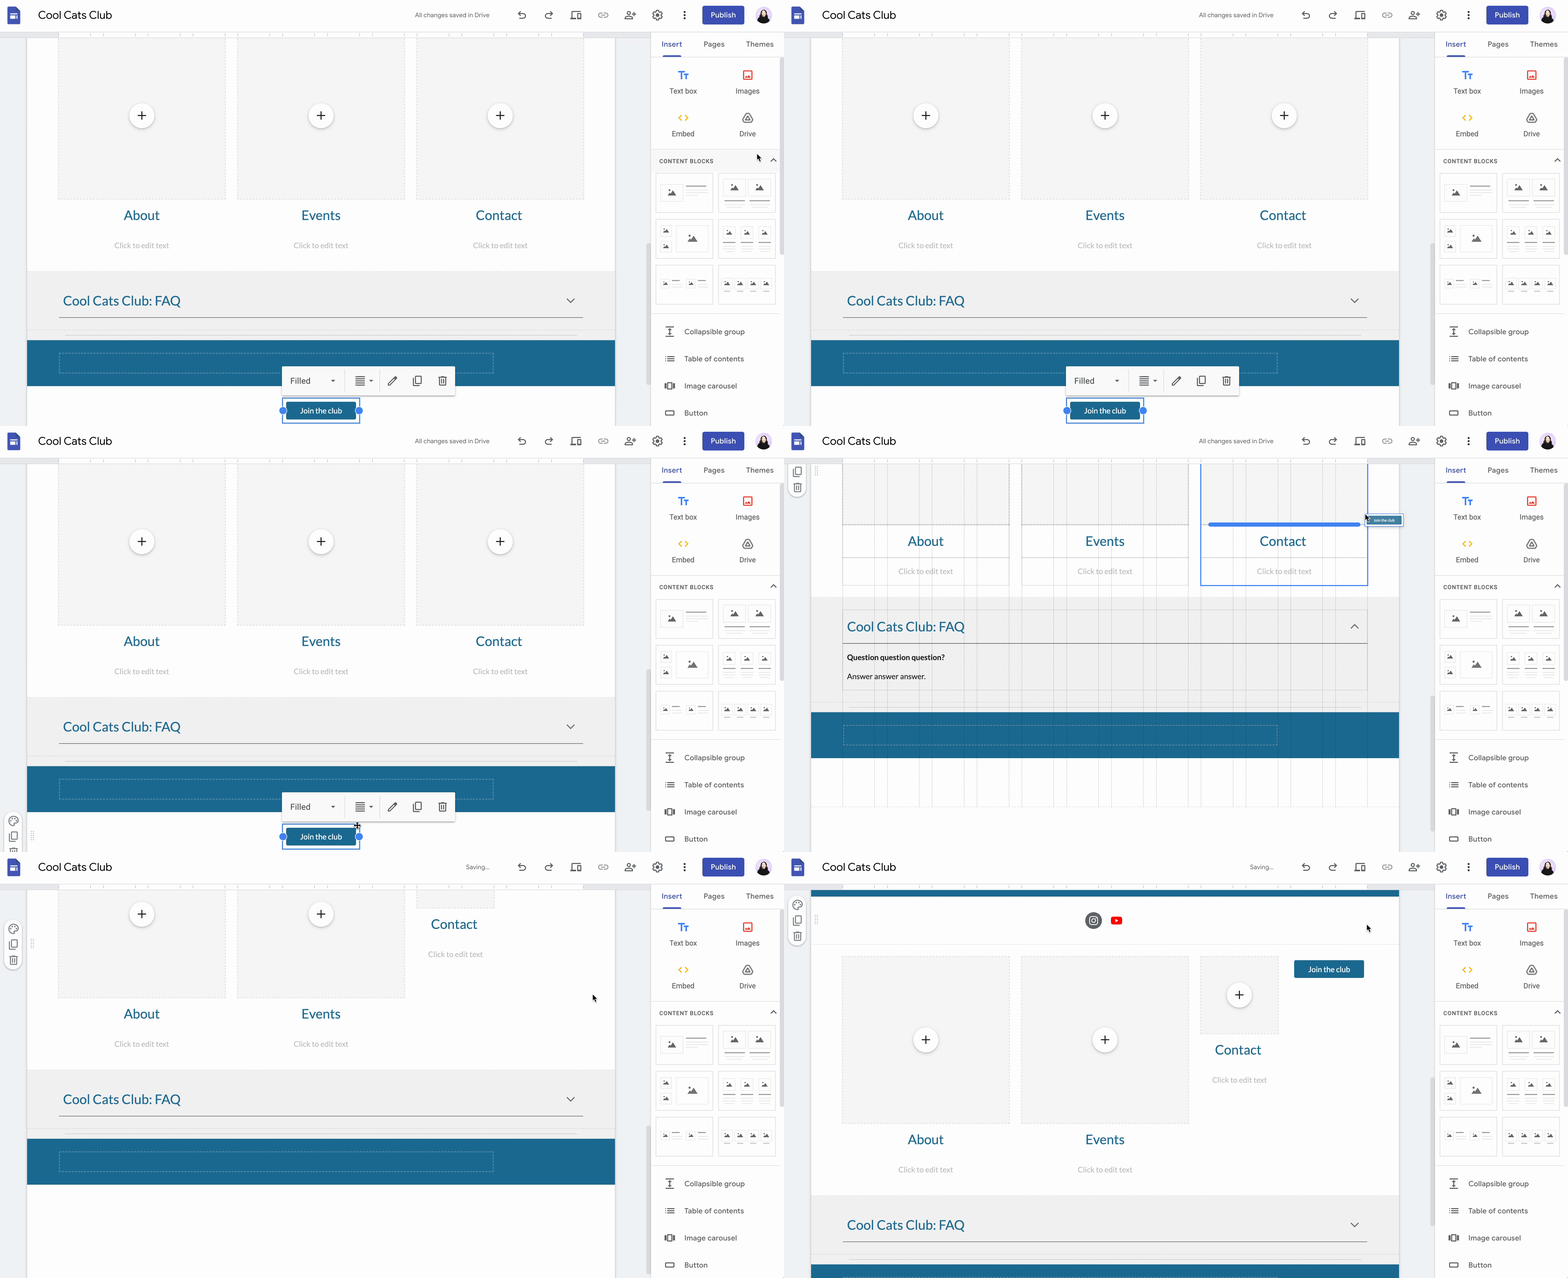
As you add new elements, they automatically appear at the bottom of your page. To reorder them, drag and drop them to wherever you want. You can even drag them next to existing elements to create columns.
How to edit columns and sections
For the most part, you have the option to resize any element as you see fit. Some elements, though, like a collapsible group, let you only change the width of the box—not the height.
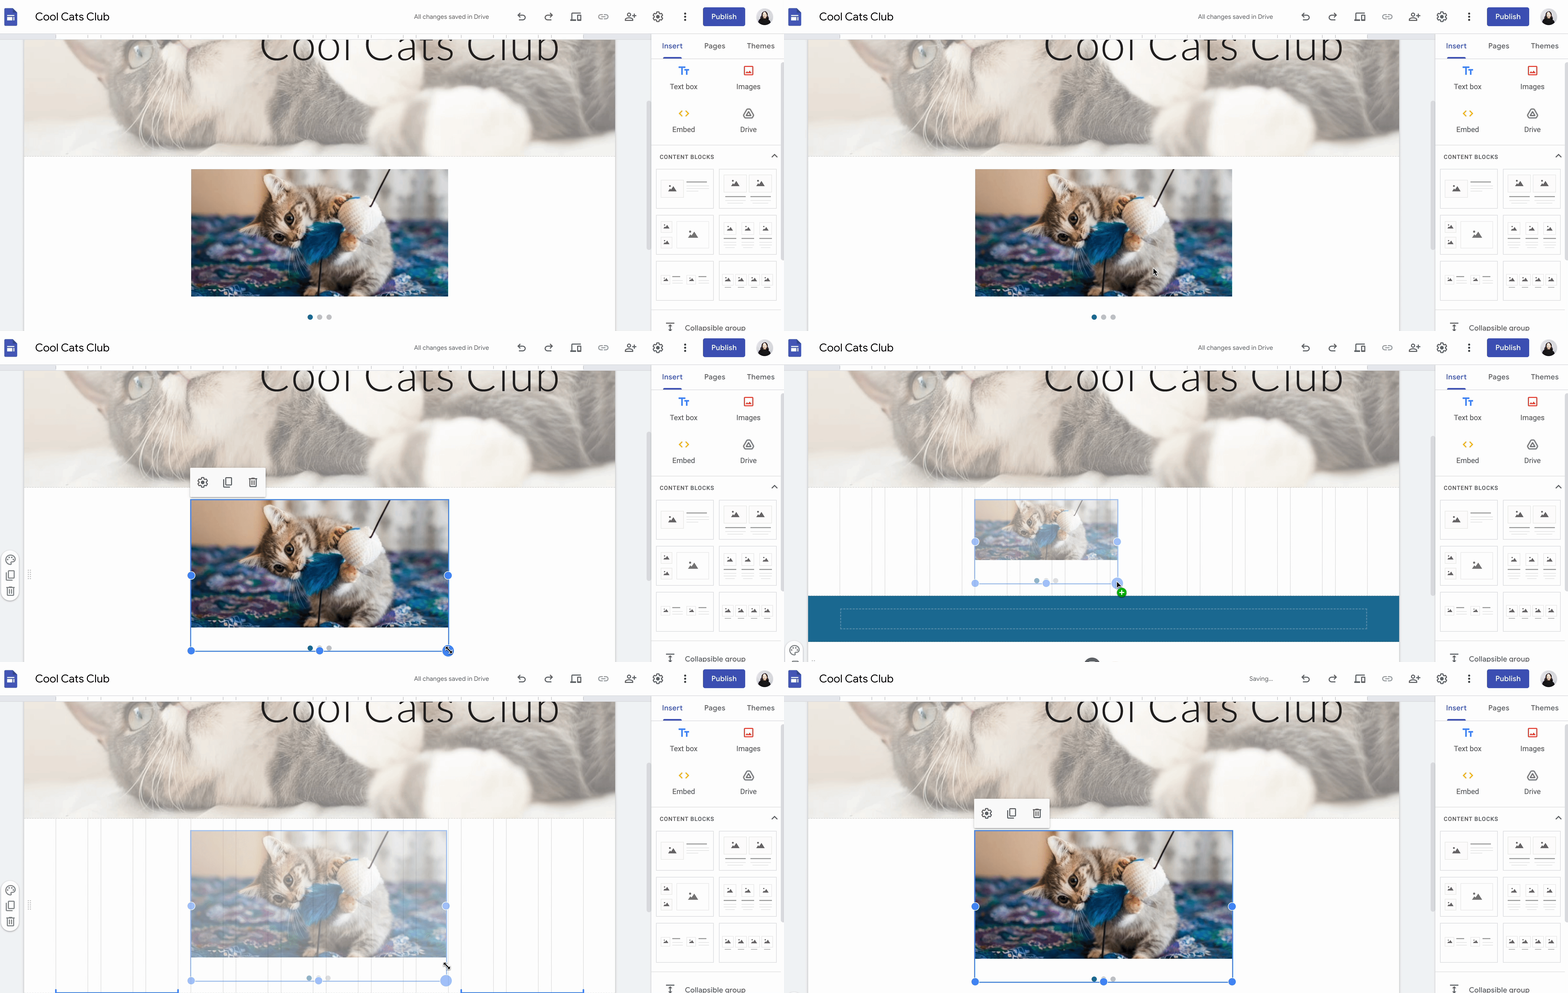
To resize an element, select it, and then click and drag any of the blue dots in the element border.
To keep your images in their original aspect ratio, hold Shift, and then drag a corner to resize it. As you resize an image, you'll notice vertical gridlines appear on the page which is helpful for aligning elements on your page.
Hover over any section block, and you'll also notice a floating toolbar that lets you change the section's background color, duplicate it, or delete it. I recommend switching up the background colors to add emphasis and break up any visuals.

Add and manage pages
Click Pages in the side menu.
Click the plus icon (
+), and then click New page. The plus icon also lets you add a new link, full page embed, or new menu to your header block.
By default, new pages get added as a separate page. To change it to a subpage, drag and drop it above the parent page. In the example below, I moved the From a human and From the cats pages to live under Blog.

Alternatively, click the vertical ellipsis (⋮) next to the parent page, and select Add subpage. From this menu, you also have the option to make the page your homepage, duplicate it, hide it from the menu, or delete it.
Notice that as you add or modify pages, the changes automatically appear on your page in the editor.
Publish and collaborate
How to collaborate in Google Sites
In classic Google fashion, it's easy to collaborate on your site with others. Click the Share with others icon, which looks like a person, above the editor. From here, you can add others and set their permissions (view only or editor) or manage permissions for general access.

Unlike other Google apps, it's not obvious how to access your website's version history, which is important—especially if you have multiple editors and need to roll back to a previous version. Click the More icon, which looks like a vertical ellipsis (⋮), above the editor, and select Version history.
How to publish a site on Google Sites
Ready to share your work?
Click Publish above the editor.
By default, your web address will include the Google Sites domain. For example,
https://sites.google.com/view/website-name. But you can modify the end of the URL (website-name). Enter this in the Web address field.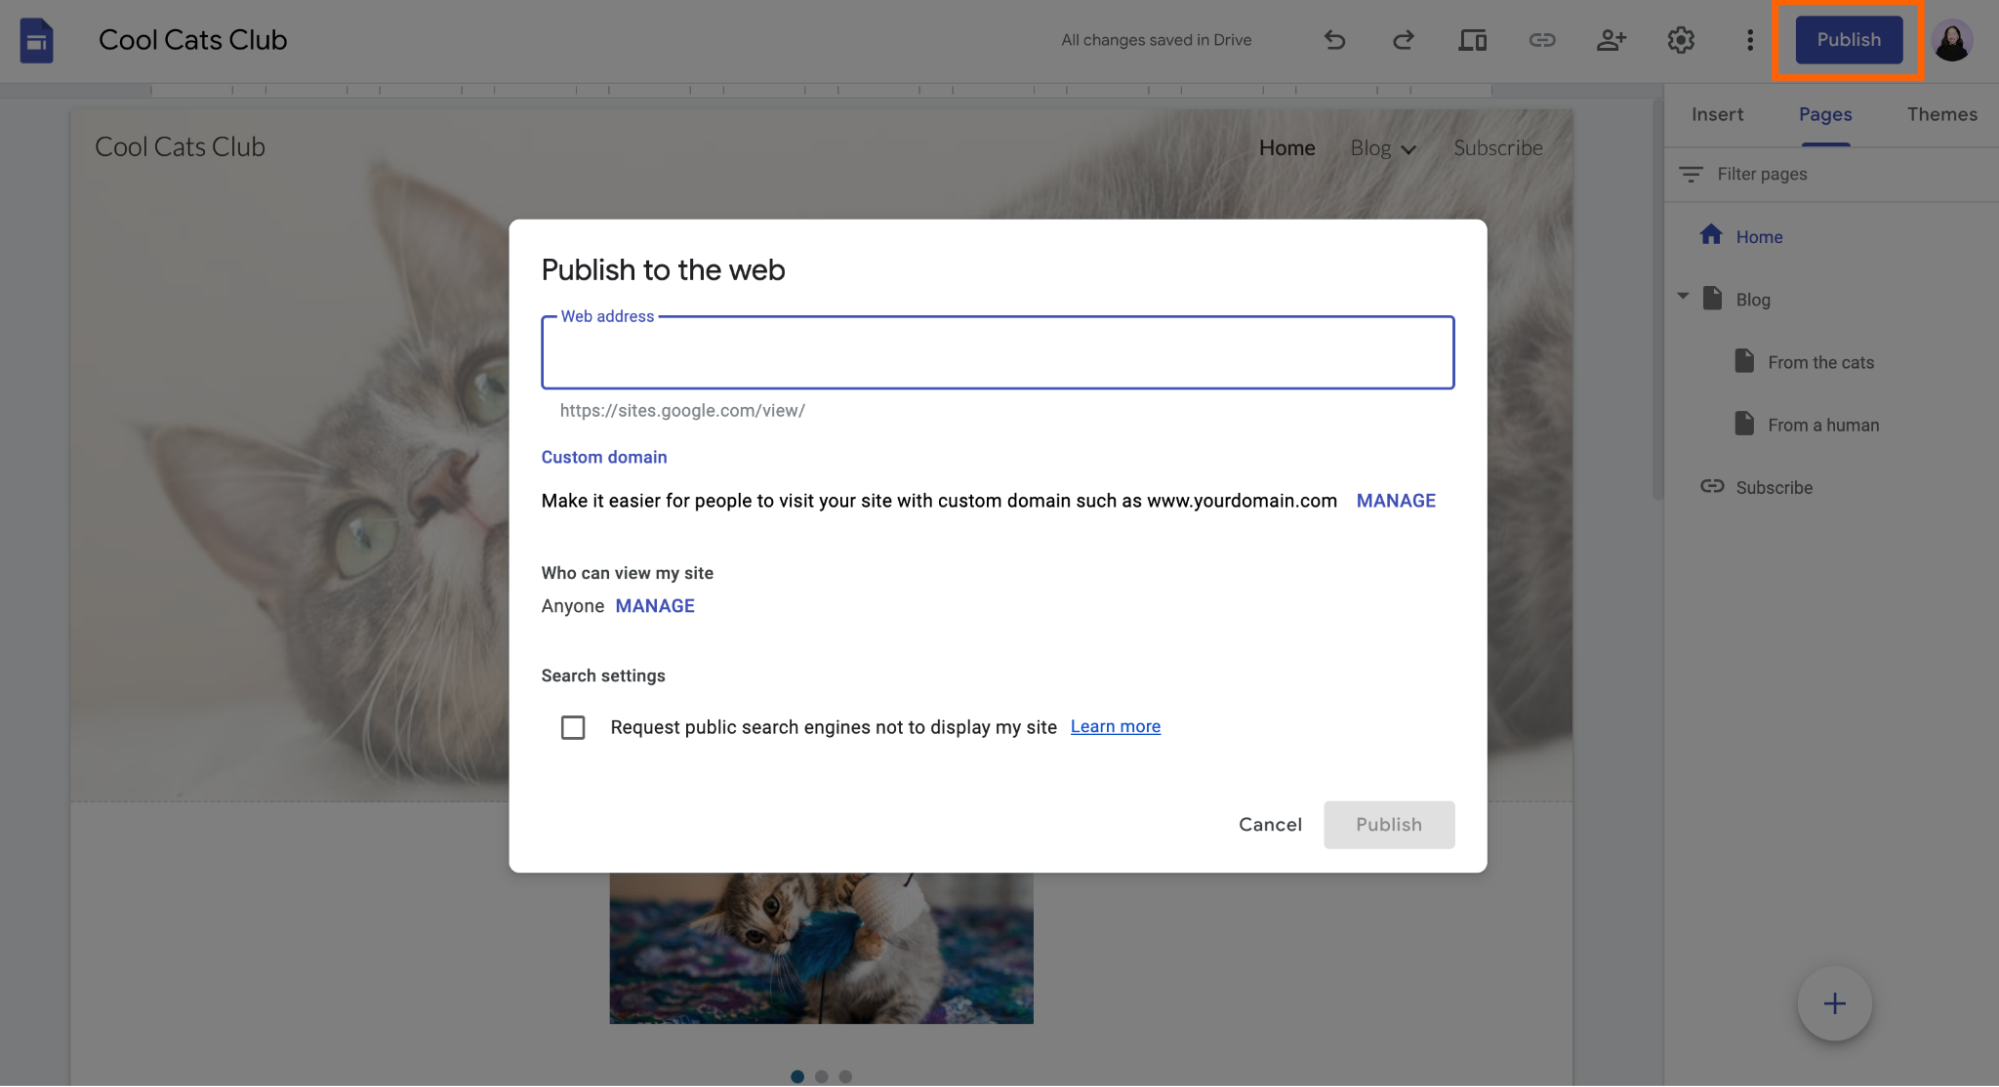
Alternatively, click Manage in the Custom domain section to create a custom domain.
Optionally, if you want to limit site access to certain people, click Manage in the Who can view my site. You can also hide your website from Google search results. To do this, click the box next to Request public search engines not to display my site.
Click Publish.
If you make changes to your site down the road, be sure click Publish to ensure the changes go live. Whenever you re-publish a site, Google Sites will show you the differences between your new edits and the currently published site.
How to use Google Sites: FAQs
Can I have a custom domain in Google Sites?
Yes, you can set up a custom URL in Google Sites. To modify your Google Sites domain registration, click the Settings icon above the editor, and then select Custom Domains.
If you plan on using your Google Site for professional purposes, a custom domain will give it extra polish. Plus, it's pretty cheap to get a .ca or .com one—about $12 a year.
Your domain extension—such as .com or .org—matters. Not sure which one you should use? Here are the best domain extensions for your business.
Does Google Sites have widgets?
Google Sites doesn't have widgets outside of its Google apps options, but you can add any outside option with an embed code. Look for an Embed or < > option for the widget.
Note: The embed feature in Google Sites uses only HTML code.
How does Google Sites compare to other CMS platforms?
If you put Google Sites against other popular CMS platforms, it won't stack up. But if you need to create a simple site, it offers enough features to get the job done.
If you want to explore other options, check out our list of the best free website builders or the best landing page builders.
Not into it? Try a different website builder
If Google Sites is the first free website builder you've tried, give others a shot to see what features you prefer. To speed up the whole process, try an AI website builder. Or, if you want to build a site to sell your homemade goods, check out our roundup of the best eCommerce website builders.
Related reading:
This article was originally published in March 2018 by Matthew Guay and has also had contributions from Melissa King. The most recent update was published in January 2024.
