If you've run Facebook ads with Facebook Lead Ads, then you've probably realized Facebook doesn't natively send notifications to your email whenever a person fills out your lead form. Instead, you have to sign into the back end of your Facebook Business Management Account and manually check your Leads Center.
This isn't a problem if your company can hire a dedicated person to constantly check and follow up on new leads before they grow cold. But it's not realistic for most small companies. This is where connecting Facebook Lead Ads to Gmail with a Zap—Zapier's automated workflows—can come in handy.
But while this may work well for smaller-scale operations, if you're dealing with a larger volume of leads—like we do with our growth marketing company—you may need an option that provides a bit more customization. Here's what worked for our marketing agency.
Why using Gmail didn't work
At Dusk Digital, we work with several smaller businesses that don't use a CRM to handle and distribute their leads. They prefer we send new leads from Facebook Lead Ads directly to their Gmail inboxes instead.
We first connected Gmail to Facebook Lead Ads but started getting feedback from our clients that it just wasn't working. Here's why.
One of our clients didn't like getting the lead form info sent from my business email. "Could we change the sender on the lead emails we get from Facebook? It looks unprofessional when I forward the leads to the sales team?"
Here's what he was getting in his inbox:

Another client found it just didn't fit their way of organizing their inbox.
"Hey Caleb, the Facebook campaign is doing great but is there a way that you could change the sender of the email? I usually do a quick count of the leads that are coming every month by searching your email in the search bar of my email account. This will also include our conversations, so I have to pick through the results to get my lead count. Could we reroute it through another address only for sending the leads?"
While I could suggest a CRM integration to help them organize, they didn't want to change their internal processes.
Not being able to change the sender in this Zap was giving us organizational issues as well. We had many campaigns for other clients, and keeping track of the leads in our inbox was getting out of control. If we filtered the leads by keywords in our inbox, then we were also getting email threads that we didn't want to show up.
Our Solution: Using Email by Zapier
The solution turned out to be simple. We just swapped using our Gmail account with Email by Zapier. Now, for each client, we set up a new Zap connecting their Facebook Lead Ads account with Email by Zapier.
This enabled us to use a no-reply Zapier email as the sender with a custom name for the "display name." This setup looked more professional and was easier to filter in our email inboxes.
How to connect Facebook Lead Ads to Email by Zapier
If you run a marketing agency and many Facebook Ad campaigns or just want a cleaner way of managing Facebook Lead Ads in your email, give our workflow a try.
Facebook Lead Ads is a premium app—available on Zapier's paid plans. Learn more about premium apps.
Want to get started quickly? Try a Zap template—Zapier's pre-built workflows. Just click on the Zap template below to get started. You'll need a Zapier account if you don't already have one.
Or you can follow the steps below to set it up yourself from scratch.
Set up your trigger
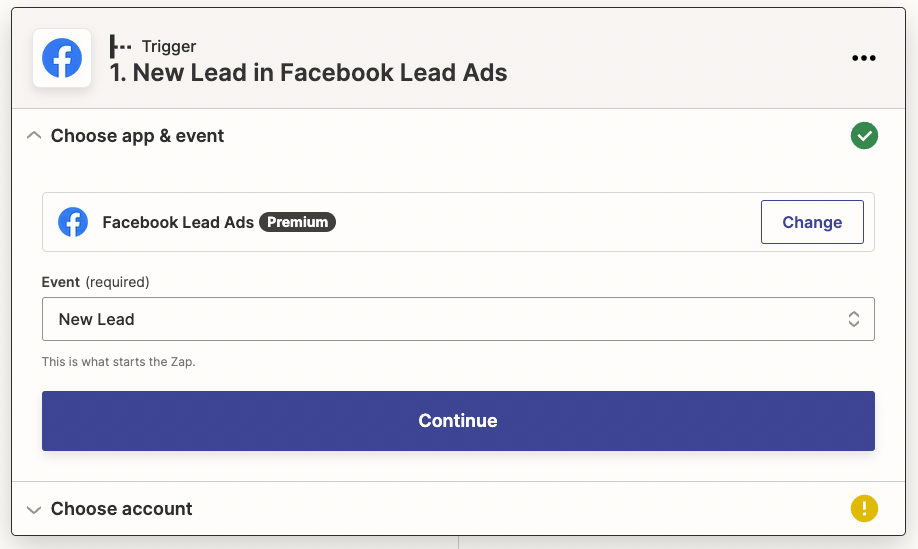
First, you'll need to set up your trigger, which is the event that starts your Zap. Search for and select Facebook Lead Ads for your trigger app and New Lead for your trigger event.
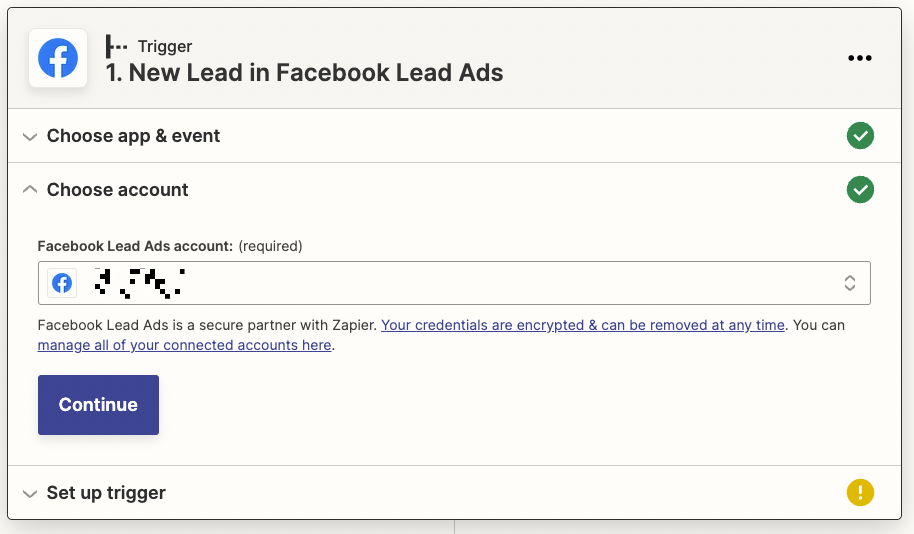
Next, connect your Facebook Lead Ads account by selecting your Facebook account from the dropdown or connecting your account if you haven't already. Then click Continue.
Next, select the Facebook page and Facebook Lead form you want to use in your Zap. When you create your Facebook campaigns, you can create and name different lead forms. You can search for the correct form by name or use any form in your account.
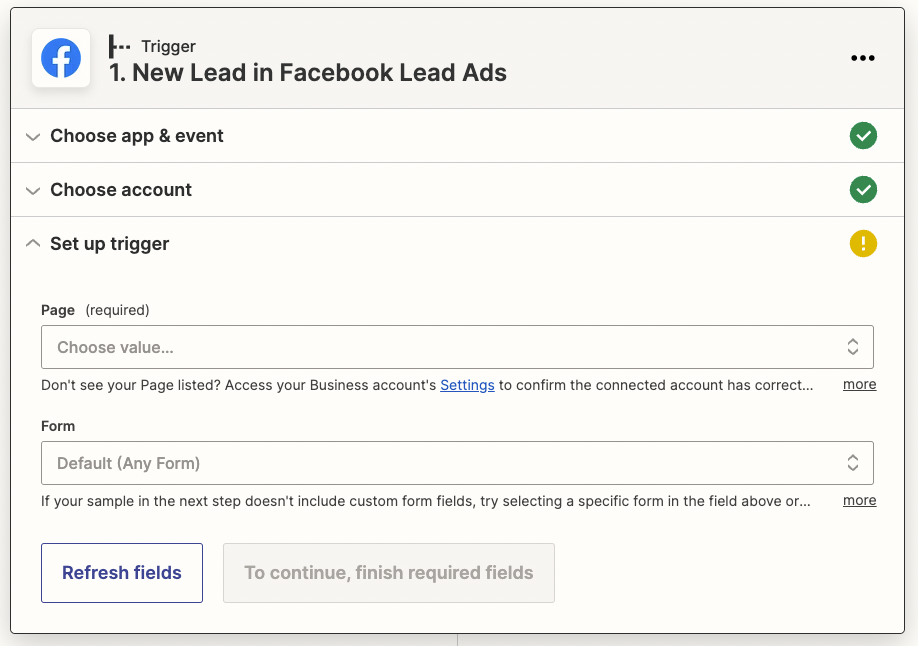
Click Continue. Now you need to test your trigger. Zapier will find a recent result in your Facebook Lead Ads account for the lead ad and form you selected earlier. This will be used to set up the rest of your Zap.
If you don't have any lead data, you'll need to create a sample lead to test your Zap.
Test your trigger step, and click Continue once you see that your trigger is working properly.
Set up your action
Next, you'll set up your action, which is what your Zap does after it's triggered.
Search for and select Email by Zapier for your action app and Send Outbound Email for your action event. This is where the magic happens because this action allows you to send an email from a custom zapiermail.com address.
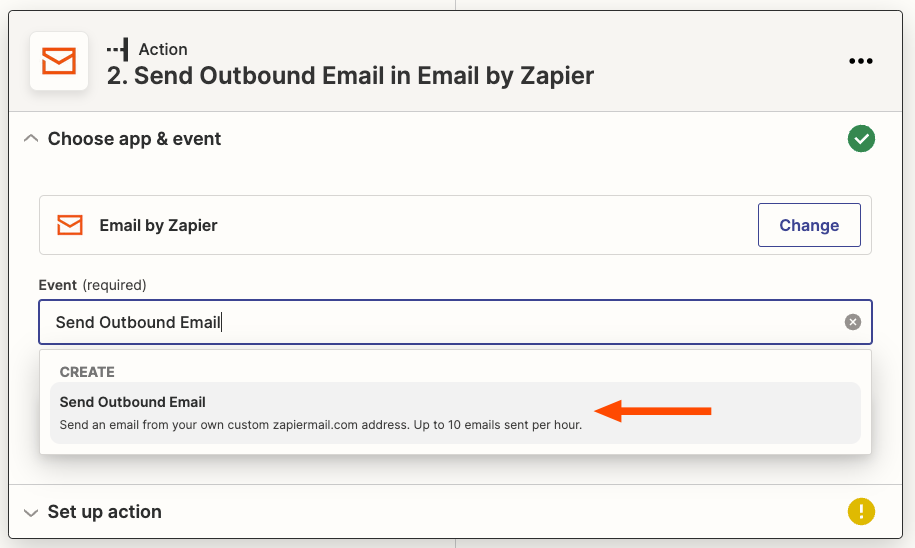
Next, customize your action by filling in the required fields to match your needs.
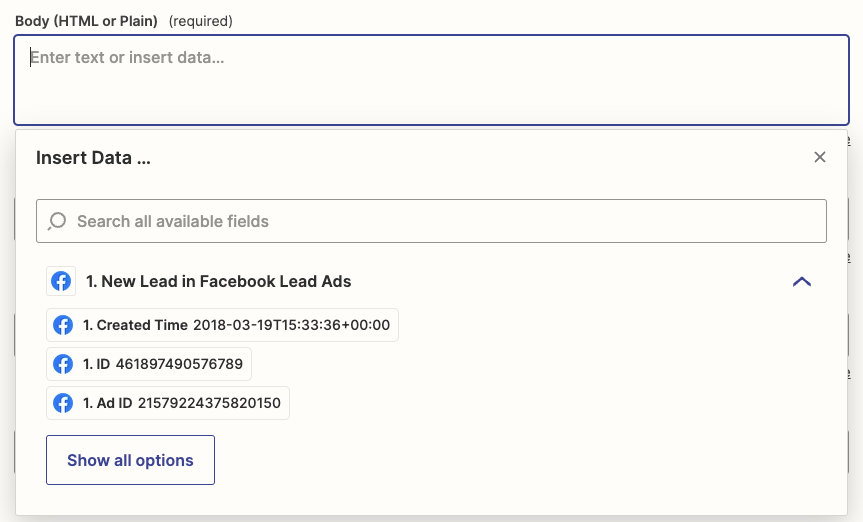
To add details from your lead form in the email, click in the Body field and select data from your previous Facebook Lead Form step.
The next part is my favorite part of this Zap. In the From Name field, add the display name you want to send your email from. I've shown an example, but what you include is up to you. When the leads come in, you can have a more professional presentation to your clients and a cleaner experience when you filter these leads in your inbox.
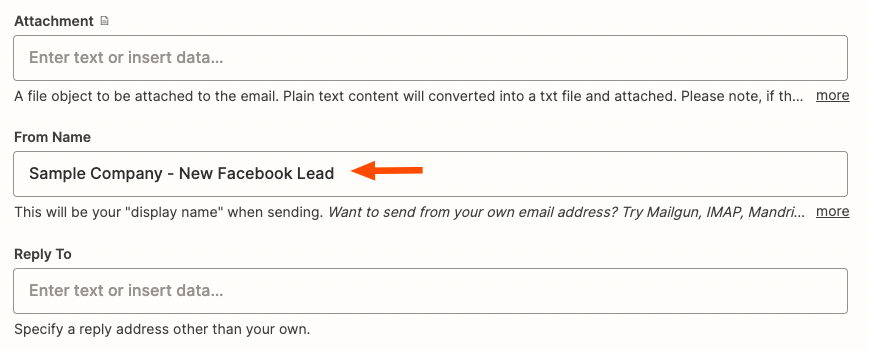
Once you've set up your remaining fields, test your action step to make sure it's working how you want it. Once you see everything is working correctly, you're now ready to use your Zap.
An easy way for more organized leads
As you can see, this process is quite simple. By using Email by Zapier, you can build a customized system to organize your leads.
There may be more advanced ways to achieve the same results, such as integrating Facebook Lead Ads with a CRM. But simplicity has its value. Using this simple Zap helped our marketing agency and easily met our clients' needs—and it took less than an hour to set up. At the end of the day, finding the "low-hanging" fruit solutions that are fast and easy to implement will be the solutions that save you time and money.
This was a guest post from Caleb Riutta, a serial entrepreneur, content specialist, and Co-Founder at Dusk Digital. Dusk Digital is an SEO and growth marketing company in Phoenix, Arizona. Besides work, you may find him traveling the world and living as a digital nomad. Want to see your work on the Zapier blog? Check out our guidelines and get in touch.
