I recently had to complete a stack of comprehensive medical forms, and for some reason, every page had to be filled in by hand. By no means am I against an opportunity to improve my poor penmanship, but by page 13, I was genuinely confused as to why I couldn't fill in these forms online.
I still don't know the answer to that, but what I do know is that digitally fillable PDFs make everyone's lives easier: there's no physical paperwork to print or store, it's more accessible, and no one has to worry about deciphering chicken scratch.
Here, I'll show you how to make a PDF fillable in Adobe, along with tips for how to use and modify form fields.
Note: You need a paid Adobe Acrobat subscription to make a fillable PDF. If you don't have a subscription, Adobe offers a free seven-day trial.
How to make a fillable PDF in Adobe
With Adobe Acrobat, you can create a fillable PDF from scratch or convert an existing file, like a Word document, into a fillable PDF. In my opinion, it's much easier to do the latter, so let's do that.
1. Create your form in Microsoft Word or Google Docs
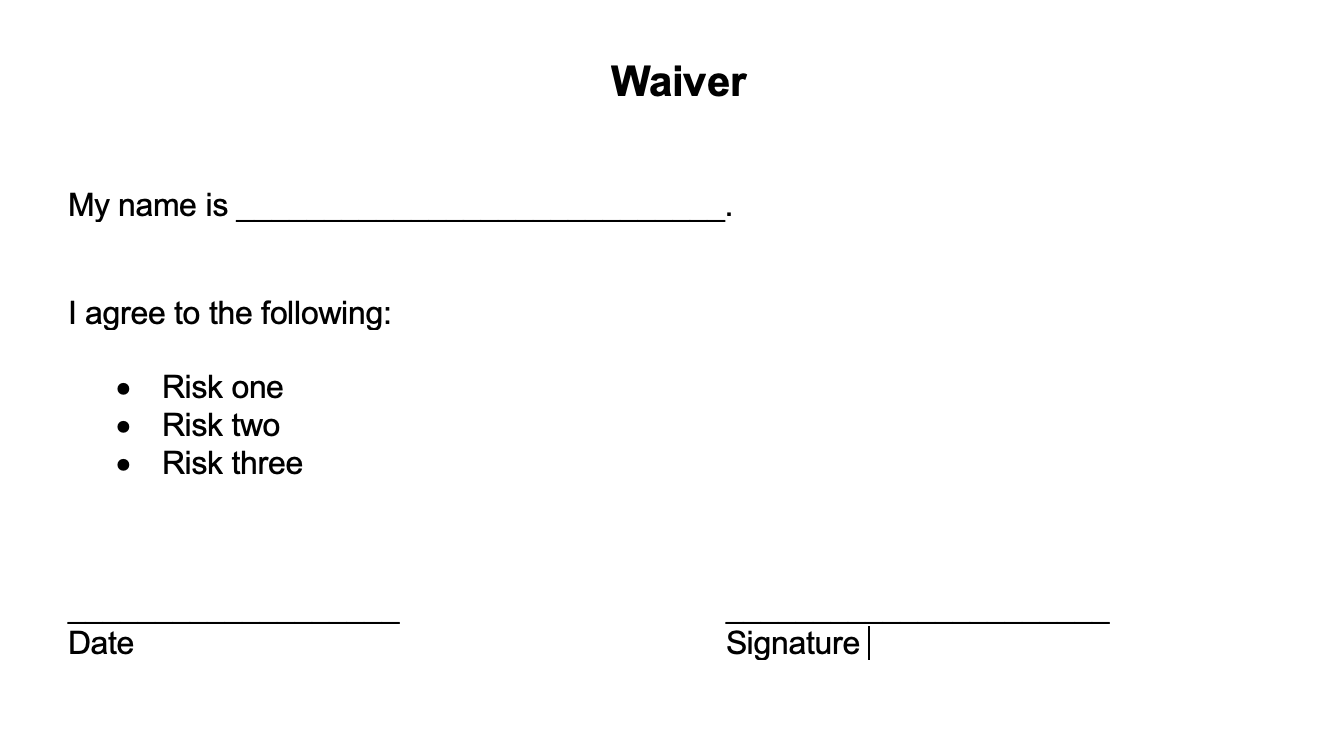
Let's say you're creating a boilerplate waiver. Type out the details as you normally would. For the spots where the user needs to add in their information—for example, their name, initials, and signature—insert a horizontal line (enter a series of underscores) as a placeholder. When you convert your Word or Google Docs file into a PDF later on, Adobe will insert fillable form fields wherever it detects horizontal lines.
Here's an example of what that waiver might look like.
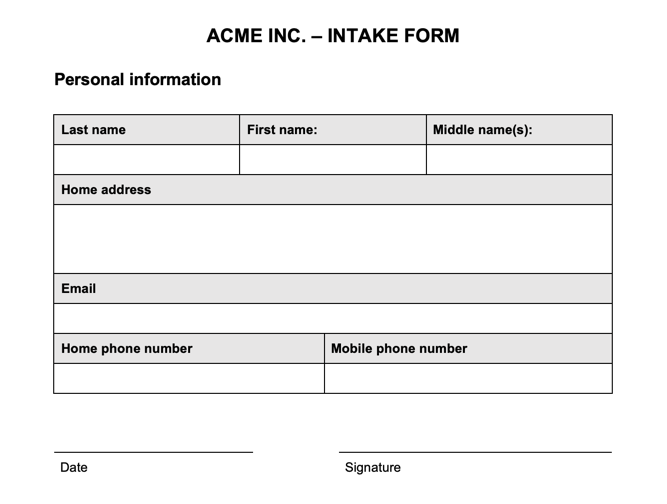
You can also use a table to create a classic intake form. Adobe will add fillable form fields wherever it detects empty table cells.
Once you've created your form, export it as a PDF. Here's how to do that in Microsoft Word and here's how to do it in Google Docs.
If you don't want to build a form from scratch, you can also browse through Microsoft Word's robust library of templates to help you kickstart the form-creation process.
2. Make a fillable PDF
Now that you've built your form, you're ready to make a fillable PDF.
Open Adobe Acrobat.
Click Create, and then click Create a PDF.
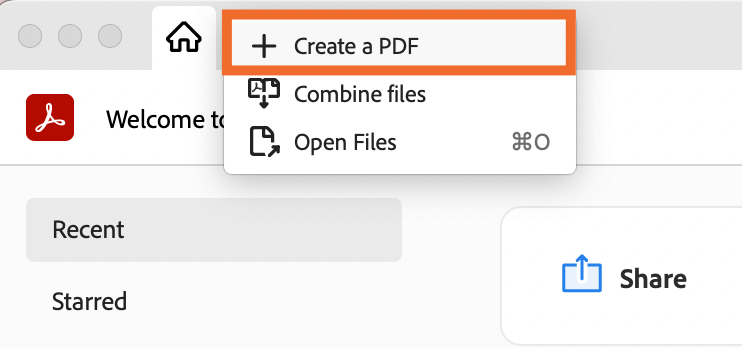
Click Select a file, and upload the PDF you just created. You can also drag and drop the file from your computer into Adobe.
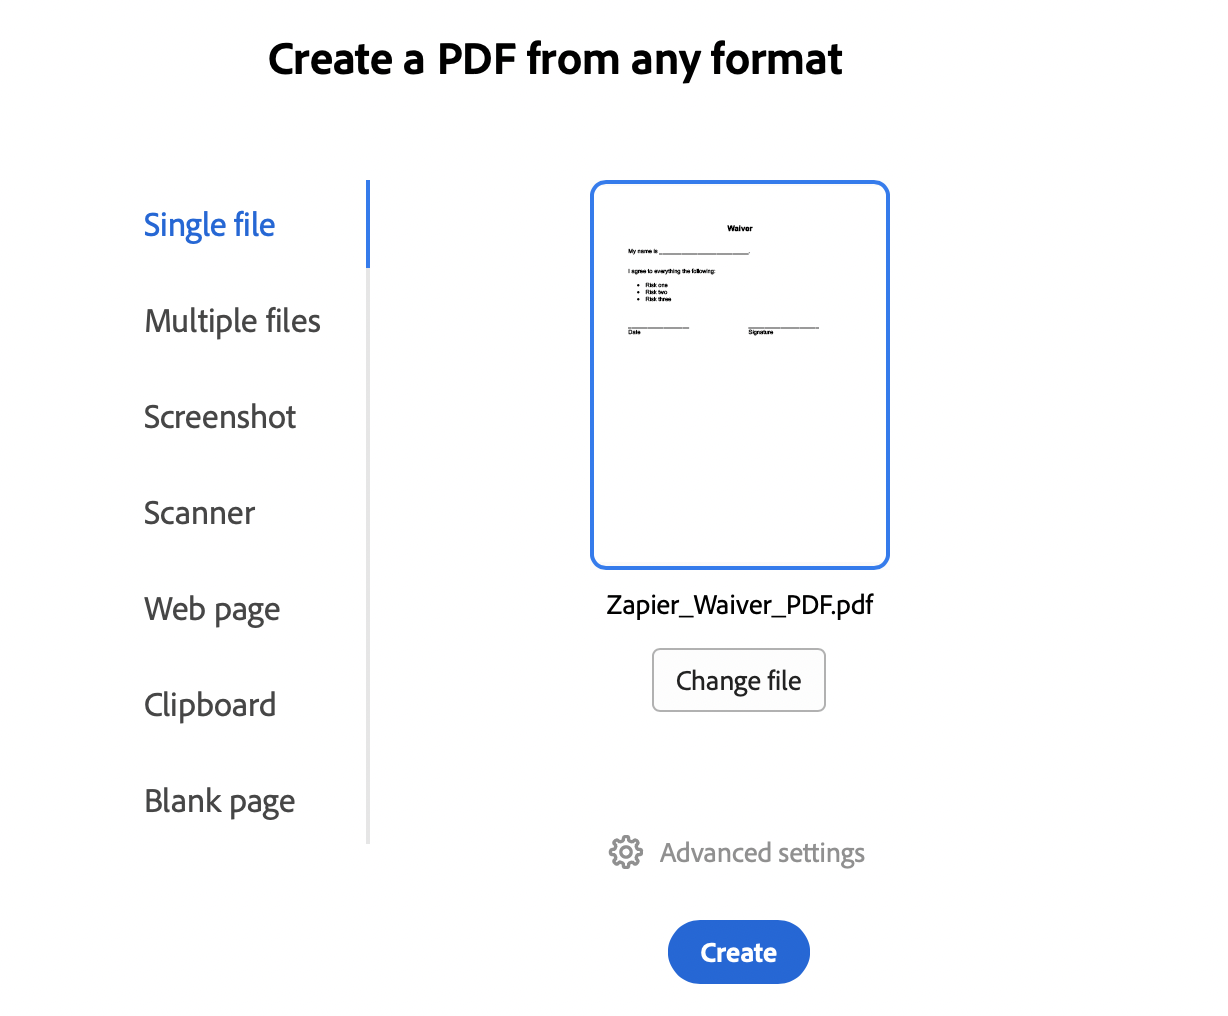
Click Create.
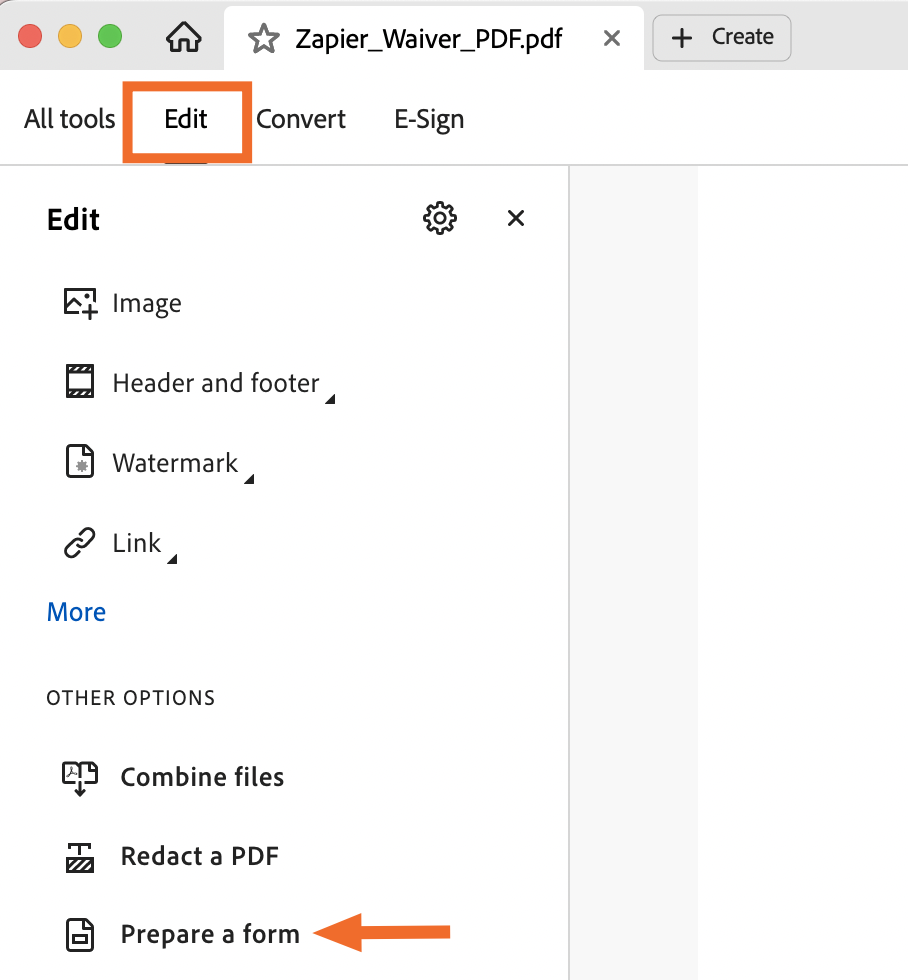
Click Edit, and then select Prepare a form.
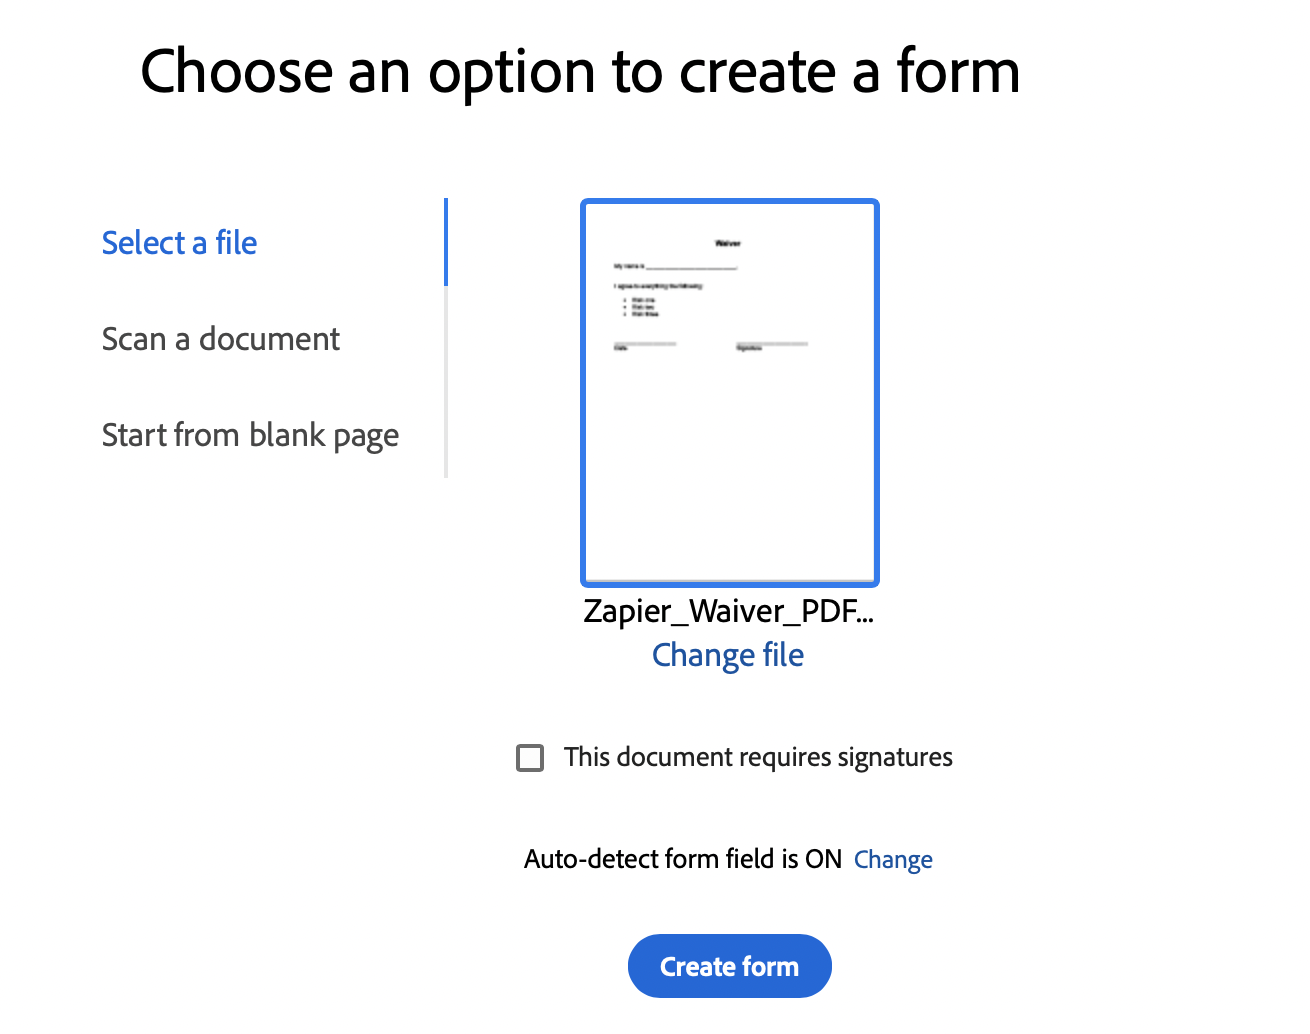
Adobe will ask you to re-confirm that the file you uploaded is the file you want to turn into a form. Click Create form.
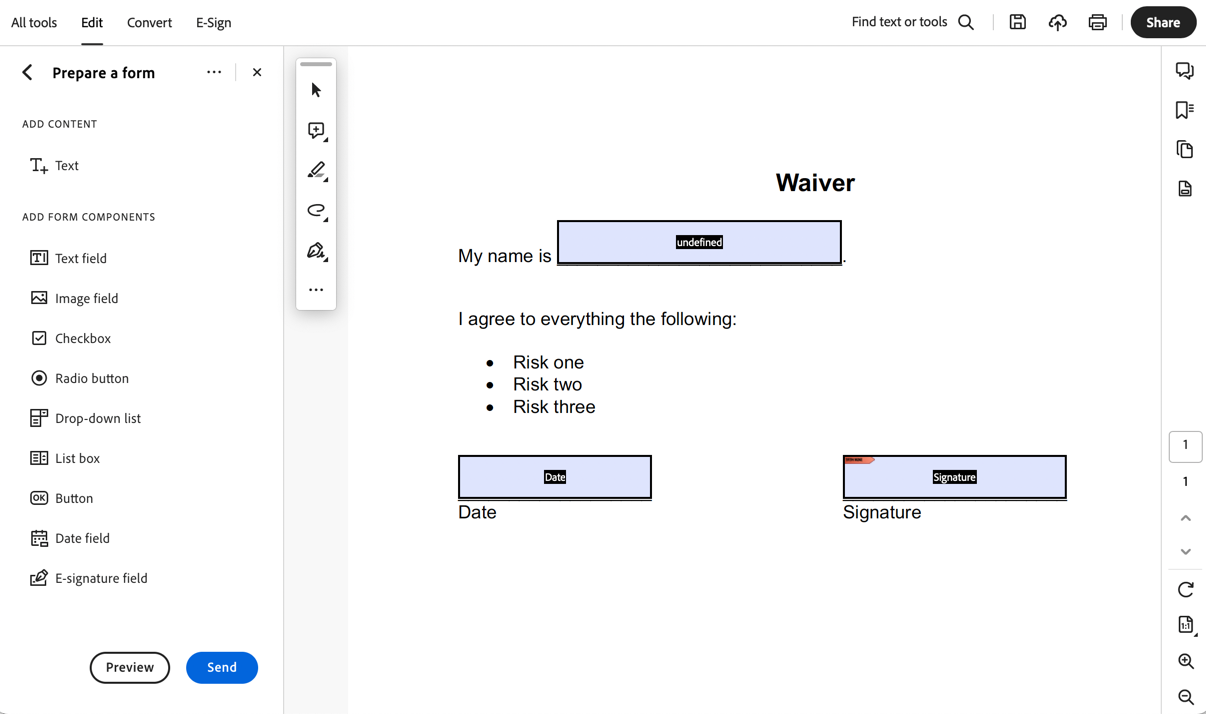
That's it. If there are no rogue form fields, you can probably share your form as is. But if you want to modify some of the fields, you can do that, too.
3. Edit the form fields
Adobe offers a comprehensive guide on how to customize PDF form fields—there are endless possibilities. But for now, here's a broad overview of how to modify your fillable PDF.
As you work, you can click Preview in the Prepare a form side panel to make sure your form's shaping up the way you want it to. And Adobe doesn't auto-save changes, so be sure to save your work as you go.
Add form components
By default, Adobe only populates text and eSignature fields when you convert an existing file into a fillable PDF. But you can insert a handful of other types of form fields—for example, you can insert checkboxes, dropdown lists, and date fields (this allows the user to choose a date from a calendar instead of manually entering the date).
In the Prepare a form side panel, click the component you want to add.
Your cursor will turn into a rectangle, representing your selected field.
Click the spot on your form where you want to place the component. If you want to add the same component to other parts of your form, keep clicking to add.
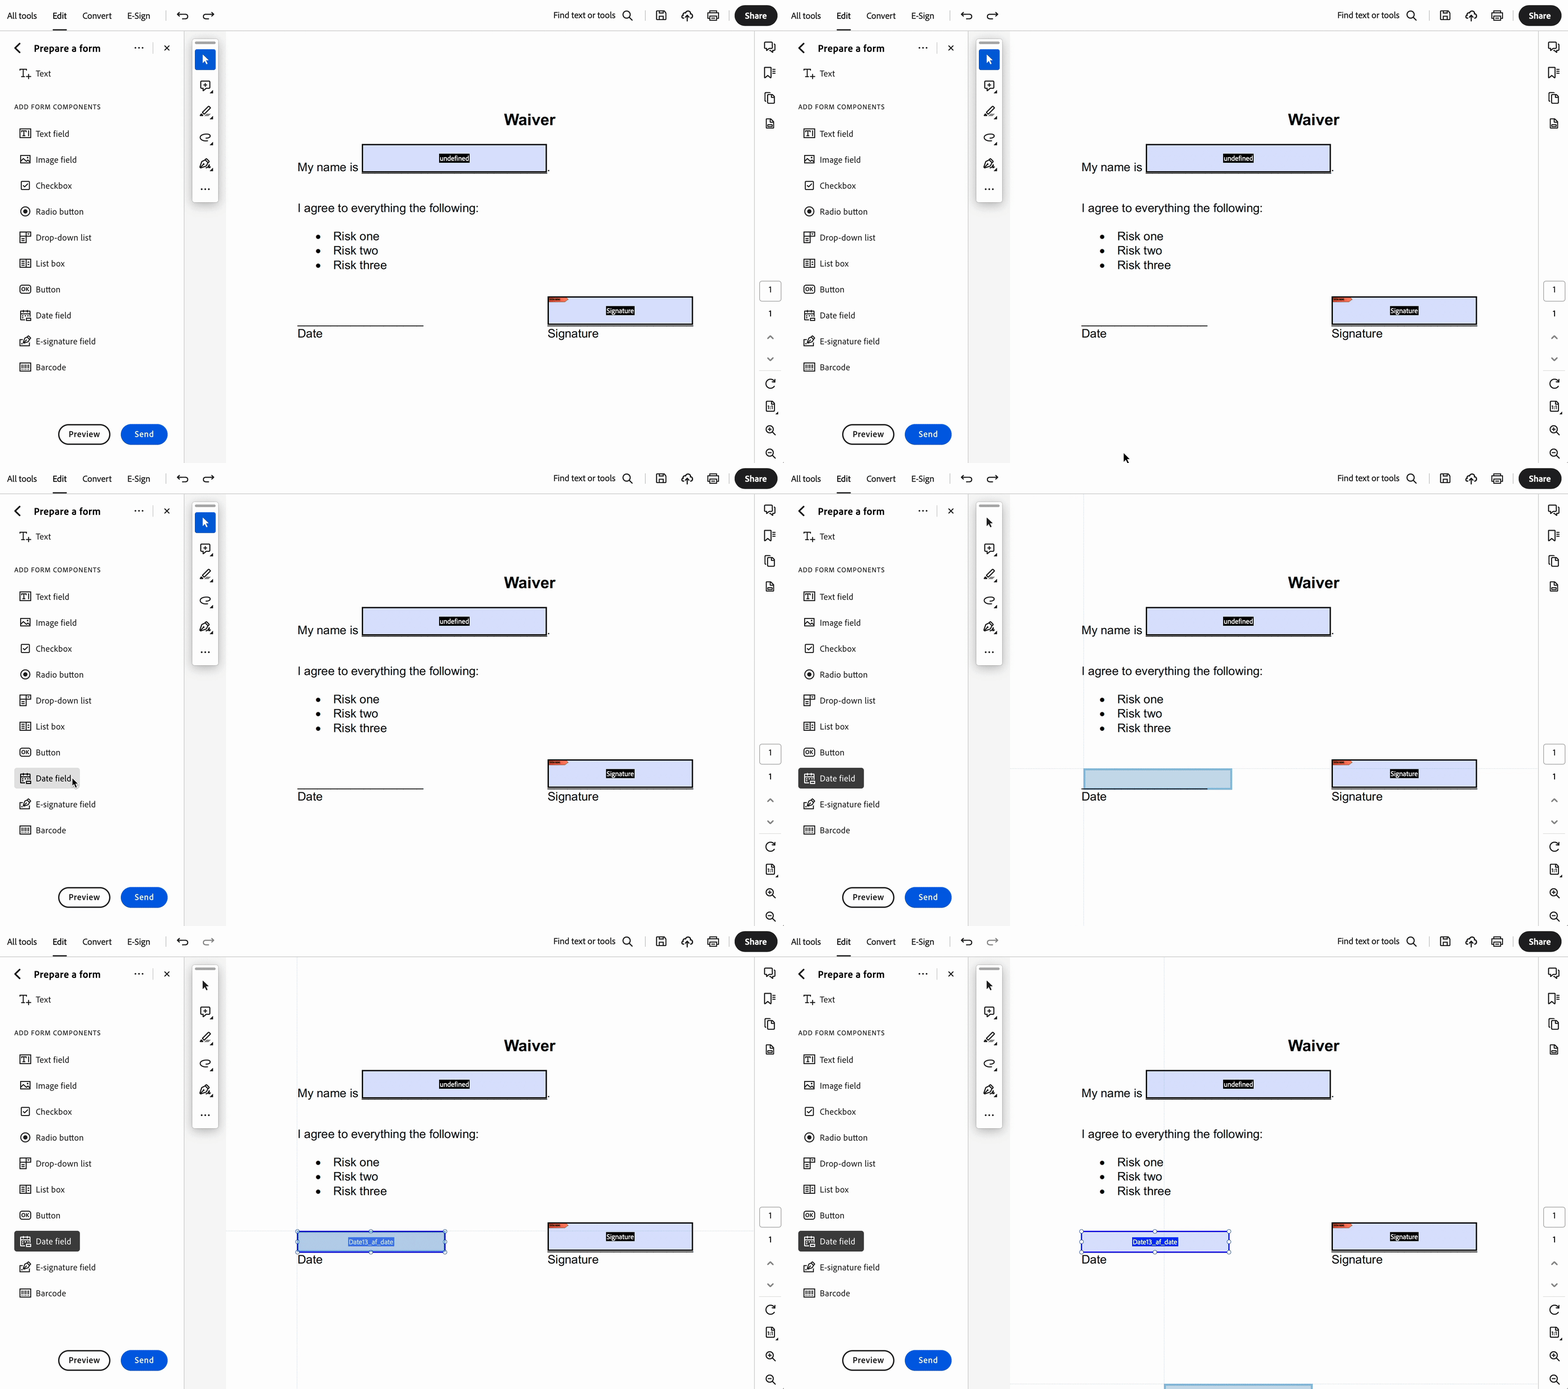
Once you're done adding that one component, click the Select text icon in the floating toolbar (it looks like an arrow) to go back to using your cursor as normal.
Modify general properties
Right-click a form field and select Properties to change the following options:
Name. Giving each field a unique name makes it easier to keep your form organized, especially if you have a lot of form fields. This information is visible only to you and anyone else who has edit access.
Tooltip. When the user hovers over the form field, the tooltip tells them what to do. For example, the tooltip for a date field might read, "Select today's date."
Form Field. You can specify how the form field is seen: Visible, Hidden, Visible but doesn't print, Hidden but printable.
Read Only. This prevents the user from changing the content of the form field.
Required. This makes a field mandatory for the user to fill in. If someone attempts to submit the form without filling in all required fields, an error message will appear, and the empty required form field will be highlighted.
Delete form components
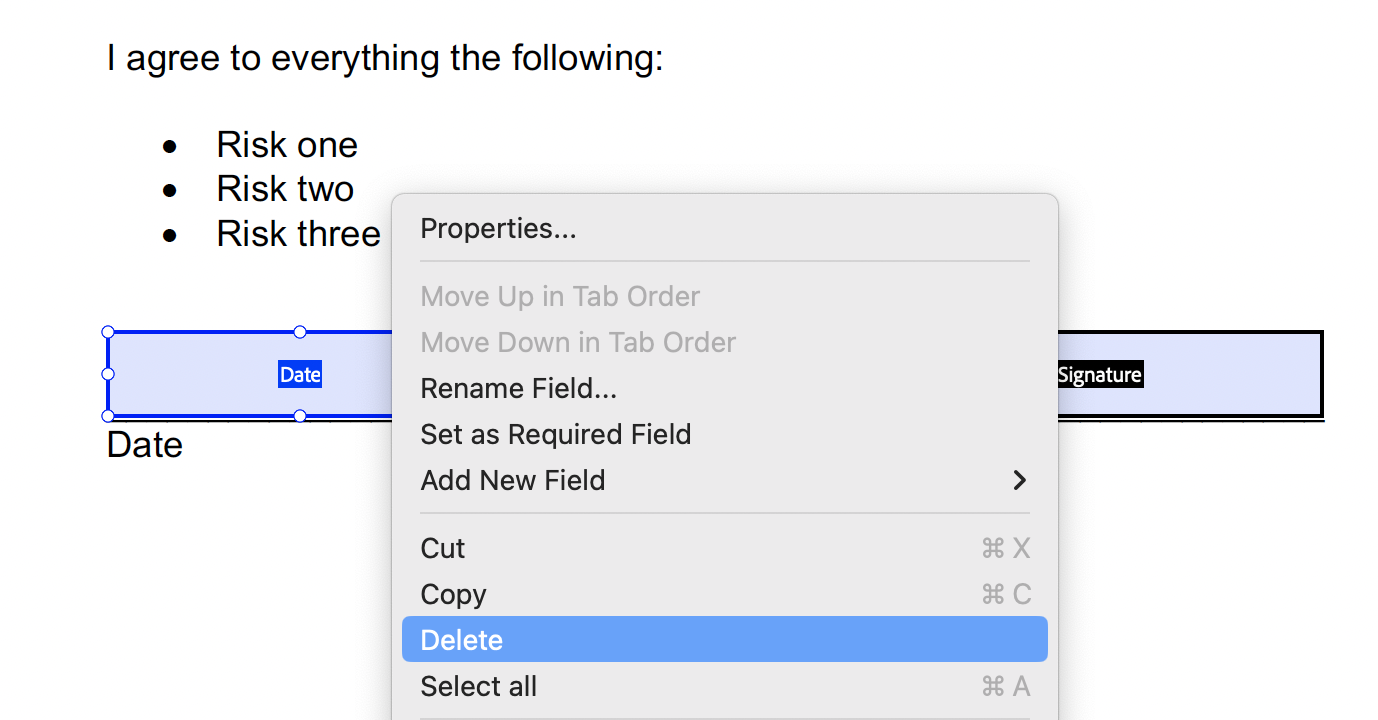
If you want to swap out an existing form field for another, or you want to get rid of the field altogether, right-click it, and then select Delete.
How to make a fillable PDF for free
The one downside to using Adobe to make a fillable PDF is that it comes at a cost—the lowest paid tier is $12.99/month (billed annually). But there are plenty of other PDF editor apps on the market that allow you to make a fillable PDF for free.
Take PDF.co, for example. For the low, low price of zero dollars (for a limited number of credits), you have all the tools you need to create a fillable PDF. With Zapier's PDF.co integration, you can automatically do things like convert other files into fillable PDFs. Learn more about how to automate PDF.co, or get started with one of these premade workflows.
More details
Zapier is the leader in workflow automation—integrating with thousands of apps from partners like Google, Salesforce, and Microsoft. Use interfaces, data tables, and logic to build secure, automated systems for your business-critical workflows across your organization's technology stack. Learn more.
Related reading:


