Evernote and OneNote both offer easy ways to quickly create new notes from your desktop. For Evernote, there's a keyboard shortcut for Macs to instantly create a new note from the menu bar (Command + Control + N), and there's a shortcut for OneNote on Windows to quickly create a new note with two keystrokes (Win + N).
But what if you want to add text to an existing note in Evernote or OneNote, rather than create a whole new note?
For example, maybe you want to quickly add a new title to your list of books to read or add a new idea to your current project note. You could append a note in Evernote or OneNote the manual way: Open the program, find the note to update, and then enter the text.
It's not difficult to do, but when you're in the zone, context-switching just to add something to a note can kill your focus. Instead, you can add things to a note—even if you don't have the app open—with the Zapier Chrome extension.
Here's how the extension works: It allows you to trigger automated workflows, which we call Zaps, straight from your browser with a mouse click.
I use our Chrome extension to add stuff to my notes constantly. I have notes in Evernote and OneNote for keeping tabs on things like what I'm working on each week, questions I have for my manager, things I need to buy for an upcoming party, ideas for future blog posts, and more. The sooner I can get that out of my head and collected into the notes I've already started, the better.
Here's how you can update existing notes in Evernote or OneNote instantly from the Chrome browser.
Zapier is a no-code automation tool that lets you connect your apps into automated workflows, so that every person and every business can move forward at growth speed. Learn more about how it works.
Install the Zapier Chrome extension
First, install the Chrome extension: Go to Zapier's listing in the Chrome Web Store and click the Add to Chrome button. Once installed, you'll see the Zapier logo in your menu bar.
Create the push trigger
Log into your Zapier account and click the Make a Zap button at the top of the home page.
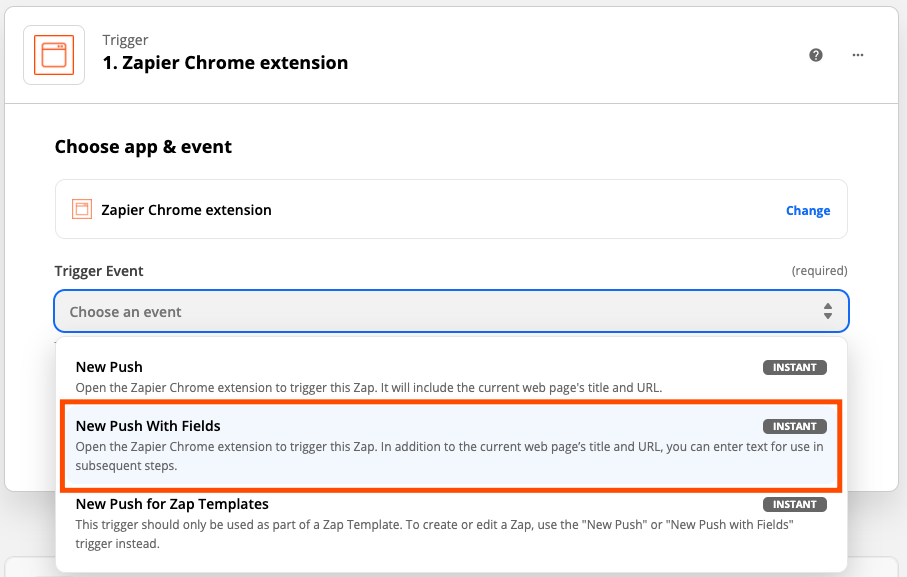
In the Zap editor, search for and select Zapier Chrome extension as the trigger app—the app that will start your workflow. Under Trigger Event, select New Push With Fields from the dropdown menu. This option will allow you to create your own fields, which you can fill in with whatever text you'd like to send to your note app. Click Continue.
Next you'll be prompted to type in text that'll be used as field names. Think of these as prompts so you can organize what you're submitting—such as "My brilliant idea". Once you've added your fields, click Continue.

In the last step for this part, we'll test the connection. Click Send test Zap.
In your Chrome browser, click on the Zapier icon from the menu bar. You'll see your Zapier account, any Zaps where you use the Chrome extension as a trigger, and the new Zap you're working on. It will say "TESTING." (Don't worry about the name of the Zap yet if it's something weird, you can change it later.)

Click on the Zap. You'll see the fields you just created earlier.
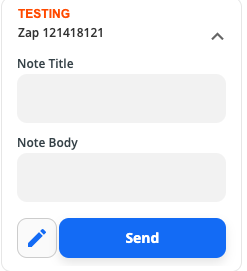
Type in some sample text and click Send.
Toggle to the Zap editor again. You should see the test was successful, with the sample text you typed in populating the fields you created earlier.
Click Continue to set up the next step: sending text to Evernote or OneNote.
Add the Evernote or OneNote action
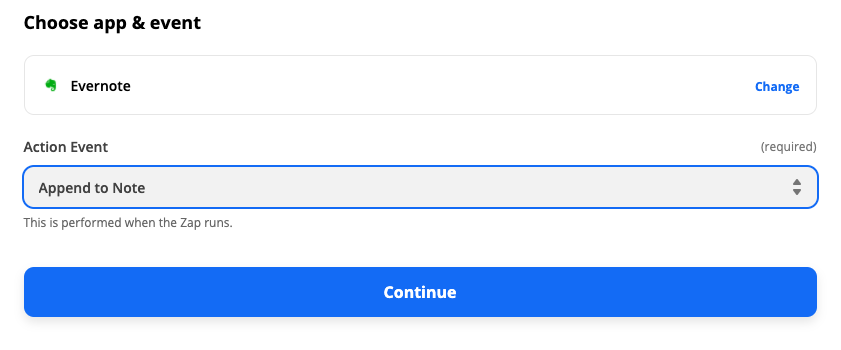
Next, select Evernote or OneNote as the Action App. and Append to Note as the Action Event—this is the thing we want our Zap to do. Click Continue.
Next, connect your note app account to Zapier if you haven't done so before. If you've used your note app in a Zap already, you'll see your account listed in the dropdown menu. Click Continue when you're done.
For each app you connect, Zapier will ask for a general set of permissions which allows you to be flexible with your Zaps. The only actions Zapier takes on your app accounts are those a given Zap needs to accomplish what you've set up.
Read more: 7 ways to automate Evernote
Set up your note
Select your note app in the Zap editor, and select Append to Note as the Action Event—the thing you want your Zap to do. Click Continue.
Now set up your template. Choose the notebook and specific note you want to add text to. Once that's selected, you can type in text—which will appear the same every time your Zap runs.
You can also insert information from the Chrome trigger tested earlier. To do so, click on the blank Content field. A dropdown menu will appear with information from the Chrome test. Click on Show All Options.
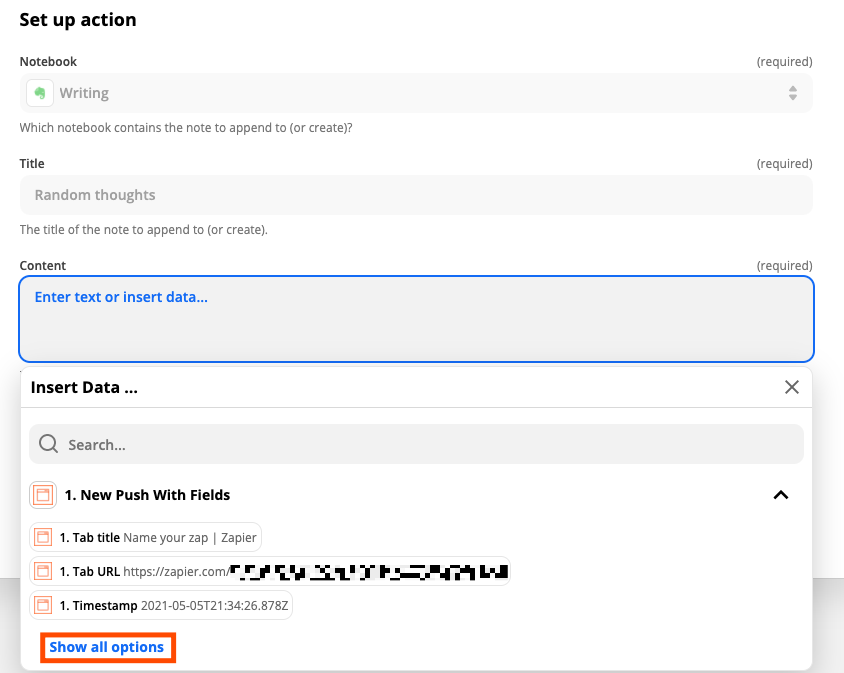
Scroll down until you see the text you typed and sent via the extension. Select what you want to use.
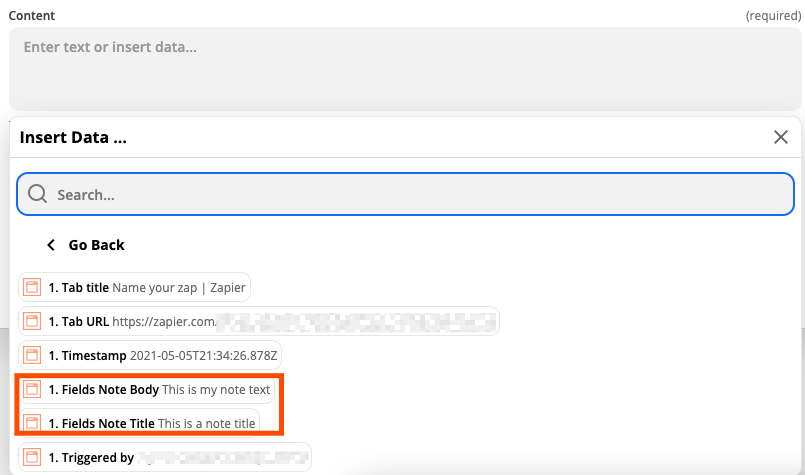
These are what we call dynamic values, which means that the information will change depending on what you type and submit through the Zapier Chrome extension once your Zap is turned on.
Once you've formatted your note content how you'd like, click Continue.
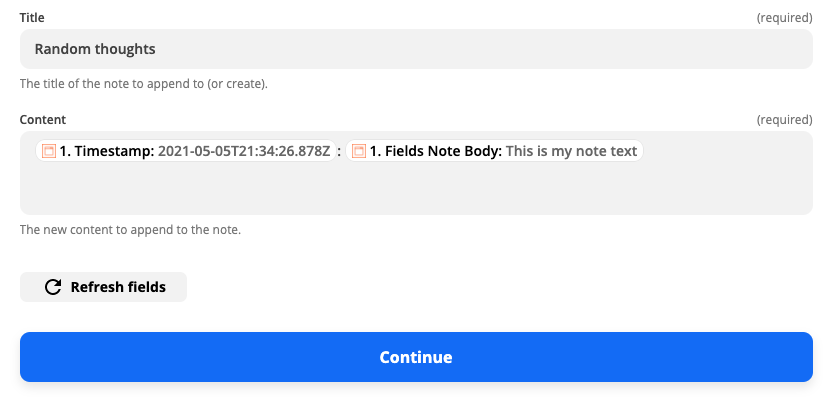
Click any of the testing buttons to test your Zap. Toggle to your note app to see how it looks.
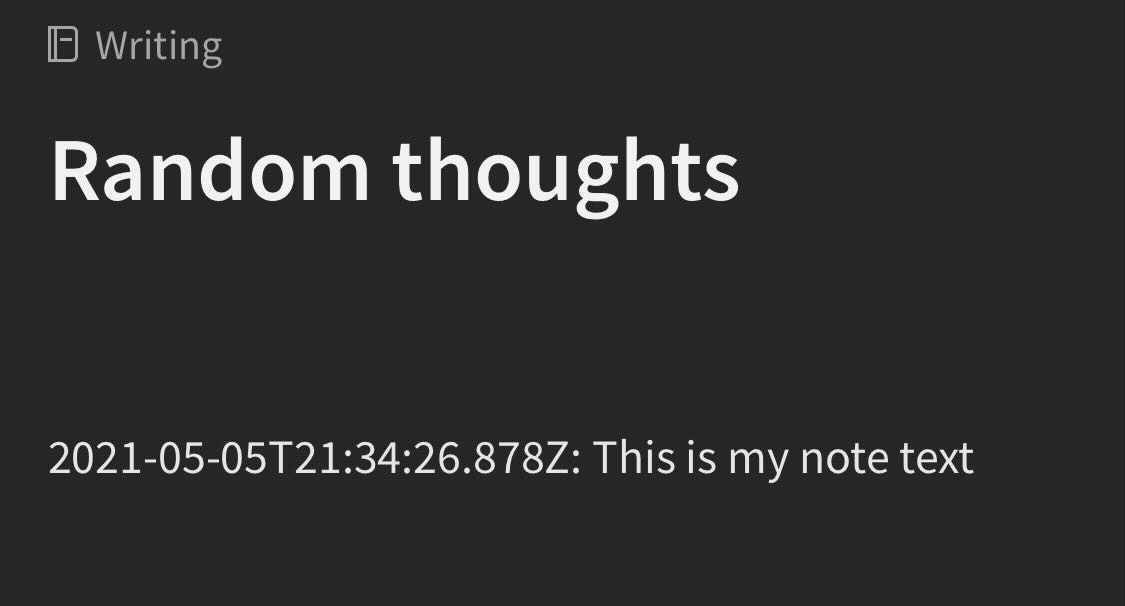
When you're happy with everything, don't forget to give your Zap a name—such as "Add to weekly done tasks in Evernote"— and turn your Zap on.
You're all set!
Read more: Discover more ways to automate OneNote
Add to your notes with ease
Now when you click on the Zapier extension in your browser, you can quickly add any text to an existing note in Evernote or OneNote. You can also copy the Zap in your Zapier Dashboard and adjust the details in the Zap editor to make this work for other notes you have.
You can use this to keep a running list of just about anything.
Zapier's Chrome Extension is pretty powerful. Learn more ways you can use the Zapier Chrome extension to send info to and from thousands of apps with just one click.
