
Calendly isn't particularly hard to use, which is part of why it's one of the best meeting scheduler apps. That doesn't mean every feature is obvious, though, and some of Calendly's best features are just a little bit hidden.
While I'm a big proponent of pressing all the buttons to learn your way around an app, I get that you might not have the time to do that. So I did it for you. Here are the seven hidden Calendly features you can use to make scheduling easier.
1. Add buffers between Calendly events
Cutting off a customer mid-conversation is never great. But if your day is filled with back-to-back meetings, it's going to happen. The best way to prevent this is by adding a buffer—"busy" blocks—before and after a meeting. Here's how to automatically do that in Calendly.
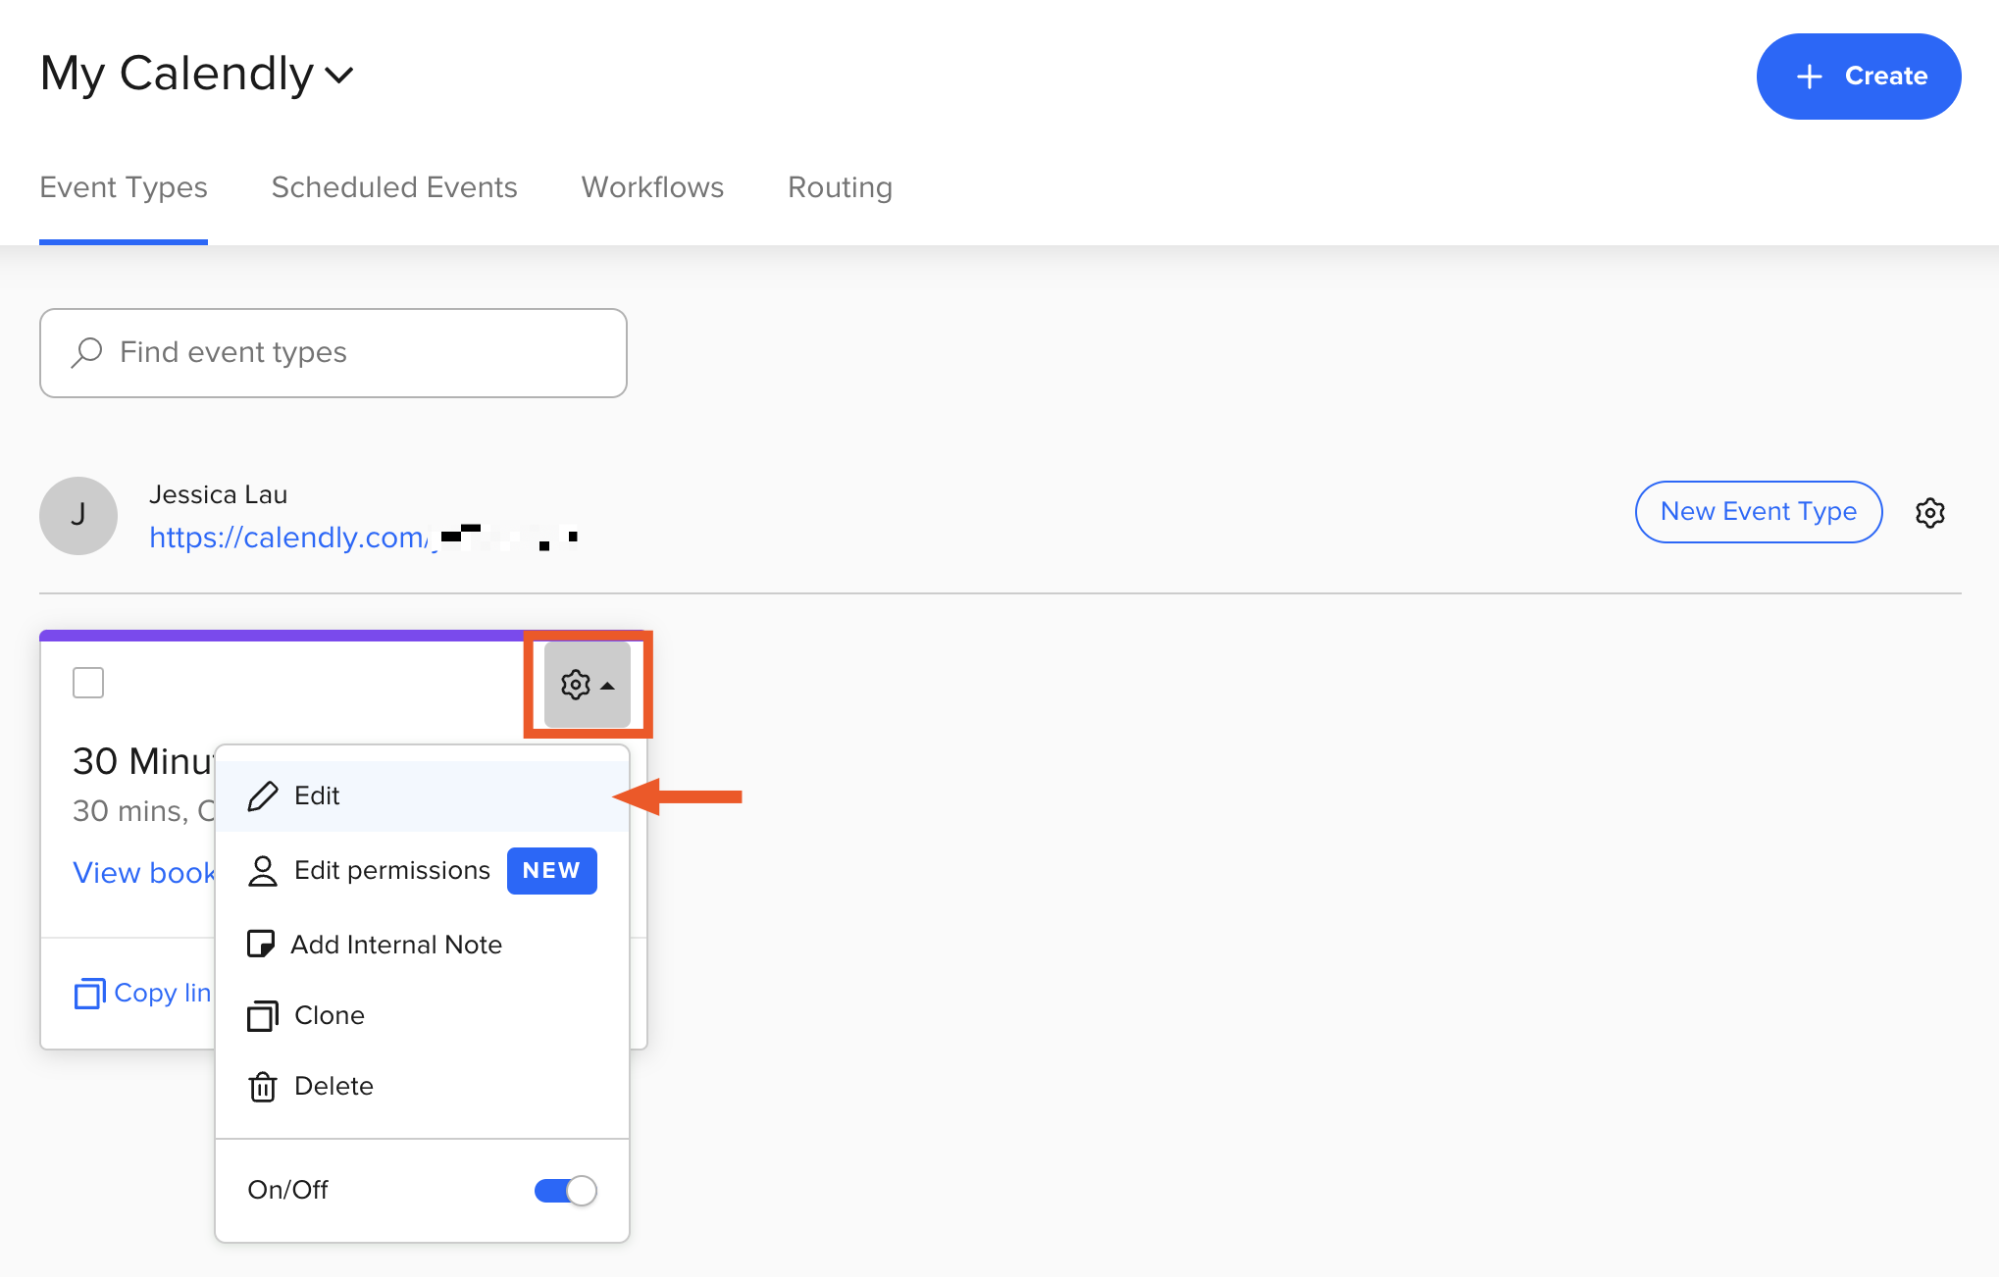
On your Calendly home page, click the Meeting settings icon, which looks like a gear, for a given Event Type. Then select Edit.
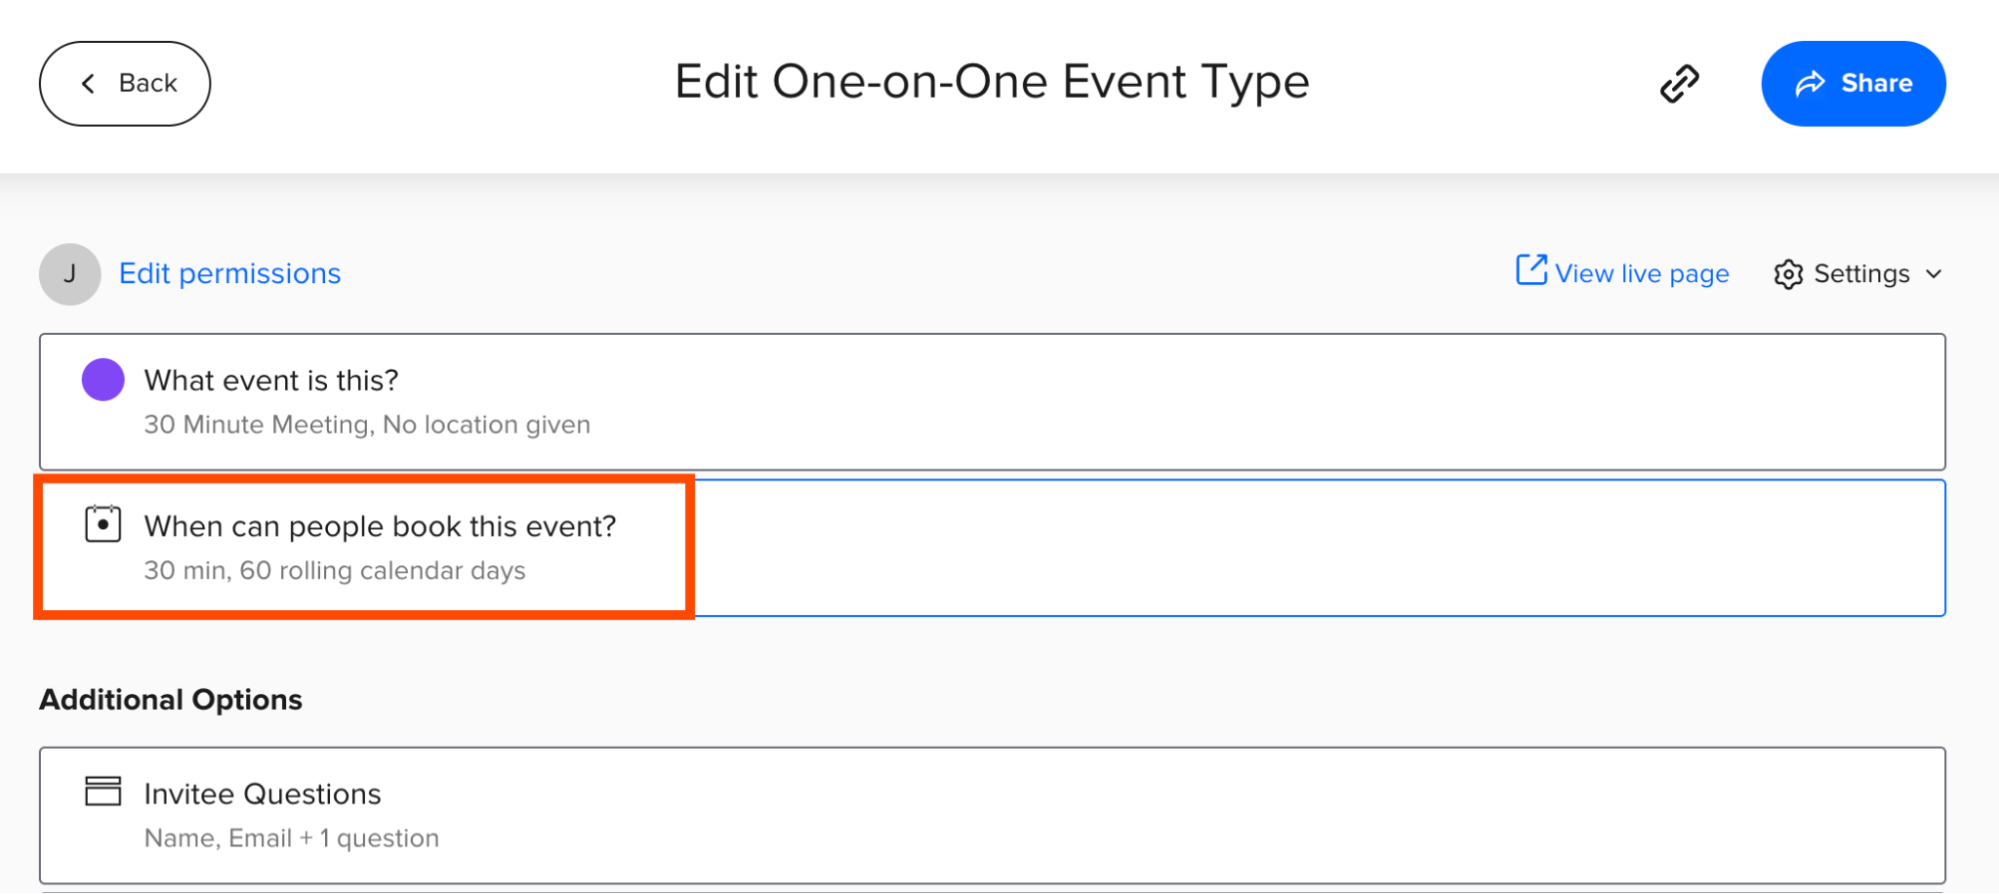
On the Edit Event Type page, click When can people book this event?
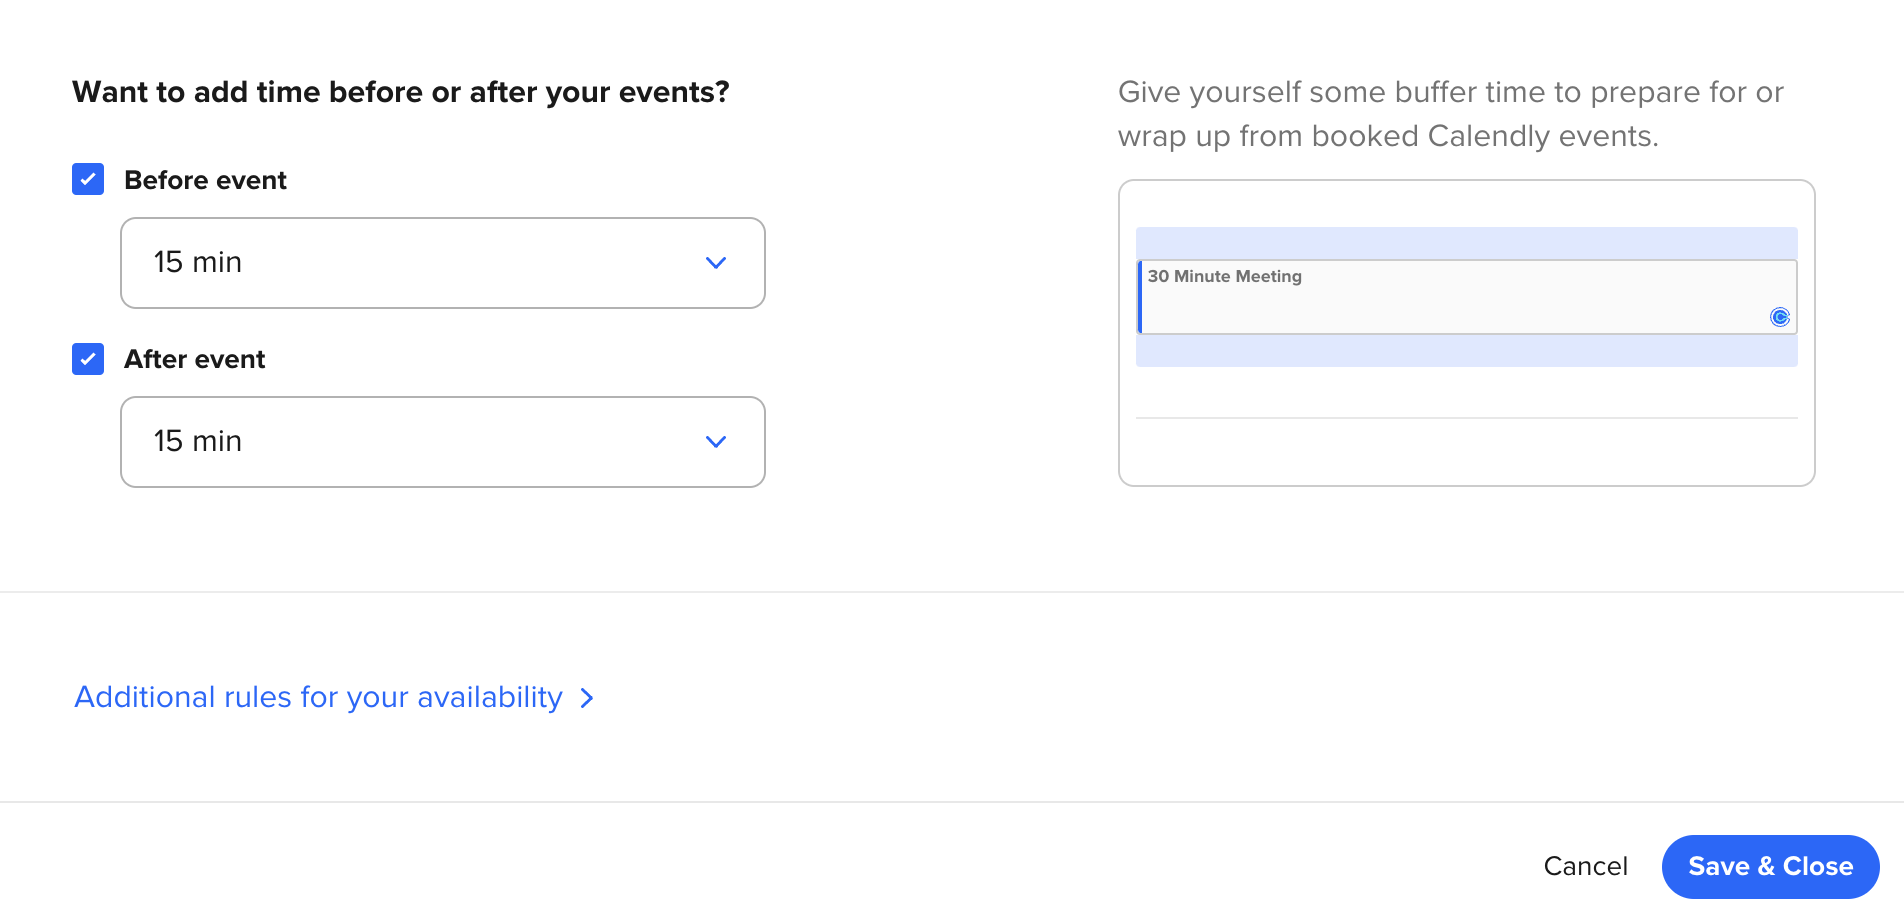
In the section under Want to add time before or after your events?, select when you want to add a buffer (you can select before or after). If your days are regularly filled with back-to-back meetings, I recommend adding at least a 10-minute buffer before and after.
Click Save & Close.


Now you have a little breathing room to prepare for your next meeting, grab a coffee, and even take a bathroom break.
Note: Buffers are event-specific, so you can customize the buffer settings for each of your Event Types.
2. Limit the number of appointments per day
You probably don't want to be in meetings all day every day—at some point, you need to do some focused work. That's why it might be a good idea to limit the total number of meetings you allow each day, regardless of when those meetings might happen. Here's how to do that.
On your Calendly home page, click the Meeting settings icon, which looks like a gear, for a given Event Type. Then select Edit.
On the Edit Event Type page, click When can people book this event?
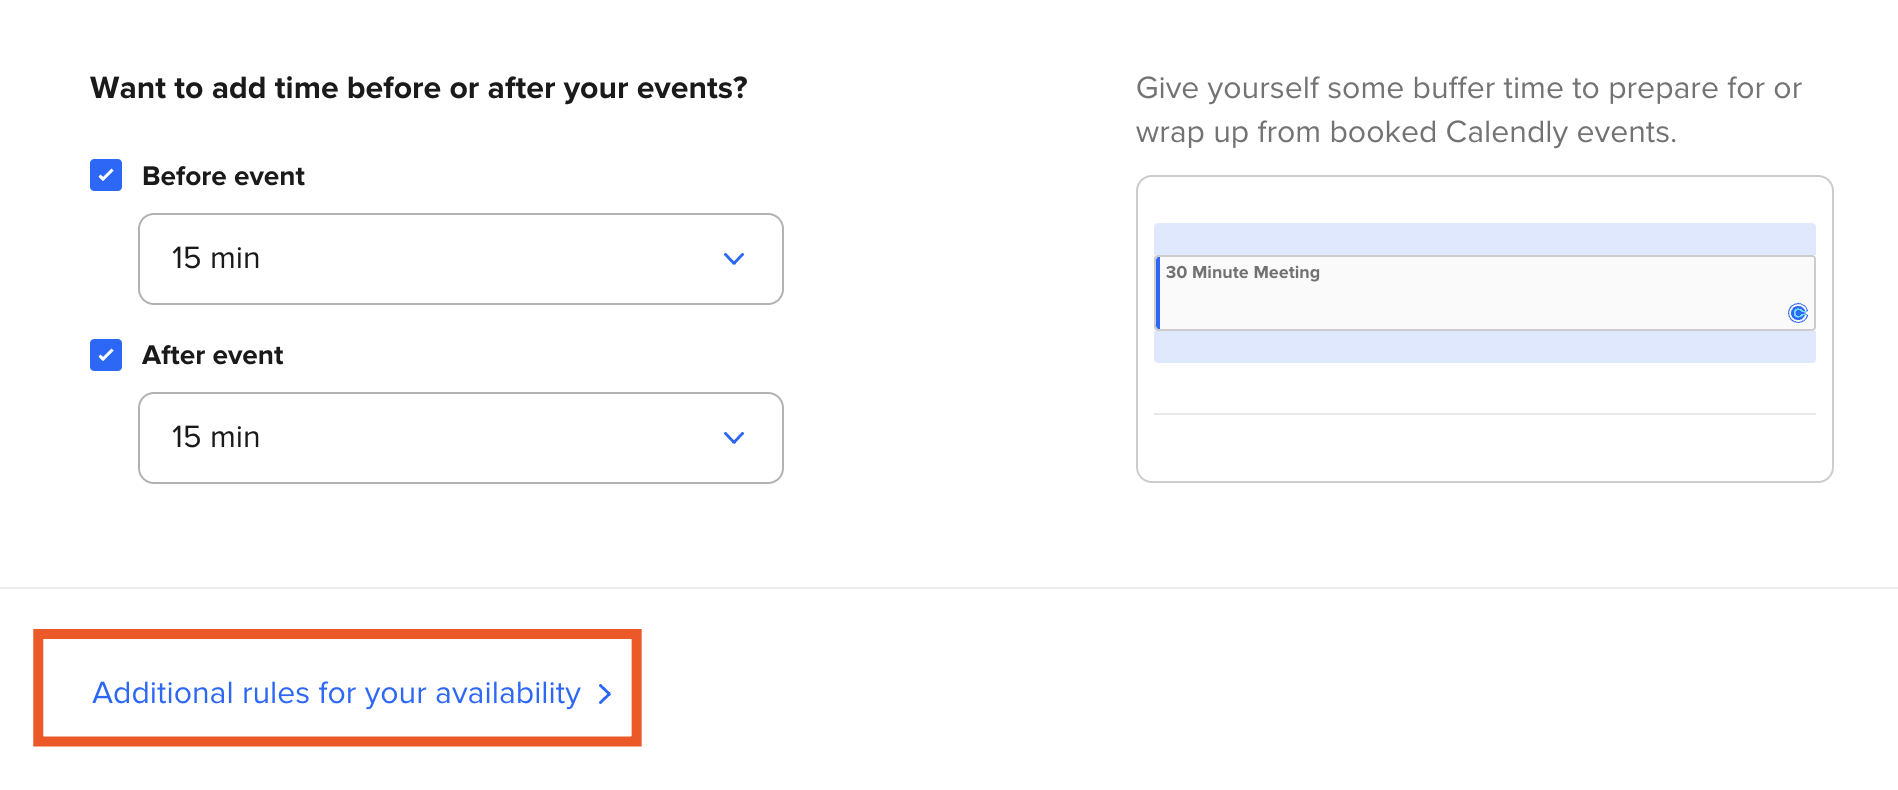
Click Additional rules for your availability.
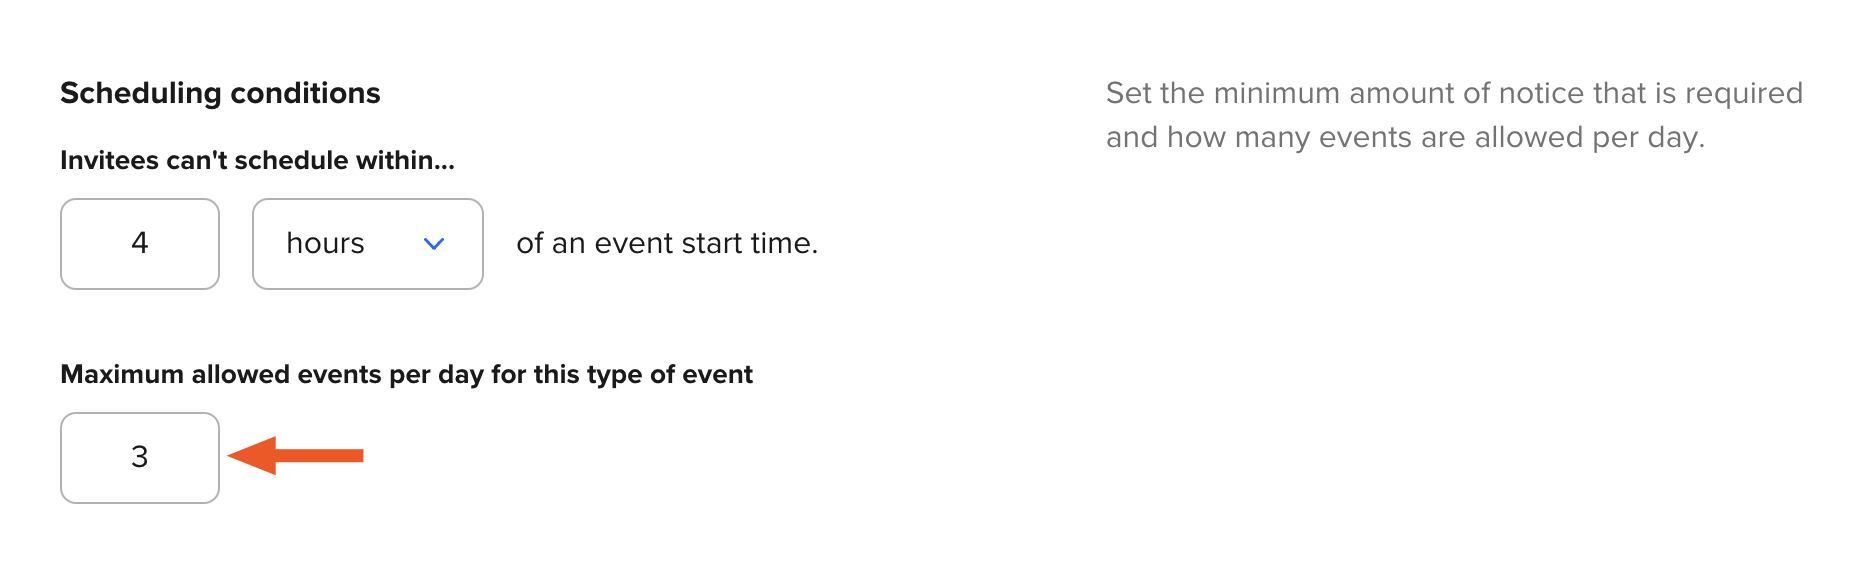
In the Scheduling conditions section, under Maximum allowed events per day for this type of event, enter your meeting limit.
Click Save & Close.


That's it. It'll no longer be possible for your day to have five hour-long meetings when you set the limit to three.
3. Create secret events
Let's say your meeting availability is set for only the afternoon—no mornings. But on the off chance someone can only meet you in the morning, you still want to offer the convenience of booking through your scheduling page. That's where secret events come in.
Secret Calendly events don't appear on your main scheduling page and can only be viewed and booked by invitees who have the event link.
On your Calendly home page, click the Meeting settings icon, which looks like a gear, for the Event Type you want to make secret. Then select Edit.
On the Edit Event Type page, click When can people book this event?
Click Additional rules for your availability.
In the Secret event section, click Make this a secret event.
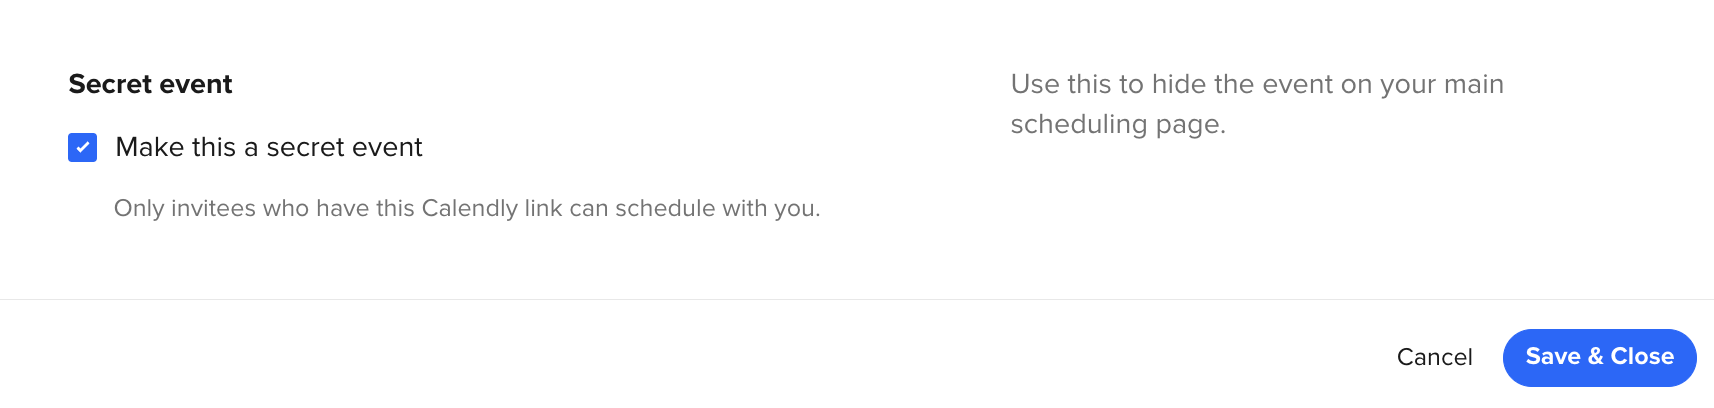
Click Save & Close.

On your Calendly home page, any secret events will be marked with a secret icon, which looks like an eye with a line running through it.

When you want to give someone access to your scheduling page with a given secret event available, copy the event link as you normally would and share it.
4. Use meeting polls to book a group event
Anyone who's ever tried to organize a group event understands the struggle of finding a time that works for everyone. With Calendly's meeting polls, you can let your invitees vote on a select list of times that work best for them. Then you can review the votes and book the preferred meeting time.
Let's first create the meeting poll.
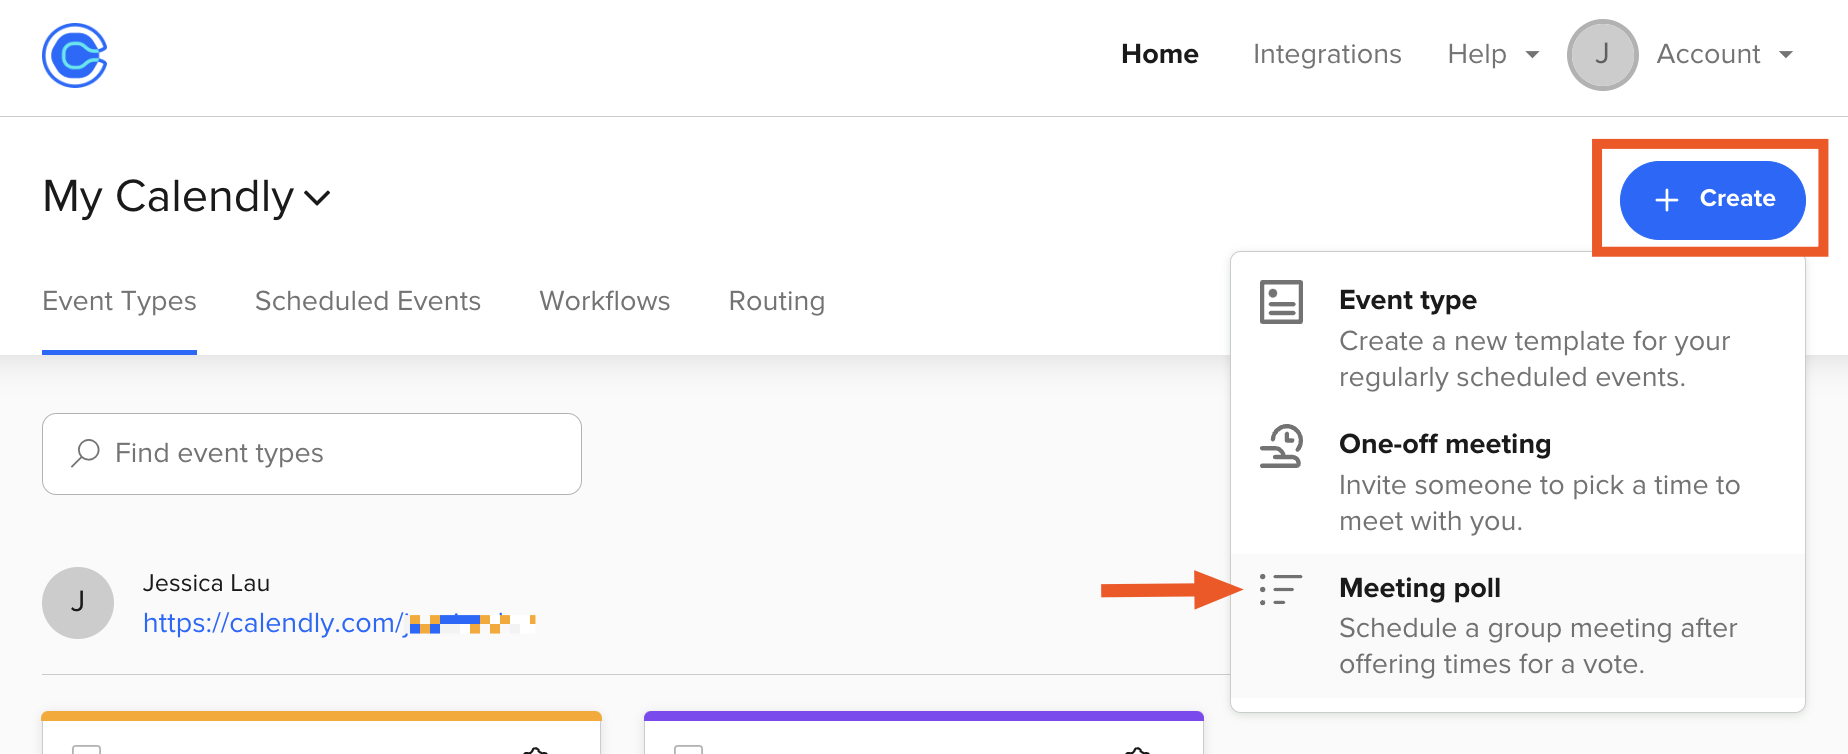
On your Calendly home page, click + Create. Then select Meeting poll.
Now you have to select the event duration and time slots you want to offer invitees to vote on.
Modify the event duration: By default, the event duration is set to 30 minutes. But it's easy to change this. In the Meeting poll side panel, under Duration, click the down caret (
∨). Then click the desired time or enter a custom length.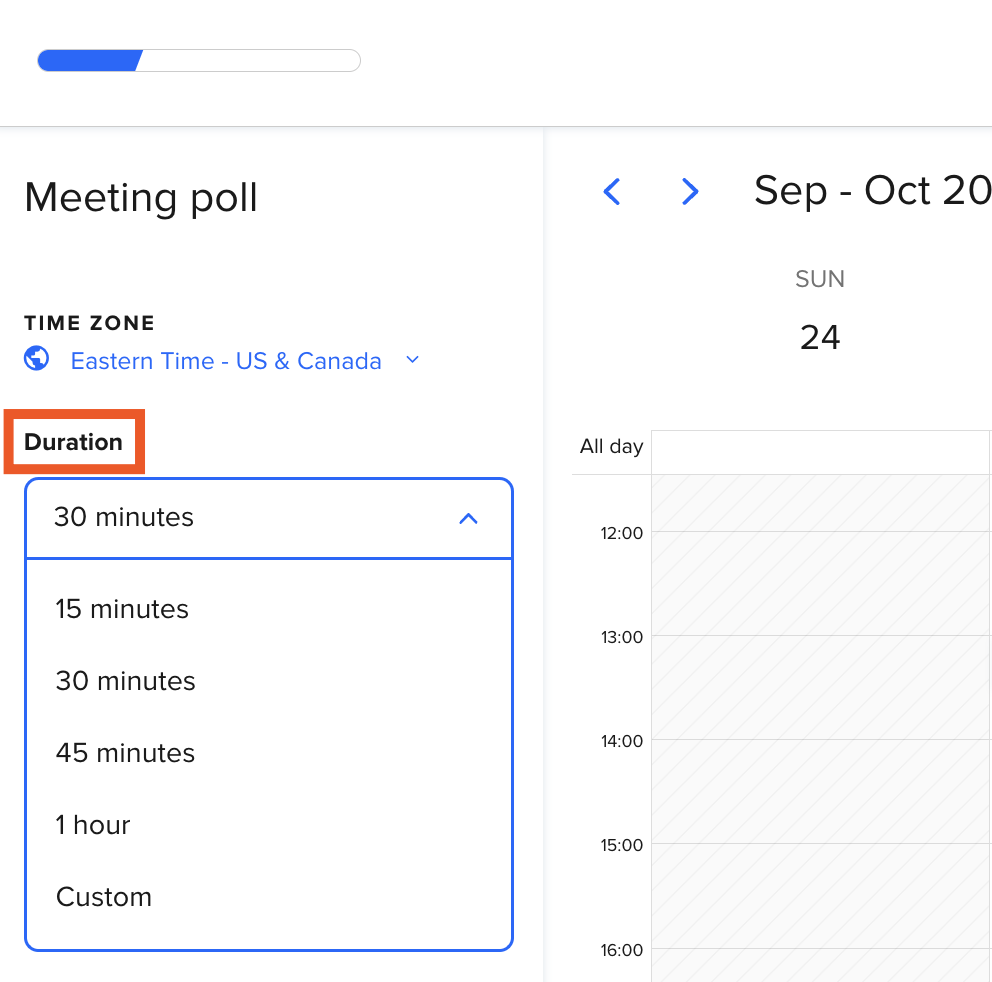
Select time slots: Click the time slots you want to offer (up to 40) directly on your calendar. If you want to view the selected times in a list, click the down caret (
∨) beside /40 times selected.
Click Next.
Edit the meeting details, including the meeting name and location.
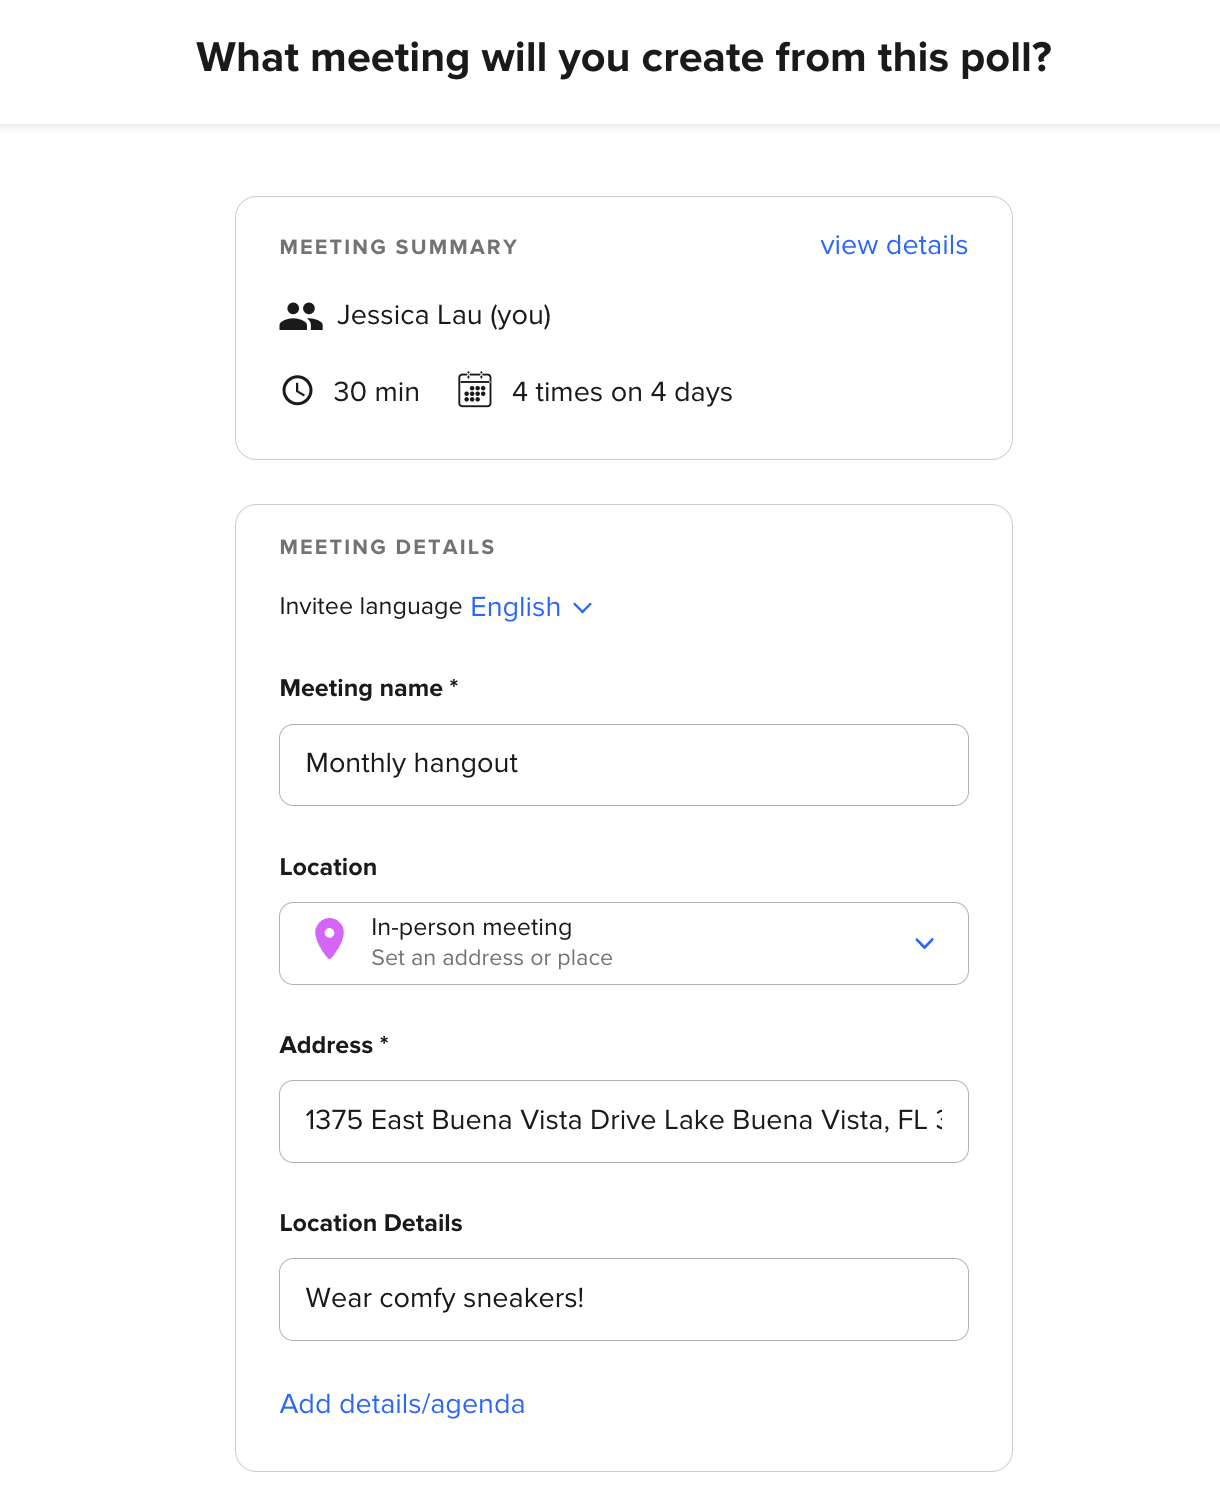
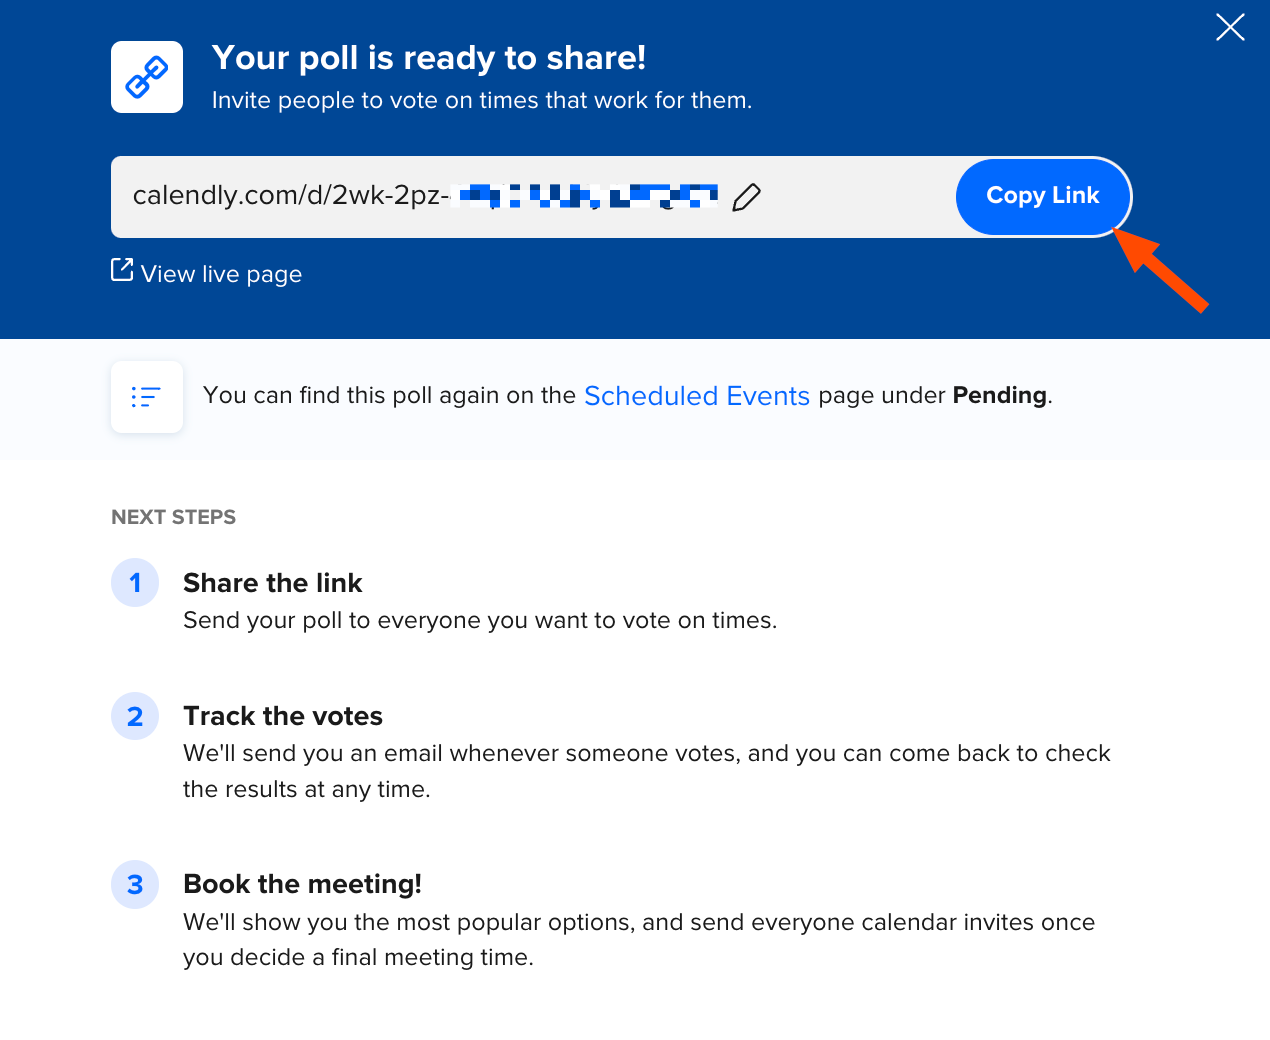
Click Publish meeting poll.
In the pop-up window that appears, click Copy Link. Now you can share the meeting poll with your invitees.


Anyone who gets the link will have access to the meeting poll page where they can vote on the times that work best for them. Here's an example of what the page looks like.

Once all the votes are in, you can book a meeting based on the top votes.
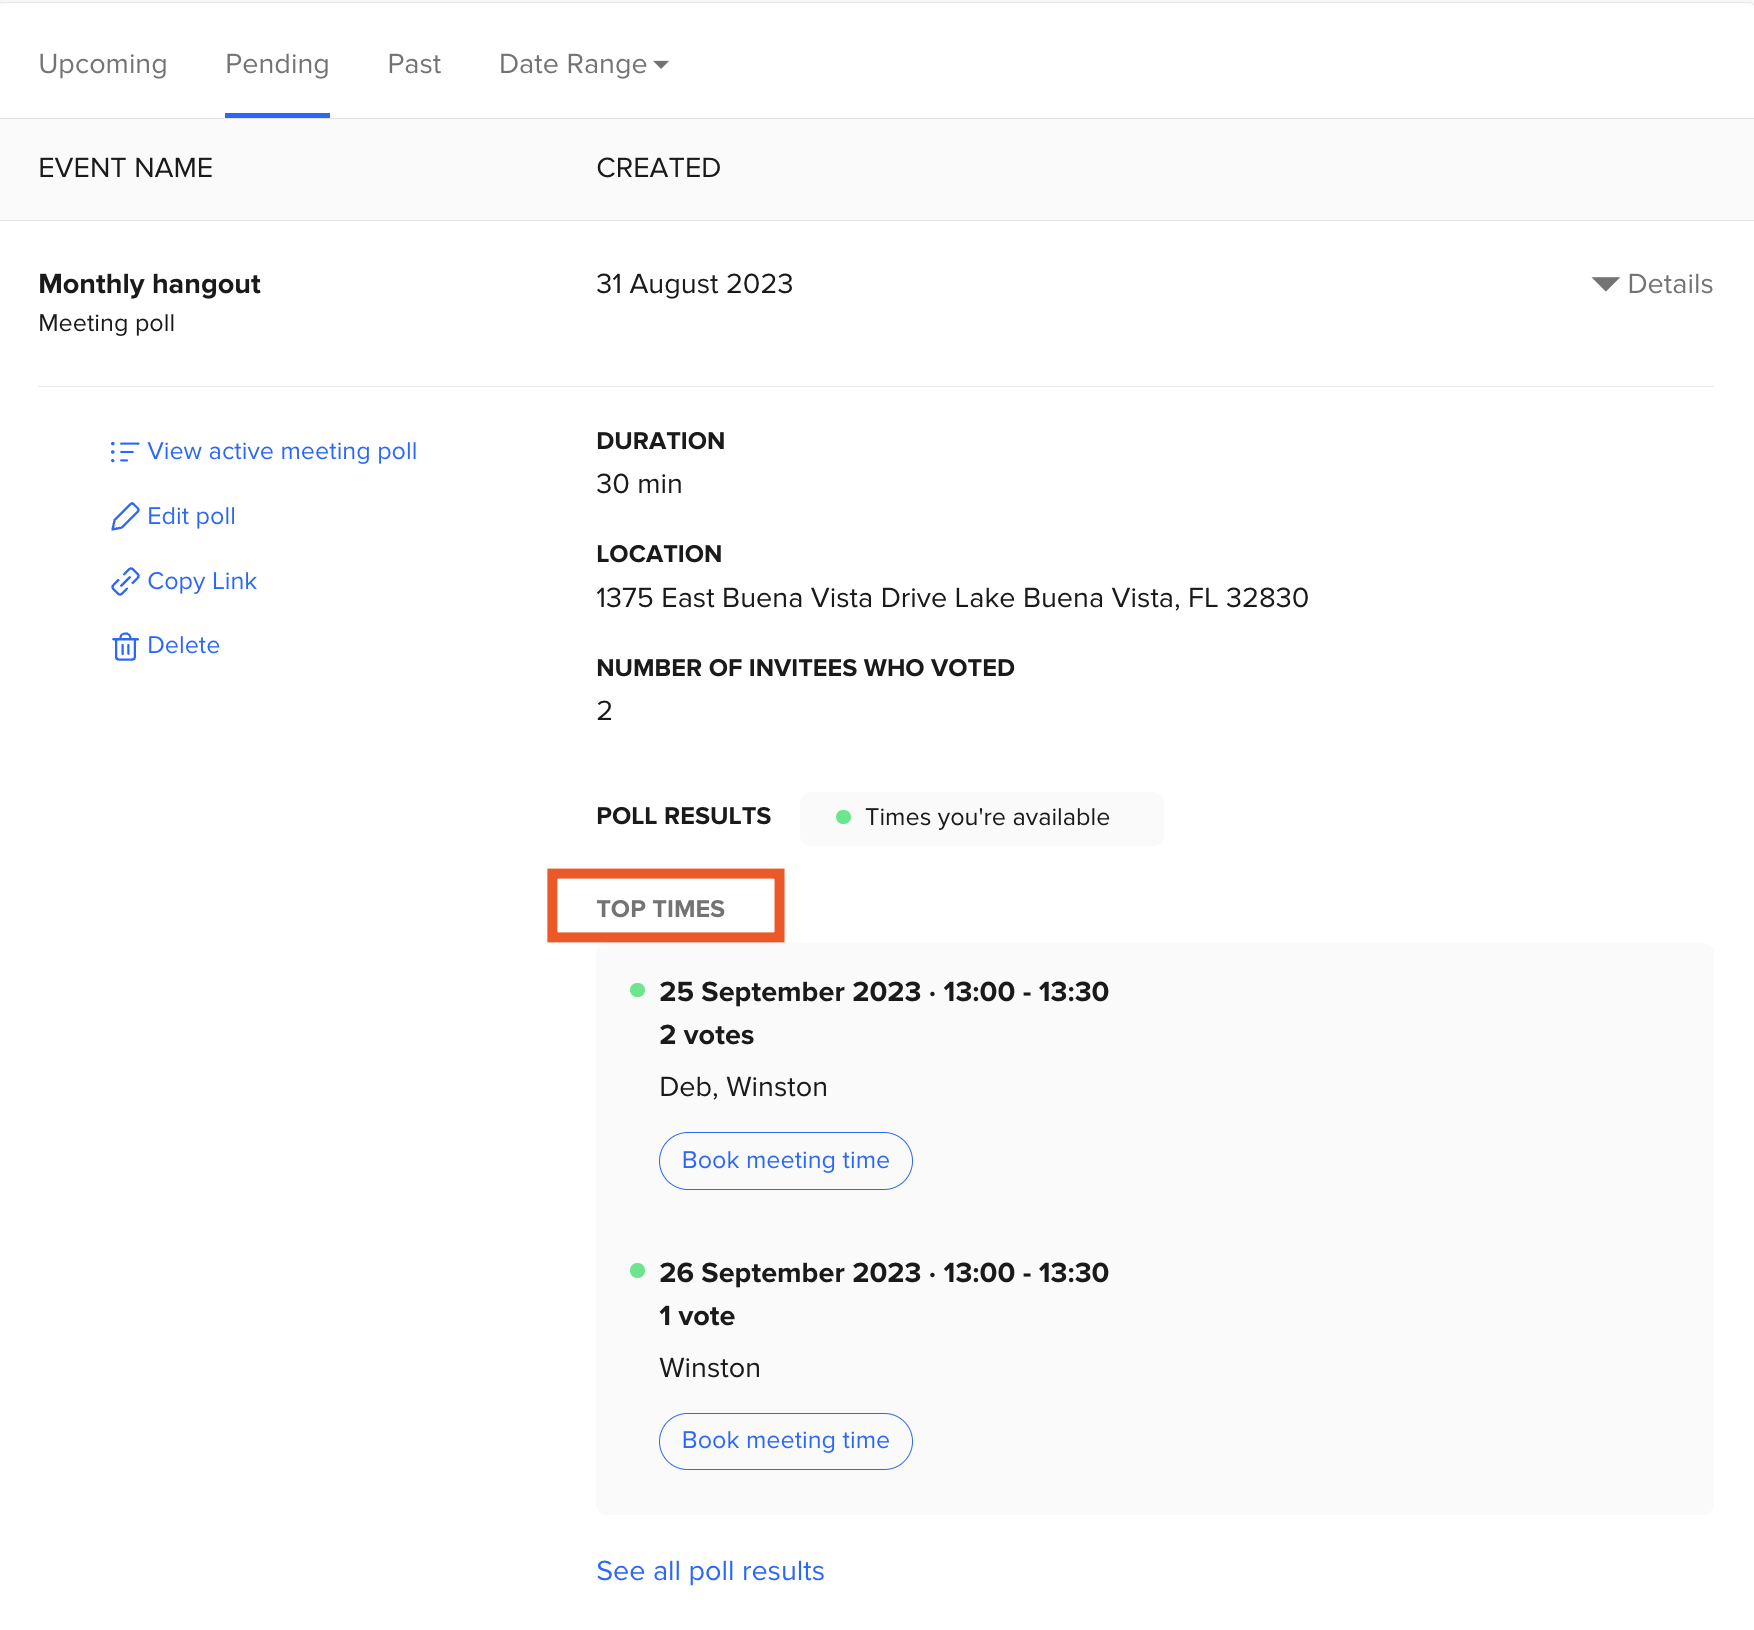
On your Calendly home page, click Scheduled events.
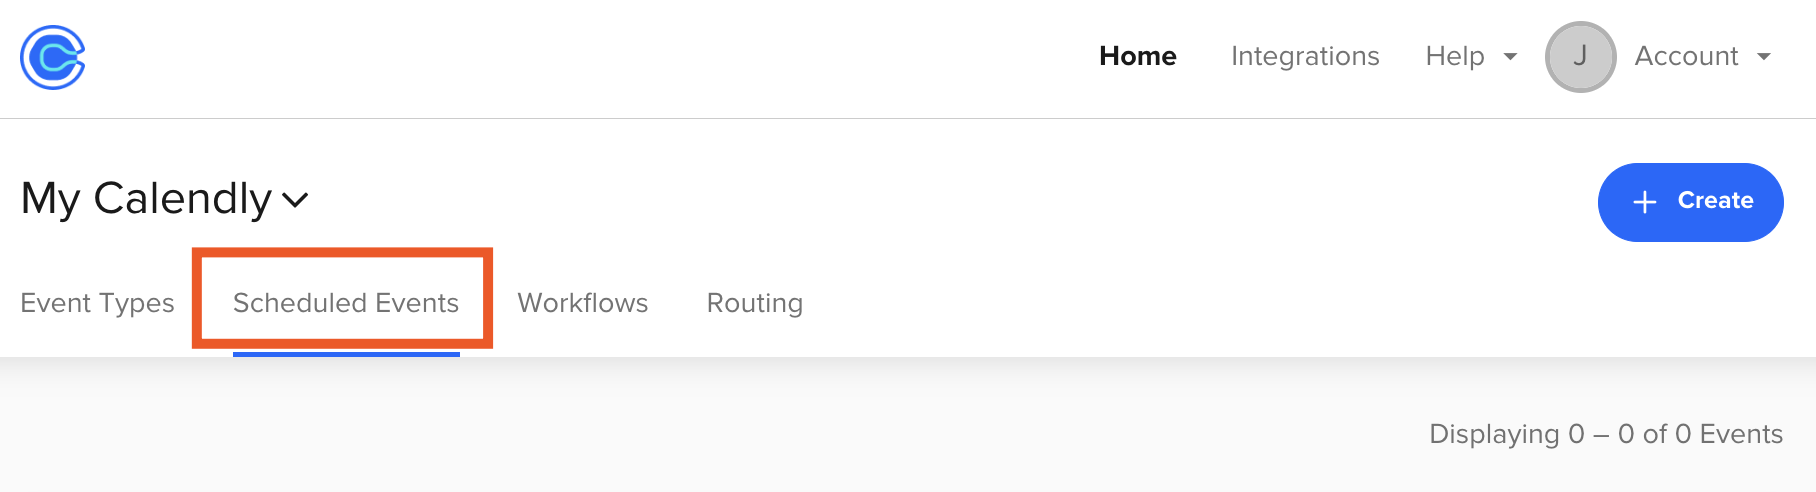
Click Pending. Then select the event that you sent the meeting poll for to get more event details.
In the expanded event view, Calendly displays a list of the Top Times invitees voted for. Click Book meeting time for the time slot that works for most people.
In the pop-up window that appears, click Book Meeting to confirm the meeting details.
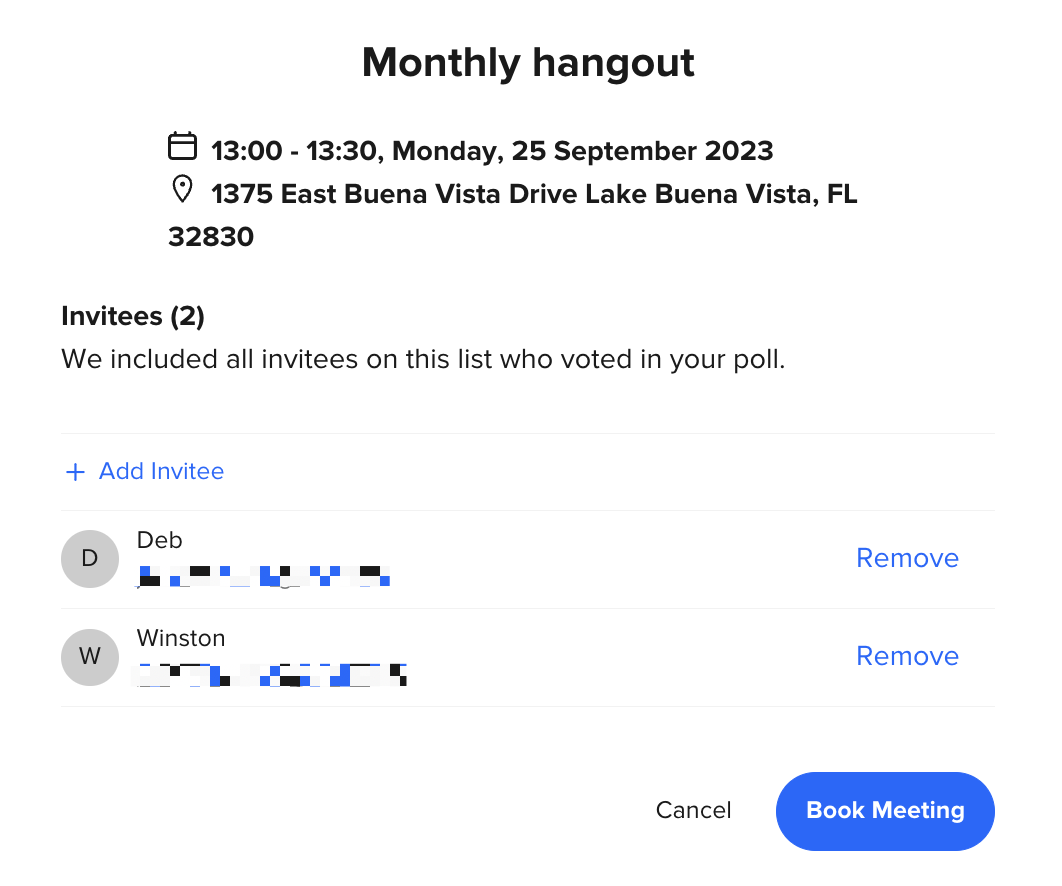


Note: Calendly will send a calendar invitation with the meeting details only to you and the invitees who voted in your poll. If someone didn't vote but you still want to include them in the event, click Add Invitee.
5. Add your company logo to your Calendly scheduling page
If you use Calendly to schedule business meetings, adding your company logo to your scheduling page is a nice professional touch.
Don't have a company logo? You can create one for free in Canva—no background in design needed. Or, you can use DALL·E and Zapier to generate a brand logo based on a simple design brief.
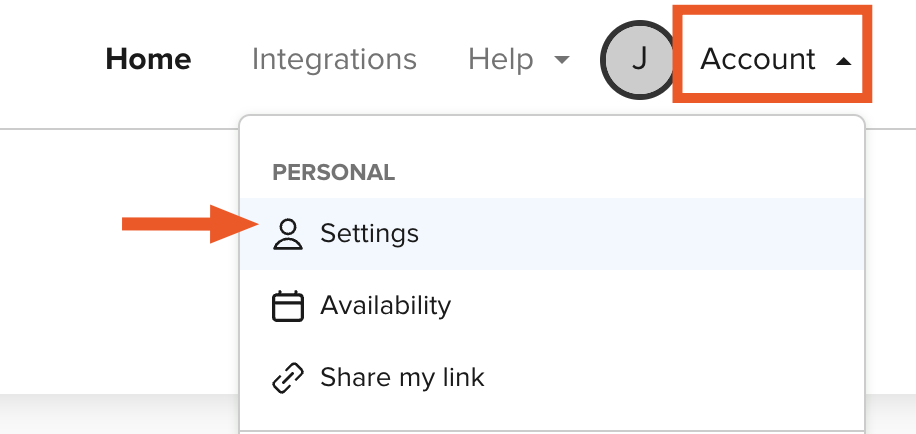
On your Calendly home page, click Account. Then select Settings.
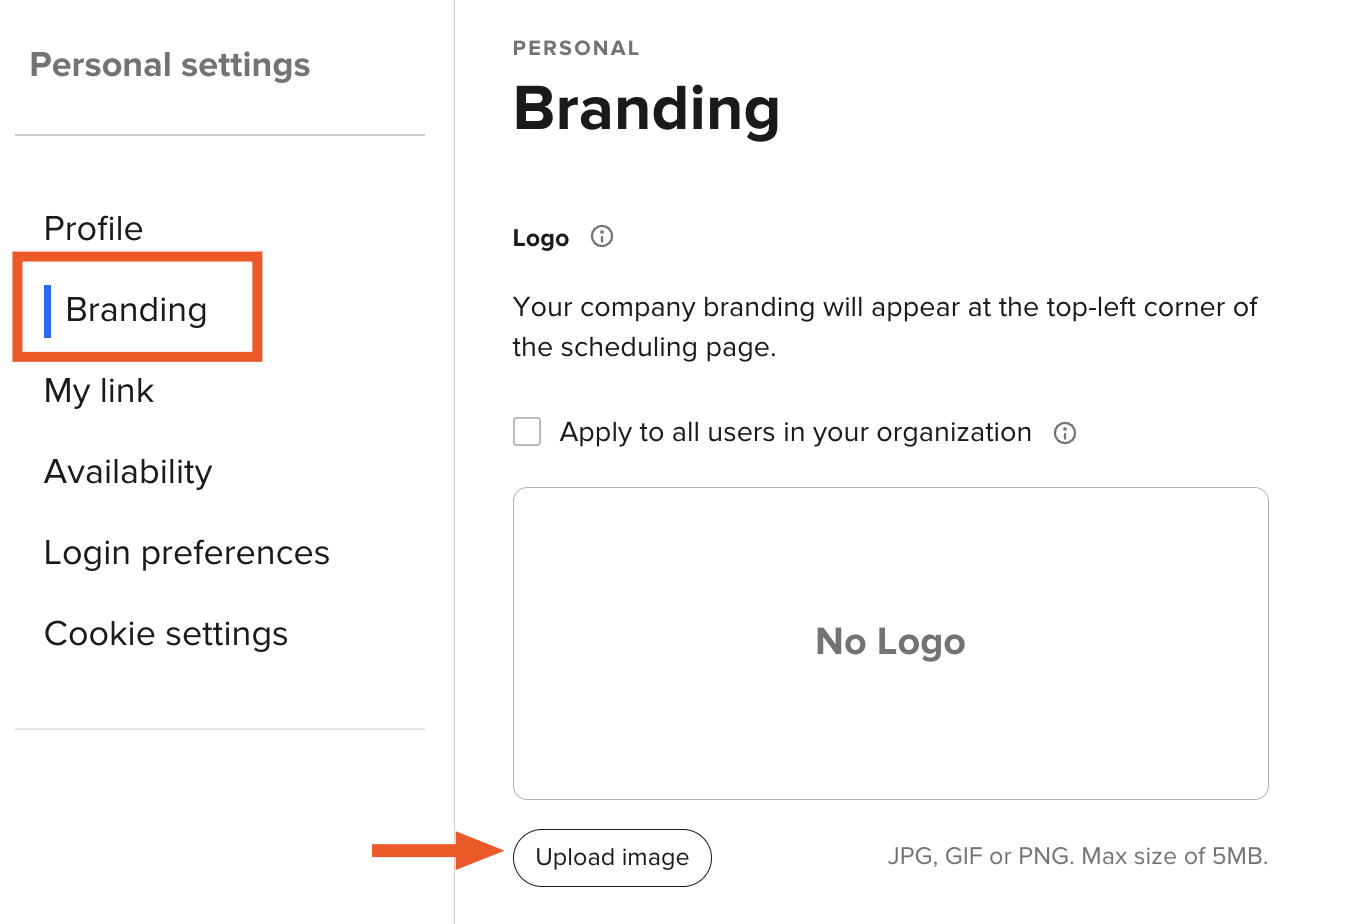
In the side menu, click Branding.
Click Upload image to add your image file.
By default, Calendly's branding appears on your scheduling page and the confirmation and notification emails sent to your meeting attendees. If you're on a Professional or higher plan, though, you can turn this off by clicking the toggle beside Use Calendly branding.
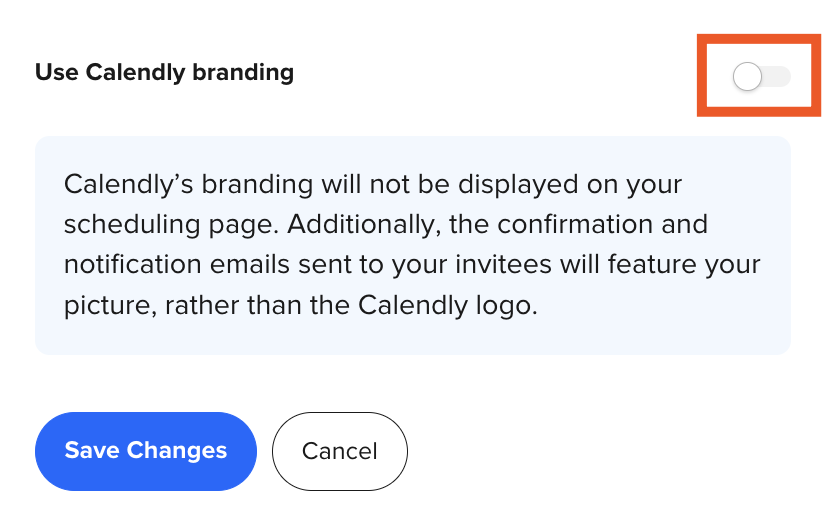
Click Save Changes.


Now when someone visits your scheduling page, your company logo will make the page feel a little more like a natural extension of your company.

6. Connect Calendly with your existing calendars
Calendly lets you set your hours and preferences for work meetings. But let's say you schedule a doctor's appointment for next Monday in your personal calendar. How does Calendly know to block your meeting availability for that time?
You could manually update your Calendly schedule. Or you can automate the process by connecting Calendly with popular calendar apps like Google Calendar, Office 365 Calendar, Exchange Calendar, and iCloud Calendar. It's not exactly a hidden feature, but it's one I think people tend to put off using.
On your Calendly home page, click Account. Then select Settings.
In the side menu, click Availability.
In the main area of the Availability page, click Connected calendars. Then click Add Calendar Account.

On the Connected calendars page, click Connect beside the calendar type you want to connect.
Can't connect your calendar of choice? Zapier's integrations with calendar apps might help.

Follow the security prompts to connect your selected calendar. Once connected, you'll be brought back to the Connected calendars page.
In the Configuration section, beside Add to calendar, select your primary calendar (the one you want to add new Calendly events to when they're scheduled).


You're all set.
7. Embed your Calendly scheduling page on a website
Sure, you could share a link to your Calendly scheduling page for other people to book a meeting with you. Or you could make scheduling easier on everyone and embed the page directly on your website.
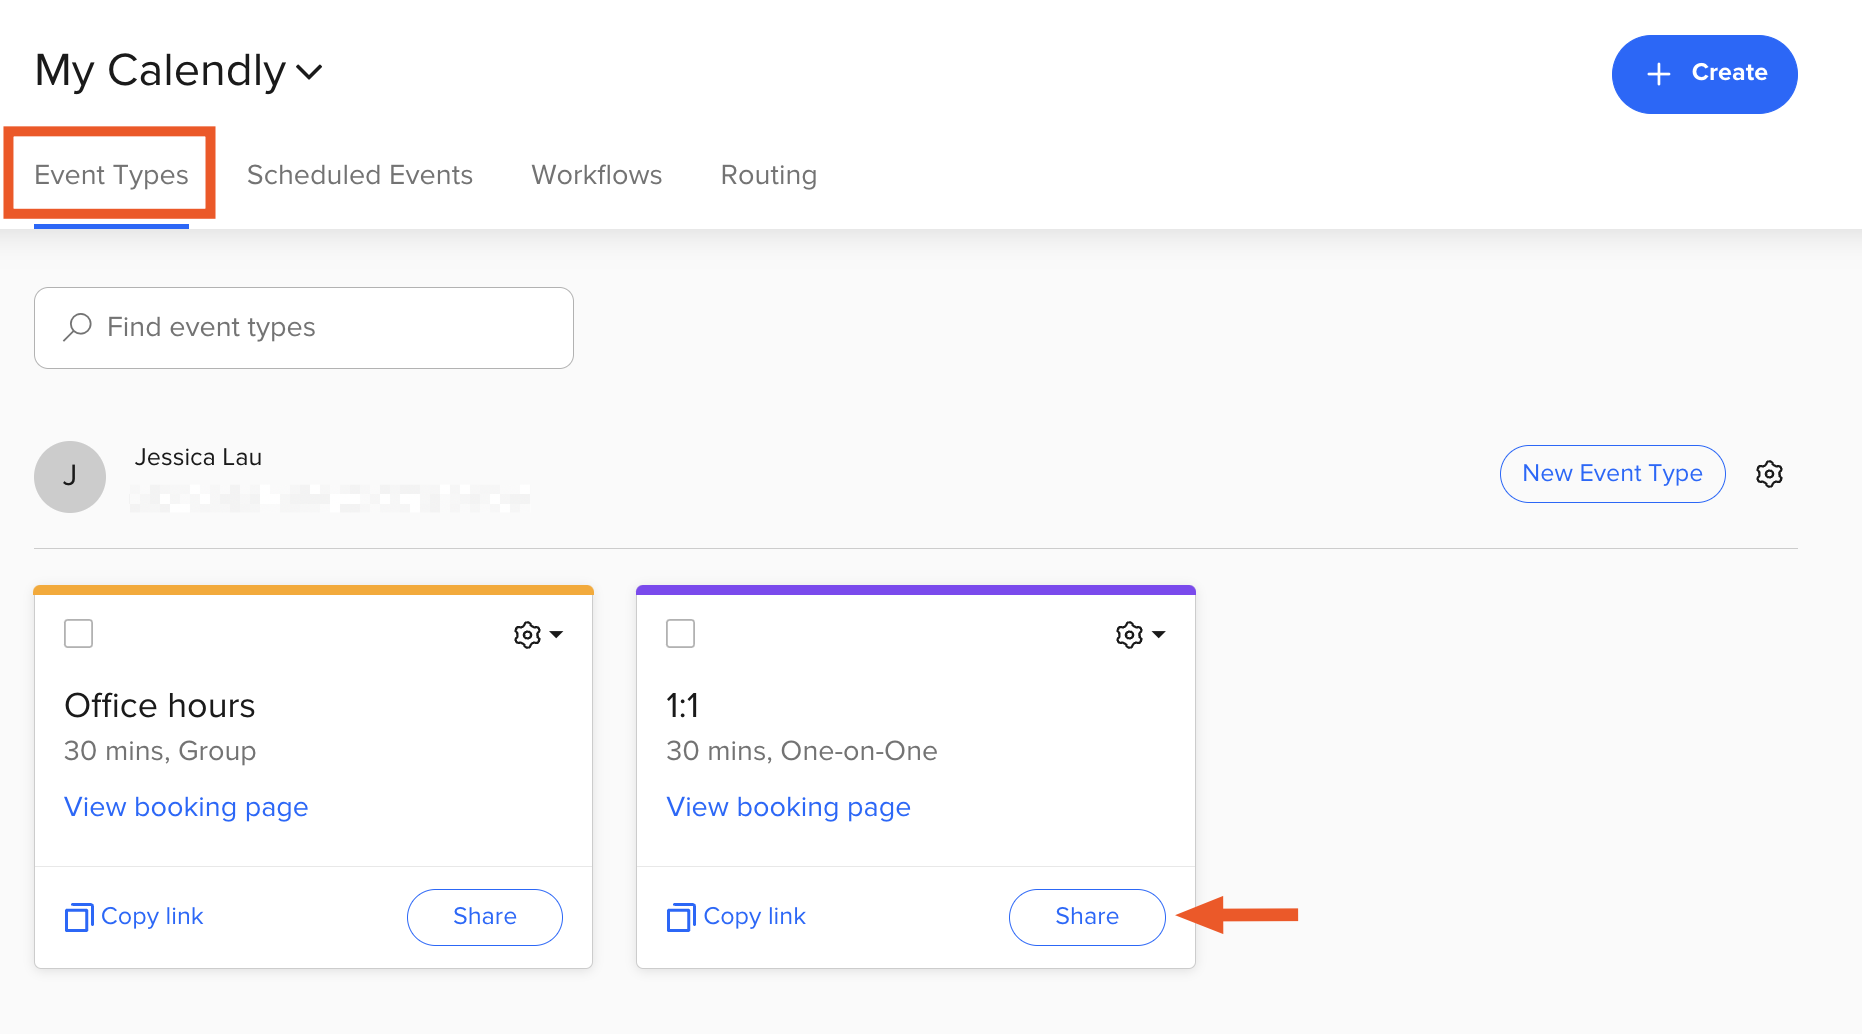
On your Calendly home page, go to the Event Type you want to share, and click Share.
In the pop-up window that appears, click Add to website.
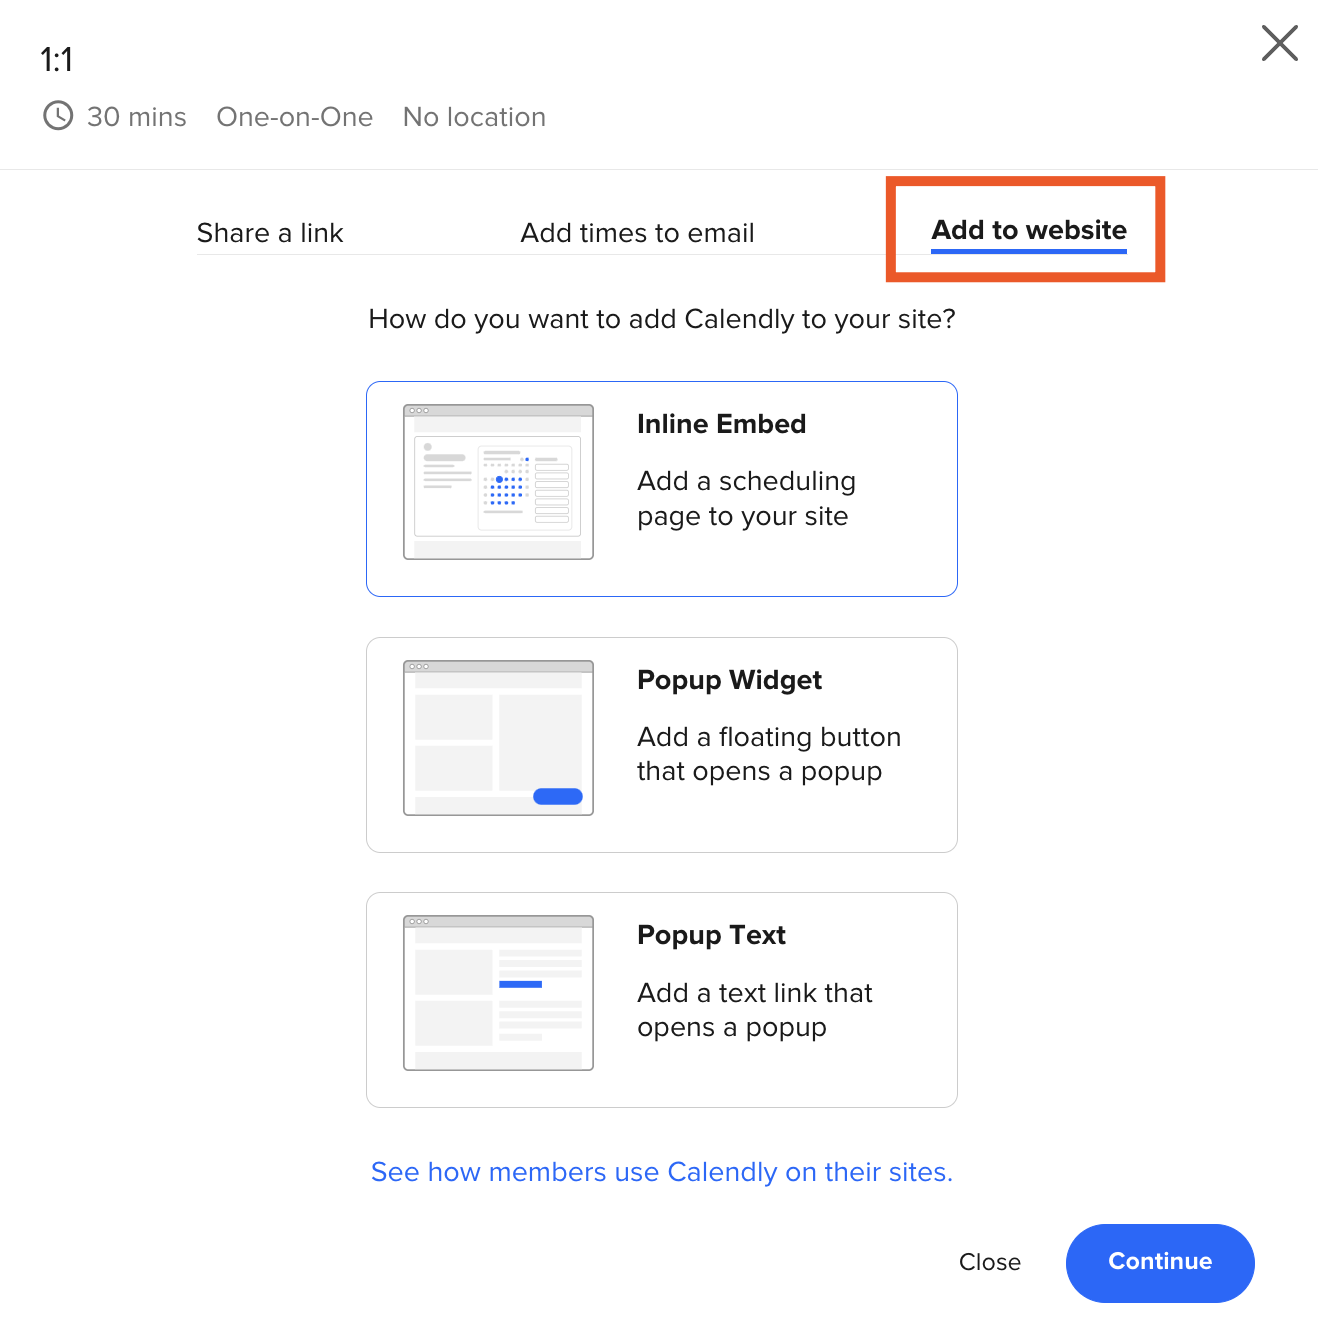
Select how you want to add the scheduling page to your website: Inline Embed, Popup Widget, or Popup Text. A popular option is the Inline Embed, which lets you add the form to a particular website. The other two options allow you to add a button or a text link to your site that turns into a popup.
Click Continue.
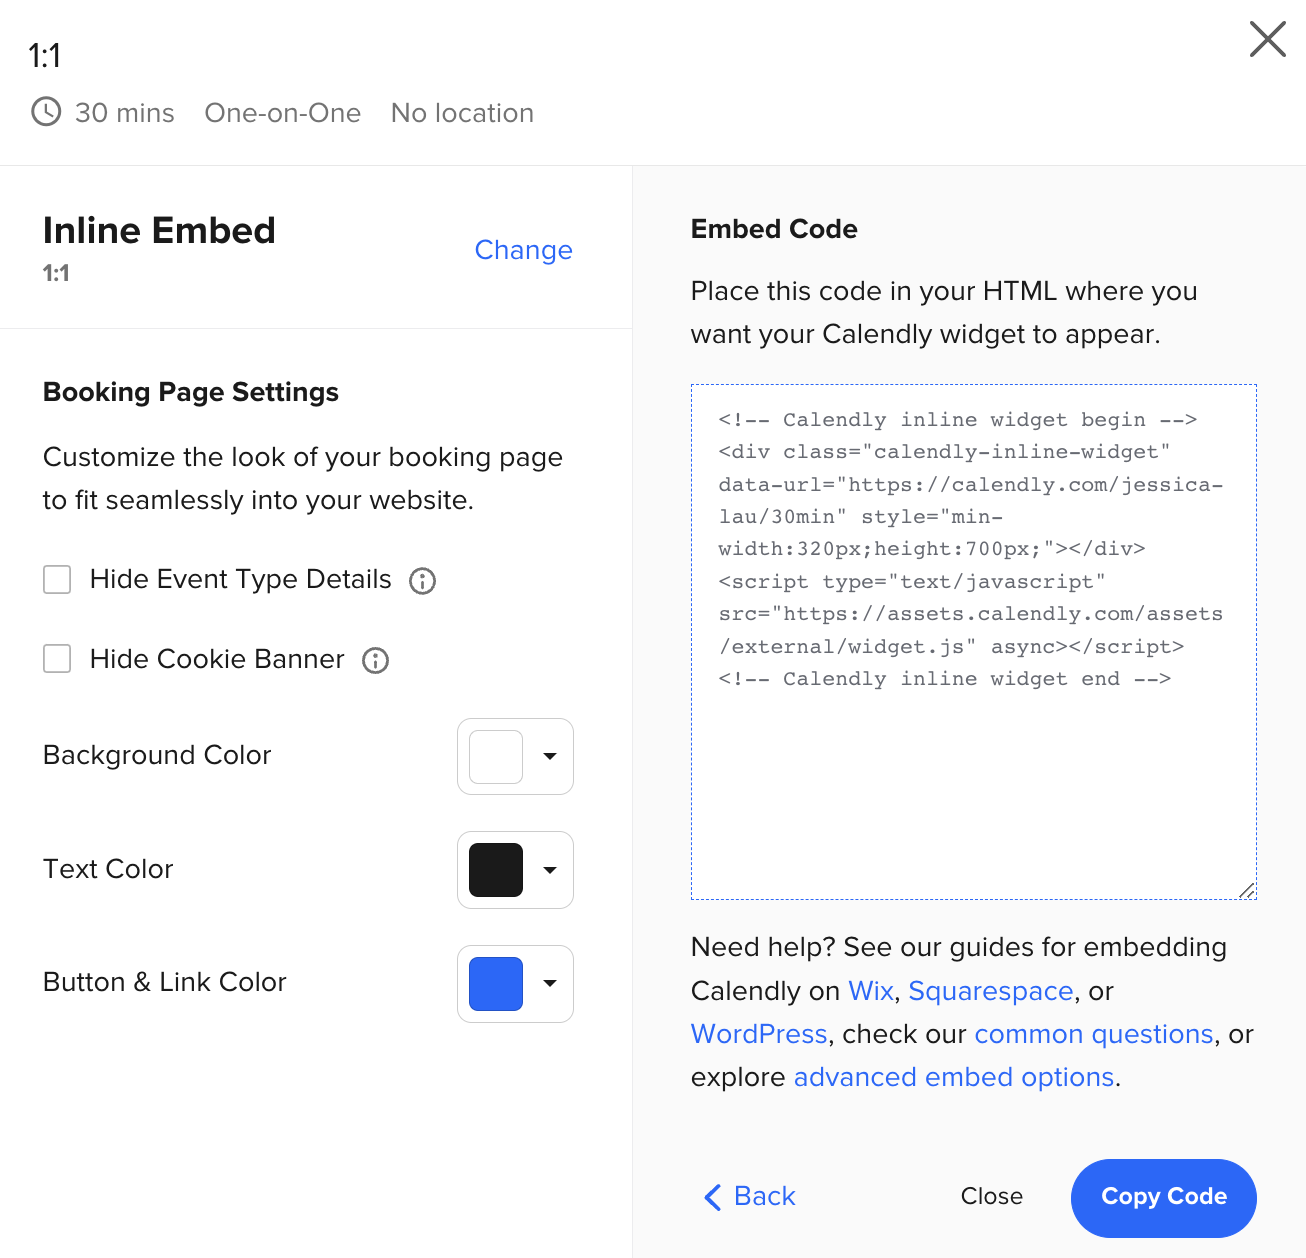
For any option you choose, Calendly will create an embed code for you to copy and paste into your HTML where you want your Calendly widget, button, or link to appear. You can also customize the look of your booking page, button, or link by changing features like the text and button color. Once you're happy with your booking page settings, click Copy Code.


Now you can paste the code in the desired spot of your HTML. If you're not sure how to do this, here are step-by-step instructions for popular website builders:
Connect Calendly with your other go-to apps
Calendly offers great integrations with calendar apps, but what if you want to connect it to your CRM or even just a spreadsheet? That's where Zapier's Calendly integration comes in. You can connect Calendly to thousands of apps, allowing you to quickly do things like create Zoom meetings for newly scheduled events. Here are a few workflows to get you started.
To get started with a Zap template—what we call our pre-made workflows—just click on the button. It only takes a few minutes to set up. You can read more about setting up Zaps here.
Add or update ActiveCampaign contacts for new Calendly invitees
Create Google Sheets rows from new scheduled Calendly events
Related reading:
This article was originally published in September 2021 by Justin Pot. The most recent update was in September 2023.


