If you're collecting any information through Typeform, you can count on handy charts and graphs to give you a holistic view of responses. But there are times where it's easier to see responses in a spreadsheet.
Typeform has a native Google Sheets integration, but if you want more control over what responses get sent to your spreadsheet, Zapier can help.
We'll show you how to create a Zap—what we call our automated workflows—that will automatically populate a Google Sheet with Typeform responses as they come in.
New to Zapier? It's workflow automation software that lets you focus on what matters. Combine user interfaces, data tables, and logic with 6,000+ apps to build and automate anything you can imagine. Sign up for free.
Before you begin
Once you have your Typeform form ready, create a Google Sheet with columns that match your form response fields.
In our example, we're collecting responses for an event registration that include name, email, and any questions event attendees have. Here's our Google Sheet:
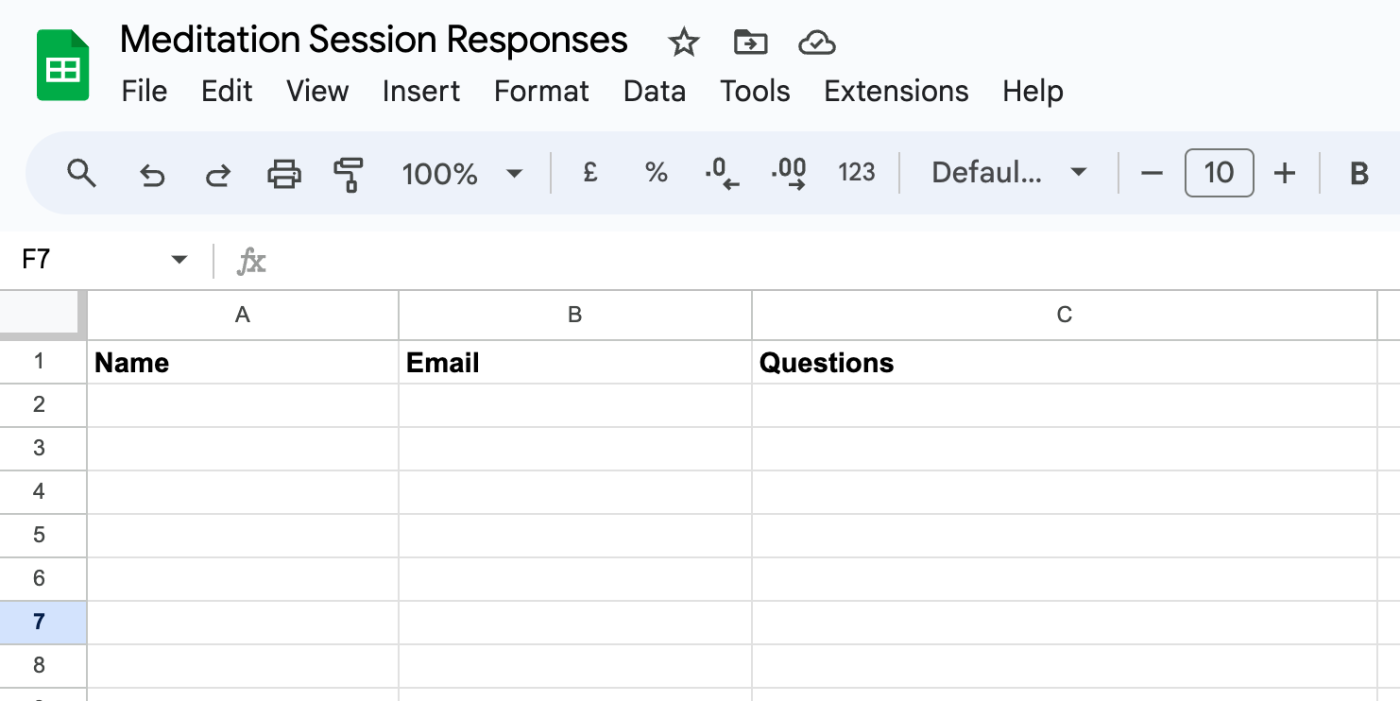
You can create different headings based on your form fields. Just make sure to have some form of column headings as those will be used to set up your Zap.
Make sure you also have at least one response to your Typeform. You'll need that to set up your Zap.
How to collect new Typeform responses in Google Sheets
Now you're ready to set up your workflow. Zapier lets you create automated workflows called Zaps, which send your information from one app to another. You can create your own Zap from scratch without any coding knowledge, but we also offer quick templates to get you started.
If you'd like to start with a template, click on the Zap template below to go to the Zap editor. You'll need to create a Zapier account if you don't already have one. Then, follow the directions below to set up your Zap.
Collect new Typeform responses as rows on Google Sheets
Set up your Typeform trigger
Let's start with the trigger—the event that starts your Zap. If you're using the Zap template, this will be selected for you. Otherwise, search for and select Typeform as the trigger app and New Entry as the trigger event, then click Continue.
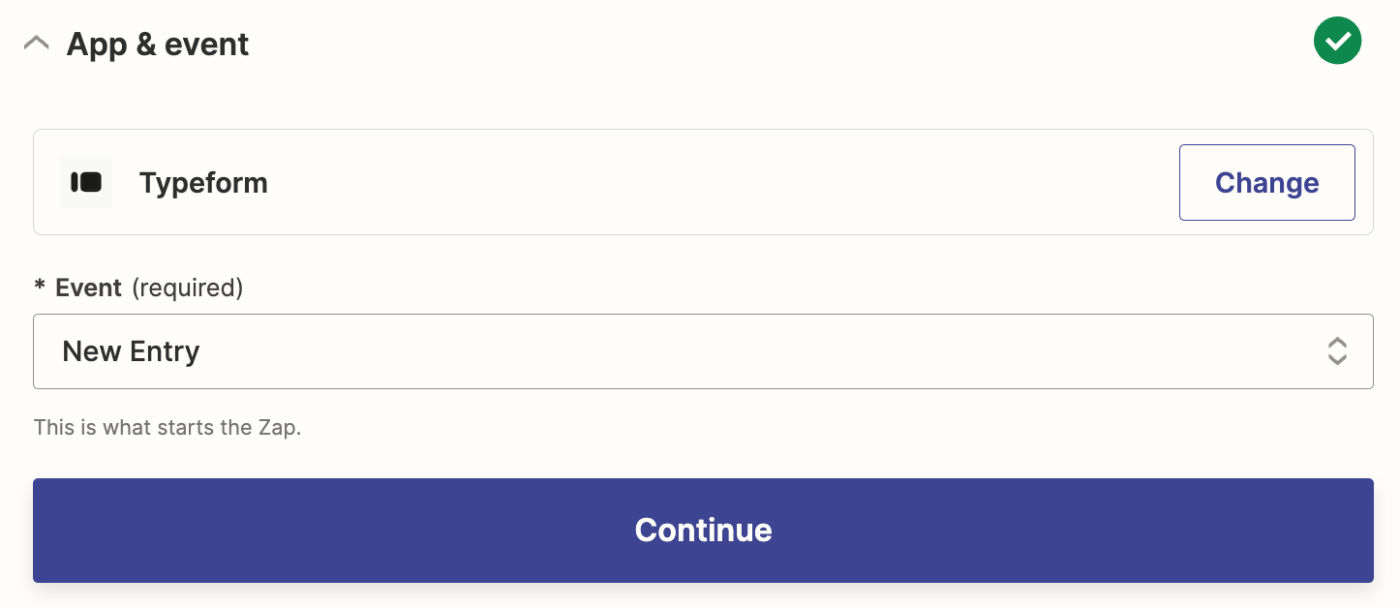
Next, sign in to your Typeform account, if you haven't already, and click Continue.
Setting up your trigger only takes one step. In the Typeform Form field, select the form you want to use in this workflow, then click Continue.

Now, it's time to test your trigger step. If you don't have at least one response to your form, add one now. Once you have at least one submission, click Test trigger.
Zapier will now show you the three most recently form submissions. Choose the result you want to use to set up the rest of your Zap, then click Continue with selected record.
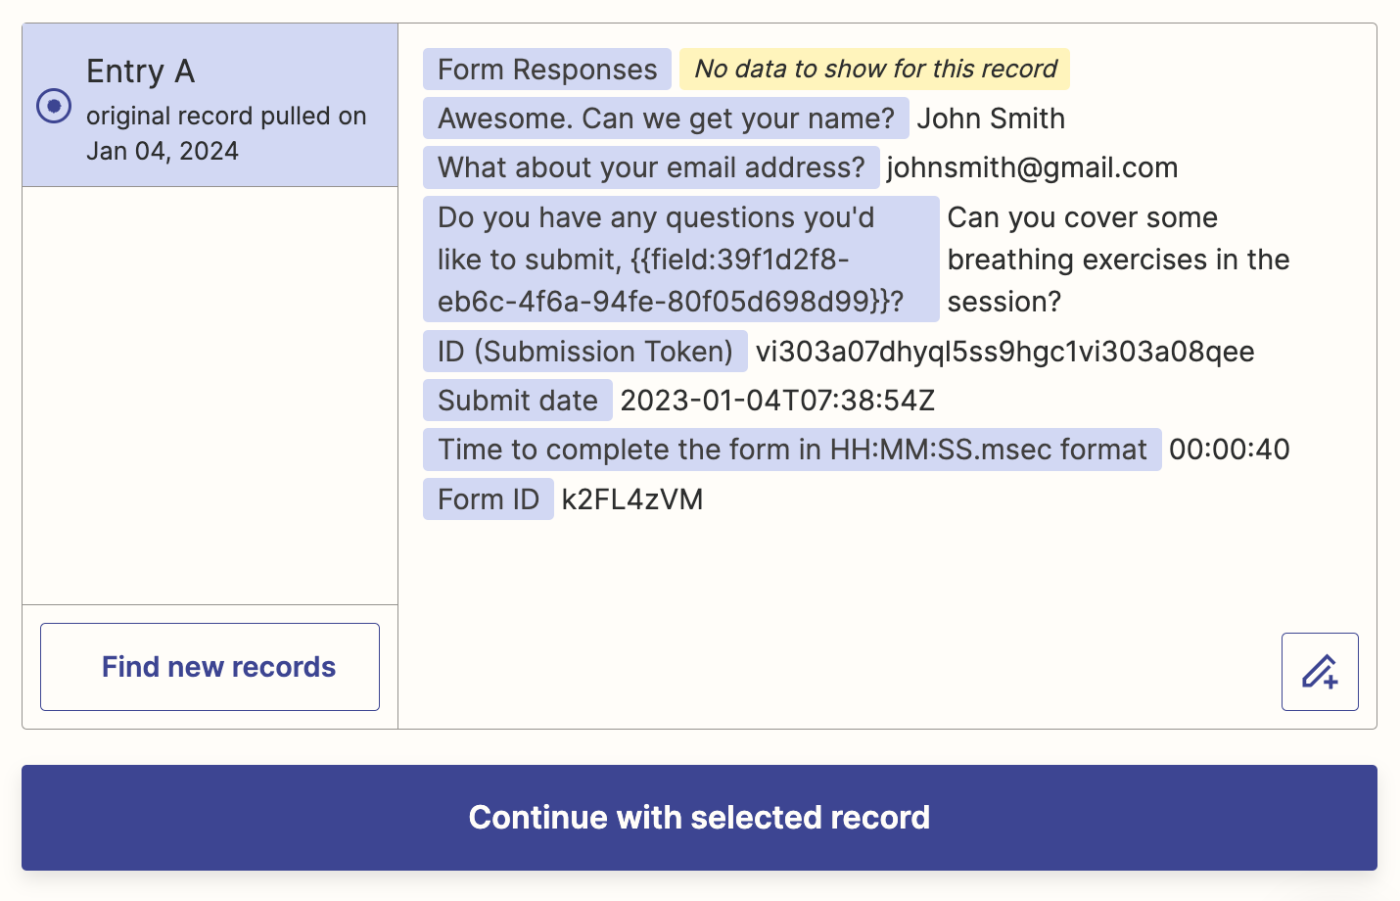
And that's it for your trigger step!
Set up your Google Sheets action
Now it's time to set up the action—the event your Zap will perform once it's triggered. If you're using the Zap template, these will already be selected for you. Otherwise, search for and select Google Sheets as your action app and Create Spreadsheet Row as your action event. Click Continue.
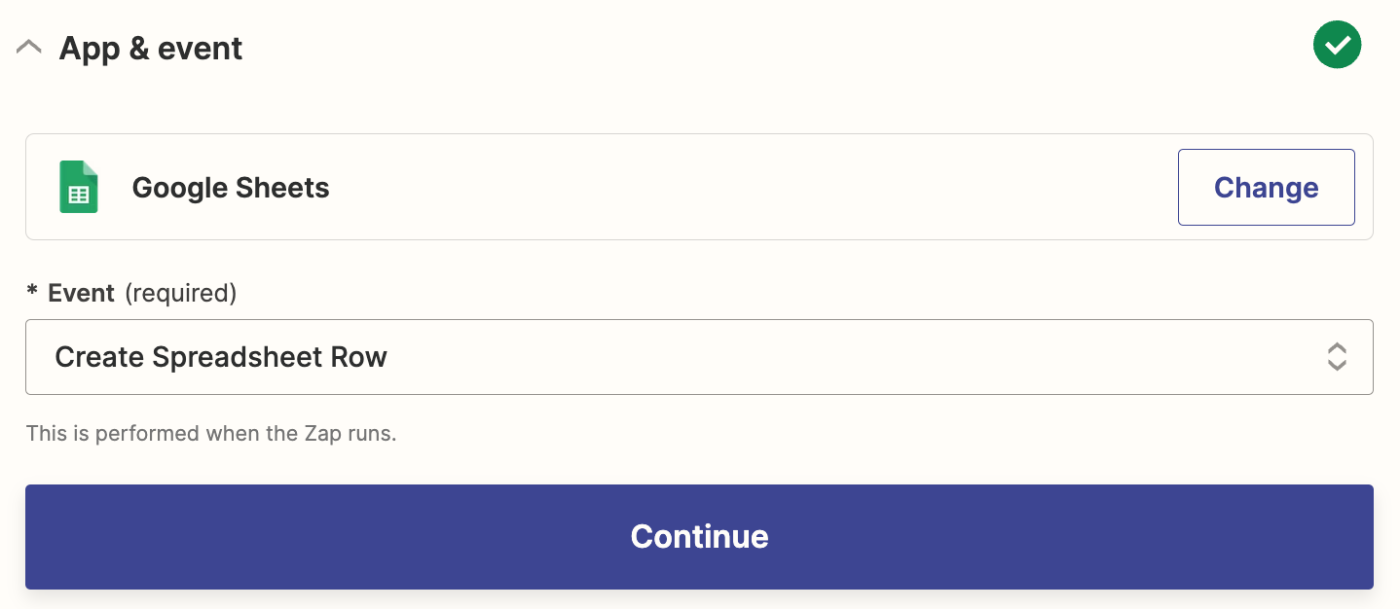
Next, sign in with your Google Sheets account, if you haven't already, and click Continue.
Now, it's time to customize your action step. First, select the drive where your Google Sheet is stored in the Drive field. Then select the spreadsheet you created in the Spreadsheet field. And finally, choose the appropriate worksheet (by default, it's "Sheet1").
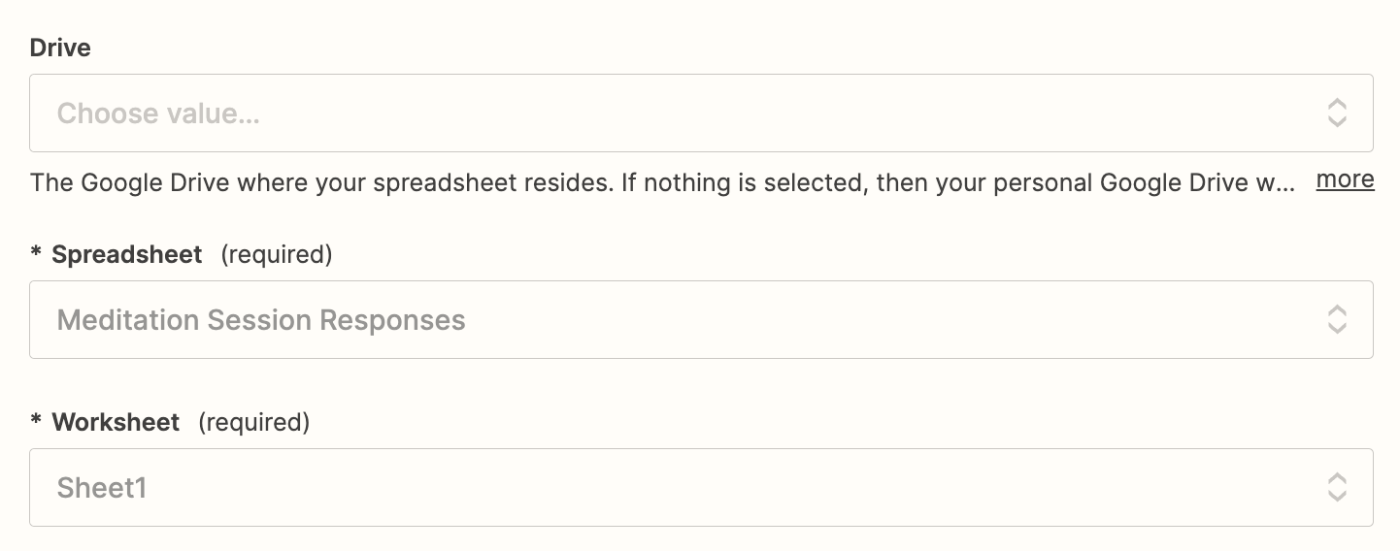
When you do this, Zapier will automatically pull up the column headings from your Google Sheet.
In our example, we created three column headings: Name, Email, and Questions. Now all that's left to do is to map the fields from our Typeform to our Google Sheet columns. To do that, click in the field where you want to add Typeform data, then select the appropriate data from the Insert Data dropdown.
Here's what our fields look like:
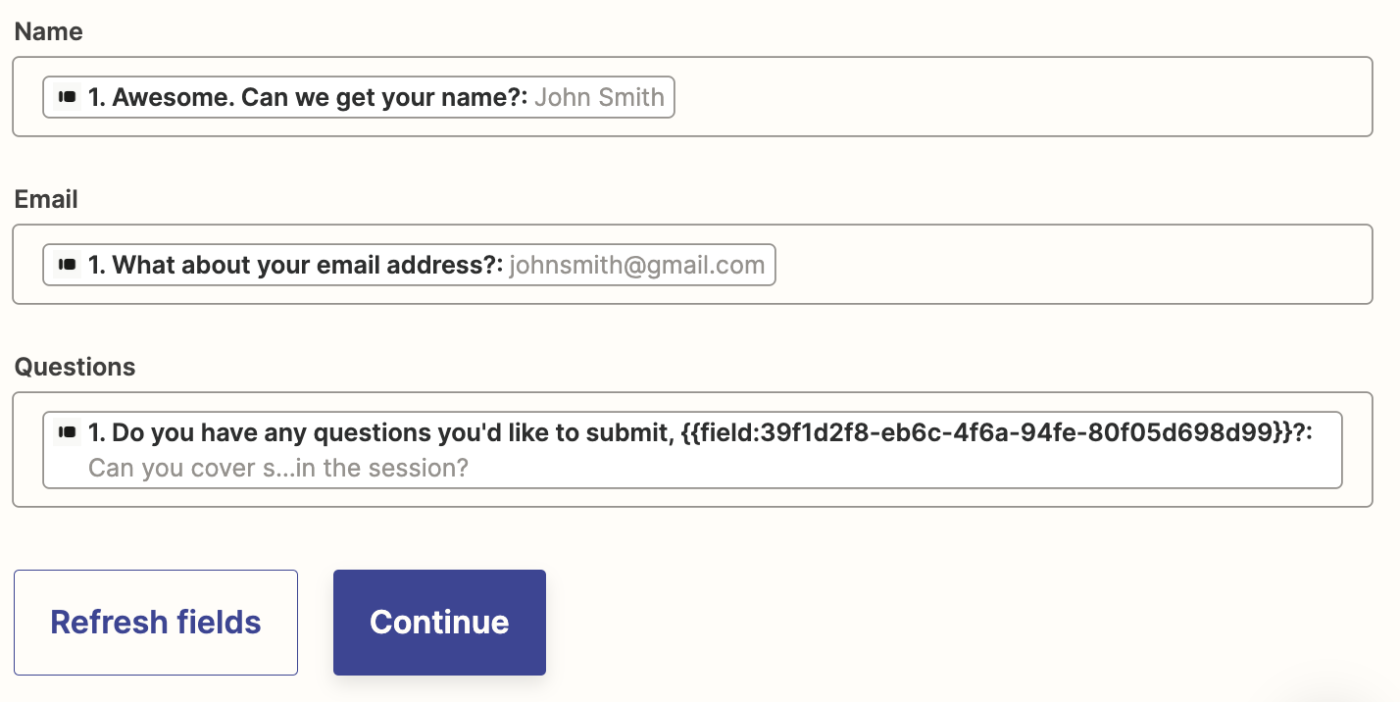
Do this for all the column headings, and when you're happy with the setup, click Continue.
Now, test your Zap. Click Test step and Zapier will send the test data to your Google Sheets spreadsheet. Open your spreadsheet to make sure that everything is as it should be.
This is what our sample test looked like:
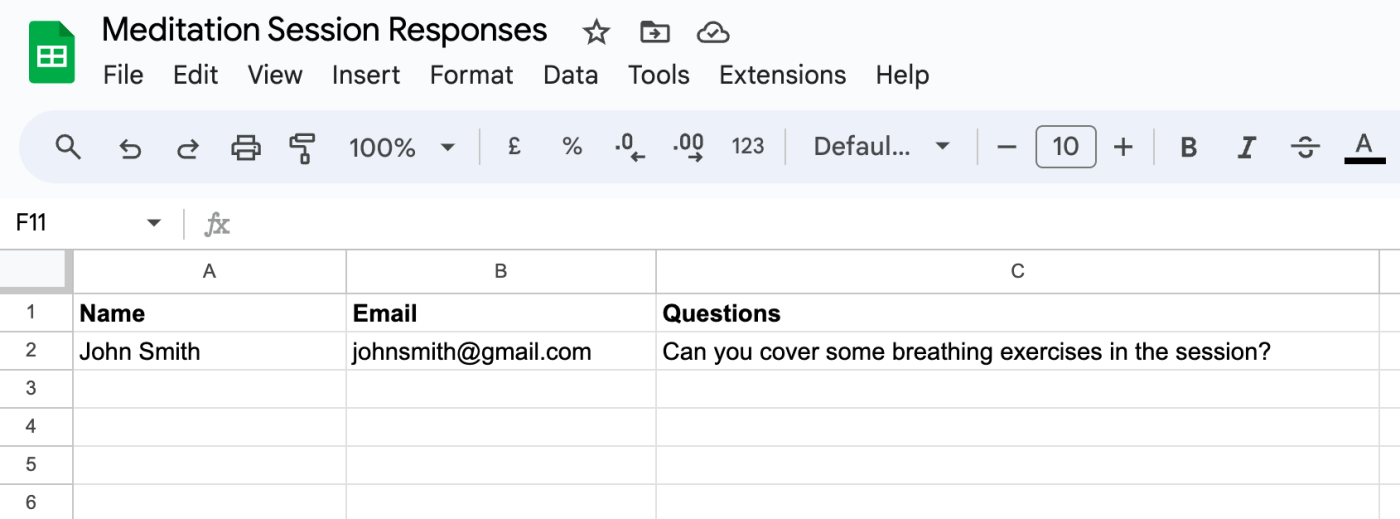
If everything looks right, you're ready to use your Zap. Now, every time you get a new response in Typeform, it will be added to your Google Spreadsheet automatically!
Collect new Typeform responses as rows on Google Sheets
This article was originally published in July 2019, with contributions by Krystina Martinez. It was most recently updated in January 2024.
