The (true) cliché that "content is king" typically refers to content as a marketing strategy. But really, any sort of digital content is king, ruling over all we do.
And kings have large entourages—Egyptian kings needed tombs to hold their stuff. Digital content creates lots of "stuff," stuff we need to share to do business. Files, whether they're documents, graphics, or a day's worth of conference webinars, need to get shared somehow.
Have you ever tried emailing any of that stuff? Super annoying and a super time-waster, as you wait for the delivery failure notification that's sure to come. Instead, try one of these options for streamlining how you share large files.
1. Use cloud sharing apps
Everyone's "journey to the cloud" has to start somewhere, right?
File sharing on the cloud is an efficient alternative to emailing mega-files or large collections of files. It completely sidesteps having to actually deliver anything. With cloud sharing, you simply store the file where other people can access it.
You have too many options to count. Dropbox and Box are two of the best known in the cloud file sharing space. And anyone using Google or Microsoft already has internal and external cloud-sharing options through Google Drive or OneDrive.
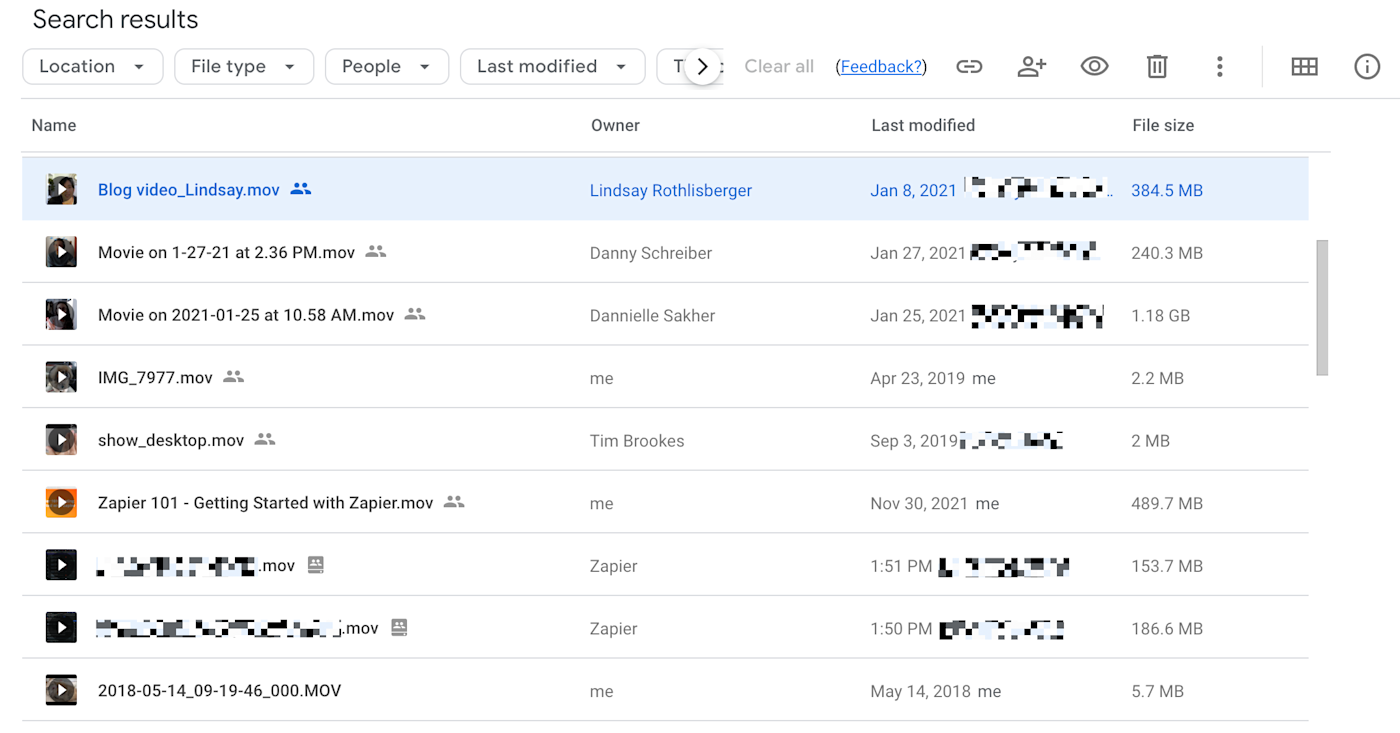
Cloud sharing is built for collaboration because these kinds of apps allow for granular access and permission levels. You can share folders, files, or even drives, and you can control who's able to see and edit which files (e.g., the Google world has three access levels: Viewer, Commentor, and Editor).
One last note: when you're shopping through cloud sharing options, don't conflate cloud storage with cloud sharing. A cloud-based app built as a backup-and-archive storage tool may offer some limited sharing functionality, but that's not its purpose. If team file collaboration is your priority, select a tool designed with collaboration in mind.
Ideal use case: If you and your team or clients are already working together in a cloud environment that offers document sharing, using that same tool is the simple and efficient option. It's also ideal when you want people to be able to edit a file: cloud sharing apps often have version control, approval workflows, and local syncing.
Cons: Managing the permissions in cloud sharing can become a headache and could lead to some oversharing. Plus, it can be expensive: the free plans have storage and file size limits and might lack some of the more advanced collaboration tools, like approval workflows. Finally, files on the cloud are more vulnerable to hacking than locally-stored and shared files.
2. Use a purpose-built tool for sharing a single file
There are purpose-built tools dedicated to fast, secure file sharing. When all you want to do is deliver a file to someone else, you don't need the bells and whistles beyond that. Often, you don't even need to create an account.
You have two options here:
Peer-to-peer (P2P) sharing
Docking the file (temporarily) on a third-party server managed by the file share application
In P2P file sharing, the transfer is made via your web browser—your file never gets stored anywhere. The wrinkle to that is you have to keep your browser open while the recipient downloads the file. If there's a bad internet connection or speed, P2P sharing can take a long time, or not succeed at all.
Here's a look at ToffeeShare, which offers free P2P and third-party server sharing.
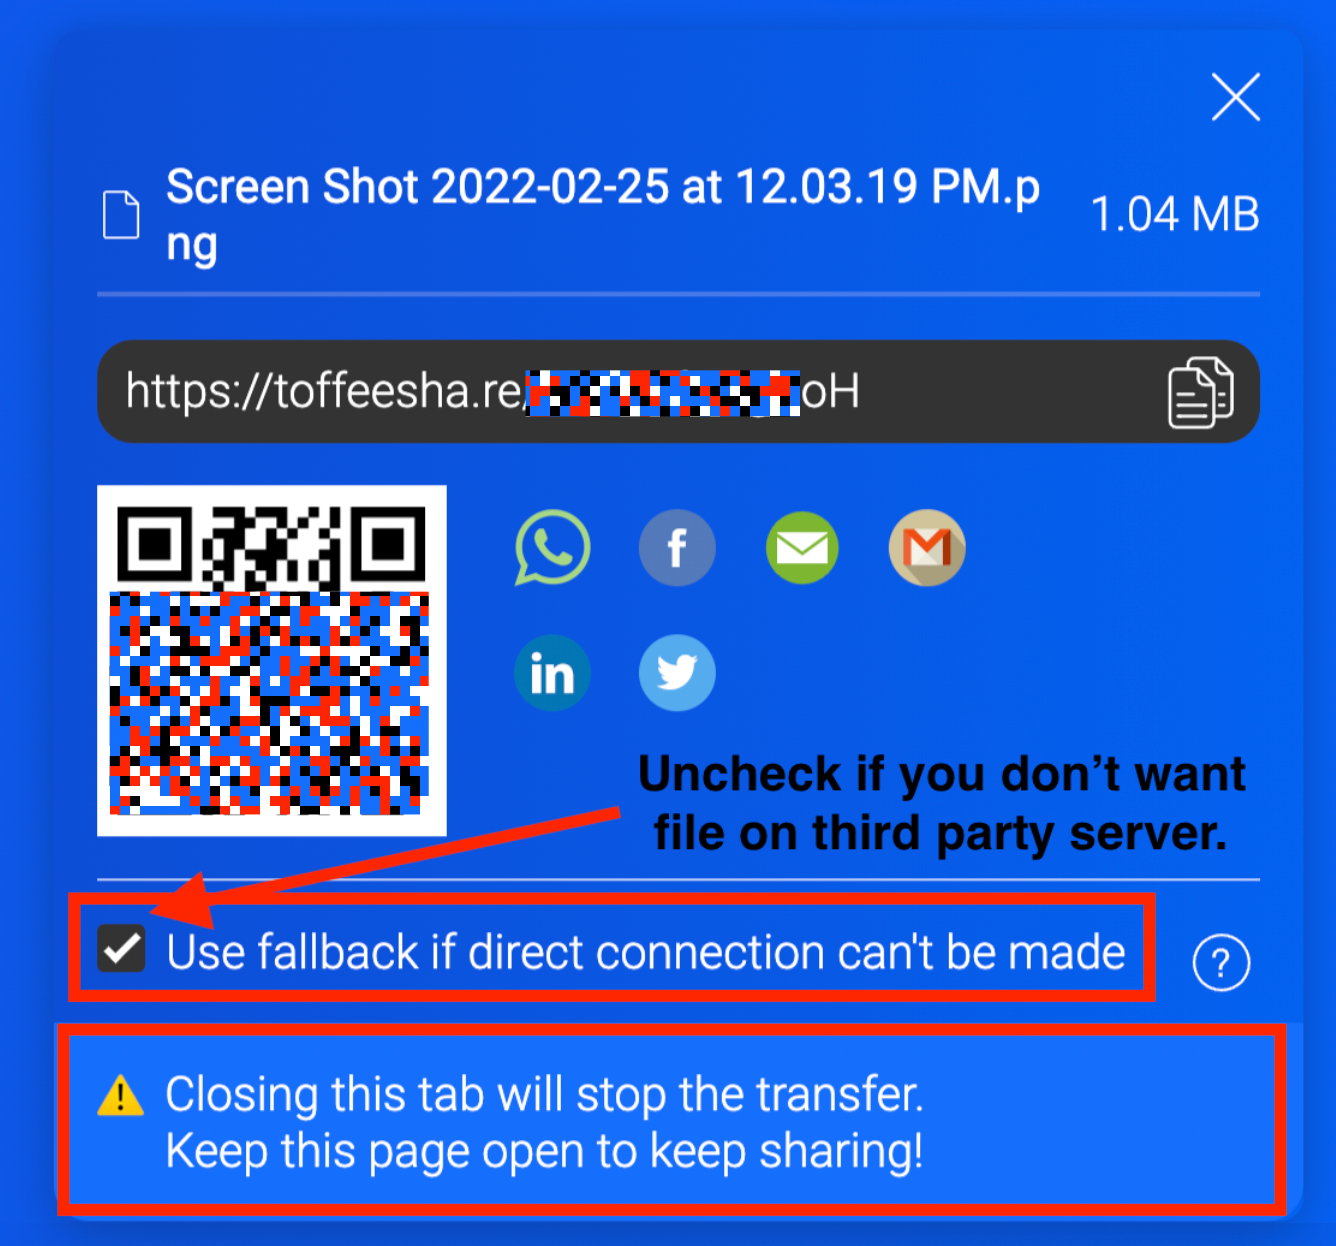
It defaults to allowing third-party server storage as a backup, but you can uncheck that box to keep it P2P. You can also see all your options for ways to share the file link.
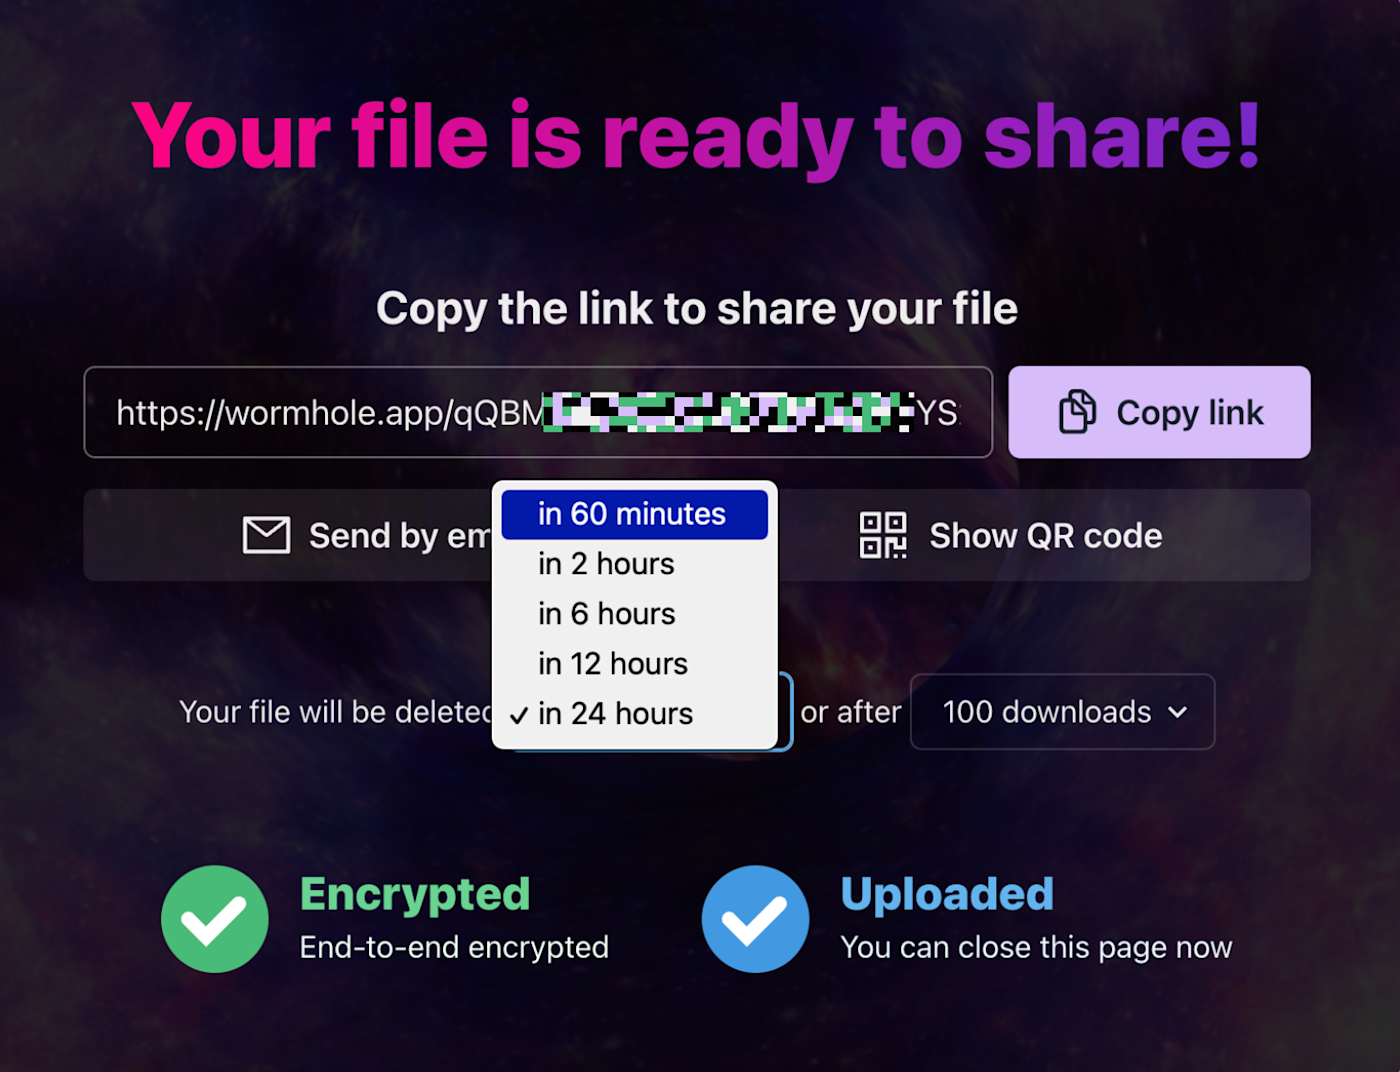
Wormhole is another free, easy-to-use file sharing tool. It temporarily stores your files on a Wormhole server where your recipient(s) can access them. You can limit the number of downloads and set how long the file remains available.
And Dropbox has Dropbox Transfer, which allows you to dock your files on their server.
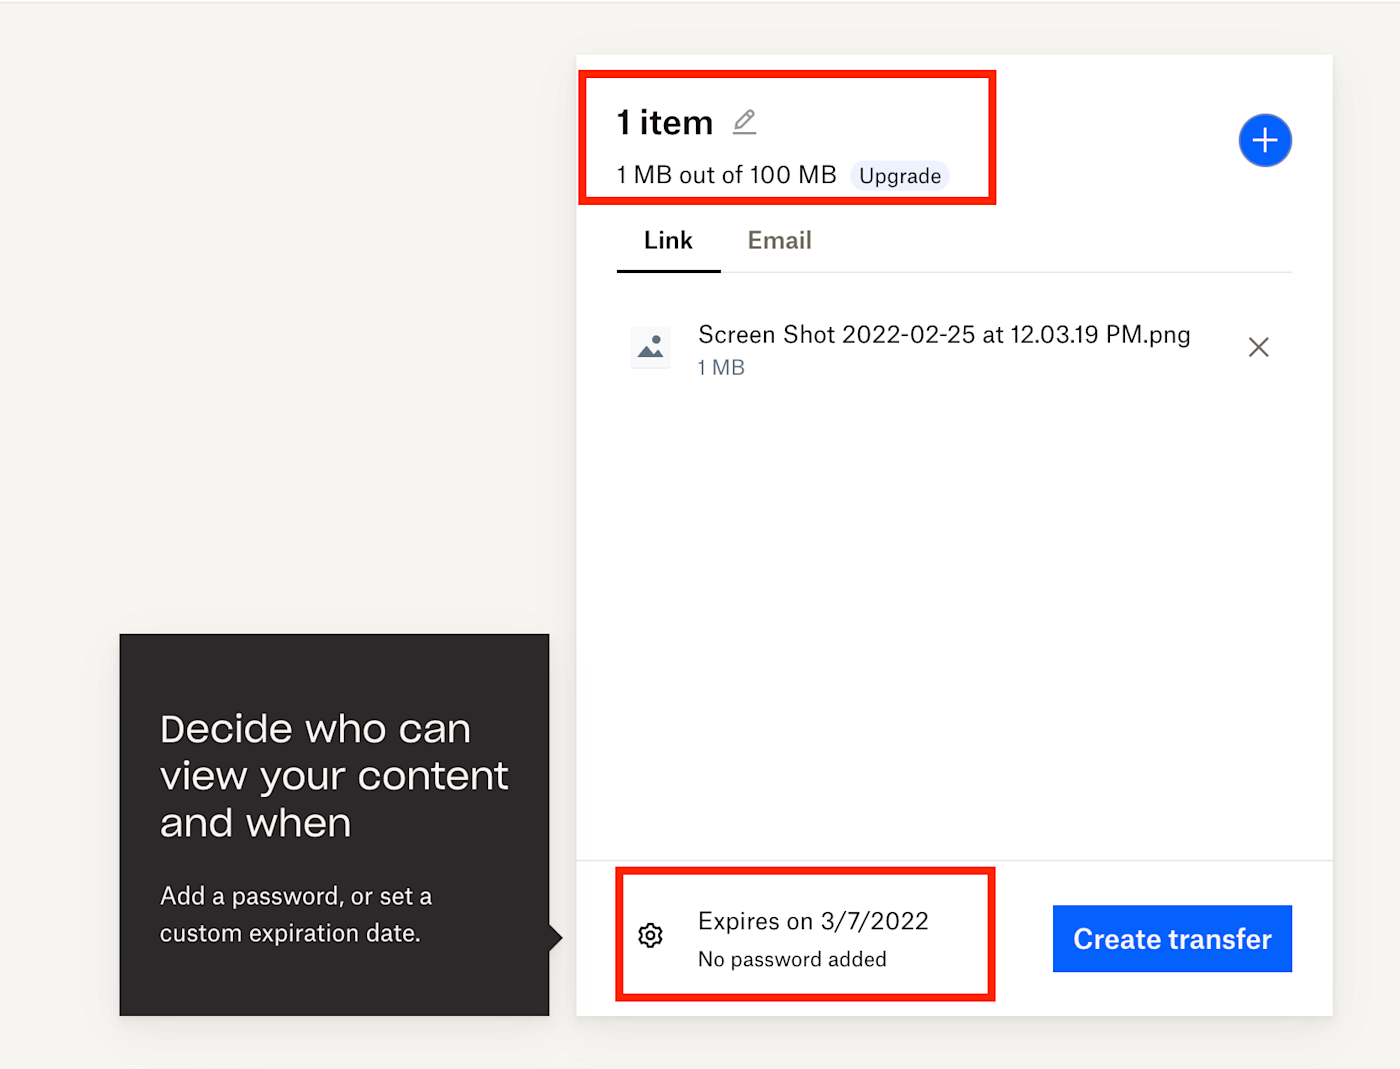
You can send a link to access the file, or you can email the file directly to your recipient. A copy of your file will remain on Dropbox servers for a week, unless you set a shorter time frame. The main downside of Dropbox Transfer is that the free version has a comparatively small file size limit of 100MB. The free version of WeTransfer, another file sharing app that stores your files on its servers, allows file sizes up to 2GB. (More on WeTransfer to come.)
Generally, these tools provide greater security than cloud sharing since the encrypted file is outside your environment for only a short period.
Ideal use case: When sharing a large file is a one-off or irregular event, and no collaboration is required within the file, these are the tools you should go for. For example, if you need to share graphic or wireframe files that require feedback, but the recipient won't edit them directly. It's also great for sharing research or reference files.
Cons: Have I mentioned that you have to keep your browser open for P2P sharing? If you're in direct contact with the recipient waiting for access, and you both have passingly acceptable internet connections, P2P can be great. Since both P2P and third-party server file sharing methods create a second file, they're not suitable for real-time joint collaboration.
3. Use a client portal
WeTransfer started as a file transfer service in 2009, and it's since expanded its services to include file storage, some collaboration features, and a specialized tool for multimedia file organization, with a paid subscription.
Paid WeTransfer subscriptions also include a branded portal for individual clients. A client portal is a secure, centralized, cloud-based space for you and a specific client to share files with each other. Some client portals might also include other functions, like storing communications and sharing live project plans. They can be a great option if your work requires sharing lots of files with clients, regardless of whether you also need collaboration. Sometimes, you just need a shared space.
Note: If you already use a paid, cloud-based business application that holds client information, like a project management or invoicing system, you may already have access to a client portal feature you can use to share files.
Ideal use case: If your projects require large file sharing or storage and have concrete start and end dates, then a client portal is useful. It makes file sharing seamless, but you can archive the portal contents when the project is over, so it doesn't eat away at your storage space.
Cons: These are getting into expensive territory.
4. Make your files smaller
Maybe your existing delivery options are fine—it's the files that need to be smaller. File compression utilities may be old school, but don't overlook them.
Most operating systems come with their own file zip utility. On both Windows and macOS, start by right-clicking on the file or folder you want to compress. Windows users should then select Send to > Compressed folder. Mac users will select Compress "[file or folder name]".
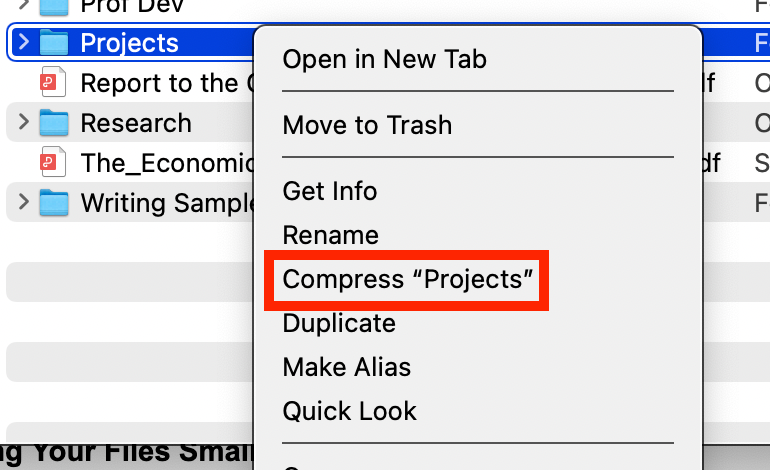
Alternatively, you can choose a free compression application, like 7-Zip or iZip. Then there's WinZip, which began as a simple, free file compression tool. Now it's more accurately classified as a hybrid, offering premium features like email integration and cloud storage.
Your recipients don't need a special compression tool to extract or "unzip" these files, which makes it a safe choice. But other compression alternatives can create even smaller files and compress them more quickly. If you're dealing with mega-files, consider compressing them into a .rar or .7z file.
Start by looking at what compression file formats are available with an application—many let you select the compression file format you want. Keep in mind that the recipient might need an extra utility to extract any compressed file that's not a .zip file. The same compression applications, including free options, that produce the other file compression formats can also extract them.
If you share video or large image files, then you might consider an app designed specifically for compressing these types of files, like Movavi. Compressing them into a .zip file won't degrade the quality, but the file won't be as compact.
Ideal use case: This is for one-off shares with no collaboration needed. Pretty much any use case where a P2P option would work well—it's a personal preference.
Cons: Compression is an interim step. You still need to deliver the file somehow, either via email or cloud. You end up with at least two files: the original and the compressed one. Also, some compression utilities don't have the greatest user interface or experience, especially if you want to use some of the more advanced compression formats.
Keep your file sharing options open
Different tools will make sense under different circumstances, so don't necessarily rely on the same tool every time you need to share a large file.


