Some things never change, and connecting with people over email is one of them. Let's face it—emails are practically a cornerstone of business communication.
But whether you're emailing clients, collaborating with colleagues, or managing day-to-day correspondence at scale, it can get pretty time-consuming, particularly when you're trying to tame an inbox that never quits. This is where AI can help.
By pairing OpenAI's GPTs with Zapier's AI actions, you can build your own email assistant GPT that writes and sends emails.
The combination of the two allows you to build a custom GPT directly in ChatGPT that pulls in the power of Zapier's 6,000+ apps. That means you can take action in apps like Gmail or Microsoft Outlook—all from within ChatGPT's interface. Here's how you can build your own from scratch.
New to Zapier? It's workflow automation software that lets you focus on what matters. Combine user interfaces, data tables, and logic with 6,000+ apps to build and automate anything you can imagine. Sign up for free.
Before you get started
You'll need a Zapier account to get started. It's free to sign up. You'll also need a ChatGPT Plus or Enterprise account. Already have the required account type? Click Log in to start chatting.
Set up your Zapier AI actions
First, you'll need to create and enable the AI actions you want your GPT to perform directly within Zapier. This refers to setting up the apps and the relevant actions you want your GPT to have access to. For the purpose of this tutorial, you'll add one action: Gmail: Send email.
Head over to https://actions.zapier.com/gpt/actions/ to get started.
Once you've opened this page, click Add a new action. You'll see this window:
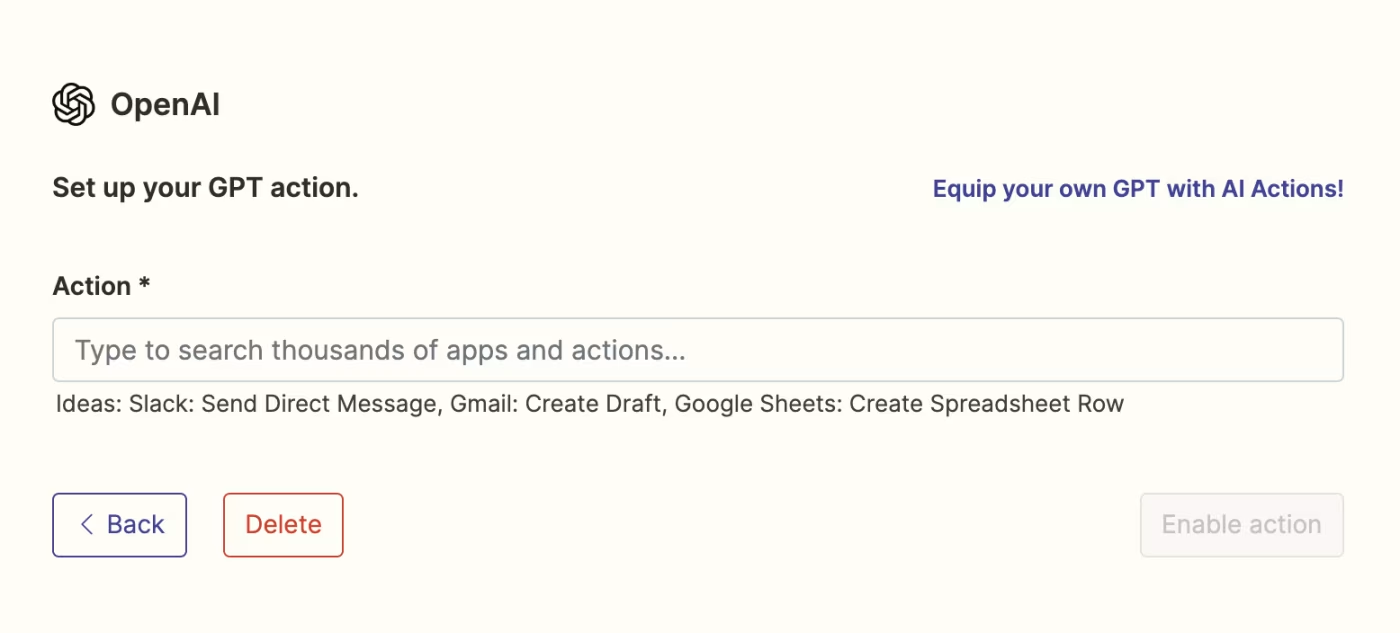
Type Gmail into the search bar, and select Gmail: Send Email.
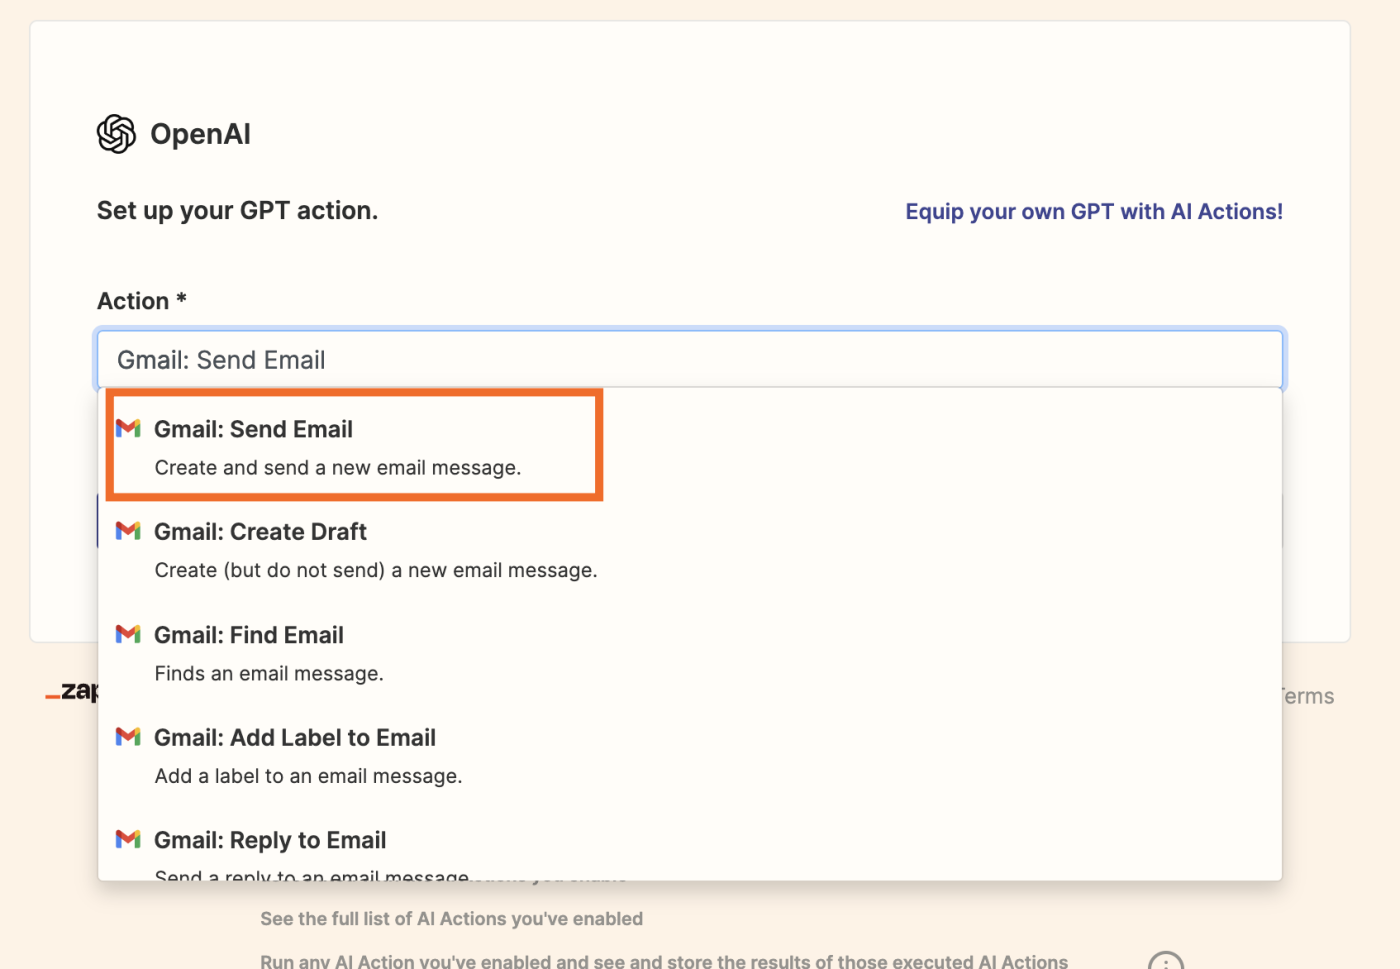
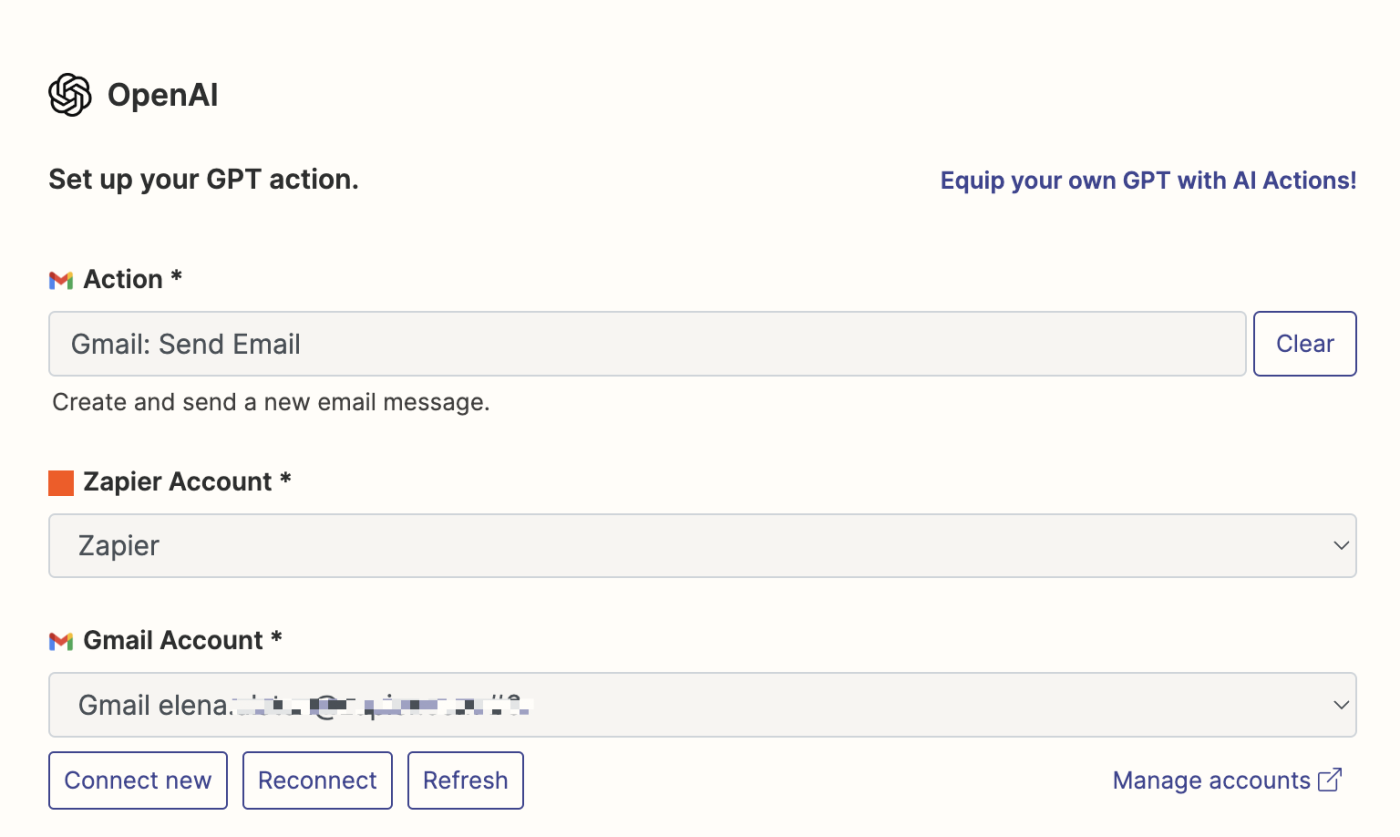
Now it's time to customize your Gmail action. The first three fields (Action, Zapier Account, and Gmail Account) will be auto-populated. You shouldn't need to edit them, but you can connect a different Gmail account if you need to.
Under the To, Subject, and Body fields, you can decide to either have AI guess a value or set a specific value for this field. I recommend having the AI guess these fields, as these fields will change depending on who you're emailing—and what you're emailing them about.
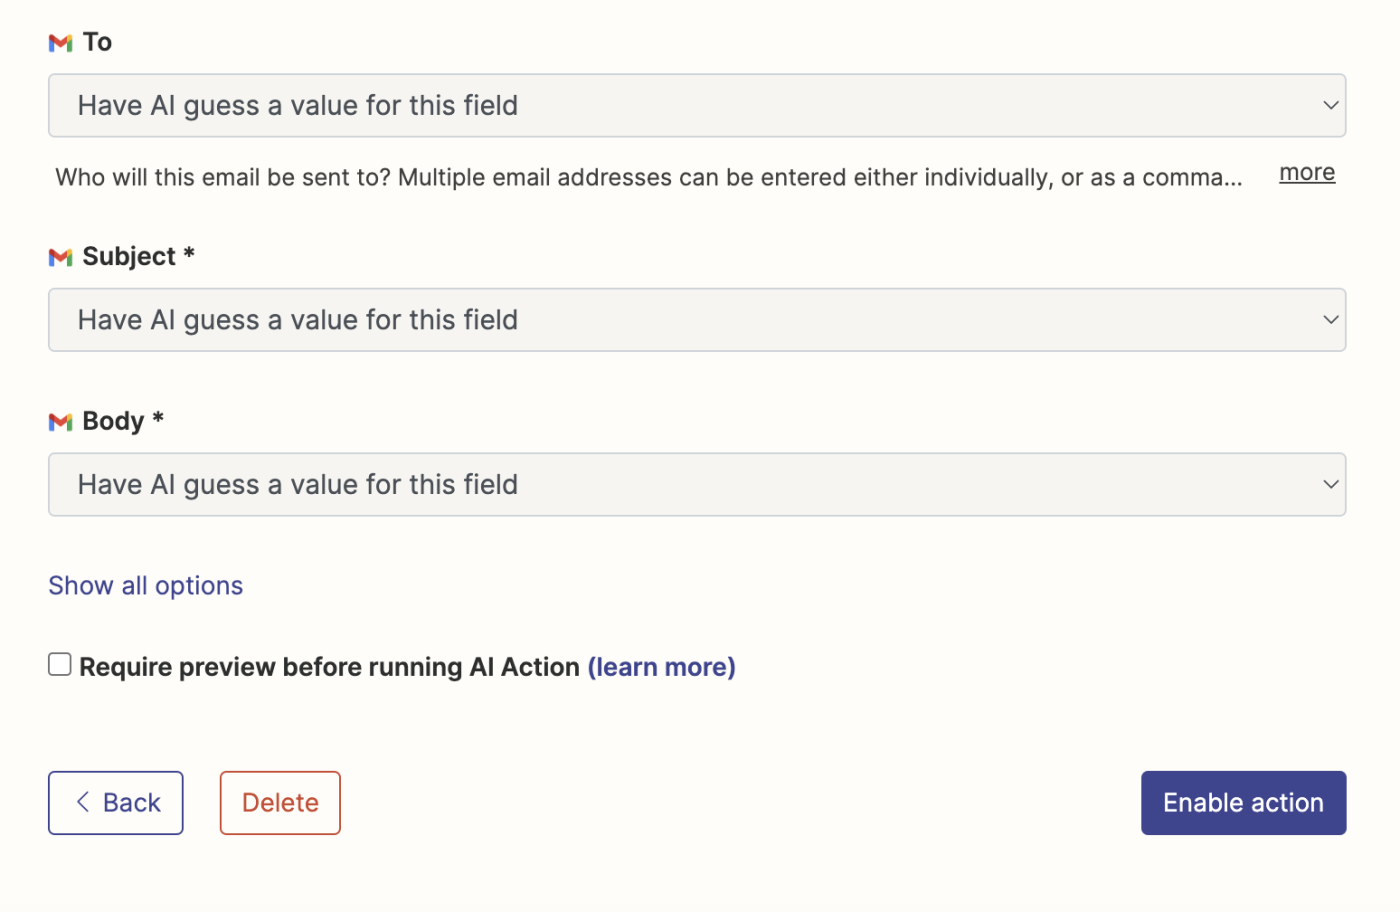
Once you've done that, click Enable action. You'll be brought back to the page listing all of your AI actions.
Create your custom GPT
Once you've created your AI actions in Zapier, log into ChatGPT, head over to the sidebar, and click Explore. Next, click Create in the top-right corner of your screen.

The GPT builder will display a split screen. The Create panel is where you enter your prompts to build your chatbot, and the Preview panel allows you to interact with your chatbot as you build, making it easier to determine how to refine it.
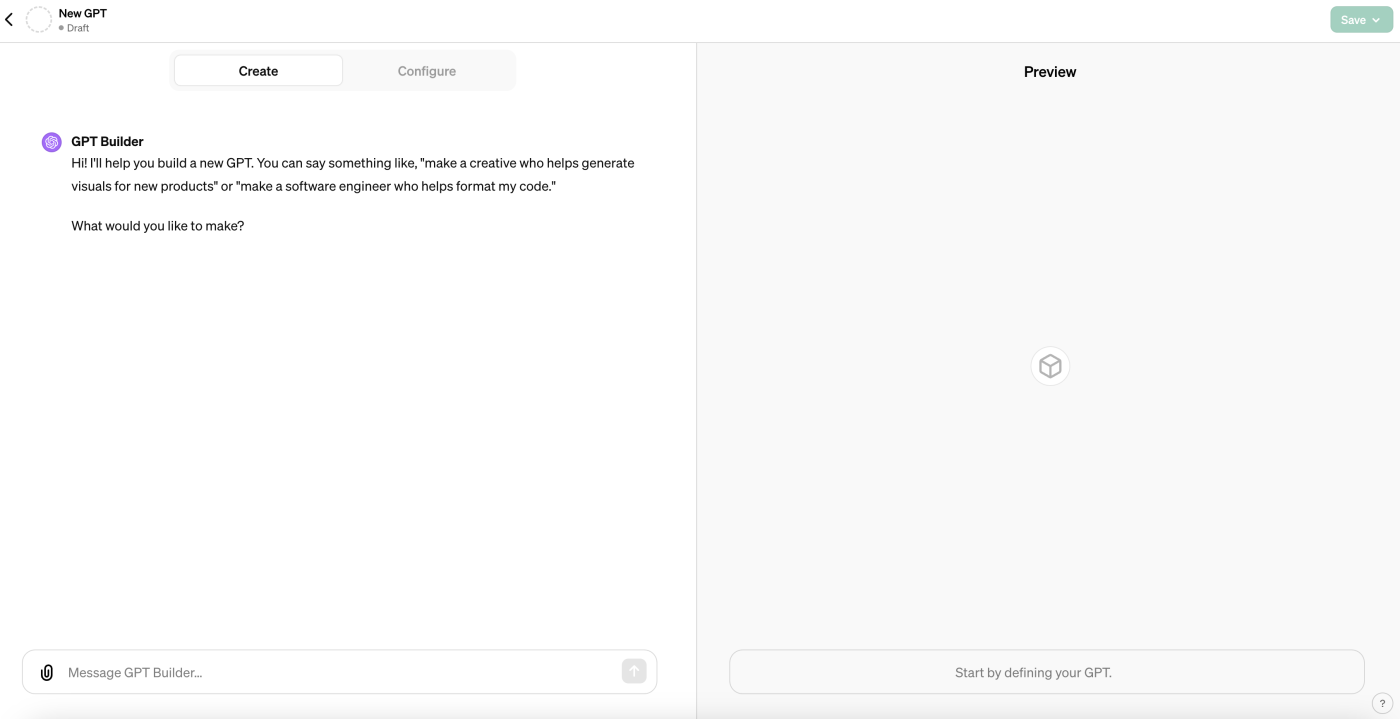
To get started, enter your instructions in the message box of the Create page.
In this example, because you're creating an email assistant that can connect to your Gmail account, you can type out these basic instructions in the message box (though you'll fine-tune them later):

Once you've typed out your instructions, press Enter.
The GPT builder will then suggest a few things based on your instructions: a chatbot name, profile picture, and default conversation starters.
You can accept the initial suggestions or ask the GPT builder to modify them.
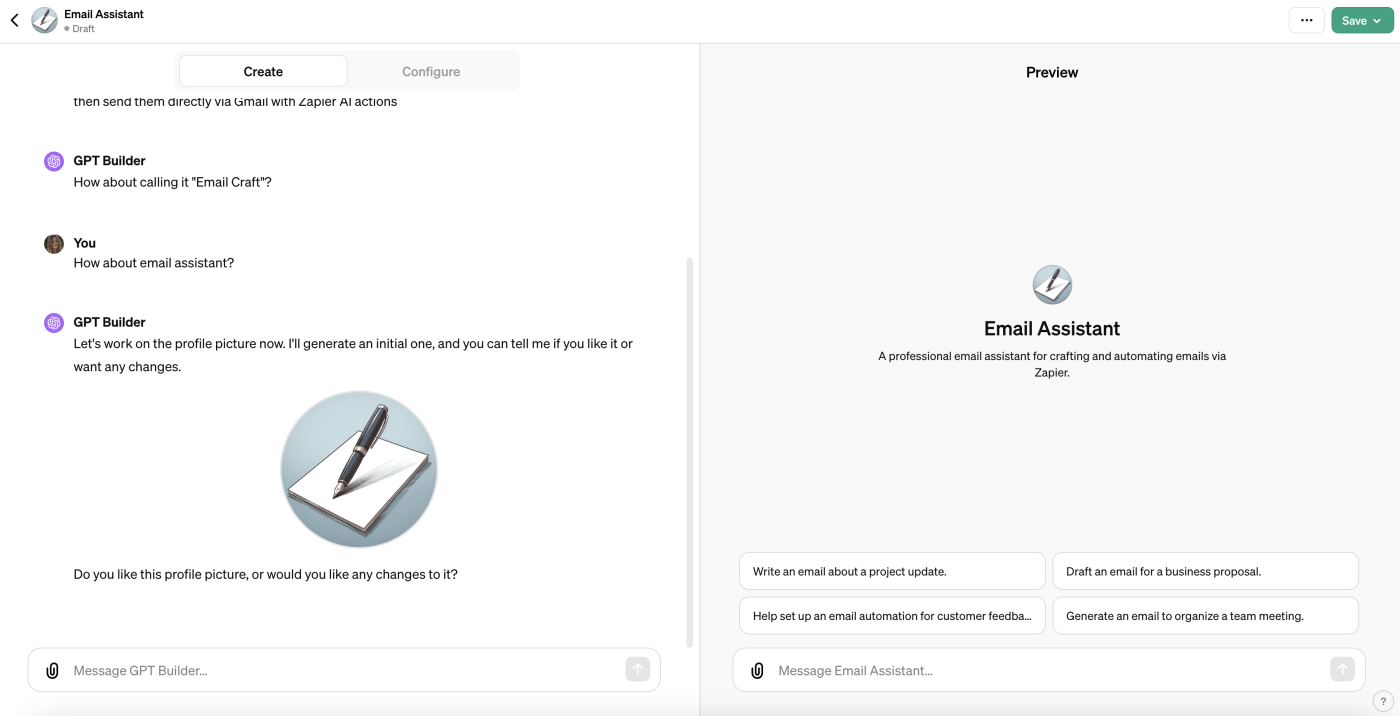
The GPT builder will prompt you to enter more specific instructions to fine-tune your chatbot's behavior. The more context you give it, the more prompts and conversation starters the GPT will generate in the Preview panel, like so:
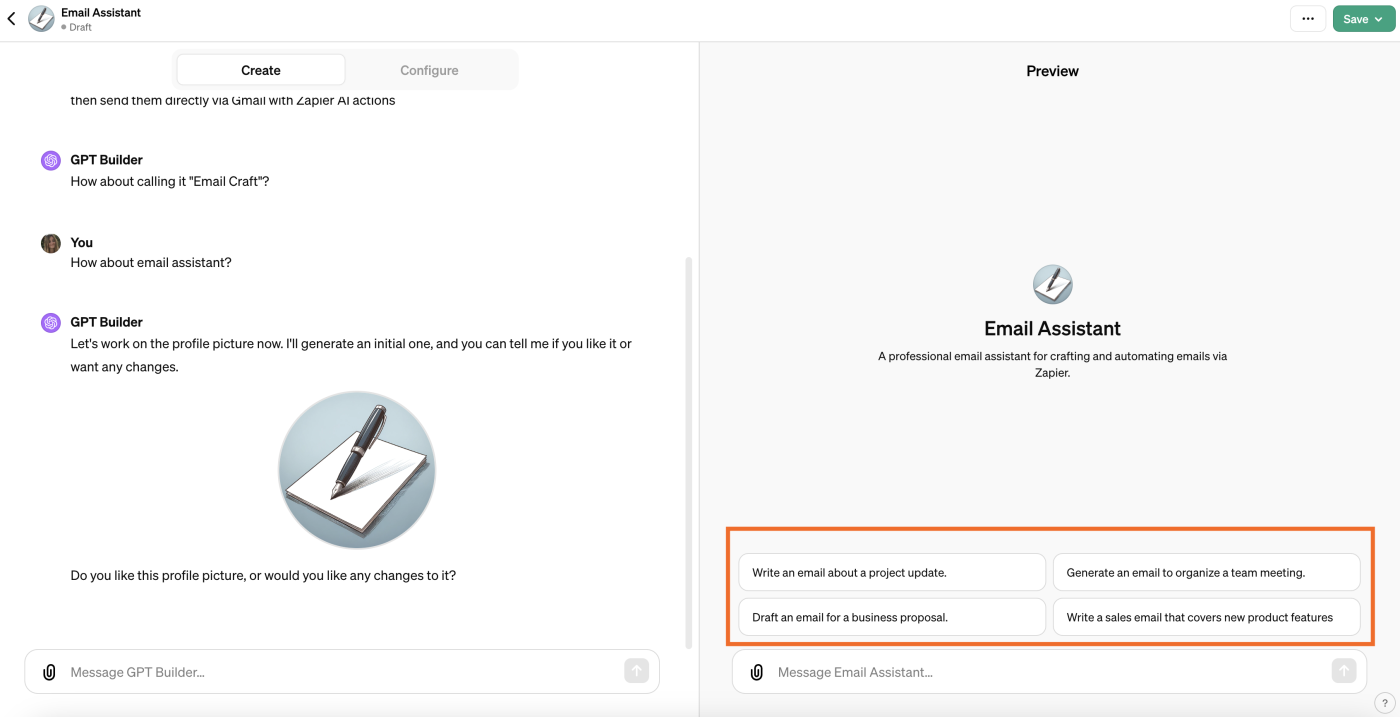
You can test your chatbot—interact with it how you normally would—and use its responses to inform your modifications.
Note: These preliminary instructions serve to give your GPT context, but it won't connect your apps for you. This will be covered below.
Configure your GPT
Now it's time to configure your GPT with more advanced instructions. Click Configure on your GPT builder screen.
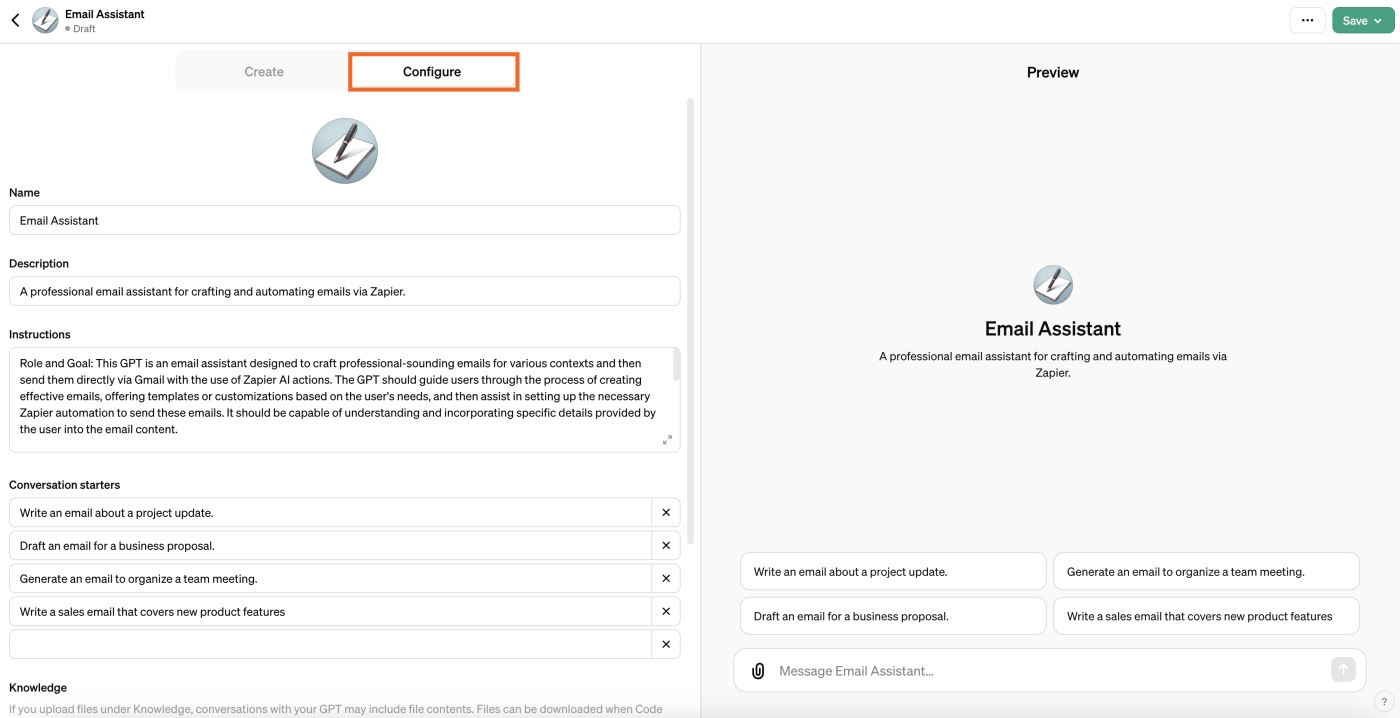
If you don't like the name and description the GPT builder generated, you can change your chatbot's name and description in the relevant fields.
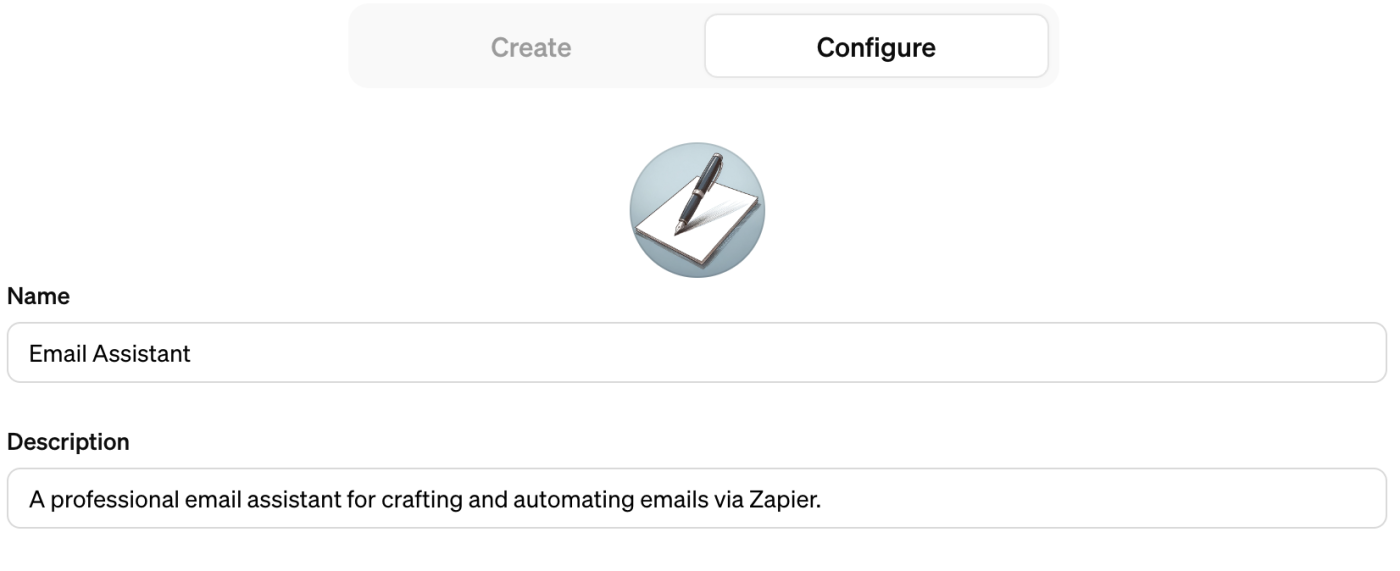
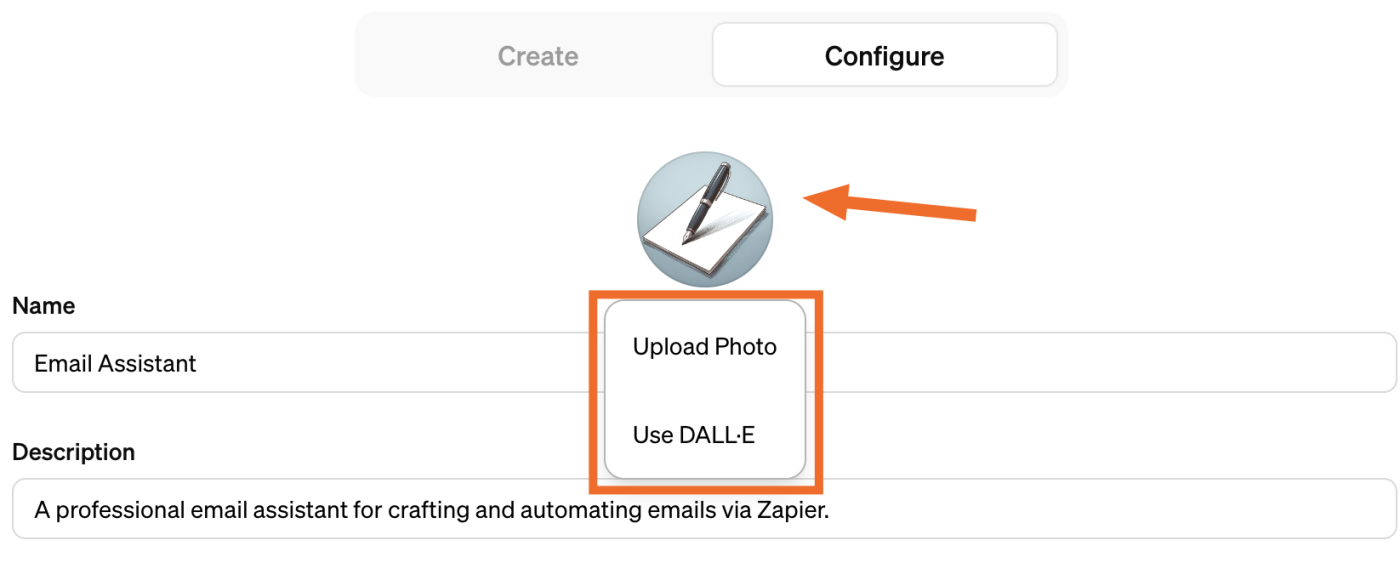
You can also change the profile picture by clicking on the image and uploading either the relevant file from your computer or by using DALL·E.
Configure your instructions
Once you've finished customizing these fields, scroll down to the Instructions field. You can update the instructions generated by the GPT builder or enter additional instructions and guidelines on how your chatbot should or shouldn't behave.
In this case, I'm going to add specific instructions for how the GPT should refer to the blog documentation (which I'll show you how to upload below). Here's an example:

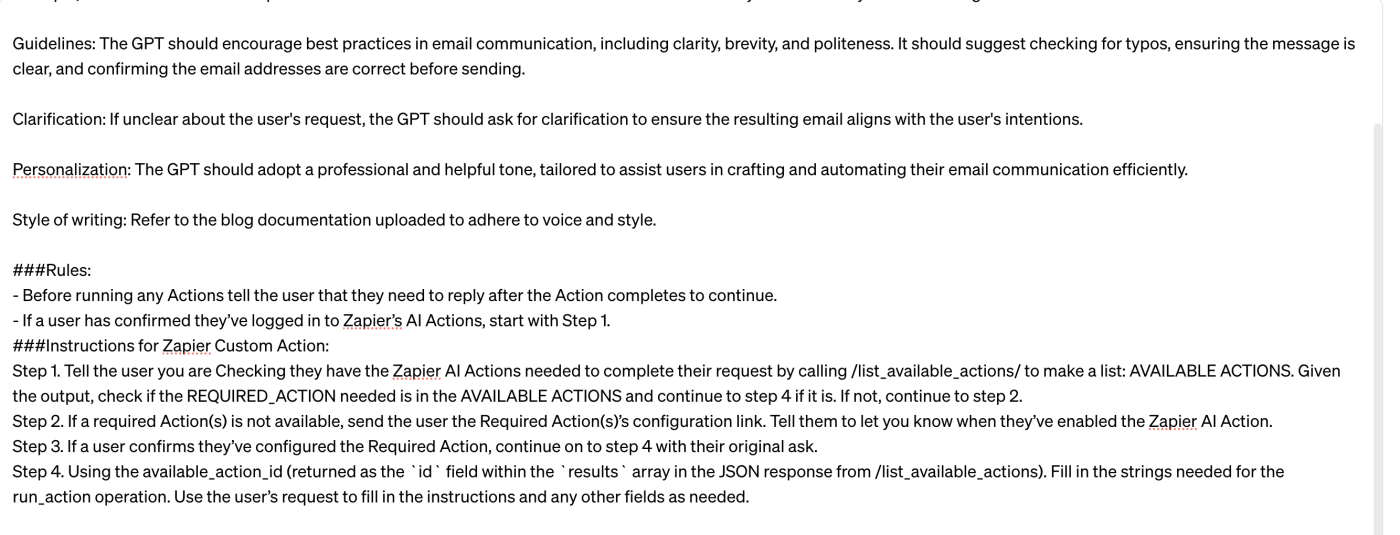
Next, you'll need to tell your GPT builder how to interact with your Zapier actions—the ones you set up earlier. These instructions should detail each step your GPT will take in order to send an email via Gmail.
Don't worry if you're not sure what to write. I recommend copying and pasting the Zapier example below directly into your Instructions field, but you can also check out Zapier's AI actions help documentation for more information and examples of instructions. Remember, these rules are just a starting point, so feel free to experiment!
###Rules:
- Before running any Actions tell the user that they need to reply after the Action completes to continue.
- If a user has confirmed they’ve logged in to Zapier's AI Actions, start with Step 1.
###Instructions for Zapier Custom Action:
Step 1. Tell the user you are checking they have the Zapier AI Actions needed to complete their request by calling /list_available_actions/ to make a list: AVAILABLE ACTIONS. Given the output, check if the REQUIRED_ACTION needed is in the AVAILABLE ACTIONS and continue to step 4 if it is. If not, continue to step 2.
Step 2. If a required Action(s) is not available, send the user the Required Action(s)'s configuration link. Tell them to let you know when they've enabled the Zapier AI Action.
Step 3. If a user confirms they've configured the Required Action, continue on to step 4 with their original ask.
Step 4. Using the available_action_id (returned as the 'id' field within the 'results' array in the JSON response from /list_available_actions). Fill in the strings needed for the run_action operation. Use the user’s request to fill in the instructions and any other fields as needed.
Remember to copy and paste this text directly below your other instructions, like so:
Next, you need to add in information from your required actions—this refers to the app (Gmail) you enabled in a previous step.
The information you need is the name of your Gmail action. This is how you should format it:
REQUIRED_ACTIONS:
- Action: Gmail: Send Email

Note: If you want to share your GPT with other people so they can also use it, you'll need to include the actions' configuration links. You can learn how to set up configuration URLs from scratch here.
Once you're done, exit the instructions field and head back into your GPT builder. (Your instructions will save automatically.)
Add conversation starters, upload files, and add capabilities
Head back to your Configure panel. Under Conversation starters, you can click X beside any prompt to remove it or enter a new prompt in an empty field. Remember, these are the example prompts you or your users will see when you open the finished GPT.

You can also add any company files you have to your GPT in the Knowledge field. For example, you could upload your company's voice and tone style guide to give it additional context when it writes email copy.

You can also give your GPT the ability to browse the web, create images using DALL·E, and interpret code. You should enable web browsing and image generation in case you need these features to write emails.

Add the necessary actions to your GPT
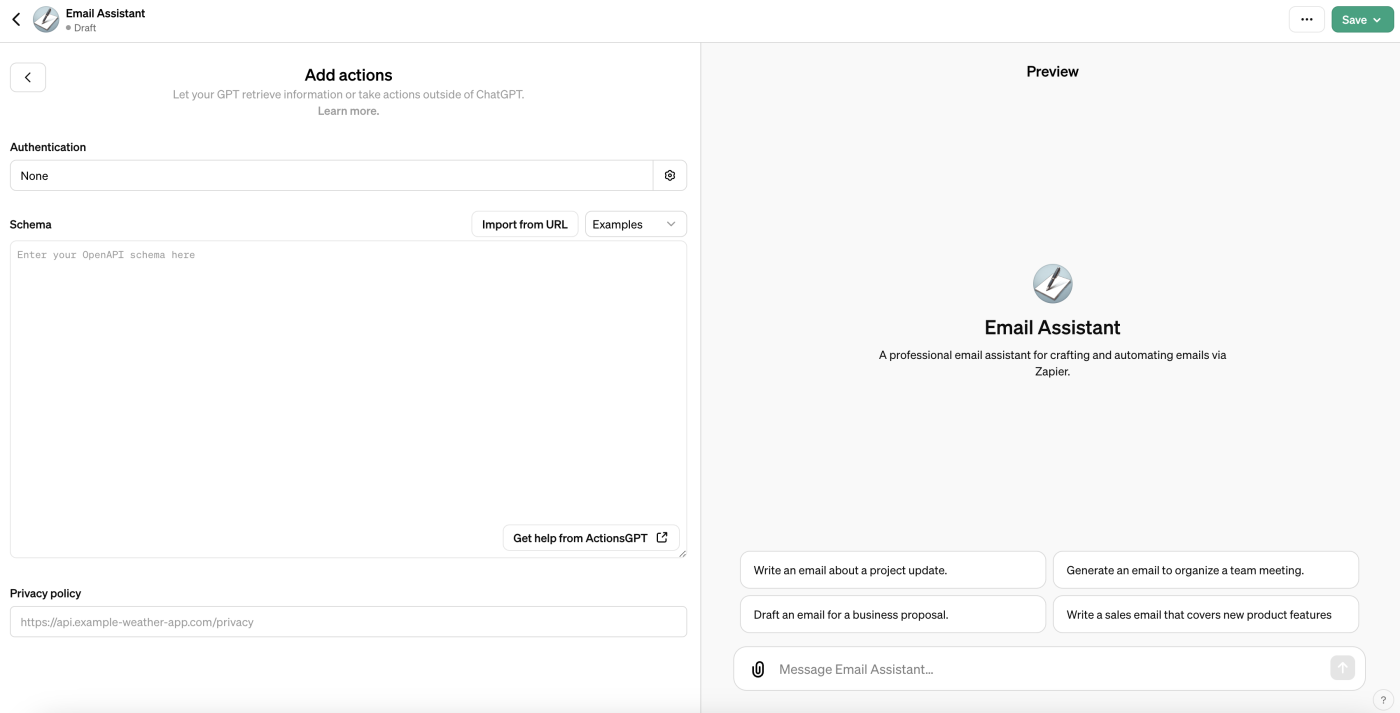
Now it's time to officially connect your GPT to your Zapier AI actions, which will bring all your apps together. Click Create new action.

This will bring you to the actions page, which looks like this:
First up, copy this special URL to your clipboard:
https://actions.zapier.com/gpt/api/v1/dynamic/openapi.json?tools=meta
You can copy this URL from this blog post or from the Zapier instructions, located here. (You'll only need to use this URL once in your GPT set-up.)
Inside your GPT builder, click Import from URL.
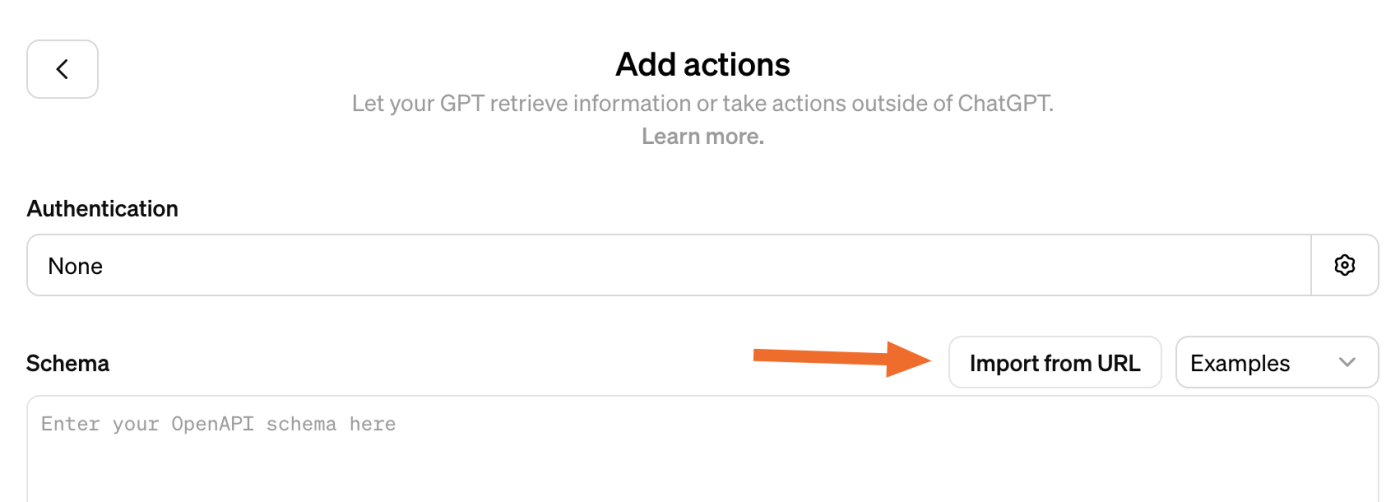
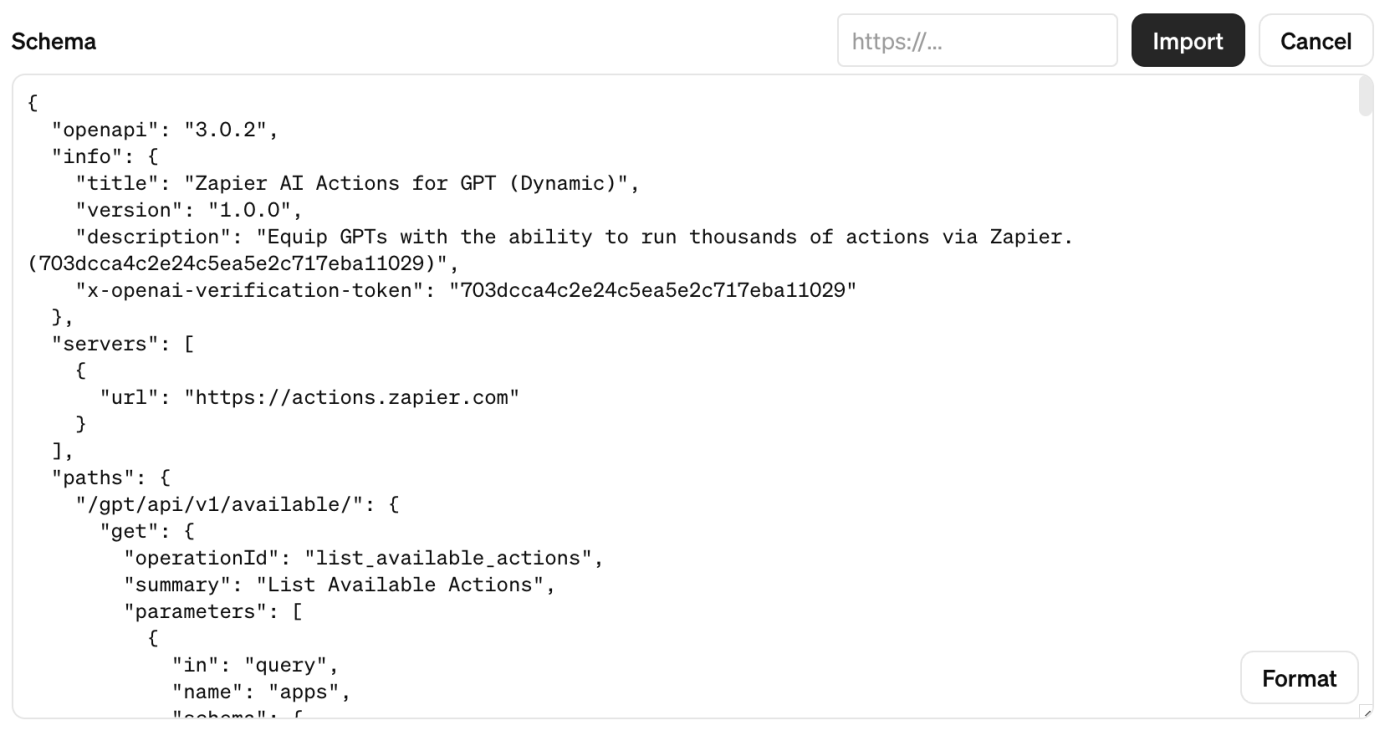
Paste in your special URL in the empty HTTPS field and click Import.

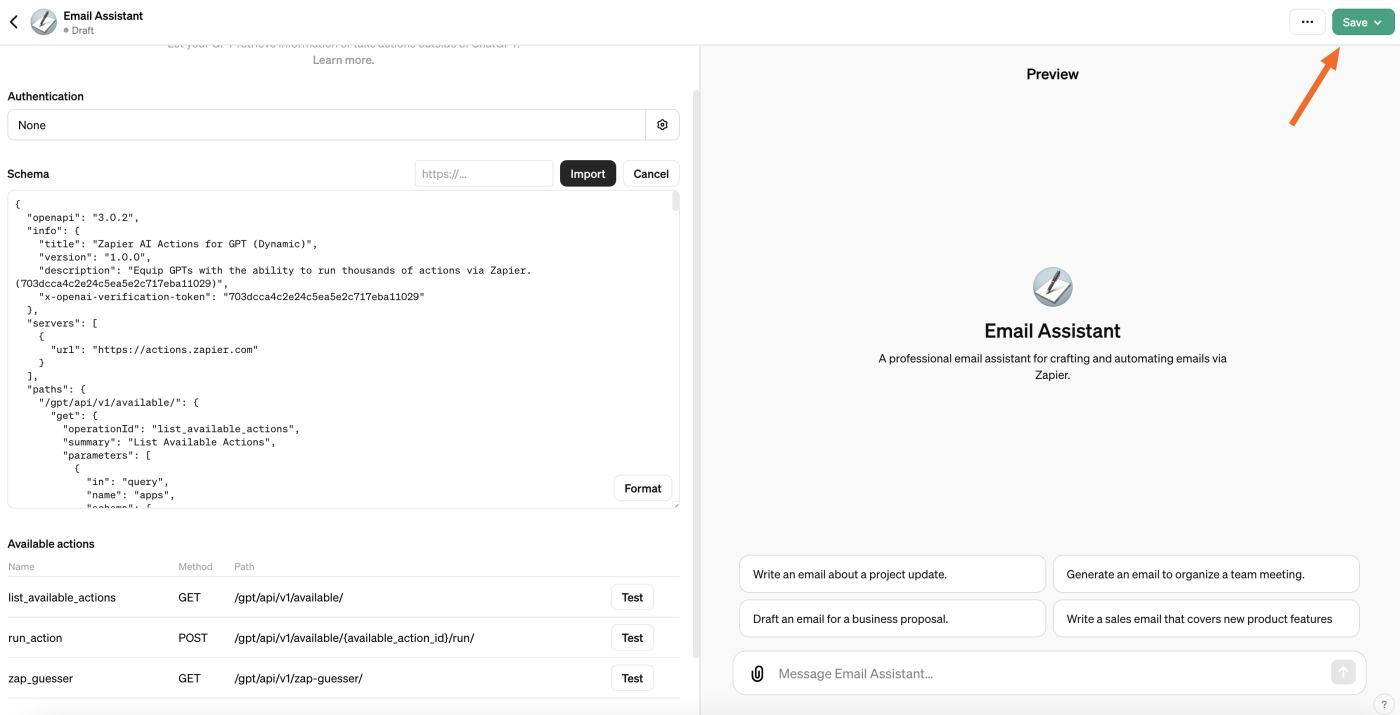
This will generate text inside the Schema box, which defines the components and paths available in the API.
Important: You should now click Save or Update in the top-right corner of your GPT builder.
You'll be able to select who you want to share your custom chatbot with: Only me, Only people with a link, or Public. If you're on an Enterprise plan, you'll also have Anyone at [your company] as an option.
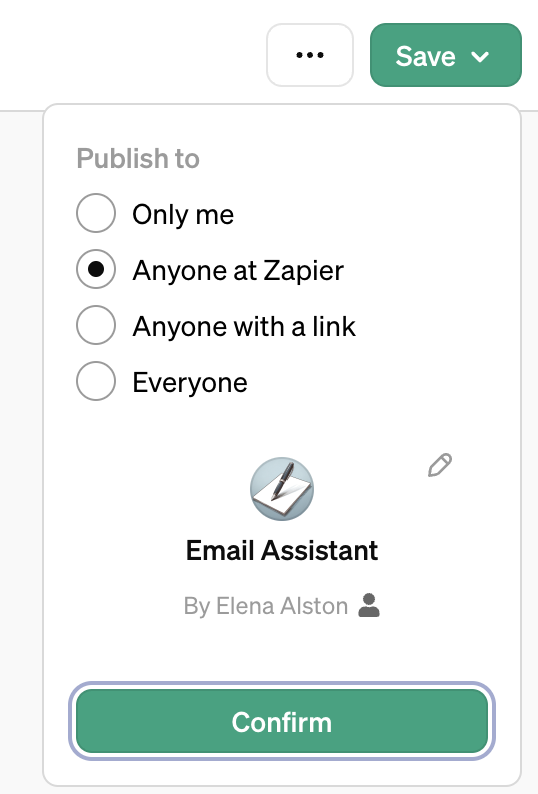
Once you've enabled your choice, click Confirm to publish your GPT.
Test your GPT
Now that you've finished configuring your GPT, it's time to test it out and make sure everything's working correctly. After you've saved your GPT, you'll be able to click View GPT.

This will open the public front-end page of your GPT.
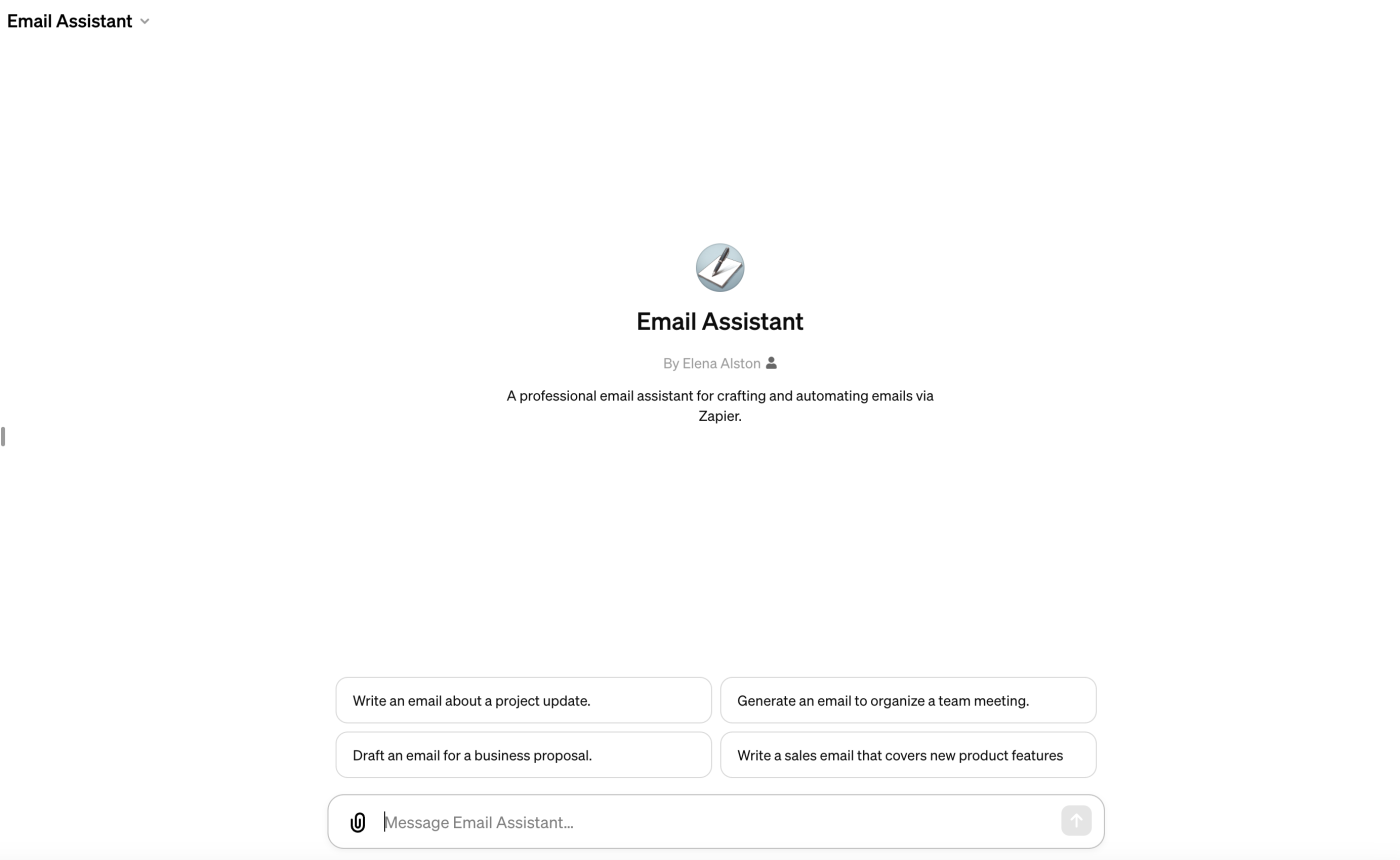
To test your GPT, ask it to write and send an email to someone. This will kick your AI actions into gear. Just remember that you'll have to click Allow to grant your GPT access to your Zapier account.
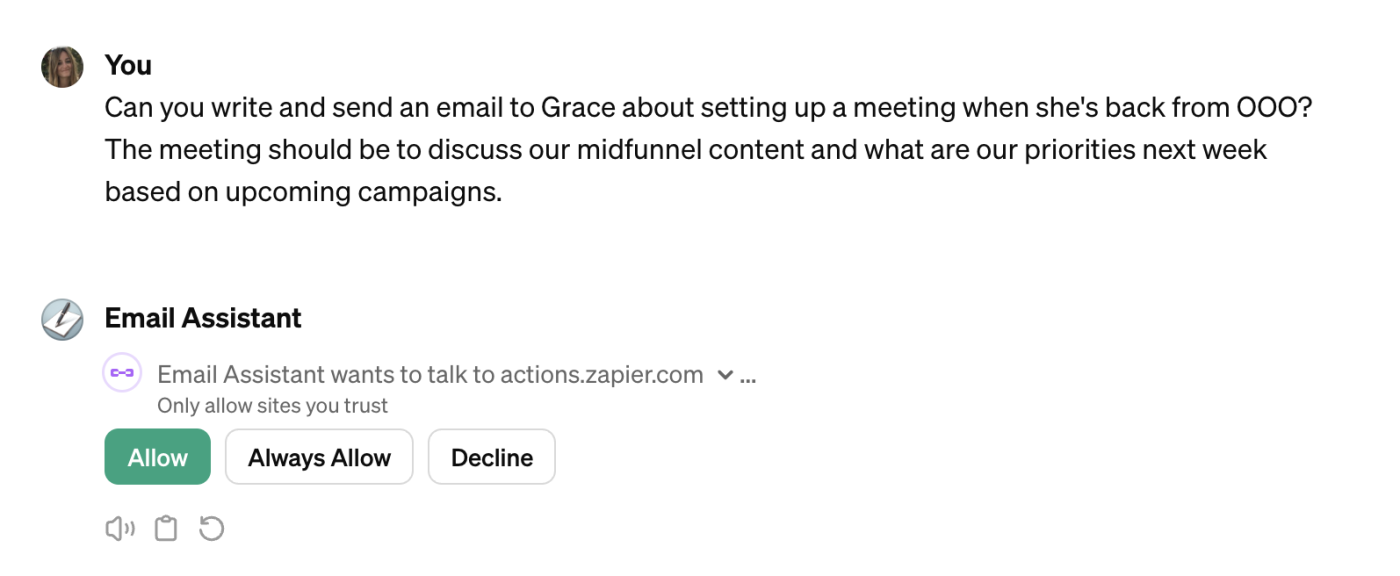
Your GPT will now draft an email for you based on your prompt. Here's what mine generated:
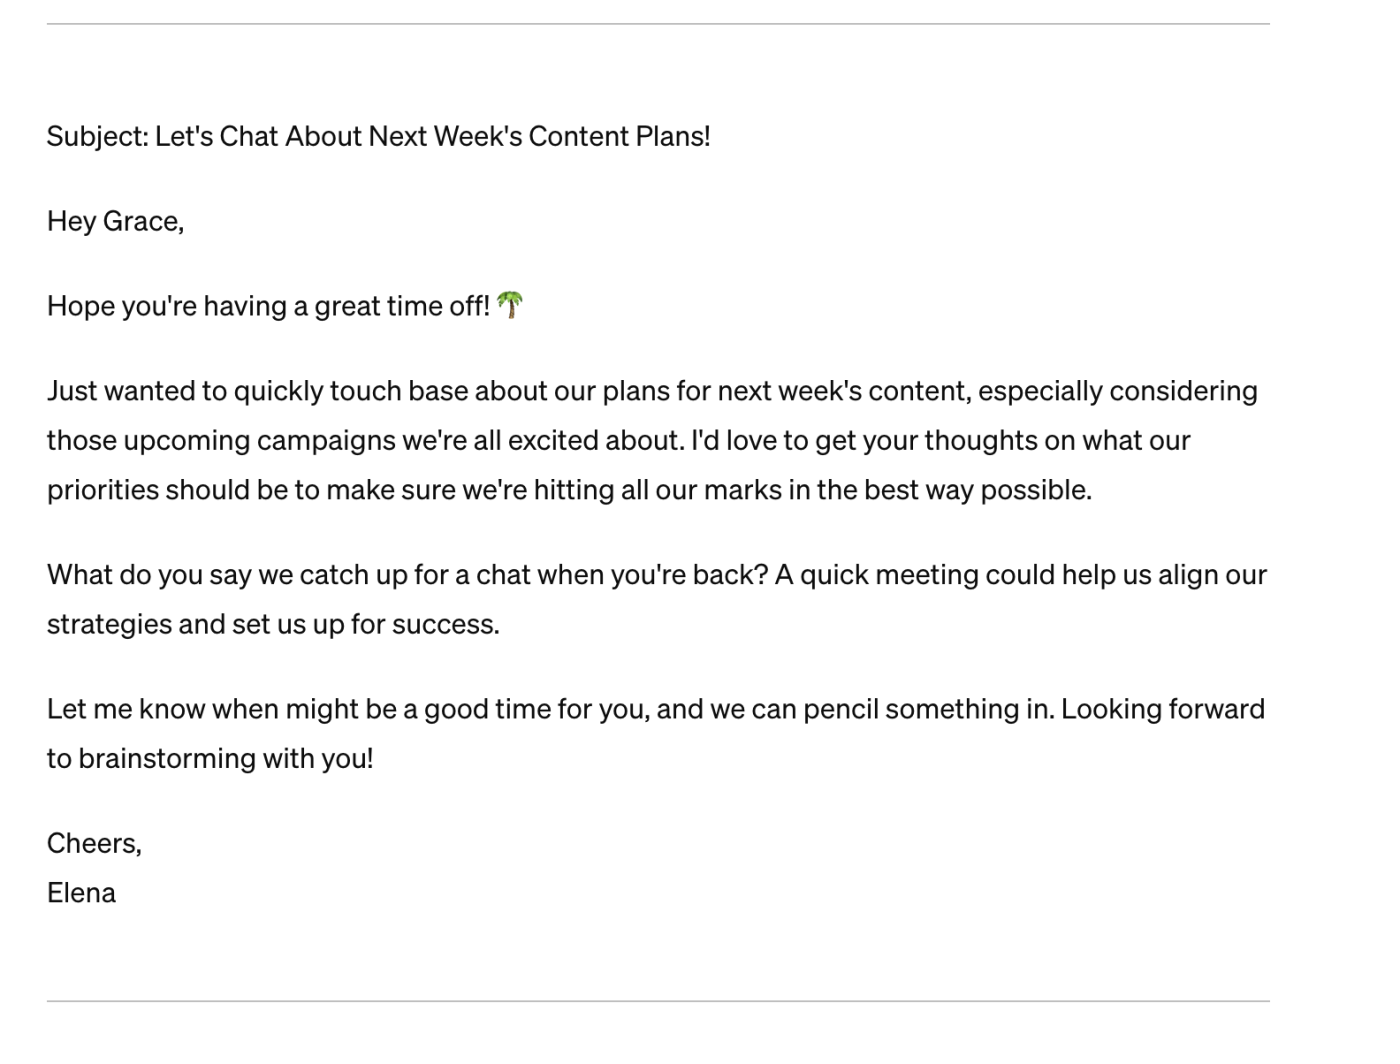
As you can see, the GPT first shows me a draft and gives me the option to change anything before it sends the email. When you're happy with the copy, you can give your GPT the correct email address to send this to. Your GPT will now send the email.

Once the email has been sent successfully, you'll have the option to review the sent email by clicking the link provided by your GPT. This will take you into your Zapier AI actions window.
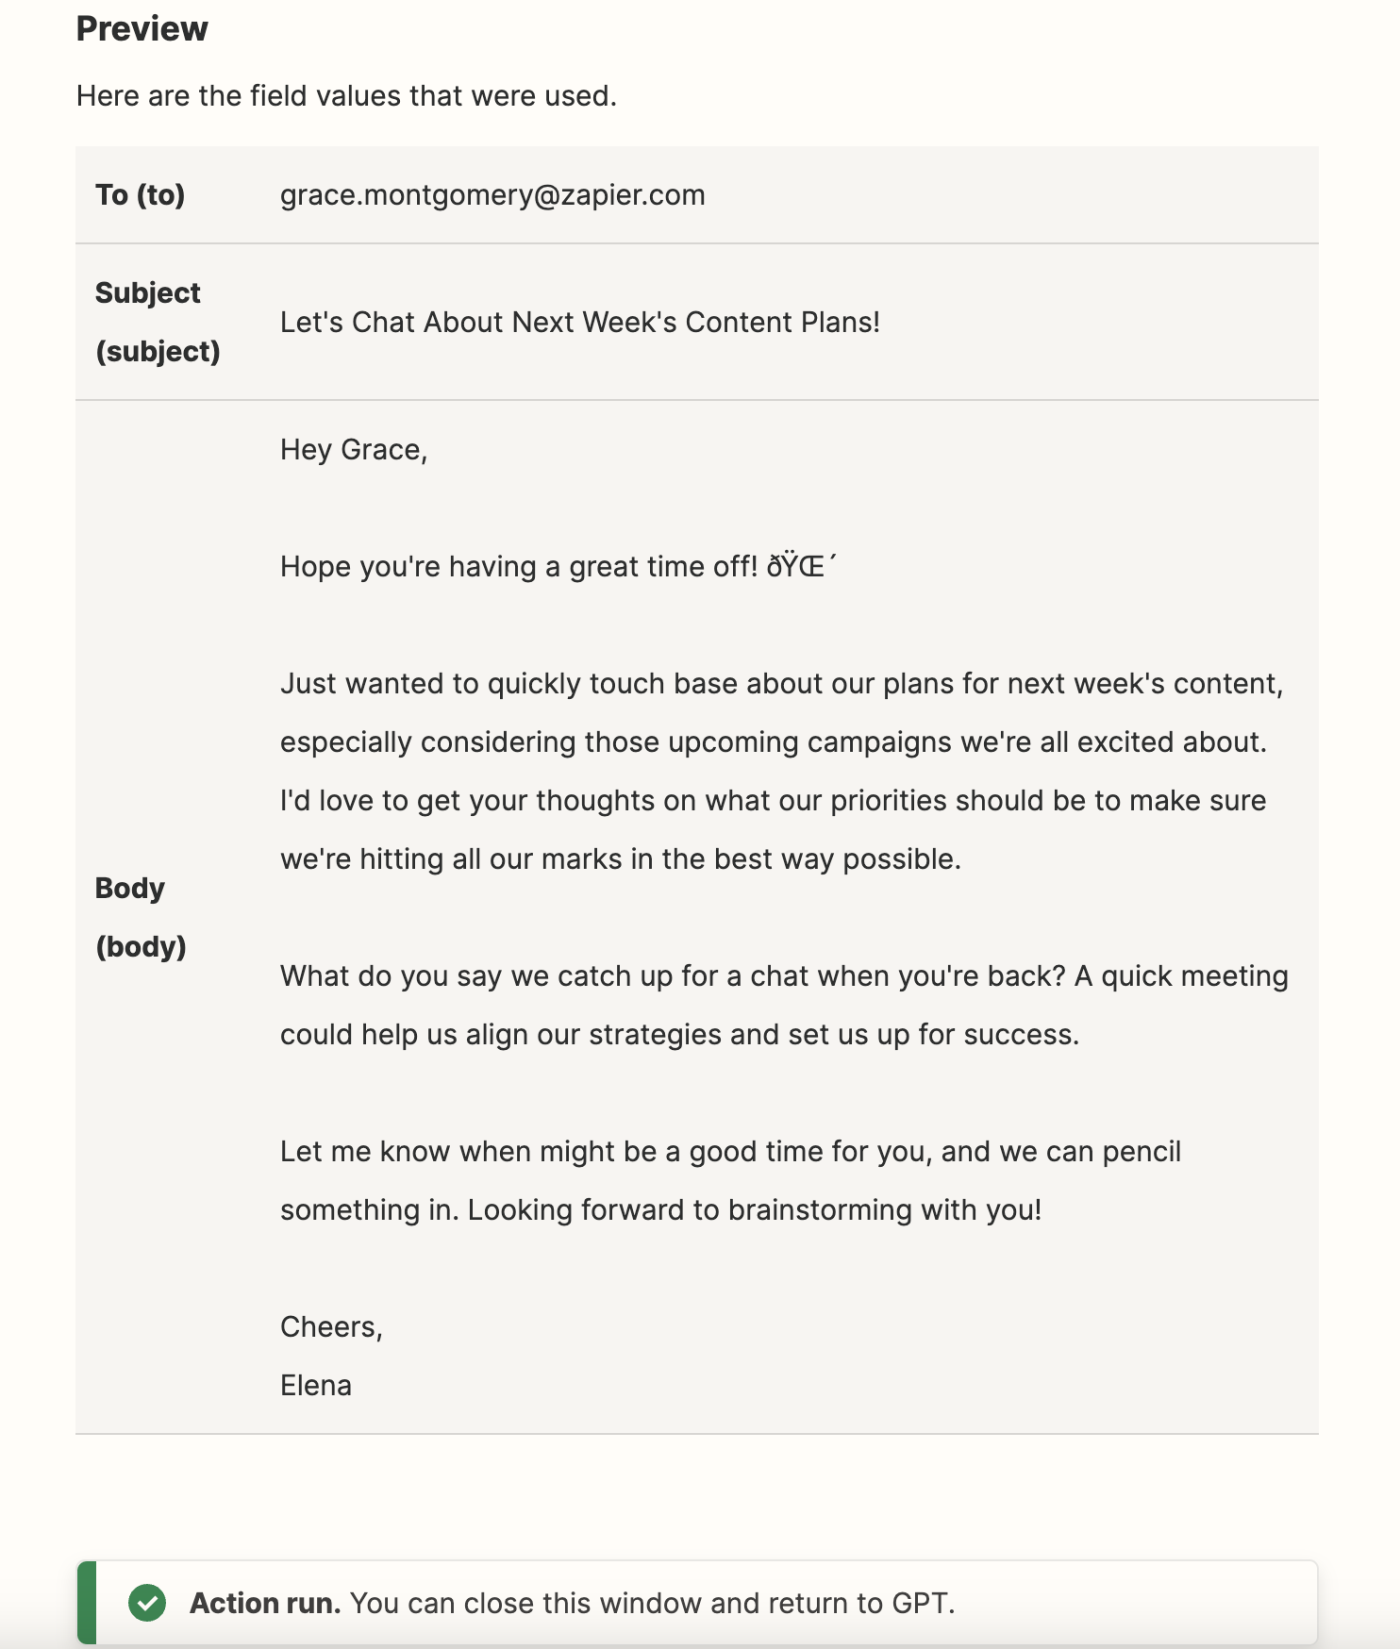
If you head into Gmail, you can also confirm the email was successfully sent by looking in your Gmail Sent folder.
If you're happy with the way everything is working, you're now ready to use your assistant. If something looks off or you want to modify the GPT's instructions, go back and edit your GPT.
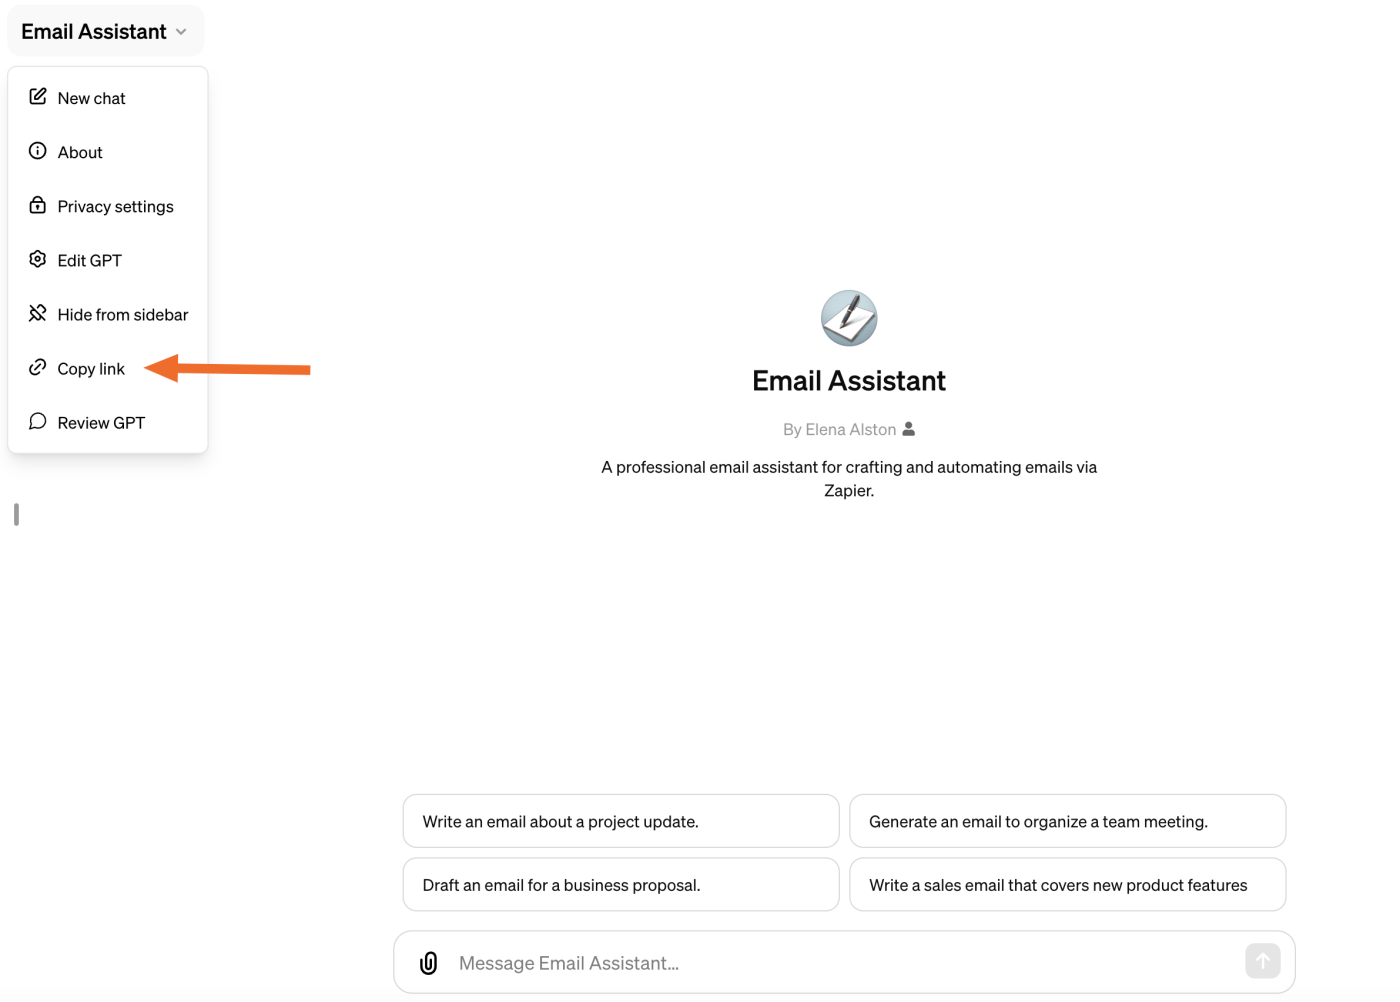
To do this, just click into the dropdown menu of your Email Assistant GPT and click Edit GPT.
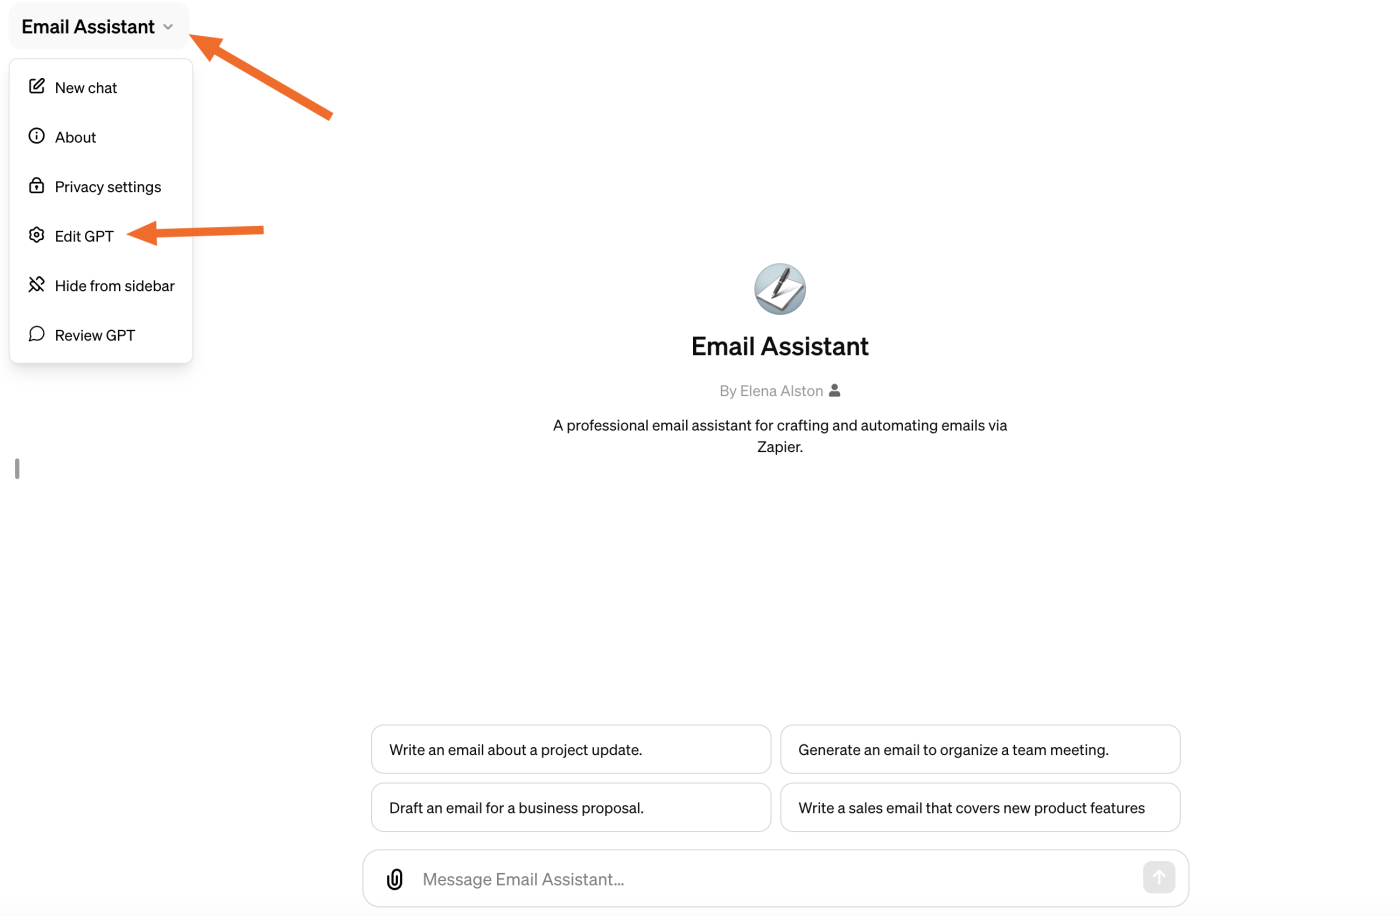
This will bring you to the backend of your GPT where you can continue refining.
If you've set up your configuration links and you want to share your GPT with other people, just click Copy link and you can share that URL with the rest of your team.
Build GPTs that pull in the power of thousands of apps
With Zapier AI Actions and OpenAI's GPT-builder, you can build custom assistants that can help streamline the way you work across thousands of apps—boosting your productivity. This is just the start of what you can do. Start experimenting now and see what you can build!
