
By default, the page margins in Google Docs are set to one inch all around. But what if those settings leave you with an awkward sentence dangling at the top of the next page because—edit as you might—there just isn't enough room on the previous page?
If you're fiddling with page margins just to make a page break appear at a less awkward spot, you can switch to a pageless view. Otherwise, here's how to change margins in Google Docs.
Table of contents:
How to change margins in Google Docs using page setup
Go to docs.google.com. Or open the Google Doc you want to edit.
Click File and then select Page setup.
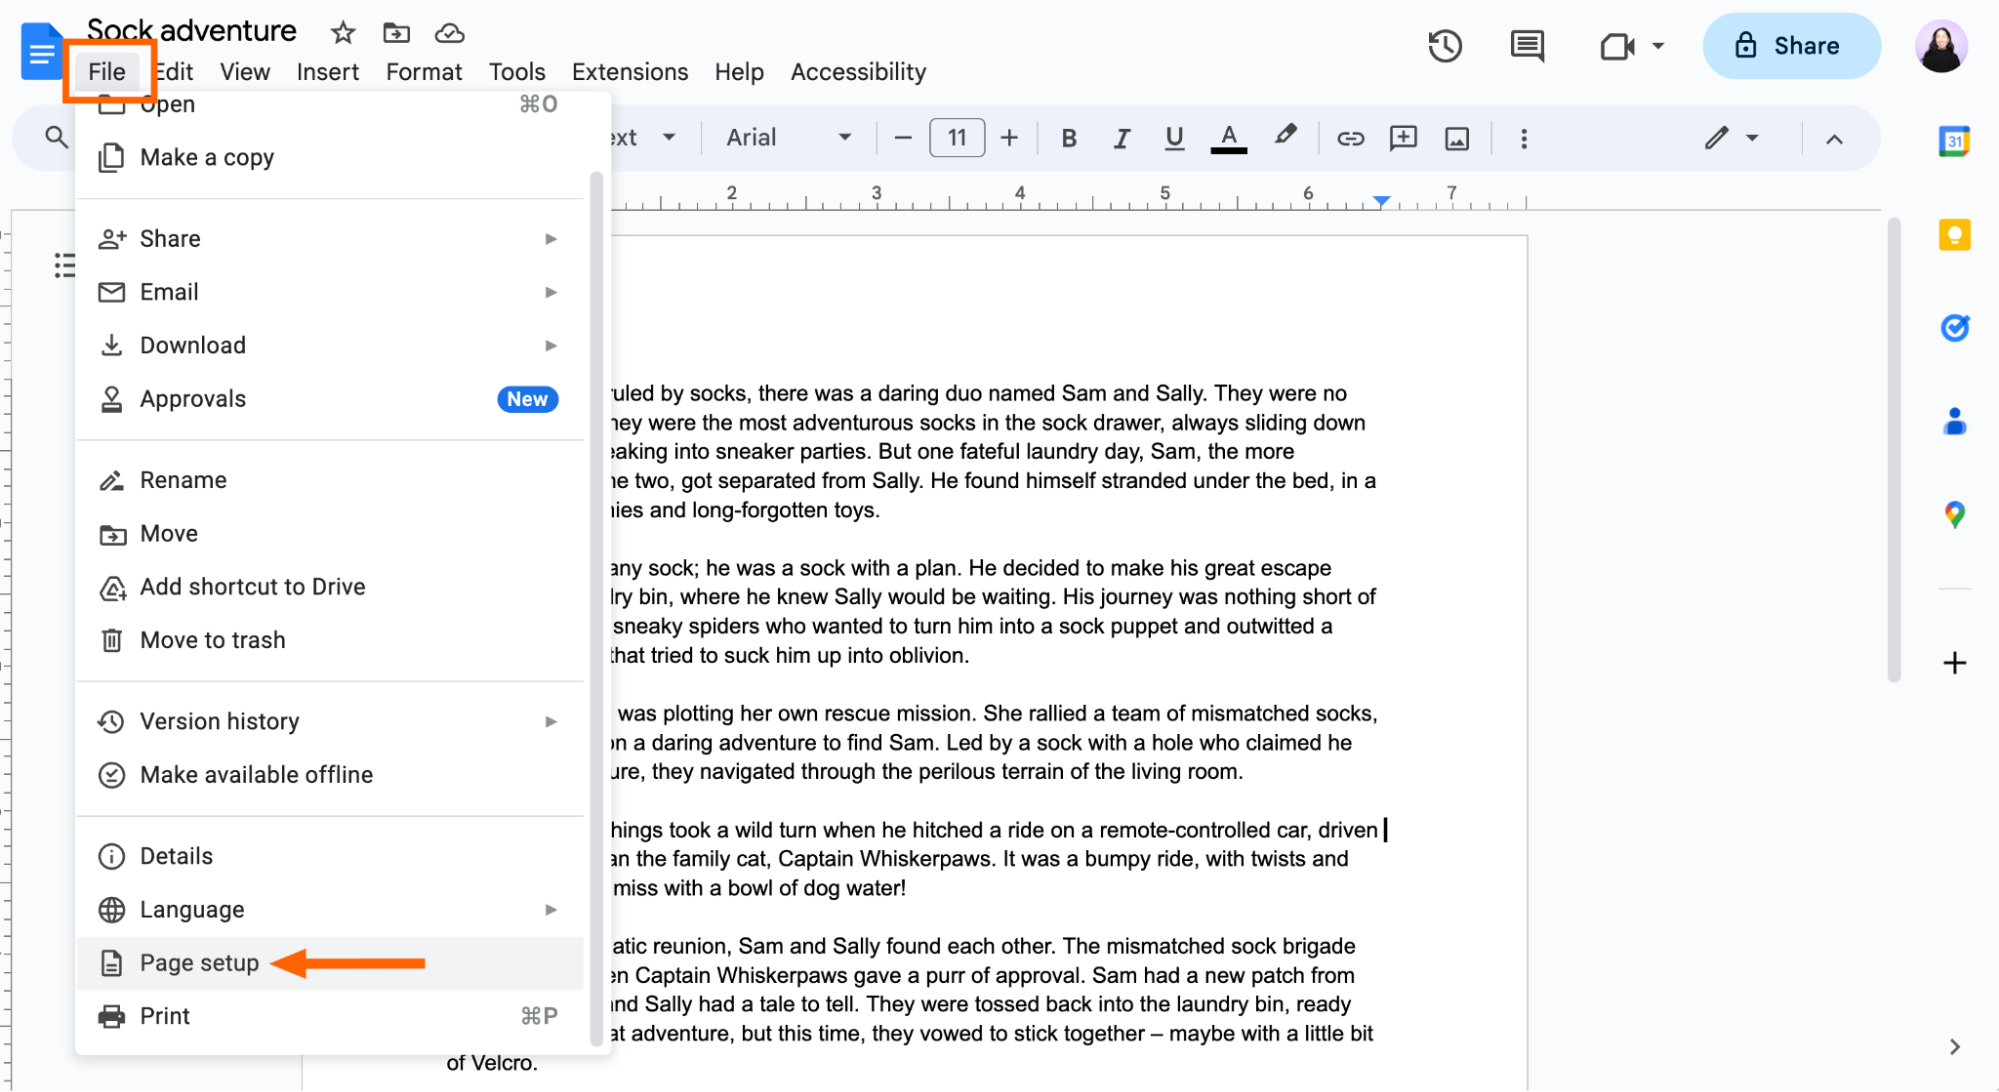
Enter the widths you want for the Top, Bottom, Left, or Right margins of your page. In this example, I set the margins to two inches all around.
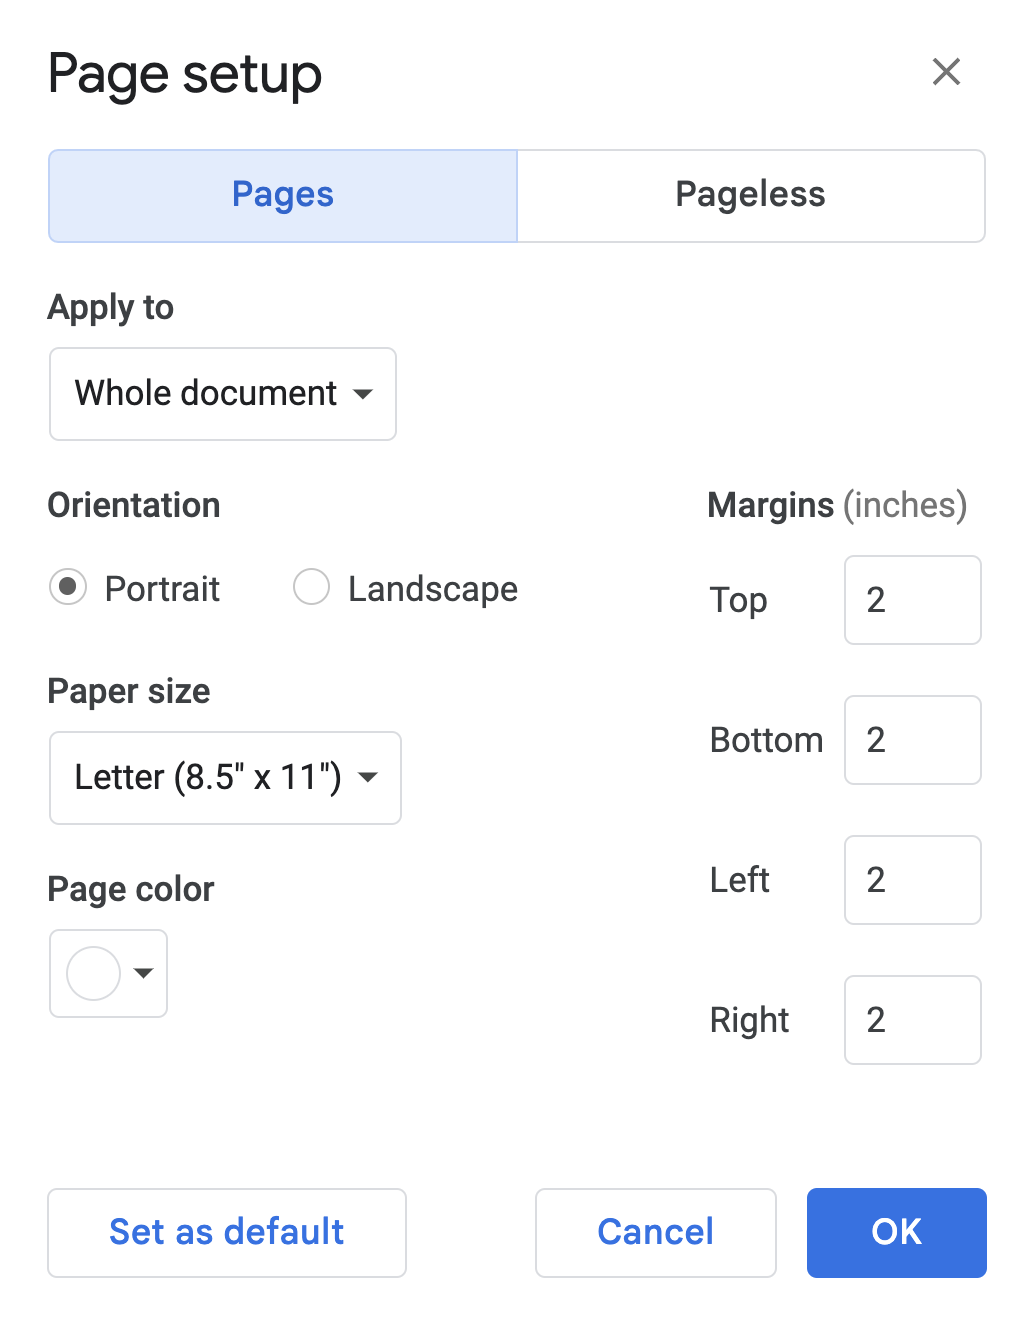
Click OK.
Optionally, if you want to use the same page margins for all your future documents, click Set as default.


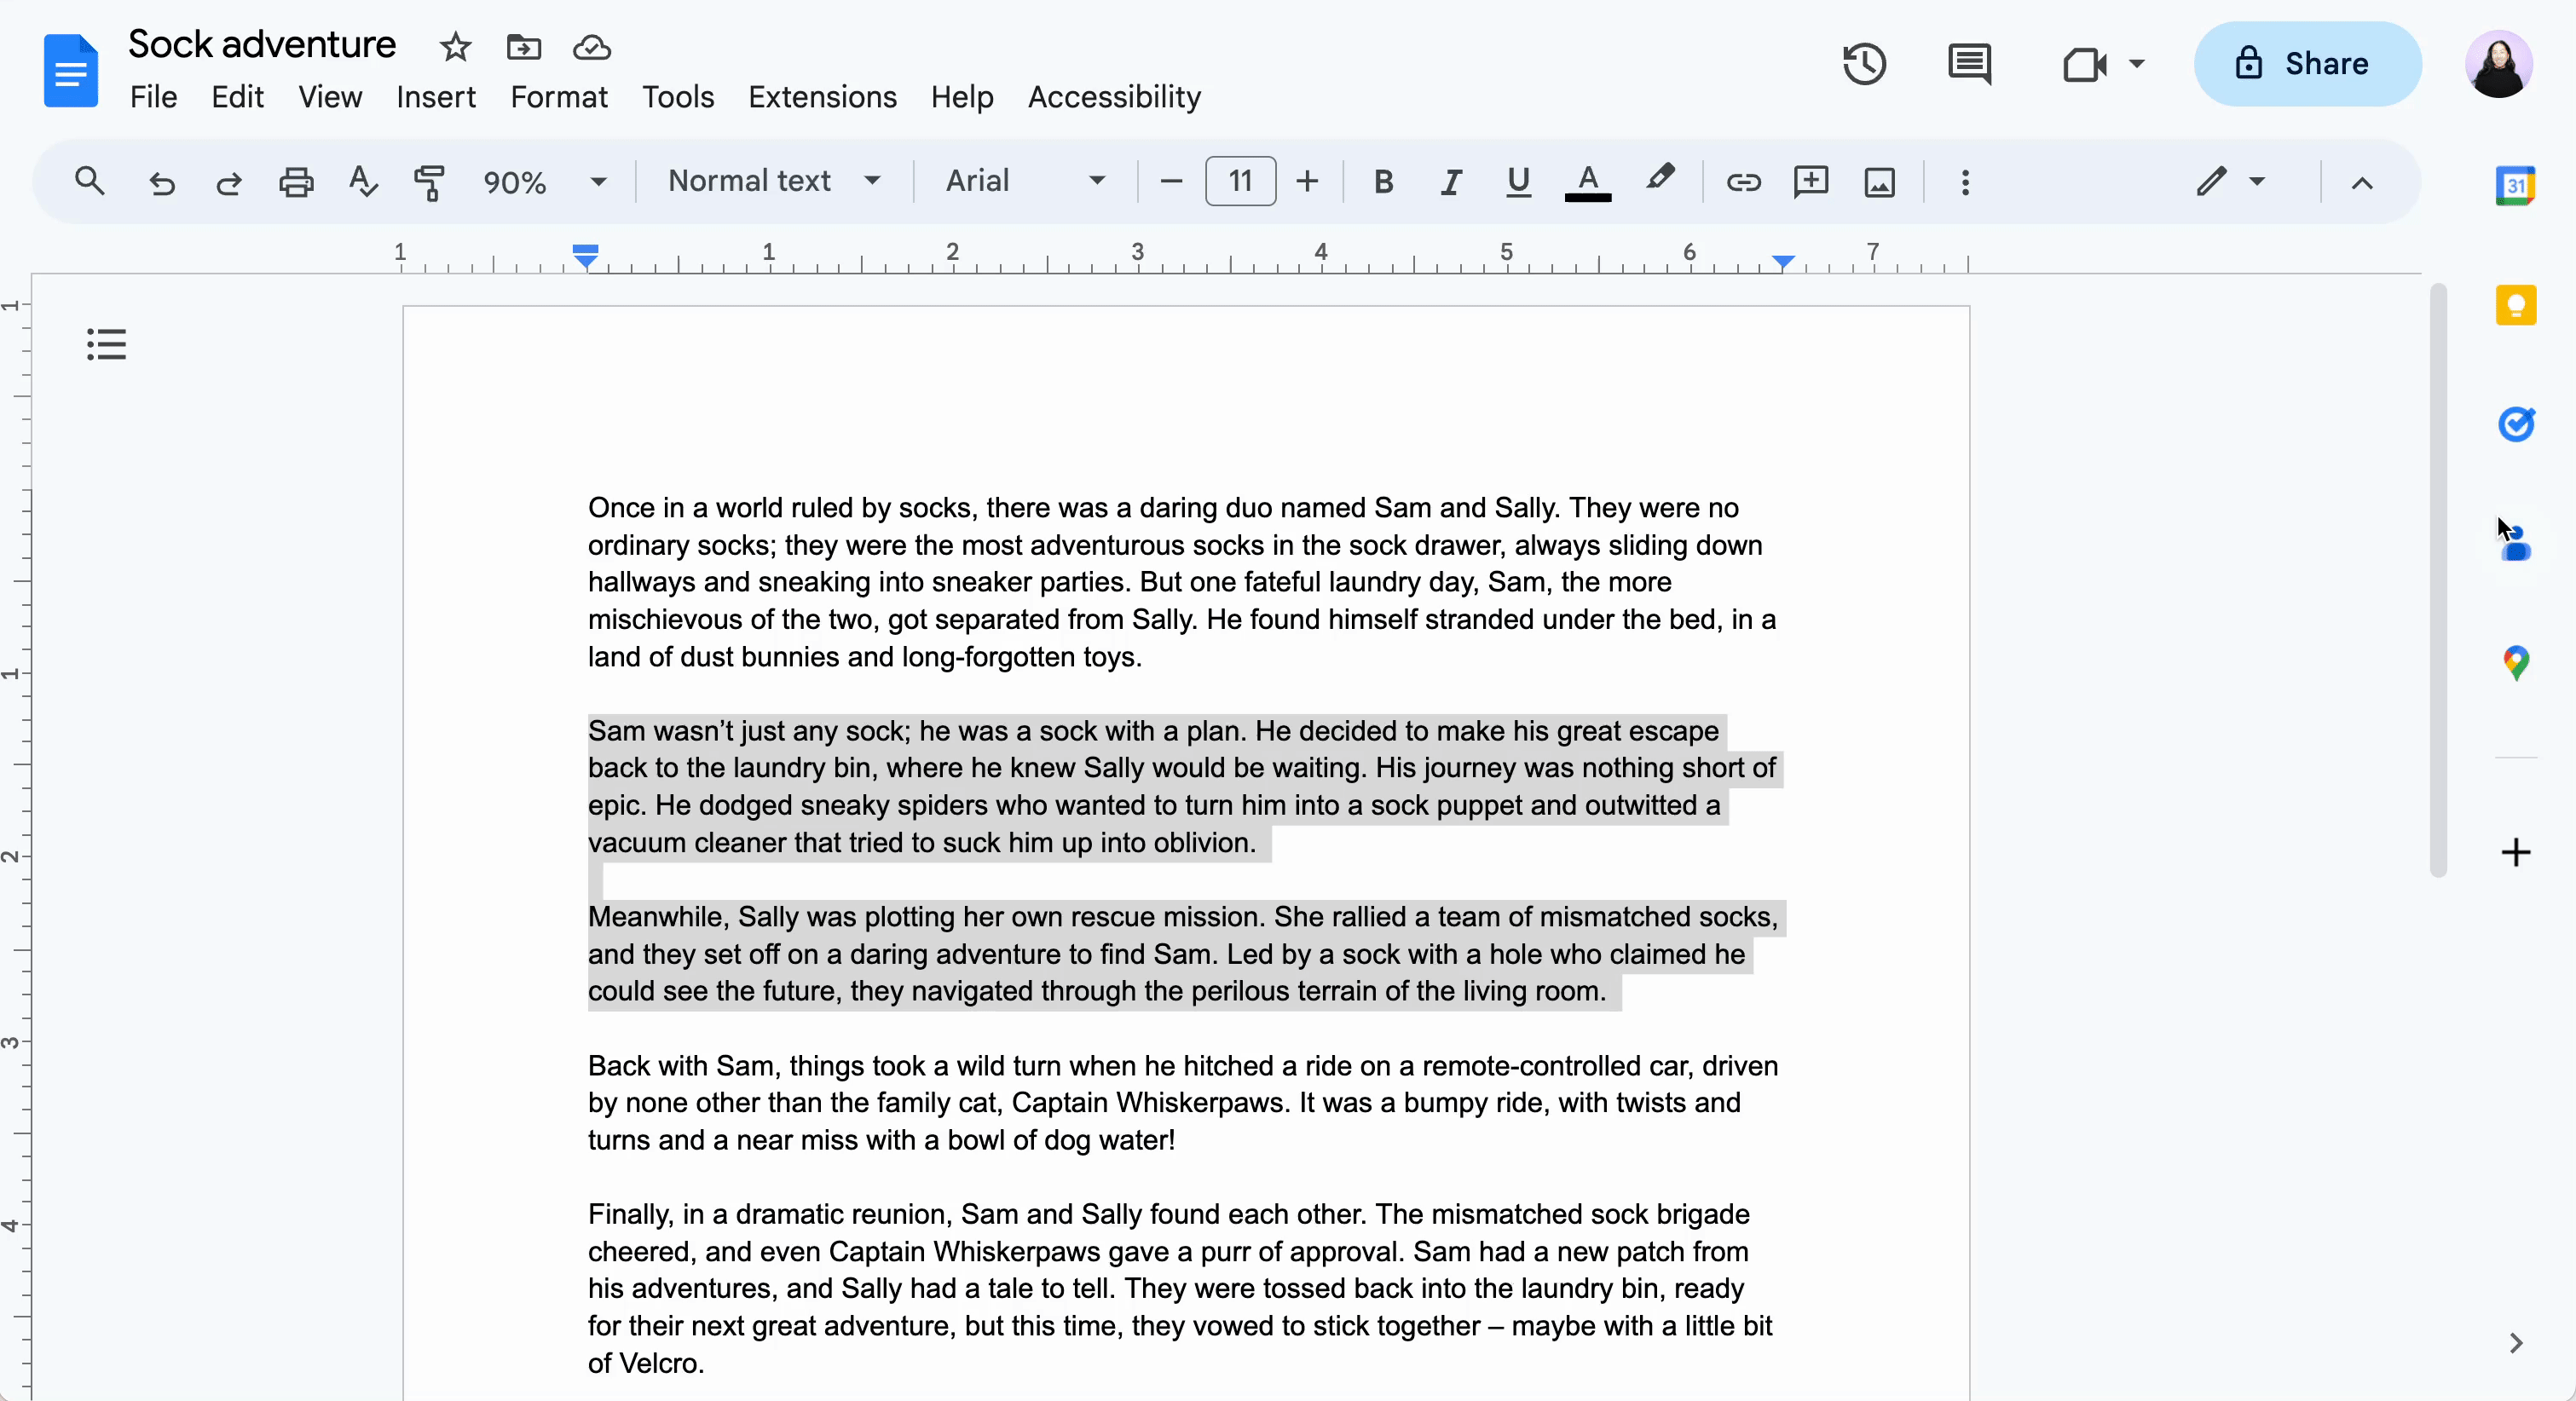
That's it. Now I have plenty of room in the page borders to scribble notes or, more likely, draw doodles.

How to change margins in Google Docs using the ruler
Let's say you want to tweak your margins just enough to make all your text fit on one page. You could take a guess at what magic border settings would do the trick, enter it in your Page setup fields, and hope for the best. Or you can adjust the margins using the ruler, giving you get a real-time preview of your changes.
Click the paragraph that you want to adjust the margins to. Or, if you want to apply the same margins to multiple paragraphs, highlight them.
Slide the small triangle on the left or right side of the horizontal ruler above your document to adjust the width.
Note: The rectangle above the left triangle changes a paragraph's indentation, not the margins.
Hover your cursor over the top of the vertical ruler next to your document until it turns into a down-facing arrow. Then drag your cursor up or down to adjust the height.


How to change margins in Google Docs on the mobile app
You'd think since Android is part of Google, it would get first dibs at practical functionalities in Google apps like adjusting margins in Google Docs. But you'd be wrong. For some reason, Google Docs allows only iPhone mobile app users to customize their page margins; the closest option Android users have is switching to a pageless view (but that's helpful only if you're trying to get rid of page breaks).
How to change margins in Google Docs on an iPhone
Open your document in the Google Docs mobile app.
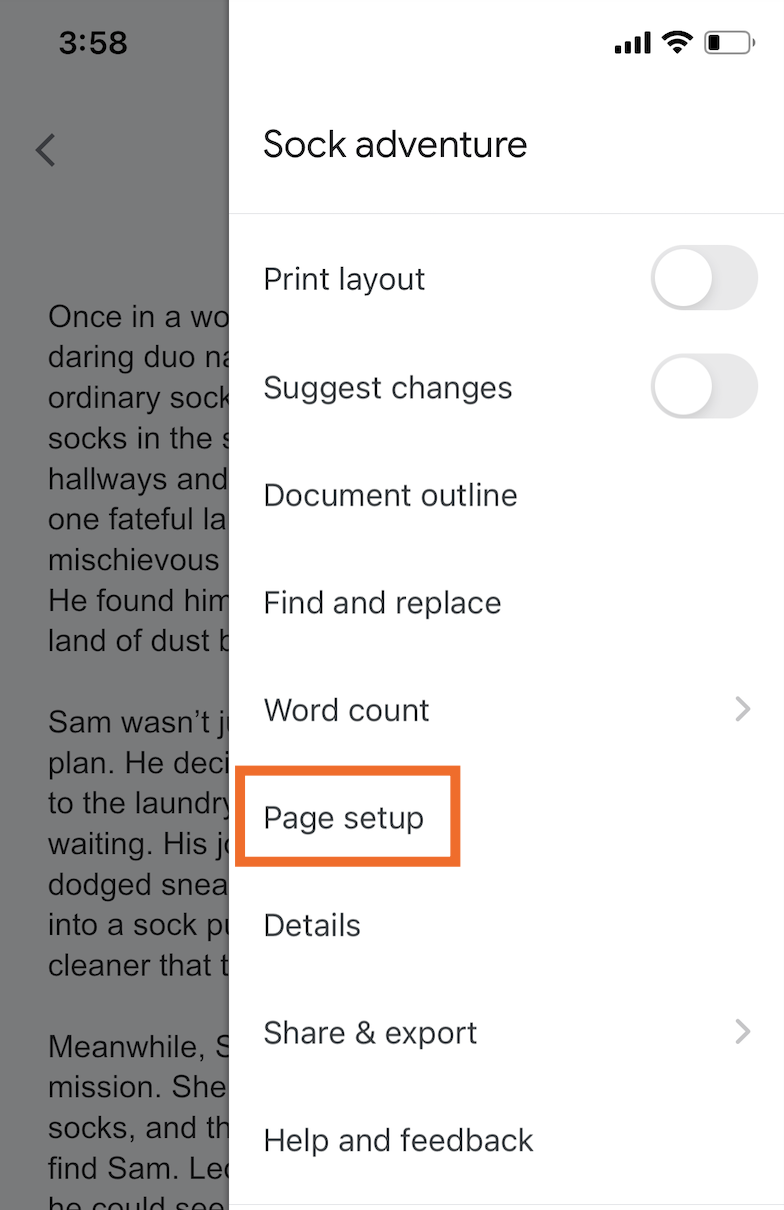
Tap the More icon, which looks like an ellipsis (
...).
Tap Page setup.
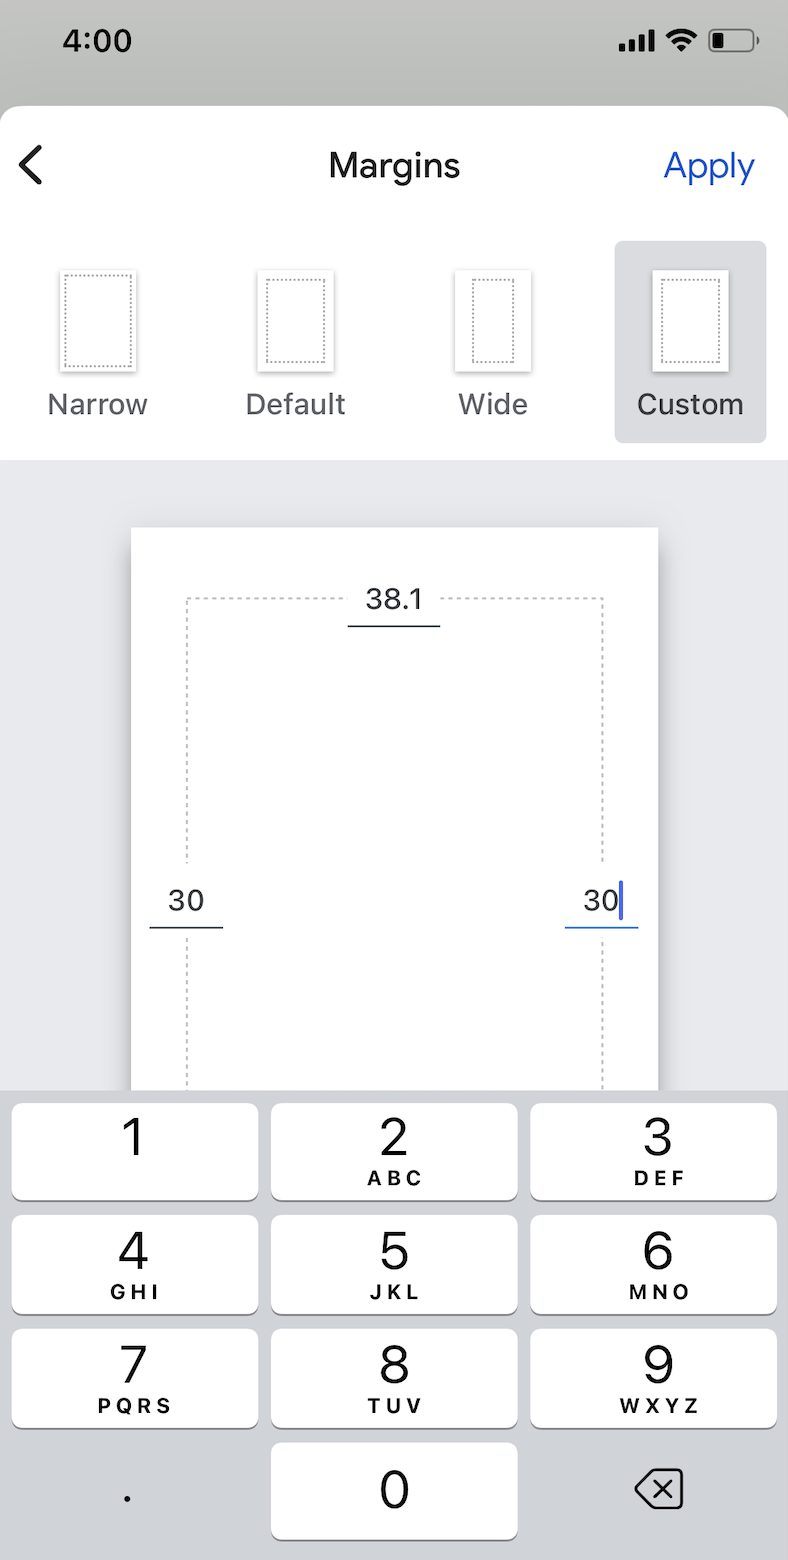
Tap Margins.

Choose Narrow, Wide, or Custom. To modify Custom settings, tap the dimension for any of the borders, and then enter your desired width or height.


You're all set.
Automate Google Docs
Fussing with the margins is time-consuming enough. Use Zapier to connect Google Docs with your other apps, so you can automate the rest of your tedious document-related tasks. For example, you can create a Google Docs template and automatically populate it with data from your spreadsheet. Here's a workflow to get you started.
Copy data from new Google Sheets rows to a Google Doc template
Create Google Docs from template for new Google Forms responses
Create documents from templates in Google Docs for new submissions in Jotform
To get started with a Zap template—what we call our pre-made workflows—just click on the button. It only takes a few minutes to set up. You can read more about setting up Zaps here.
Related reading:


