Google Analytics is a powerful tool for measuring your website's performance, but if you've never used it before, setting it up to track your website isn't exactly the most intuitive process.
In this tutorial, we'll explain how to add Google Analytics to WordPress, Wix, Squarespace, HubSpot, Shopify, Weebly, and custom-built websites.
How to Get a Google Analytics Tracking Code
The first step in setting up Google Analytics to track your website is getting a tracking ID: a unique identifier used to associate your website with your Google Analytics profile.
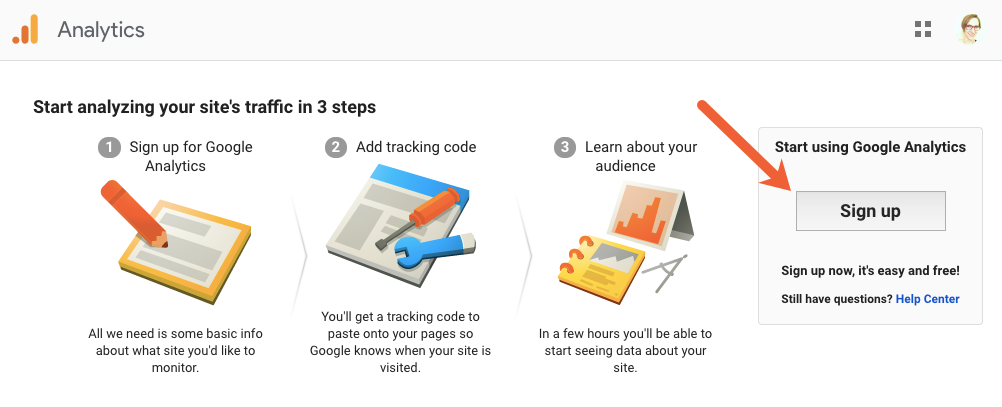
To get a tracking ID for your website, navigate to the Google Analytics home page and click the Sign up button.
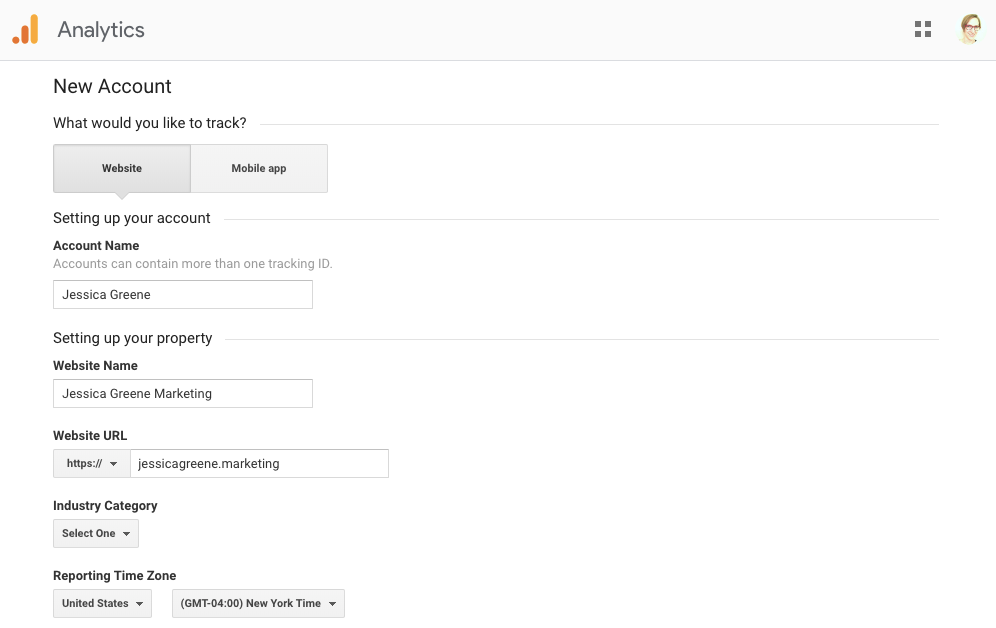
Select Website, and name your account. If you only plan to track one property, your website's name should be fine. If you plan to track multiple properties, you may want to use your own name or business name. Next, fill in the other requested details.
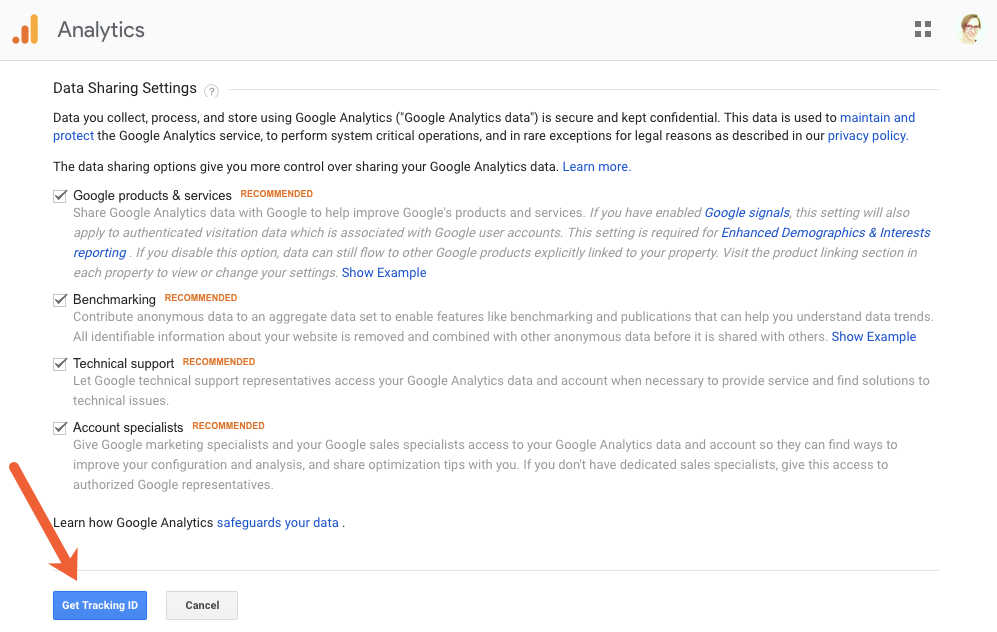
Read through the data sharing options and uncheck any that you're not comfortable with. When you're finished, click Get Tracking ID.
Read through the data sharing and terms of service agreements, check the boxes to agree to the terms, and click I Accept.
Once you've done that, Google Analytics will provide your tracking ID, as well as some code you may need to add to your website to set up Google Analytics tracking. Make sure to keep this window open; you'll need it for the next step.
How to Add Google Analytics to Your Website
The method you'll use to add Google Analytics tracking to your site will depend on the platform you used to build your site. Use these links to jump to the instructions for your site's platform:
How to add Google Analytics to a custom website
If you have a custom-built website with a team of developers who manage your site, you can send your developers the code that displayed in the Global Site Tag section after you created your Google Analytics account.
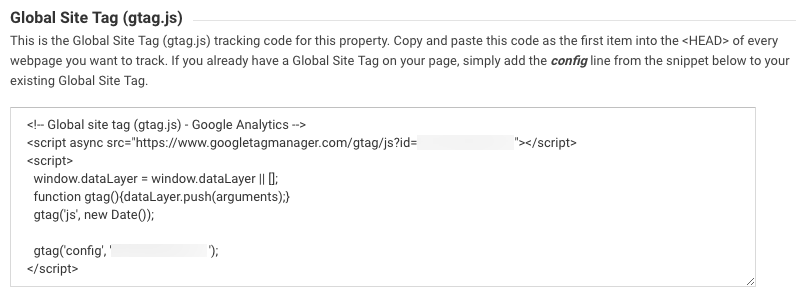
They'll add it to the global code that appears on every page of your site somewhere between the <head> and </head> tags.
To validate the change, navigate to any page of your website, right-click somewhere on the page, and select View Page Source. In the page source view, click Control + F (Windows) or Command + F (Mac) to open the search function, type </head>, and tap enter. Then scroll up from the highlighted </head> tag and make sure your Global Site Tag displays.
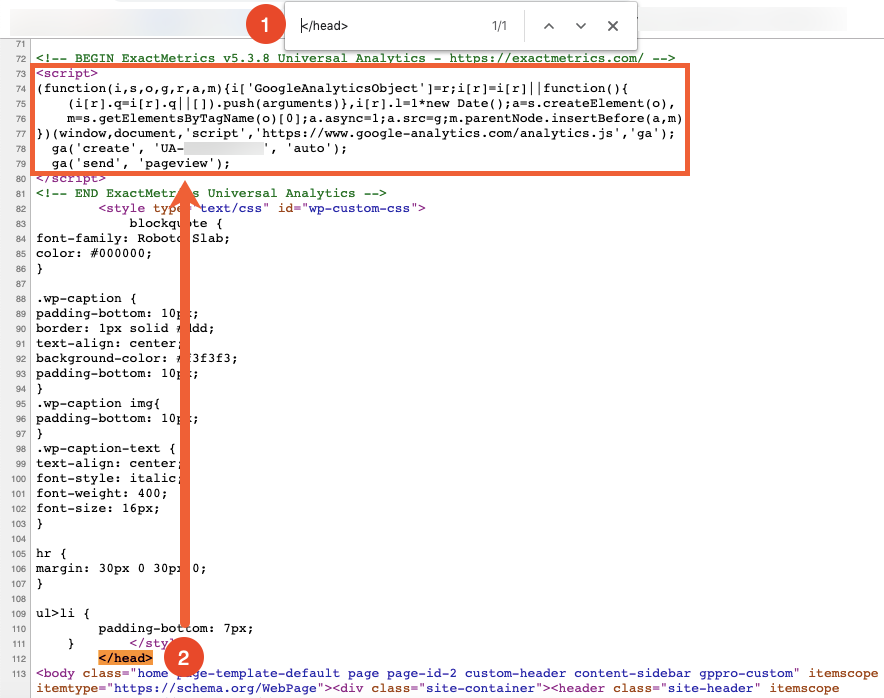
You can test it the same way on multiple pages if you want to make sure the code appears on every page. As long as it does, Google Analytics can track your site.
How to add Google Analytics to WordPress
If your site is built on WordPress, you can use a plugin to add your Google Analytics tracking code to every page of your WordPress site.
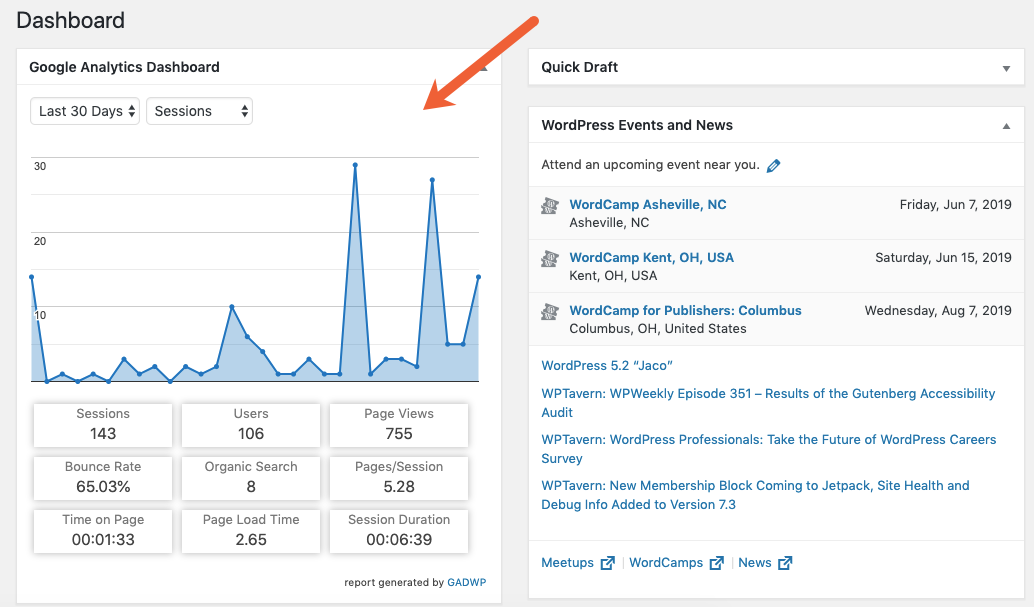
There are multiple plugins to choose from, but we've used the free plugin Google Analytics Dashboard for WP. It makes it easy to add your tracking code and adds a Google Analytics dashboard to your WordPress dashboard so you can see some of your site's analytics without even leaving WordPress.
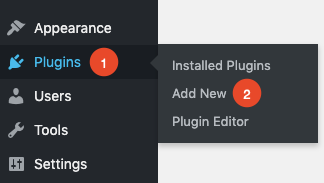
To install Google Analytics Dashboard for WP, sign in to your site's WordPress instance, hover over click Plugins, and click Add New.
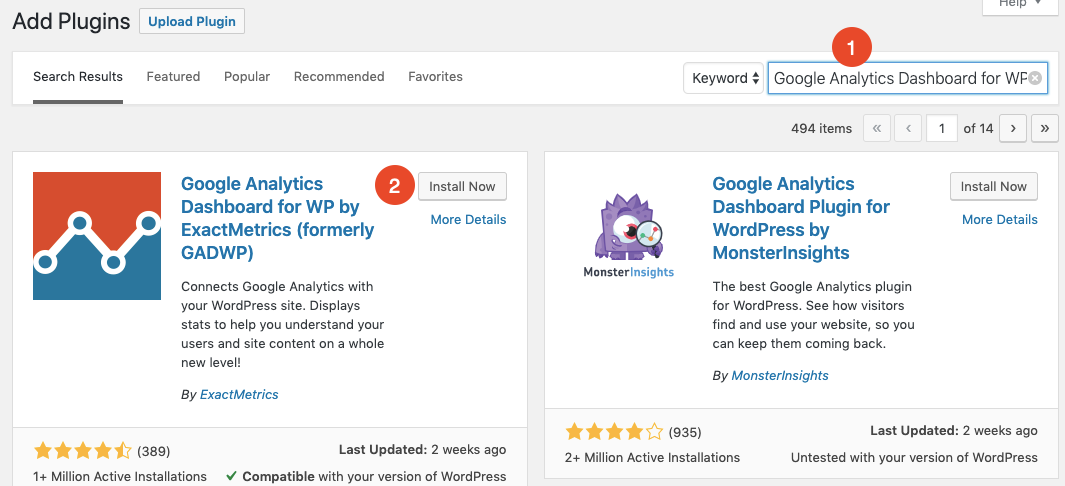
In the search bar, type Google Analytics Dashboard for WP. When you see the plugin in the results, click Install Now.
When the plugin finishes installing, click Activate. This redirects you to your list of installed plugins.
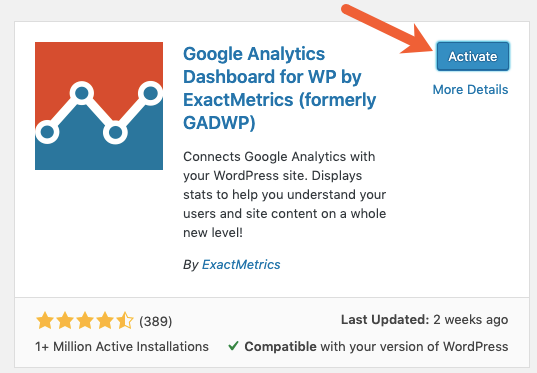
Now, on your list of installed plugins, look for Google Analytics Dashboard for WP, then click the Settings link below it.

On the settings page, click Authorize Plugin.
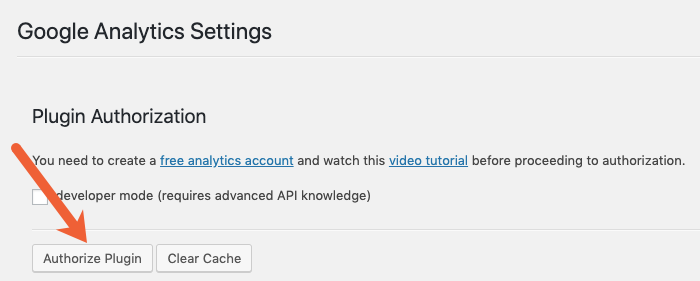
Click Get Access Code.

Sign in to the Google account you used to sign up for Google Analytics, and click the Allow button to grant the plugin access to your Google Analytics data.
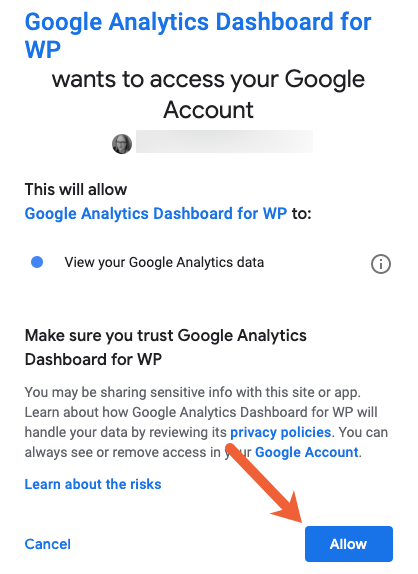
Copy the provided access code.
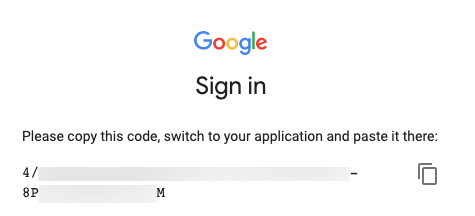
Navigate back to WordPress, paste the tracking code into the Access Code box, and click Save Access Code.

The plugin automatically adds the Google Analytics tracking code to all pages of your site and shows you Google Analytics data on your WordPress dashboard.
How to add Google Analytics to Wix, Squarespace, or HubSpot
If you use Wix, Squarespace, or HubSpot, Google Analytics tracking is a built-in function of the platform. You just need the tracking ID you got when setting up your Google Analytics account.
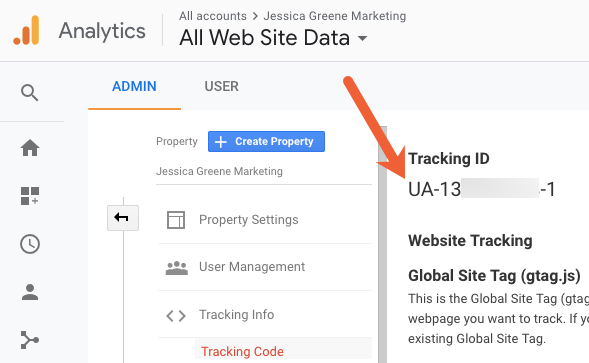
Once you have your tracking ID:
Follow these instructions to set up Google Analytics tracking in Wix.
Follow these instructions to set up Google Analytics tracking in Squarespace.
Follow these instructions to set up Google Analytics tracking in HubSpot.
After you enter your tracking ID, each platform automatically adds your Google Analytics tracking code to every page of your website.
How to add Google Analytics to Weebly and Shopify
Weebly and Shopify have sections in their admins where you'll paste your Global Site Tag code to add the tracking code to each page of your site.
First, you'll need to copy the Global Site Tag code that displayed after you created your Google Analytics account:

Next, follow the instructions below to add the code to Weebly or Shopify:
After you save your changes, the CMS will automatically add your Google Analytics tracking code to every page of your website.
How to Add Additional Websites to Google Analytics
If you have more than one website you want to monitor in Google Analytics, you can add those websites to your account so you can switch easily between all of them.
To add additional properties to Google Analytics, open Google Analytics, and click the Admin tab.
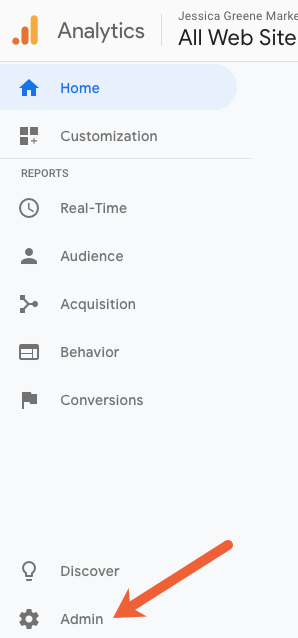
Click + Create Property.

Fill out the details, and click Get Tracking ID to get the code you'll need to add to your other websites to track them in Google Analytics.
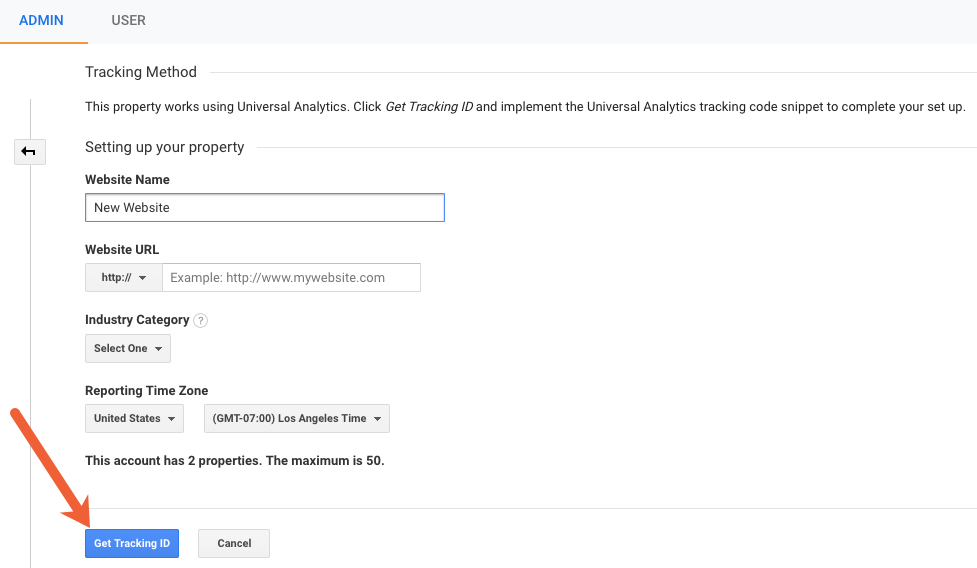
Once you've added your tracking code to each of the websites you want to track in Google Analytics, you can switch easily between them by clicking the dropdown next to the Analytics logo.

It takes a few days for Google Analytics to start showing data for a website after you create an account and add the tracking code, so don't panic if you don't see data immediately. After a few days, you should be able to log in to Google Analytics and start measuring your site's performance.
Ready to learn more about Google Analytics? Check out our guide on turning your Google Analytics data into actionable tasks, or connect Google Analytics to the other applications you use with these Google Analytics Zapier integrations.


