
We independently review and test every app we write about. When you click some of the links on this page, we may earn a commission. Learn more.
We all have our reasons for loving Google Docs. (Mine is that it keeps my computer desktop clean—thanks for asking!) And while Google Docs isn't generally known for its looks, it has a whole load of features that help you add some flair to your documents.
Unfortunately, Gemini for Google Docs can't help you with the aesthetic side of things (yet), so you'll have to do it manually.
Let's cut to the chase: here are a few of my favorite Google Docs formatting tips.
1. How to add a signature in Google Docs
If you're dealing with a legal document, you should probably use an eSignature app. But if you're just trying to add a signature to your document to make it look fancy, you can do that directly within Google Docs. Here's a quick overview on how to do it (for more detailed steps with screenshots, check out how to add and edit a signature in Google Docs).
Click the section of the document where you want your signature to appear.
Click Insert > Drawing > New.
Click the down caret (
⋁) next to the Line icon, and select Scribble.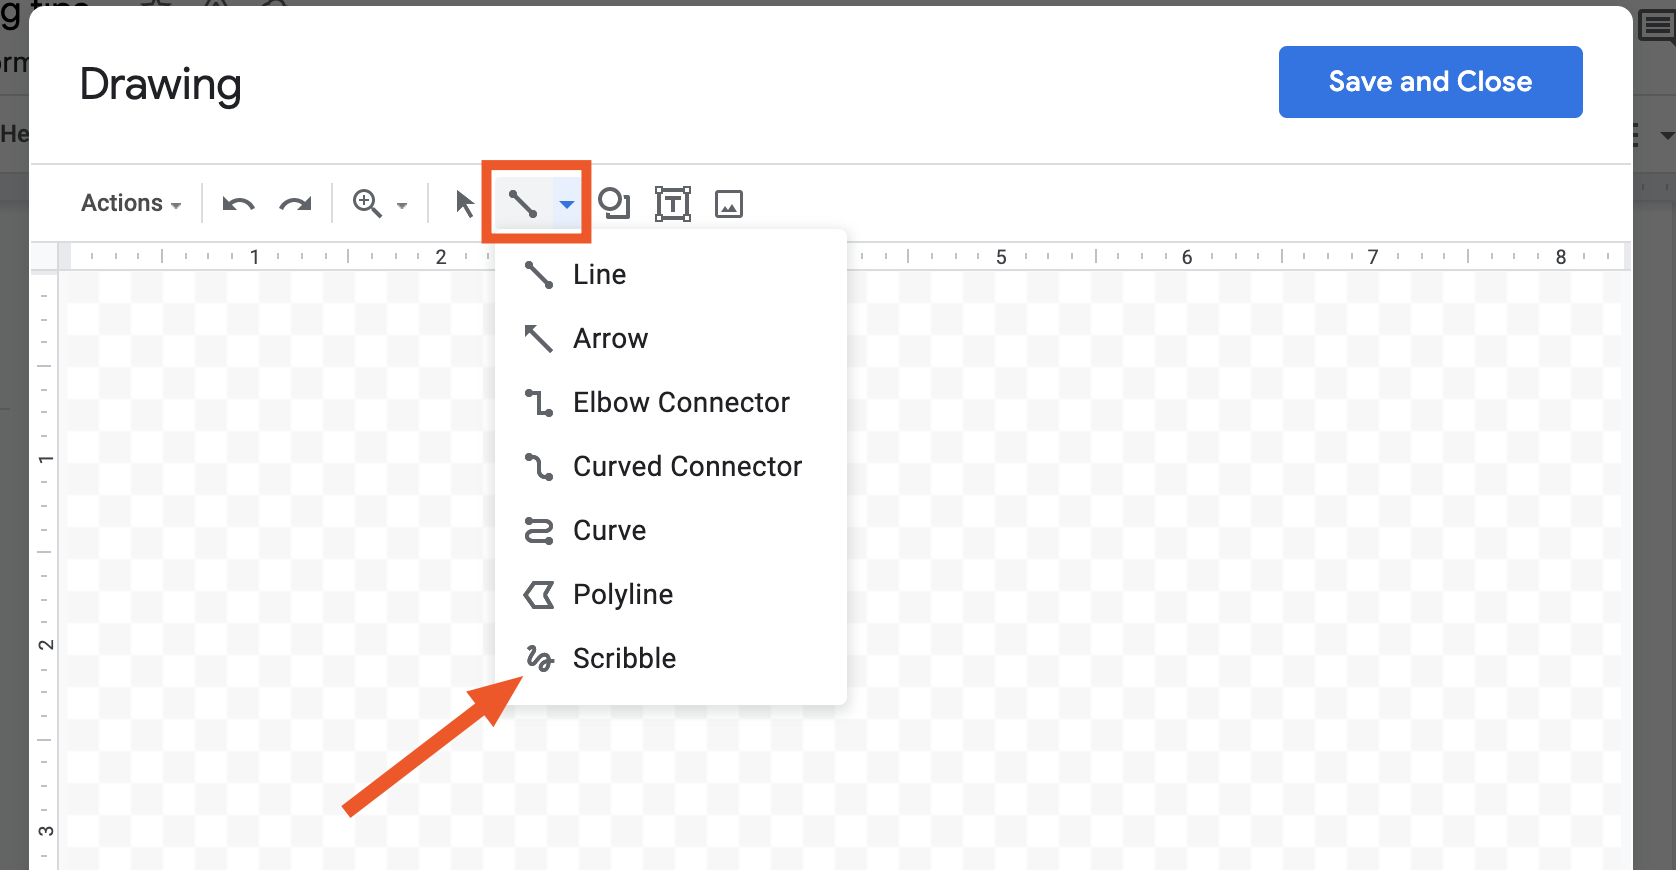
Draw your signature.
Click Save and Close.

It's not the easiest task in the world to draw your signature using a trackpad or mouse—as you can see from my questionable example below—but Google Docs lets you select to edit just a small section or letter rather than the whole thing. This way, you don't need to keep scribbling and rescribbling until you get it exactly right.

This drawing feature is great for signatures, but you can use it to draw anything you want within your document. For example, if you want to create a timeline in Google Docs, you might use Line, Arrow, or Elbow Connector instead of the scribble tool, so you have some nice, clean lines to work with.
2. How to do subscript or superscript in Google Docs
Google Docs has a built-in superscript and subscript formatting feature, so you can make sure your equations are all formatted correctly. (But also, why are you doing math in Google Docs?)
Highlight the text you need to translate to superscript or subscript.
Click Format > Text > Superscript or Subscript.

Or you can highlight the text you want to edit and use these keyboard shortcuts:
For superscript:
Ctrl+.on Windows orcommand+.on Mac.For subscript:
Ctrl+,on Windows orcommand+,on Mac.
3. How to add a border in Google Docs
If you're thinking Google Docs doesn't have the option to create a border around your document, you'd be…kind of right. It doesn't have a specifically designed feature for creating borders like Microsoft Word does, but there are a couple of workarounds.
Draw a border
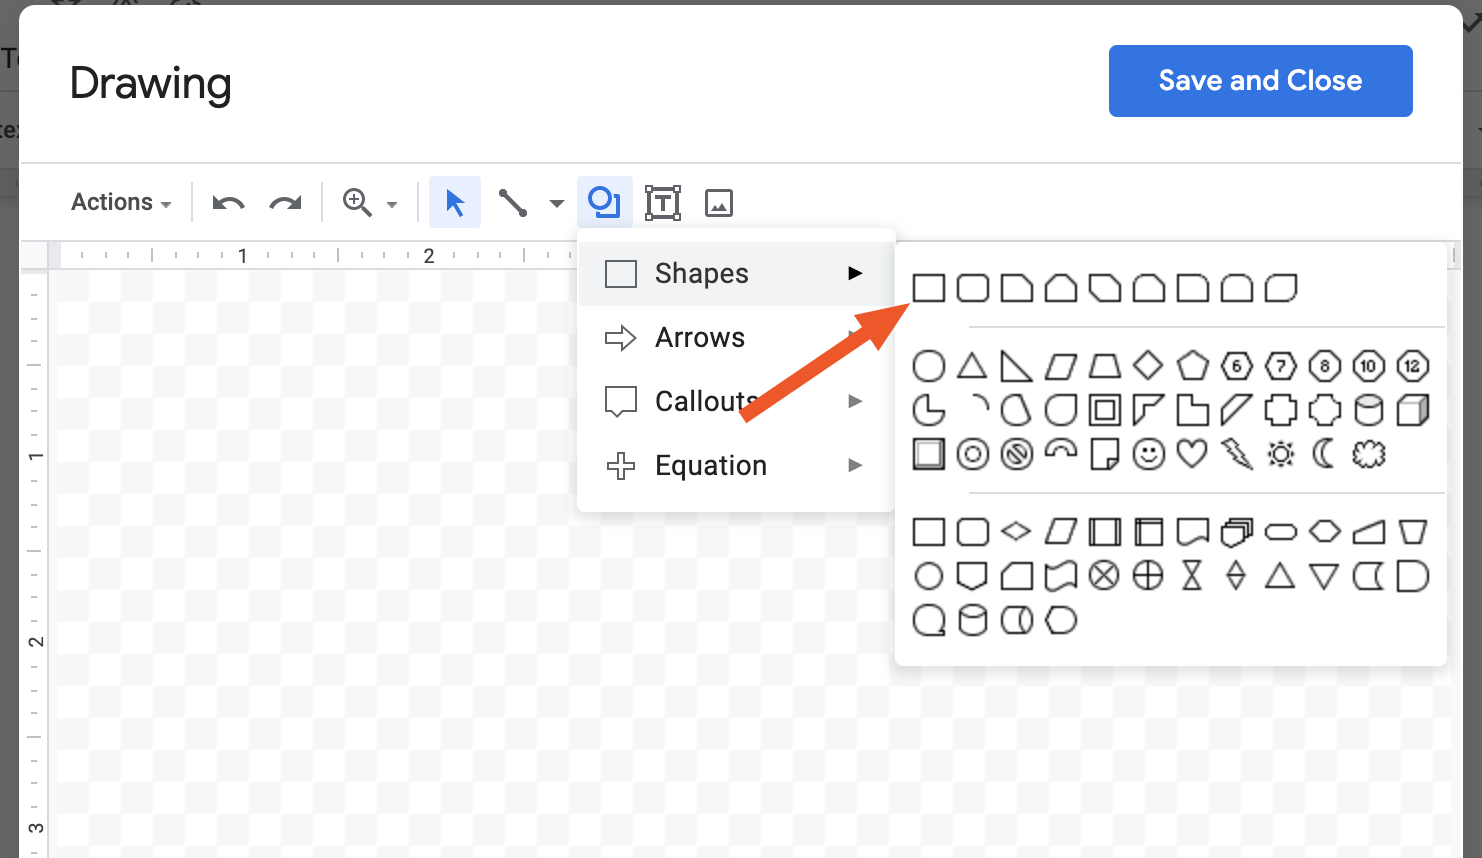
Click Insert > Drawing > New.
Click the Shape icon, and select Rectangle.
Draw a roughly rectangular shape (you don't have to get it perfect here).
Optionally, adjust the Fill color, Border color, and Border weight. If you plan to include text on your page, I suggest using the Transparent fill color or a color that adds enough contrast against your text color.
Click Save and Close.
You can then edit the size and shape of your border within the document by clicking and dragging.

Need to add text within the parameters of your border?
Click the rectangle in your document.
In the floating toolbar, click the Behind text icon.


You're all set.
Insert a table
Click Insert > Table > choose a 1 x 1 cell. This will add a box to your document that you can then click and drag to fill the whole page.
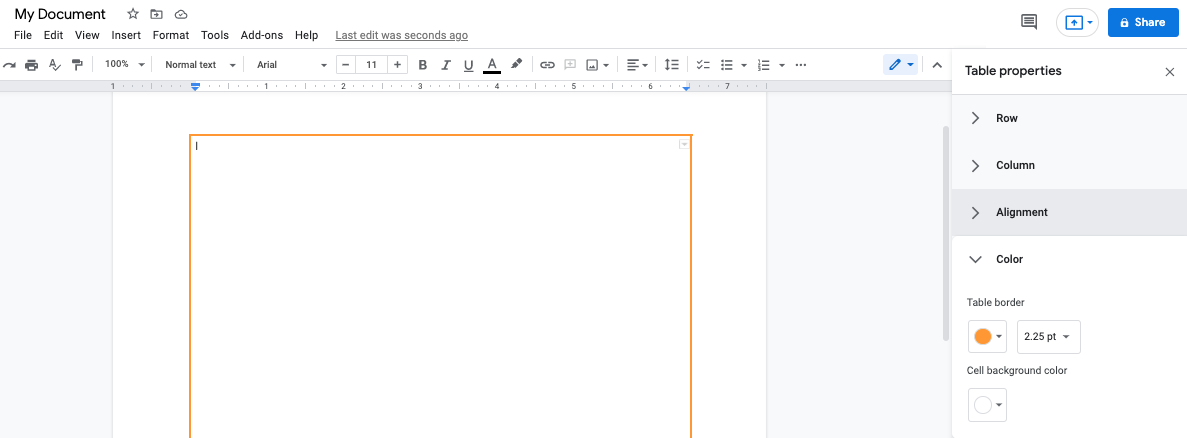
To edit the border style, click Format > Table > Table properties. Here, you can change things like the thickness and color.

To create more space between the border and the text, click Cell, and then modify the Cell padding.
4. How to strikethrough on Google Docs
For italics, bold, or underlined text, there's an obvious button in the Google Docs toolbar. To strike through text, however, you need to dig a little deeper.
Highlight the text you want to strike through.
Go to Format > Text > Strikethrough. Or you can use the keyboard shortcut:
Alt+Shift+5on Windows orcommand+shift+Xon Mac.
5. How to make a table of contents in Google Docs
By default, Google Docs' document outline feature automatically generates a table of contents in the side panel next to your document. This table of contents stays with you as you scroll, making it easy to navigate through your doc online.
But if you plan to print your document or convert it to a PDF, you're better off generating a table of contents within your document.
Before you do, be sure to apply the correct styles, like Title, Subtitle, and Heading 2, to your document.
Click the section of the document where you want your table of contents to appear (likely at the beginning of the doc).
Click Insert > Table of contents.
Choose what type you want: Plain Text, Dotted, or Links. The first two options will display the heading names with anchor links and relevant page numbers; the last will show only the heading names with anchor links.

If you've applied changes to your text styles or added new sections after you first created your table of contents, Google Docs makes it easy to automatically update your table of contents to match. Click anywhere in your table of contents, and then click the Update table of contents icon in the floating toolbar.

6. How to set tabs in Google Docs
Let's say you want to group related documents together. You could store them in the same Google Drive folder, and it would work fine. But it's a little clunky. Instead, I recommend you set tabs in Google Docs. This way, you can create one parent doc and add your other documents as sub-docs.
You have a few options for setting tabs:
Use your keyboard shortcut. Press
Shift+F11.Use the Google Docs ribbon. Click Insert > Document tab.

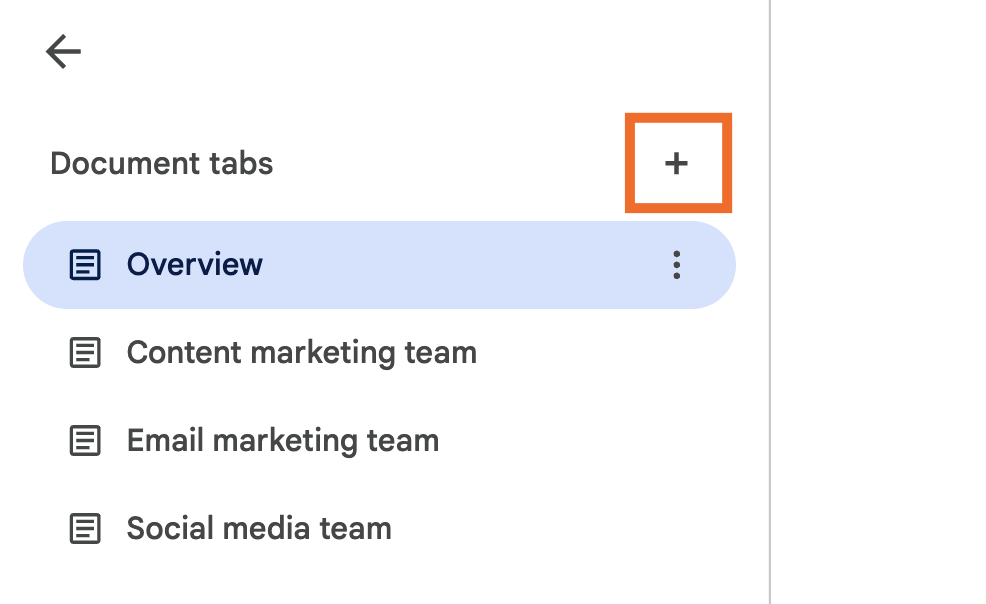
Use the left panel. From the side of your doc, click the Show tabs and outlines icon, which looks like three horizontal lines stacked vertically, to open the left panel. Then click the Add tab icon, which looks like a plus sign.


Now you can seamlessly toggle between docs without needing to open 17 tabs at once.
To manage and reorganize a tab, click the Tab options icon, which looks like three dots stacked vertically (⋮), next to the tab you want to modify. From here, you can do things like add subtabs, rename your tab, and show the outline for that tab's document.

You can also use the Tab options menu to reorganize your tabs. But I find it's easier to drag and drop the tabs directly in the left panel.

7. How to change background color on Google Docs
Why use plain white when you can change the background color of pages in a Google document? This feature is particularly handy if you want your docs to match your brand.
Go to File > Page setup.
In the Page color section, select a color. You can even add a custom color by using a color dropper or entering a hex code.
Optionally, if you want all new documents you create in the future to use the same page color, click Set as default.

8. How to add an image border in Google Docs
If you want your images to stand out in Google Docs, add an image border around them.
Select the image, and click the Border color icon, which looks like a pencil, in the toolbar.
Select the border color you want to use. Similar to changing the page color, you can also add custom border colors.
Optionally, click the Border weight icon in the toolbar to change the thickness of the border. Or click the Border dash icon to change the border style—for example, dotted or perforated lines.

While you're at it, take a look at a bunch of other great tips for editing images in Google Docs.
9. How to add fonts to Google Docs
By default, Google Docs will choose Arial as your font when you're creating a document. I like it, but it's not for everyone. And you might even have some specific fonts you use in your brand guidelines. Here's how to add new fonts to Google Docs.
Click the down caret (
⋁) next to your font, and then select More fonts.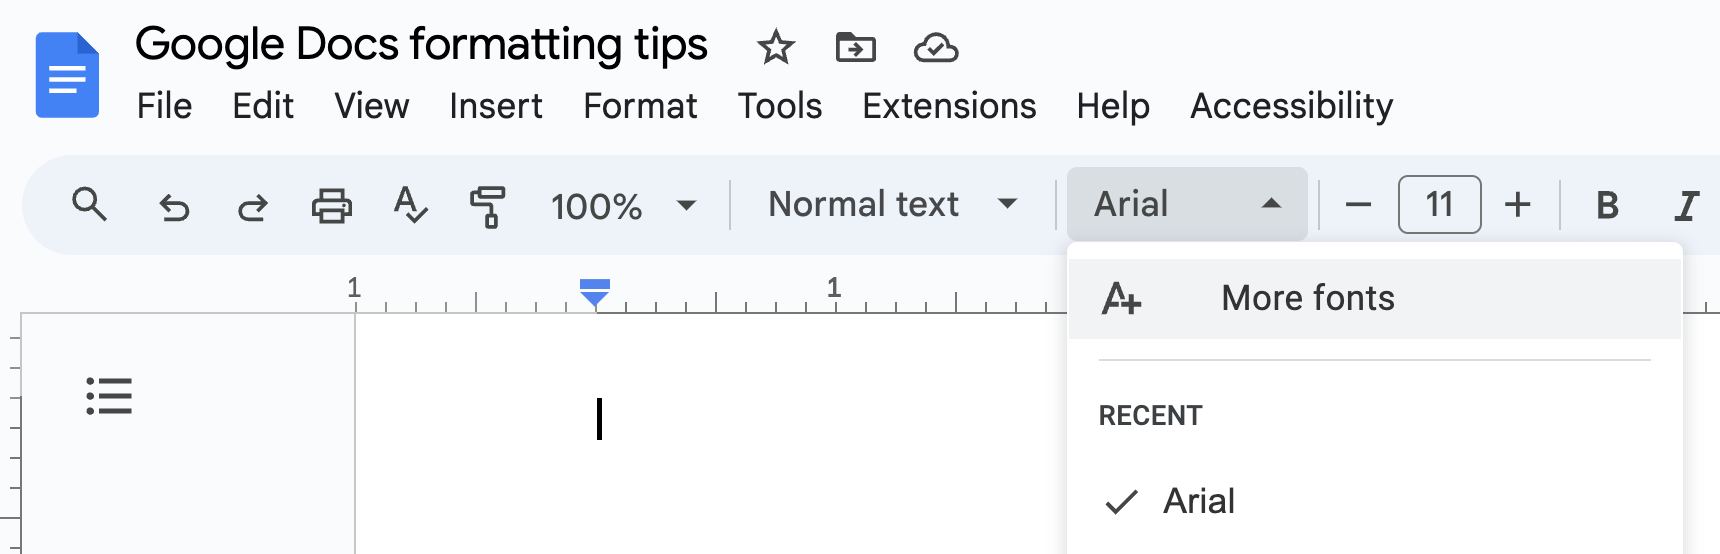
Search for the name of the font you're looking for.
Click OK.
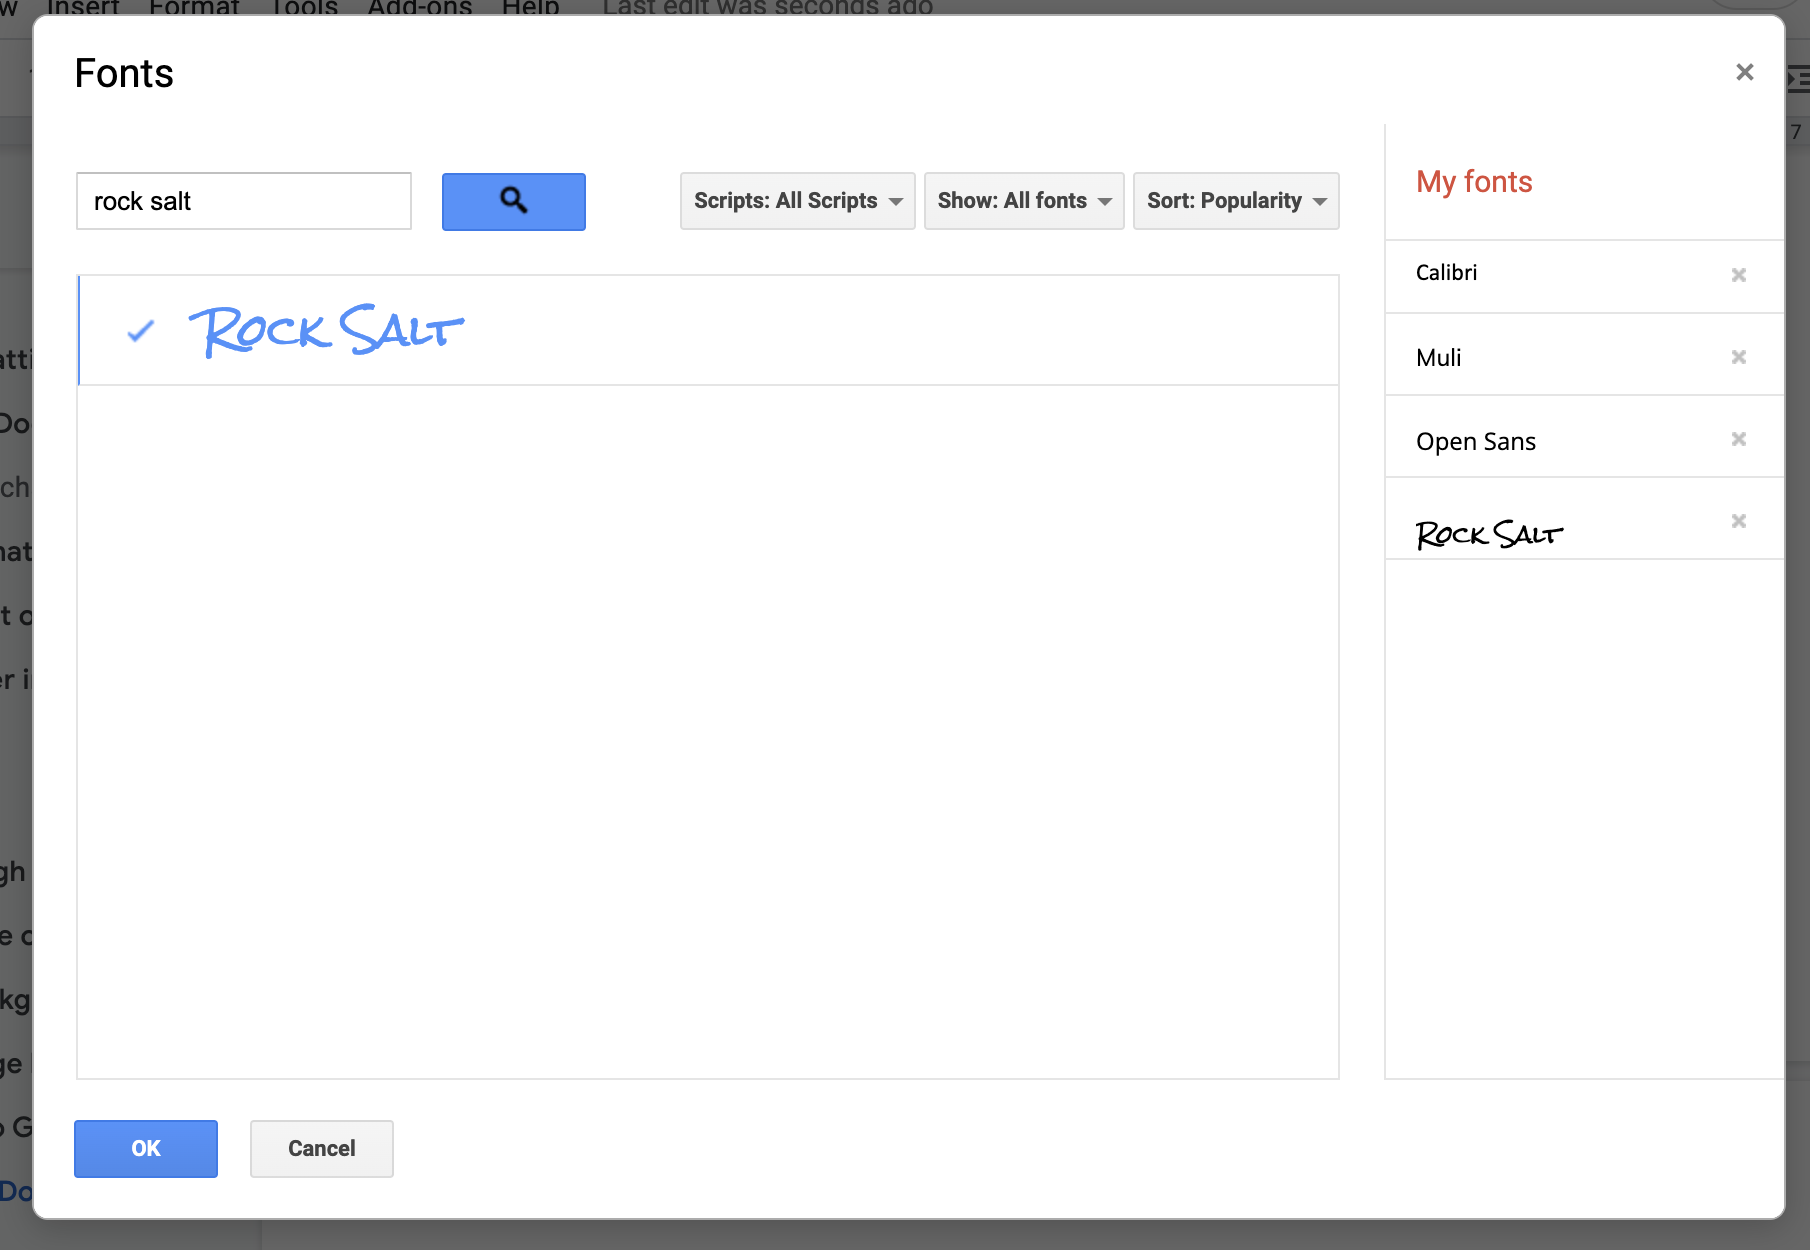


Google Docs will automatically change your current font style to the one you just added. It'll also appear in your font dropdown, so you can easily select it for use in the future.
10. How to change margins in Google Docs
By default, the page margins in Google Docs are set to one inch all around. But you have two options to adjust them.
Using page setup
Click File and then select Page setup.
Enter the widths you want for the Top, Bottom, Left, or Right of your page.
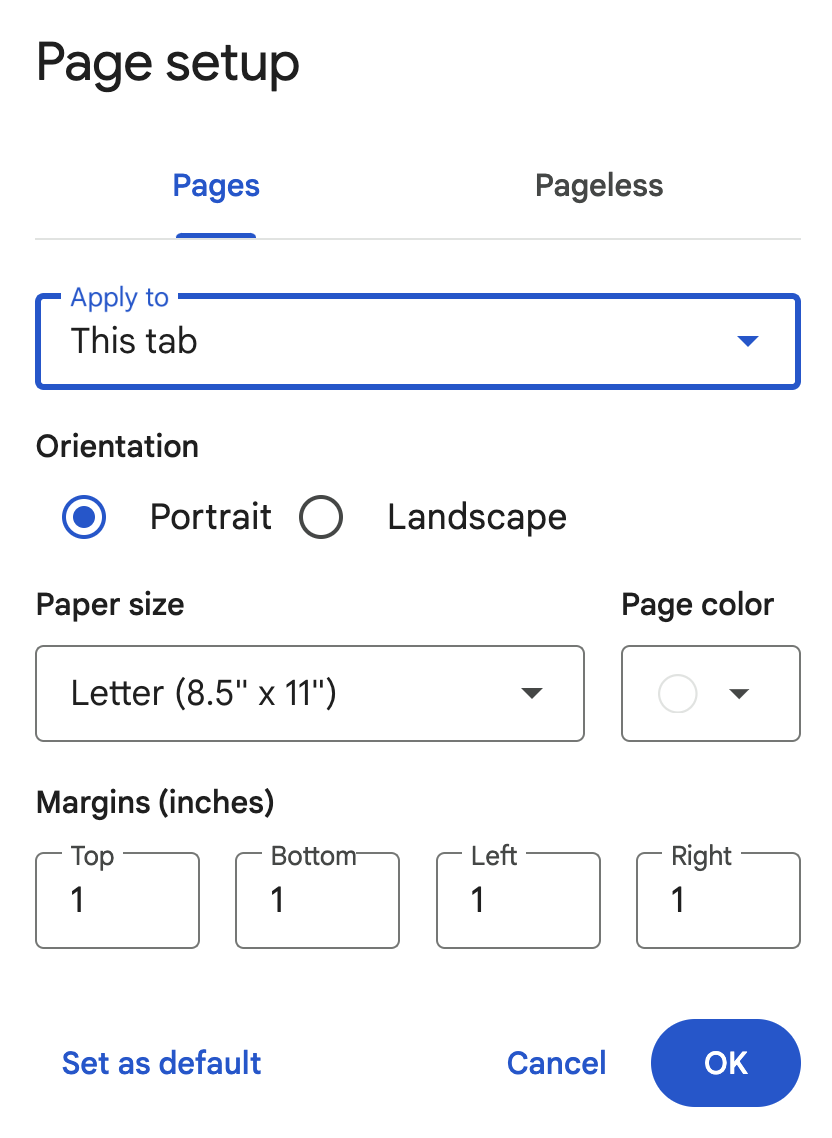
Click OK.

Using the ruler
Click the paragraph that you want to adjust the margins to.
Slide the small triangle on the left or right side of the horizontal ruler above your document.

Note: The rectangle above the left triangle changes a paragraph's indentation, not the margins.
Hover your cursor over the top of the vertical ruler next to your document until it turns into a down-facing arrow. Then drag your cursor up or down to adjust the height.


If you're fiddling with page margins just to make a page break appear at a less awkward spot, there's an easier workaround. Here's how to use Google Docs' pageless view, so you can create a document without page breaks.
11. How to do a hanging indent on Google Docs
Let's say you're creating a bibliography using the MLA, APA, or Chicago style guide. You're going to need to format each reference with hanging indents (where all lines of your paragraph, except the first, are indented a half an inch).
Use the keyboard shortcut to highlight your entire page:
Ctrl+Aon Windows orcommand+Aon Mac. Or highlight the paragraphs you want to apply hanging idents to.Click Format > Align & indent > Indentation options.
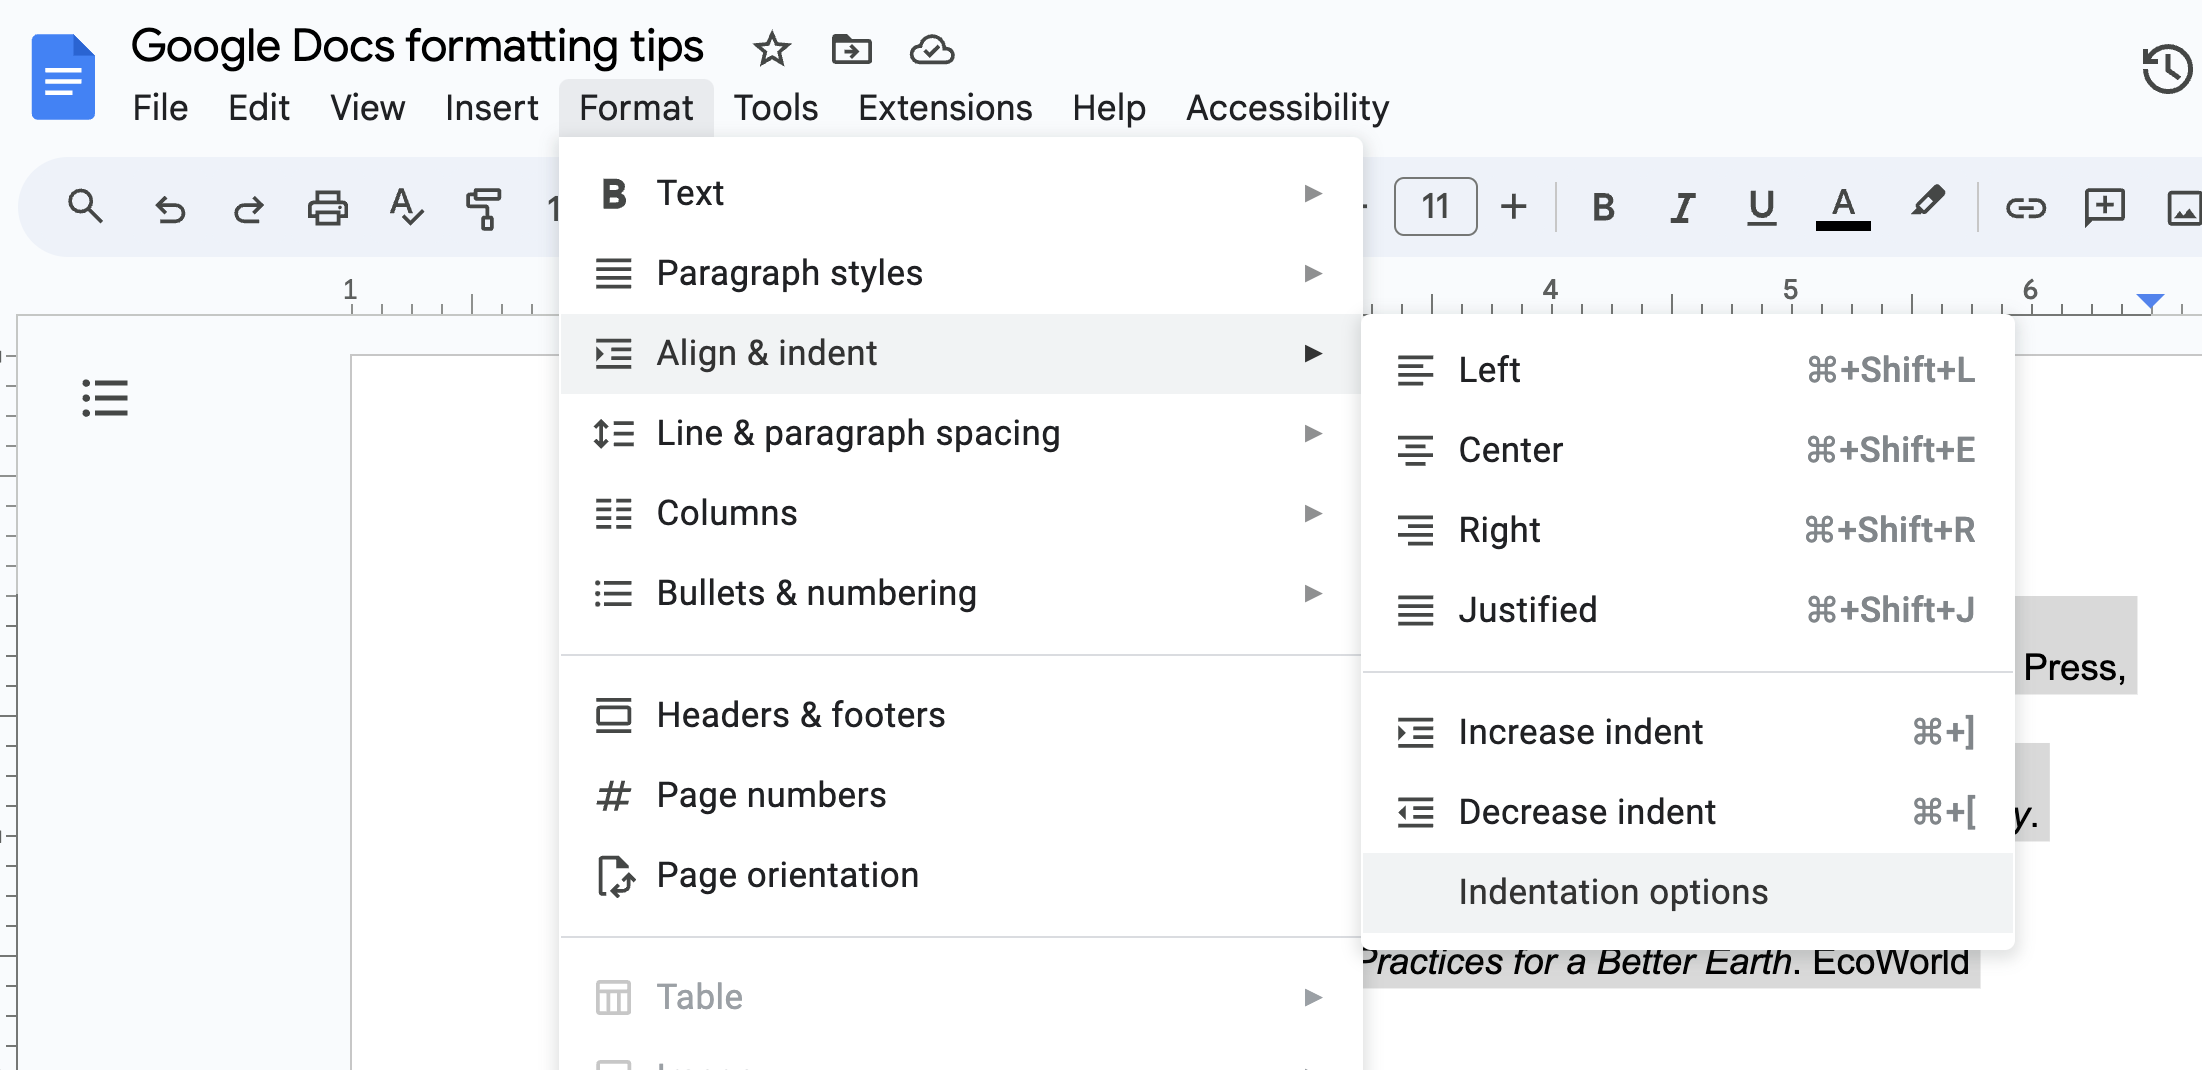
In the Special indent section, click the down caret (
⋁), and select Hanging.
Click Apply.


12. How to add a cover image in Google Docs
If you want to create a branded document, or you simply want to jazz things up, you can add a cover image to the top of your Google Doc as long as you're in pageless mode. Here's the most straightforward way to add a cover image.
Click Insert > Cover image.
Choose how you want to add your image: Upload from computer or Choose from stock images.

Upload or select the image you want to use.
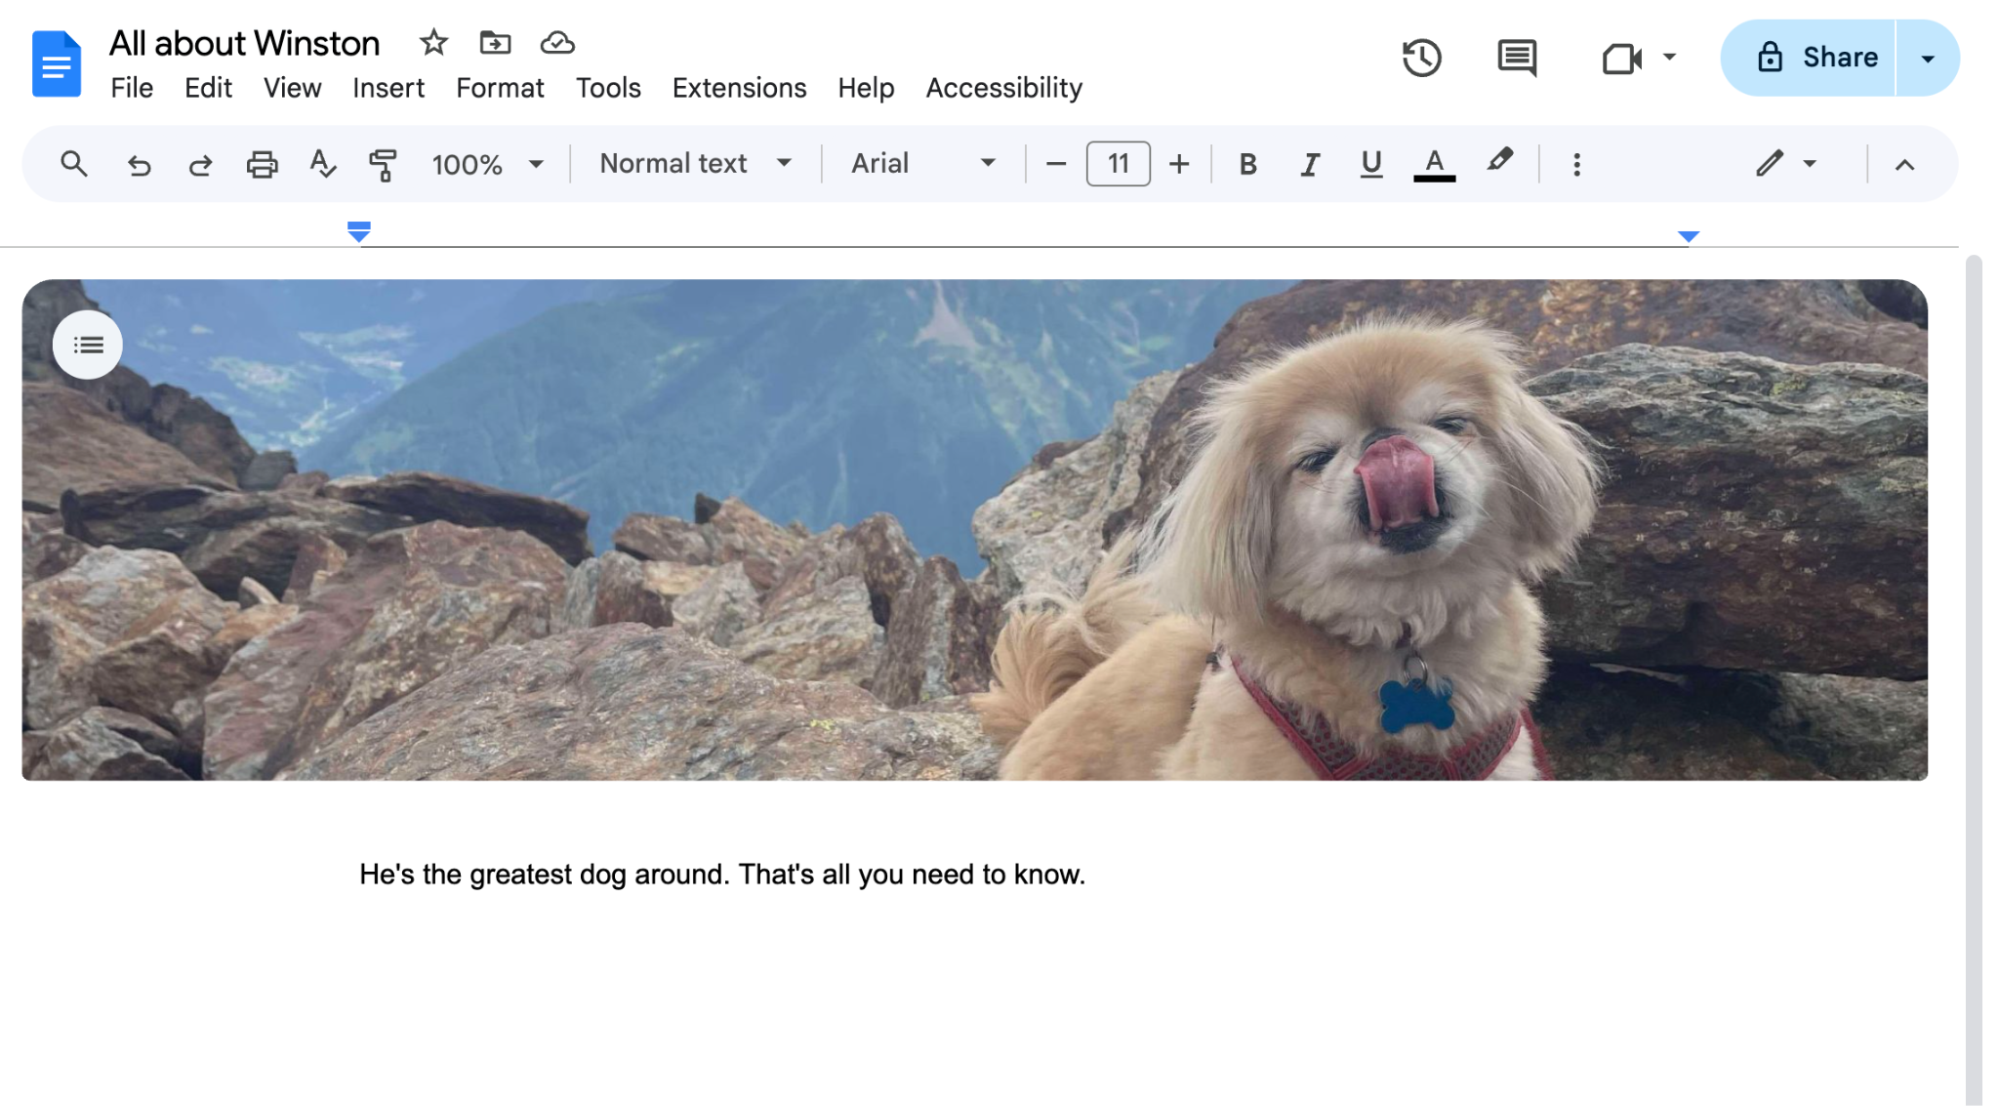
If you want to replace, reposition, or delete your image, click the image, and choose the appropriate editing tool in the floating toolbar. You also have the option to add alt text to your cover image.


Keep an eye out for new formatting features
Clearly, there's a whole lot more to Google Docs formatting than meets the eye. And Google is constantly adding new features. So the next time you get that See what's new button pop up to promote a new feature, fight your instincts to click that big X, and take a look at what's available.
Automate Google Docs
If you find yourself applying the same page formatting settings again and again, save yourself some time by turning your document into a Google Docs template. Once you have your template, connect Google Docs with Zapier. This way, you can automatically populate your document with data from spreadsheets and form submissions. Here are a few workflows to get you started.
Copy data from new Google Sheets rows to a Google Doc template
Create documents from templates in Google Docs for new Google Forms responses
Turn new Typeform entries into Google Docs (from templates)
To get started with a Zap template—what we call our pre-made workflows—just click on the button. It only takes a few minutes to set up. You can read more about setting up Zaps here.
Related reading:
This article was originally published in March 2022. The most recent update, with contributions from Jessica Lau, was in November 2024.


