
Google Forms is a simple-to-use form builder app, but there seems to be a perception that it's too simple. Which is unfortunate, because it's a pretty robust tool—if you know how to use it.
To demonstrate how powerful it is, here are nine Google Forms features to help you make the most of this app—from collecting and routing responses to building quizzes and customizing your form's look and feel.
For a more comprehensive overview of Google Forms, check out our Google Forms guide.
9 Google Forms features you should know about
Before you get started, head to docs.google.com/forms, so you can play around with each setting as we go.
How to create a quiz in Google Forms
Google Forms doesn't advertise itself as a quiz tool, but it's a surprisingly capable one. Whether you're a teacher putting together a quick knowledge check or someone who just wants to make the next team trivia feel a little more official, you can turn any form into a multiple-choice quiz. You can even have Google Forms automatically grade tests and quizzes.
Click the Settings tab.
Click the toggle next to Make this a quiz.
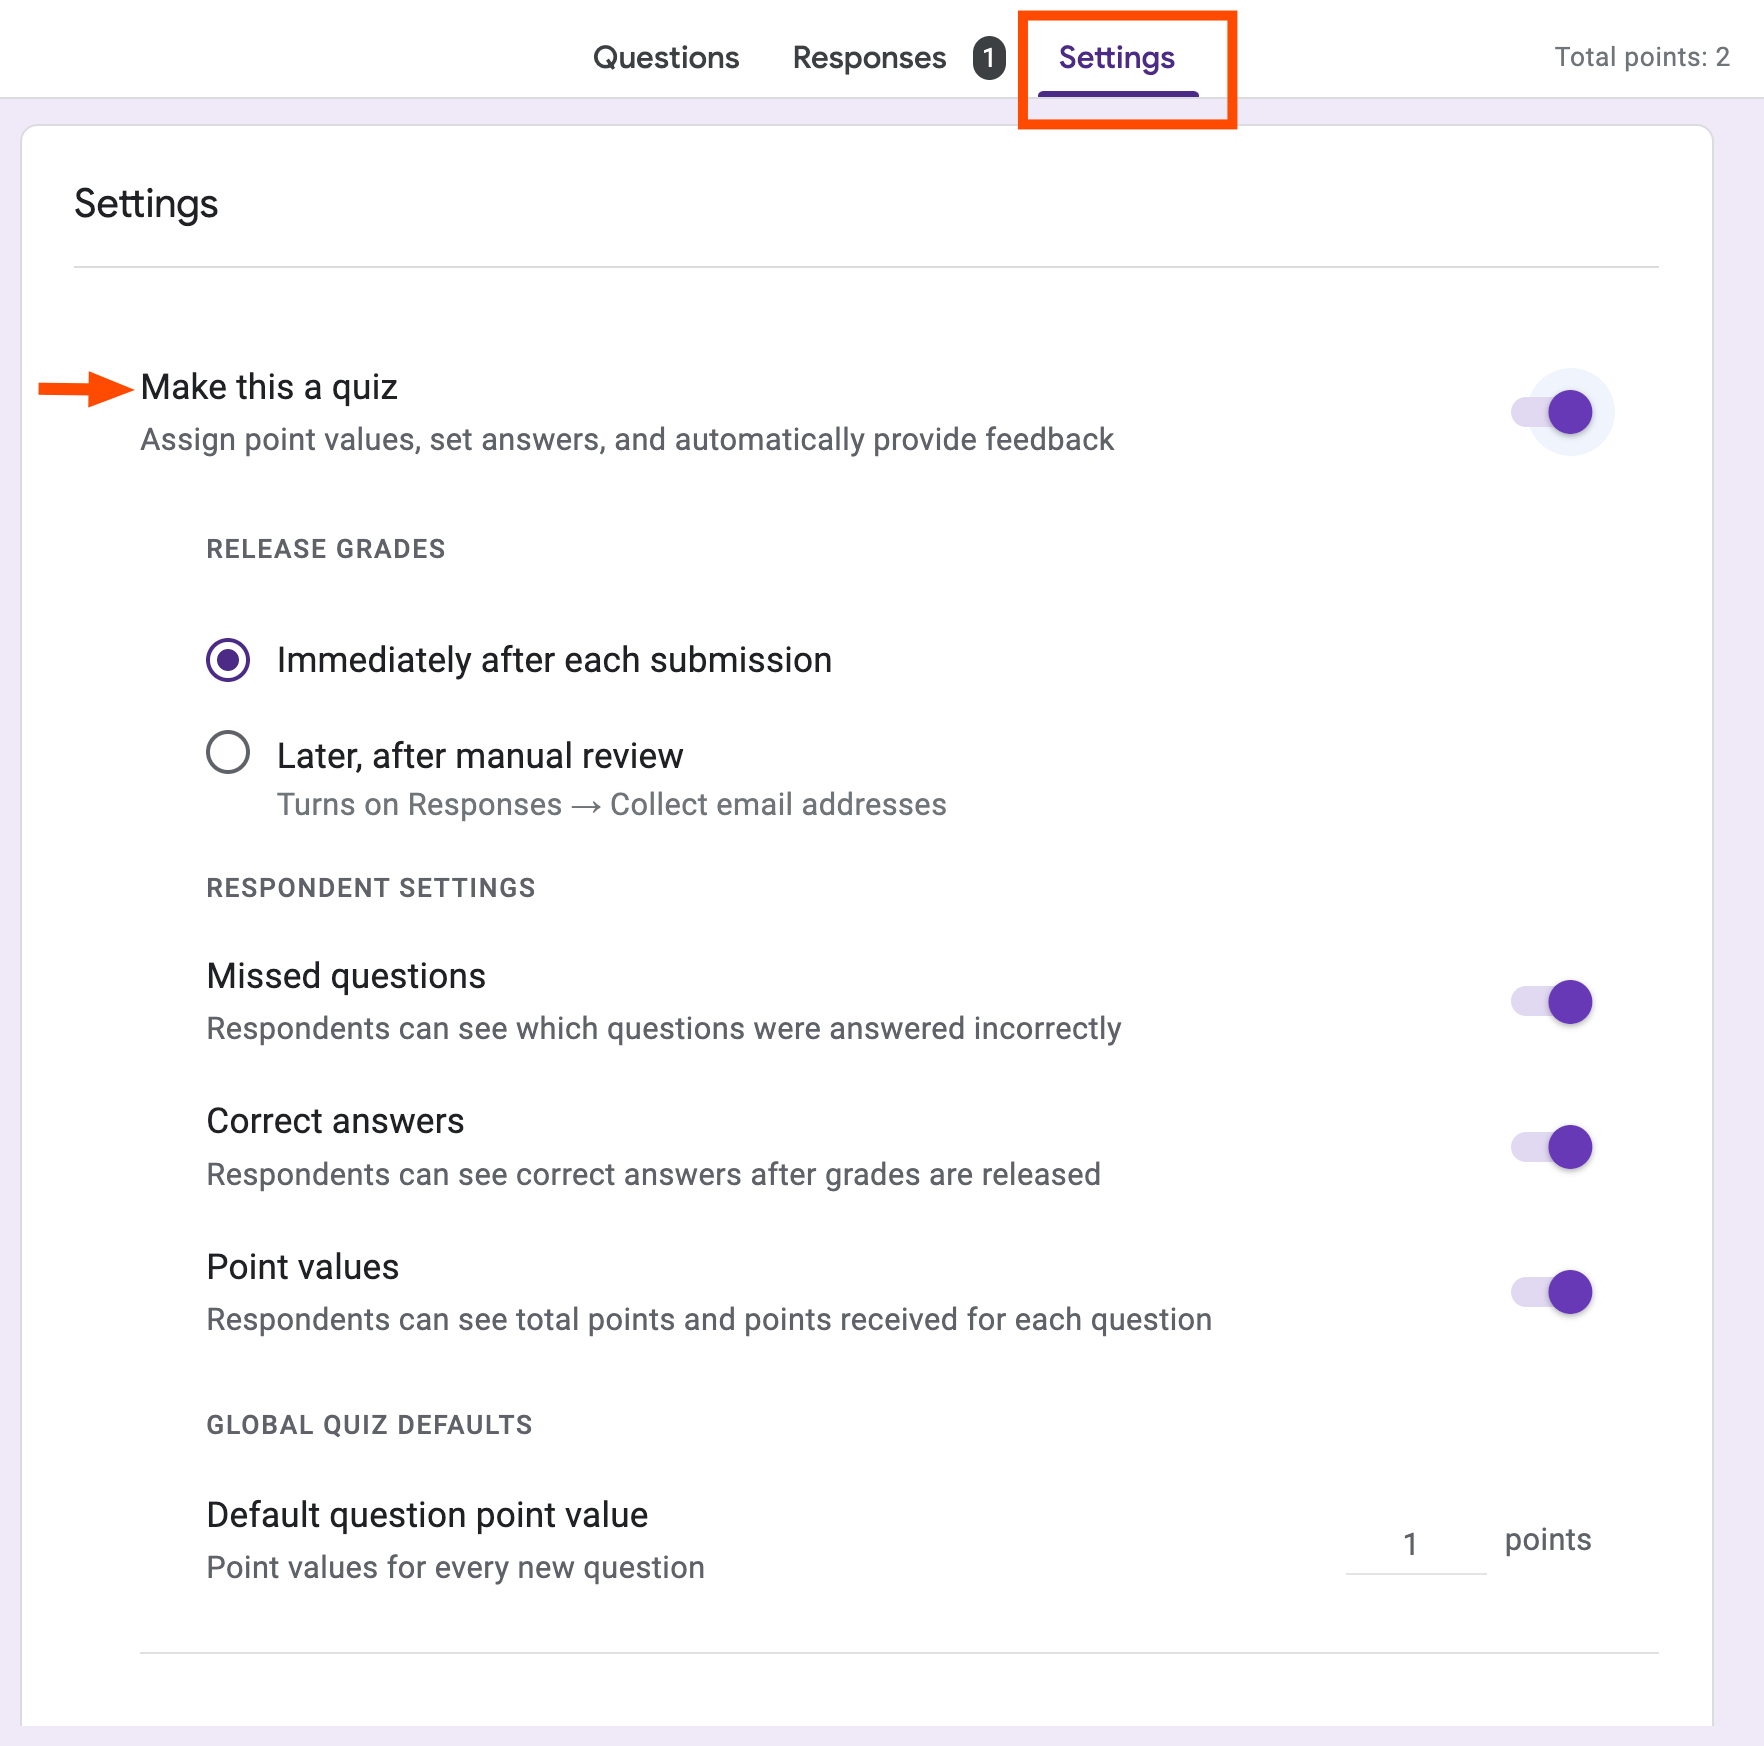
From here, you can enable a number of features to help streamline the feedback process:
Release grades. You can choose when to release quiz grades: immediately after submission or after a manual review.
Respondent settings. You can also let students see which questions they answered incorrectly, along with the correct answers and point values for each.

How to create a self-grading quiz on Google Forms
To turn Google Forms into your own personal Scantron, here's how to create a self-grading quiz.
If your quiz contains multiple-choice and short- or long-answer questions, click Answer key for each one, and select or add the correct answer(s). To take things a step further, you can also add answer feedback to improve students' understanding.

Note: If the answers for your short- or long-answer questions are complex or can be varied, I would recommend marking these manually.
How to limit responses in Google Forms
By default, Google Forms doesn't collect email addresses. This is useful because people don't need a Google account to fill out your form, and they can respond anonymously. The downside: you can't confirm who provided which answers, and people could, in theory, submit the form multiple times. But you can prevent this.
Click the Settings tab.
Under the heading Responses, click the toggle next to Limit to 1 response.

Now, respondents can only submit the Google Form after they've signed in. Keep in mind: not all your respondents may be Google users. So if you're not sure, I'd recommend leaving this Google Forms feature off.
How to make conditional questions in Google Forms
Let's say you want to display specific questions in Google Forms based on the respondent's previous answers. You'll need to first split your questions into sections. Once that's done, here's a high-level overview of how to set up conditional questions.
Go to the question that'll determine where respondents go next.
Click the More options icon (
⋮), and then select Go to section based on answer. Note: Conditional questions only work with multiple-choice or dropdown question types.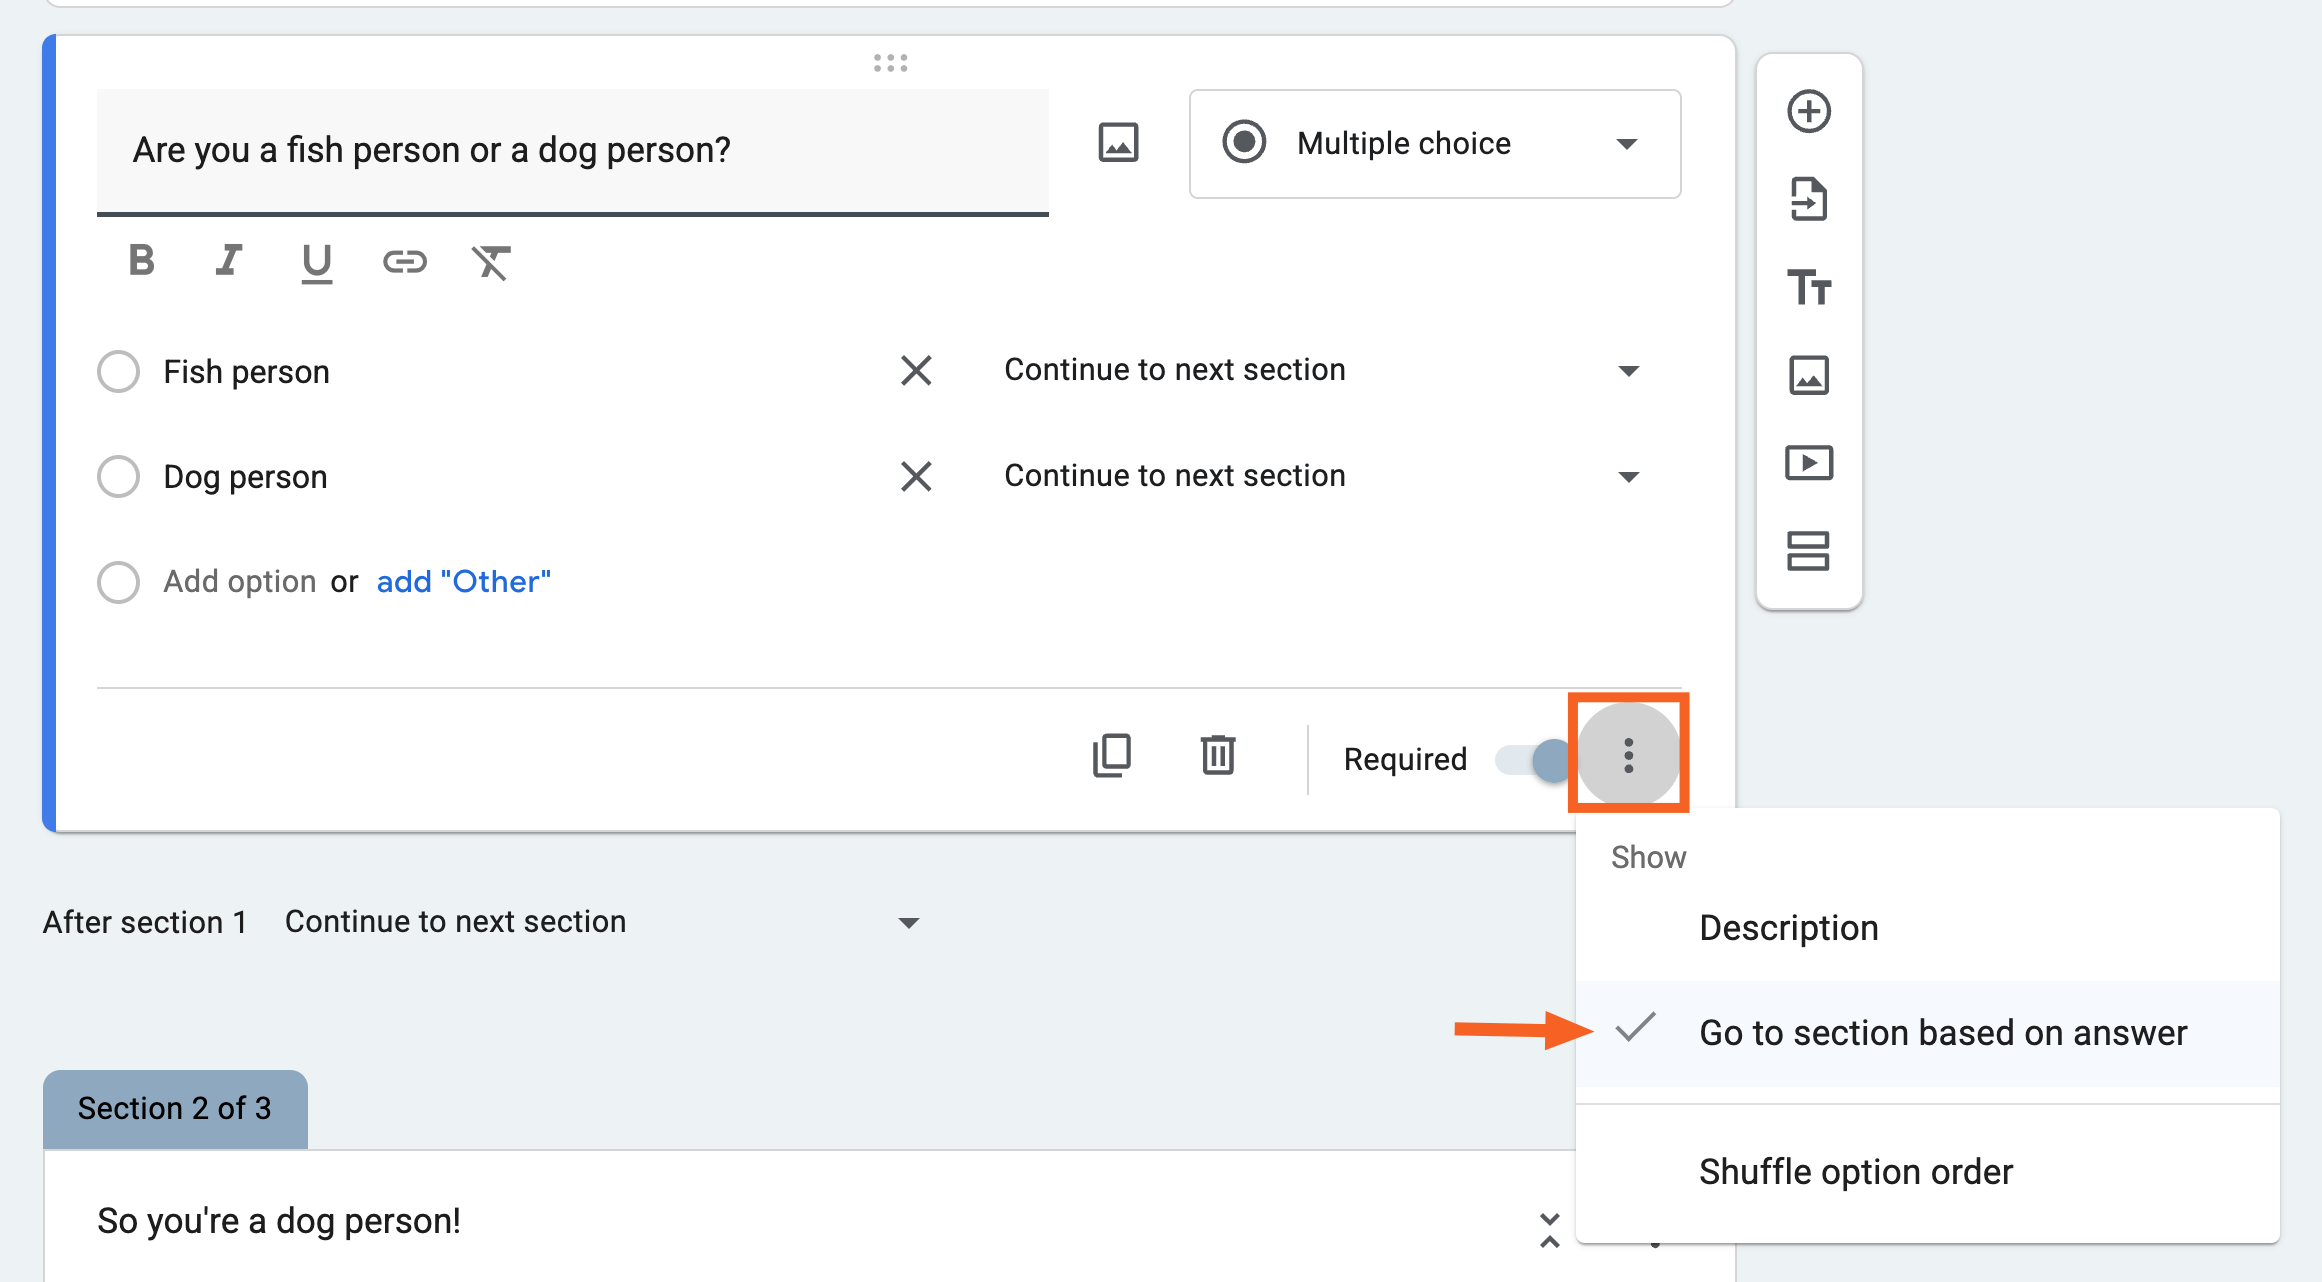
The next step for each answer is automatically set to Continue to next section. But you can change this. Click the dropdown next to any available answer, and select where the answer should direct the respondent to.

How to add a header image in Google Forms
Google Forms, by default, is pretty bare bones. And purple. If you want to add some personality or, at least, match it to your company's branding, here's how to add a header image.
Click the Customize theme icon, which looks like a paint palette.

In the Theme side panel that appears, under Header, click Choose image.
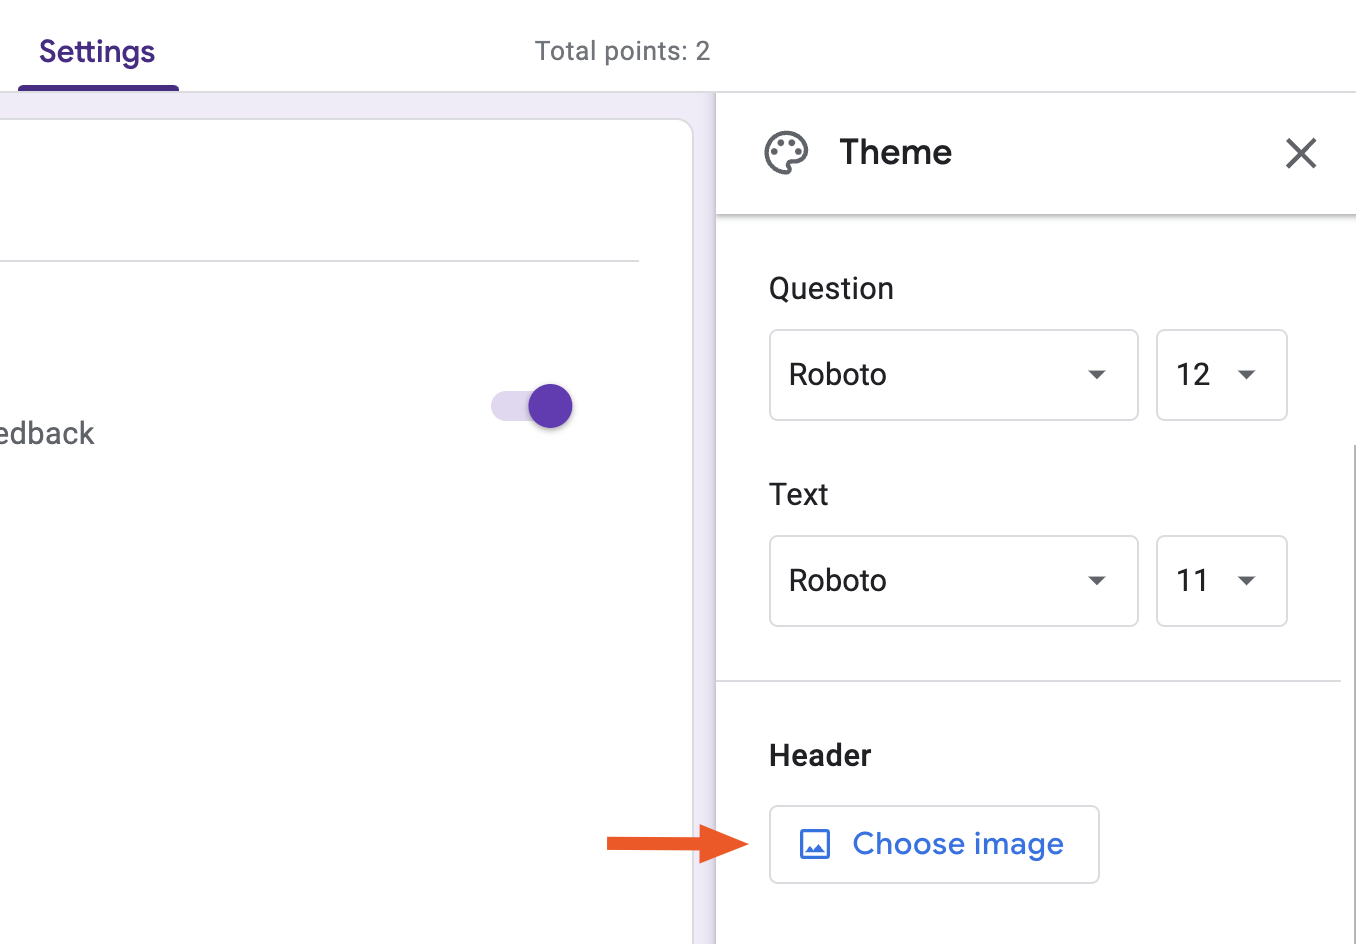
In the Select Header window, choose a pre-made header image, or click Upload to add your own.
Edit the header image to your liking, and then click Done.


Google will even automatically adjust the color theme of your form to match the image header.
Learn more: How to make perfect Google Forms header images
How to collect email addresses in Google Forms
If you anticipate wanting to follow up with respondents, I recommend collecting their email addresses with their form submission.
Click the Settings tab.
In the Responses section, click the dropdown menu next to Collect email addresses.
Choose how you want to record respondents' email addresses:
Verified. Respondents will need to sign in to Google to complete the form, and then confirm their email address.
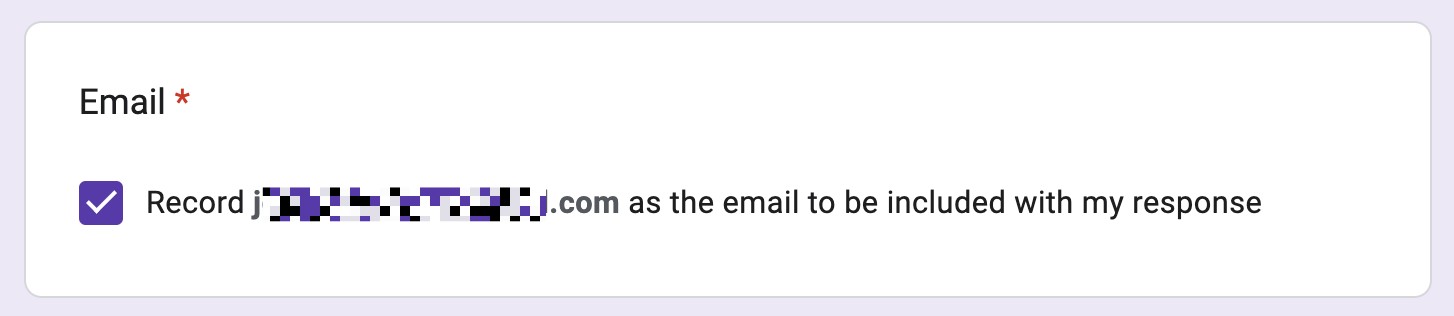
Responder input. Respondents will be asked to manually enter their email address.

How to add a progress bar in Google Forms
There's nothing worse than getting two or three questions into a survey, only to cry out loud to no one in particular, "How many more questions do I have to answer?" Here's how to add a progress bar in Google Forms to help manage your responders' expectations.
Click the Settings tab.
In the Presentation section, click the toggle next to Show progress bar.
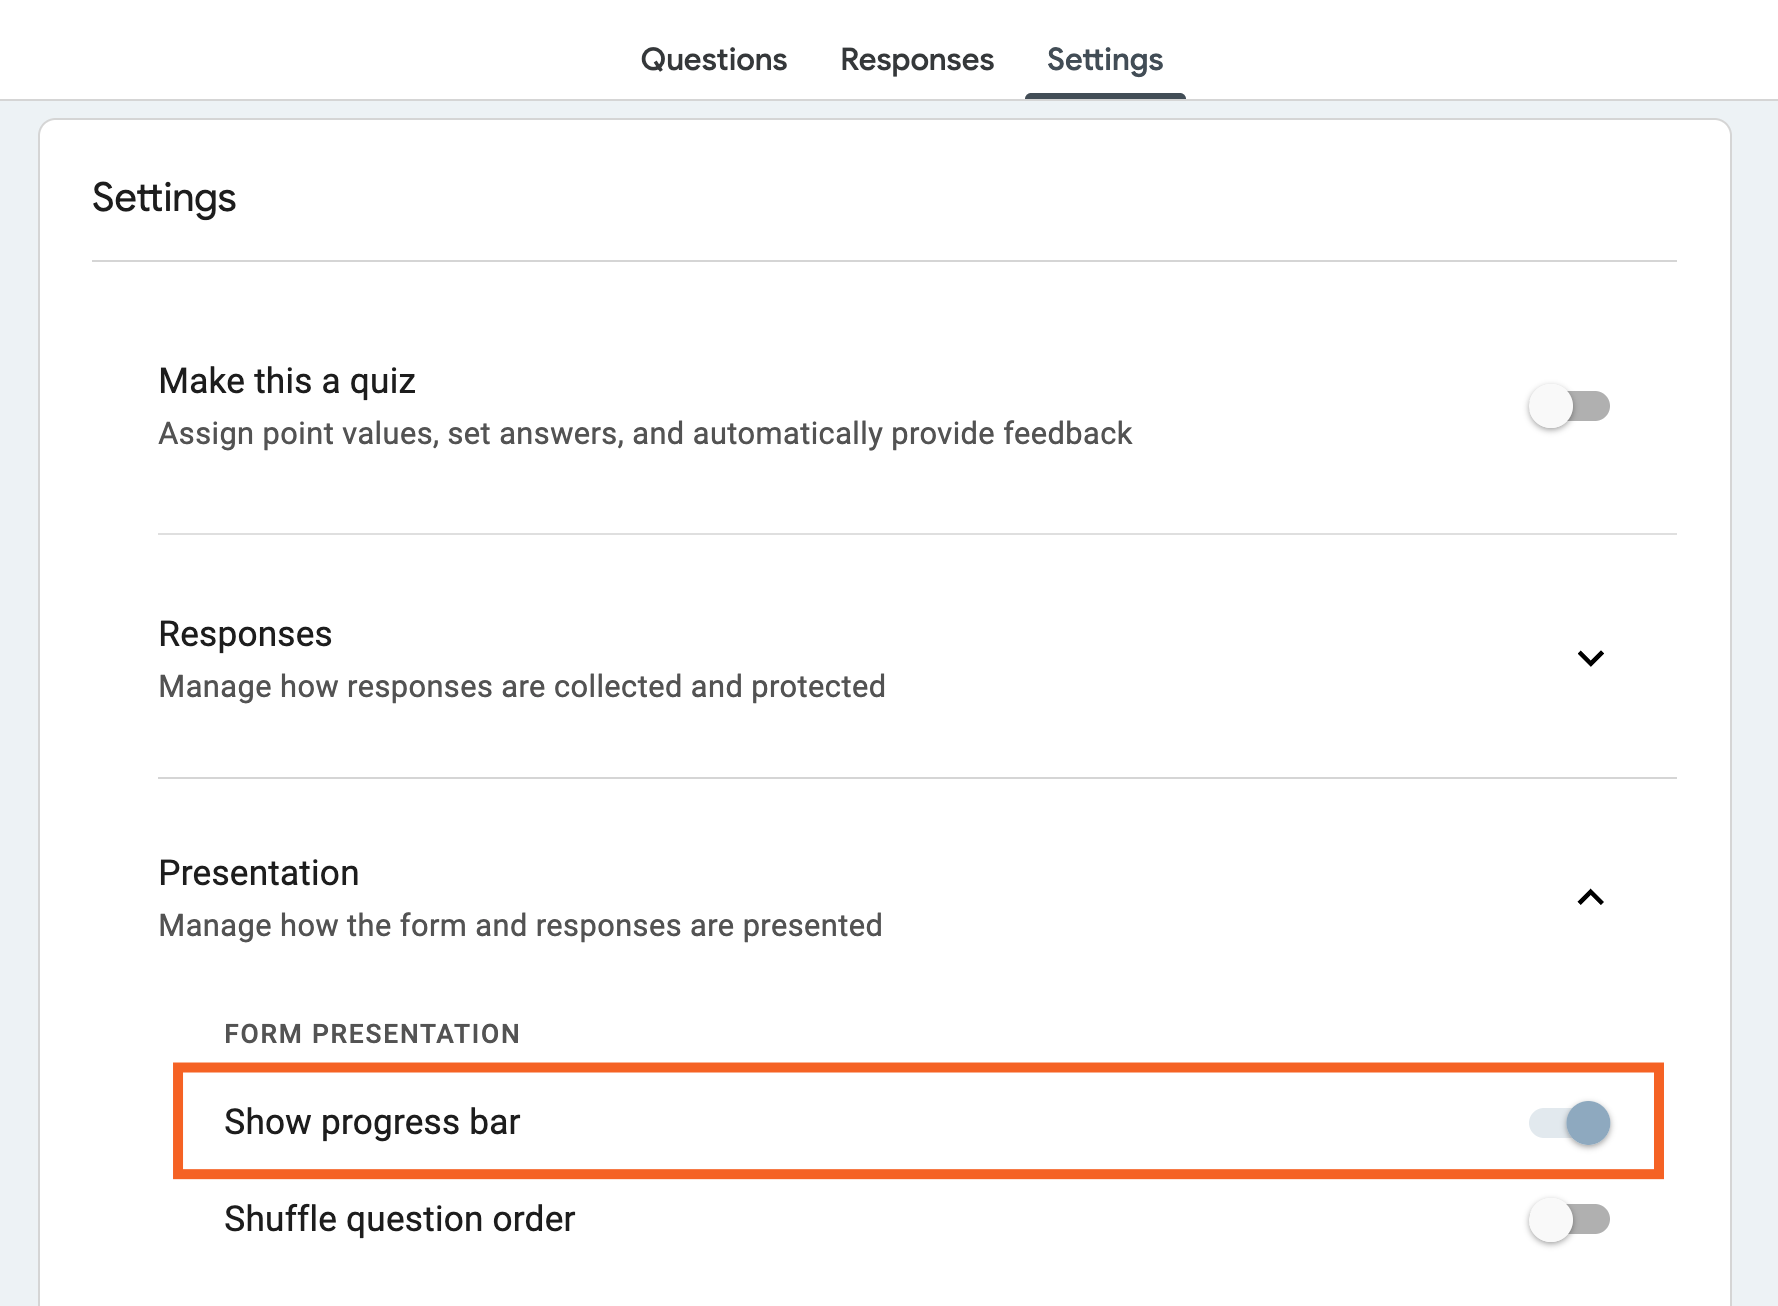

A progress bar will appear at the bottom of your form to indicate how many more pages (sections) the user has to answer.

How to create a Google Forms template
If you thought there'd be an easy way to create your own Google Forms template and share it with others like you can with Google Docs, you'd be wrong. But there's a simple workaround.
Create your form in Google Forms.
Click the More icon (
⋮) above the form (top-right corner), and select Make a copy.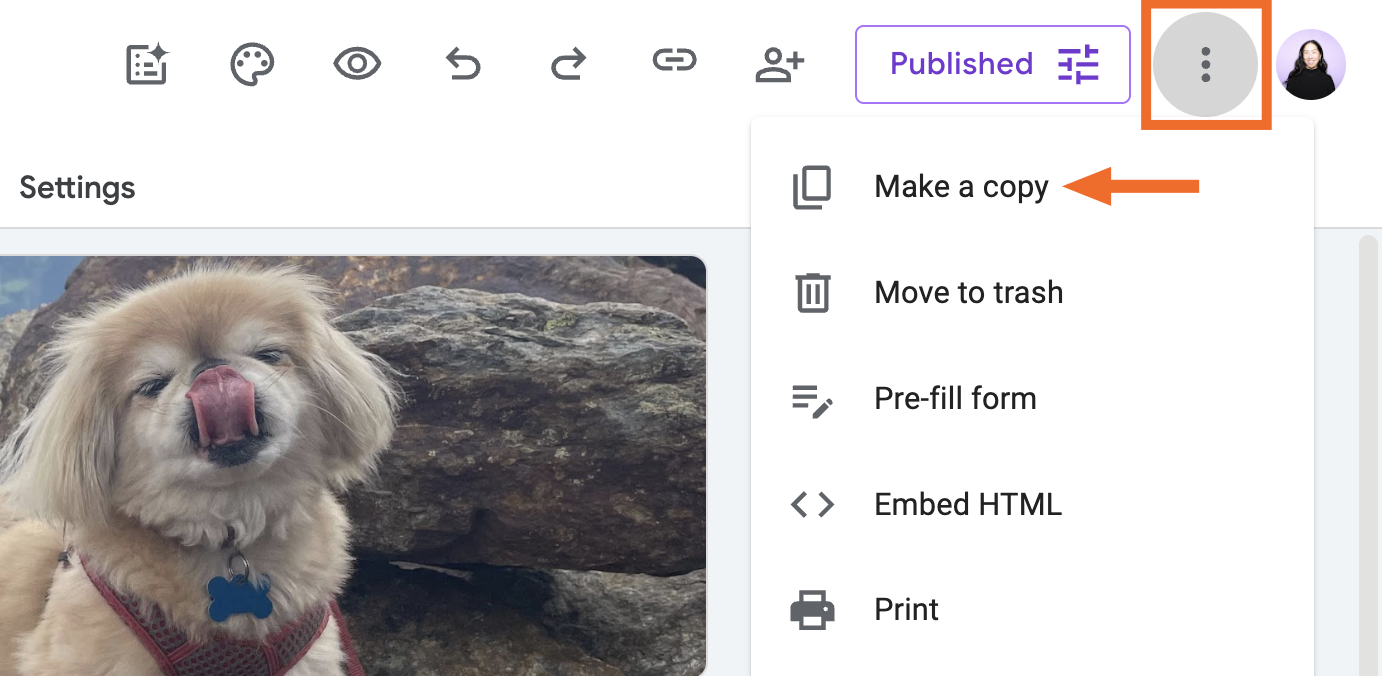
Edit the copied form as needed.

From there, you can share a link to your form to anyone who wants to use it as a template. Or you can add them as a collaborator.
How to save Google Forms responses in Google Sheets
By default, Google Forms responses are stored in Google Forms itself. But if you'd rather save them in Google Sheets, it's really easy to do.
Select the Responses tab, and click Link to Sheets.
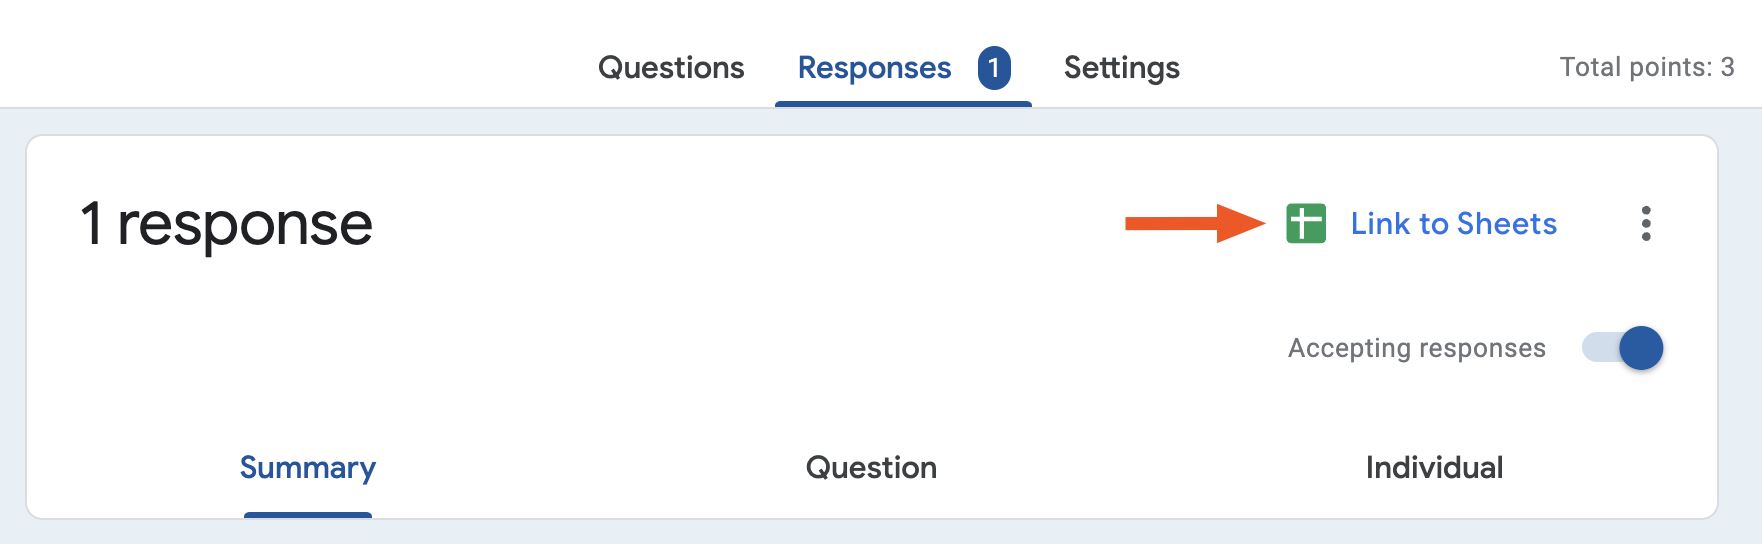
In the Select destination for responses window that appears, choose where you want to store your answers (new spreadsheet or an existing one), and then click Create.


Just like that, all of your responses will be sent to a Google spreadsheet in your Google Drive.
How to create a form with Gemini in Google Forms
If the word "form" has lost all meaning to you and you're blanking on what questions to ask another human, you can use Google Gemini to build a Google Form for you. Note: This is currently available only to users in the Google Workspace Experiments program.
Create a blank form in Google Forms.
In the prompt window that appears, describe the form you want to create in the prompt box. For example, "Help me create a post-webinar feedback form" or "Help me create a survey to conduct market research on [industry]."
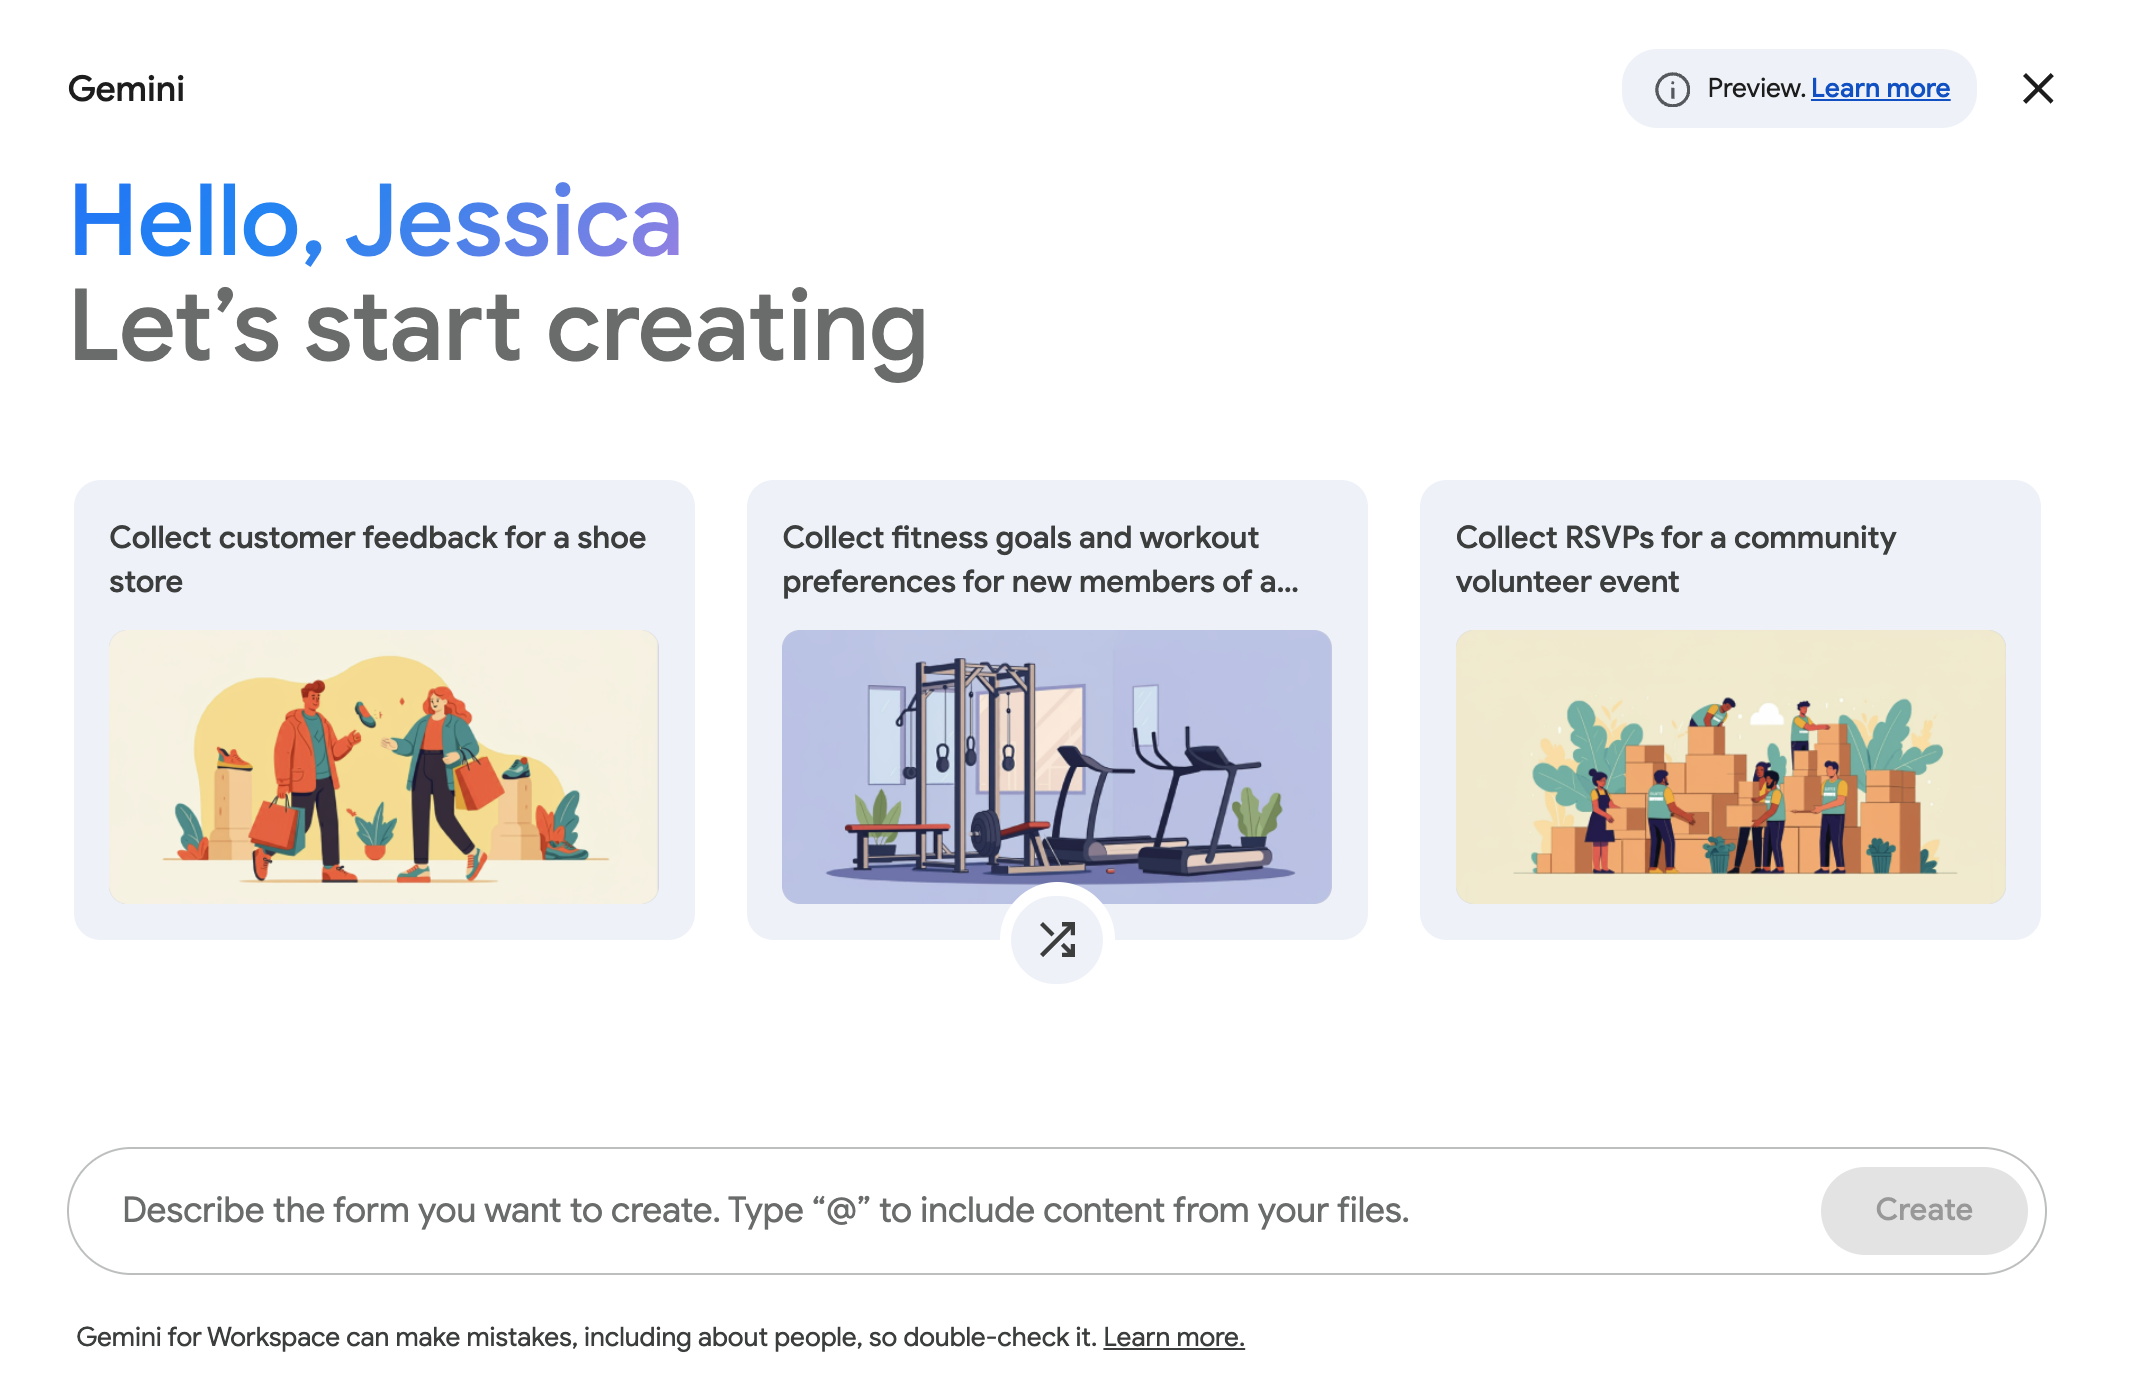
Click Create.
Review the draft form. If you want a different version, click Try again. You can also edit the prompt, and click Try again.
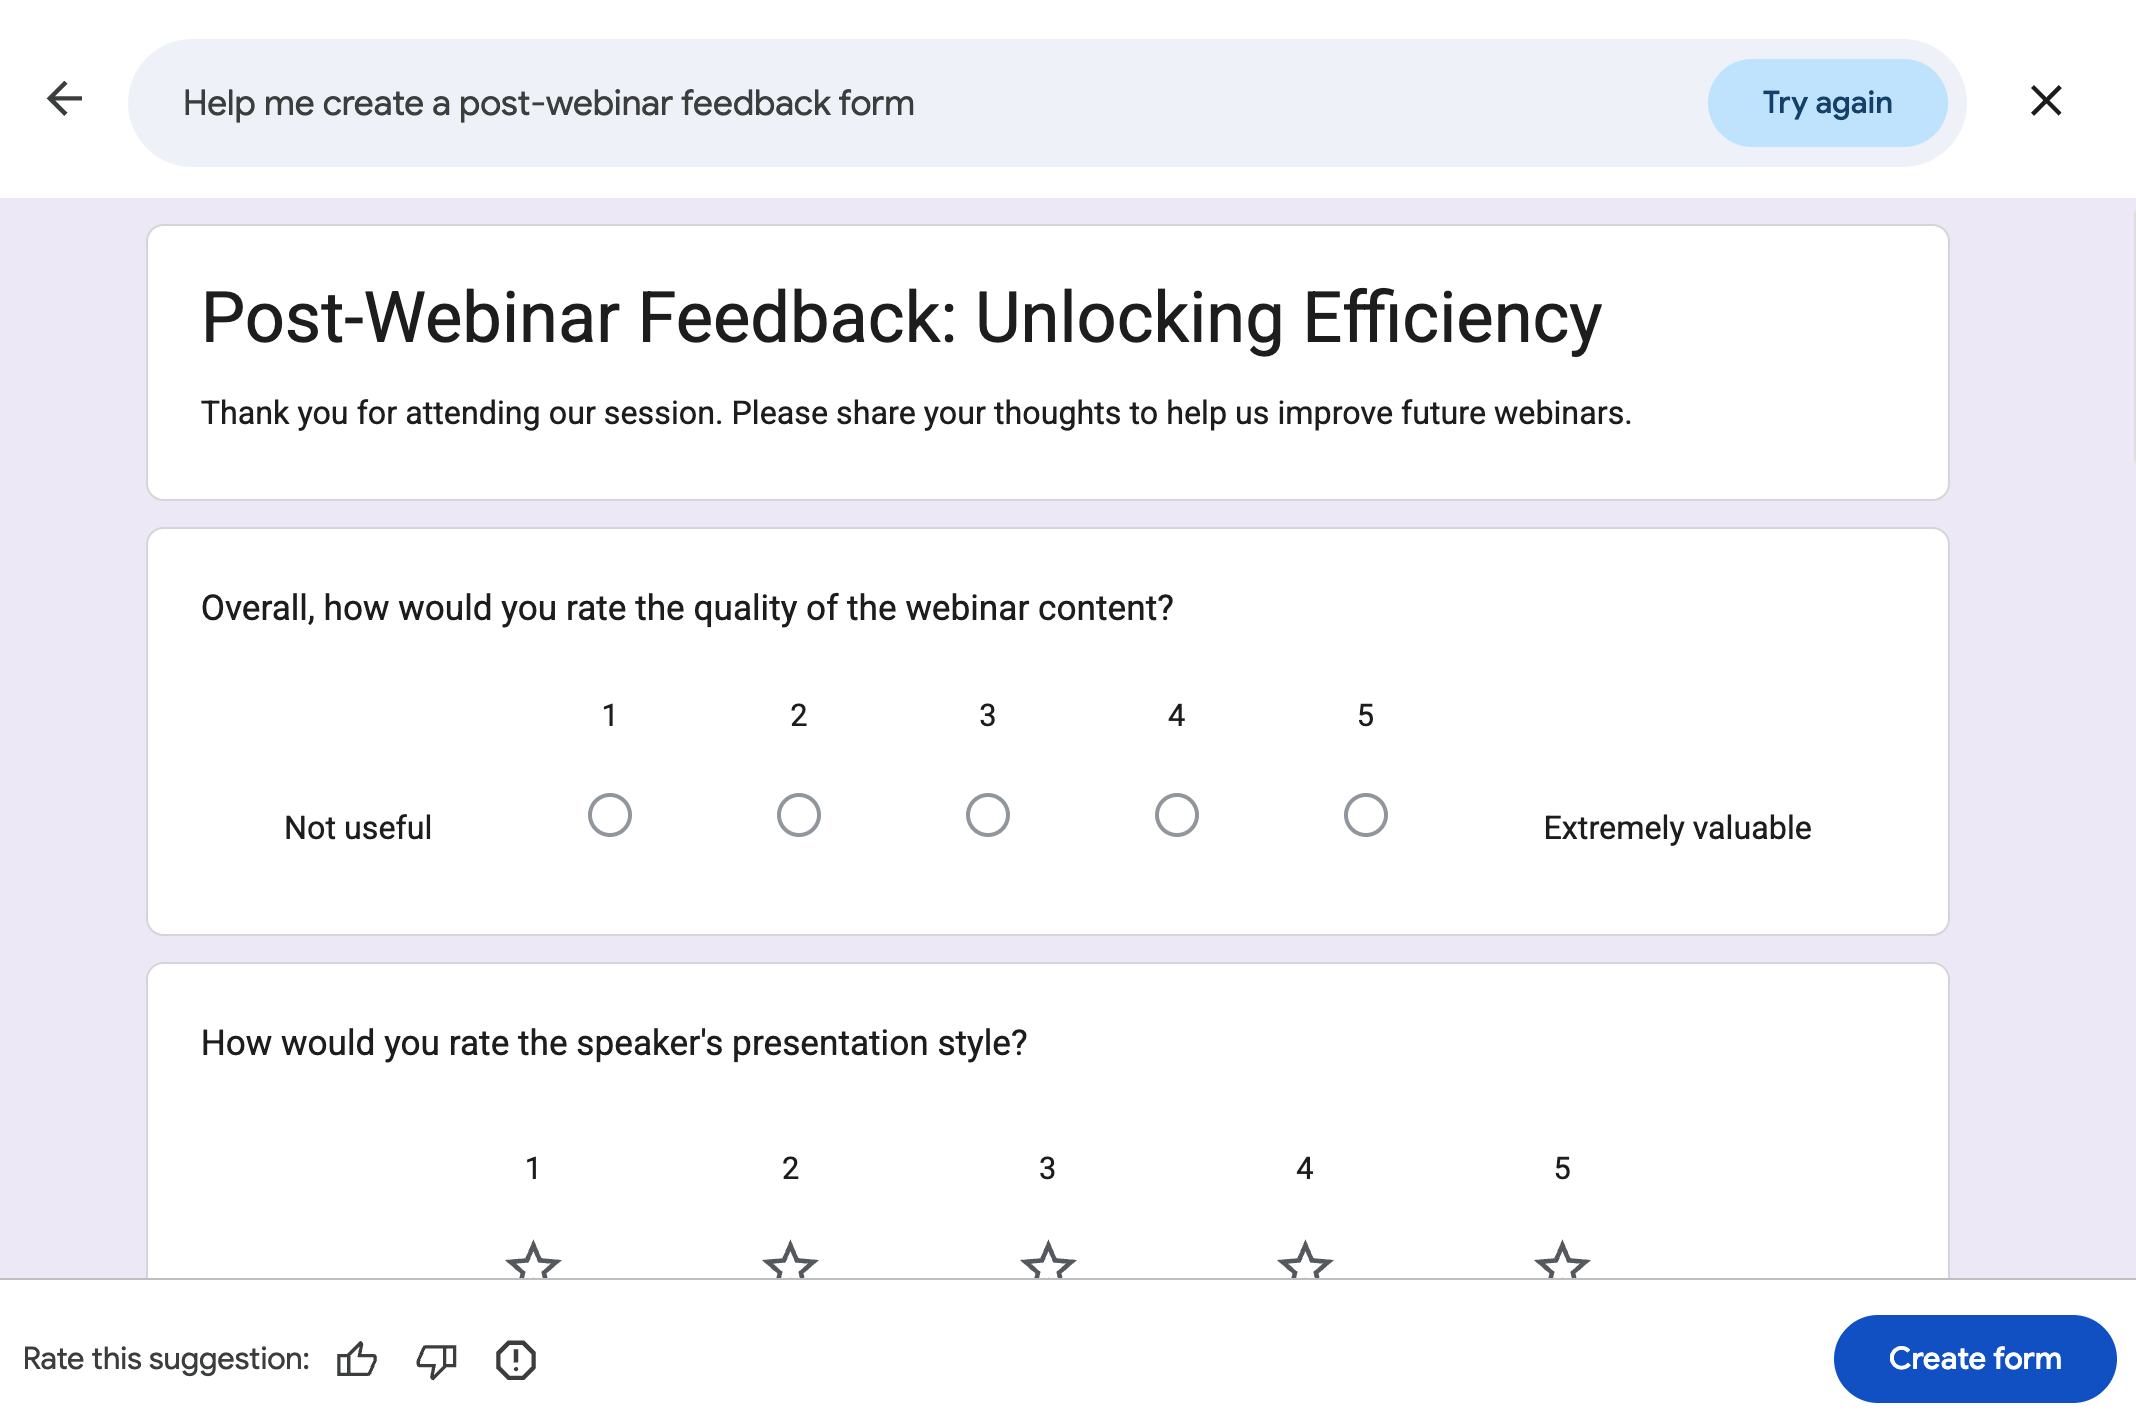
When you're happy with the draft, click Create form.
You can also ask Gemini to generate more questions by clicking Suggest questions at the bottom of the form. Note: This works only for forms Gemini originally built—it won't suggest questions for forms you created manually.


This feature is still relatively new, so there are a handful of limitations. For example, it can output only basic forms with one section containing multiple questions, and it can't add conditional logic. But if you need help getting the question ball rolling, Gemini is a solid starting point.
Automate Google Forms with Zapier
Google Forms is a simple, no-fuss way of creating quizzes and collecting feedback. But if you want to do something with that data, use Zapier's Google Forms integration to connect it with thousands of other apps. This way, you can automatically do things like turn Google Forms entries into tasks and projects or create a Google Calendar event after someone submits a response.
Or, if you use an AI chatbot like ChatGPT or Claude for your daily work, you can use Zapier MCP to act on form responses directly from your AI chat window. For example, you can ask your AI assistant to summarize the latest responses and draft a follow-up email to every respondent. Discover more ways you can automate Google Forms.
Zapier is the most connected AI orchestration platform—integrating with thousands of apps from partners like Google, Salesforce, and Microsoft. Use forms, data tables, and logic to build secure, automated, AI-powered systems for your business-critical workflows across your organization's technology stack. Learn more.
Related reading:
This article was originally published in January 2021 by Justin Pot. The most recent update was in June 2026.


