Do you manage a Facebook Page and struggle to keep up with responding to messages? Maybe you only receive messages occasionally and forget to check it. Or maybe you have a very active page and too many messages to handle. Whatever the case, it's crucial to find efficient ways to handle these inquiries. Luckily, there are tools that can help, so you don't always have to be on-call to respond to messages quickly.
With Zapier and OpenAI's GPT-3, generating thoughtful responses to incoming Facebook messages has never been easier. With just a few clicks, you can create a Zap—our word for Zapier's automated workflows—that automatically responds to any Facebook Messenger message you receive.
In this tutorial, we'll guide you through the process of seamlessly connecting Facebook Messenger and OpenAI using Zapier, empowering you to effortlessly manage messages and provide exceptional customer experiences.
Looking for GPT-4 or OpenAI's other latest models? You can access those via our ChatGPT integration now—allowing you to add ChatGPT-powered conversations into apps like Slack. You need $5 or more of credit in your OpenAI account to access GPT-4. Discover popular ways to use the ChatGPT Zapier integration.
How it works
For this project, we'll be using OpenAI's GPT-3 to generate responses to our Facebook Messenger messages, and then we'll send the response back using Zapier's Facebook Messenger integration. In total, our Zap has 3 steps:
Trigger: New Message sent to Page in Facebook Messenger
Action: Send a prompt to OpenAI's GPT-3 to generate a response
Action: Send Message from Page in Facebook Messenger to send the AI response
If you'd like to start with a template, click on the Zap template below to go to the Zap editor. You'll need to create a Zapier account if you don't already have one. Then, follow the directions below to set up your Zap.
Promptly reply to Facebook messages with custom responses using OpenAI
Before we begin developing our Zap, you'll also need an OpenAI account if you don't already have one. Go to platform.openai.com to sign up for your account.
Are you ready to build this yourself? Let's get started!
This workflow requires a multi-step Zap, available on a paid Zapier plan or during a free trial. Learn more about multi-step Zaps.
Step 1: Set up your Facebook Messenger trigger step
Head over to Zapier, and click the Create Zap button to create a new Zap.
Search for and select Facebook Messenger for the trigger app and New Message sent to Page for the trigger event (if you're using the Zap template, these will already be selected for you).
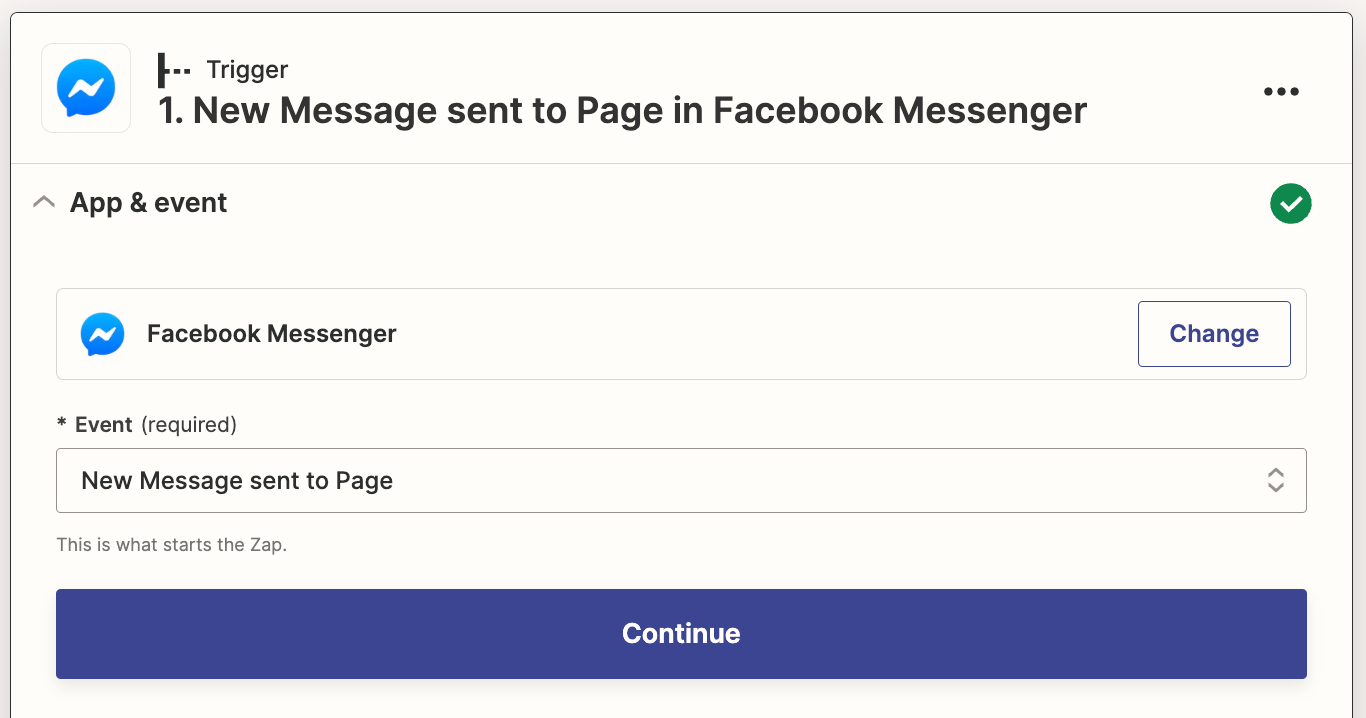
Next, connect your Facebook Messenger account if you haven't already connected it to Zapier. You'll be asked to sign in with the Facebook account you use to manage your Facebook Page. Leave all permissions set to Yes to give Zapier access to the details of your Facebook page, then click Done.
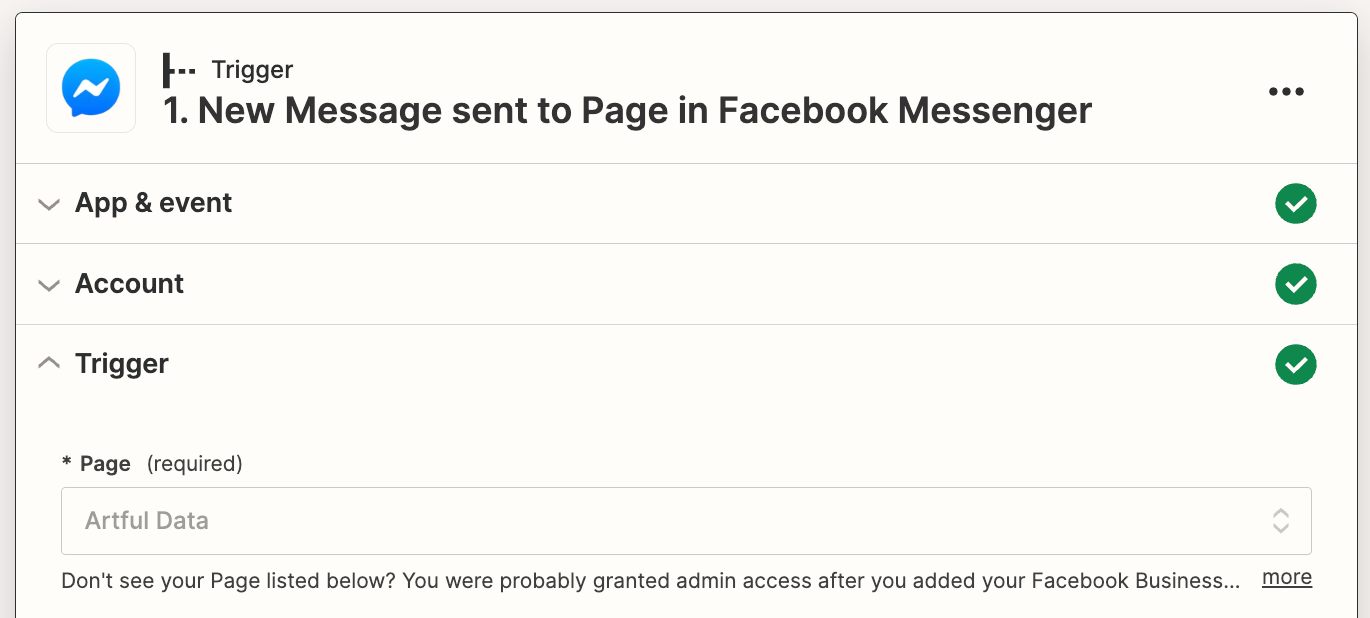
Now it's time to set up your trigger step. First, select the Facebook Page you want to use for this Zap. This will be the page Zapier monitors for incoming messages:
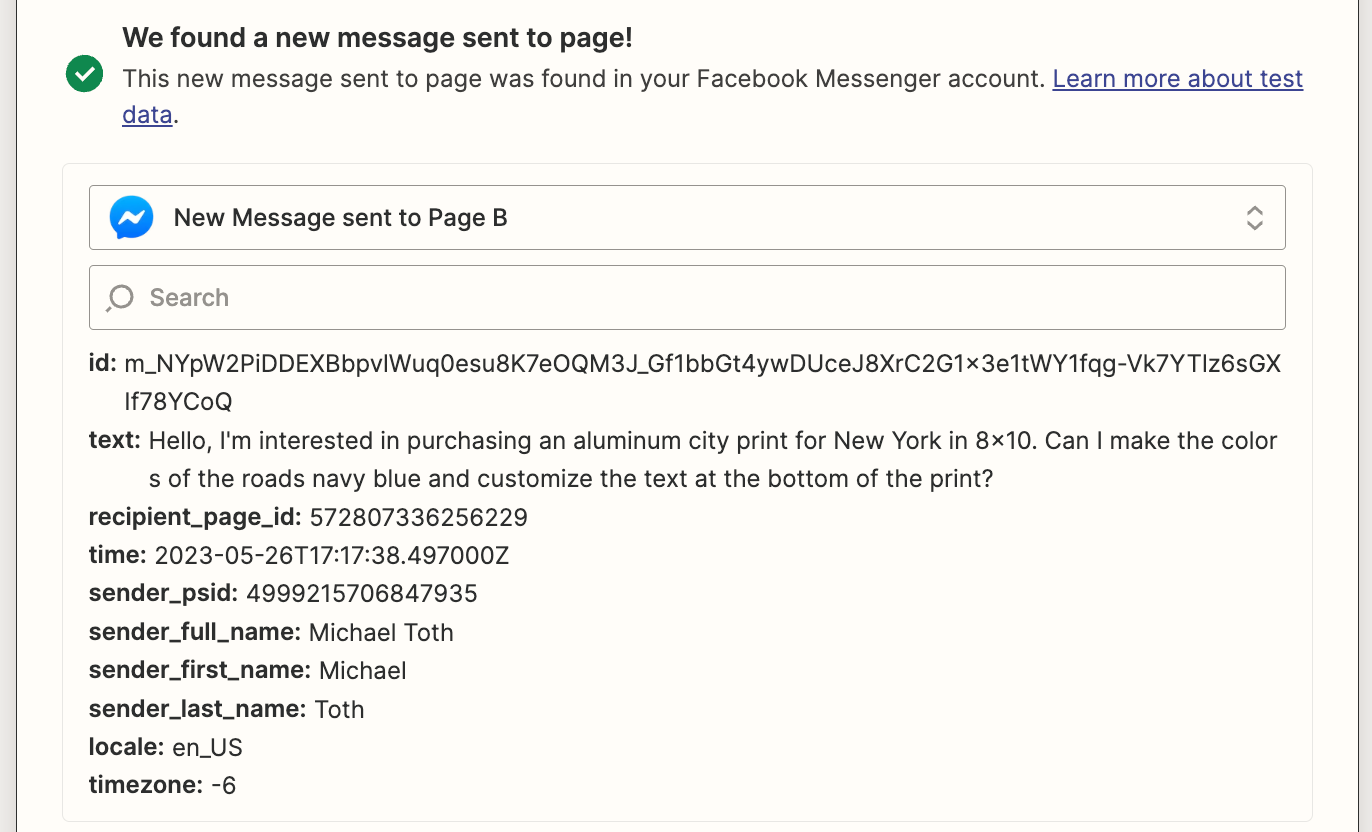
Finally, click on Test and Test Trigger to receive a recent message from your Facebook Page. You should see a recent message, as shown below. If you don't have any messages in your account, you may want to send in a test message of your own first before testing your step.
Next, we'll set up our prompt to send this message to OpenAI to generate a response.
Step 2: Set up your OpenAI message response prompt
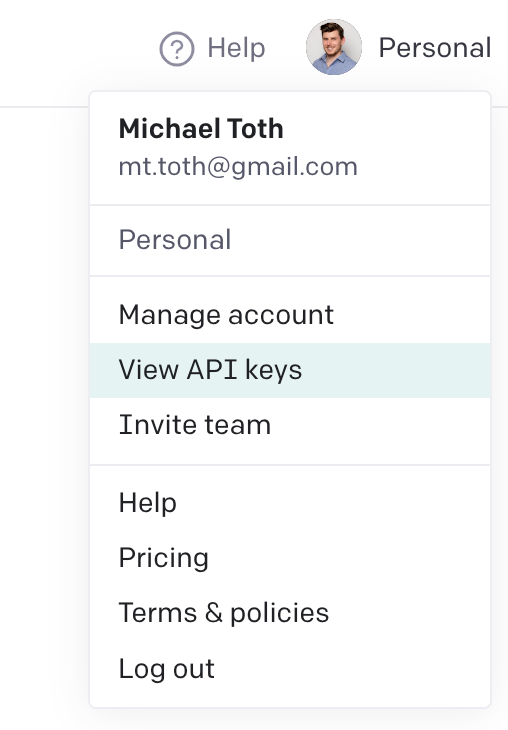
If you haven't set up your Zapier connection to OpenAI, you'll have to do that now. To start, head back over to platform.openai.com to log into your account. At the top right of the page, click on your profile icon and click View API keys:
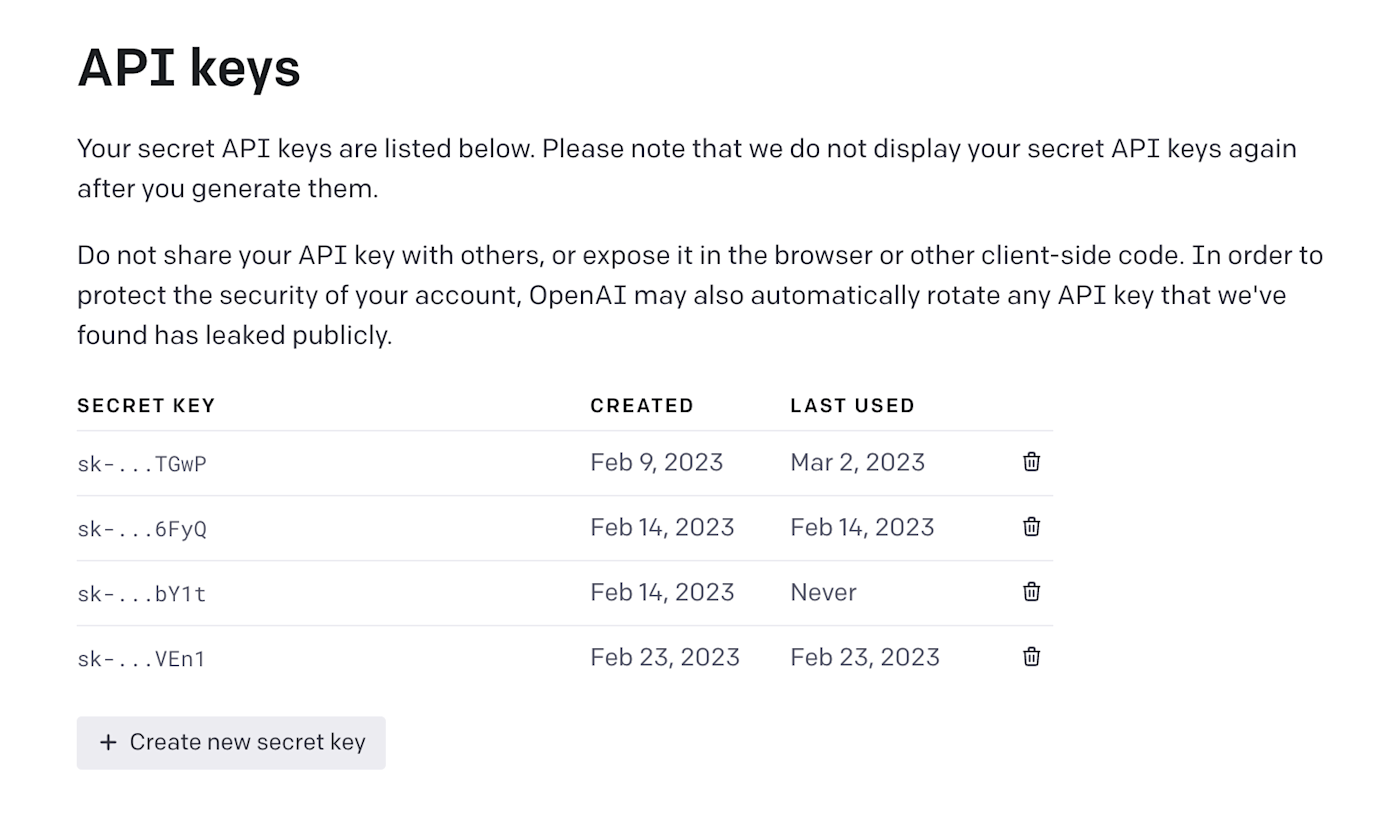
From that page, click on the + Create new secret key button to generate a new API key. You'll need this key to connect to your OpenAI account within Zapier. Copy this key and store it somewhere safe.
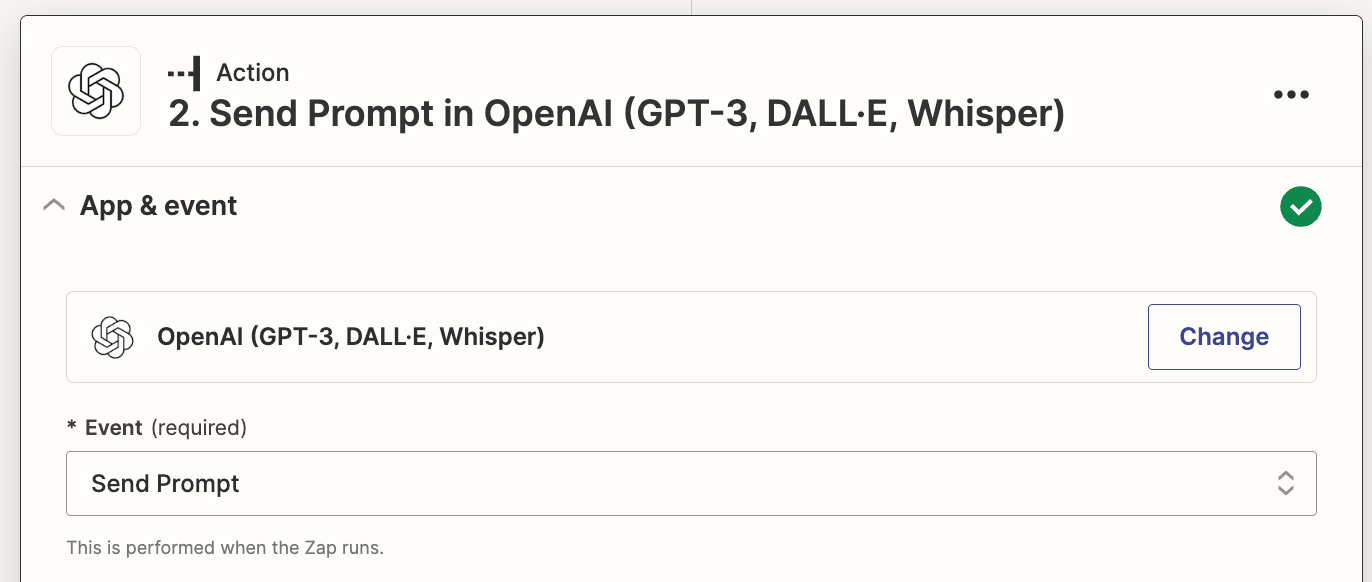
Head back over to Zapier and add a new action step at the bottom of your Zap. Search for the OpenAI app and choose the Send Prompt event:
Click on Choose account, and set up a new account by providing the API key you just generated in OpenAI. If you already have set up your account connection, simply select your existing account.
Next, you'll need to add the prompt you want to send to OpenAI. You'll want to do some basic prompt engineering to ensure you get the best responses possible. While you may be able to get some acceptable responses by simply asking GPT-3 to respond to the inquiry, you'll have more success if you also provide more details about your Facebook Page and some information related to frequently asked questions. With this in mind, let's walk through an example of how to construct your prompt.
In my case, I run an online art business called Artful Data. I sell personalized art prints to customers, and I often get messages on my Facebook page about what sorts of customizations are possible. I'll create my prompt by first telling GPT-3 that it should act as a friendly and helpful customer service agent for a company called Artful Data. Next, I'll provide more details about what Artful Data does, what products we sell, and how customers are able to personalize our art prints.
Finally, I'll send over the inquiry we received from a customer, surrounded by triple quotes, which help GPT-3 to identify what it should respond to. Here's my complete prompt:
You are a friendly and helpful customer service agent for a company called Artful Data. Artful Data is an online art business that specializes in personalized art pieces for customers. We have several different product types, including city maps, star maps of the night sky, and soundwave prints that display the soundwave for an audio file. We sell these as paper prints, wood wall hangings, and aluminum wall hangings. These are often given as anniversary gifts, engagement gifts, and wedding gifts. All aspects of my prints are customizable, including text, colors, and fonts. We just got an inquiry on Facebook Messenger from a potential customer. Please help to draft a response:
"""
Customer Name: <Sender First Name from Facebook Messenger Trigger>
Customer Inquiry: <Message Text from Facebook Messenger Trigger>
"""
Copy and paste this prompt and edit it to reflect the specific details that are relevant for your own Facebook Page.
Replace the bracketed content with the Sender First Name and Message Text variables from your Facebook Messenger trigger by selecting Sender First Name and Message Text from the Insert Data dropdown.
Here's how my prompt looks with everything mapped:
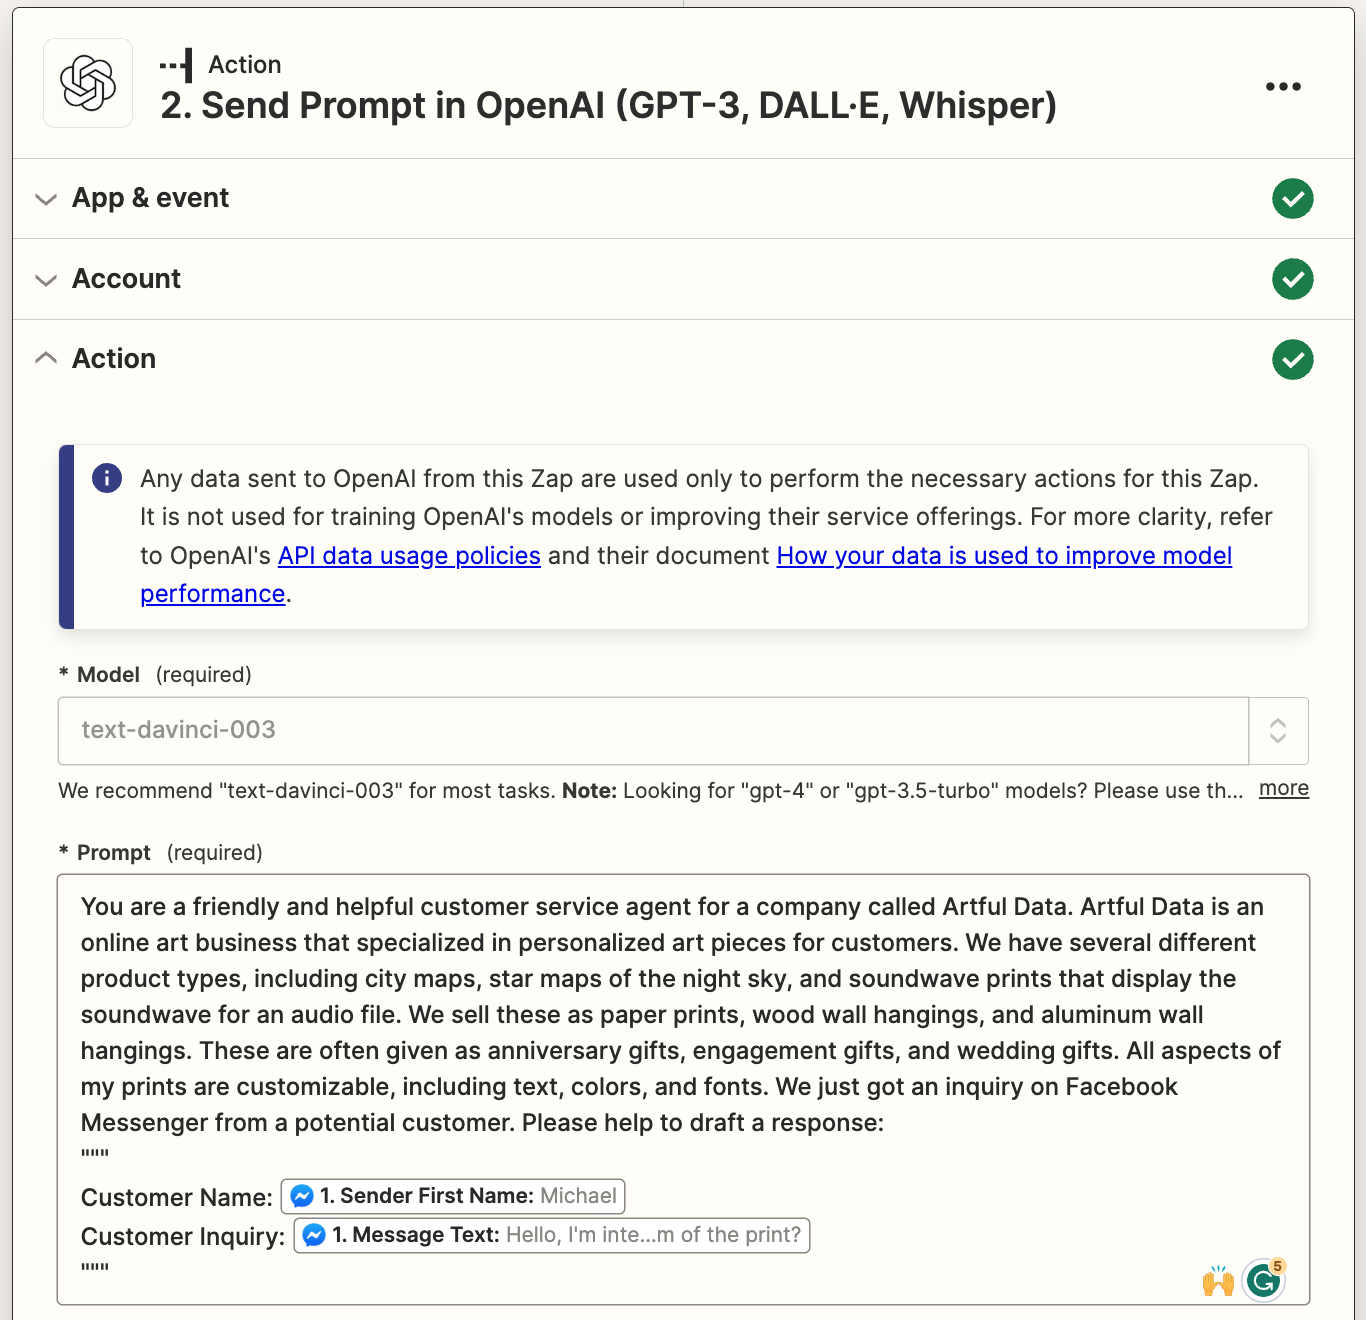
Note: The text-davinci-003 model is now deprecated and has been replaced with the default gpt-3.5-turbo-instruct model.
You can leave all of the other fields for this step set to their default values.
Click Test Action to send the prompt over to OpenAI. Review the summary and make sure everything looks okay.
Step 3: Set up your Facebook Messenger response
Finally, we'll set up the action step that will send the response back to Facebook Messenger.
Add a third step and search for the Facebook Messenger app. Select the Send Message from Page event.
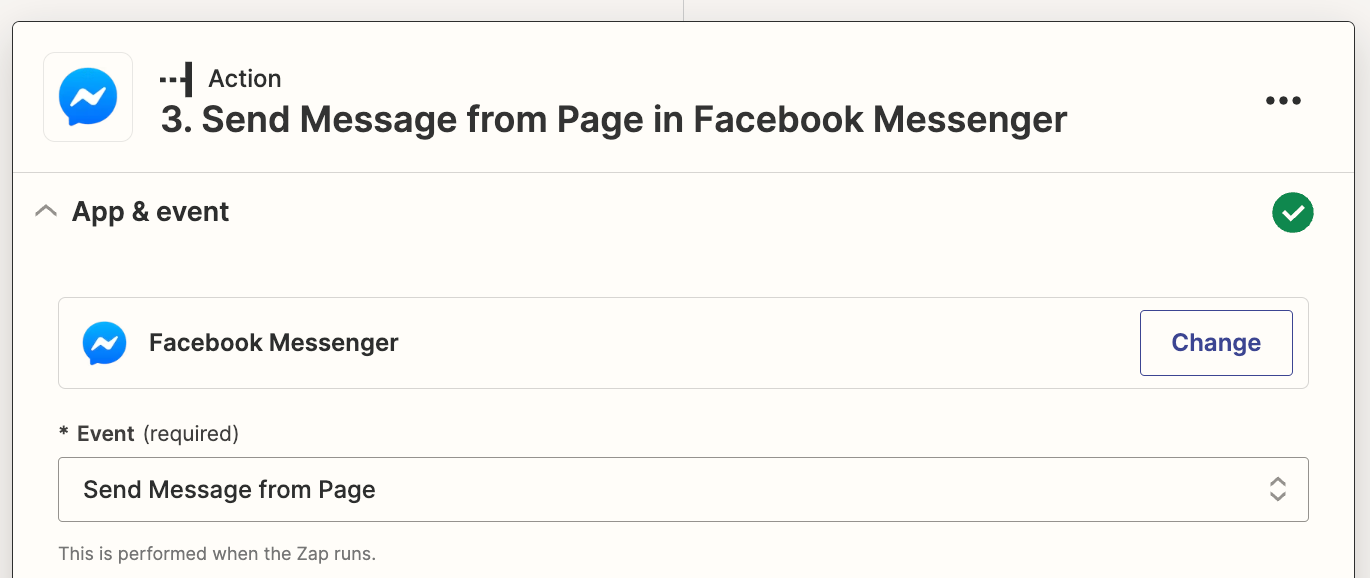
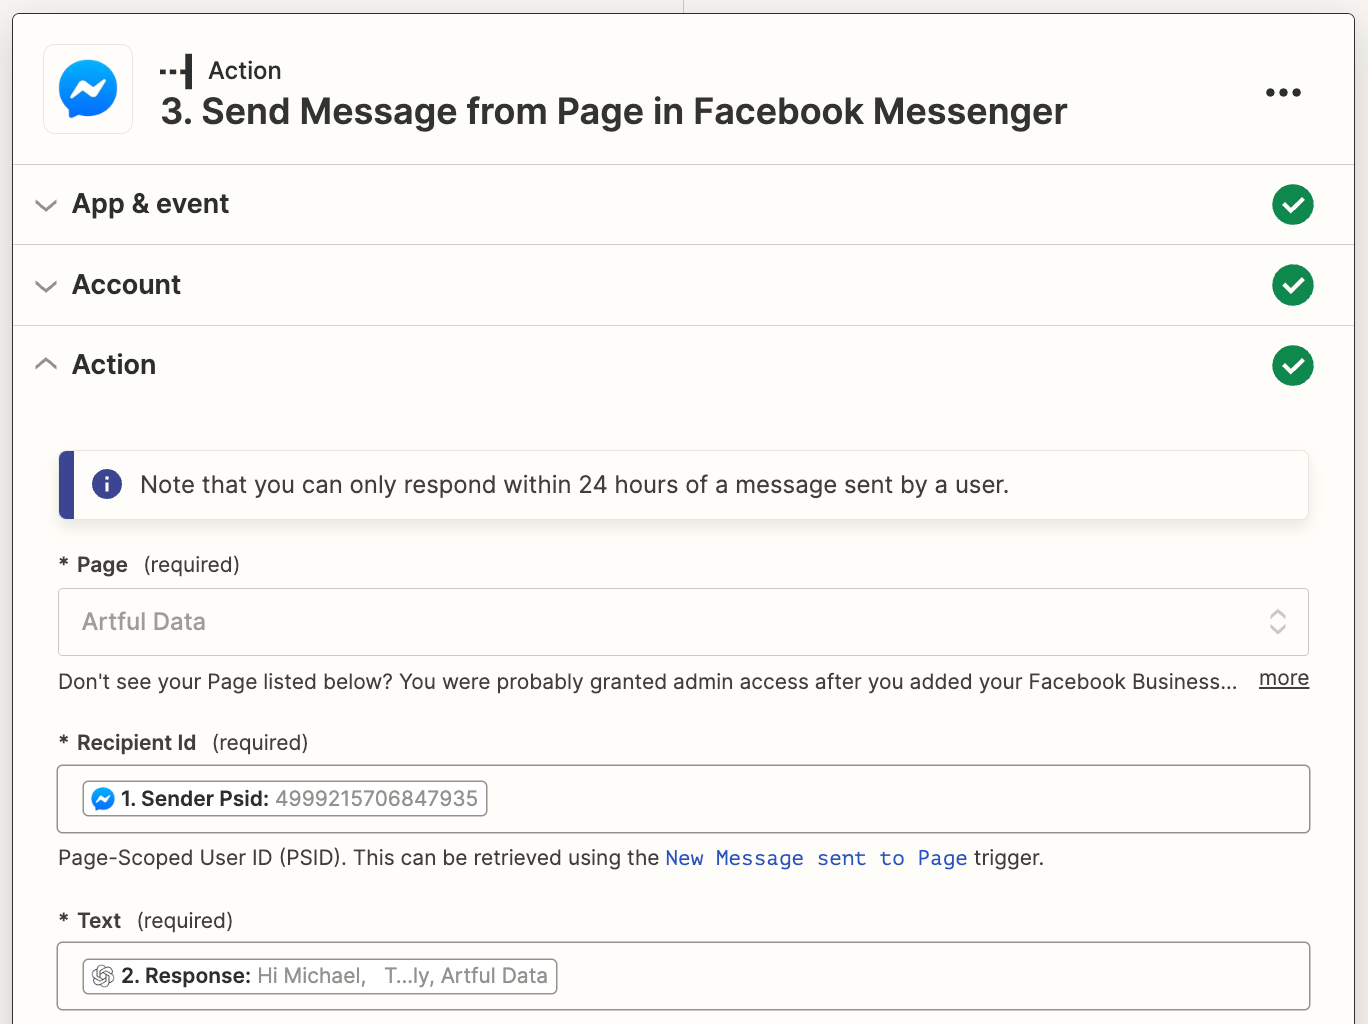
Next, we'll set up the action step. Select the same Page you selected in your Facebook Messenger trigger above.
In the Recipient Id field, map the Sender Psid variable from your Facebook Messenger trigger by clicking in the field and selecting it from the Insert data dropdown. This will ensure the response goes back to the person who sent the message to your page initially.
In the Text field, add the response written by OpenAI by clicking in the field add selecting Response in the Insert data dropdown.
Your completed step should look like this:
Next, click Test Action to send the response back to Facebook Messenger where you received the initial message. If everything looks good, you're now ready to use your Zap.
Whether you're handling occasional inquiries or managing a bustling Facebook Page, this Zap provides an efficient solution that frees up your time while delivering exceptional customer experiences. Get ready to supercharge your customer service and revolutionize the way you interact with your Facebook community!
Zapier is the leader in workflow automation—integrating with 6,000+ apps from partners like Google, Salesforce, and Microsoft. Use interfaces, data tables, and logic to build secure, automated systems for your business-critical workflows across your organization's technology stack. Learn more.
