How We Test Our Ansible Roles with Molecule
Since the early days of Zapier, way back in 2012, we have provisioned resources on our servers using configuration management—first with Puppet and then with Ansible since we found it easier to extend in a Python heavy environment. Today, we have over 98 Ansible roles of which 40 are "common" roles that are reused by other roles. One problem we wound up hitting along the way: A role isn't touched for months and when someone finally dusts it off to make some changes, they discover it is woefully out of date. Or even worse, a common role may be changed and a role that depends on it isn't updated to reflect the new changes. Sound familiar?
This isn't a new problem in software engineering. Untested code that isn't covered by tests running in continuous integration (CI) will inevitably rot given a long enough timeline. This is why we always aim to have a suite of automated tests with at least 80% code coverage. Unit testing is often the lowest-hanging fruit—it's dead simple to write a series of tests against a single object or module. Integration tests that cover a collection of objects working together can be trickier to get away with but can provide large dividends of value when done right. We've been accustomed to these professional practices for decades now, so why can't we have the same safety net with our Ansible roles? While I found a lot of tooling out there (Test Kitchen, ServerSpec, etc.), I couldn't find one that felt like it really scratched my itch. That changed when I found Molecule.
Molecule is interesting because it seems to be the "glue" that ties a lot of really good tooling together to automate development and testing of Ansible roles. It integrates with Docker, Vagrant, and OpenStack to run roles in a virtualized environment and works with popular infra testing tools like ServerSpec and TestInfra. While it's tempting to just jump right into our main infra project to get tests running, it's better to start small first with a single stand alone. Here's how you can get started testing in Ansible with Module. For demonstration purposes I'll develop a role that installs and configures Consul, writing automated tests along the way.
Getting Started
We'll be using Docker to run our virtualized environment in, so make sure you have that installed for your specific OS. We will also need a Python virtual environment set up since Molecule is distributed as a pip dependency. While there are numerous ways to set this up, I prefer virtualenvwrapper for its ease of use. With it installed, we'll create our project and virtualenv needed:
mkproject ansible-consul
With that setup, we will install the three core pip modules needed: ansible, docker and molecule. Set up your initial project structure by running molecule init --driver docker --role ansible-consul --verifier testinfra.
You'll see this created a small project skeleton for an Ansible role. For reference, this is the project structure post init (with a small change to the readme).
.
├── README.md
├── defaults
│   └── main.yml
├── handlers
│   └── main.ymlx
├── meta
│   └── main.yml
├── molecule.yml
├── playbook.yml
├── tasks
│   └── main.yml
├── tests
│   ├── test_default.py
│   └── test_default.pyc
└── vars
    └── main.yml
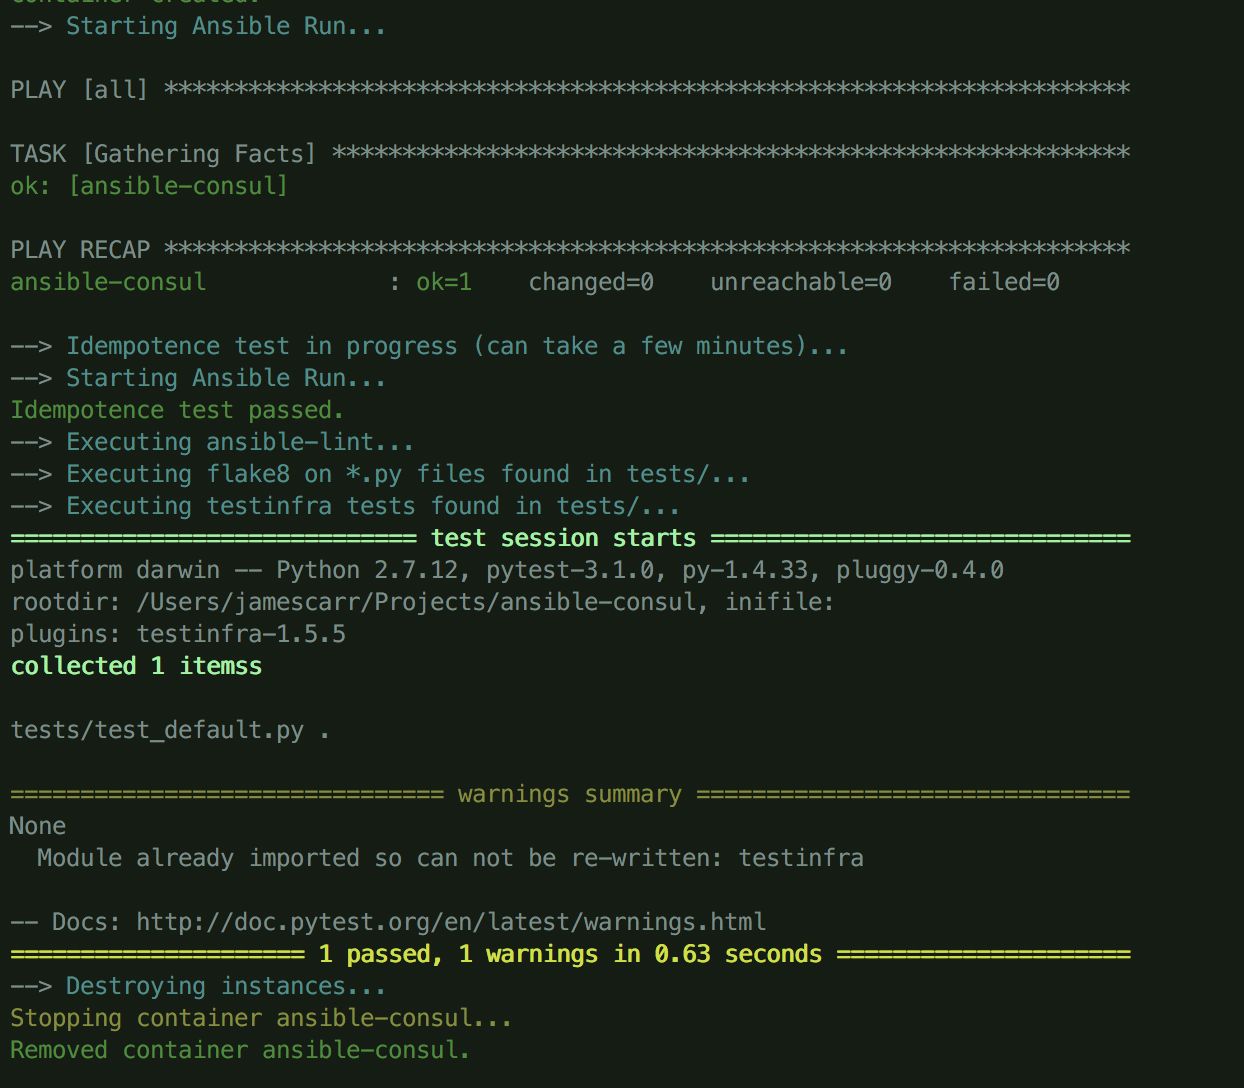
Switch into the project directory and run molecule test to run the initial test case. You'll see a docker container get pulled down, an empty Ansible run, and a test pass. If you look in tests/test_default.py, you'll see a single test that verifies that /etc/hosts exists.

We now have a “walking skeleton” Ansible role ready, let's add some meat to it!
Building the Role
First we'll start very small and write a test to verify the Consul is installed. Since Consul is distributed as a binary rather than a package, we'll have to use the File TestInfra resource to verify the binary has been downloaded.
import testinfra.utils.ansible_runner

testinfra_hosts = testinfra.utils.ansible_runner.AnsibleRunner(
     '.molecule/ansible_inventory').get_hosts('all')


def test_consul_is_installed(File):
    consul = File("/usr/local/bin/consul")
    assert consul.exists
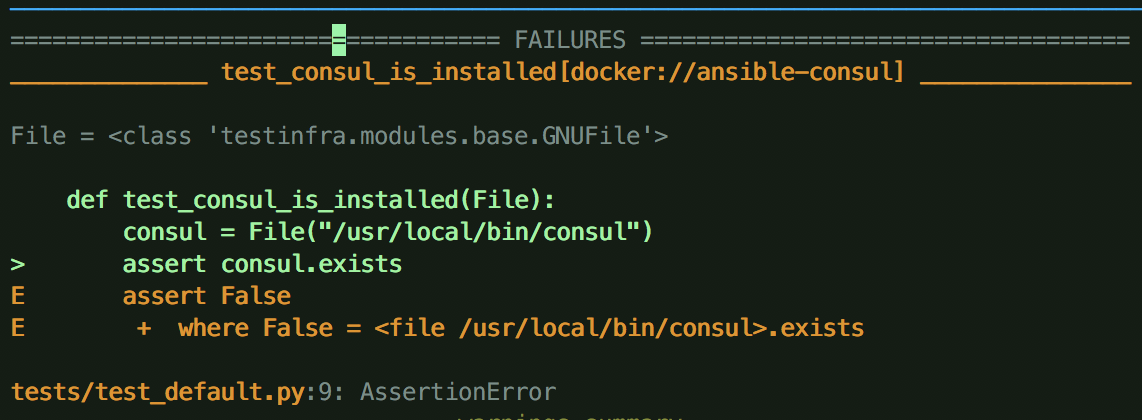
Running this test will produce a failure because we haven’t actually done anything yet! Let’s go write our Ansible tasks to pass this test now.

Through some trial and error, we discover for our target OS we need to install unzip so we can use unarchive to extract the Consul binary. We also need to unstall ca-certificates and run update-ca-certificates so we validate the certificate for releases.hashicorp.com correctly.
---
- name: install unzip
  package:
    name: "{{ item }}"
  with_items:
    - unzip
    - ca-certificates

- name: update ca certs
  command: update-ca-certificates
  changed_when: False

- name: Extract consul
  unarchive:
    src: https://releases.hashicorp.com/consul/0.8.3/consul_0.8.3_linux_amd64.zip
    dest: /usr/local/bin
    remote_src: true
You may be asking, "Why didn't you also write tests to verify the packages were installed as well?" The main thing we're interested in here is that Consul is installed, and that's it. How it gets installed is not tested because we want that process to be flexible and changeable as long as the same result is produced in the end. Once again you can view the progress so far at the install-consul-binaries tag on github.
When adhering to TDD, one major recommended practice is to follow a cycle of “red, green, refactor” as we write tests. This means that instead of moving on after passing a test, we take a little time out to refactor since we have test coverage that allows us to modify without fear. One thing that sticks out like a sore thumb above is that we opted to hardcode a lot of values in our Ansible role, which makes it quite inflexible for whoever uses it. What if they want to change the version installed? Or change the download URL to their own internal distribution server? Let’s take a little time out and extract some variables to defaults/main.yml.
consul_version: 0.8.3
consul_package_name: "consul_{{ consul_version }}_linux_amd64.zip"
consul_download_url: "https://releases.hashicorp.com/consul/{{ consul_version }}/{{ consul_package_name }}"
consul_bin_dir: /usr/local/bin
And use them in the task.
- name: Extract consul
  unarchive:
    src: "{{ consul_download_url }}"
    dest: "{{ consul_bin_dir }}"
    remote_src: true
And, with that, you can rerun the test and verify all is well. The test passes and we can move on since there is not much here to clean up. Getting Consul installed is the easy part, how about have the role start it up as a service?
def test_consul_is_running(Service):
    consul = Service('consul')

    assert consul.is_running
    assert consul.is_enabled
This will fail because we never started Consul up, nor did we create a service for it. Since we installed a binary, there is no supervised service installed so we'll have to create it ourselves. The first step we’ll take is to render a systemd service configuration to run Consul. Again focusing on the simplest unit of work, we render a very simple configuration that takes a few sinful routes like running the service as root and not even bothering to load a Consul configuration file. Don't worry, we can add those bits later.
[Unit]
Description=Consul Agent
Requires=network-online.target
After=network-online.target

[Service]
Environment="GOMAXPROCS=`nproc`"
Restart=on-failure
User=root
Group=root
PermissionsStartOnly=true
ExecStartPre=/sbin/setcap CAP_NET_BIND_SERVICE=+eip {{ consul_bin_dir }}/consul
ExecStart={{ consul_bin_dir }}/consul agent -data-dir=/tmp/consul
ExecReload=/bin/kill -HUP $MAINPID
KillSignal=SIGINT

[Install]
WantedBy=multi-user.target
Next, render the configuration in tasks/main.yml and use notify restart the service:
- name: Render Systemd Config
  template:
    src: consul.systemd.j2
    dest: /etc/systemd/system/consul.service
    mode: 0644
  notify: restart consul
Last but not least, add the handler to handlers/main.yml to do the actual work of restarting Consul. We use the systemd Ansible module to do the heavy lifting for us and set the state to restarted for idempotence to guarantee that the service is restarted whether it is stopped or already running:
---
- name: restart consul
  systemd:
    daemon_reload: yes
    name: consul
    state: restarted
    enabled: yes
Once again, you can view the progress so far in a checkpoint tag on github.
Alright! Let’s run our tests and see if this actually works now.

Uh-oh! Since we’re running inside a docker container, we don’t actually have systemd running, do we? Thankfully there are some solutions here in the form of running the solita/ubuntu-systemd image with some special privileges to give us a full ubuntu system rather than a container running a single app as PID 1. To do this, make the following modifications in molecule.yml under the docker section:
docker:
  containers:
    - name: ansible-consul
      image: solita/ubuntu-systemd
      image_version: latest
      privileged: True
Yay! The Ansible runs provisions successfully and the tests pass as well!

The progress so far can be found under the systemd-started tag on GitHub.
Testing Multiple Platforms
Ignoring all the warts, let’s imagine that our role is further fleshed out and works great. It really takes off and starts making its way to the most widely-used Ansible role for installing Consul. Then the issues start getting opened with a common theme. “Please Add Support for Ubuntu 14.04”, “Can You Support CentOS?”, etc. Thankfully, Molecule makes this extremely easy to accomplish.we just have to hunt down those special docker images that run upstart and systemd.
After the hunt is completed, update molecule.yml to run three containers for three different OS targets:
docker:
  containers:
    - name: centos7
      image: retr0h/centos7-systemd-ansible
      image_version: latest
      privileged: True
    - name: consul-ubuntu-16.04
      image: solita/ubuntu-systemd
      image_version: latest
      privileged: True
    - name: consul-ubuntu-14.04
      image: ubuntu-upstart
      image_version: latest
      privileged: True
With little surprise, the two new targets fail when we run molecule test since they’re going to require some different behavior specific to their environment.

Luckily, it looks like CentOS failed because update-ca-certificates is named something else—an easy fix. But before we figure that one out, how about we see if it can actually just use get_url without any weird CA issues like Ubuntu 16.04 had? So in tasks/main.yml let’s have that task only run on Debian derivatives:
- name: update ca certs
  command: update-ca-certificates
  changed_when: False
  when: ansible_os_family == "Debian"
Sure enough, when we re-run our tests, we now have CentOS7 passing and ubuntu 14.04 is complaining because it doesn’t have systemd available.

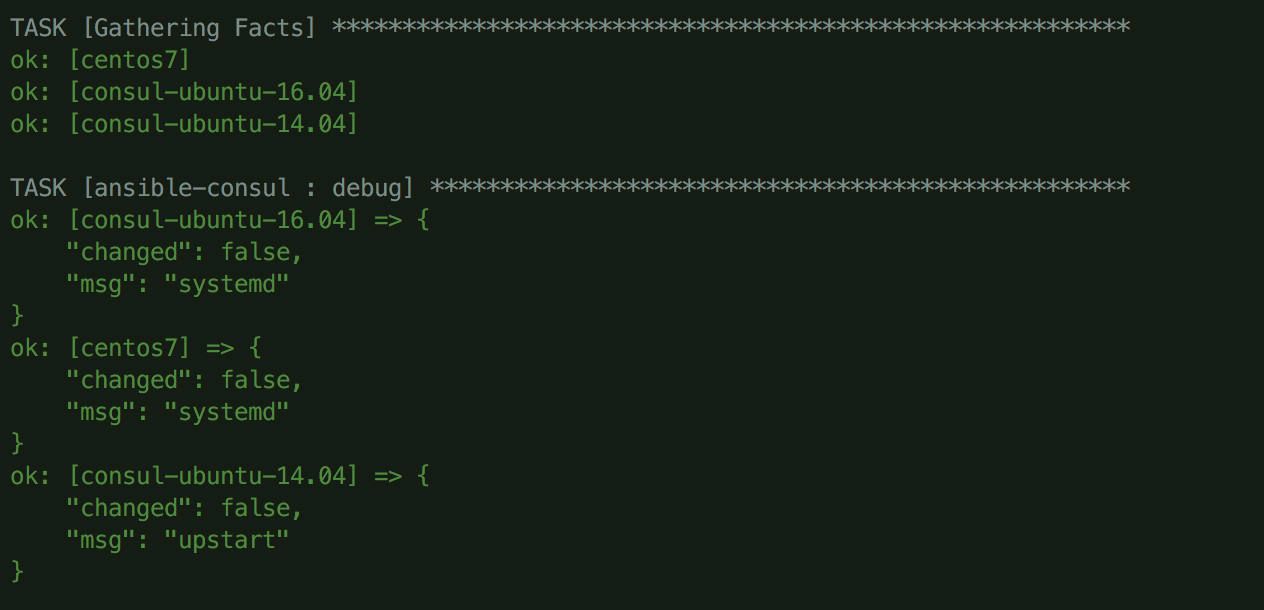
It appears we’ll want to detect which init system the target host is using and change what we do based on that. After a little Googling, it seems that the ansible_service_mgr fact should give us this. Let’s do a quick debug and run molecule test to see the value of this on each host.

Alright! That looks like exactly what we want to use. With this newfound knowledge, conditionally render upstart or systemd configurations based on the value in ansible_service_mgr:
- name: Render Systemd Config
  template:
    src: consul.systemd.j2
    dest: /etc/systemd/system/consul.service
    mode: 0644
  notify:
    - reload systemd daemon
    - restart consul
  when: ansible_service_mgr == 'systemd'

- name: Render Upstart Config
  template:
    src: consul.upstart.j2
    dest: /etc/init/consul.conf
    mode: 0644
  notify: restart consul
  when: ansible_service_mgr == 'upstart'
We also modify our handlers slightly by using the service module to generically restart the service covering upstart, systemd or even old school init.d. However that module won’t handle systemd daemon reloading so add a special handler to do that in those situations:
- name: reload systemd daemon
  command: systemctl daemon-reload
  changed_when: false

- name: restart consul
  service:
    name: consul
    state: restarted
    enabled: yes
You can find the final project structure under the final tag on GitHub. And with these changes, we verify our role works successfully across three different OS targets!
Conclusion
I really like how easy it is to use Molecule, and we have some big plans for using it further at Zapier. Having it running in CI and able to run on new pull-requests to guard against regressions is a pretty big win in my book. And having the tests run on a schedule can better guard against role rot when a role goes untouched for a few months.
Did you find this post helpful? Let us know in the comments!

Comments powered by Disqus