Push by Zapier Now Includes Context Menus

Push by Zapier is a Google Chrome extension that lets you trigger Zaps instantly from your browser with just a click. It's great for those moments where you want to automate a task, but you don't want to build a new trigger. You just want something to happen automatically, right then—like quickly adding a new Google Calendar event from Chrome or adding text from a website to a Google Sheet.
Today, we're excited to announce that we've added a long-awaited feature to Push by Zapier: context menus.
What are context menus? How do they work?
Previously, if you wanted to access a Push Zap, you’d have to click on the extension's button in Chrome to open its menu. Now, it's much simpler: your Push Zaps will appear in context menus in Chrome.
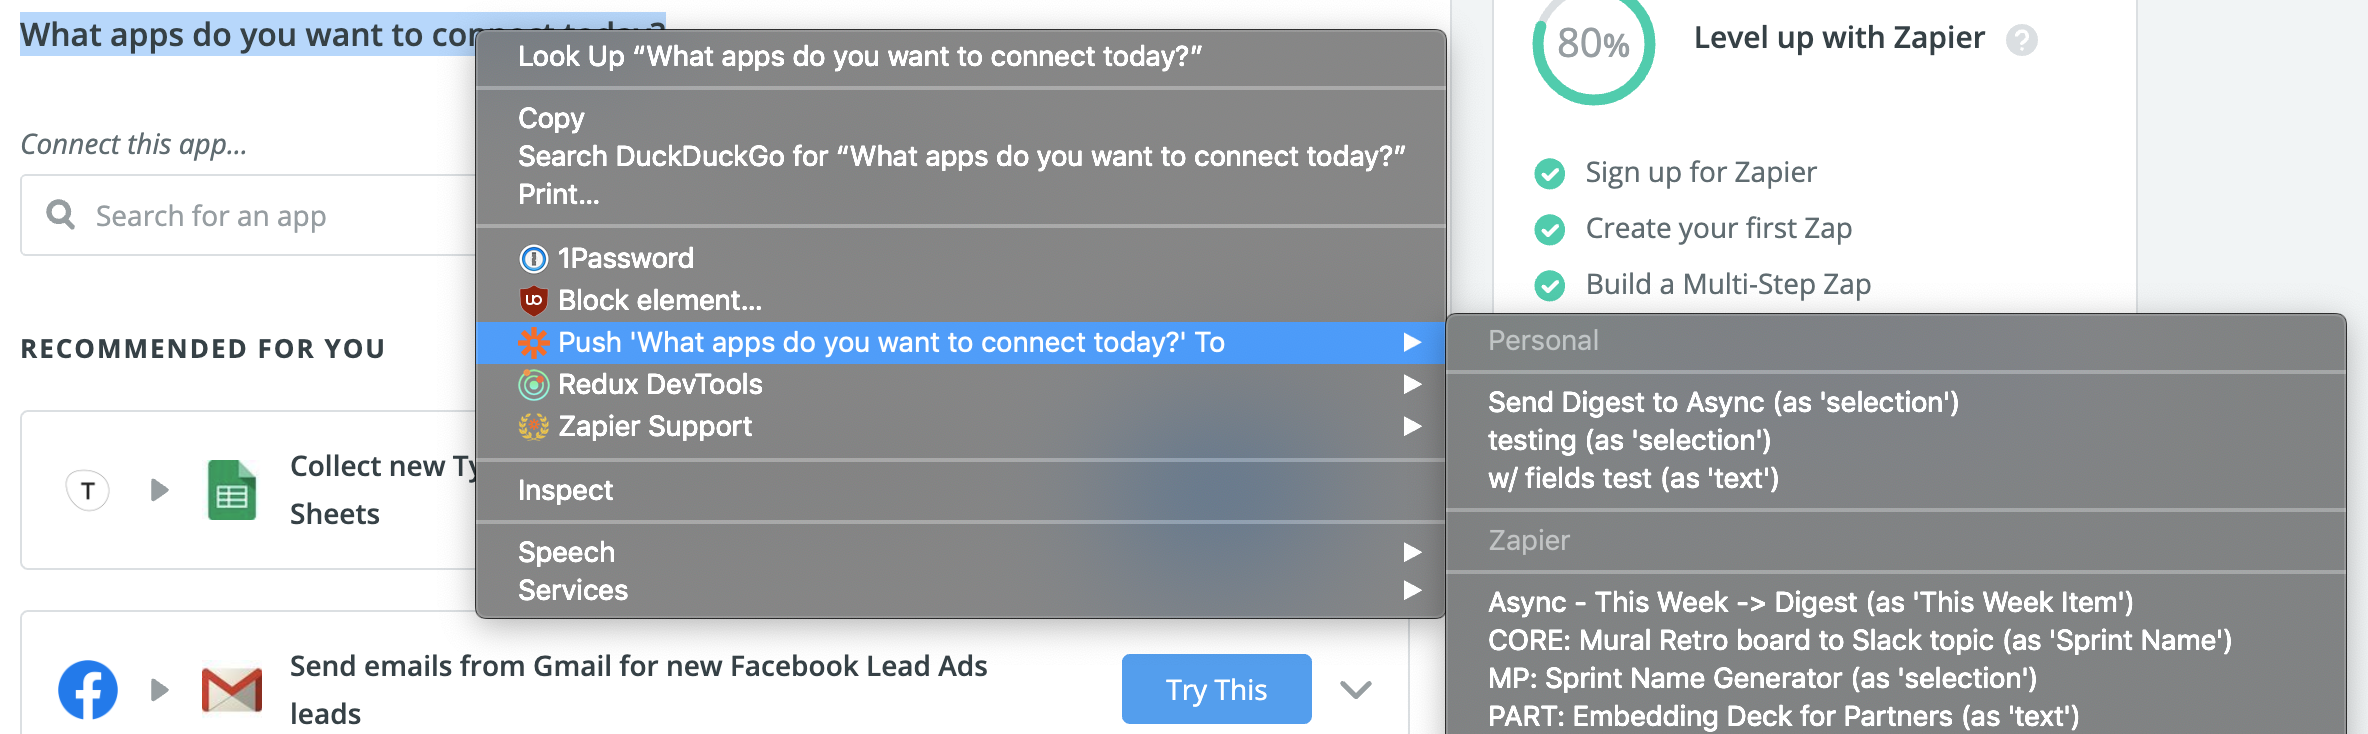
Instead of navigating to the menu, you can right-click anywhere on a web page to access Button Push Zaps or right-click on selections, links, and images to Push specific data to Buttons and Forms with a single field.
As a result, you can easily use text, links, and images from any web page in your Push Zaps.
Here's an example of selecting text and using the Push by Zapier context menu to send it to a Zap:
This is a great option for users who need to move freestanding text from the web into another app—for example, if you want to send quotes or links from the web into a Slack chat. Read more about popular ways to use Push by Zapier.
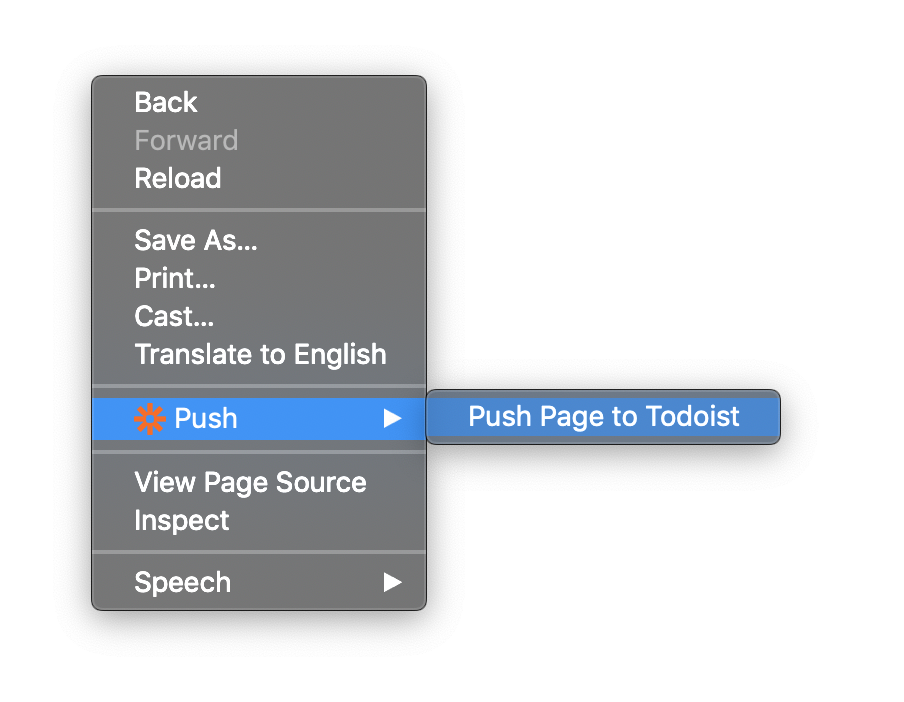
As mentioned, you can also use the new context menu feature to select links and send them to a Push Zap. If you want to create a new item in Todoist based on a link—like an article you'd like to read later—just highlight it and right-click. The context menu will look something like this:

Notifications
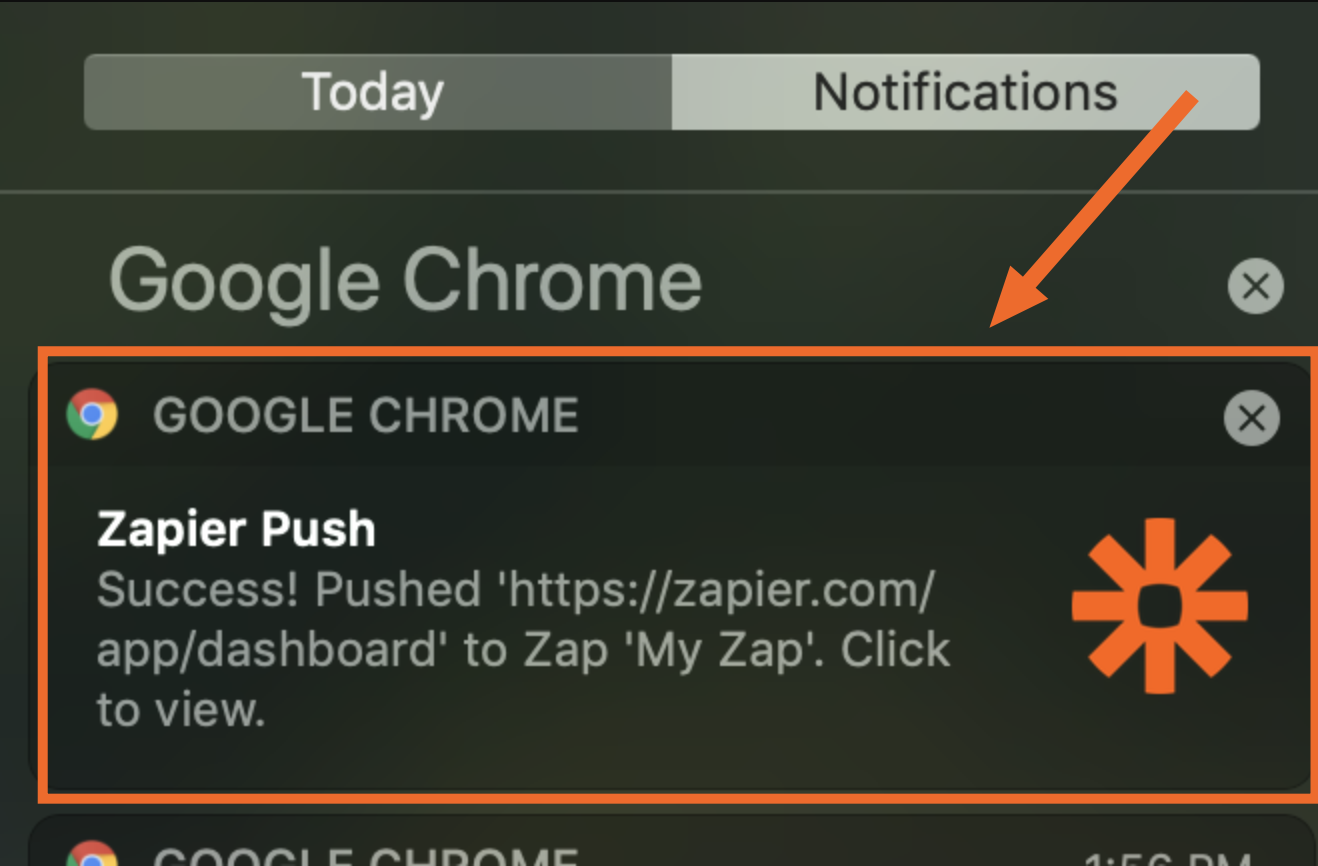
We've also changed how you can see the status of these Push Zaps. Now, you'll receive their status via browser notifications.
After running a Zap, click the notification bubble to open the task history page. Clicking here…
…will take you here, so you can see the details of the Zap's status.
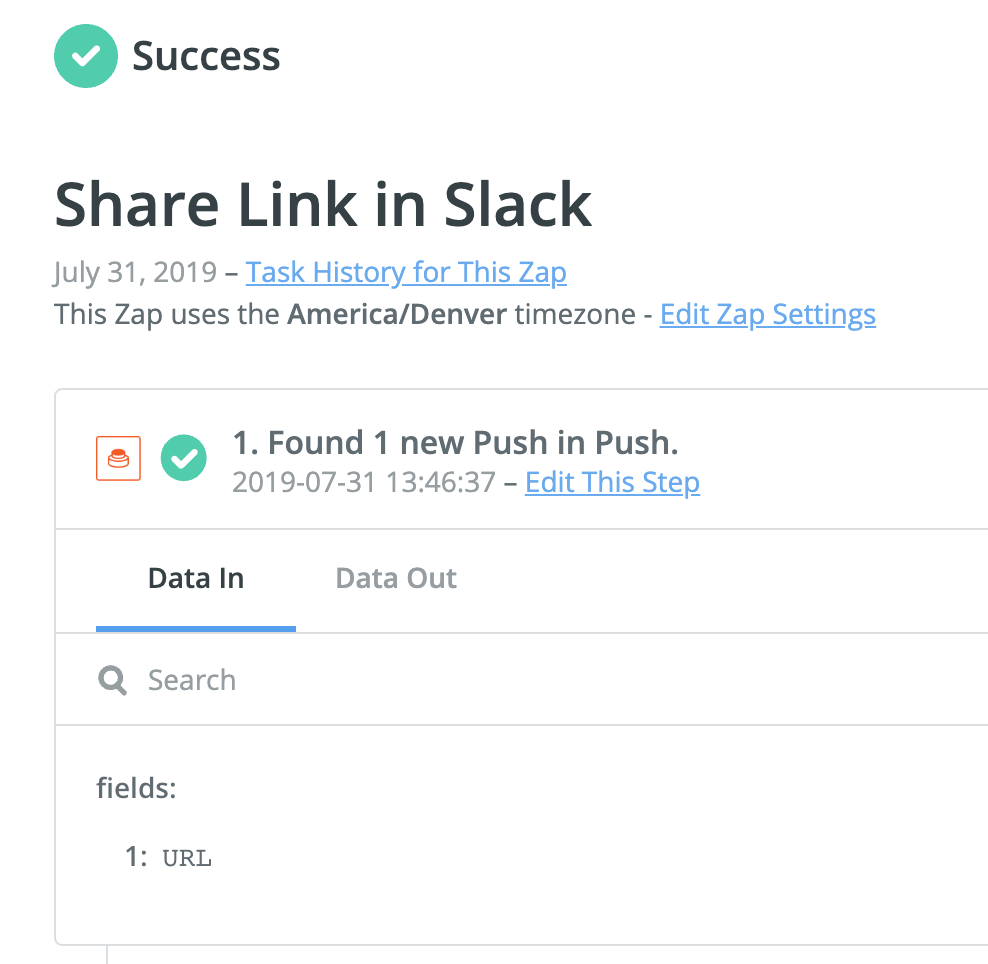
This change makes it simpler to see whether your Zaps are running successfully.
What if I don't want notifications?
We know that browser notifications can get a bit noisy. If you'd rather not receive notifications about the status of your Zaps, you can turn them off via the Extensions page in Chrome. Toggling notifications on or off will affect all of your Push Zaps.
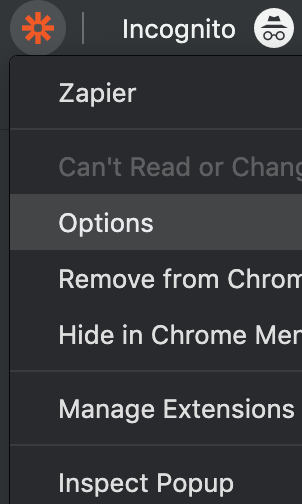
To change your notification settings, right-click the extension icon and choose Options.
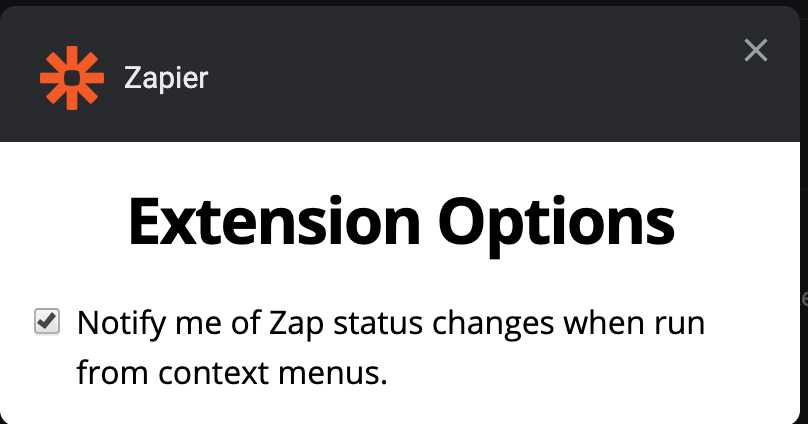
This will open the Options form and allow you to enable/disable notifications.
About the Author
Hannah Herman is a tech writer and native New Yorker. She’s written extensively on automation, digital innovation, and the ethics of AI. When she’s not writing, she’s probably reading; her favorite book is Anna Karenina.