Updates to ScheduleOnce: Manage Zaps within ScheduleOnce
Switching between multiple different tools to get things done can take up time and distract you.
That's why we're happy to announce the latest improvements to our ScheduleOnce integration: You can now see all the ScheduleOnce Zaps you've set up right within the app. The new "Manage Zaps" tab in ScheduleOnce's Zapier dashboard shows you which Zaps you've turned on, which are off, and lets you jump into editing them without having to navigate to Zapier.
Paired with the Zap selections in the "Add Zap" tab, you can now find the workflows you need to be productive, set them up, and review your current automations at any point. So whether you just need to monitor your Zaps, want to refine your processes, or add new time-saving workflows, you can do it all side-by-side your booking and client info.
How will ScheduleOnce users see this in action?
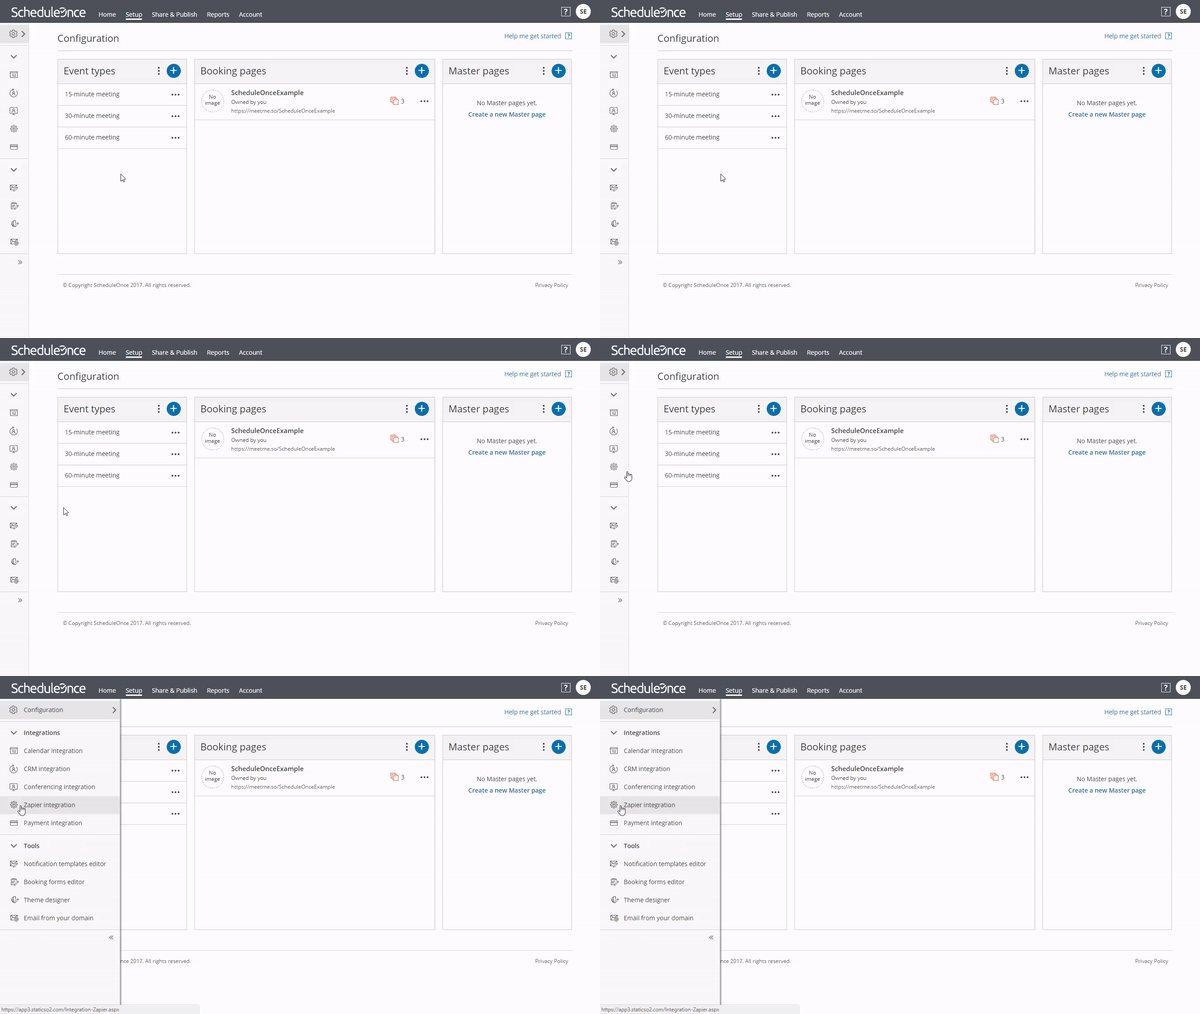
1. Enter your ScheduleOnce account
Once you log in to your ScheduleOnce account, head over to the left sidebar, and click on "Zapier integration".

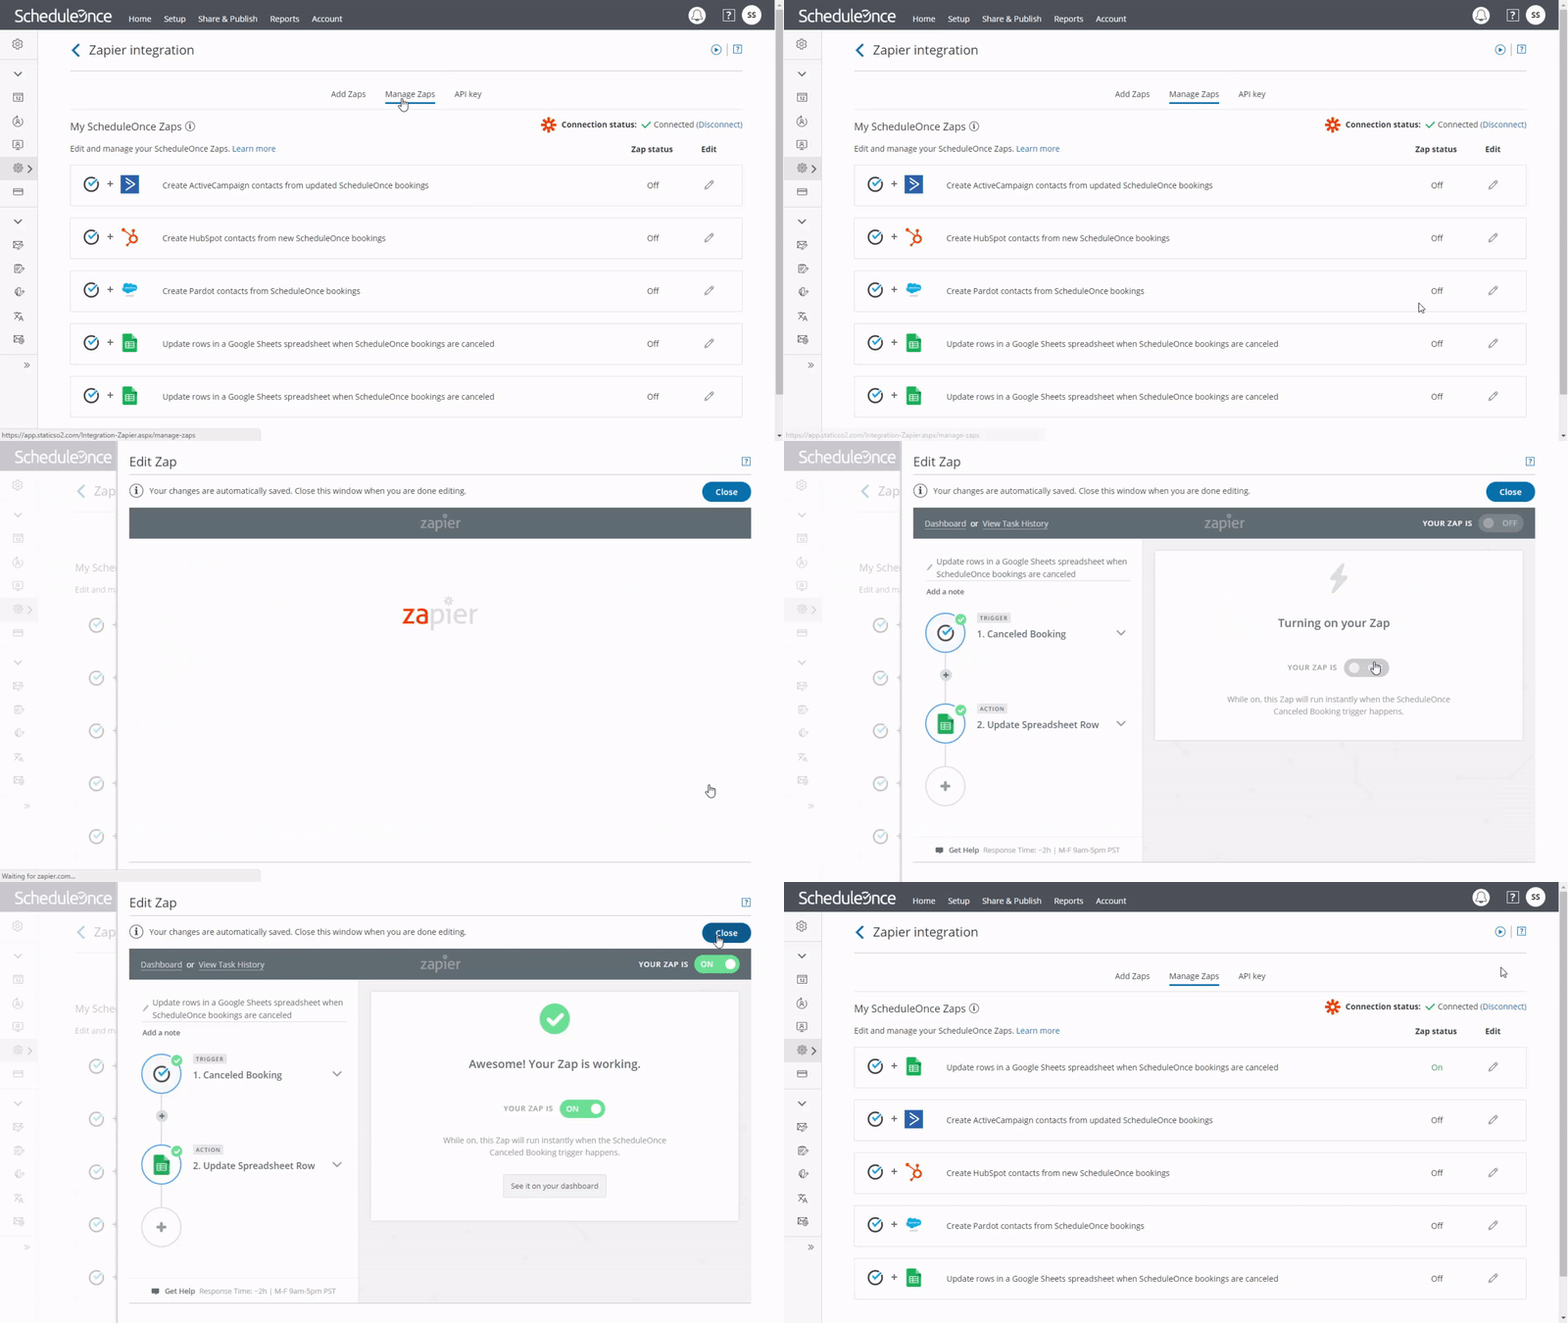
2. Manage your Zaps
This new pane shows your active Zaps first, followed by the ones you've turned off, and also any incomplete ScheduleOnce Zaps you may have started and left as drafts. Simply click on the pencil icon to open up the Zapier editor and make the updates you need, and they'll be automatically applied.

Looking for inspiration on which Zaps to set up and bring into that tab? Try these popular combinations:
## How To Automate ScheduleOnce with Zapier
-
Sign up for a ScheduleOnce account, and make sure you have a Zapier account
-
Try some pre-made ScheduleOnce integrations and learn more about how ScheduleOnce works with Zapier
-
Check out our ScheduleOnce help documentation for details on connecting your account and setting up your first Zap
-
Or login and build a custom workflow with ScheduleOnce and Zapier