Try Customizing Your Facebook Lead Ads Zaps with Filters

Facebook Lead Ads is one of the fastest growing apps on Zapier. When connected to Zapier, your Facebook Lead Ads can talk to your favorite CRM, email marketing platform, or other tools you use to run your business.
As you’ve probably guessed, a Zap can do much more than copying information between two apps. Use filters to customize your Facebook Lead Ads Zap to your business’ needs. You can organize leads before adding them to your CRM or notify team members when leads with specific attributes enter your funnel. Filters let you choose if and when a Zap should run.
Here’s a few examples on how to use filters with Facebook Lead Ads:
- Assign leads to team members in your CRM by filtering information collected in the ad — like product customer is interested in, area code, or budget.
- Send yourself an email, text message, or push notification when a lead comes in only during business hours.
- Subscribe leads to your MailChimp newsletter list but only if they checked "subscribe to emails" in the leads form.
How To Automate Facebook Lead Ads with Filters
- Make sure you have a Zapier account and a Facebook Lead Ad set up.
- Pick a Facebook Lead Ads Zap template or create a Zap from scratch.
- Select Facebook Lead Ads as the trigger for your Zap and select the lead ads form.
- Click the plus sign between steps and add a filter to your Zap.
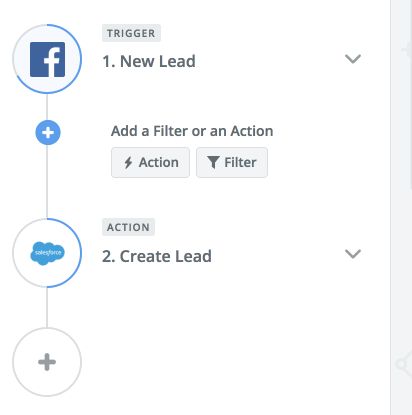
5. Select an action and turn on your Zap.
That’s it! For more ways to automate with Facebook Lead Ads, check out how other Zapier users use Zaps to be more productive:
- Steal This Workflow: How Real Estate Agents Use Facebook Lead Ads to Automatically Wrangle Leads
- Steal This Workflow: eCommerce Businesses Leverage Facebook Lead Ads to Connect with Customers