
If you've ever sent an email with the subject line Subject goes here, you know the importance of test emails. Spelling and grammar mistakes—or, even worse, pricing errors—can be costly and embarrassing. Then there's formatting: without testing, it's easy to send an email that seems perfect within Mailchimp but looks glitchy in your audience's inboxes.
In this article, I'll show you the step-by-step process for sending a Mailchimp test email (complete with screenshots). I'll also outline the troubleshooting steps you should follow if your test email doesn't arrive. Finally, I'll explain why you might want to use Mailchimp's Inbox Preview feature as an alternate way to preview your emails.
Table of contents:
How to send a test email in Mailchimp
To send a Mailchimp test email, start by signing in to your Mailchimp account.
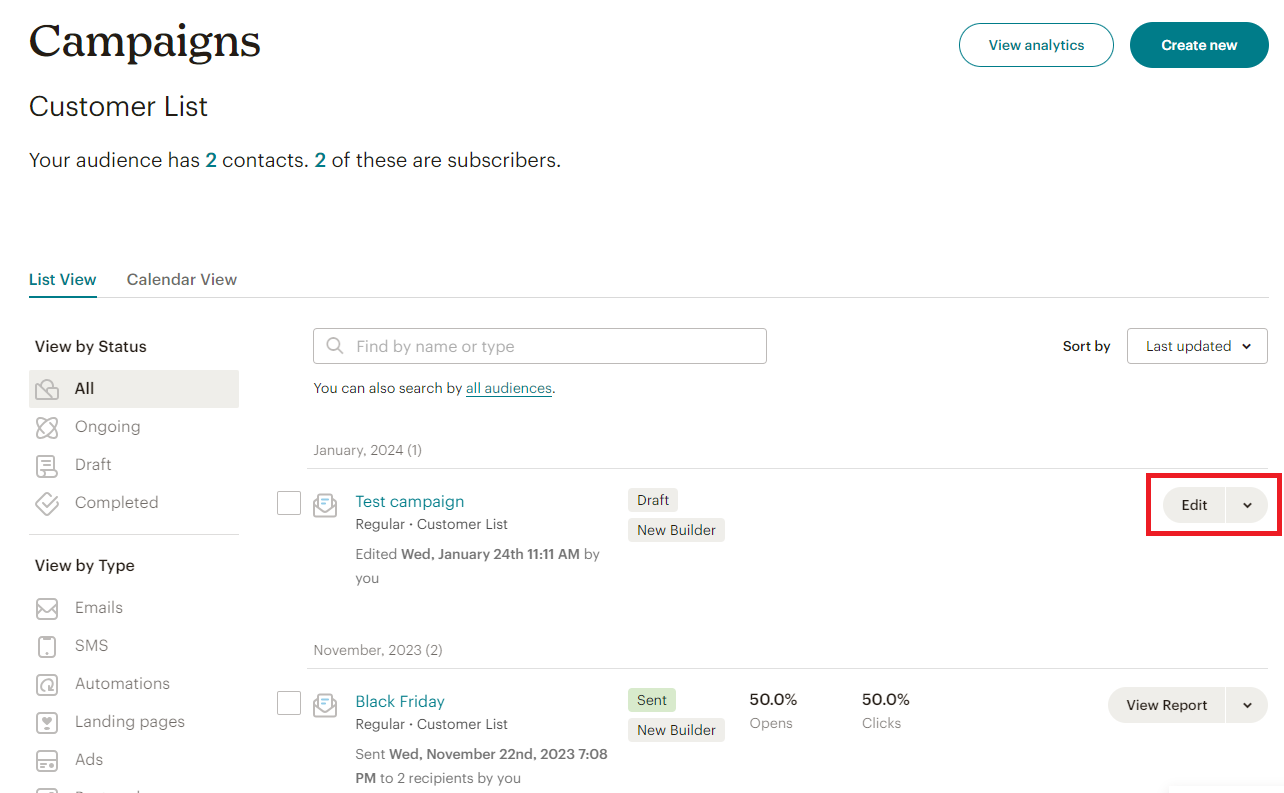
Click the Campaigns dropdown, then click All Campaigns. This will take you to a list of your email campaigns, including sent campaigns and draft campaigns.
If you haven't yet created your email, go ahead and do that now by clicking Create new. (Once your email is ready, you can follow the rest of these instructions.) If you've already created your email, find it in the list, and click Edit.
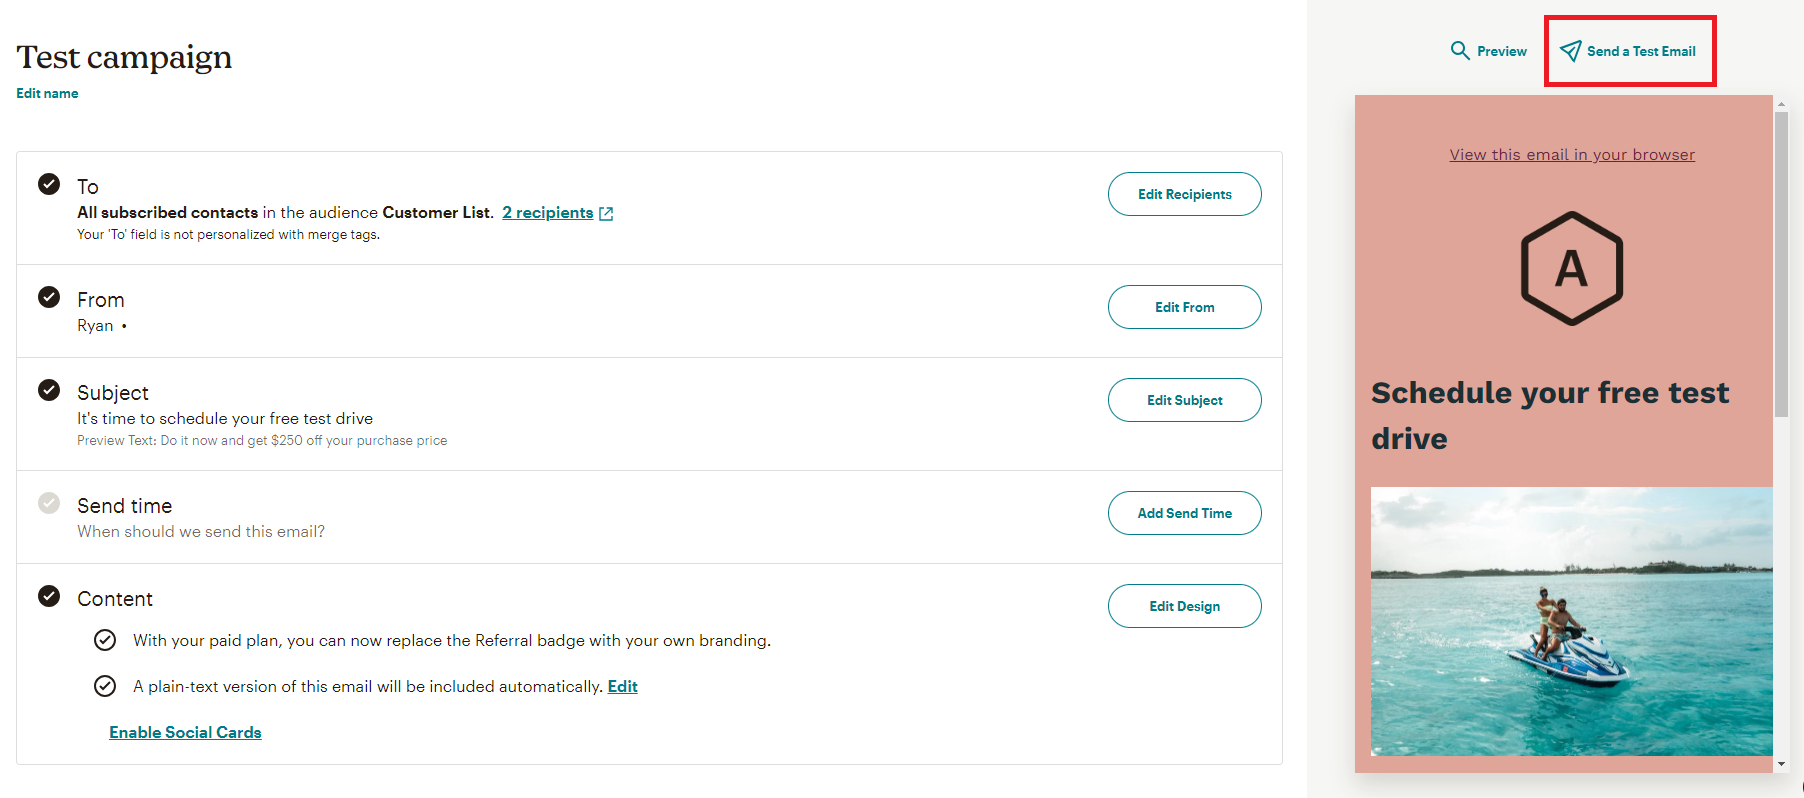
On the right side of the screen, you'll see a box that renders your email within Mailchimp. Clicking the Preview button (the one with the magnifying glass) shows you how your email might look on desktop and mobile devices. While this is a helpful reference tool, it isn't the most accurate method of confirming how your email will display.
For a more precise preview, click Send a Test Email.
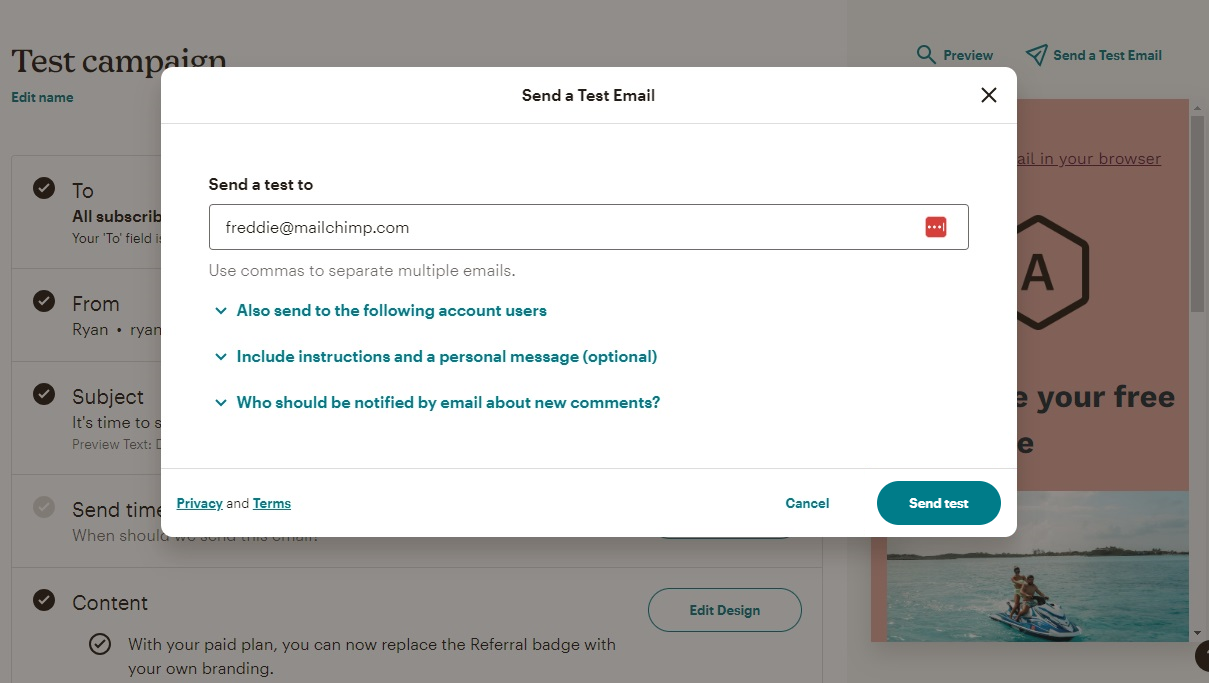
Input the email address you'd like to send to. To send a test email to multiple email addresses, input them all here and separate them with commas. (Free users can send to a maximum of six recipients, while paid users can send to as many as 20).
Click the dropdown toggles to see more options: if you're sending your test email to someone else, for example, you can include a message outlining the kind of feedback you're looking for.
When you're ready, click Send test.


That's it! Your test email should show up in the correct inbox shortly after.
Troubleshooting Mailchimp test emails
Once you've sent your Mailchimp test email, it shouldn't take long to arrive. I timed it, and my test email arrived in about 10 seconds. If your Mailchimp test email isn't sending, here are some options.
Your first stop should be your spam folder. If your test email was flagged as spam, review your content—especially your subject line—for spammy language. Avoid subject lines with all capital letters and too many exclamation points (sorry, "CLICK HERE FOR A FREE GIFT!!"). Check out Zapier's guide to email marketing best practices for more tips on avoiding the spam folder.
If your test email isn't in your spam folder or your inbox, take a look at your "From" email address. If you're using a free email address, like @gmail.com, it may be causing issues. Try sending emails from a custom domain instead (like @companyname.com).
If you're already sending from a custom domain, make sure you've authenticated your domain with Mailchimp. Domain authentication helps email service providers (ESPs) verify that your emails are legitimate.
Finally, take a look at the email addresses you're sending to. If you're sending test emails to corporate, education, or government email addresses—or anywhere else that has a spam firewall—you may need to get your IT department to add the address you're sending from to an allow list.
How many test emails can I send in Mailchimp?
To prevent abuse by spammers, Mailchimp limits the number of test emails you can send in a day. Free users can send up to 24 total tests within 24 hours, while paid users can send up to 200 tests in that same period. If you hit this limit, another option for testing your emails is the Inbox Preview feature.
Inbox Preview: another way to test emails in Mailchimp
Mailchimp's Inbox Preview feature is an alternative email testing method. It's ideal for testing multiple browsers and devices at the same time. Instead of only testing the devices and browsers you happen to use, you can see how it renders with the email clients that are most popular with your audience.
You can also see how your emails look in dark mode. Dark mode has given me email headaches in the past—since it automatically changes your background and font colors, you can end up with an illegible email and awkward-looking images if you don't optimize for it.
Inbox Preview is only available on Mailchimp's paid plans, which give you 25 Inbox Preview tokens per month. From there, you can buy additional Preview tokens as needed.
Here's how to use Inbox Preview:
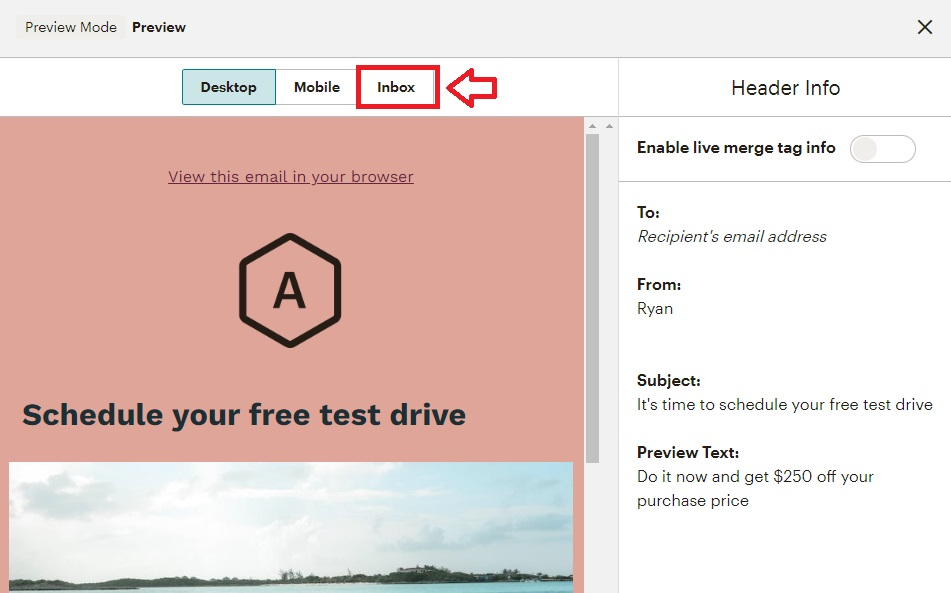
To get started, open the email campaign you want to test, and click Edit Design > Preview > Inbox.
Click Get Started.
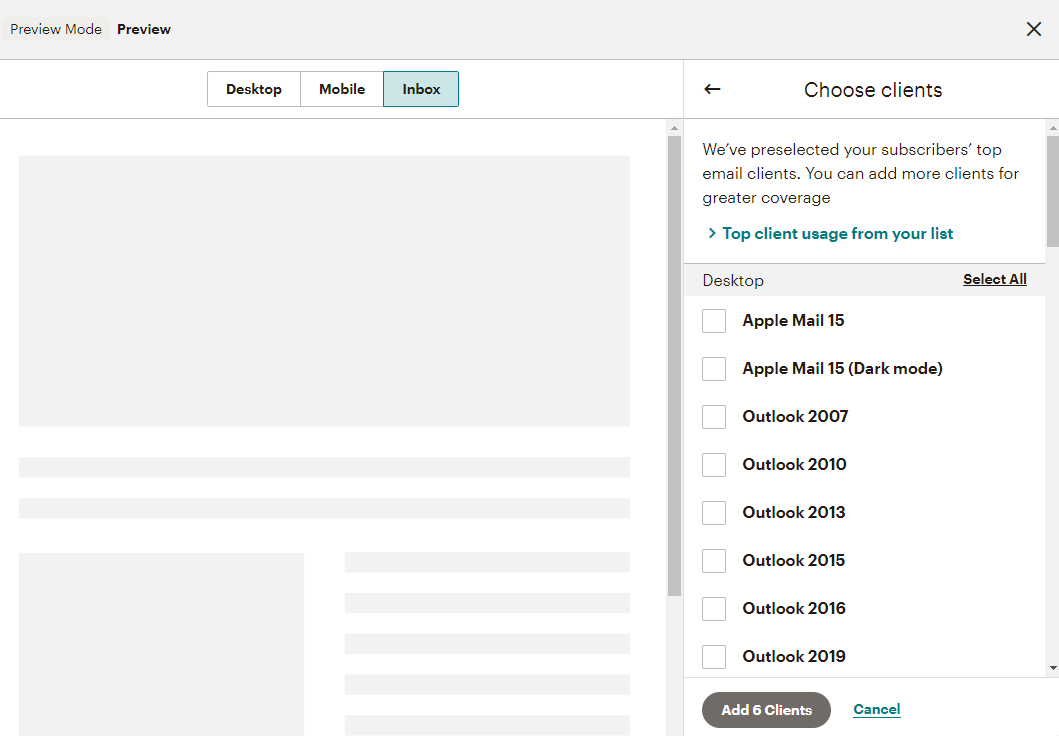
On the following screen, you'll see a list of email clients. Here's where Inbox Preview gets really useful: since Mailchimp already knows which email clients are most commonly used by your audience, it pre-selects them for you. Because you have a limited number of tokens, you'll probably want to stick to the pre-selected options.
Click Add Clients to start generating your email previews.


Voilà! You now have a preview of your email on a variety of platforms and browsers. Unless you're testing a large number of email clients, generating these previews should only take a minute or two.

Connect Mailchimp to other apps
In an ideal world, those test emails are eventually being sent to a big list of actual subscribers. By connecting Mailchimp to Zapier, you can automatically send leads to your Mailchimp list, no matter where they come from. Learn more about how to automate Mailchimp, or get started with one of these workflows.
Subscribe new Facebook Lead Ad leads to a Mailchimp list
Add Mailchimp list subscribers from newly-caught webhooks
Add subscribers to Mailchimp for new Google Sheets rows
Zapier is a no-code automation tool that lets you connect your apps into automated workflows, so that every person and every business can move forward at growth speed. Learn more about how it works.
Related reading:


