Email automation lets you send personalized, targeted messages to your audience based on a specific event or timed workflow. For example, you could automatically send a purchase confirmation whenever someone buys a product on your site, or you could automatically send a series of emails sharing your most popular blog posts.
The more data you have on your audience, the more personalized your automated emails can be. For instance, if you know your subscribers' birthdays, you can use that as a trigger, automatically sending them a birthday greeting on their big day.
As you can imagine, these kinds of emails save loads of time and cut down on user errors commonly attached to manual messages.
One of the most well-known email marketing platforms is Mailchimp. Here, I'll walk you through how to use Mailchimp for email automation, from getting set up to interpreting your data after a campaign is complete.
How to send an automated email campaign based on a Mailchimp template
Mailchimp offers a number of pre-built templates—or "journeys," in Mailchimp marketing-speak—that'll help you hit the ground running. Follow these steps to use a template for your automated campaign.
From Mailchimp's Home screen, click the Automations dropdown, then select Pre-built journeys.
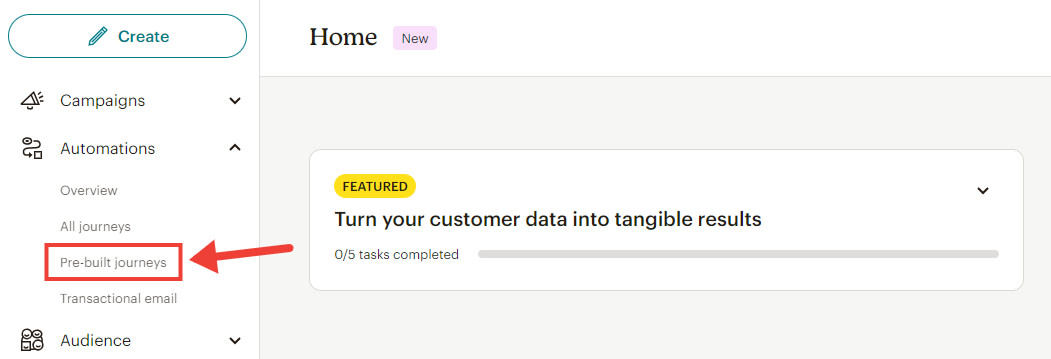
You'll be presented with 80+ pre-built email automations. Each covers a different aspect of the customer journey, from Welcome new contacts to Promote cross-sell opportunities.
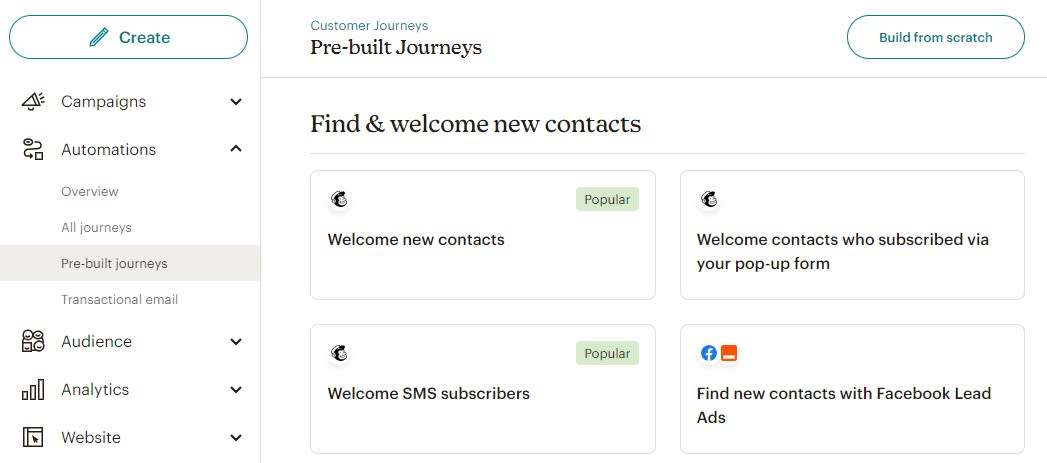
As you scroll through this list of pre-built journeys, you'll see that they're organized into five subgroups: Find & welcome new contacts, Nurture leads, Re-engage contacts, Support and manage contacts, and Transactional emails.
Find & welcome new contacts
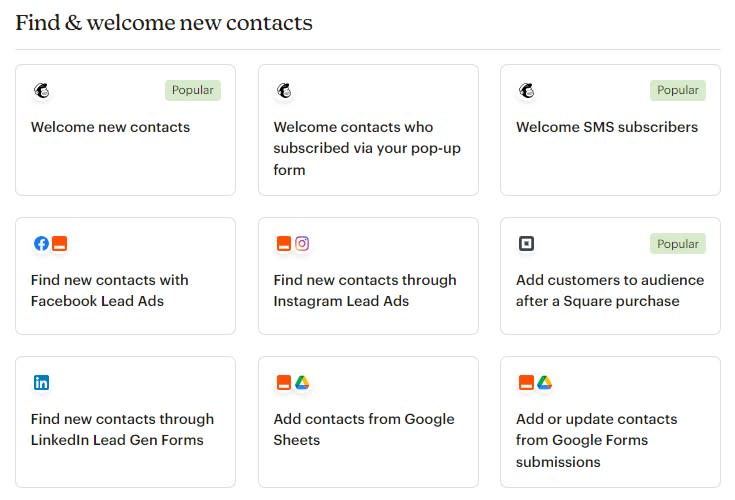
You may want to create an automated email series catering to the needs of new subscribers. If that's the case, scroll to Find & welcome new contacts.
Welcome new contacts will send subscribers an email when they first join your list.
Welcome SMS subscribers will send an introductory SMS welcoming new users.
Add customers to audience after a Square purchase allows you to grow your Mailchimp list with customers who've purchased via Square.
Nurture leads
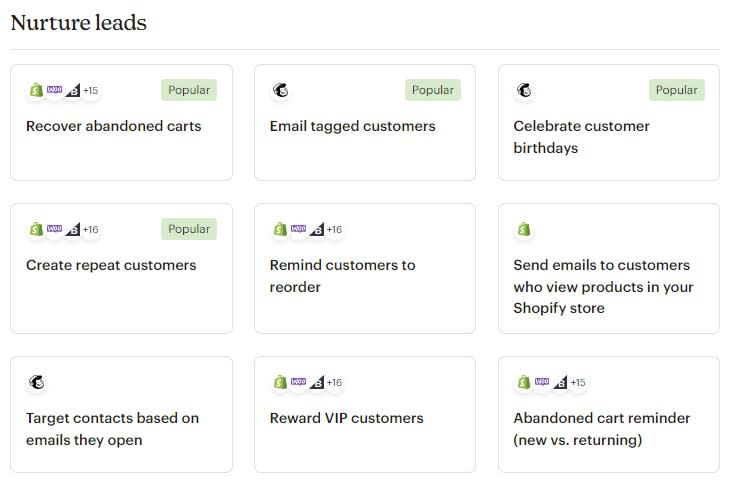
Whether you're running an eCommerce store or drumming up prospects for your small business, you'll need to nurture leads. Fortunately, Mailchimp has nearly 50 lead-nurturing automations for you to choose from:
Recover abandoned carts will help win back lost revenue by sending an email when a cart is abandoned.
Email tagged customers will send a series of emails after a tag is applied to a customer.
Celebrate customer birthdays will offer promotions or well wishes to customers on their birthday and tag customers who received a birthday offer.
Create repeat customers will nudge first-time shoppers to turn into returning customers by offering automated promotions after their first order.
Remind customers to reorder will remind customers to reorder products after a set amount of time.
Send emails to customers who view products in your Shopify store will automatically follow up with targeted emails based on products your customers view.
Target contacts based on emails they open will tag customers who have opened a specific email, then follow up to engage and encourage purchases.
Reward VIP customers will send exclusive offers to customers after they've made their fifth purchase.
Abandoned cart reminder (new vs. returning) will segment your abandoned cart emails depending on whether customers are first-time or repeat buyers.
Re-engage contacts
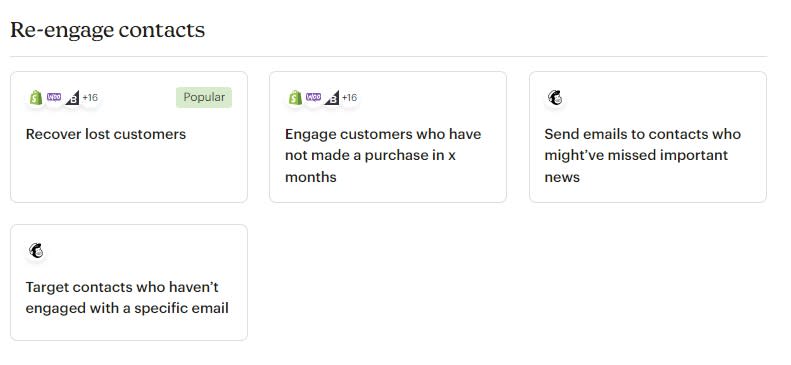
Every email list has dream subscribers who open every email. But there's also likely a decent-sized cohort of people who've forgotten why they signed up and are no longer in the habit of engaging with you. Mailchimp's Re-engage contacts automations were made for this group:
Recover lost customers will help you win back shoppers who haven't purchased from you recently.
Send emails to contacts who might've missed important news will identify subscribers who haven't opened a specific important email and follow up to engage them.
Target contacts who haven't engaged with a specific email identifies customers who haven't clicked links within a specific email and sends an automatic follow-up.
Support and manage contacts
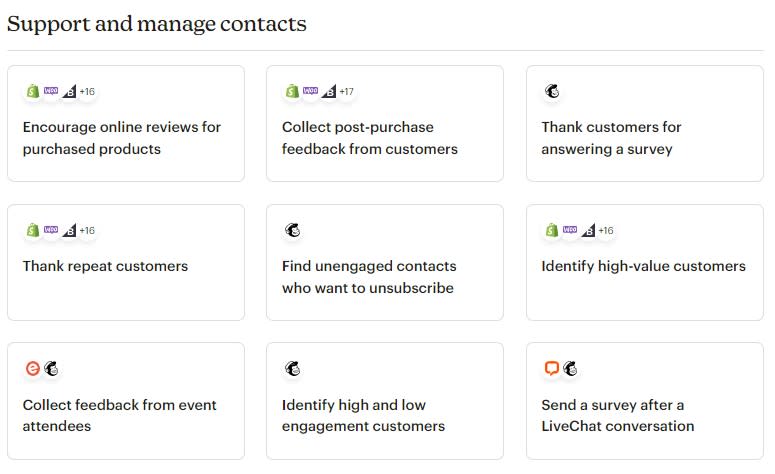
The longer contacts are a part of your email list, the more nuanced it gets to manage them. That means email automations don't stop at welcome sequences and abandoned cart emails; you'll also want to use email for tasks like collecting post-purchase feedback, identifying high-value customers—and even finding unengaged contacts who want to unsubscribe.
Encourage online reviews for purchased products will help you nudge customers to leave reviews one week after buying.
Collect post-purchase feedback from customers will help you gather valuable user intel to improve your customer experience.
Find unengaged contacts who want to unsubscribe will help you improve your open rates by identifying users who don't want to engage with your brand anymore.
Identify high-value customers will sort customers based on how many orders they place, helping you set up rewards and promotions for each.
Transactional Emails
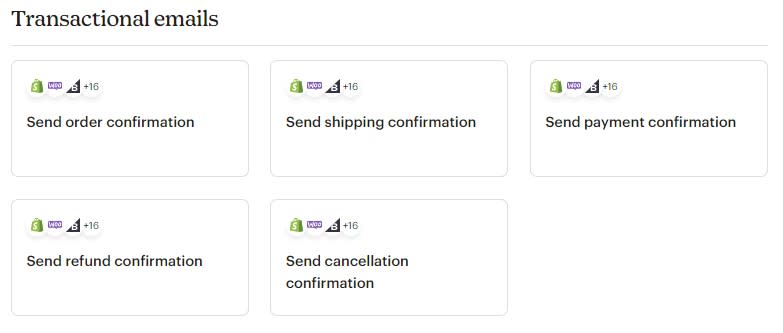
Transactional emails play a vital role in giving customers peace of mind that their order has been received, shipped, canceled, or refunded. Here are Mailchimp's transactional email templates:
Send order confirmation provides a personalized order confirmation email.
Send shipping confirmation provides customers with shipping tracking details.
Send payment confirmation notifies customers when their payment has been processed.
Send refund confirmation advises customers when their refund request has been processed.
Send cancellation confirmation lets customers know when their order has been canceled.
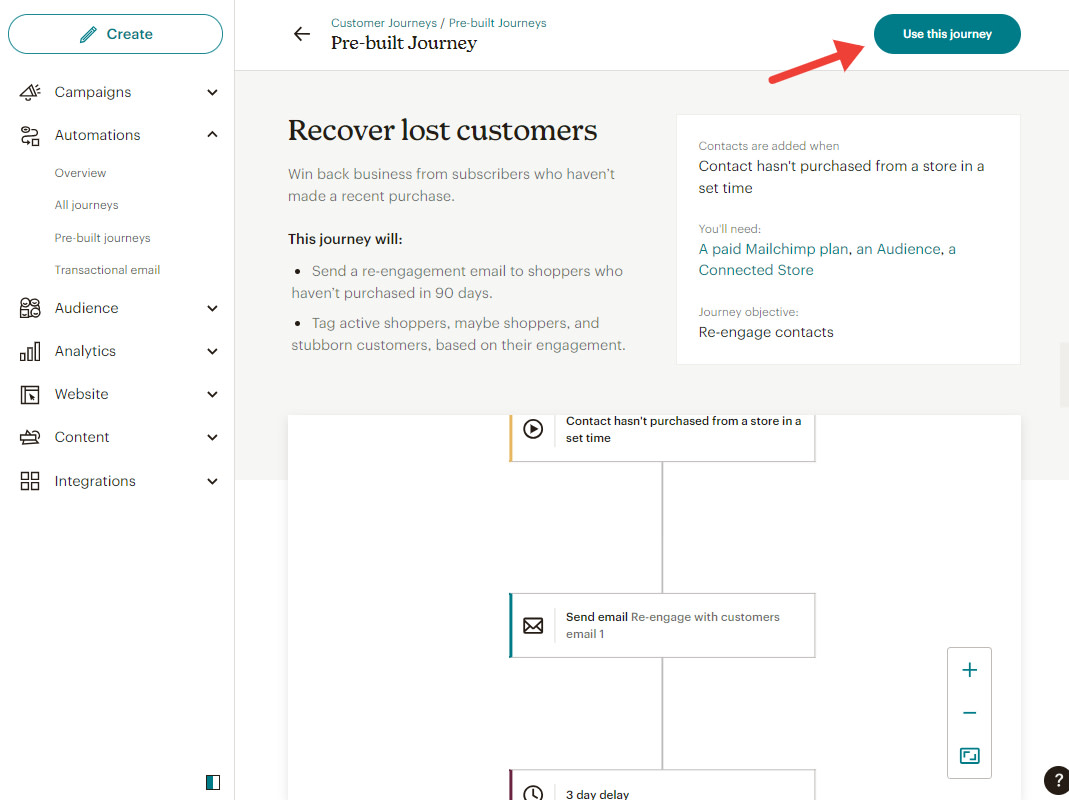
Once you've found the right pre-built campaign template, select it, and then click Use this Journey in the top-right corner. Mailchimp will walk you through the rest of the process.
How to send a customized automated email campaign in Mailchimp
If one of Mailchimp's pre-built campaigns doesn't meet your needs—and this is likely the case if you're sending a series of emails—you'll need to design yours from scratch. Here's how to get started:
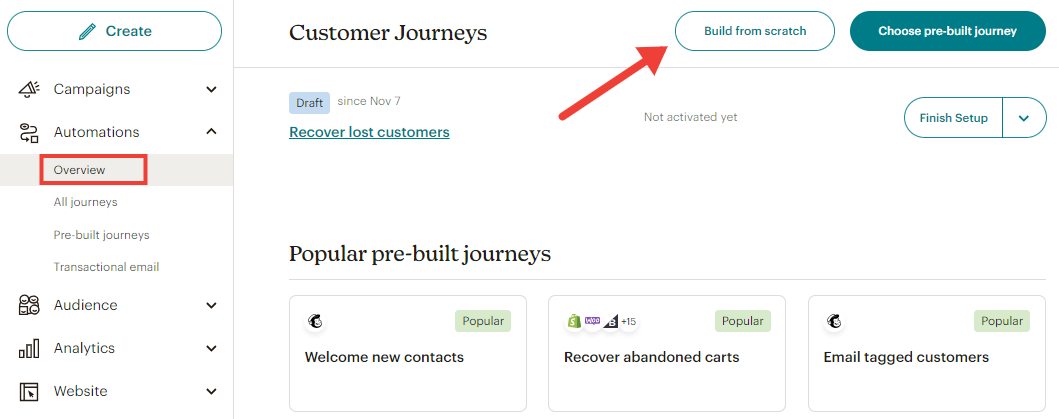
Select the Automations dropdown menu on the left side of Mailchimp's interface.
Click Overview.
Click the button that says Build from scratch.
Name your campaign
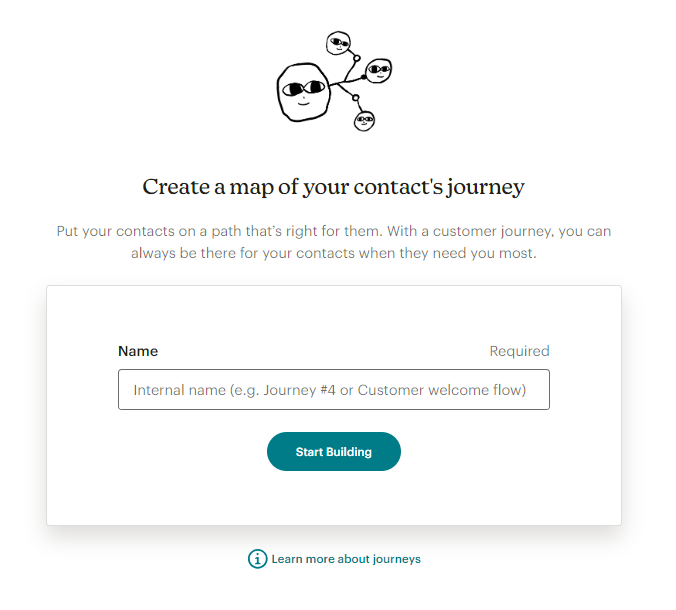
Now you'll name your automated campaign, and click Start Building.
Set your initial trigger
Every isolated email within an automated campaign has its own, separate trigger. The first trigger will kick off the campaign initially, with each corresponding trigger firing off the next email within the series.
Mailchimp provides default triggers, even in custom workflows. When building an automated campaign from scratch, you'll be prompted to choose your initial trigger after clicking Choose A Starting Point.
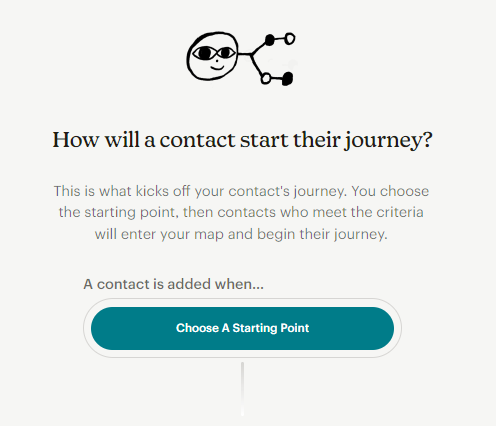
To guide you, Mailchimp presents a list of the most commonly-used triggers.
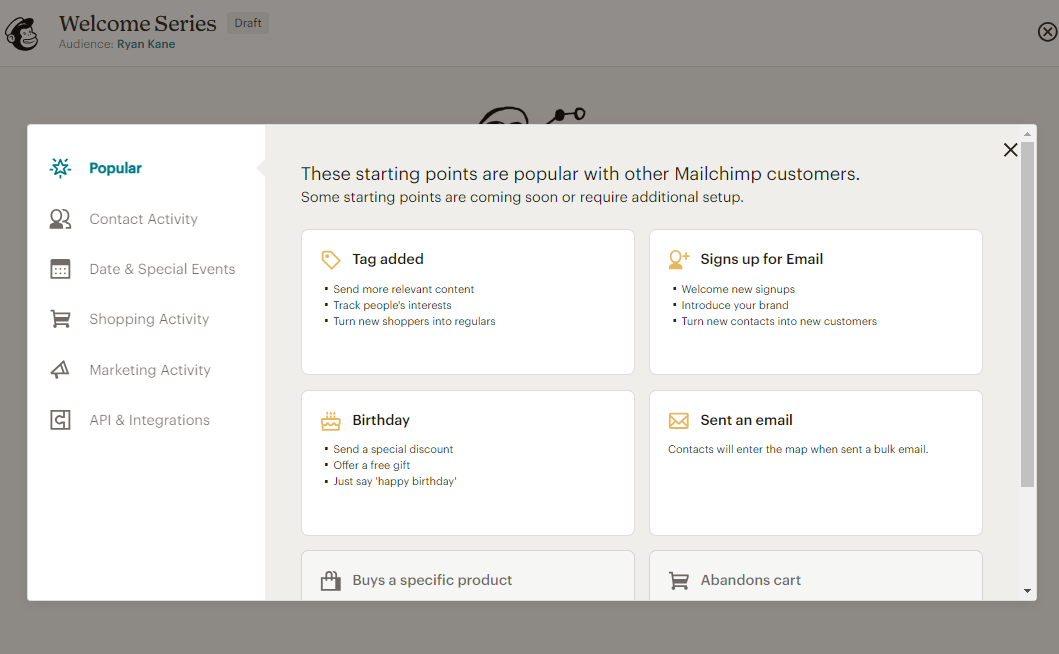
Select the trigger you'd like to use to kick off your campaign (i.e., what needs to happen for Mailchimp to send the first email in your workflow?). Your trigger can be based on a number of factors, including eCommerce activity (e.g., a subscriber makes a purchase), campaign activity (e.g., someone opens an email you sent previously), and list management (e.g., someone joins your list).
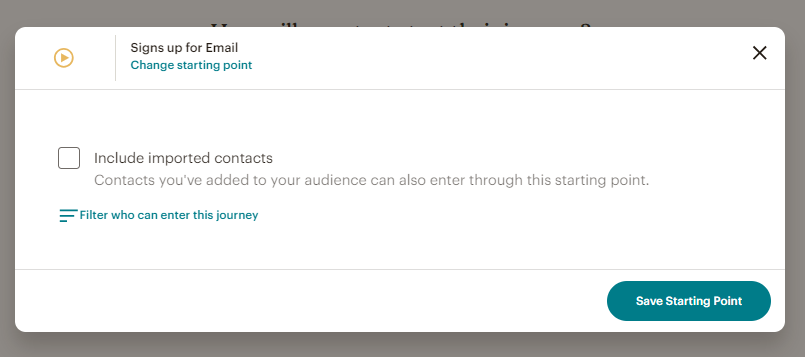
Once you select your trigger, click Save Starting Point in the bottom-right corner.
Update triggers for every email in your campaign
Since you've already selected your first trigger, your next step is to decide the action that comes next. To do so, select Add a journey point.
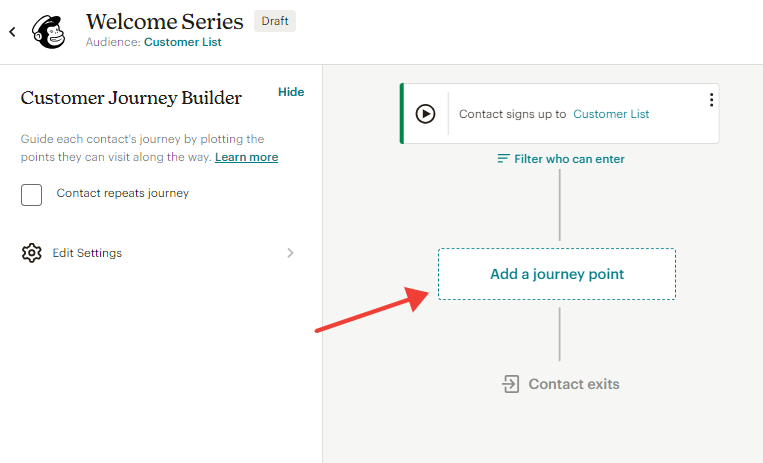
In Mailchimp's Customer Journey Builder, each journey point is a chance to choose from a set of rules and actions. Most likely, you'll want to click Send email at this stage—although you can also send an SMS, tag customers, send a survey, or create more complex rules.
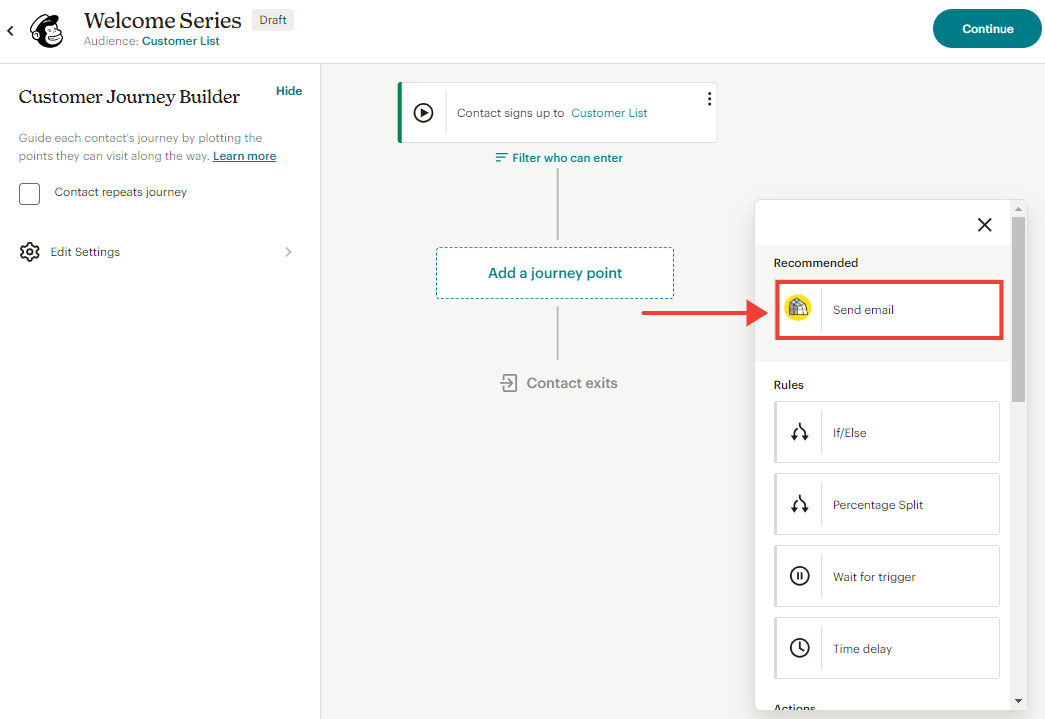
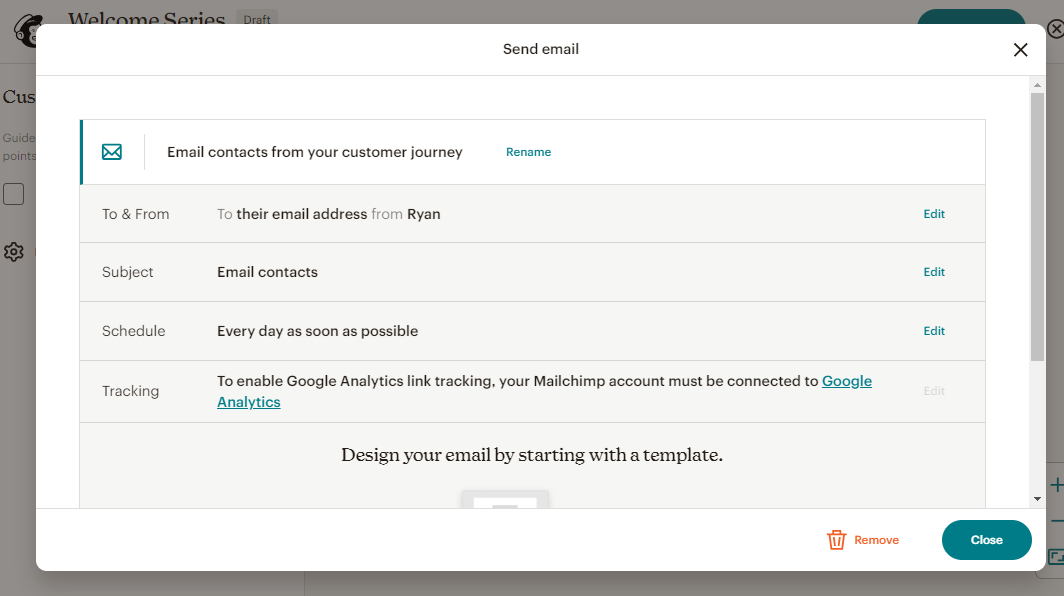
Clicking Send email will give you options to customize elements of your email, like its subject line and schedule. You can also design your email here—we'll cover that in the next section. For now, click Close to return to your email sequence.
At this stage, you've got a full (albeit short) email sequence: your initial trigger is followed by an action, after which your contact exits the sequence.
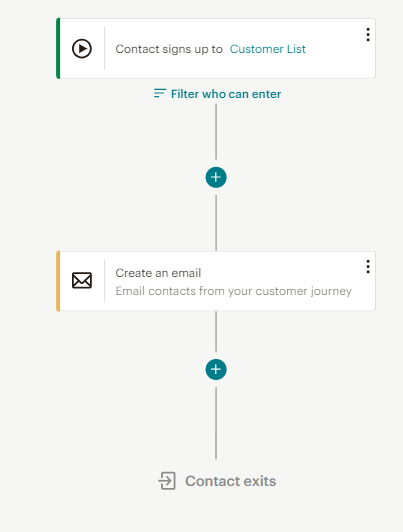
The next step is to add every email you want within your campaign and set triggers for each. (If you only want to send one automated email, skip this step.)
Set the trigger for your second email by selecting Add a journey point, and repeat the process from the first trigger.
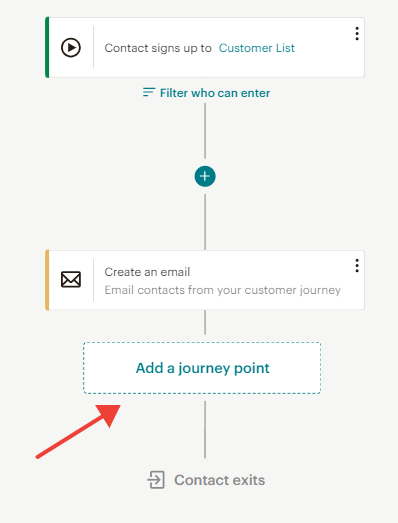
Each following email in the workflow will be based on the previous email, or the subscriber's interaction with the previous email. For example, you could trigger the second email to send one day after the previous email was sent, or you could trigger it to send one day after the previous email was opened.
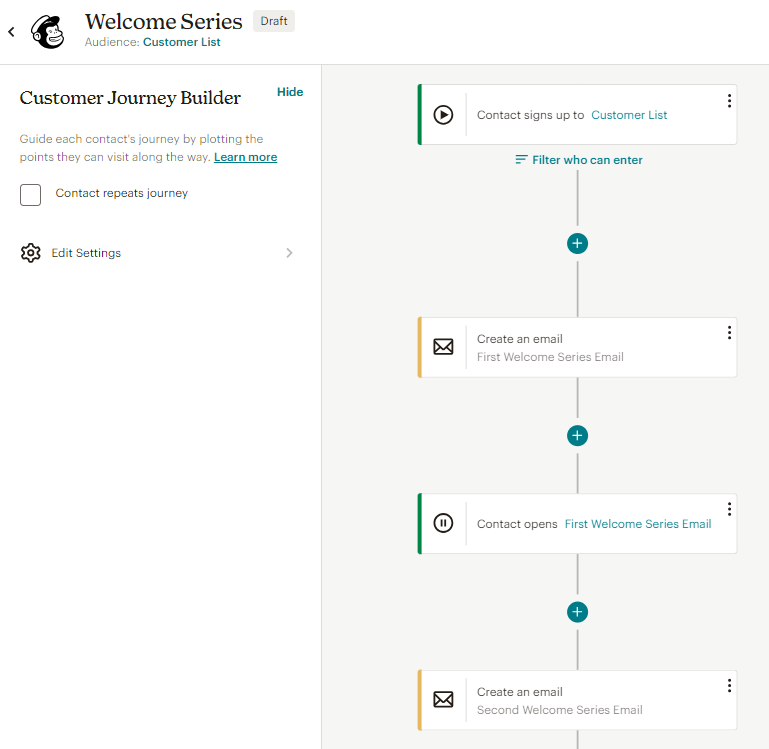
Here's what my customized email automation looks like so far:
Set your schedule
Before we dive into scheduling, it's important to understand the difference between schedules and triggers. A trigger is what fires off an automated email in the first place (and every other email in the workflow). A schedule, on the other hand, will limit an email send to particular days or times of day. For example, if you set your schedule to exclude weekends, an email that is triggered to send on Saturday will not be sent to the subscriber until Monday.
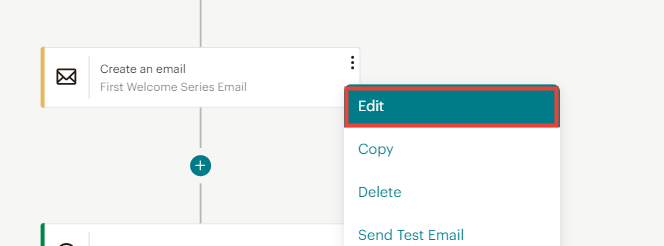
To set your schedule, click the three dots to the right of the first email of your workflow, then click Edit.
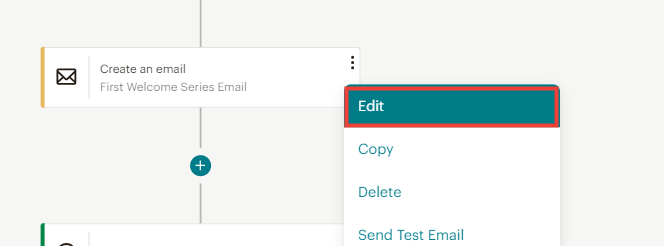
In the row that says Schedule, click Edit. Then select which days of the week you would like the first email to send, and whether you would like to send the email at specific times.
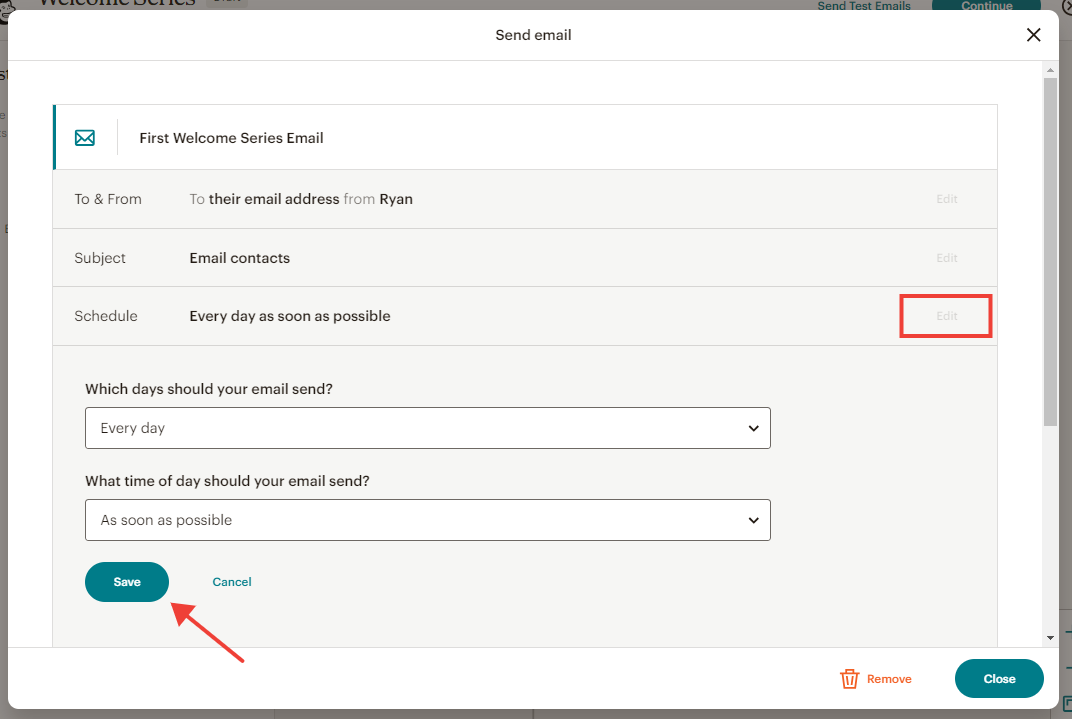
Click Save in the bottom-left corner, and repeat the process for the rest of the emails in your workflow.
Filter by segment
Rarely will you want to send an automated campaign to your entire list. Why? Because your customers probably get a hundred different email messages in their inbox on any given day. They will only open (let alone click on) what's relevant—which a blast to your entire list is not.
Your segments can be as specific or generic as you want them to be, but it's important to keep them up to date.
To select your segment, click Filter who can enter underneath your first trigger.
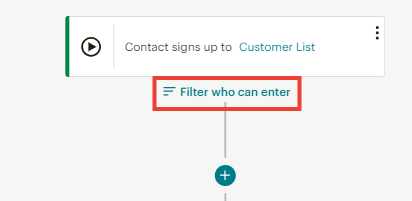
Then, choose an existing segment or click Add filter to create a new one.
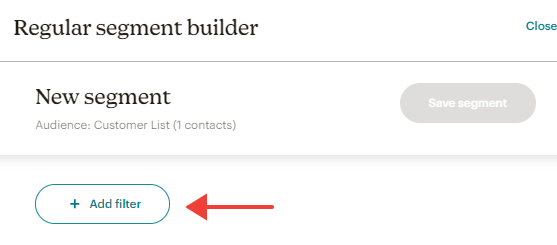
You'll be presented with filtering options, including demographic details, engagement history, and customer behavior.
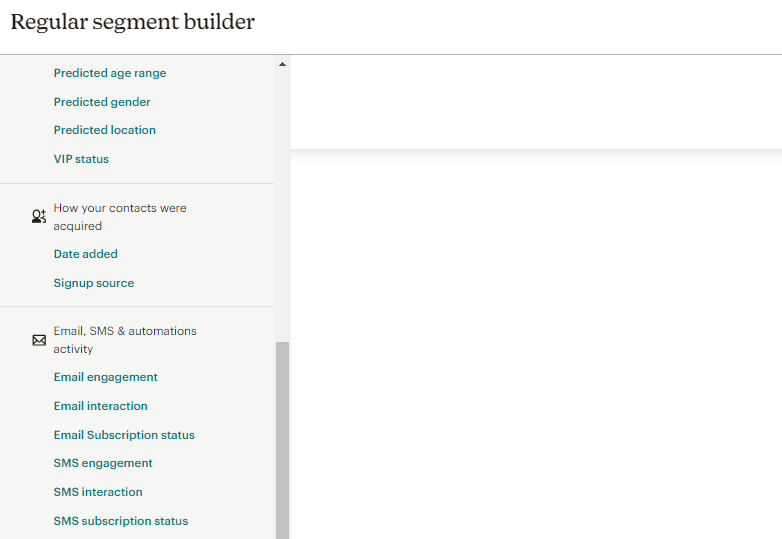
Since I'm creating a welcome series in this example, I'm going to filter by Signup source. Once you choose your filtering option, select the parameters you want to use, and click Save segment. Now, only subscribers who meet these criteria will be allowed into the automation.

Add tags and other journey points
So far, we've explored adding triggers and emails. But Mailchimp's journey points can also be used to change how a subscriber is organized within your list. You can populate a field, add a tag, or delete them from the list entirely.
When would you use this? It depends on the type of automated series. For example, if you sent out an autoresponder thanking customers for attending your free book signing, maybe you want to retain this information in your list. To do this, you could add a tag to all event attendees.
To add tags and build other actions into your email automation, click Add a journey point within your workflow, then select your desired action from the dropdown list.
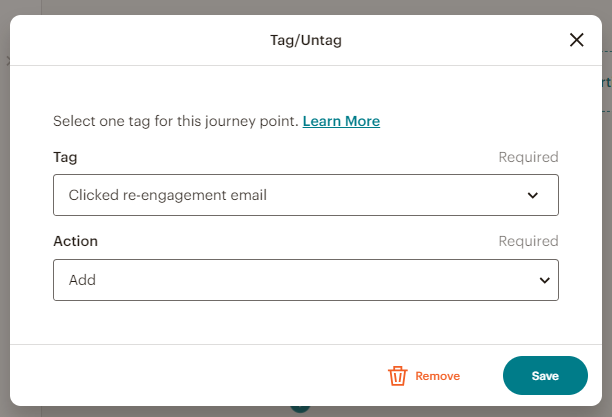
Click Save to preserve your changes, and repeat the process for any additional actions you want to add to your workflow.
How to design an automated email in Mailchimp
Now it's time for the fun part: designing your email. How you choose to design your email comes down to you, your brand, and your connection with your audience. If your following would respond better to a simple, text-based email, do that. If they enjoy photos, colors, and product features, you can include those through Mailchimp's easy, drag-and-drop email builder.
To design each email in your workflow, click the three dots to the right of the email, then click Edit.
If you haven't already, give your email a name and subject line, and specify who the email is coming from.
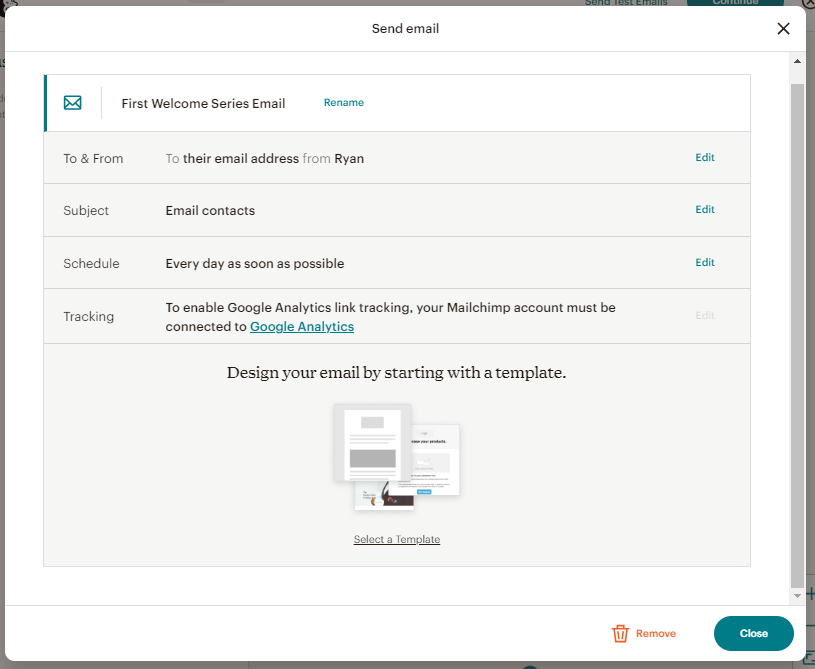
At the bottom of this screen, click Select a Template.

Then, select a pre-built template from one of Mailchimp's professionally designed options.
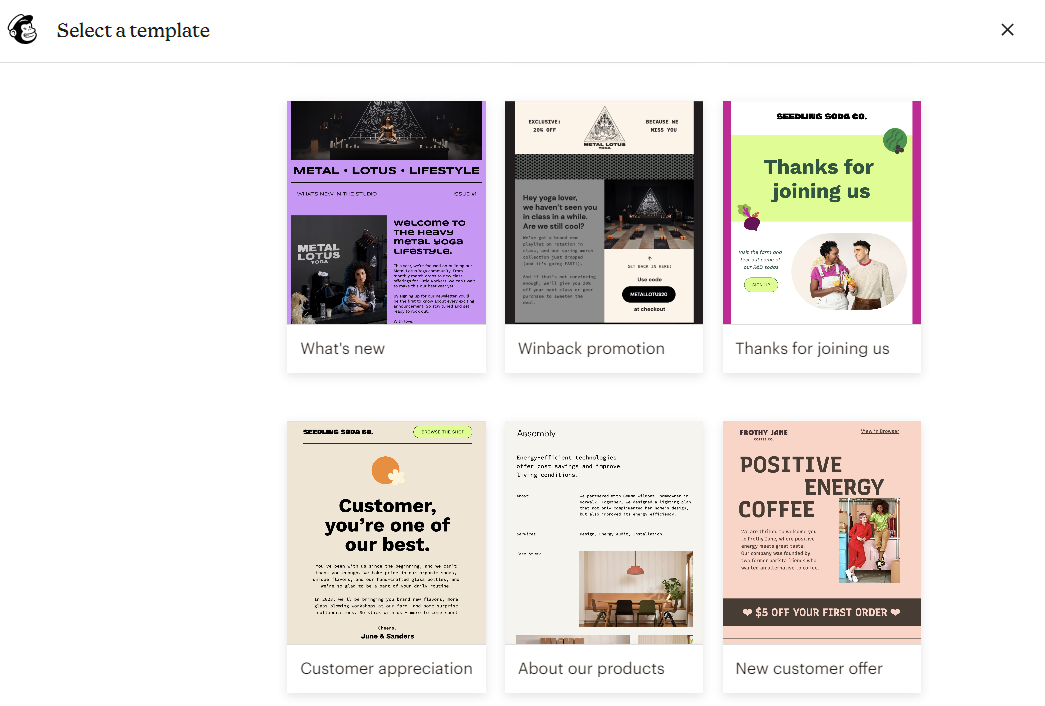
Hover over the design you'd like, and click Apply. Then use Mailchimp's drag-and-drop builder to swap out elements, change colors, and add text. When you're done, click Save and return to journey.
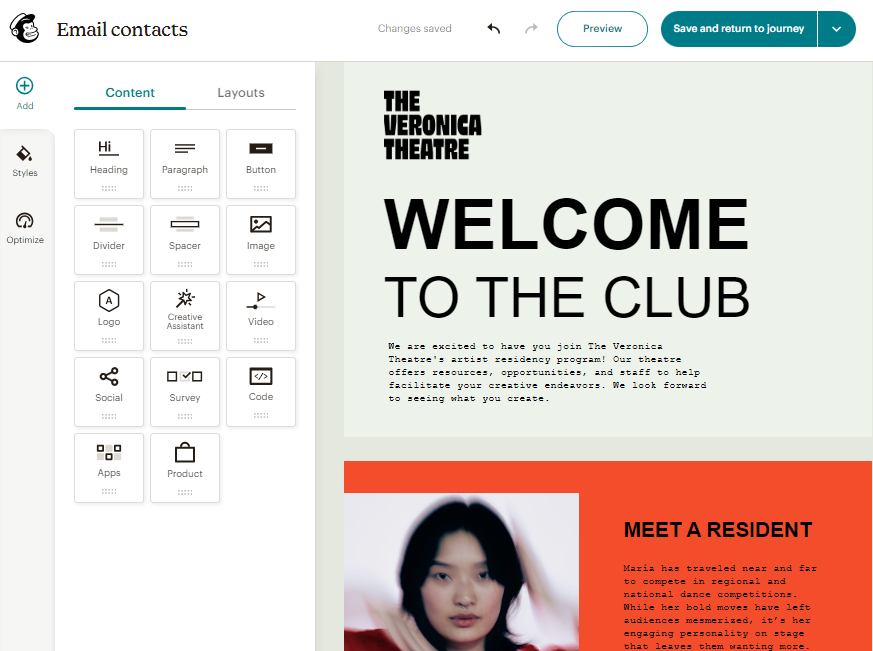
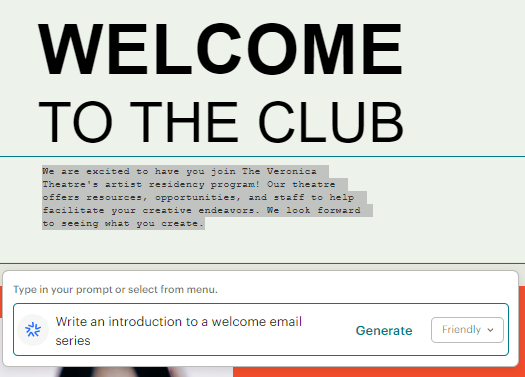
To speed up the design process, you can use Mailchimp's Intuit Assist generative AI tool to instantly generate text.
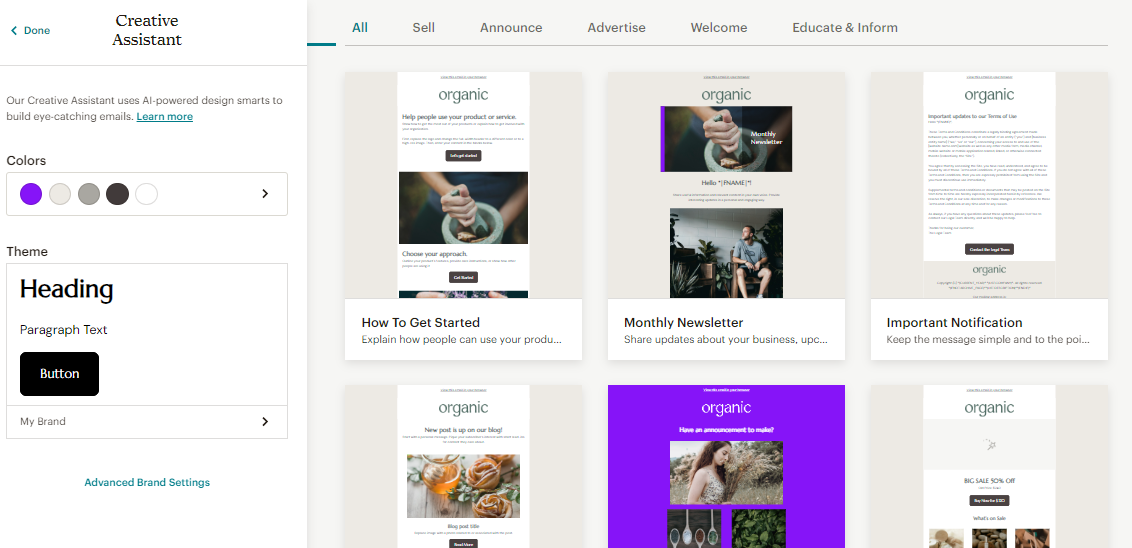
If you'd rather not use a pre-designed template, you can also choose to start from scratch or use Mailchimp's AI-powered Creative Assistant tool.
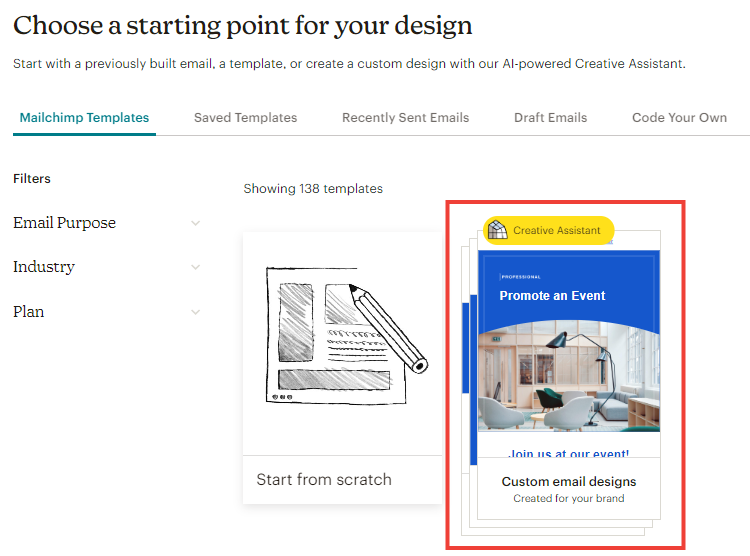
Creative Assistant references your Mailchimp profile to generate unique email designs that are consistent with your brand. You can also tweak colors, themes, and fonts from the Creative Assistant interface.
How to analyze your automated email campaign data in Mailchimp
Unlike one-off emails, an automated campaign might run for an extended period of time—even for the entire lifetime of your business. But that doesn't mean you should set it and forget it. You should be taking a look at what's working and what's not, so you can refine your workflows.
Mailchimp's ready-made reports make interpreting your data pretty simple.
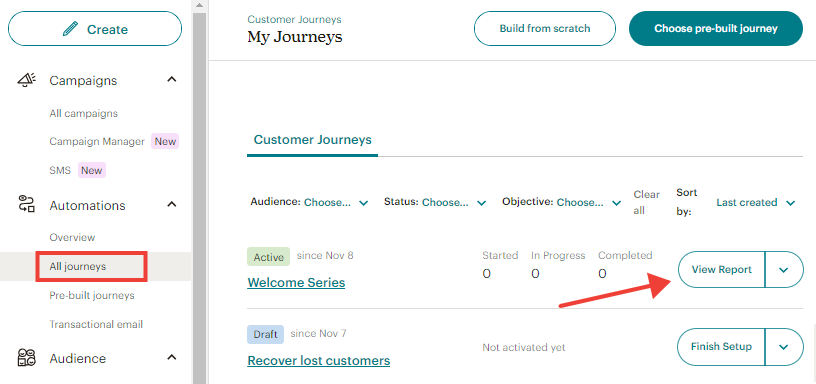
To navigate to your campaign's report, click the Automations dropdown in Mailchimp's menu, then select All journeys. Next to the campaign you'd like to analyze, click View Report.
Scroll down to view information about the open rate, click rate, and unsubscribes from your campaign.
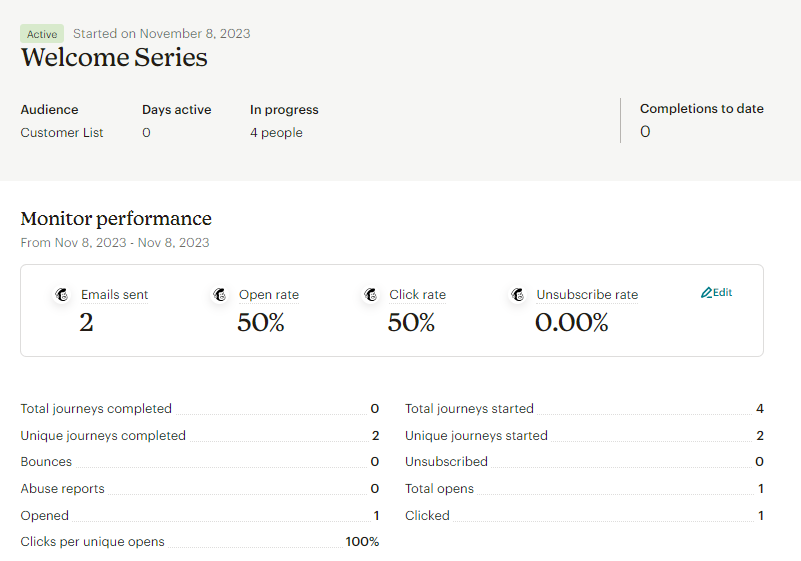
Open rate: This is the percentage of people who opened your email once it reached their inbox.
Click rate: This is the percentage of people that clicked on your email (implying that there was something in your email that drew them in).
Unsubscribed: This is the number of people who opted out of your list after receiving your email.
Mailchimp makes note of your list average and industry average for each of these, giving you a frame of reference.
To improve these statistics, you can try a few email marketing best practices. If you have a low open rate, try a new subject line to increase interest. If your click rate is low, your email might be too long or cluttered, distracting people from moving on to your website, or your calls to action (CTAs) may not be strong enough. Or maybe the subject matter simply doesn't interest them, in which case you need to reconsider how you segment your list.
Connect Mailchimp to other apps
Mailchimp offers lots of native integrations, but with Zapier's Mailchimp integration, you can extend Mailchimp's email automation capacities, connecting it to thousands of other apps. Learn more about how to automate Mailchimp, or get started with one of these pre-made workflows.
Subscribe new Facebook Lead Ad leads to a Mailchimp list
Create Mailchimp subscribers from new Typeform responses
Add subscribers to Mailchimp for new Google Sheets rows
Zapier is the leader in workflow automation—integrating with 6,000+ apps from partners like Google, Salesforce, and Microsoft. Use interfaces, data tables, and logic to build secure, automated systems for your business-critical workflows across your organization's technology stack. Learn more.
By setting up automated campaigns from the get-go, you'll save yourself time down the road—and ideally delight your customers with personalized, timely messages.
Related reading:
This article was originally published in February 2019 by Kara McCartney. The most recent update was in November 2023.
