New for Unbounce: Automate Lead Generation with Unbounce's In-App Zapier Integration

Unbounce is a favorite of digital marketers: they use it to easily set up landing pages, website overlays and sticky bars within minutes. Today, Zapier is excited to announce a new way for marketers to use Unbounce with Zapier: Zapier is now a built-in integration within Unbounce's platform. This new integration experience allows you to connect your Unbounce landing pages, overlays and sticky bars to over 60+ without ever leaving Unbounce, and access to over 900+ apps in Zapier.
With Zapier now accessible within Unbounce, you can quickly create Unbounce Zaps to automate your repetitive workflows. Build Zaps to take care of tedious, yet important, tasks such as these:
No matter what your workflow is, you can set up simple Zaps to automate it with Unbounce + Zapier. It's especially helpful when improving your lead generation workflows. Zoe Tattersall, co-founder at The Complete Detox Cleanse Nourish, uses Zaps to connect Unbounce to tools such as Google Sheets, Gmail, and Facebook. Now she can set up and manage those Zaps without having to navigate away from Unbounce.
“I use Zapier and Unbounce to automate our client nurture flows and to manage lead distribution to our global team," Tattersall says. "I really love that I can now see Zaps on my Unbounce pages. It’s so much easier to keep track of my integrations."
How to Instantly Connect to Apps within Unbounce Using Zapier
1. Log into Unbounce
Log into Unbounce and navigate to one of your pages. Scroll down until you see the Integrations section.
2. Choose Your Integration and Create a Zapier Account
Choose one of the integrations marked as "Powered by Zapier". Once you click, you'll see a pop-up that navigates you to Zapier. If you haven't created a Zapier account yet, you can do so now.
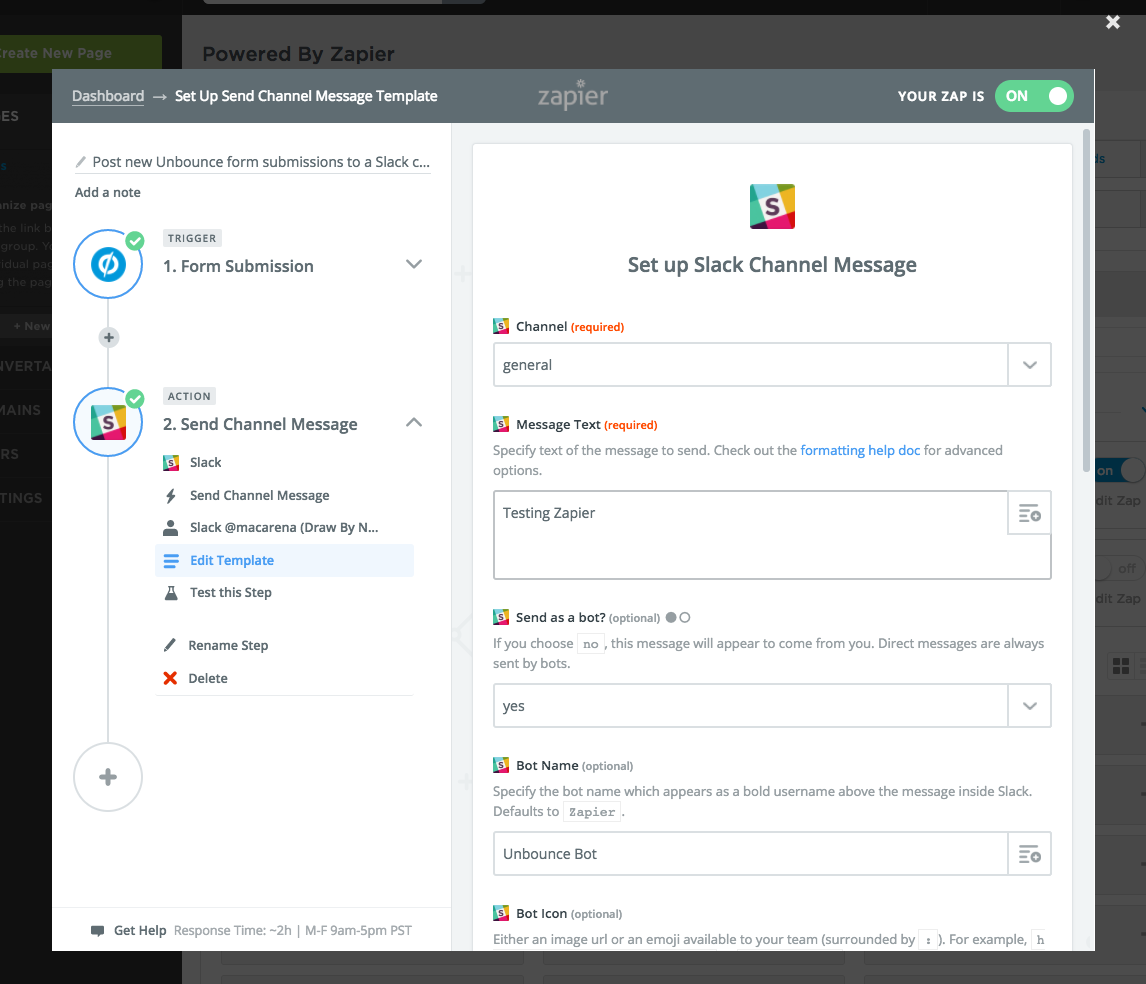
For example, let's click on Slack. You will be see a pre-built Zapier integration between Unbounce and Slack appear. Click "Create this Zap" and follow the steps.
3. Customize Your Unbounce Zap
Follow the prompts to create your Zap. You will notice that a lot of your Unbounce information is already filled in for you, so you can simply click "Continue".
Don't forget to turn your Zap to "on" after you've finished customizing it.
5. Sit Back As Your Unbounce Zap Does the Work
Once your Unbounce Zap is turned on, you will see it appear in the "Zaps Turned On" section of your Zapier pop-up within Unbounce. At any time, you can click on that Zap to edit it or turn it off. If you ever turn off your Zap, you can find it again in the "Zaps Turned Off" section of the Zapier pop-up. Now you all need to do is sit back as automation does all the heavy lifting for you!