Try Using Google Sheets with Zapier Filters: Surface the Information You Need

Google Sheets' familiar interface makes it easy for teams to build powerful spreadsheets without the fuss. Once connected to Zapier, Google Sheets can trigger actions in 1,000+ apps, making it possible to use it as a simple CRM, dynamic to-do list for your team, and much more.
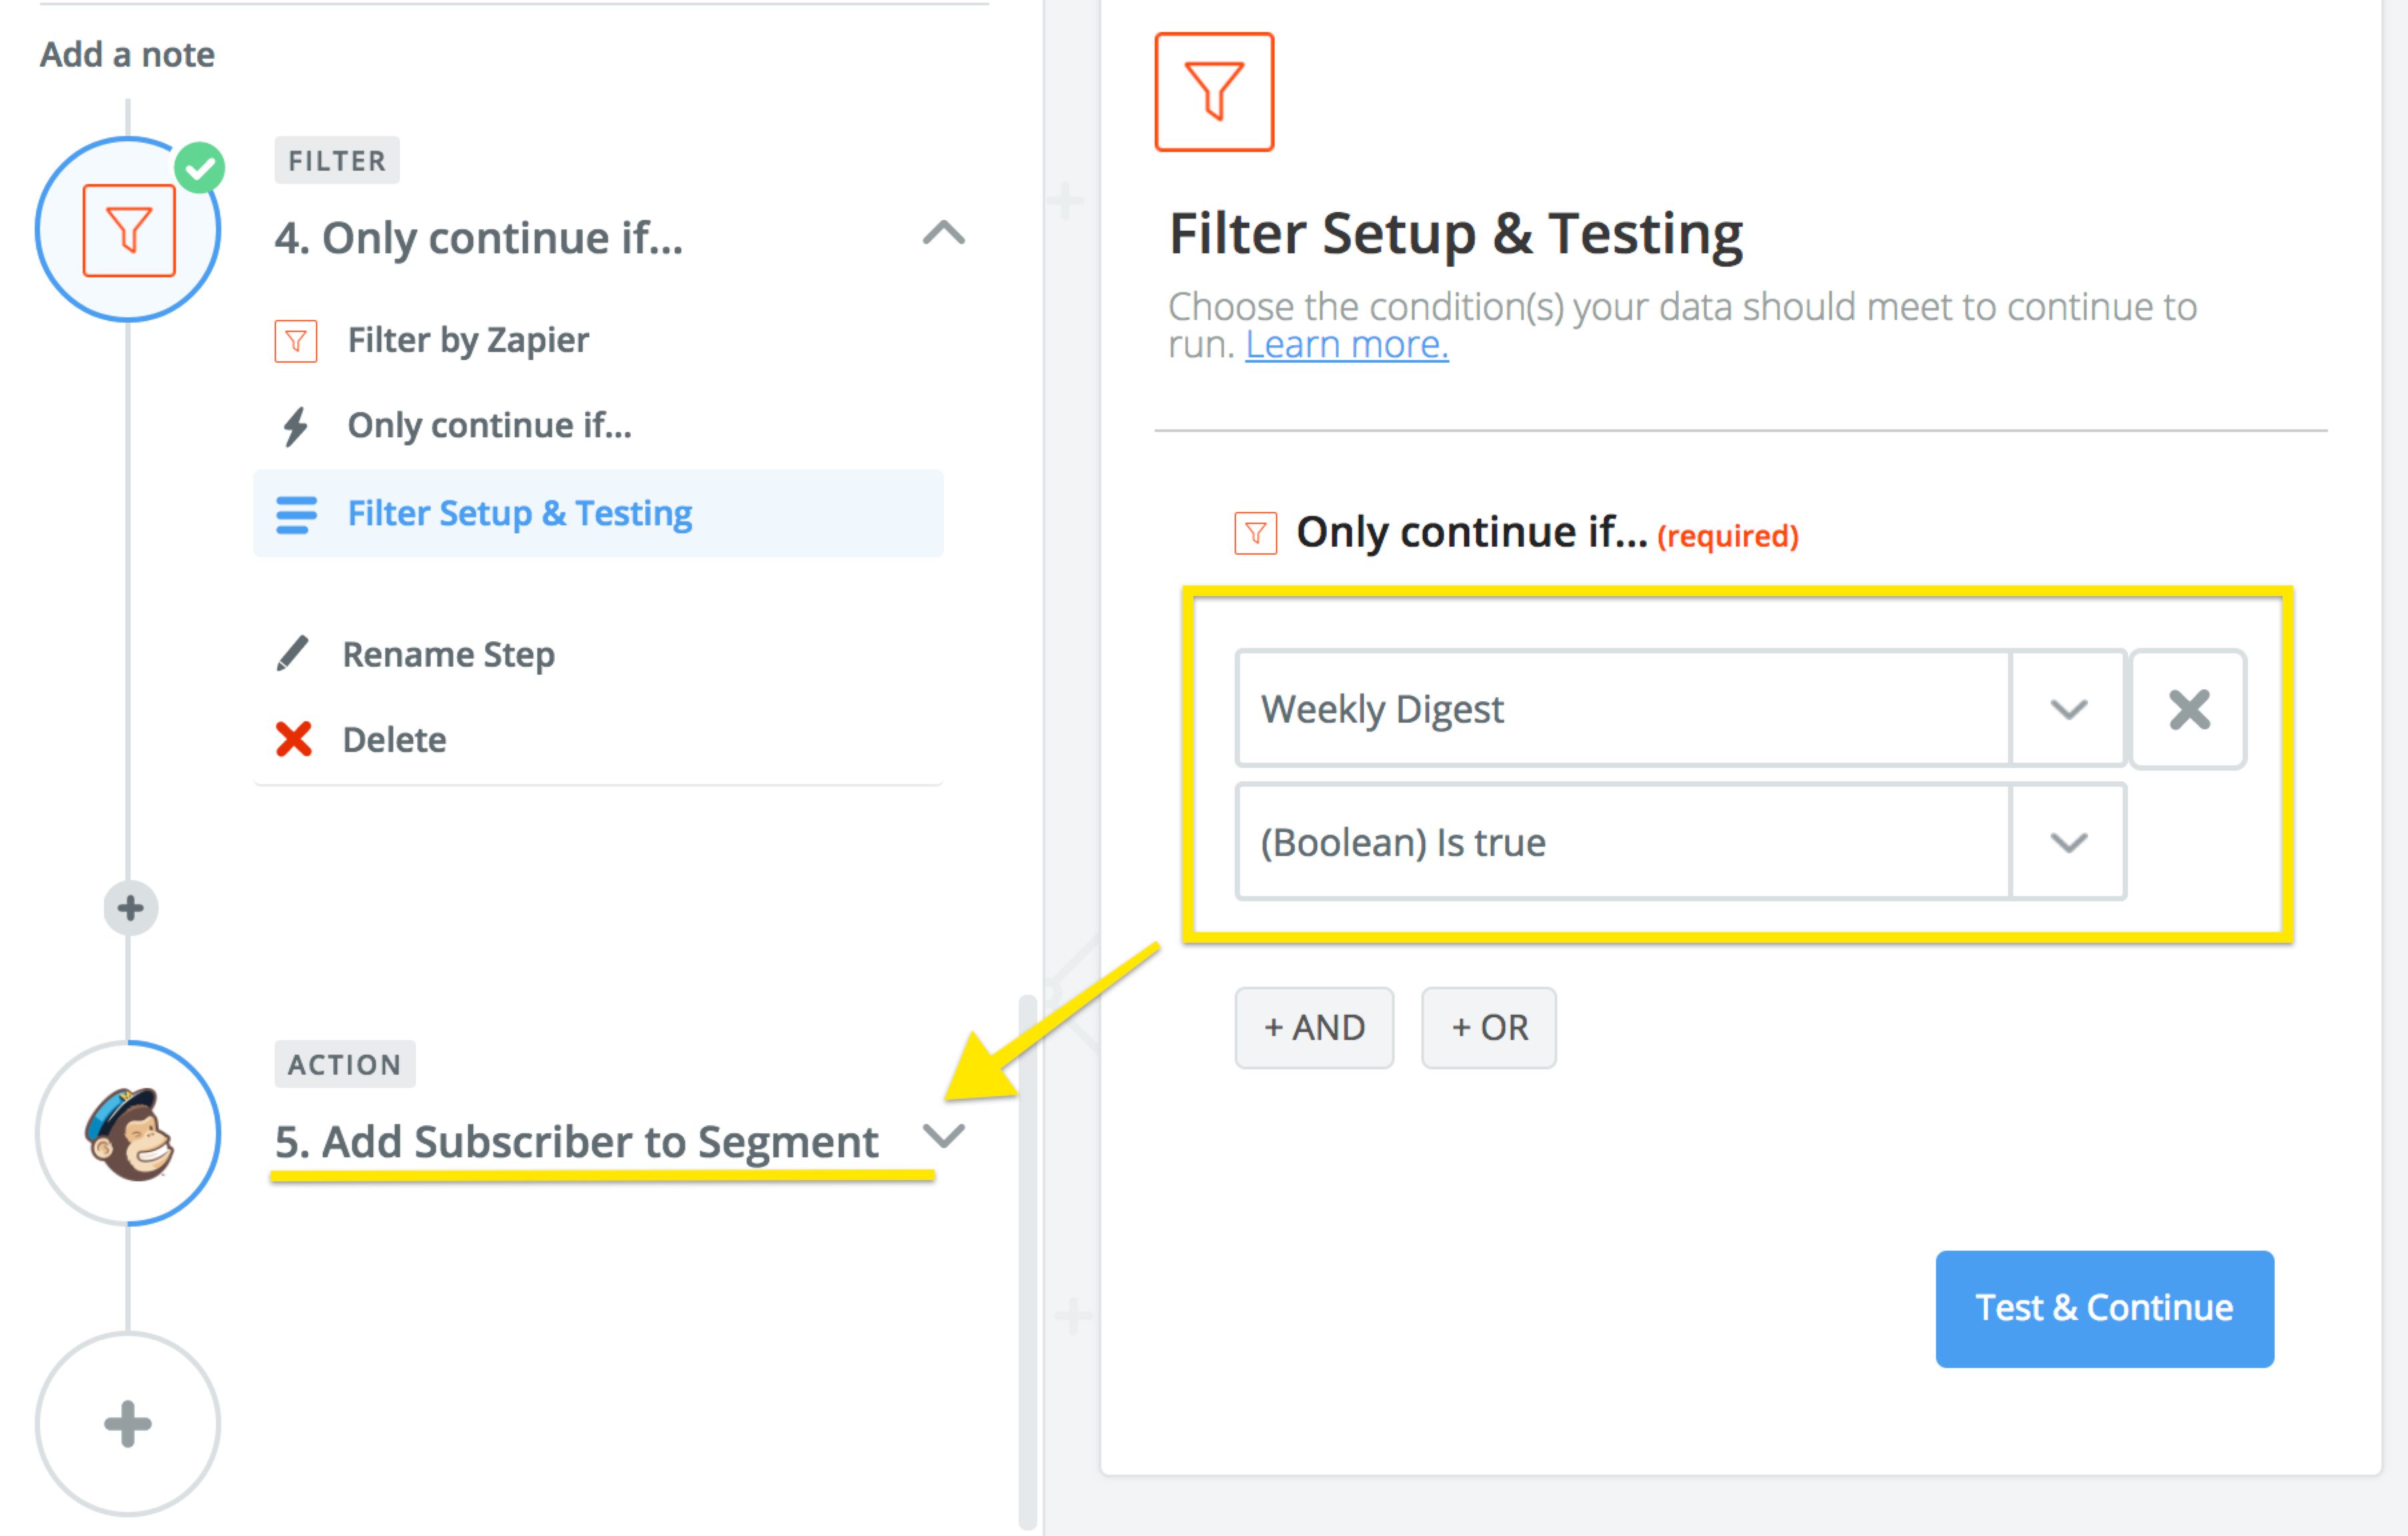
Don’t stop there! Your automation can do more. Add filters to your Zaps and automatically surface information you’re looking for or trigger actions at a specific time. Filters tell Zaps if and when they should run. Here are a few popular use cases for Google Sheets with Zapier filters:
- Send an email when a new row is added to Google Sheets, but only if certain column is filled out.
- Automatically copy an entry to another Google Sheet when a column contains specific text.
- Add a Trello Card when a row is updated in Google Sheet if it contains a certain label.
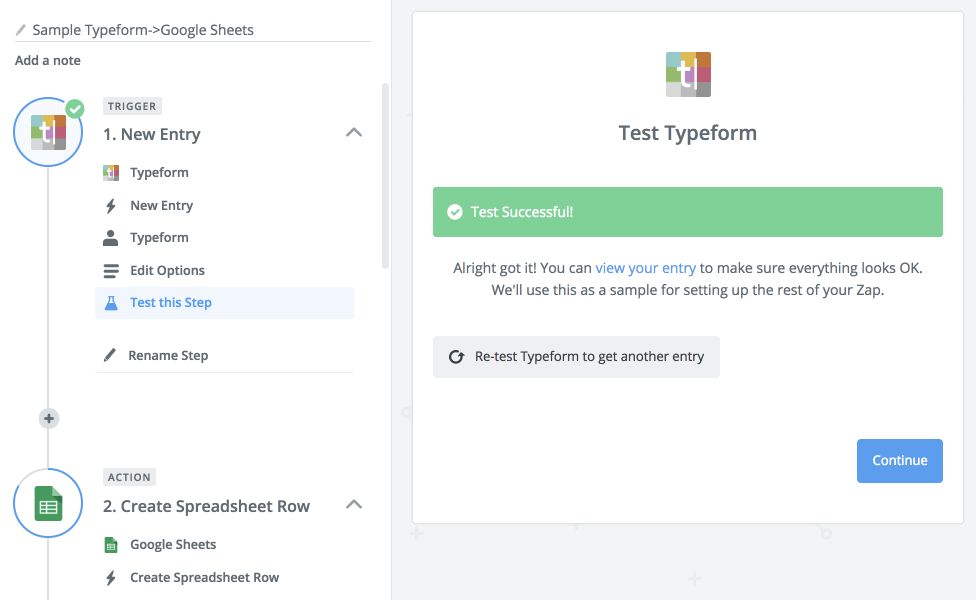
Imagine you’re a real estate agent and have a Zap that creates a Google Sheets row whenever a Typeform survey is filled out. Add a filter to look for a specific answer to a survey question and record it in a different sheet. For example, we can filter by services a potential customer is looking for.
- Filling out a Typeform with the following question triggers a Zap.

2. Add a filter to the Zap to look for relevant information.
3. The Zap action will automatically organize information in a separate sheet so your team knows exactly who to reach out to without sifting through each name.
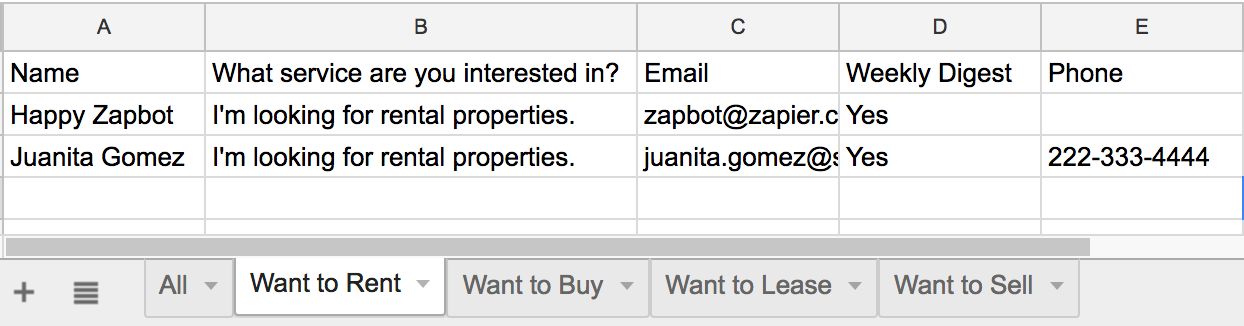
Take the example above: after your Google Sheet is updated, you can send out customized email responses by service type or subscribe customers to a relevant newsletter list in MailChimp.
Try adding filters to your Google Sheets Zap now and gain more control over when and which information is moved to your favorite apps.
How to Automate Google Sheets with Filters by Zapier
- Make sure you have a Zapier account and a Trello account.
- Pick a Google Sheets automation template or create a Zap from scratch.
- Select a trigger for your Zap.
- Set up a filter to check for specific information or timing.
- Select an action and turn on your Zap.