Google Sheets is the king of databases. From storing leads to tracking new customers, it's become a hotspot for gathering important company information.
Making sure that data gets transferred—reliably—into a CRM tool like Salesforce in real-time helps push prospects through the lead cycle faster, as sales teams can take immediate action. That's why you should think about connecting Salesforce with Google Sheets so you can easily manage the data transfer between them.
In this article, I'll show you how to set up a Google Sheets Salesforce integration so you can automatically create a record in Salesforce every time a new row is added to Google Sheets. I'll first cover how to do this with the Salesforce Data Loader and the Google Cloud Connector. Then, I'll show you how to do it the easy way—by automating it with Zapier.
Zapier is the leader in workflow automation—integrating with 6,000+ apps from partners like Google, Salesforce, and Microsoft. Use interfaces, data tables, and logic to build secure, automated systems for your business-critical workflows across your organization's technology stack. Learn more.
Table of contents
How to use the Salesforce Data Loader
Salesforce Data Loader is a tool approved by Salesforce, designed to handle large data transactions (mainly the import and export of records) using CSV files. It facilitates various operations such as inserting, updating, deleting, or exporting records within Salesforce from other tools.
Here are some step-by-step instructions for setting it up:
Click the settings icon in the top right of your Salesforce page and select Set up.
Search for "Data Loader" in the Setup Quick Find bar and click Download—then follow the instructions.
Install the latest version of Azul Zulu and follow the instructions.
Next, install Data Loader as a Zip file and move all the contents to a new file.
Double-click on the Data Loader file and click Run.
Once the data loader opens, select Insert.
You'll be prompted to log into your Salesforce account and allow access to Data Loader.
Click Next and select the record (your CSV file). You'll want to download your Google Sheet as a CSV file for this to work.
Click Next and map your CSV columns to the right Salesforce fields.
Finally, create a new folder (or directory) for your files.
How to use the Google Cloud Connector for Salesforce
Another way of integrating Salesforce with Google Sheets is by using the Google Cloud Connector. This add-on allows you to pass data from Google Sheets (and other Google applications) directly into Salesforce.
With it, you can import, add, update, and delete Salesforce data based on any updates made to Google Sheets. Here's how you can set it up:
Open the Google Sheet you'd like to use.
Click Extensions > Add-ons > Get add-ons.
Search for and select Salesforce Connector.
Click Install, then Continue.
Allow the add-on access to your Salesforce account, then click Done.
Once you've installed the add-on, you'll just need to give your Salesforce account access so you can start moving your data. To do this, head back into your Google Sheet and follow these steps:
Click Extensions and open up Salesforce Connector.
In the pop-up window, click Authorize, then Allow.
You can now select different options within your add-on, like moving your Google Sheets data into Salesforce or adding Salesforce data to a Google Sheet.
Why you should use Zapier instead
While you can use the above options to connect Salesforce with Google Sheets, there are quite a few limitations when it comes to flexibility and data size.
For example, the Salesforce Data Loader doesn't allow you to automatically sync data on a recurring basis. And, as a developer tool, it's not as user-friendly as other options. While the Google Cloud Connector does allow you to schedule data transfers, it has a limited set of interval options. Plus, it can routinely run into errors when transferring large amounts of data.
Building an automation with Zapier, on the other hand, allows you to transfer your Google Sheets data straight to Salesforce (and vice-versa) automatically. You can transfer the data in real time and schedule recurring transfers (as many as you like), all without using code.
Plus, Zapier connects with thousands of apps, offering a comprehensive solution for diverse, custom needs across multiple platforms.
Time-saving ways to connect Google Sheets with Salesforce
There are plenty of ways to integrate Google Sheets and Salesforce. If there's a tedious, manual task you do every day (like adding leads to Salesforce from new rows in Google Sheets), you can easily automate it to eliminate the busywork. Here are some of the most popular ways to automate Google Sheets and Salesforce:
To get started with a Zap template—what we call our pre-made workflows—just click on the button. It only takes a few minutes to set up. You can read more about setting up Zaps here.
Send lead data to Salesforce from Google Sheets
While generating leads and storing them in Google Sheets is its own battle, making sure your prospects end up in Salesforce is a pretty important step. After all, you don't want anyone falling through the cracks.
But manually downloading their information, reformatting it, then uploading it into Salesforce from Google Sheets doesn't just waste time—it also invites human error into the mix. And you can forget about transferring heaps of data at scale.
Instead, you can use these Zaps to automatically transfer your Google Sheets data over to Salesforce in real time—either by creating a new record or updating an existing one—the moment a new row in Google Sheets is created.
Add leads to Salesforce from new rows on Google Sheets
Create custom Salesforce objects from new rows on Google Sheets
Update Salesforce custom objects from new Google Sheets rows
On the other hand, you might also want to log your Salesforce data in Google Sheets. Keeping an up-to-date lead system across both apps means anyone within your organization can access the most current lead information, whether they prefer working within Salesforce or Google Sheets.
These Zaps can greatly enhance collaboration and efficiency within your team, ensuring that everyone is on the same page when it comes to managing leads and sales opportunities:
Create rows on Google Sheets spreadsheets for new Salesforce opportunities
Create Google Sheets spreadsheet rows from new Salesforce custom objects
How to integrate Google Sheets with Salesforce
Now, let's walk through the process of integrating Google Sheets with Salesforce using Zapier. In this case, we'll focus on one specific workflow—adding leads to Salesforce from new rows on Google Sheets.
But remember, there are various ways to connect these two apps based on your specific needs and goals.
Before you begin
Before you create a Zap that integrates Google Sheets with Salesforce, you'll need to create a Zapier account if you don't have one already. Don't worry, creating an account is easy and free. Just head right here. You'll also need a Google account and a Salesforce account. Once you're signed in, you can create new Zaps using the Create Zap button or by going to zap.new.
Salesforce is a premium app—available on Zapier's paid plans. Learn more about premium apps.
Set up your Google Sheets trigger
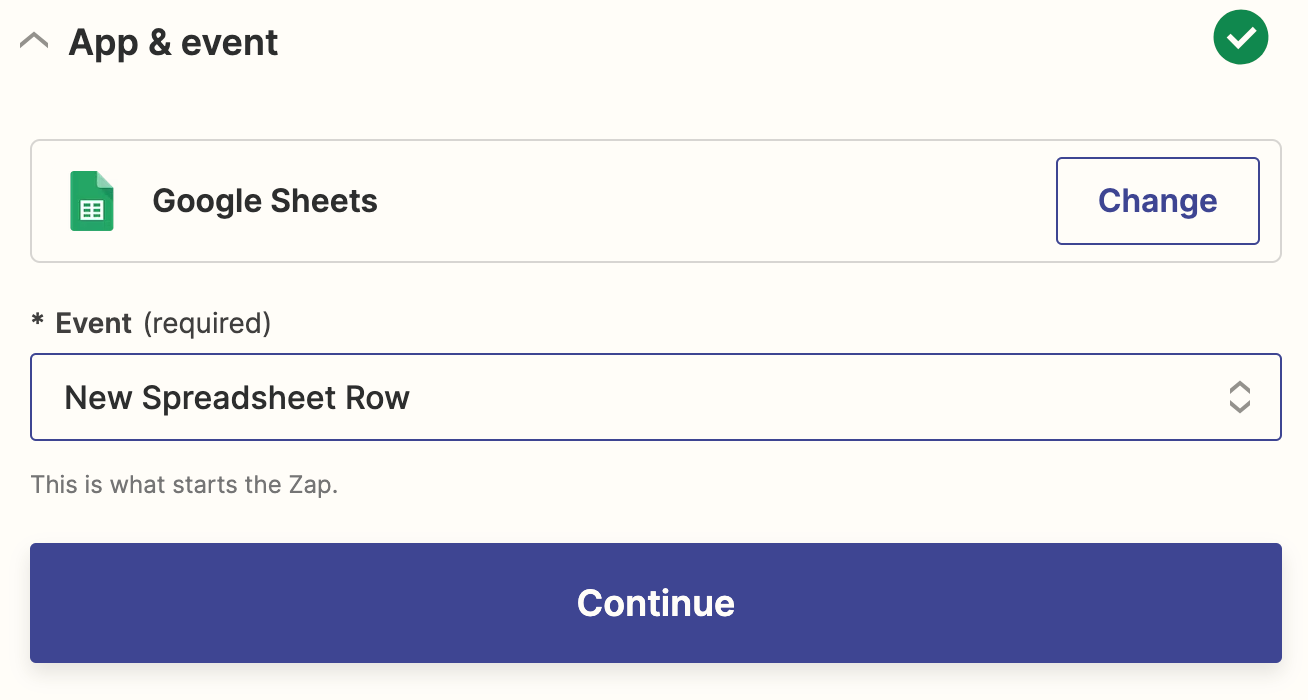
Once you're in the Zap editor, you'll first need to create the trigger, which is the event that will kick off your Zap. Search for and select Google Sheets as the trigger app and New Spreadsheet Row as the trigger event. Click Continue.
Next, connect your Google Sheets account to Zapier if you haven't already. Click Continue.
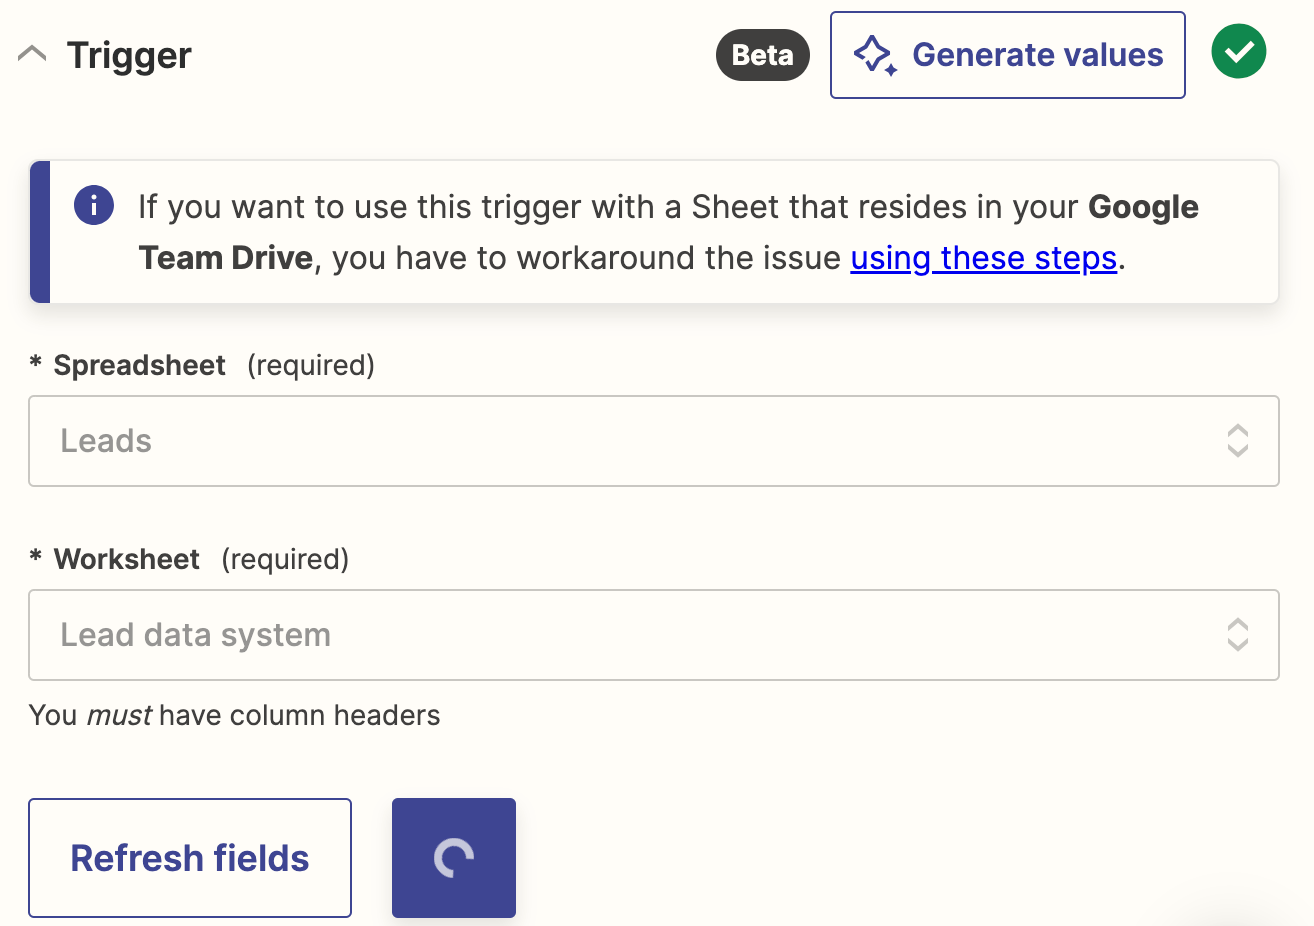
Now, select the spreadsheet and specific worksheet you'd like to use. In my case, I'll select the spreadsheet I've set up to store all my leads.
Click Continue.
Next, test your trigger. Zapier will look for a recent spreadsheet row in your Google Sheet, according to how you set up your trigger earlier. You'll use whatever Zapier finds to set up the rest of your Zap.
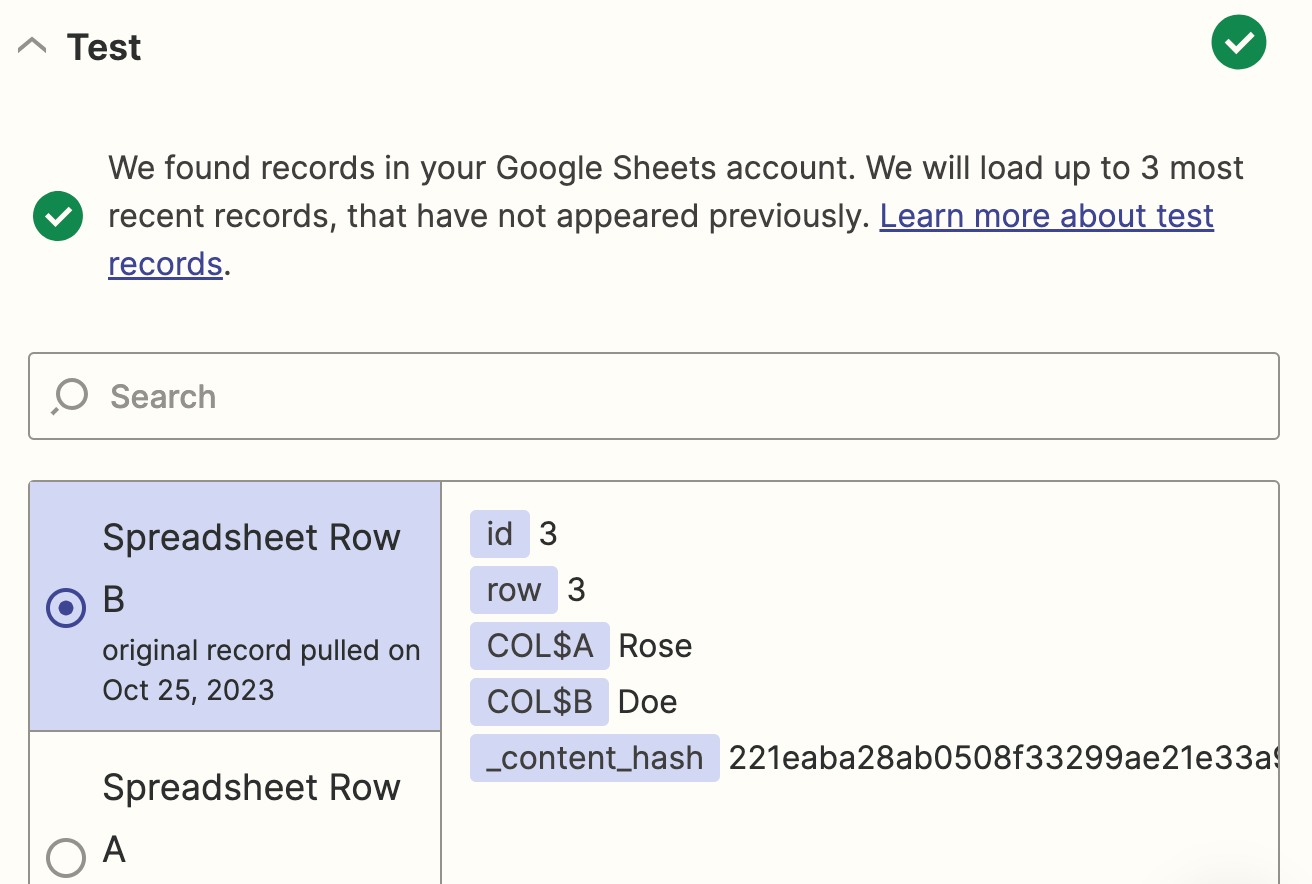
Once you see your test results, check them and make sure you have the data you want. If something looks off, make adjustments to your trigger criteria if needed, and retest until you get the information you want. Once you're happy with the results, click Continue with selected record.
Set up your Salesforce action
Now it's time to set up the action, which is the event the Zap performs once it's triggered. Search for and select Salesforce as your action app, and select Create Record as your action. Click Continue.
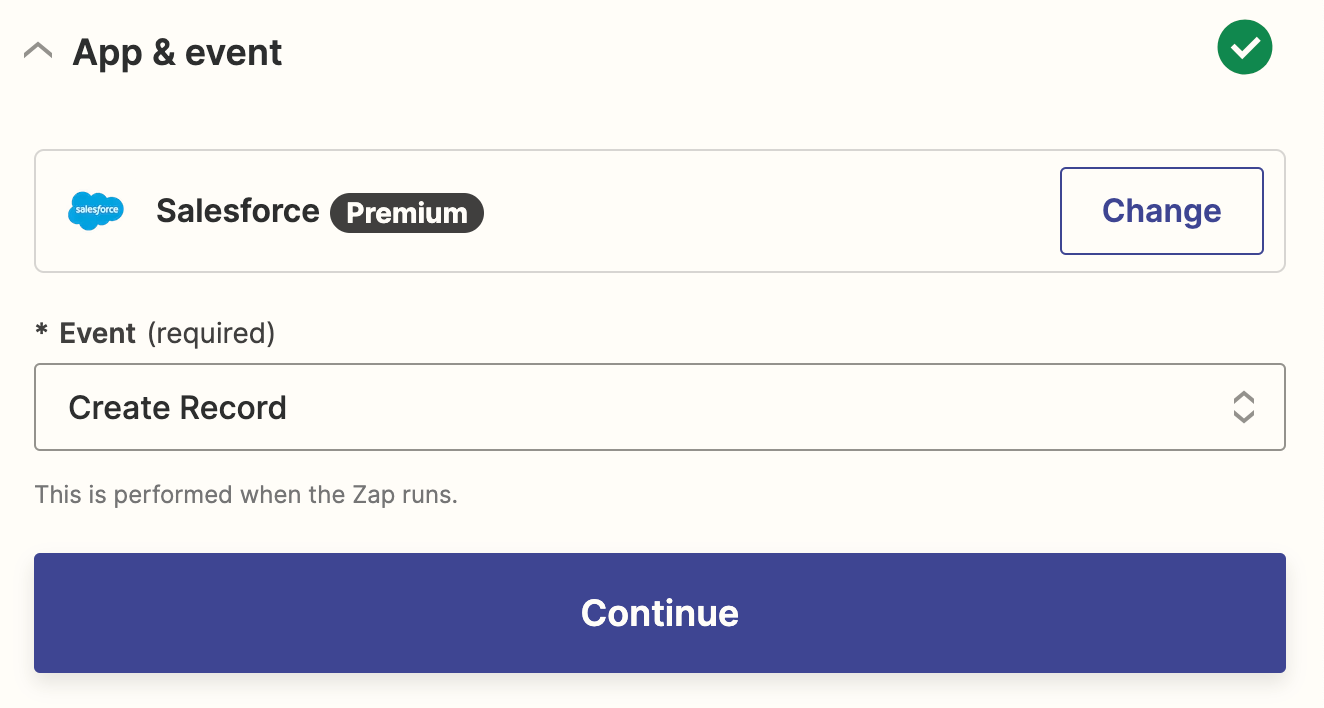
Next, connect your Salesforce account if you haven't already, or select an existing Salesforce account from the dropdown menu and click Continue.
Now you need to tell your Zap how to set up the Salesforce lead. Under Salesforce Object, click Lead.

You can pull in data from your Google Sheets records by clicking inside any empty field where you want the data to go and selecting an option from the Insert Data dropdown menu. This includes your lead's personal information, like first name, last name, email address, etc.
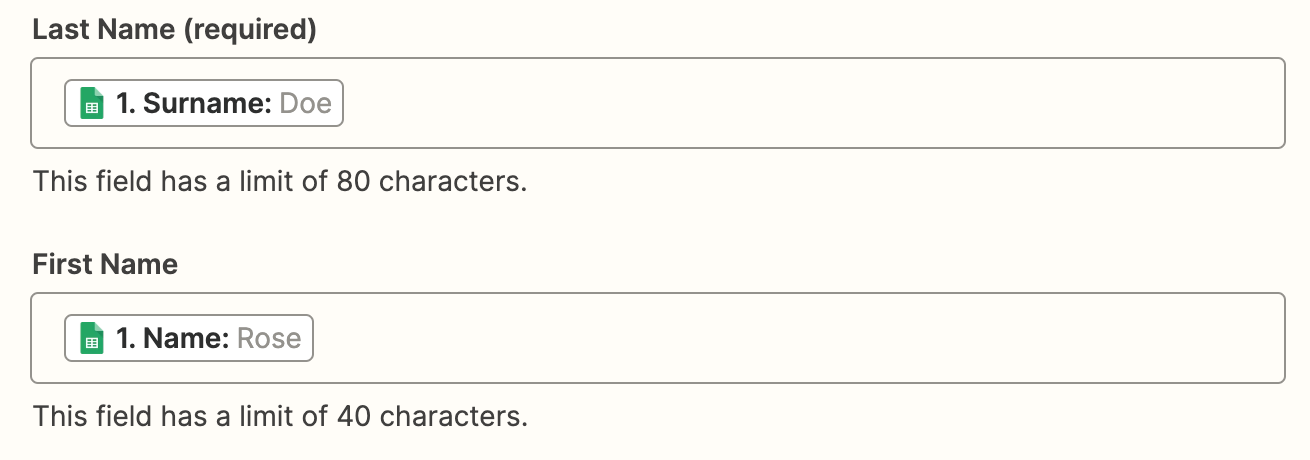
Once you've finished customizing these fields, click Continue.
Now it's time to test your action. When you click Test & Review or Test & Continue, Zapier will create a record in Salesforce according to how you customized the fields.
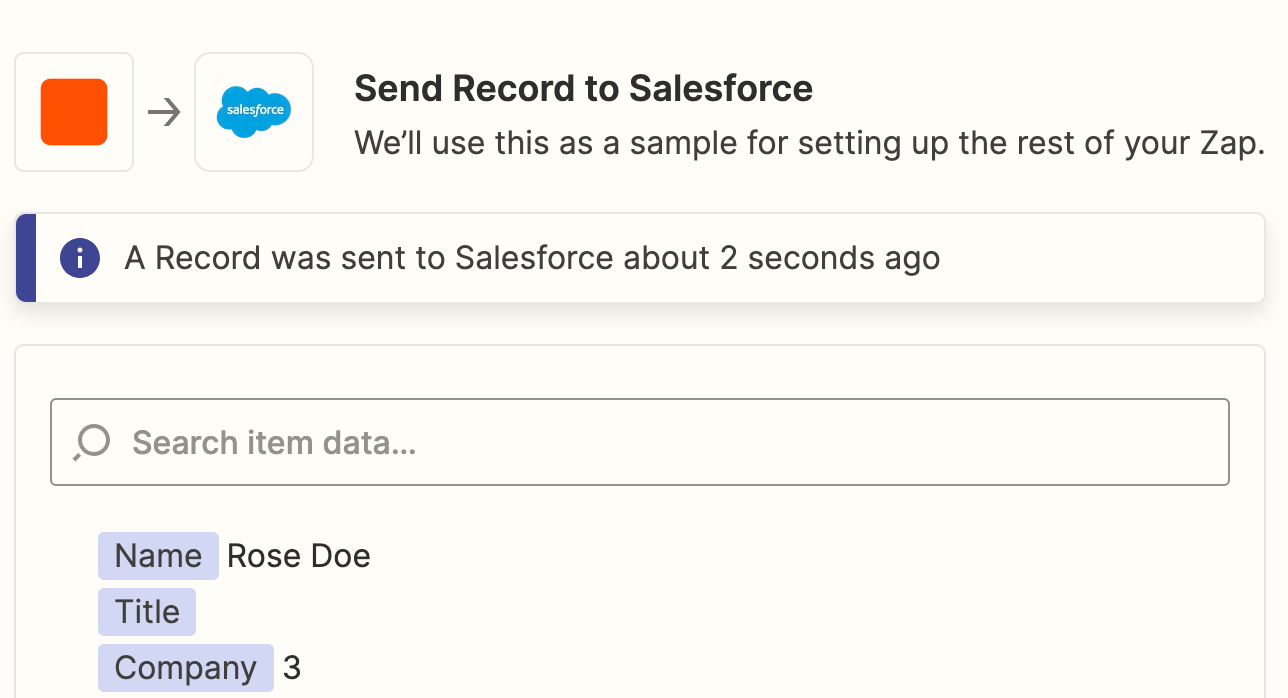
It's a good idea to test your Zap so you can check if your Salesforce record looks okay. If you'd rather skip the test, just click Skip Test in the bottom-right corner. If your test looks good, your Zap is now ready to turn on. If something looks off, go back and tweak things until you get it just right.
Build a Google Sheets Salesforce integration
No matter how you go about integrating Google Sheets with Salesforce, connecting the two so you can pass data back and forth automatically helps you build a streamlined lead management system your whole organization can benefit from.
And, if you integrate Google Sheets with Salesforce via Zapier, you get the full flexibility of building custom, automatic workflows that do the heavy lifting for you.
