
When it comes to converting prospects, you know that old sales adage: you need to strike while the iron is hot.
That means following up (fast) with leads who reach out. To do that, you'll need to use forms to capture contact details and an efficient database to store that information—one that's preferably powered by automation.
With Zapier Tables and Zapier Interfaces, you can build an entire lead management system that lets you automatically add every new lead you receive via a form straight to a table, so you can keep track of everyone. Then you can do things like automatically approve and assign leads to sales reps, send nurture emails (written by AI), or add your leads automatically to your task management software depending on their status.
In essence, these products allow you to collect the data you need—then take action on it. Here's how.
Before you begin
Make sure you have a Zapier account. You'll also need to access Zapier Interfaces, which is where you can build your form, and Zapier Tables, which is where you'll store your leads.

Set up your lead capture system
Let's start building your lead capture system. Here's a pre-made template to get you started:
To set the template up, follow these steps:
Click Try it on the template above
Click Use template in the window that opens
Note: Zapier's pre-built lead capture template lets you create and customize lead capture forms with a Zapier interface that you can either embed on your website or share as a public link on a landing page. All of the data collected from the form is then stored in a Zapier table, which is what we'll be using to create a seamless lead management process in the rest of this tutorial.
Want a more in-depth look at creating your lead capture form? Check out our step-by-step guide.
Customize and edit your table
Now that you've created your lead capture system in Zapier Interfaces from the template, you need to customize it. We'll start with your table. If you scroll down your home page in Interfaces, you'll see that your lead capture form is connected to a table, which is where your leads' answers will be saved each time someone uses your form.
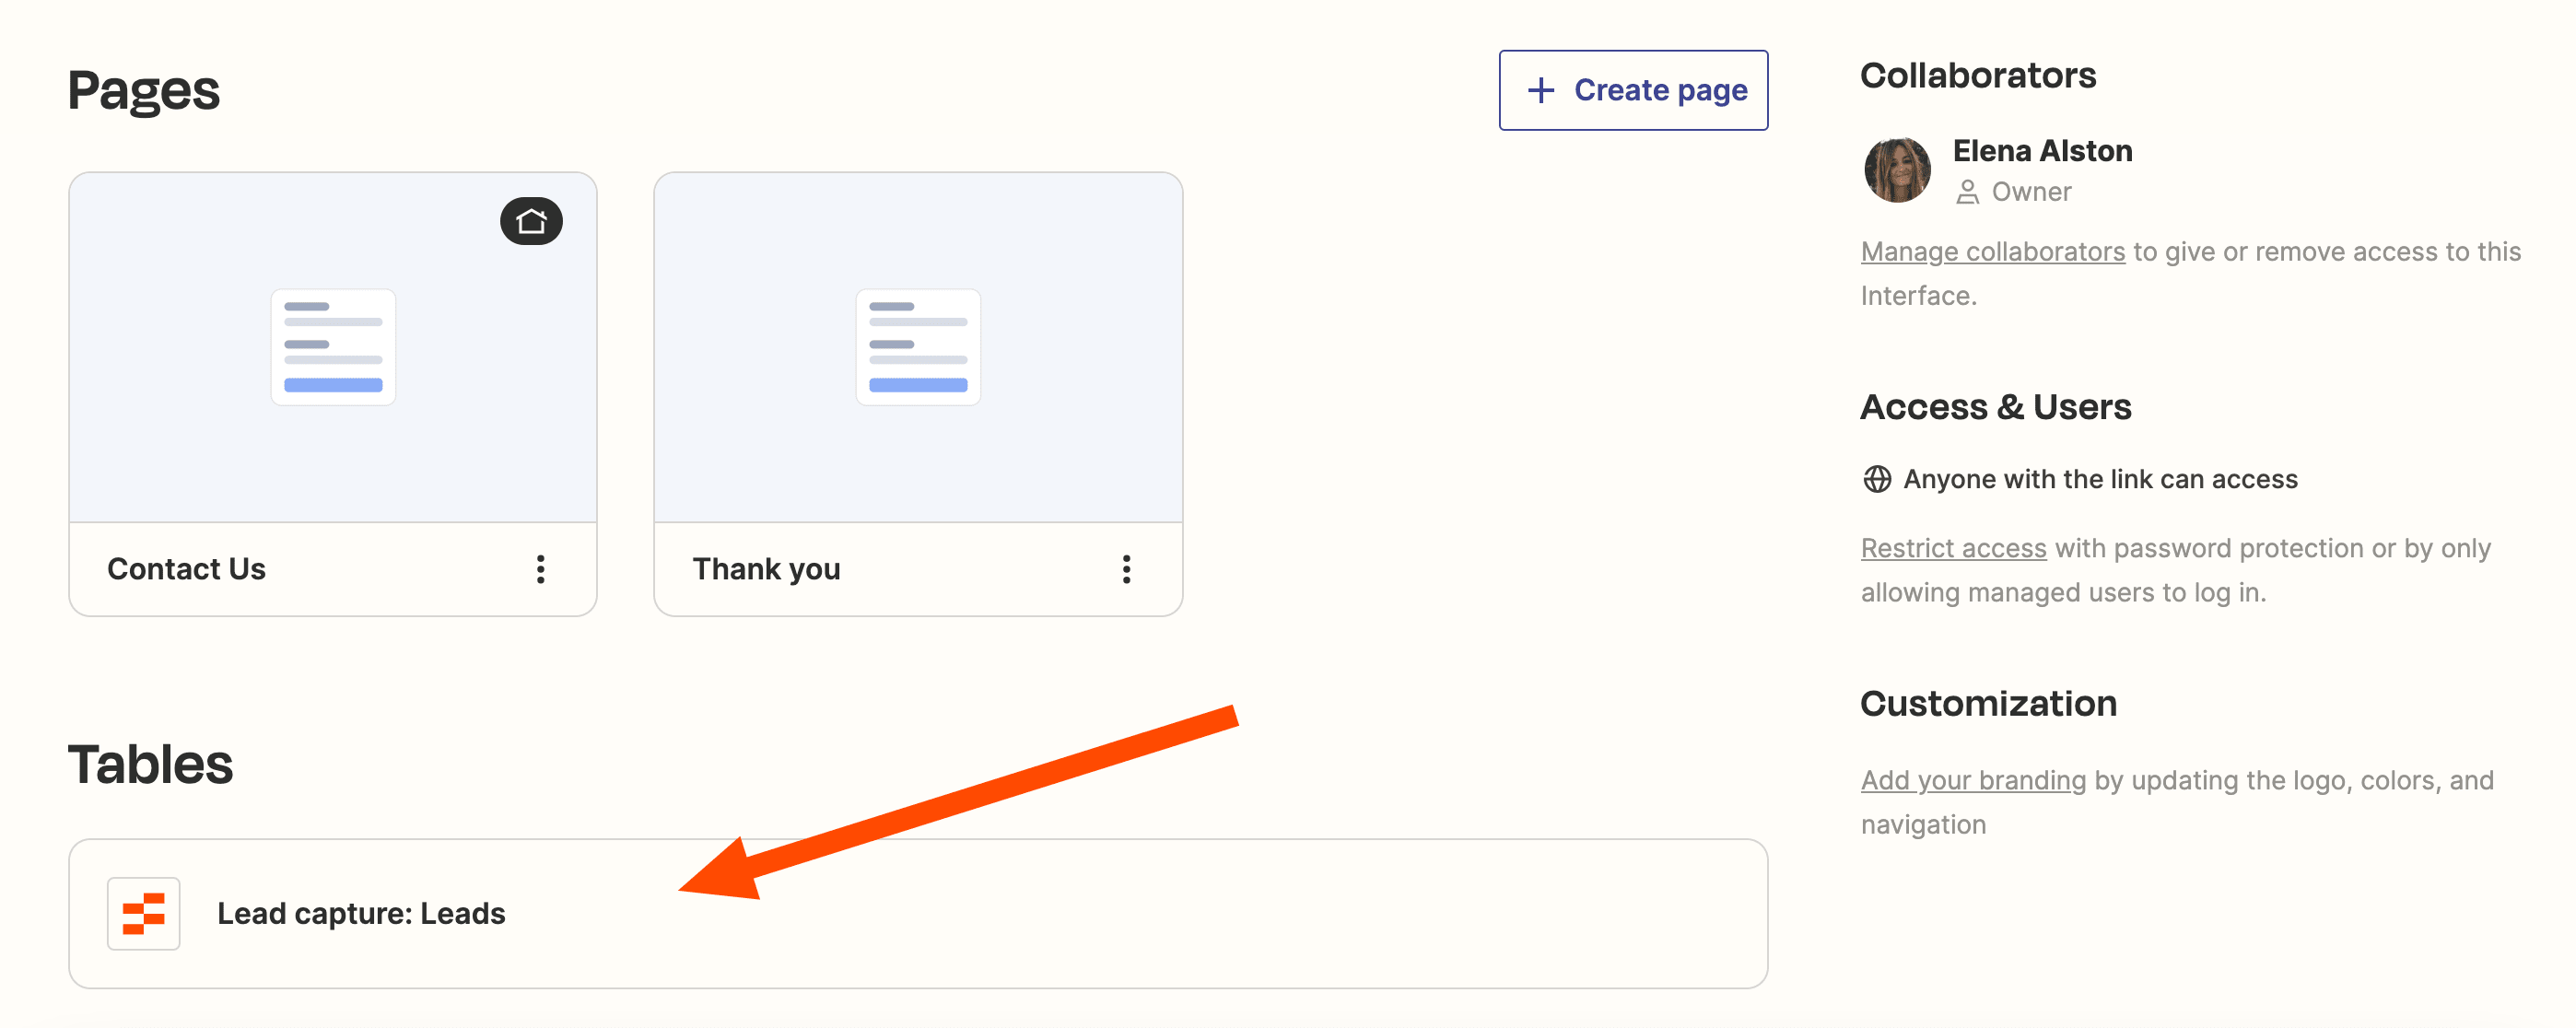
Click on your Lead capture: Leads table, which will take you into Zapier Tables. You'll see your basic table layout, along with your form fields:

Because I'm building a specific lead management process that adds leads from a form to my table and then sends them a sales email, I want to include as many details about the submitter as possible.
Note: If you selected the lead capture form template, your table fields will automatically include your form fields.
That will include fields for each lead's name, email address, notes, a button (connected to a Zap draft,) and date of submission, but you can add as many fields as you need.
To edit the existing fields, click on each field name, then click Edit field.

A right-hand side panel will appear. This is where you can edit the field name and field type, align the text, and add icons.

Under field type, you can choose between a number of options such as text, long text, date and time, number, email address, and more. You can also choose between creating an AI field, a button, or a linked record—which we'll cover in detail later.

Once you've finished editing each field, remember to click Save.
If you need to add new fields, just click on the + Add field button in the right-hand corner and repeat the same process as above.

Tip: Want to shuffle the order of your fields around? Just click on the field name you want to move and drag-and-drop it into a new place.
For any other field adjustments, you can right-click on each field name in order to lock, hide, and delete fields.

If you want to now import records into your table (or download your existing records), you can easily do that by clicking on the three-dot icon in the upper right hand corner of your table.

You can import data from any existing databases like Airtable or Google Sheets, emails from Gmail, and messages from Slack.

If you want to view a specific record in full, right-click on any field and click Expand record.

Expanding a record lets you take some additional steps, like copying a link to the specific record, duplicating it, deleting it, and so on.

Customize your lead capture form
Now that you've customized and added all your fields to your table, you'll want to make sure that your lead capture form matches your table fields. To access your linked interface, click the Linked Assets icon in the left-hand sidebar:

If you click into the Interfaces tab, you'll see the connected form that was created previously from the template. Click on it to open up your interface.
Note: The Linked Assets menu lets you access Zaps, forms, chatbots, and canvases linked to your table.
Open up your lead capture form so that we can make sure your form has all the fields it needs and those fields match your connected table. To do this, click into your Contact us page (which is the form your users will see).

Next, click Edit next to your form fields.

Here you can edit existing fields or add new fields. Click Add field in the right-hand panel.

You'll see that you can insert fields from your connected Table without having to create them from scratch:

Once you've added in your fields, remember to scroll down and click Insert field, which will save your fields automatically.
Add an AI field to your table to write emails
While I have my main table set up, I now want to further customize it by adding an AI field that will help me draft email responses automatically. That means that for every message a lead submits through a form, OpenAI will generate a customized response that I can send them.
Note: You'll need an OpenAI account to add AI fields to your table.
To add an AI field to your table, click on the +Add field button and select AI Field from the dropdown menu.

Under Name, enter the name description (in my case, I'll use "AI copywriter").

Next, you can authenticate your OpenAI account if you have one. If not, you can leave this field marked as None. Click on Select Authentication from the dropdown under OpenAI Authentication and connect your account.
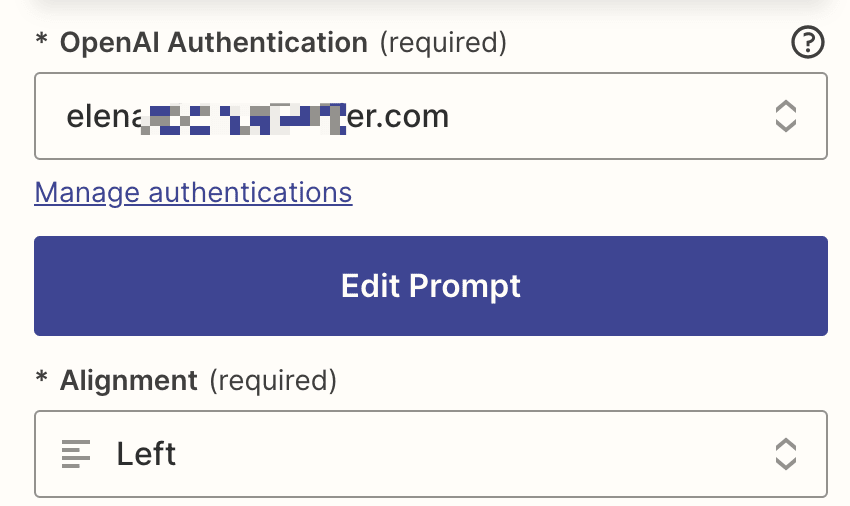
Once that's done, it's time to create your prompt.
These are the instructions that you'll give OpenAI so it knows what kind of email to write, and can include your preferred style, length, and tone. Click Create Prompt to get started.

You'll be presented with two options—you can either start your prompt from scratch or pick a template. In my case, I'll start from a template.

If you want the AI field to draft an email, scroll down through the list of options and select Draft a sales email. This template will take your lead's info from your form and draft the content based on those parameters.

Click Next.
Now it's time to configure your prompt. That means connecting your form's fields to each appropriate section.
First, under Name Field, select First name from the dropdown menu.

Under the Email field, you'll want to connect it to the message field in your form (the message your lead sends you). That way, OpenAI can address whatever it is your lead is asking you.

Click Continue.
Because you've selected a template, the prompt will already be filled in with some basic instructions. The prompt will also pull in the data fields from your form, like so:

Feel free to add more detailed instructions. For example, I'm going to add some extra details on tone and specific company information.

Under Prompt Settings, you can select which OpenAI model you'd like to use, depending on your ChatGPT account. If you haven't set up an authentication, it will default to the GPT-3.5 Turbo model.

Within your prompt settings, you can also adjust the word length and the creativity setting.
When you're finished customizing, click Done. You'll be brought back to your AI field, so just remember to click Save.
This is what ours looks like:

Now, every time a new lead comes into your lead capture form, OpenAI will automatically draft an email to your lead and add it to this field.
Want to learn more about creating AI fields in Zapier Tables? Discover more ways to power your data with AI.
Add an action button to send emails
Next, we're going to set up another field with a button that will allow me to send the message OpenAI generated as an email. If you selected the lead capture form template, this will be created for you.

Otherwise, click on the +Add field icon next to your AI field, then select Button.

In the Name field, add a clear name (in our case, we'll use Send email).

Under Type of Button, you can select Trigger Zap or Continue Zap.
To help you understand this, when you add buttons to your table, this gives you plenty of automation opportunities within your Zap workflows—what we call automated workflows—and expands the types of workflows you can create.
Trigger Zap workflows are triggers—events that start a Zap. That means that when you click on the button, it will immediately kickstart an action (like sending an email).
Continue Zap, on the other hand, is an action step—events performed once your Zap is triggered. In this case, the trigger would be a new record added to your table. This option lets you add two buttons (like approve or reject) within the same field and you can create different actions and paths depending on which button you click.

In our instance, we're going to choose Trigger Zap. That way, I can review sales emails and send them out every time a lead fills out a form.
Once you've set this up, you'll also need to add a label (the text that goes inside your button) so anyone knows what it's for at a glance. In our case, it will be Send email.

Finally, you can choose to enable or disable your buttons. If disabled, the button will be grayed out once you click it. (I recommend doing this so you don't end up sending the same email to a lead multiple times by mistake.)
Once you've set up those fields, remember to click Create. Here's what our button field looks like:

Note: Your buttons will display an exclamation mark until we set up the Zap that will trigger the automated workflow.
Remember, your table doesn't have to be super detailed, but it should include the key information you need to send sales emails to your leads. Ours has a field for first name, last name, email address, role, interests, message from the lead, the AI email generator, and, finally, the button to send emails.
Build your button Zap
Now that you've added a communication system to your table (congrats!), it's time to build the Zap that will send an automatic email to your lead whenever you click on the Send email button.
Make sure you have at least one record filled out, even if it's just sample data. That way, you'll be able to make sure your Zap is working correctly. Let's get started.
First, click the Set up button inside your field, then click +Create.

If you're using the template and this field already exists inside your table, click Edit Field, then select the Zap workflows icon from the right- hand menu. You can click on the linked Zap, which will be set up for you in the Zap editor in draft mode.

A new window will open and you'll be taken to the Zap editor, where the trigger app (Zapier Tables) and event (Trigger Zap Button Clicked) will be auto-filled, like this:

In the next step, you'll also see that your table ID and your trigger button is automatically set up, as you're linking it from your table. Click Continue.

Next up, you'll need to click Test trigger so you can make sure the trigger event is working correctly.
Once the test runs successfully, click Continue with selected record.

In this next step, you'll set up the action—the event your Zap will perform once it's triggered. Start by searching for and selecting your action app.
We'll use Email by Zapier in our example, as I want to email every new lead who submits a form with the AI response OpenAI created.
Again, if you've been using the template, this will already be selected for you, like so:

If not, search for and select Email by Zapier as your action app and Send Outbound Email as your action event. Click Continue.

Next, you need to tell your Zap how to set up your message.
Make sure you pull in the lead's email address by clicking in the To field and selecting the email data from your table from the dropdown menu. This is so that you can send your sales email straight to your lead's provided email address.

In the subject line, you can pull in data from the form your lead submitted.

Once you're done, you can now pull in your AI message by clicking in the Body field and selecting AI copywriter (your AI field) from the data dropdown.

You can also customize who the email comes from, the display name, and include any attachments.
Once you've finished mapping all your fields, click Continue.
Now it's time to test your action, so you can make sure the workflow is set up and ready to go.
Click Test step. Zapier will then send an email with your AI message.

You can also add a third step to your Zap that updates your table with the sent email's data, so everything's easy to track in one place.
If you're using the template, this will be set up for you, and you just have to click through and test the steps:

If you're setting up your Zap from scratch, click the +icon at the bottom of your Zap. Then search for and select Zapier Tables as your action app and Update Record as your action event.

Next, make sure you pull in the correct table ID and record ID so your Zap knows exactly what needs updating.

Next, you can pull in data from your previous steps into the relevant fields associated with your table. In my case, I have fields set up in my table for the email's subject line and email body. I'll pull in the data from my Email by Zapier data, like so:

You can do this for any other relevant fields you have set up in your table. Once you've finished setting up these fields, click Continue. Now it's time to test your action, so you can make sure the workflow is set up and ready to go.
Click Test step.

If everything looks good, your Zap is now ready to use. If something looks off, go back and tweak things until you get it just right.
Remember to publish your Zap! From now on, it will create and send your sales emails whenever you click Send email in your table—then update your table with any relevant data.
Tip: You can set up as many Zap workflows that send your table data to other apps as you'd like. For example, you might want to set up an additional workflow that lets your sales team in Slack know when you've sent an email to that lead, so they can take the appropriate action.
You could also set up additional fields in your table that trigger other workflows. For example, you might want to:
Add a field with a lead's status so that when an update is made to it, you could trigger a workflow that sends a notification in Slack.
Add a dynamic list of all your sales reps (from a separate table) so you can assign them new leads and trigger a workflow that notifies the right sales rep.
Add a field button that sends your new leads straight to your task management tool or another app your sales team uses.
To set up additional Zap workflows, just click on the Linked assets icon in the left-hand side bar and click +Create.

You'll also see a list of any pre-existing Zap workflows you've created. Alternatively, you can also create new Zap workflows by clicking into any field in your table, clicking Edit Field, then clicking Zap workflows from the right-hand menu.

Following that, you'll be taken to the Zap editor where you can set up new Zap workflows.
If you head back into your table, you'll see that your email buttons are now enabled:

Customize your table's settings
Clicking into the settings icon in the left-hand panel lets you edit the name and description of your table, delete it, and more.

That also includes sending records manually (pending) or automatically. Processing records manually means that if you set up a Zap that triggers when your record is updated, you'll have the chance to review it first before processing it through the Zap.
Alternatively, you can just send your records automatically, which means that any record you add in will trigger any connected Zap workflows without a delay.
Once you're happy with your table layout, you can also share the table with other team members by clicking Share in the top-right corner.

Provided you have a Team or Enterprise plan, you can share your table with anyone in your organization (like your sales team, for example). You can also create a public link.
There are a few different levels of access (editor, view-only, no access), which allow you to decide how much control you want over your table. For example, you might want to give your sales team permission to view and trigger Zap workflows, but not the ability to edit data or Zap workflows.

Note: Learn more about managing permissions in Tables.
Test out your table
Now that your lead capture table is all set up and ready, you can test it out just to make sure everything's running without blips.
First, click on Interfaces and open your lead form we set up earlier. Fill it out with test data, and hit submit, like so:

Head back into your table and check that your sample record was added to your table—remember to also make sure your AI field drafted up an email to send. Then click Send email.

Now, thanks to the Zap I set up previously, an email will automatically be sent to the lead in question, with the response the AI drafted.
Here's what ours looks like:

And now that I've sent an email to my lead, the button will be grayed out, so I can easily keep track of who's been contacted and who hasn't. You'll also see any relevant data from the email added to your other table fields.

You can always troubleshoot and tweak anything you're not happy with. Once everything is working smoothly, your new table is now ready to be used and shared with your team.
Streamline your lead management process with Zapier
With Zapier's automation platform, you can create entire lead management systems that allow you to store, manage, and automate your leads. From first capturing your prospects to nurturing them with communication and keeping your sales team in the loop, you can streamline your sales—all in one place.
Zapier is the most connected AI orchestration platform—integrating with thousands of apps from partners like Google, Salesforce, and Microsoft. Use forms, data tables, and logic to build secure, automated, AI-powered systems for your business-critical workflows across your organization's technology stack. Learn more.
Related reading:
This article was originally published in September 2023. It was most recently updated in August 2024.


