Sometimes, my inbox feels a little bit like the junk drawer in my kitchen. I know where everything is, but it's also a total mess, and I would love to clean it up…one day. Or, even better, I could have someone else clean it up.
While it'd be ridiculous to hire a cleaning service to organize a single drawer in my kitchen, there is someone who can always help you organize your inbox—AI.
With Zapier, you can create a workflow that labels all of your incoming emails automatically, with OpenAI's GPT determining which labels are appropriate. Here's how.
New to Zapier? It's workflow automation software that lets you focus on what matters. Combine user interfaces, data tables, and logic with 6,000+ apps to build and automate anything you can imagine. Sign up for free.
Before you begin
A note, this workflow will only work properly with a business Gmail account. Users with a consumer Gmail account—that end in @gmail.com or @googlemail.com—have limitations on which apps they can send Gmail information to, in compliance with Google's security protocols, and won't be able to use this Zap. You can read more about it here.
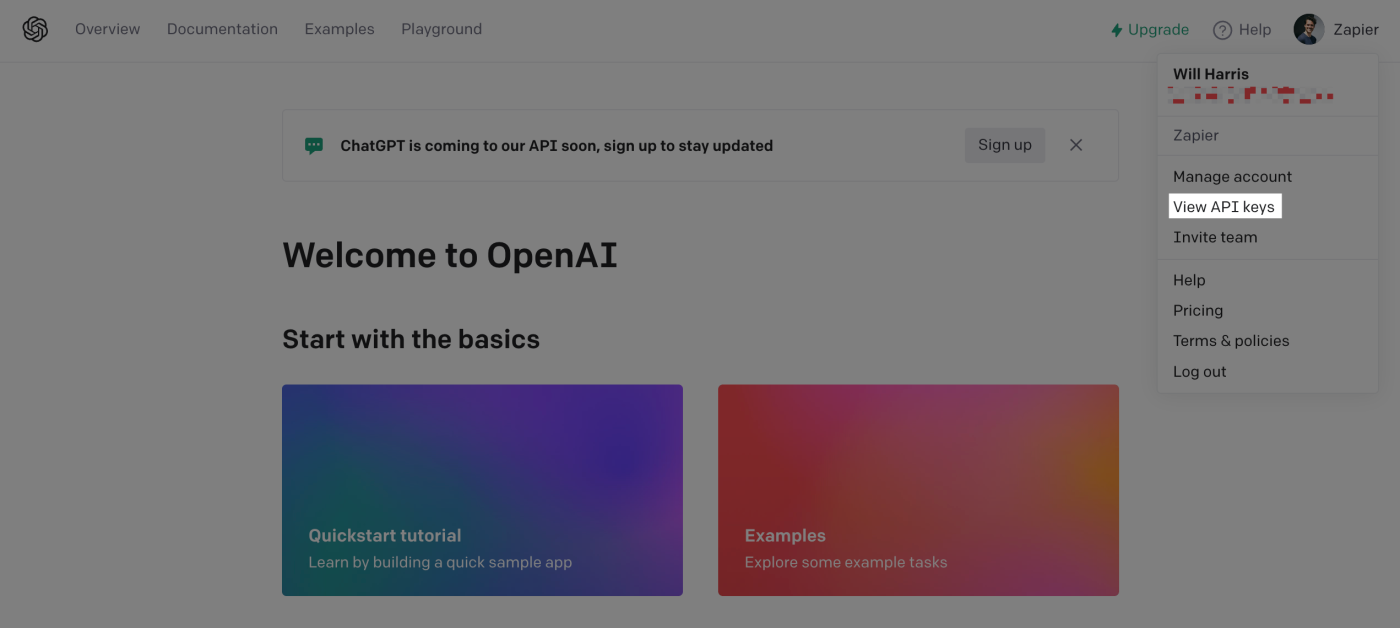
You also need to set up a free OpenAI account before getting started. Once you've opened your account, click the settings tab in the top-right corner and select View API keys.
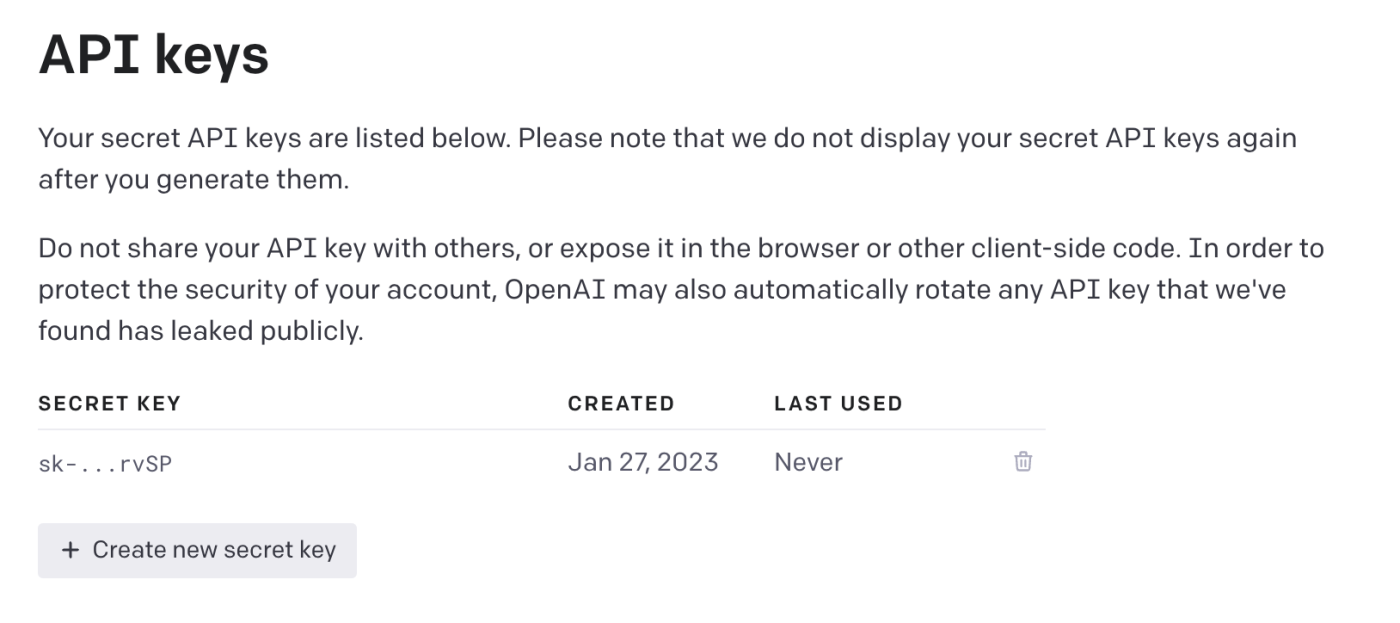
Then, click the + Create new secret key button to generate your API key. Make sure to copy the key while you're here. You'll need it later when connecting your OpenAI account to Zapier.
How to automatically add labels to your incoming emails
With Zapier, you can create Zaps—the word we use for automated workflows—that send information from one app to another.
You can create a Zap from scratch, no code needed, or use one of our templates.
To start with a template, click on it below, and you'll be taken to the Zap editor. Create a Zapier account if you haven't already, then follow the instructions below to set up your Zap.
Add labels to incoming emails automatically with ChatGPT
This workflow requires a multi-step Zap, available on a paid Zapier plan or during a free trial. Learn more about multi-step Zaps.
Set up your Gmail trigger
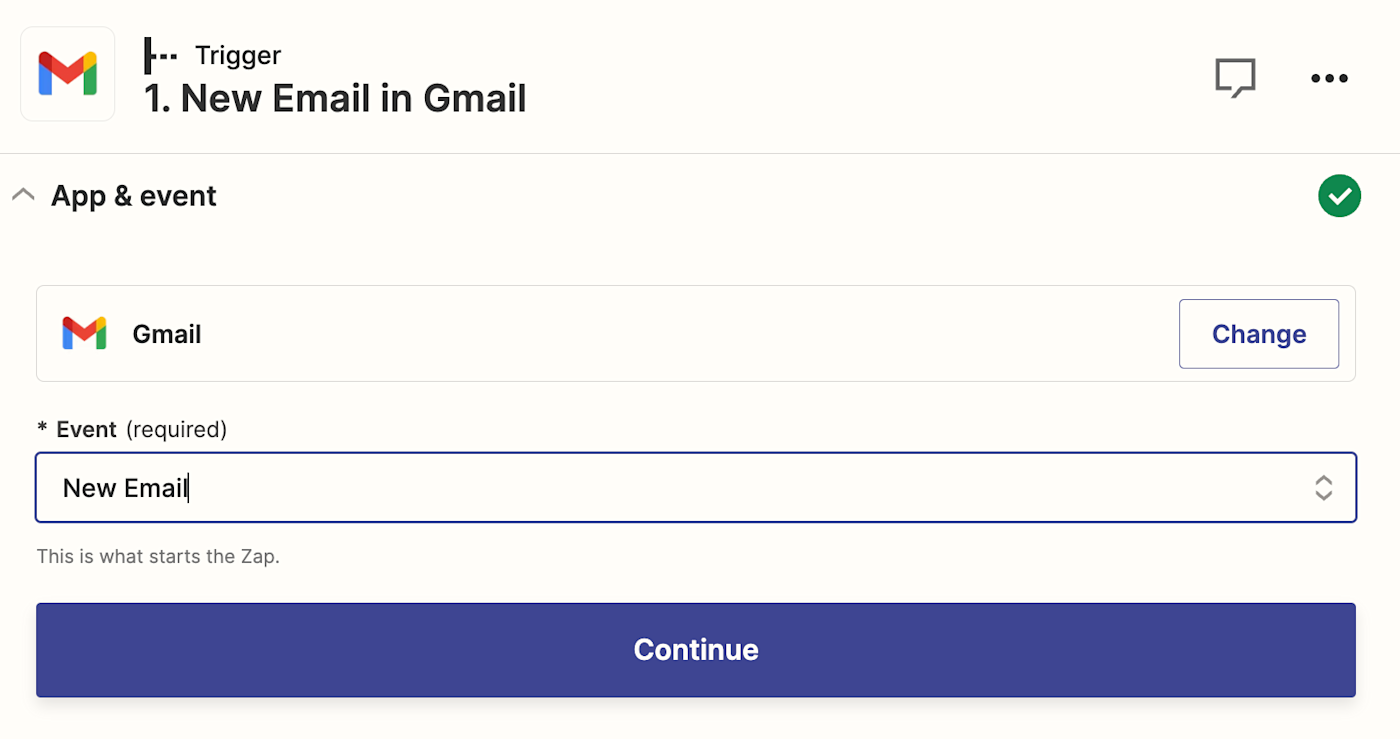
You first need to set up your trigger—the event that starts your Zap. Select Gmail as your trigger app and New Email as your trigger event, then click Continue.
If you haven't already, you'll need to connect your Gmail account. Click on Choose an account… and then + Connect a new account to give Zapier access. If you have connected Gmail to Zapier before, simply select your account from the dropdown.
Next, determine if there is a particular inbox or label you want Zapier to look for emails in. If you leave it blank, it will trigger on all emails, including sent emails and drafts. Then click Continue.
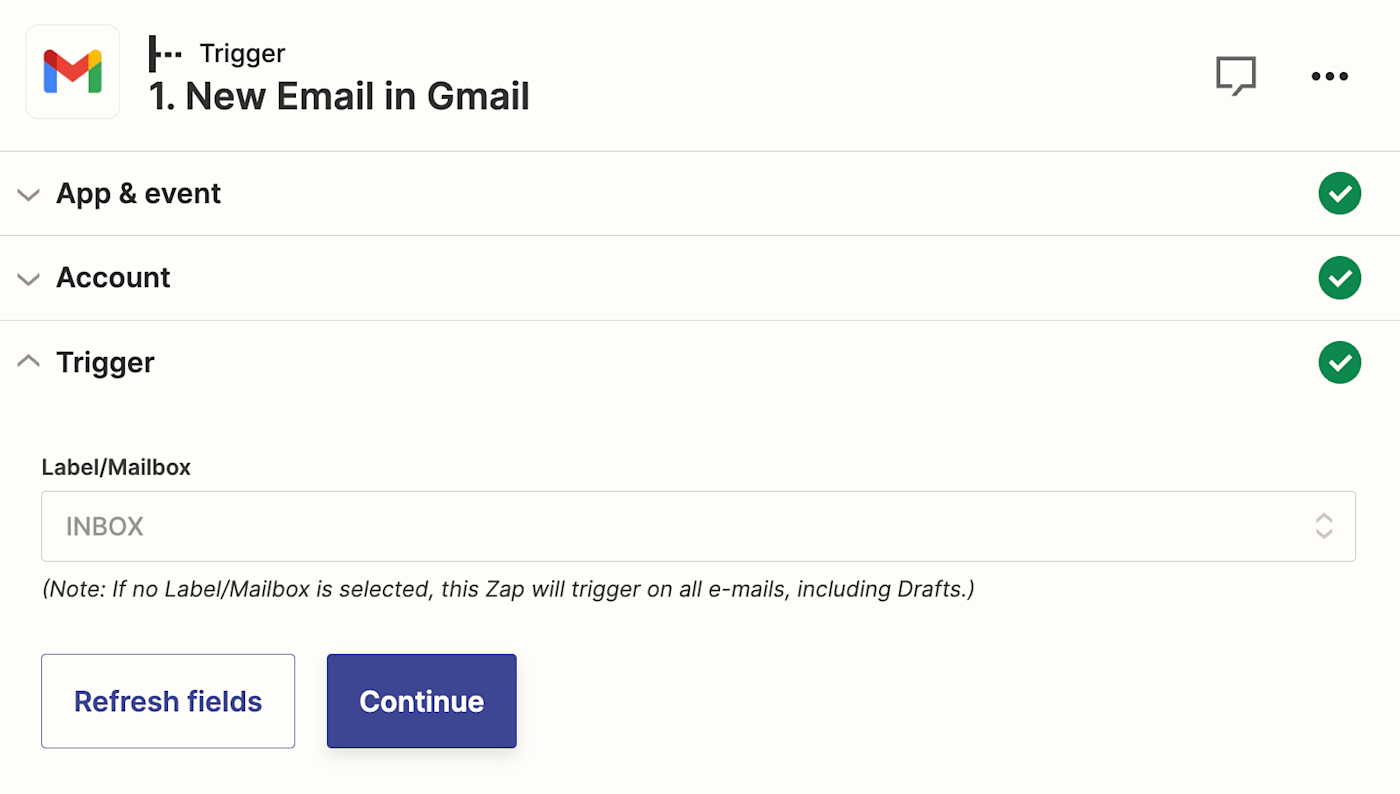
Now it's time to test your trigger. Zapier will find a recent email and use it to set up the rest of your Zap.
Click Test trigger.
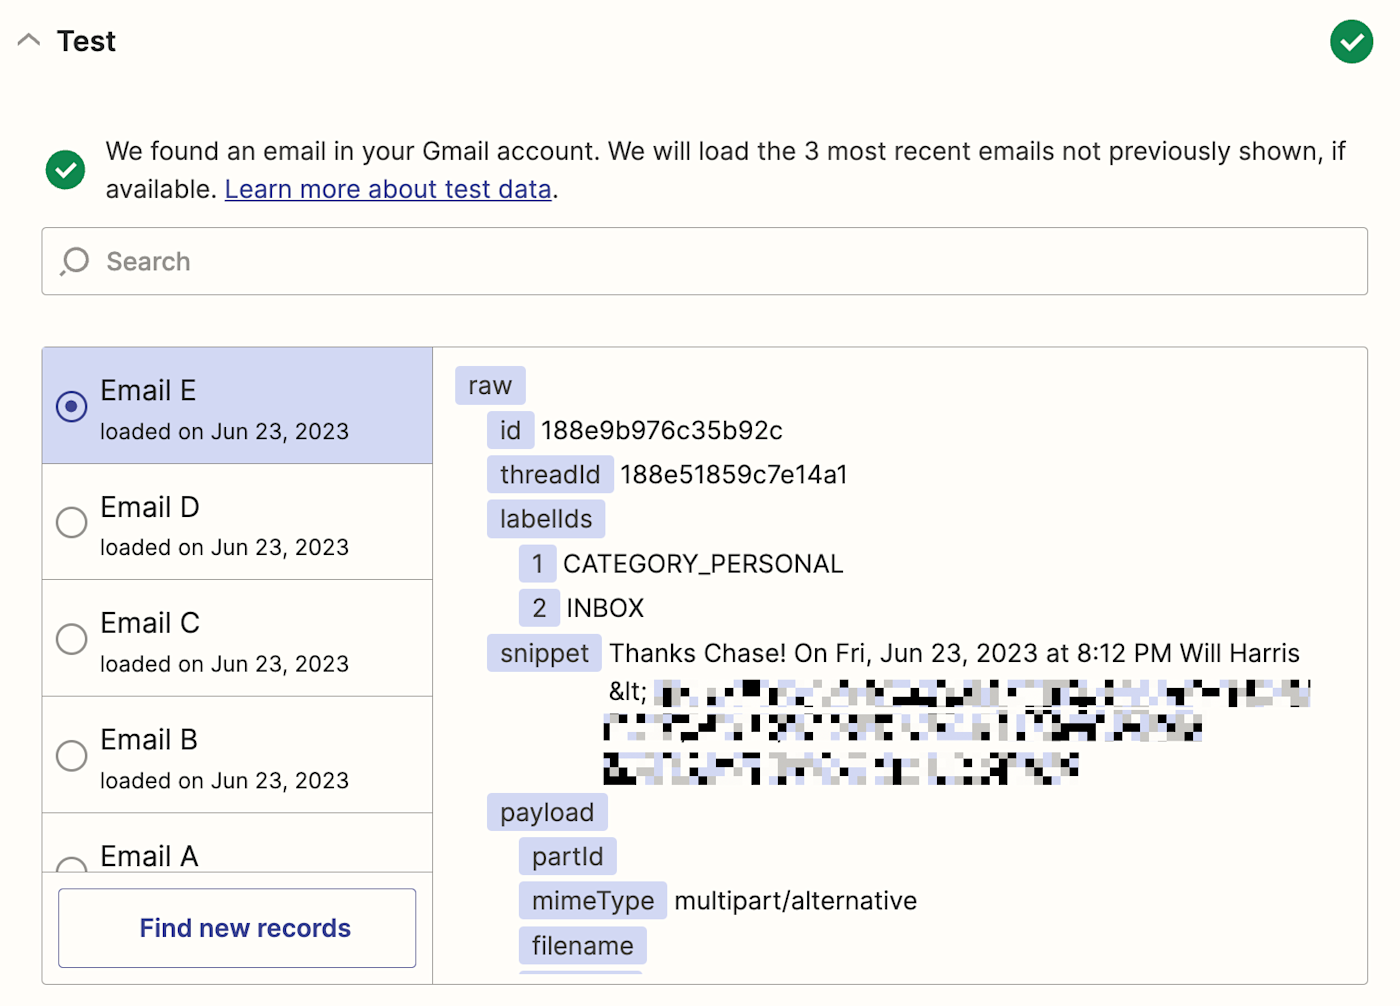
If everything is working properly, click Continue with selected record.
Set up your ChatGPT action
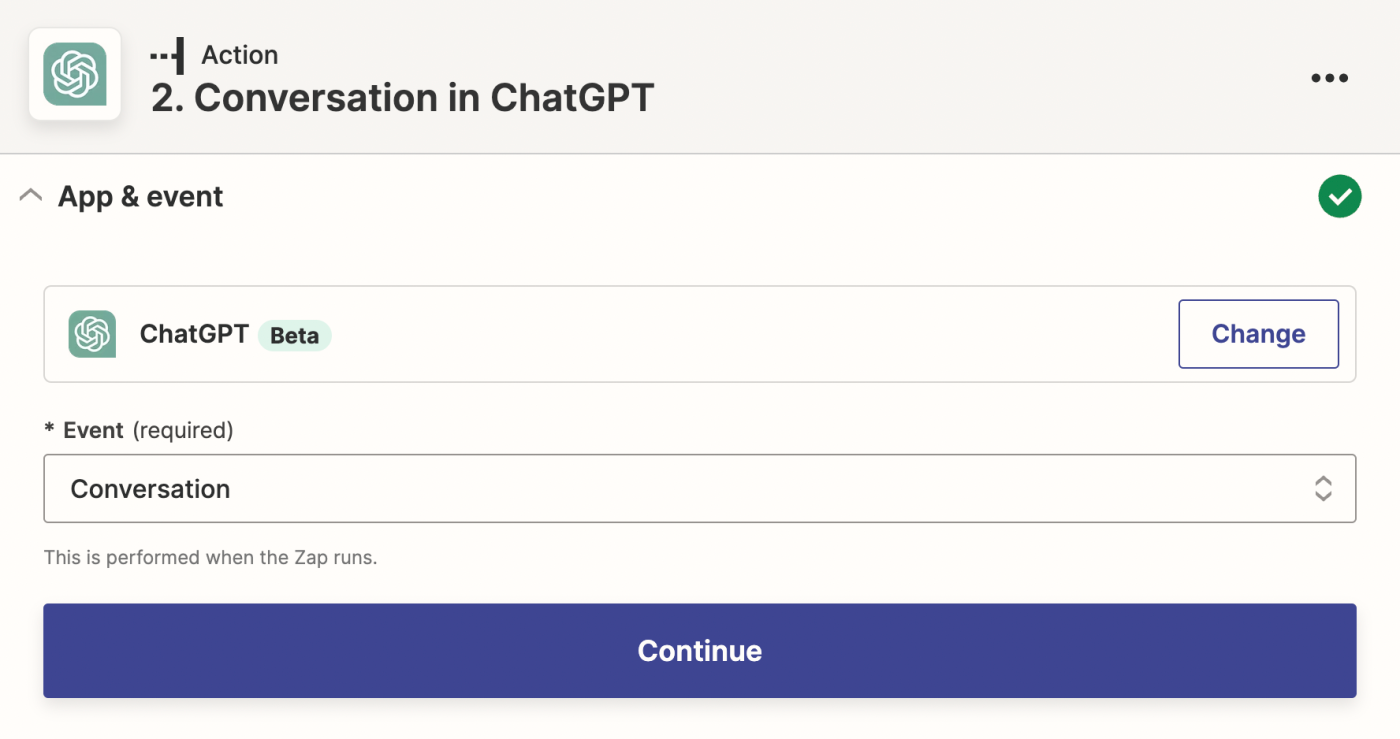
Let's set up your action—the event your Zap will perform once it's triggered. Choose ChatGPT as your action app and Conversation as your action event. Then click Continue.
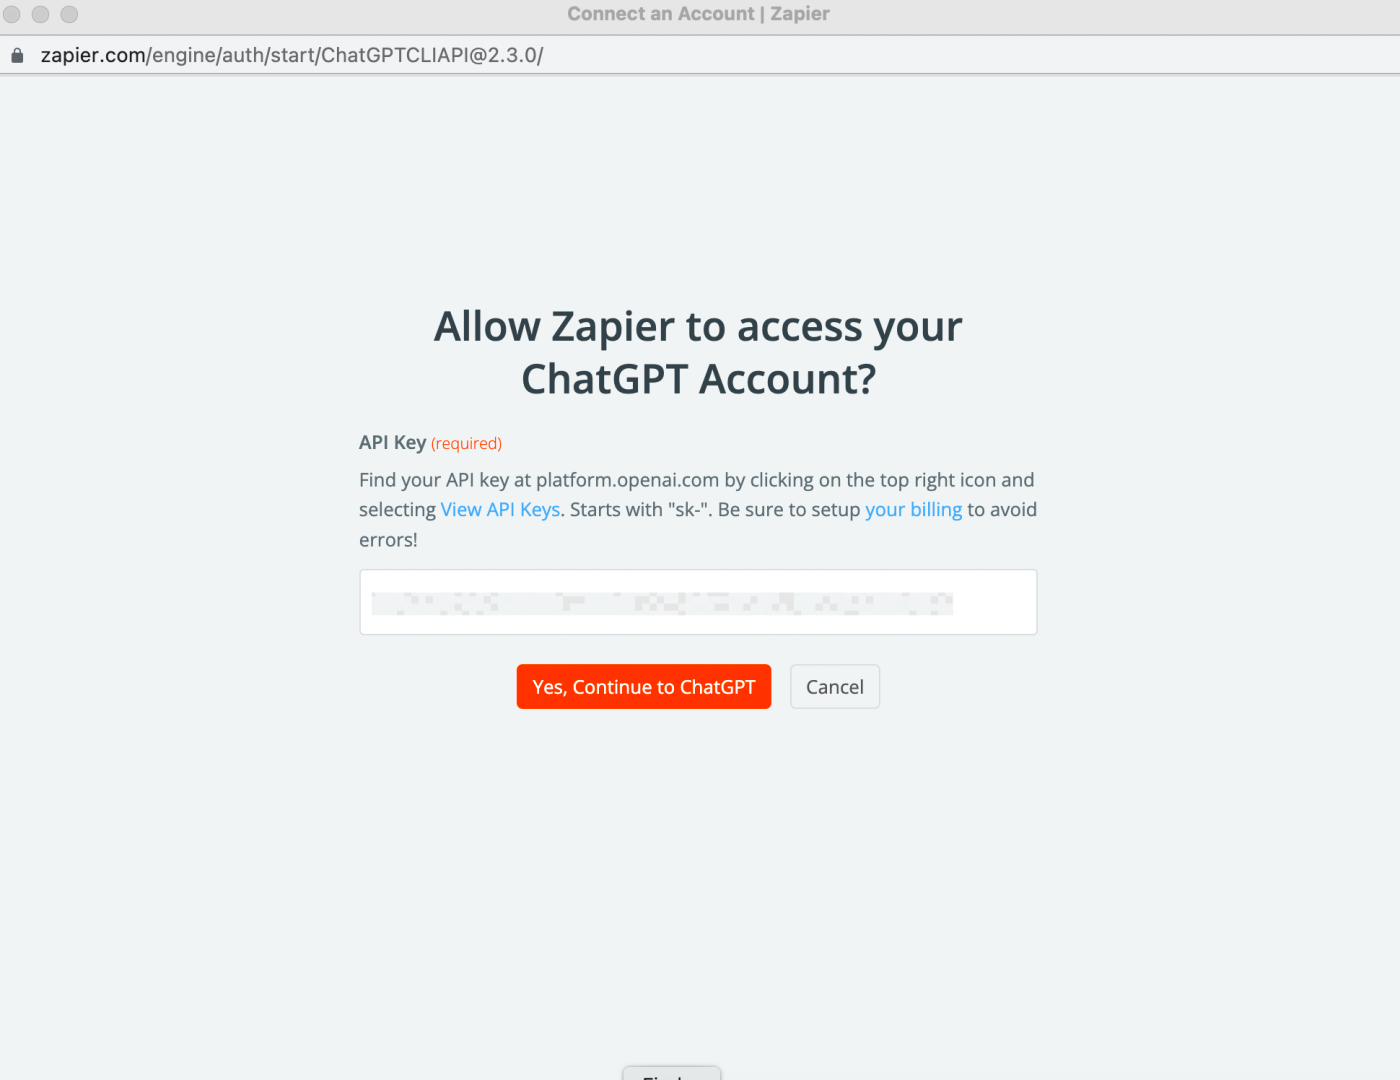
Next, a pop-up window will appear, asking for the OpenAI API key that you copied earlier. Paste it into the API Key field, and click Yes, Continue to ChatGPT.
Now it's time to customize your message to ChatGPT. The critical part here is giving ChatGPT a list of labels you want it to consider and specific instructions so that it knows when to place an email in each label.
You'll want all of your answers to be formatted in a specific way (we'll go into the specifics on why below). Tell ChatGPT to give you answers that:
correspond exactly to the label
do not have punctuation at the end
Are in all caps
Again, we'll walk through why that's important in a moment.
The last thing you need to include in your message is the body of the email. To pull it in from your previous Gmail step, click inside the User Message field and pick Body Plain from the Insert Data dropdown.
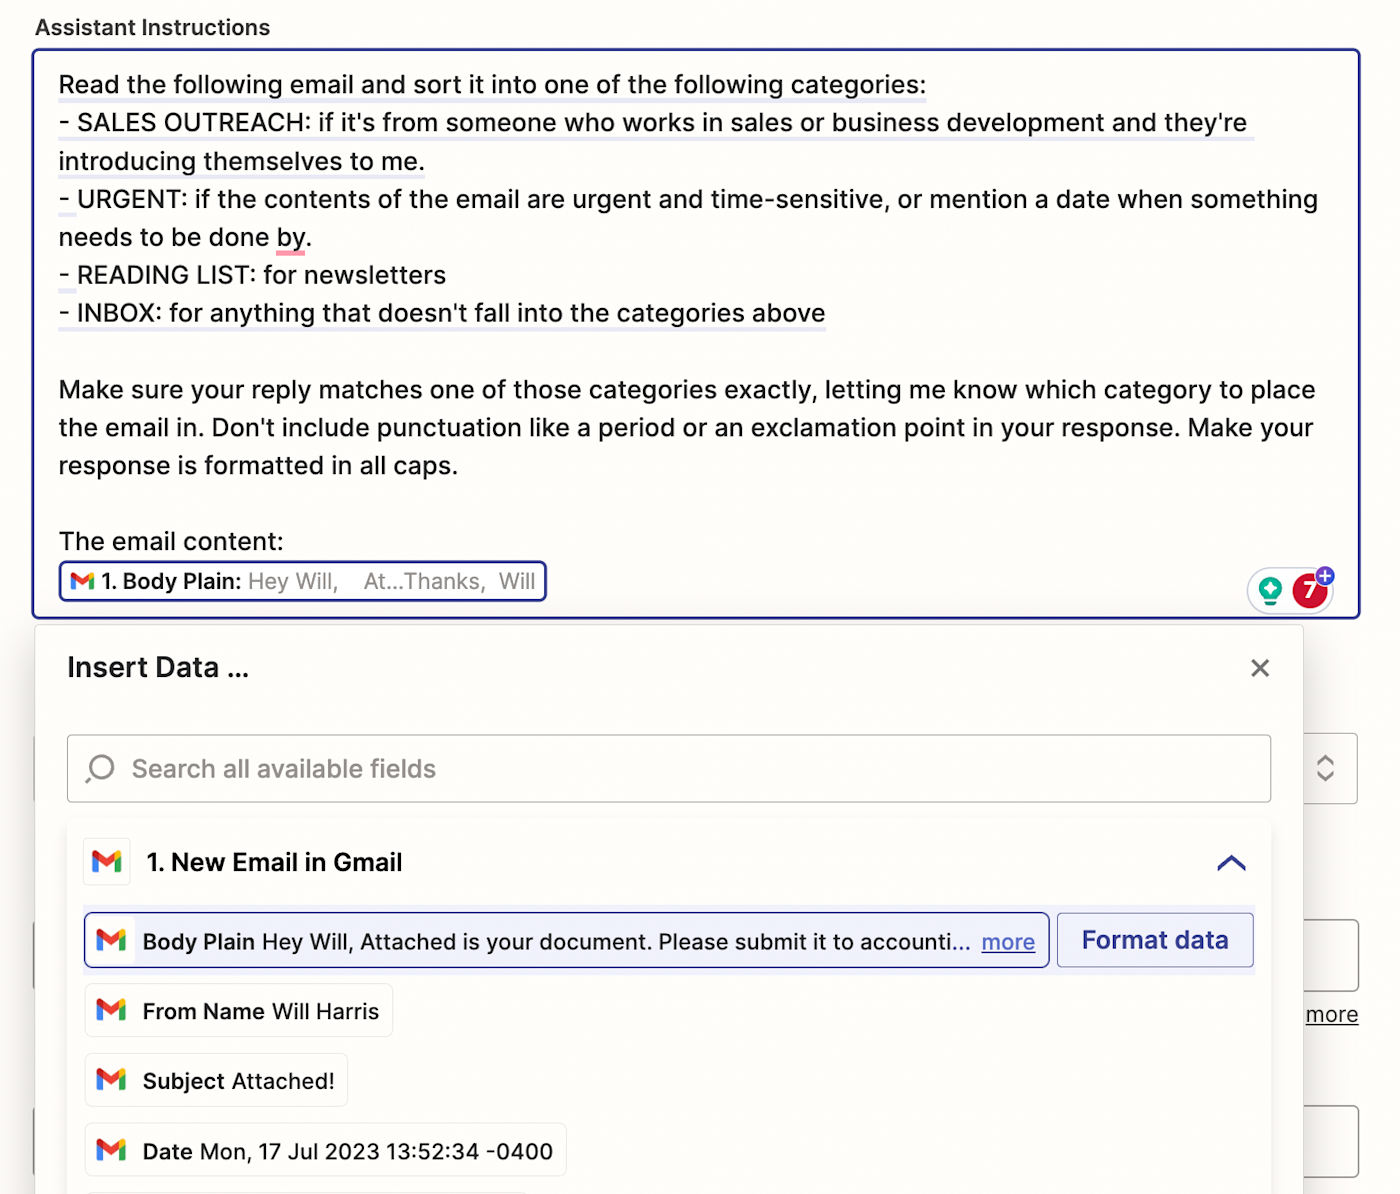
You can customize your message further by giving your assistant a name and other instructions, or adjusting the temperature (creativity) of the replies, but none of them are necessary for this particular workflow.
Once you're done customizing your prompt, click Continue.
Now, click Test action to test your Zap, and Zapier will send your message to ChatGPT.
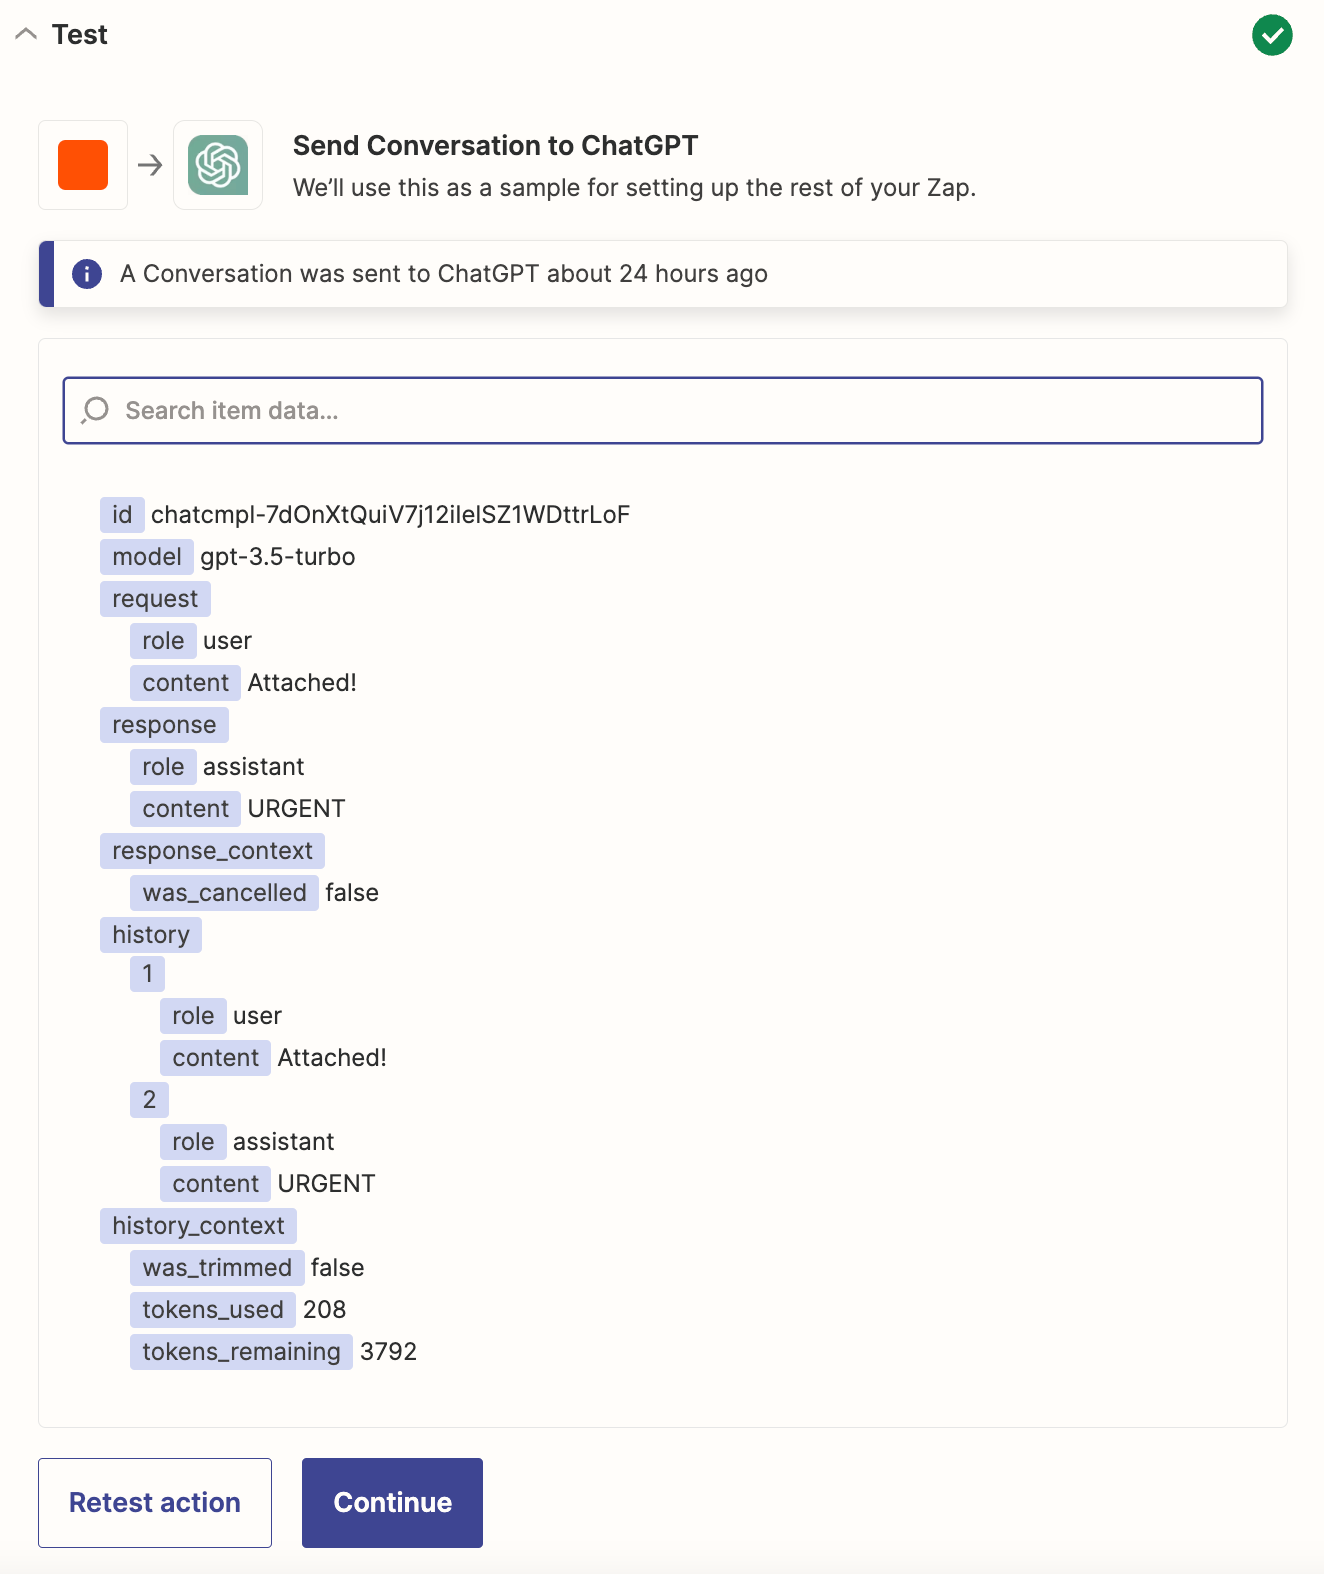
If everything looks good, click the + button at the bottom of your screen to add one more action step.
Begin setting up your Gmail action
Next, we're going to begin setting up the last step in your Zap—the one that labels your email. I say begin setting up because we're actually going to stop halfway through and add a Formatter by Zapier step in between our ChatGPT and Gmail steps. We just need to grab some information from this step first.
Choose Gmail as your app and Add Label to Email as your event. Then click Continue.
Select the same Gmail account you already connected in your trigger step and click Continue.
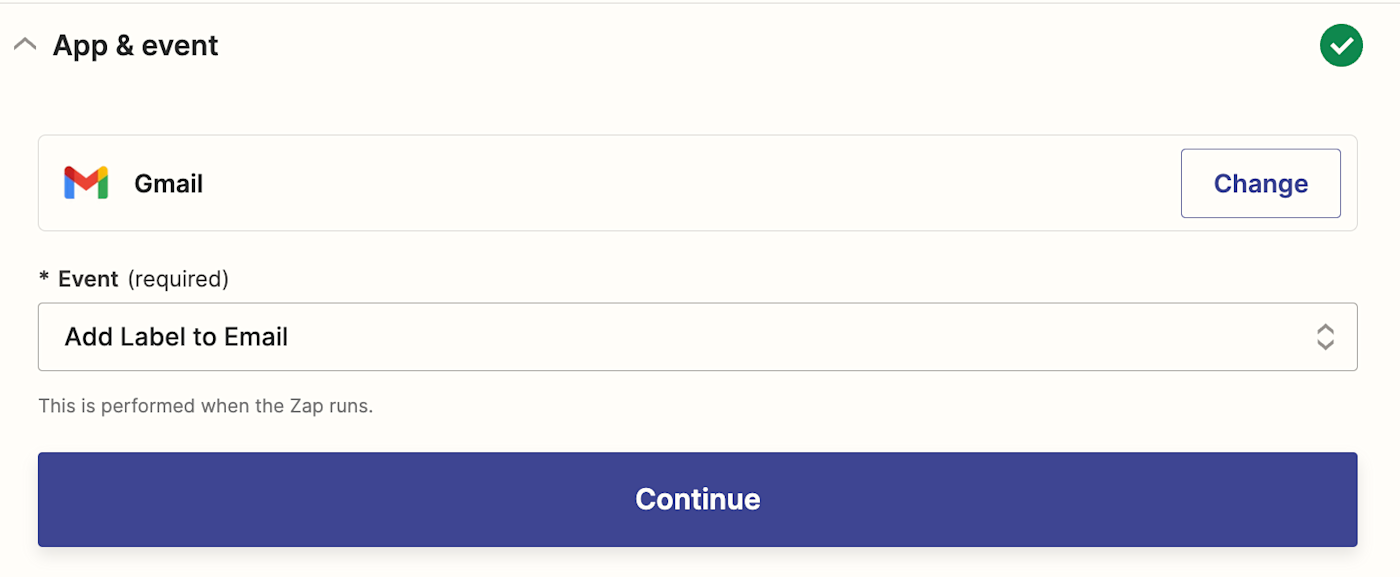
Now, we're going to find the information we need out of this step.
Click into the Label(s) to Add field. You'll see a list of Label Names (in bold) with their corresponding Label IDs underneath them (not in bold).
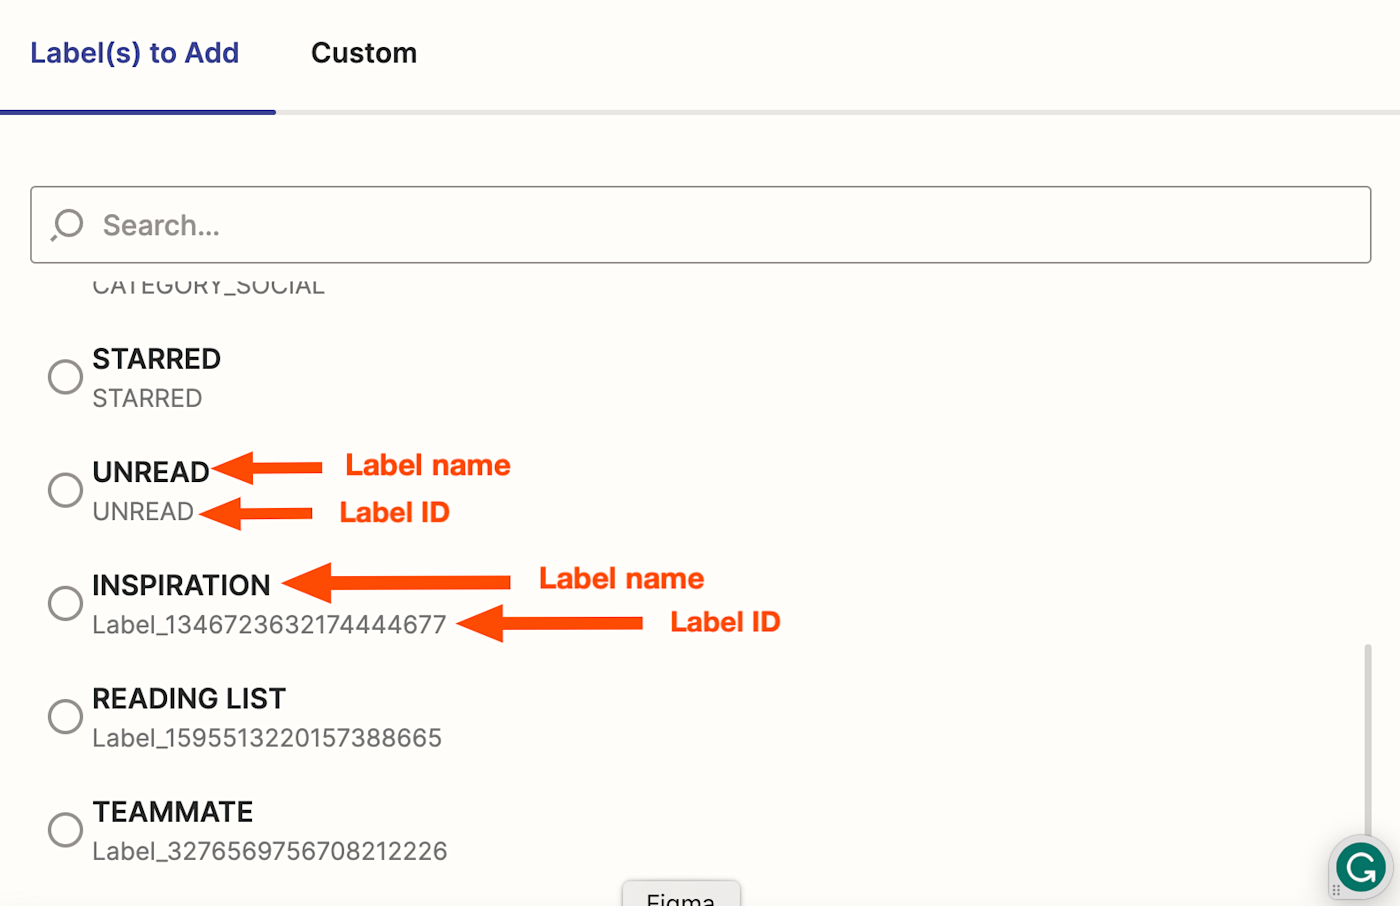
The Label ID is the value Zapier needs to send to Gmail to apply the label. This is easy for Gmail's default labels—like INBOX or UNREAD—because the Label Name and Label ID are the same. They also match the all-caps and one-word parameters we included in our ChatGPT prompt.
For custom labels though, the Label ID ends up being Label_ followed by a long string of numbers. The Label IDs for your custom labels are the information we need from this step. Document those Label IDs—in a screenshot, a notepad, or wherever you prefer—and once you're done, click the + button between the ChatGPT and the Gmail action steps.
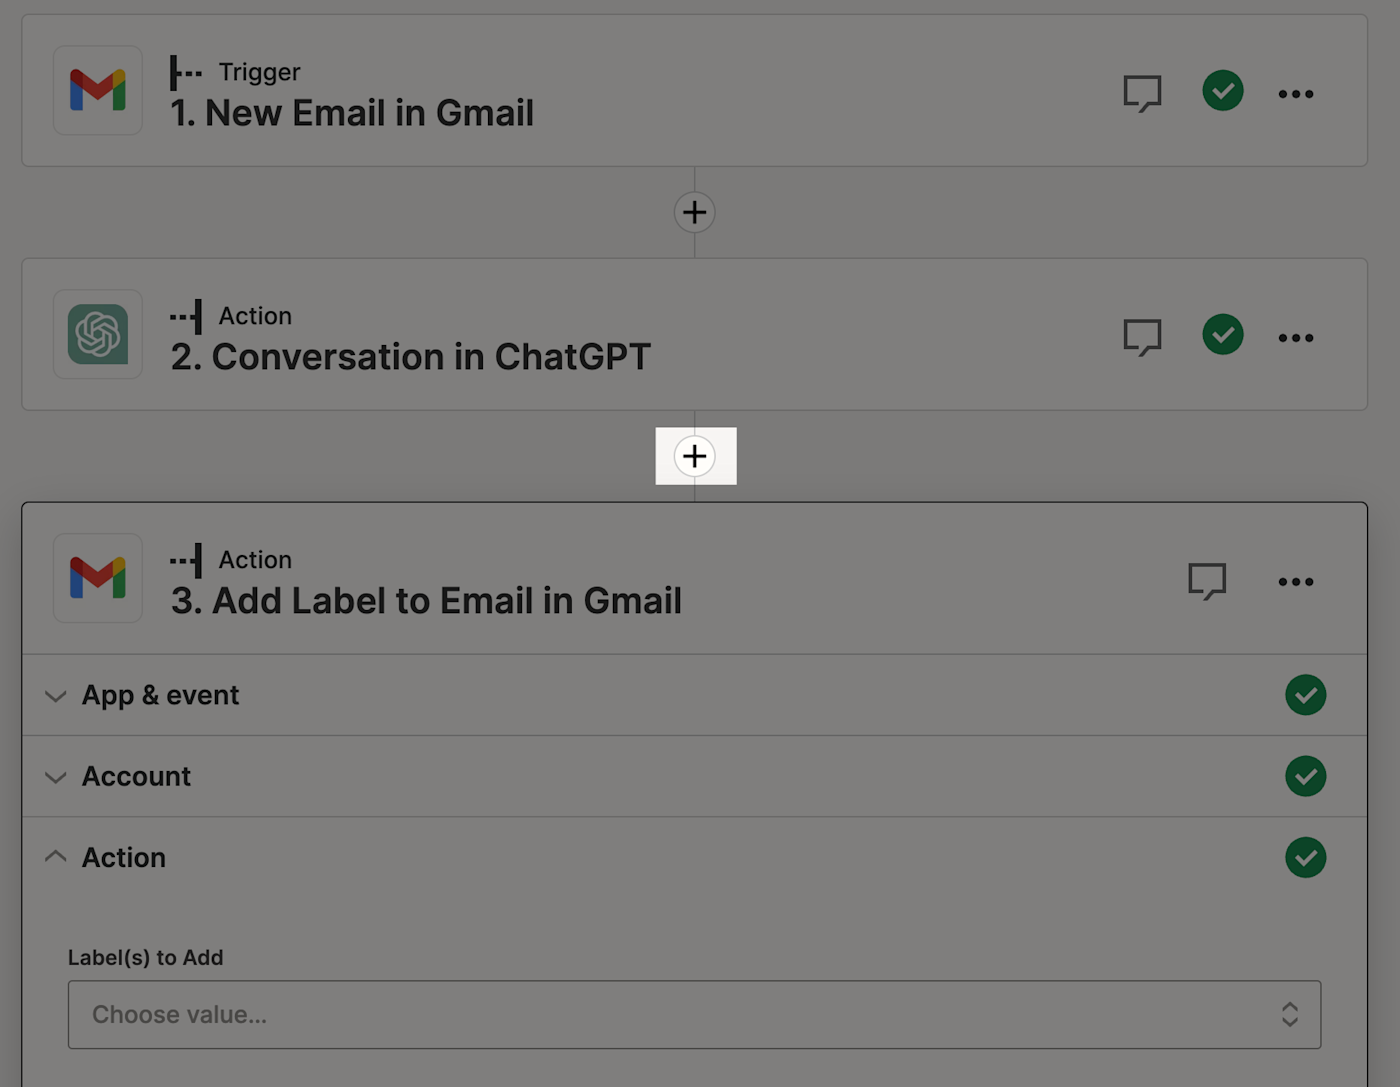
Set up your Formatter by Zapier action step
Now, we're going to use Formatter by Zapier to create a lookup table that translates the answers we get from ChatGPT and turns them into their corresponding Label IDs.
Choose Formatter by Zapier as your app and Utilities as your event. Click Continue.
Click into the Transform field and select Lookup Table.
Now, click into the Lookup Key field, and select Assistant Response Message from your ChatGPT step in the Insert Data dropdown. This lets Formatter know what value to look up and translate.
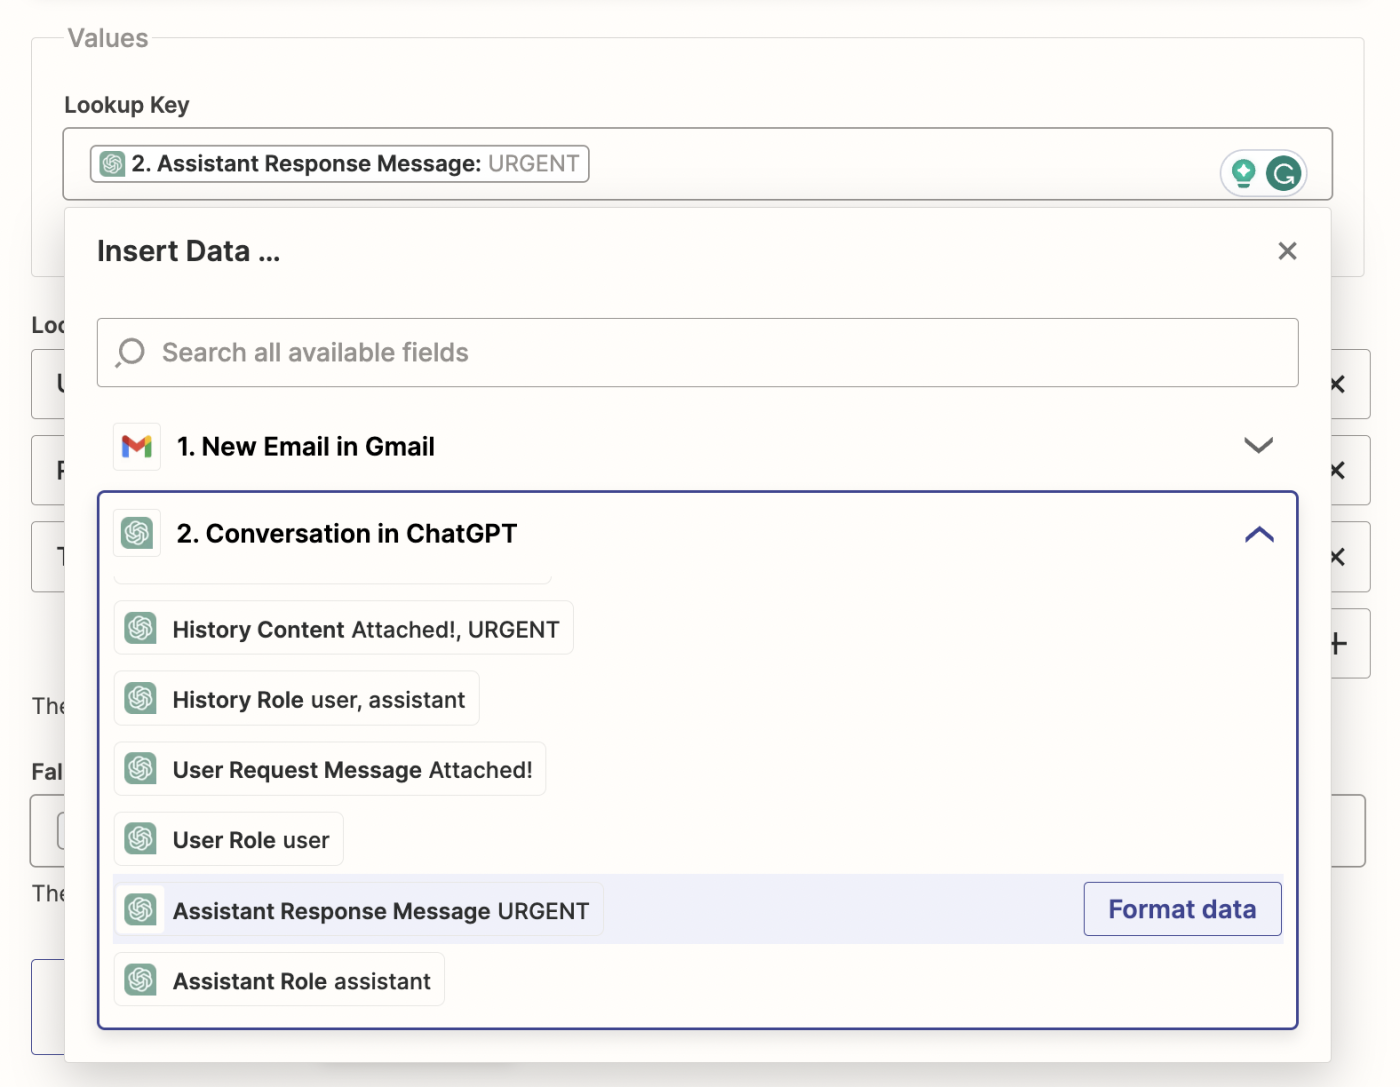
Now, create a lookup table by entering the Label Names of your custom labels in the left column (the keys) and the matching Label IDs in the right column (the values).

Next, we need to add a Fallback Value—the value to be used if Zapier does not find a matching value in the Lookup Table.
Click into the Fallback Value field and—like you did in the Lookup Key field—select Assistant Response Message from your ChatGPT step in the Insert Data dropdown. This way, if your response from ChatGPT is a default label instead of a custom one, the Zap will still run rather than pause if no value is found.

Click Continue.
Now, test your action by clicking Test action. If the label from your sample data is a custom one, you should see an output value pulled from your lookup table—like Label_7368336138505495642.
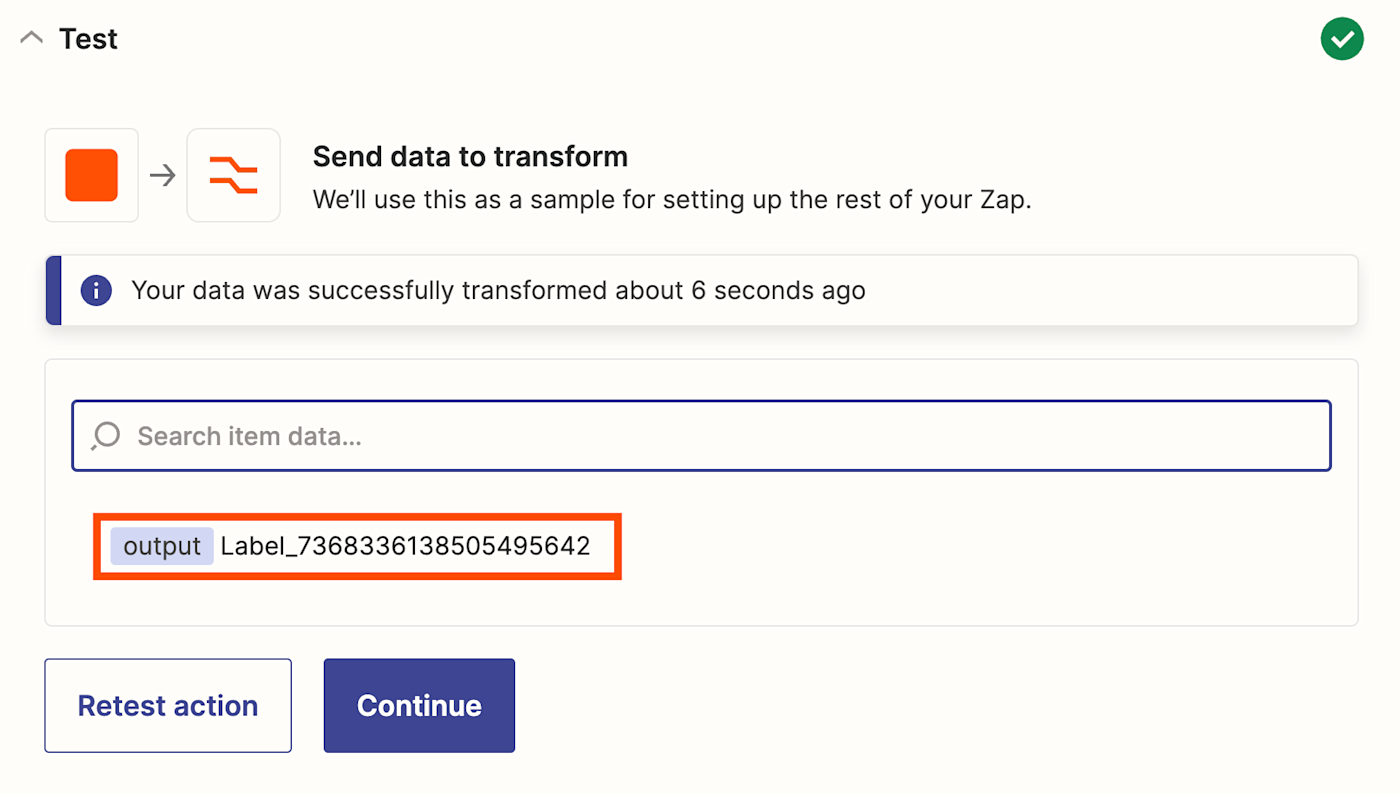
If the label from your sample data is a default label in Gmail, your output value should look the same as it did when it came from ChatGPT—all caps, exact same format, no punctuation.
If everything looks good, click Continue.
Finish setting up your Gmail action step
Now, you're going to return to your Gmail action step to finish your Zap.
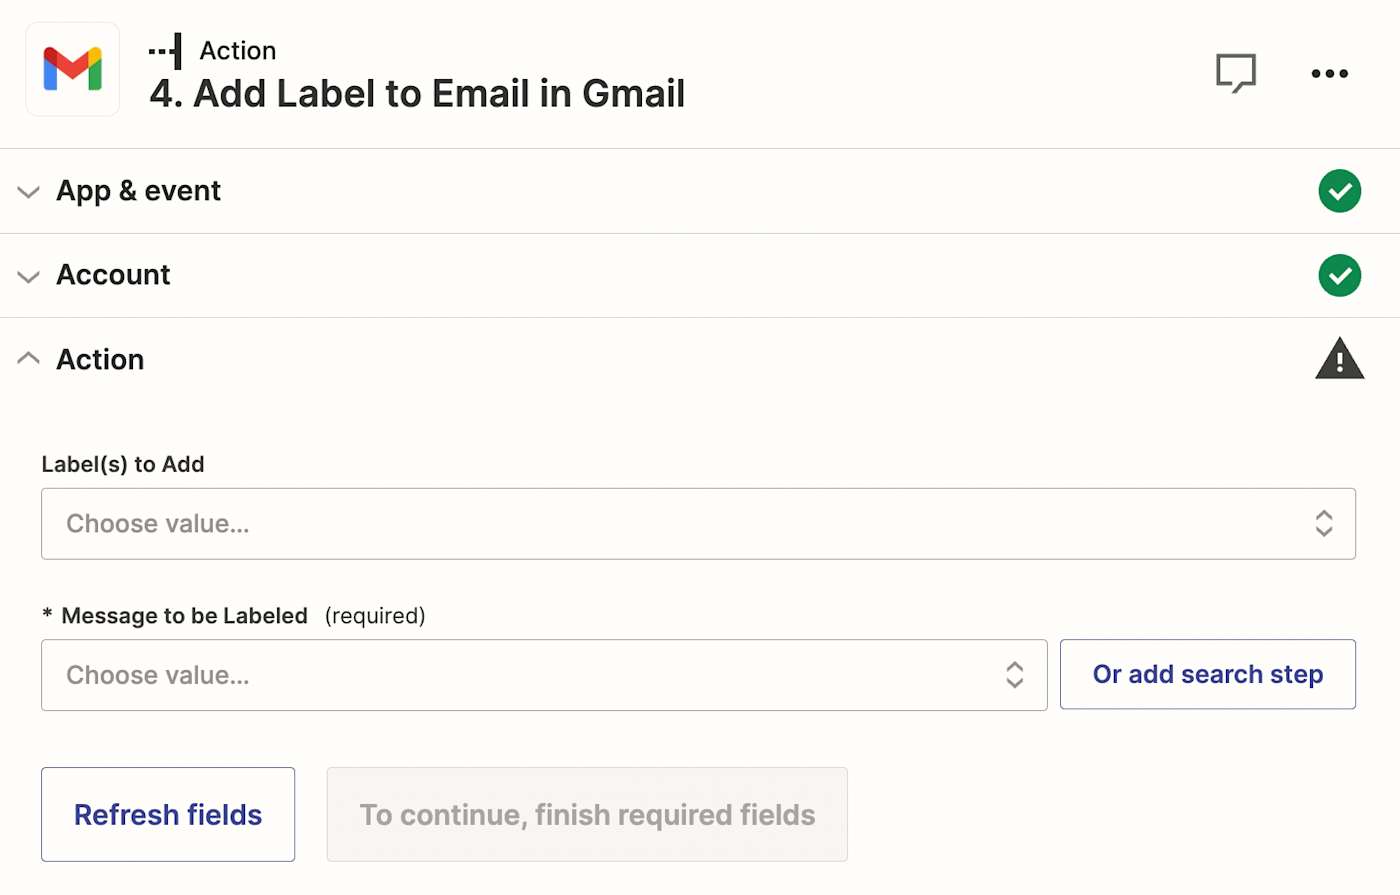
Click into the Label(s) to Add field and navigate to the Custom tab of the Insert Data dropdown. Then, click into your Formatter by Zapier step and choose Output.
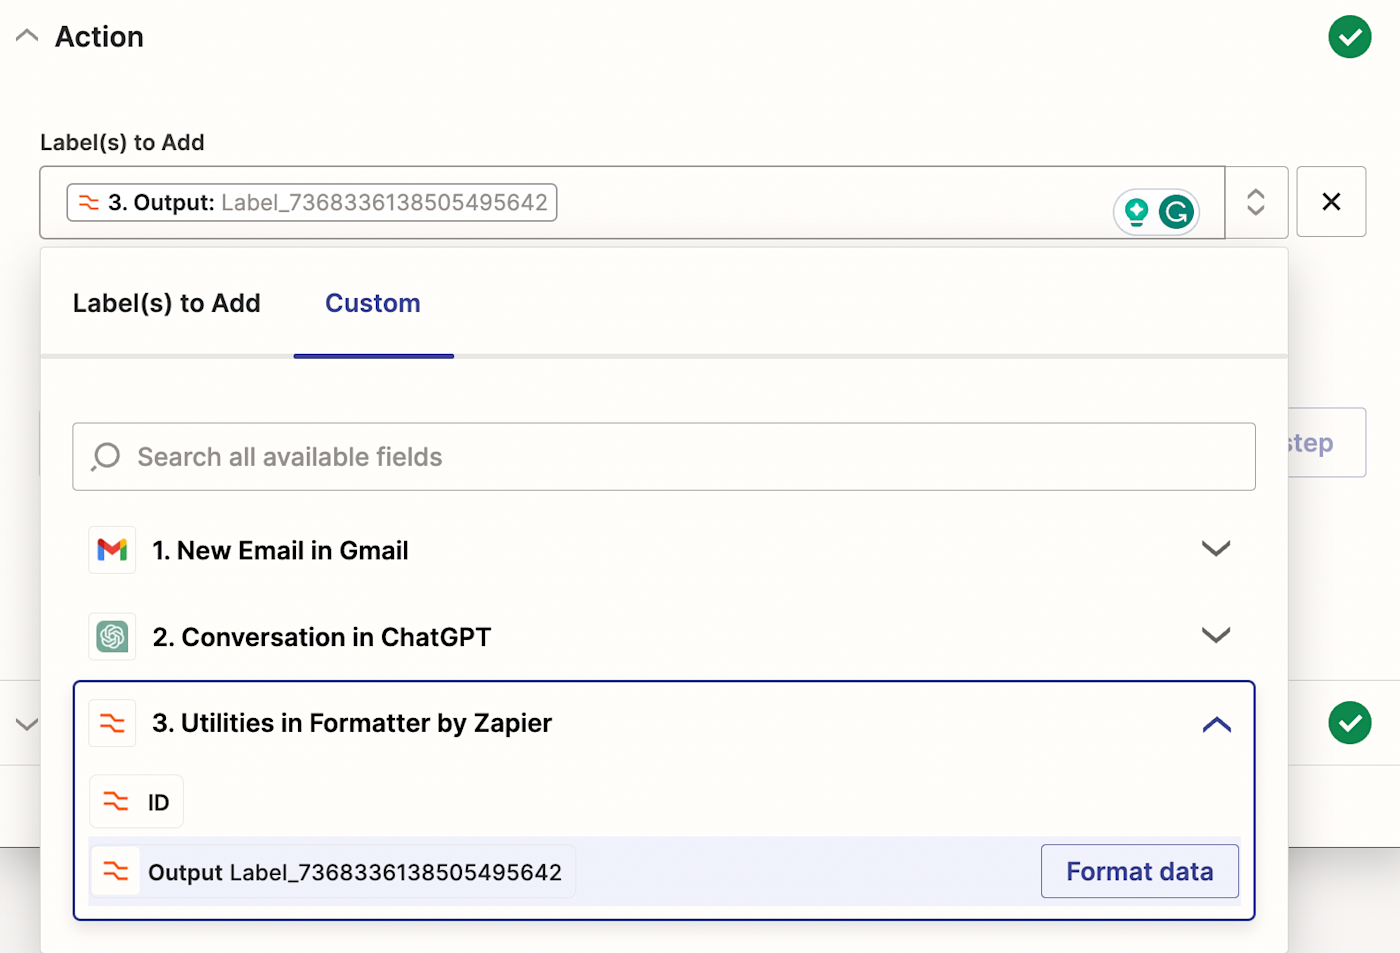
Next, you need to specify which message Zapier should label. Click inside the Message to be Labeled field, then click on the Custom tab of the Insert Data dropdown. Click into the Gmail trigger step and choose ID.
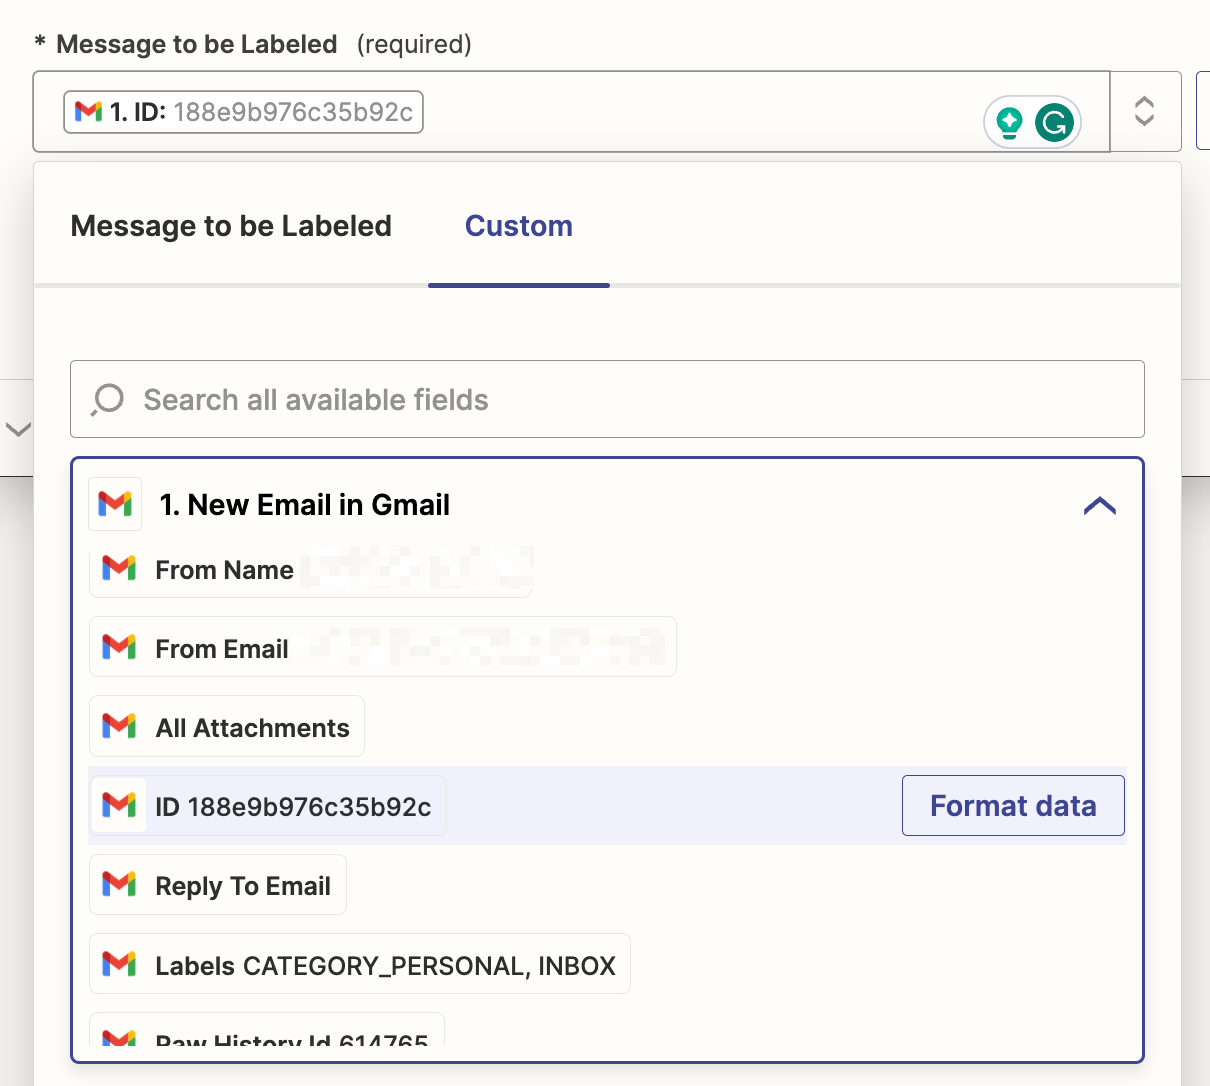
Then click Continue.
Now, click Test action to run a test. Zapier will then find your email and give it a label.
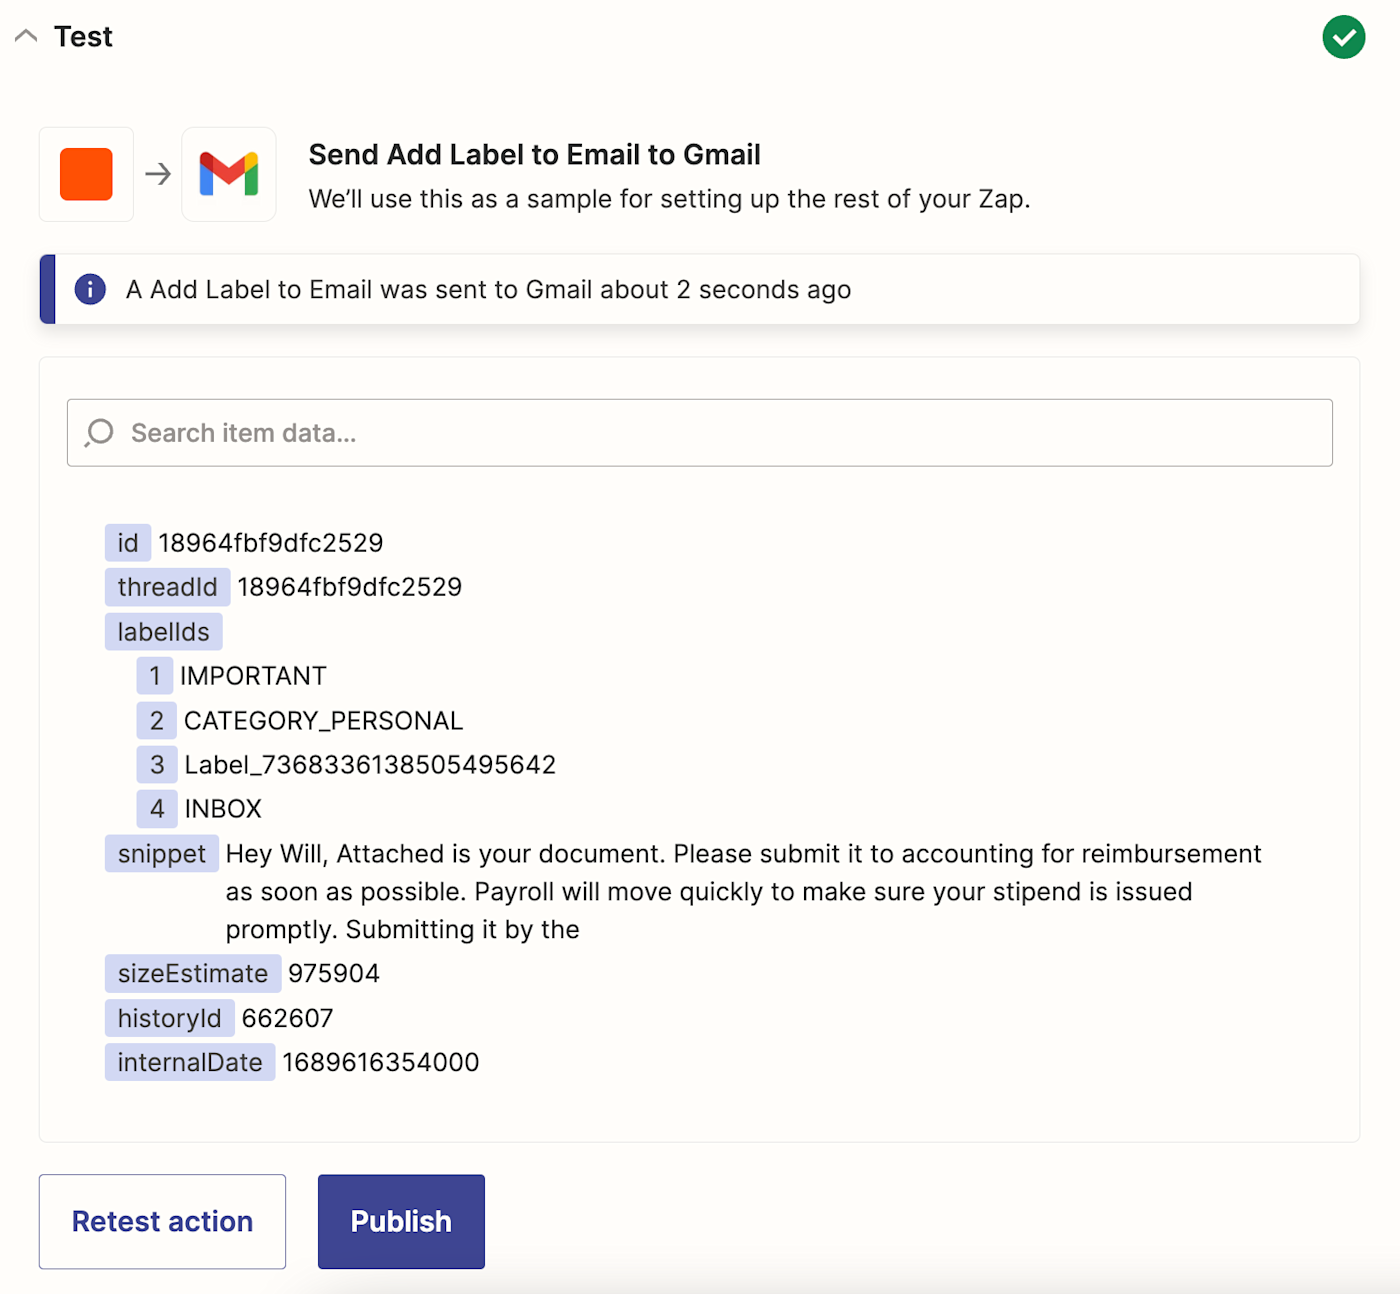
Once your test comes back, check your inbox to make sure your email was labeled correctly. If everything looks right, you're ready to use your Zap.

If your test fails, double-check the formatting of your response to ChatGPT to see if it matches your label, then try again.
Organize your inbox with AI and automation
Your inbox doesn't have to function as a digital junk drawer. Give it a little bit of organization—or let AI and automation do it—and you can keep your inbox neat and organized with ease.
Once that's done, you can turn to focus to using AI to help you reply to your emails, too.
Related reading:
This article was published in July 2023 and updated on July 18 to add more detailed instructions.
