Freshdesk is a cloud-based customer support software that is both feature-rich and easy to use. With multiple support channels available, including live chat, email, phone, and social media, you can help customers through their preferred communication method.
The intuitive inbox and robust filtering options make staying on top of support tickets easy. With the customer portal, you can customize and create a database of self-service articles. And the service level agreement (SLA) feature allows your team to define and track support resolution times.
In this tutorial, we'll walk you through how to get started with Freshdesk and show you how to use the main features.
Freshdesk Pricing: Basic free plan; paid plans start at $15/month per user. All paid plans include email ticketing, social ticketing, knowledge base, automations, and SLA management
Connect Freshdesk to 1,500+ other apps with Freshdesk's Zapier integrations.
How to Set Up Basic Features in Freshdesk
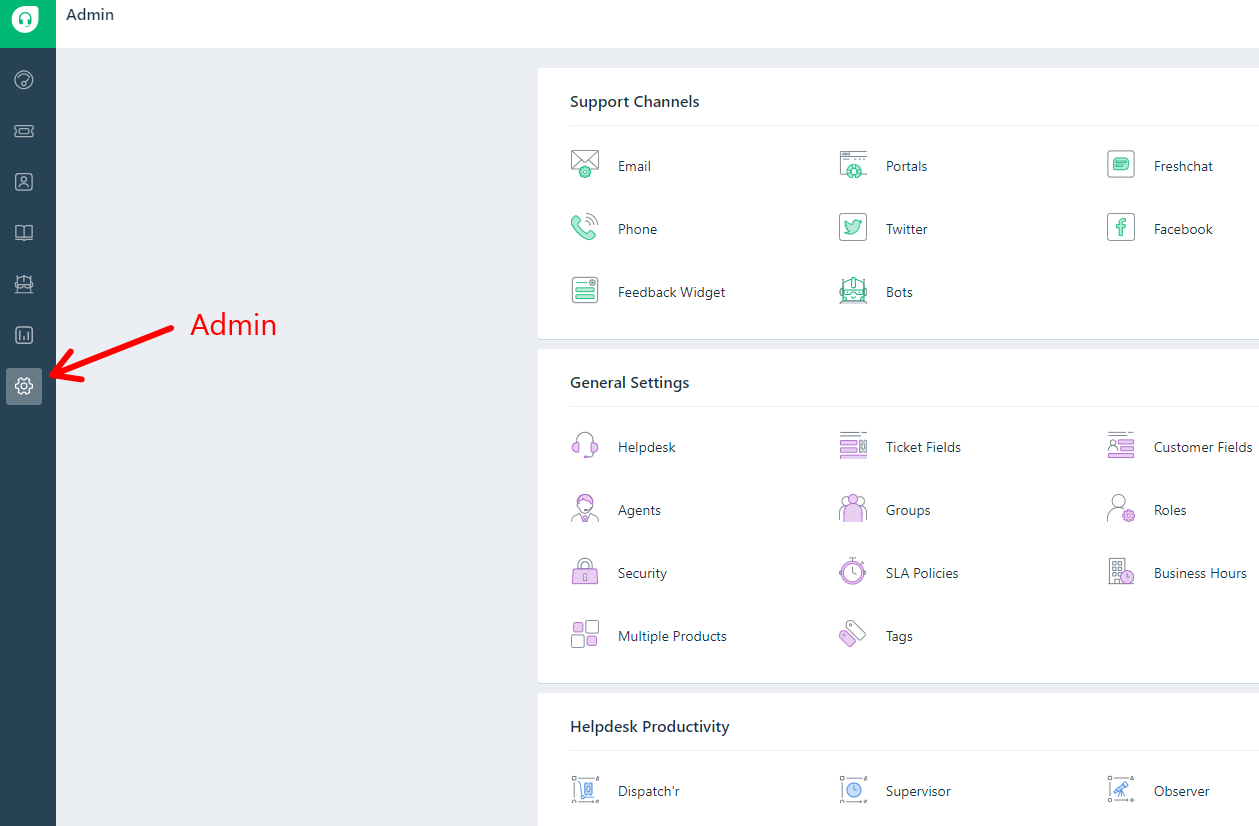
Before using Freshdesk to support customers, you'll want to set up some basic but important functions. Log in to the software and click the Admin icon on the far left of the user interface. From here, you can change general account settings, create different support channels, add agents, set up automations, and perform other basic admin tasks.
How to set up support channels
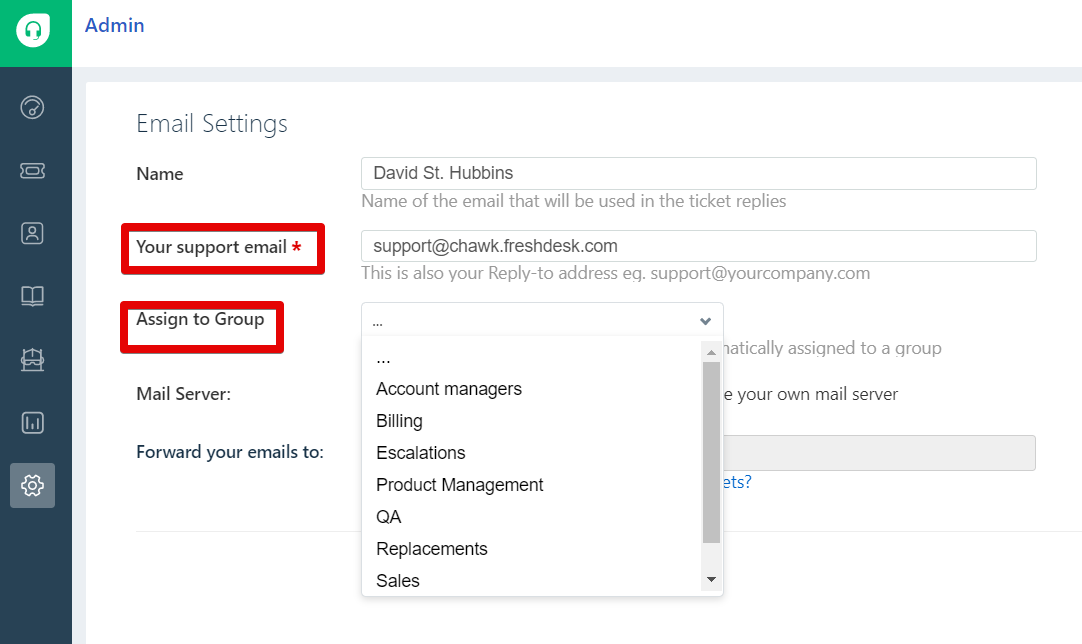
Under Support Channels, you can add channels to collect support tickets (e.g., email, chat, social media). Click Email, for example, to open up options for using this channel. Here you can customize the address(es) you want to use to collect support emails (e.g., support@yourcompany.com), the name to appear in ticket replies, the group it will be assigned to (e.g., Billing), and several more options.
By clicking the other channel options, you'll be walked through the set-up process for each. A few channels like phone and chat let you connect these features to Freshcaller and Freshchat, both paid service plans that can be integrated with Freshdesk.
How to add agents
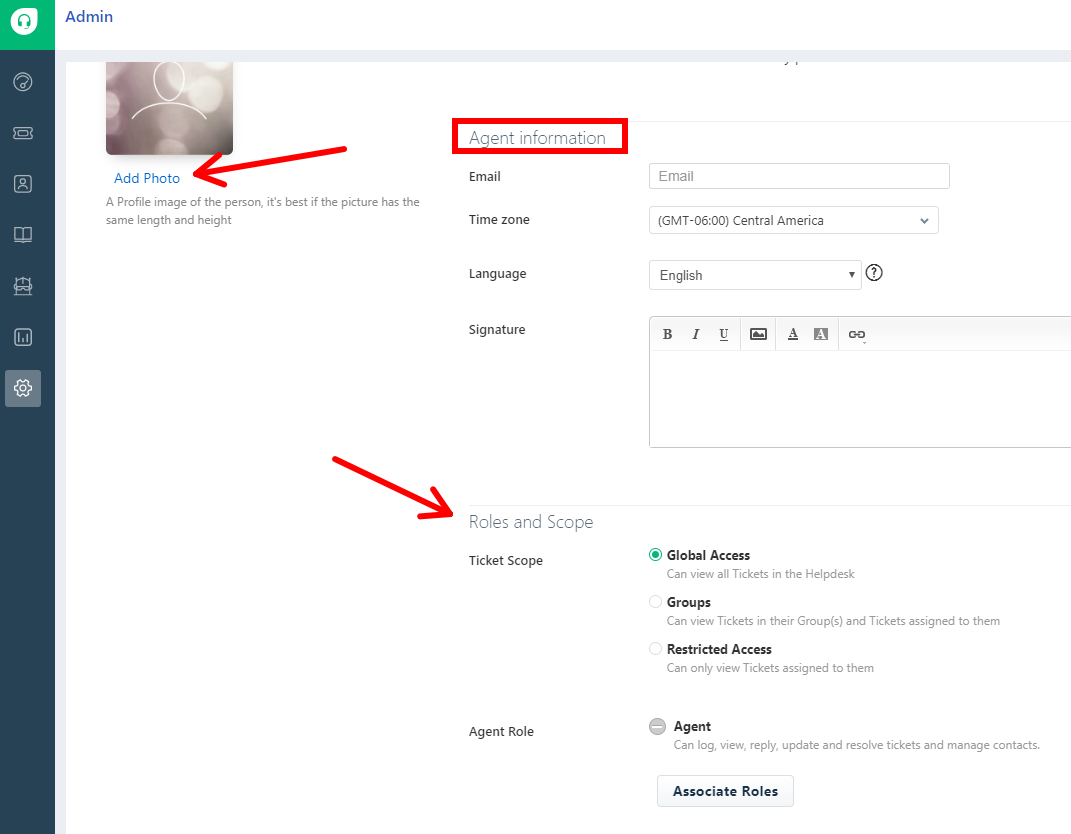
Agents are considered full-time support members who will regularly log in to the help desk. To add them, go to General Settings and click Agents > New Agent. From here, you can add personal details such as a contact email, photo, and signature. You can also define roles, related administrative access (agents, supervisors, admins, account admins), and access level to tickets.
How to create service level agreements (SLAs)
One of the most effective ways to standardize agent performance is creating SLAs, which lets you set up expectations for ticket response and resolution times. Under General Settings, click SLA Policies. From here you can use/modify the default template or create a new SLA.
SLA options include the following:
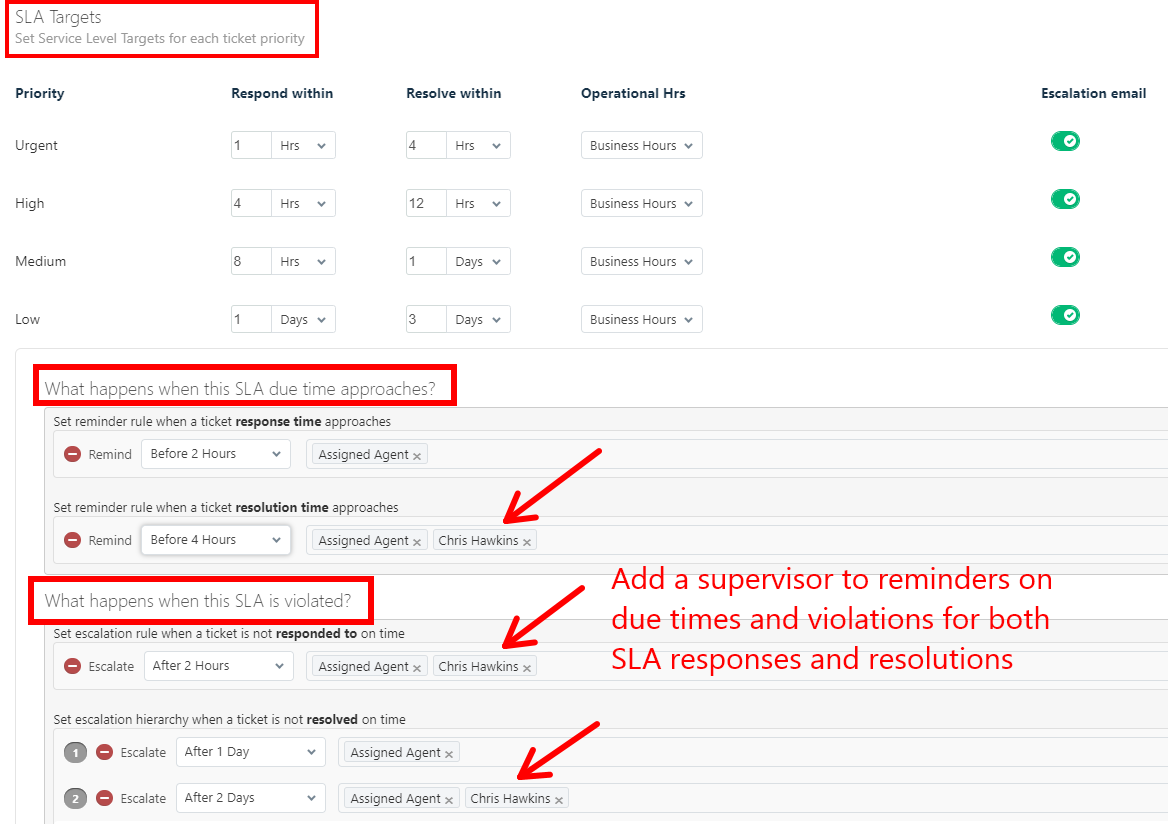
Service-level targets: set response and resolution time rules for different priority tickets
Ticket reminders: send email reminders to agents and supervisors for approaching response and resolution times
Ticket violation escalations: send escalation emails to agents and supervisors for violating the SLA response and resolution time rules
How to Create a Customer Portal in Freshdesk
The customer portal is your public-facing helpdesk where visitors can register as customers, search your knowledge base, initiate and track tickets, and interact on your forums. As an admin, you can customize the look and feel of the portal, add documents, set user permissions, and edit other functions.
How to customize and set portal permissions
Go to Admin and click your portal's name next to the headphones icon to change the public-facing name, add a logo, set the language, and customize the URL. By default, your forum's web address will be a subdomain of Freshdesk (e.g., yourcompany.freshdesk.com/support/home). However, you can use your own domain by pointing the default URL to your own (e.g., support.yourcompany.com). To see how this works, read about using a custom support URL.
To customize the portal, click Customize Portal on the right side. Here you can add your company's colors to the background, tabs, and fonts with options to further customize how all of the pages, sections, and forms look using HTML. There's a help guide for developing your own portal theme.
To set permissions, go to Admin > Portals > Settings. From here, you can allow sign-in options (e.g., Google, Twitter, Facebook) and determine who can submit tickets from the portal, who can view, and how to moderate forums.

How to add content to the knowledge base
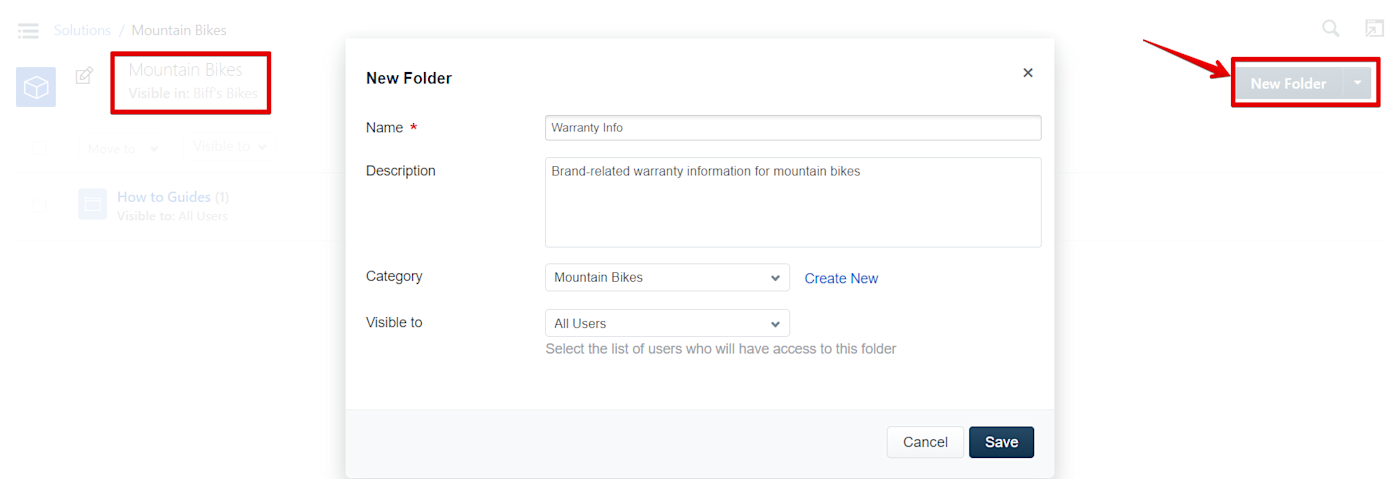
All of your customer portal content (aka "knowledge base") is managed through the Solutions tab with a three-level hierarchy: Categories, Folders, and Articles. Categories are top-level classifications such as support, Folders are sub-categories (software vs. hardware support), and Articles answer specific support questions for each folder.
To create a Category, click Manage > New Category. Add a name and optional description, then click Save. To add a Folder, click the desired category on the Solutions page. Click New Folder, add a name, and select an option from the Visible to dropdown. Click Save once you're done.
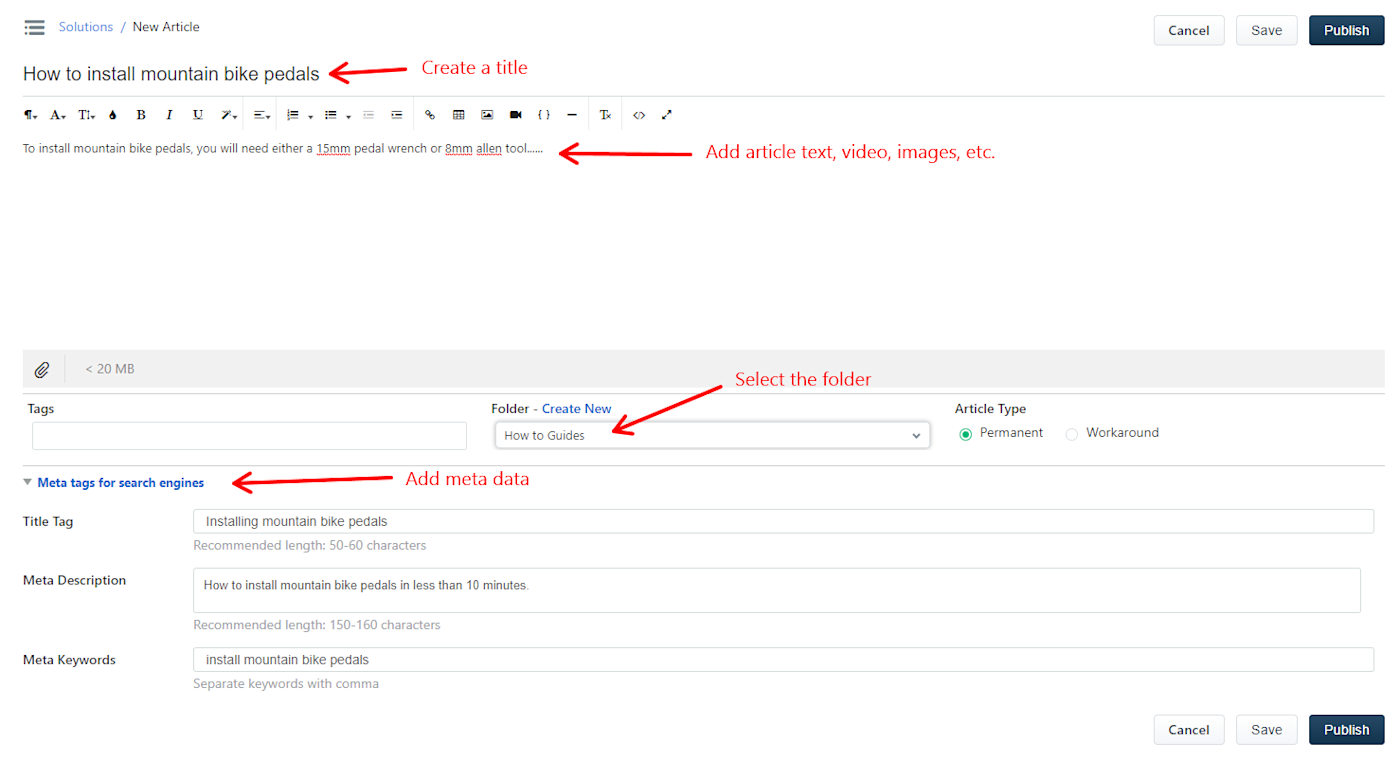
On the Solutions page, click the folder name, then click New Article on the right to add an article to a Folder. You can then add a title and the article's text in the box below. You can also do things like attach files, add videos, insert tables, and add images. Below the body text box, there's also a metadata section to help the article get found in search with fields for a title tag, meta description, and meta keywords.
How to Use the Dashboard in Freshdesk
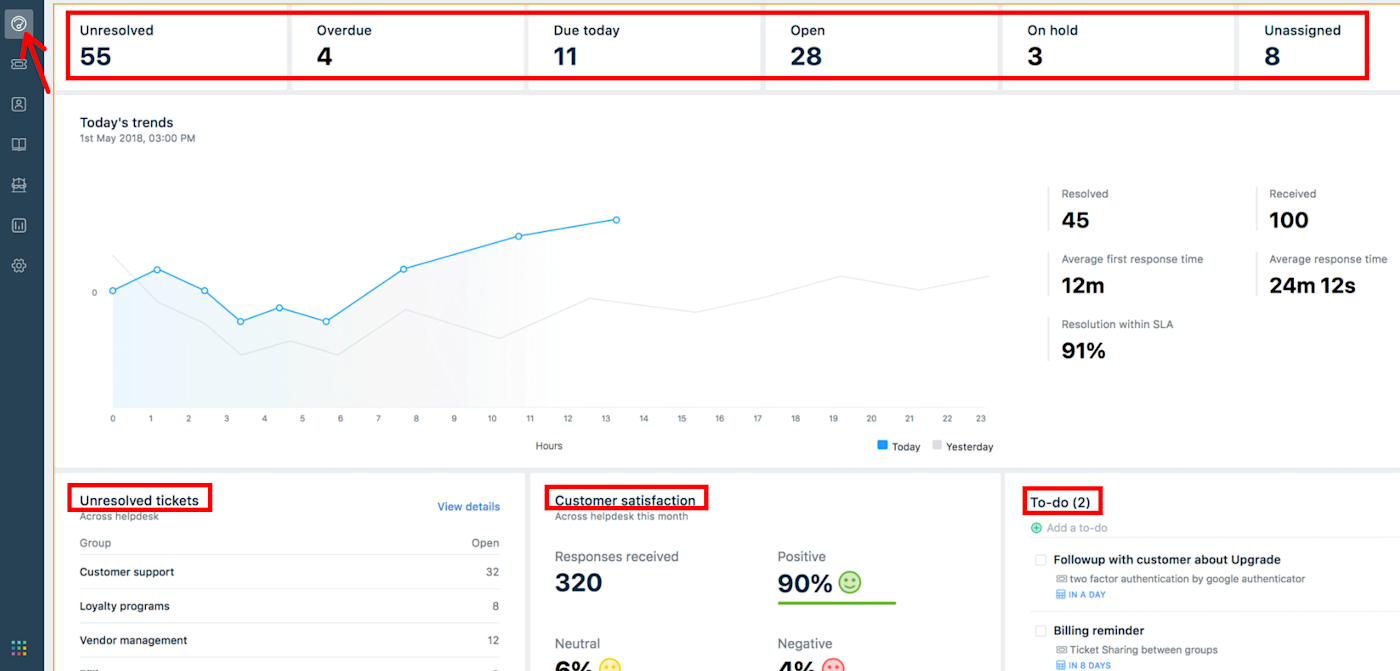
The default dashboard shows an overview of your helpdesk's performance and key performance indicators (KPIs) for items such as ticket status, average response time, unresolved tickets by group, and customer satisfaction scores.
How to create customized dashboards
Freshdesk lets you create up to 15 customized dashboards. From the Dashboard tab, click the hamburger at the top left, then New Dashboard. From here, name the dashboard, indicating whether it will be visible to all agents or agents in a group (e.g., all billing agents). Click Done to save.
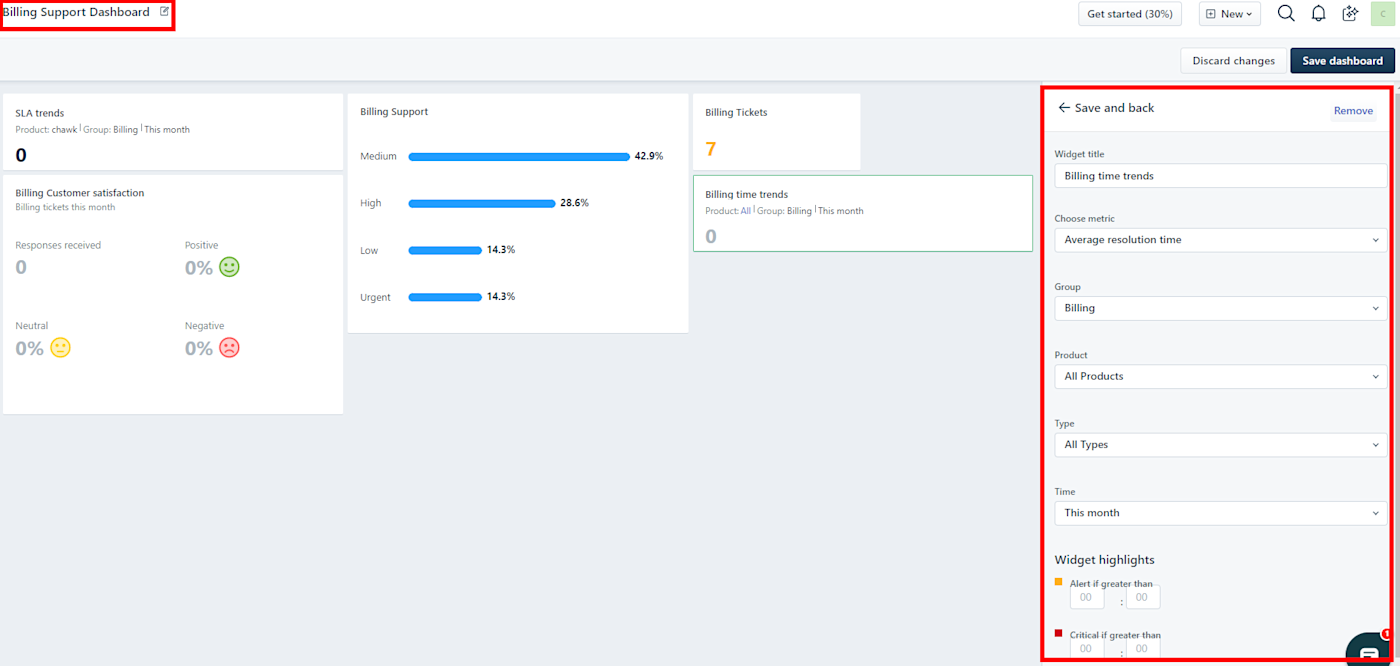
From here you can configure and add widgets to your dashboard from the library on the right side. These include options such as score card (count of tickets), ticket trends, SLA trends, and agent leaderboard. Each widget has customizable options.
To add a widget to your dashboard, click the desired option in the library. In the menu that opens up, name your widget, and then choose from the dropdowns for each option. For example, in time trends, you'll see the following options:
Metrics: e.g., average response time
Group: select all or a certain group (e.g., billing)
Products: select all or certain products (e.g., software) you're tracking
Type: select all or a certain type (e.g., refund)
Time: select the period of time you want displayed
Once you've configured and added the widgets, click Save Dashboard at the top right.
How to view your dashboards
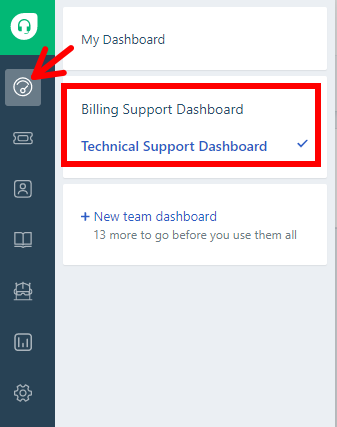
Your custom dashboards are listed on the Dashboard tab. Clicking on a dashboard will open it up, allowing you to view, edit, clone, present (full screen view), and share with your group.
How to Create Support Tickets in Freshdesk
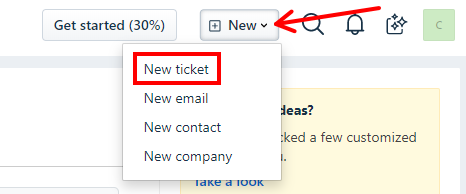
Tickets can be created manually and automatically. To create a ticket manually from any navigation tab, click New in the top right corner, then select New Ticket from the dropdown.
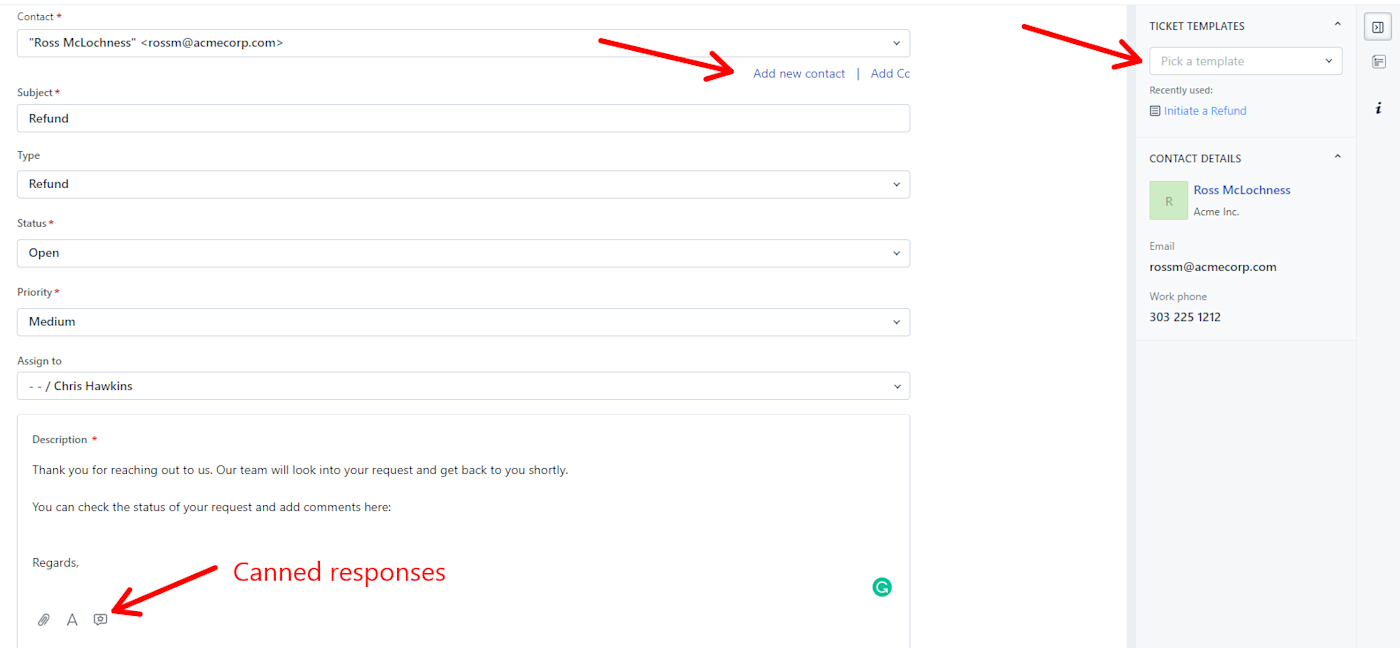
When the new ticket form opens, you'll need to either add a new contact if there is no contact record or start typing the name in the contact field to find an existing record. If you need to create a new contact, click Add New Contact. At a minimum, you'll need a name, email, and phone number. Once the contact is created, you can enter additional ticket details into the Subject, Type, Status, Priority, Tags, and Assign to fields.
How to add and edit automatic responses in tickets
By default, Freshdesk will send an email to the contact automatically once a ticket is created unless you turn off this function in Admin > Email Notifications. If you keep it on, you'll want to add a response in the text box at the bottom of the ticket. You have a few options here: Type a personal note, pick a pre-written canned response, or pick a pre-populated template (e.g., initiate a refund). You can create templates and canned responses in the Admin tab.
How customers create tickets
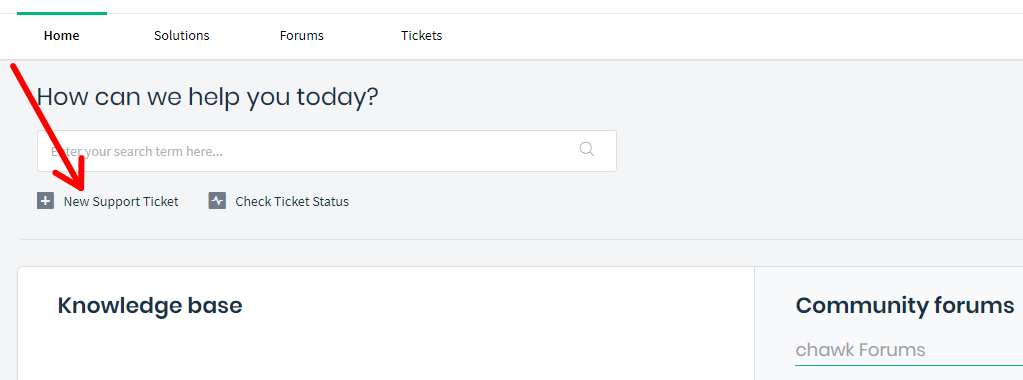
Tickets are created automatically when a customer fills out a form within your customer portal. They can do this by clicking New Support Ticket and filling out the form with their email, subject, and description. Once submitted, it will go into your ticket inbox where you can assign, change the status and priority, and add other details.
How to Manage the Ticket Inbox in Freshdesk
Access the ticket inbox for your entire team from the Tickets tab. Like an email inbox, Tickets shows a running list of all tickets, when they were created, status, priority, and category—all at a glance. Individual tickets can be clicked and replied to within the record.
How to use ticket filtering
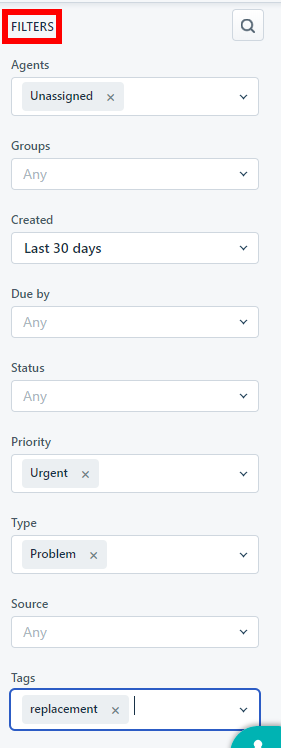
From here, you can filter tickets by properties such as agent, due by, status, priority, and name. Filtering options are found on the right side. Additionally, you can do a quick ticket sort at the top left by clicking on the dropdown. Pick a filter (date created, due by time, last modified, priority, status) and if you'd like to see the results in either ascending or descending order.
Clicking on the box before Sort By will give you bulk options for your filtered tickets as seen below. This lets you apply actions for all tickets in a filter (you can also unclick tickets you don't want in your bulk action).

How to make quick ticket updates
In the inbox view, you can make updates to a ticket's priority, assigned group/agent, and status without opening the ticket record. These can be changed to the right of each ticket. Additionally, if you hover over the ticket subject, the latest email will open in a small dialogue box from which you can view, reply, or add a note.

How to respond to tickets from the inbox
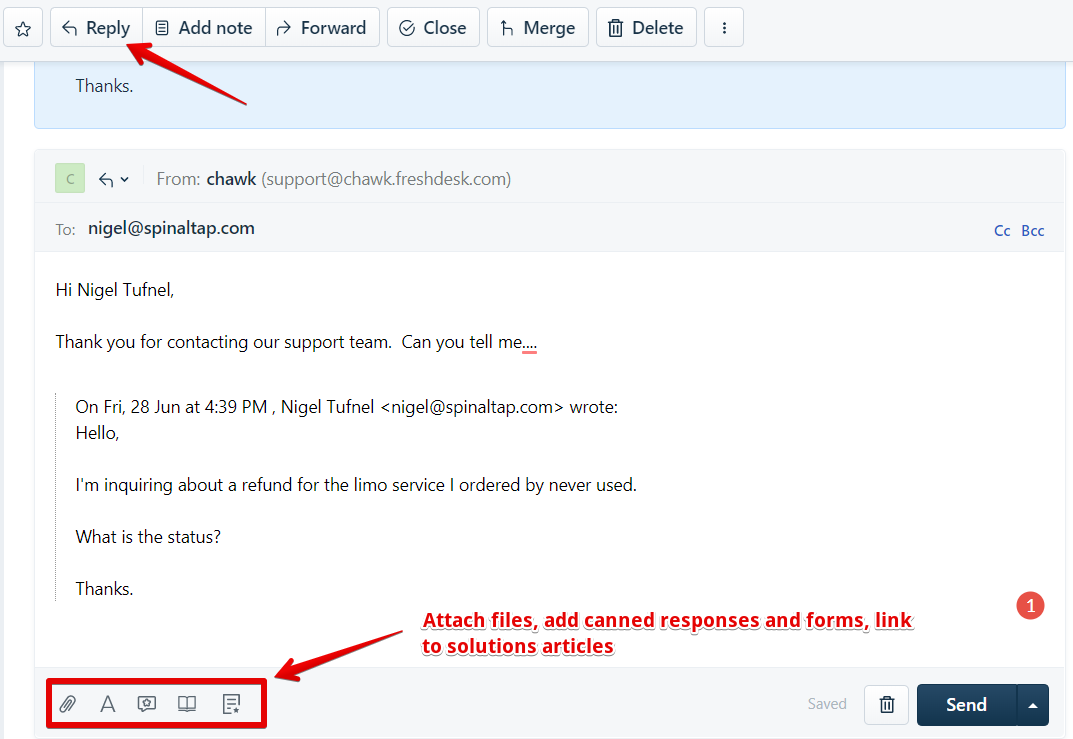
Clicking on the subject line in the inbox will open the ticket. From here you can do assorted tasks, such as respond by email, forward, merge with another ticket, change properties such as the status, and add notes.
To respond by email, click Reply and type your reply. At the bottom of the reply window you can attach files, search for solutions articles from your library to link to, and add canned responses and forms.
Providing stellar customer support should be the goal of every company. Support software like Freshdesk will help your agents stay organized and provide self-service options for customers to help shorten your support queue. To solve even more support problems, check out Zapier's Freshdesk integrations, including a Zap to notify agents in Slack when a new ticket is received.
