You can use HubSpot dashboards for just about anything. I use them to keep tabs on my own personal productivity and track progress toward team targets, and during the pandemic, I even started using dashboards to structure my remote team meetings.
The more I do with HubSpot dashboards, the more features I discover. The moral of the story is probably to pay closer attention during initial training demos (sorry, HubSpot!), but when you're first getting to know sophisticated software like this, there's a lot to take in.
So here's a cheat sheet: the hidden HubSpot dashboard features you should start using.
1. Filter your dashboards
If you're using a dashboard to get an overview of one area of the business, and you decide you want to view the data from a new perspective (a new date range, for example, or from a different team), you can change the filter for the entire dashboard in one go, rather than changing each individual report.
Go to your dashboard, and you'll see a Filter dashboard option in the top-left corner. This will override the filters on every report within that dashboard.
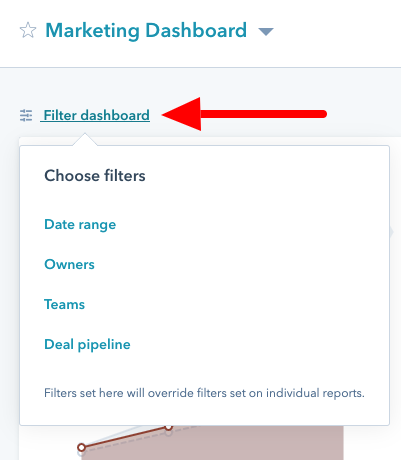
I used to change each report individually, so I had a real *facepalm* moment when I noticed the button. Not only does this feature save me time when I'm analyzing my data, but it also gives me the confidence I need that I have the correct figures in front of me. If you try to change the filter of a single report when the dashboard filter is on, you'll get this warning message.
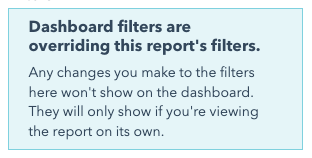
That means you get to keep your reports as is and fiddle with the dashboard however you want—you won't mess up any data.
2. Adjust visibility
If you're half as obsessed with reports as I am, it's likely you create a lot of different dashboards to keep an eye on the outcomes and progress of various projects at once. But as your library gets stacked with dashboards that have similar names (guilty), your team members might not know which ones they should be using and when.
Or maybe you have dashboards that contain sensitive information—on revenue or particular clients, for example—that you don't want everyone in the business to be able to access.
This is where HubSpot's dashboard privacy feature comes in really handy. The system allows you to create dashboards that are private to you or, if you're on the Enterprise package, to specific users and teams. You can also limit which users can edit each dashboard and report you create. This prevents anyone from dropping in and changing the criteria of a dashboard you've spent time perfecting. I've been there—it's not fun.
The option to control dashboard visibility will pop up automatically any time you're creating a new dashboard. The default is that everyone can view and edit, but think strategically about who should have access to your dashboards as you create them, so you can save a bit of hassle down the line.
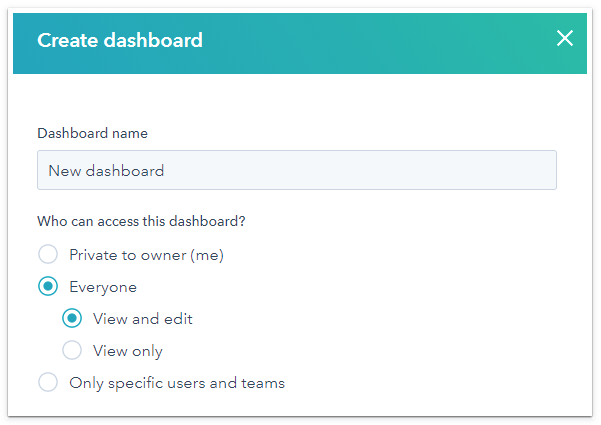
To manage access of any of your existing dashboards, there's a small button on the top-right. It'll say Everyone can edit, and if you click it, you can choose to edit the access.
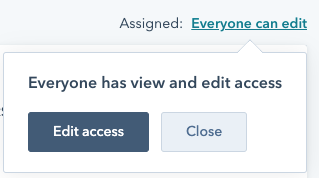
Note: to change the access, you'll need to either be a Super Admin or be the user who originally created that dashboard.
3. Add descriptions
Descriptions are a relatively new HubSpot dashboard feature that I absolutely love. You can now add descriptive text to a panel at the top of any dashboard. Mention who owns it, what it's for, or any other information that provides some clarity on how the dashboard is being used within the context of the business.
For example, you could include an overview of targets to compare the data against. Or if you're using the board to structure a meeting, you could even add the meeting agenda to the top so everyone stays focused. Here's a snapshot of what that might look like.

This provides context to each dashboard, helps you remember why you created it, and—if you force yourself to write a description before creating the whole thing—stops you from creating a dashboard that won't really have a clear value-add.
To add a description to your dashboard, click Actions at the top-right of your dashboard, and select Insert images, text, or video.
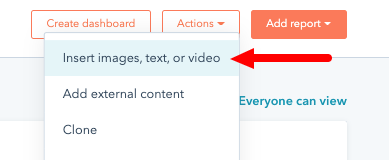
A rich text window will then appear, and it'll be added as a panel to your dashboard—you can move it around anywhere on the board.
4. Embed external (and internal) content
HubSpot's content embedding feature is a real game-changer: you can now choose to add a piece of content in place of a report panel anywhere on your dashboard. You can add an image, a video, a spreadsheet, a presentation, and more.
There are two ways to embed content onto a dashboard:
Use the Insert images, text, or video button just like you did for your description.
Use the Add external content option, which you'll also find under Actions.
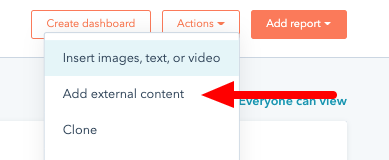
By choosing the first option, you can upload content from your HubSpot media library or upload content from your device. If you select the second option, it'll bring up a whole selection of tools HubSpot integrates with.
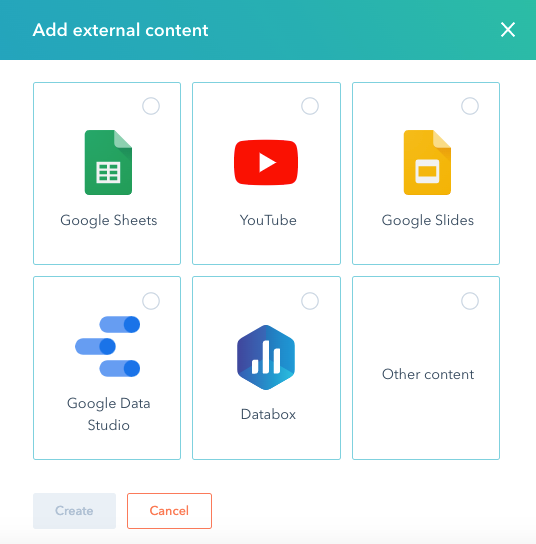
Here are a few ideas for inspiration:
Video. Include a screen capture video to show your colleagues how to use the dashboard, or add YouTube content that provides context to a project that the dashboard is tracking.
Images. Add a header image to tailor the look to a particular project or brand. This is particularly neat if you use dashboards to report data back to your clients. Add their logo on there!
Spreadsheets. Include your sales forecast or targets to refer back to easily without leaving the dashboard.
Presentation. Provide context around a particular project that the dashboard data is representing, or include the initial pitch deck if you're working with a client.
5. Email reports
If you like to get a weekly or monthly snapshot of how your team, projects, or clients are progressing, you can set up an automated email to go out on a recurring basis.
Once again, click that magic Actions button at the top of your dashboard, and you'll see an option to Email this dashboard.
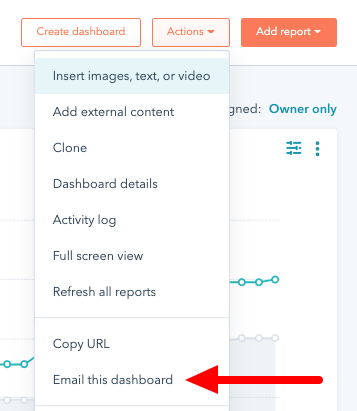
You can then select when you want the recurring email to go out and if you want the email to include the whole dashboard or just a selection of reports within that dashboard.
The email can go to you or someone else—this is great if you have a colleague or manager who doesn't need HubSpot access but wants a snapshot of how teams are performing against company goals. I did this for the CEO of a company I used to work for, and she loved it.
HubSpot knows just how important data is to running a successful business, which is why they've spent so much time developing these features to help you get the most out of their dynamic dashboards. Start incorporating some of these features into your HubSpot strategy, and dashboards will become a core part of how your business operates.
