It's time for a new you—at least at work. So no matter what you've got right now all over your desk, ask yourself: what if, starting tomorrow, you had a clean, clear space to focus on your work? What if you had a place to enjoy jotting down your ideas instead of a place that drags you down?
For the past decade or so, from blogs to Reddit to TikToks, I've seen hundreds of minimalist desk setups. But they're often so clean that I can't imagine someone actually doing work there day to day. You never see any peripherals like printers or scanners or speakers or phone chargers—but they certainly look cool in a static photo.
Recently, I saw a video editor on YouTube describe the lengths he went to to make his "dream desk setup" so that—both above and below—it appears to be entirely "wireless." Obviously, being a video editor means his desk isn't just for the sake of looking good, as he incorporates all kinds of speakers and editing decks and external hard drives and controllers. But he still maintains a clean spot to work.
After watching the video, I was convinced the time was now—not just to clean the top of my desk, but to make my whole work area look and work better. So I spent the following week researching similar videos, gathering tricks and tips, and then ordering $60-80 worth of cable-organizing products. Finally, I spent one day putting it all together.
First things first: my before times
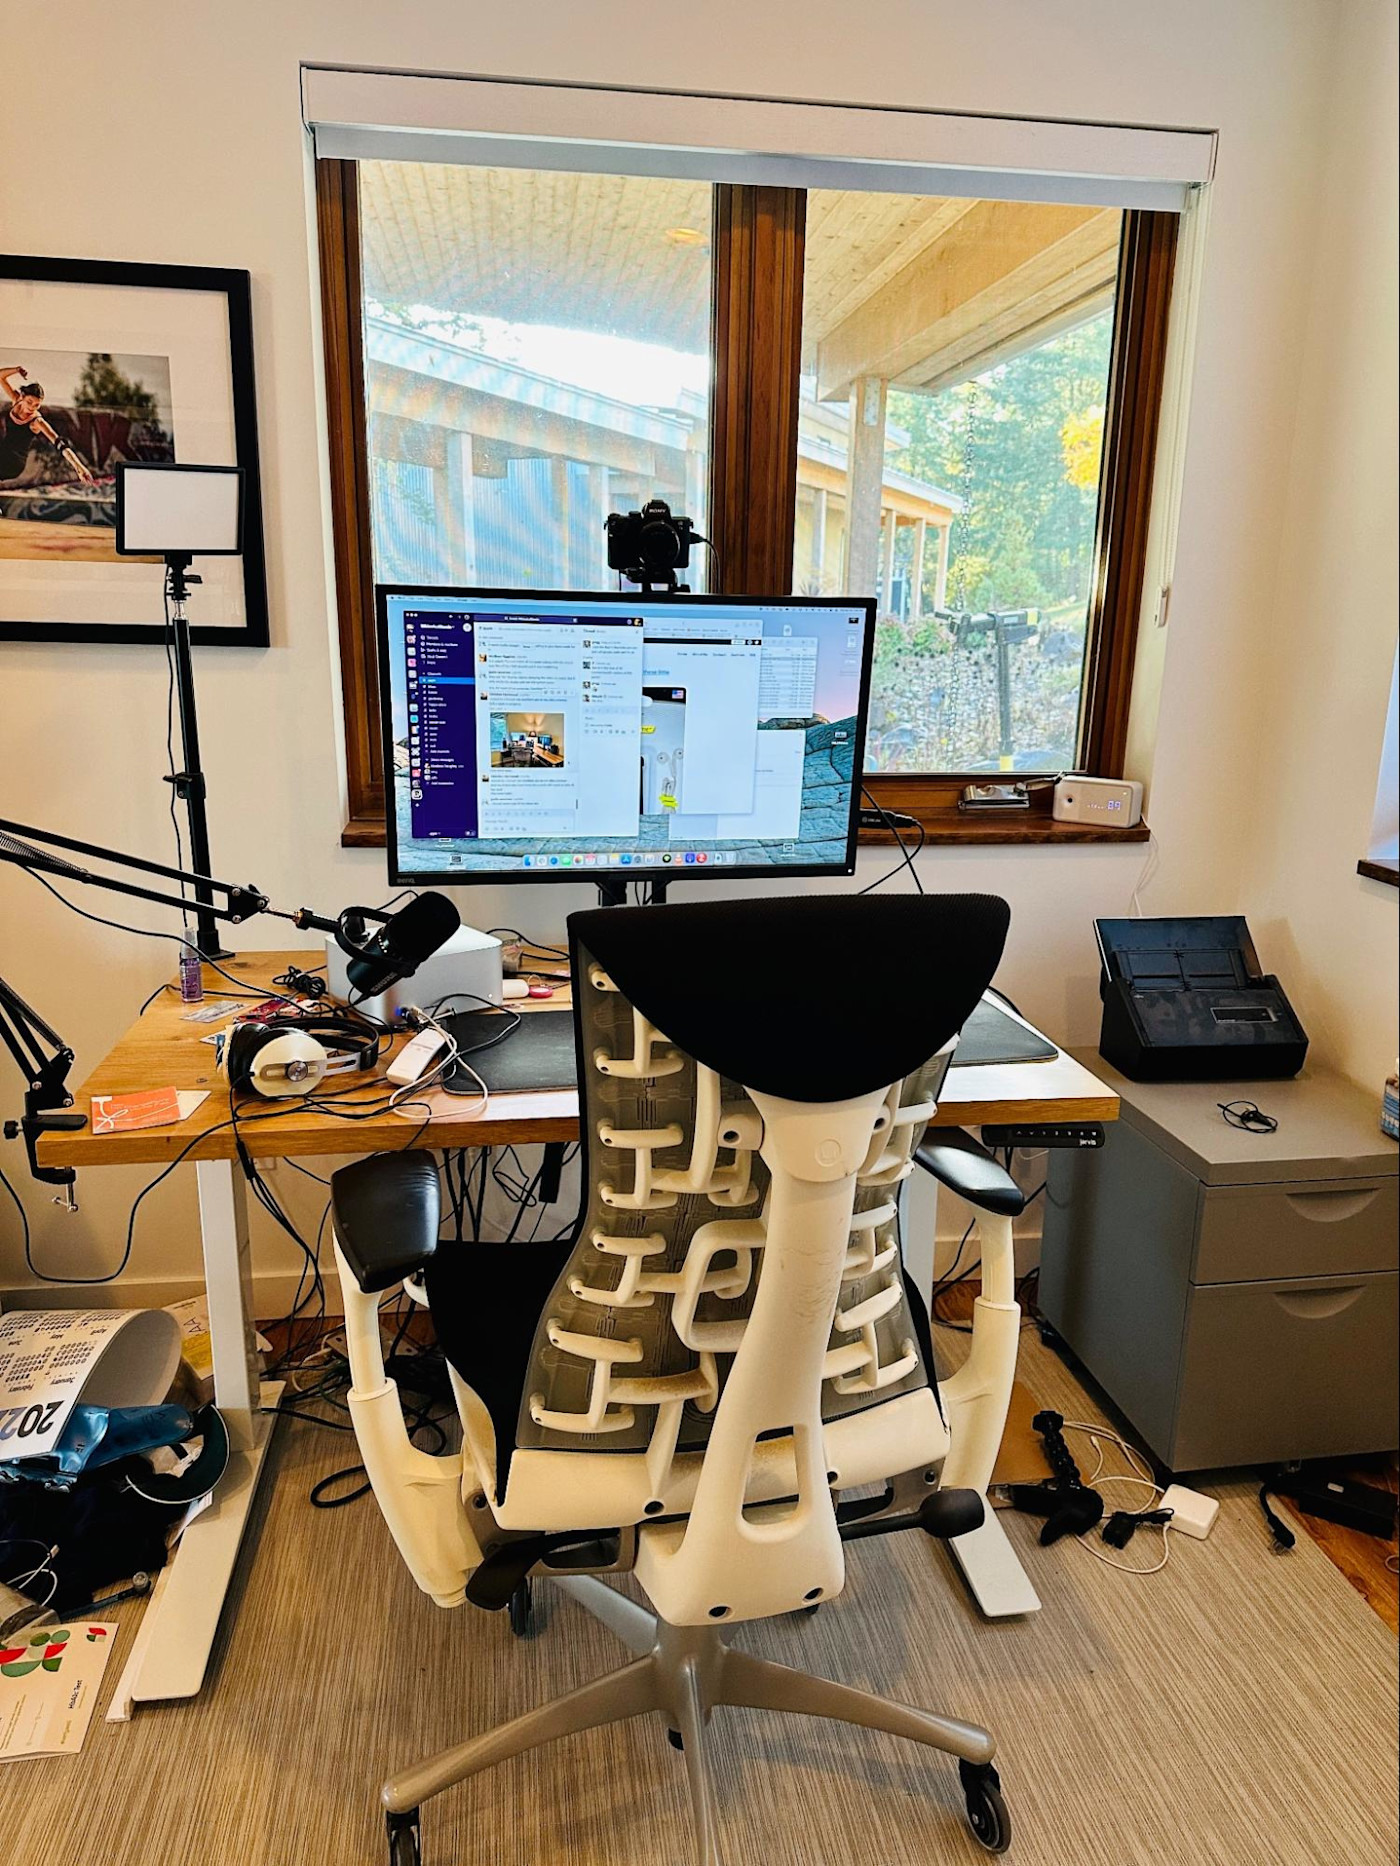
I tend to clean the top of my desk every four to six months, but almost immediately, it forms piles of half-baked projects and snail mail and receipts—so much so that, within days, I'm back to stacks of things everywhere. (And not just on my desk but also on the ground all around my chair.) If you zoom in on the photo above, you'll see the giant bundles of cables like spaghetti coming down the back of my desk near my feet that always caused havoc.
Turning a disaster area into a clean, useful space may seem like a big challenge, but if you break it down into smaller parts, it's absolutely manageable.
Map out your plan
The old saying "if you fail to plan, you plan to fail" rings very true in this case. First, you need to map out everything you want to do. Here are the steps I followed to transform my perennially problematic desk into a cleaner, better designed workspace:
If you can, set aside a day with nothing on your plate. Totally clear your schedule.
Unplug every single thing completely, and power it all down to start fresh. (You're going to place each thing back, one at a time.)
Instantly gain desk space with a monitor mount.
Attach everything you can to the bottom of your desk, with stuff you rarely touch going nearer the middle and stuff you change often toward the edges.
Figure out how you'll bundle up wires and attach them under your desk.
Design your desk so that the bare minimum of wires go down the legs of your desk to walls or other devices. Keep everything you can attached and wired underneath your desk.
That's it—so let's walk through each part of the list.
Deal with the big items
The biggest difference you can make for your desk right now is taking your monitor off its own stand and mounting it onto an arm or pole that's affixed to your desk. I use a very simple pole with a VESA mount (the mounting standard for monitors) and a desk clamp that I got on Amazon for around $30. Every monitor mounting solution I've researched includes cord management, which helps you further hide your cables for a cleaner appearance.
After my monitor, the next biggest things in my setup were two power strips on the floor, with three or four different things plugged into each—wires all over. I also have an ethernet hub with four or five cables attached and a Raspberry Pi running home automation software. Getting all these items attached underneath my desk meant I only had two power cables and a couple ethernet cables going away from my desk, minimizing my cords to manage.
Start placing items
I wanted my power strips attached as securely as possible because I tend to pull and push hard when adding or taking away plugs, so I opted to use wood screws and a cordless drill to drive them into my solid wood desk. (Strong double-sided adhesive strips might work for you, but they tend to fail on wood desks that have been oiled.)
If you opt to go with screws on the bigger or heavier items, many power strips already have holes to attach them to walls, usually in the form of a "keyhole" type mount. This TikTok video explains how to drill perfectly placed screws under your desk in less than a minute.
I put my power strips near the edges of my desk to make plugging things in and out easier, but I typically only add or remove items once every few months. I used adhesives to stick a USB hub underneath, and I put that right on the edge of my desk, so I could quickly plug into it.
Organize your cables
Once all your biggest items are attached under your desk and your monitor is attached to the top of your desk, you'll have bundles of wires and cables to hide underneath as well. The first thing I did was go to a big box DIY store and buy a roll of velcro cable ties. I wrapped each of the extra wires and cables around my hand, then used a velcro strap to keep them tidy.
With a bunch of big loops of cables hanging below my desk, I grabbed some fasteners made for attaching coax cable to walls, but you can certainly find lots of adhesive-based cable attachment points. I used my metal mounts and screws to attach all my bundles of cables under my desk. Once you've got all your cables tidy in loops, then attached under your desk, you're almost done.
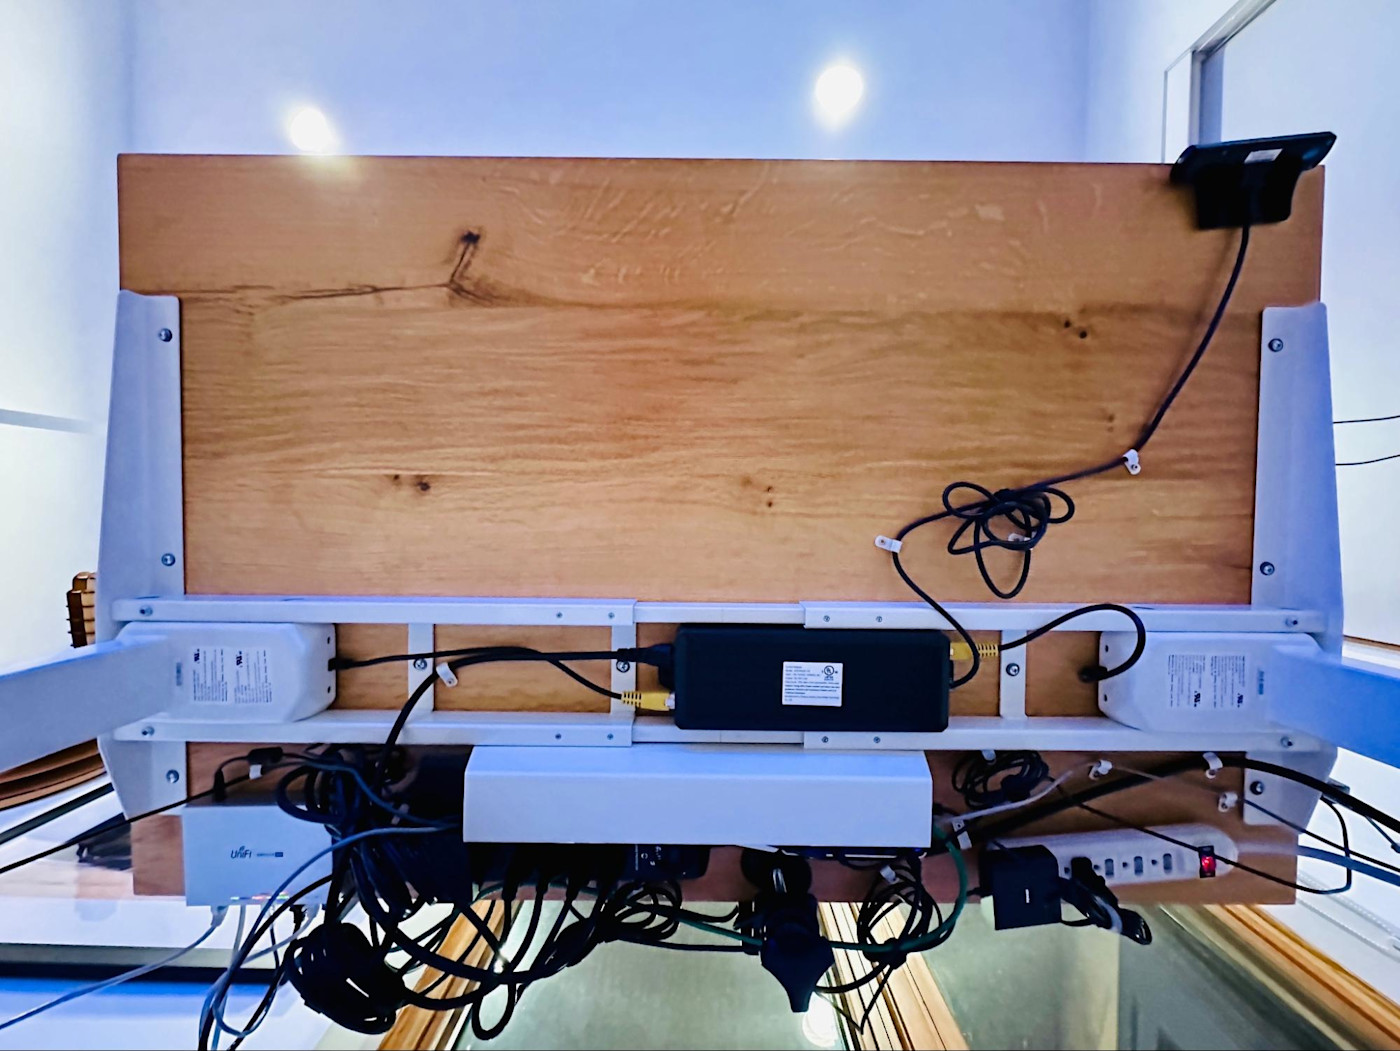
Above is a shot of the underside of my desk with everything attached, and I admit it's not the cleanest or most perfect setup, but all my devices are attached and only hang down a few inches from the bottom of the desk.
Route the fewest cables possible down the legs of your desk
All this planning means almost everything on your desk is connected to the power strips you attached underneath your desk, so you may only have one or two wires that head out away from your desk. In my case, I had two ethernet cables attached to other devices in my office and two power cords attached to my surge protectors under my desk.
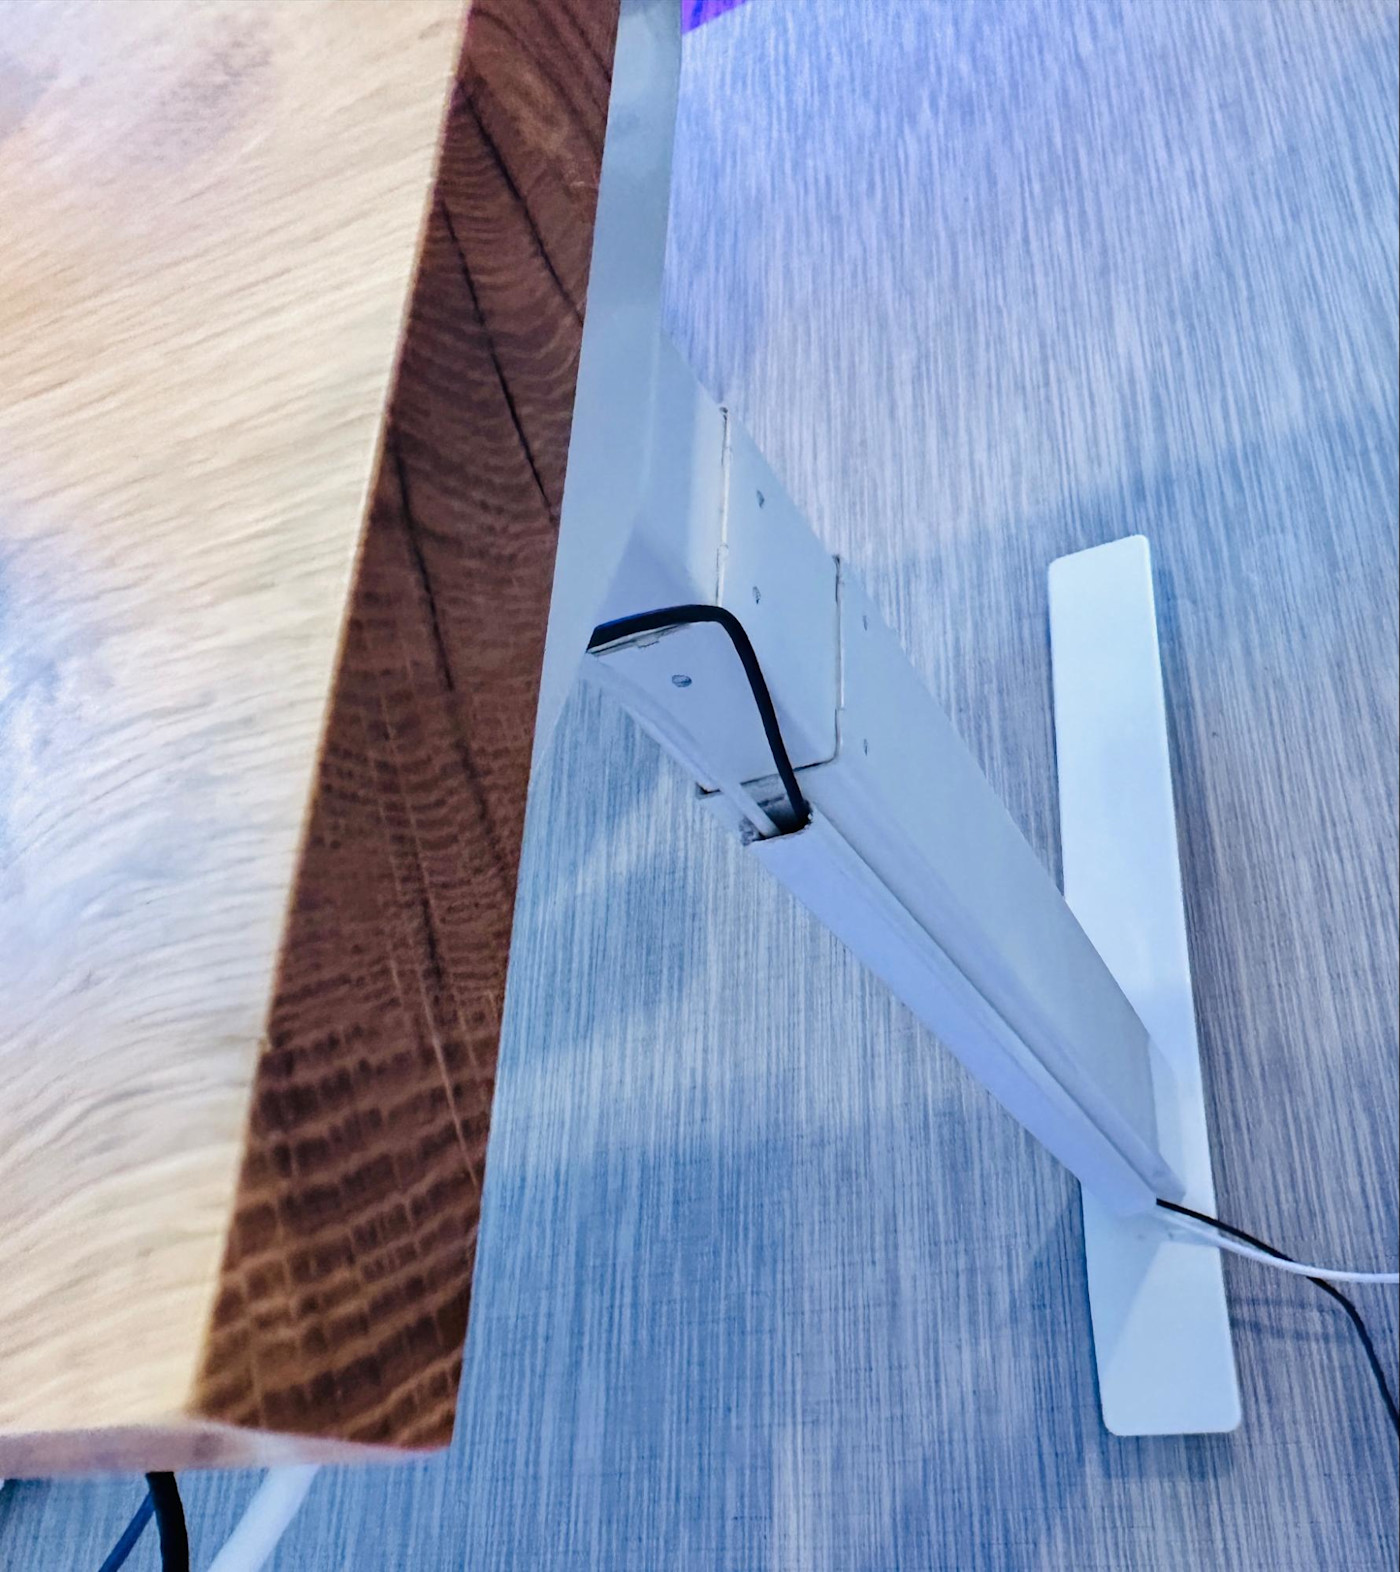
Using plastic covers made for wall-mounted TVs, you can even hide those few cables. My local DIY big box store had plastic channels I cut to length to fit my table, and they really do keep things tidy.
My clean, simplified workspace complete
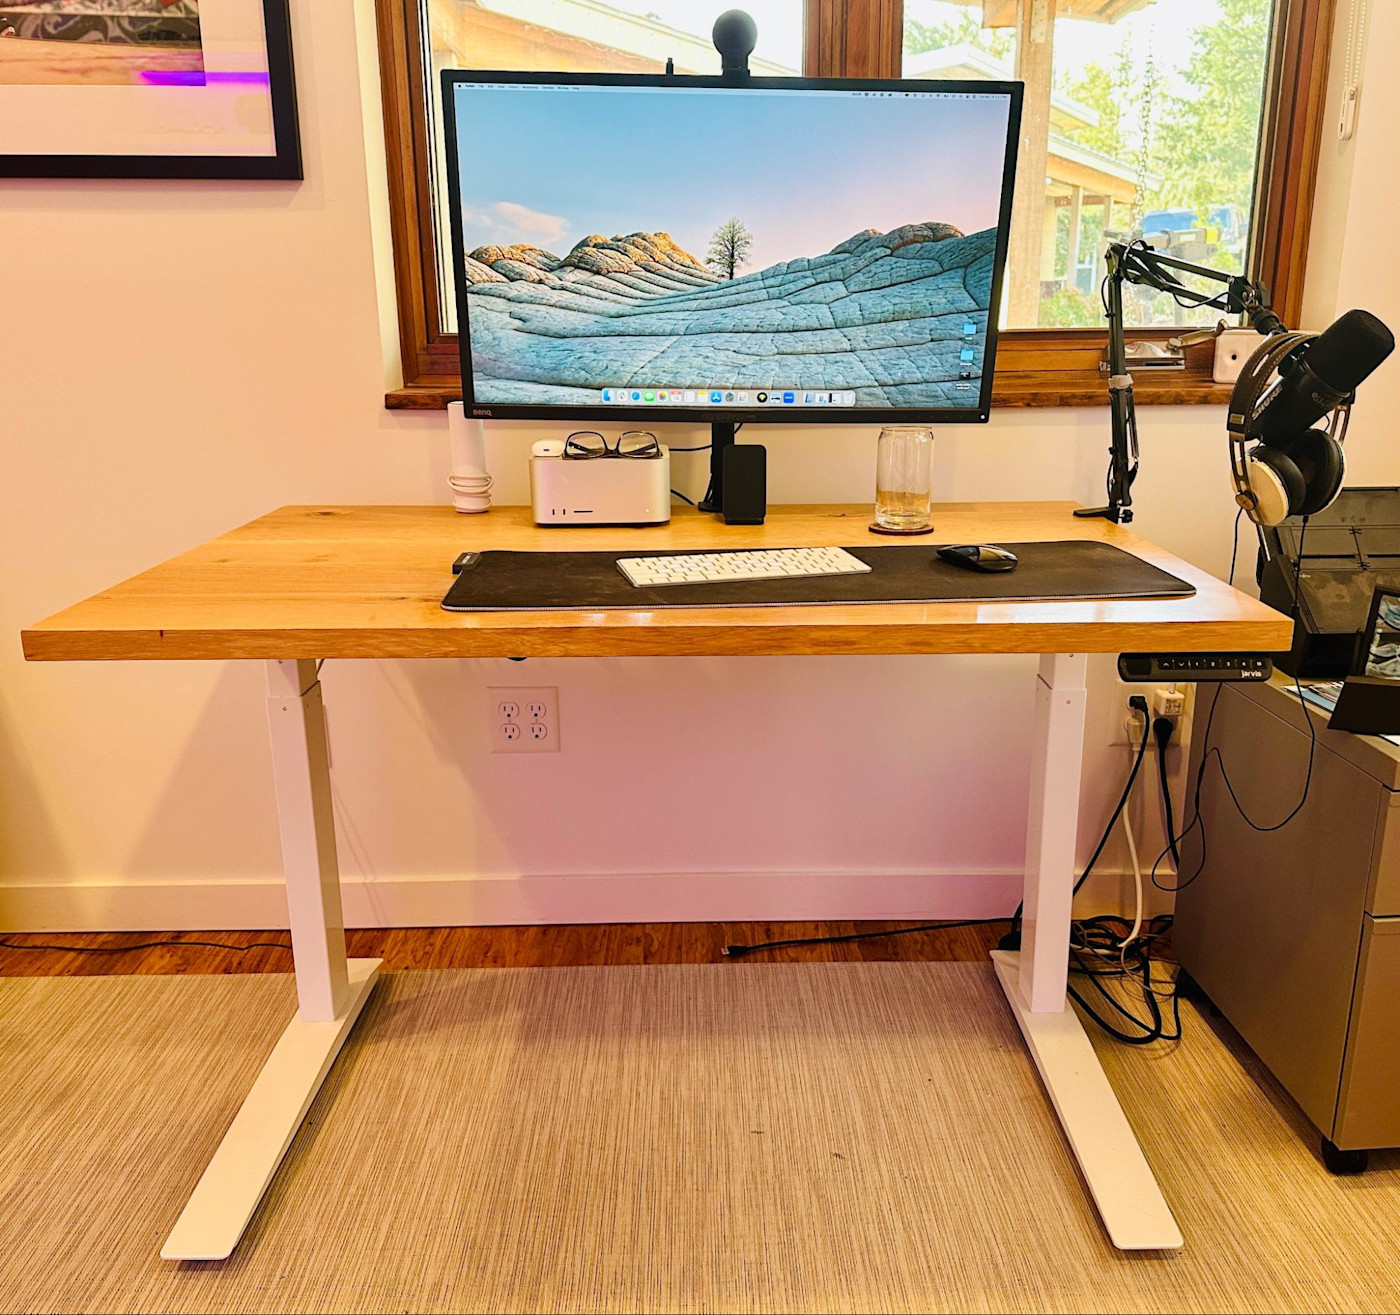
Now that I've had a "clean" setup for a few weeks, I really enjoy sitting at my desk to jot down ideas. There's nothing in the way of my work, and I finally feel good about my home office space. Keeping the top of my desk clean is easier now, as I tend to pull out papers to work on, then put them on a shelf behind me when I'm done. It's a standing desk as well, and all the cord management I did works the same whether it is in the raised or lowered position.
My desk is hardly minimalist. I have a WiFi point, a phone charger, a glass of water, AirPods, and my computer glasses. But underneath, you're not seeing everything it took to wire it, and there are just a few cords heading out from each leg that talk to things like a printer and a document scanner.
Overall, this project has a lot of bang for the buck. For under $100, I ordered half a dozen products that helped tidy up my home office workspace, and it's already helped transform my space and made working there easier. On top of all that, it only took a few hours in one day to dial everything in right—and, hopefully, it's going to look great for many years after.
Related content:


