
The very first iPhone, in 2007, had an app called Notes, which was a simple place to jot down occasional thoughts. By 2012, a Mac version was added. This all means the typical Apple user has a decade and a half of notes seemingly stuck in the Notes app. What if you want them somewhere else?
Whether you're thinking of switching to another of the best note-taking apps or just want to make a backup, getting your notes out of Apple's ecosystem makes sense. Apple doesn't make it easy, though: there's no built-in support for bulk exporting notes. You can export individual notes as a PDF, but not all your notes at once.
You're not stuck, though: a free Mac app called Exporter can export all of your notes as either Markdown or HTML files. This gives you a future-proof backup of your notes that any computer can open. It also allows you to import your Apple notes into other apps, like Notion, Obsidian, and Joplin. (I couldn't find a method for importing these notes into OneNote or Google Keep, sadly.)
Export Apple Notes using Exporter
To get started, you'll need a Mac app with access to your Apple Notes. To confirm all of your notes are there, open Notes on your Mac and check. If they're not, make sure you're signed in to the same iCloud account as your iPhone and that notes are set to sync. Head to the settings on both devices and confirm that both are using the same email address for iCloud.

Now you're ready to export all of your Apple Notes.
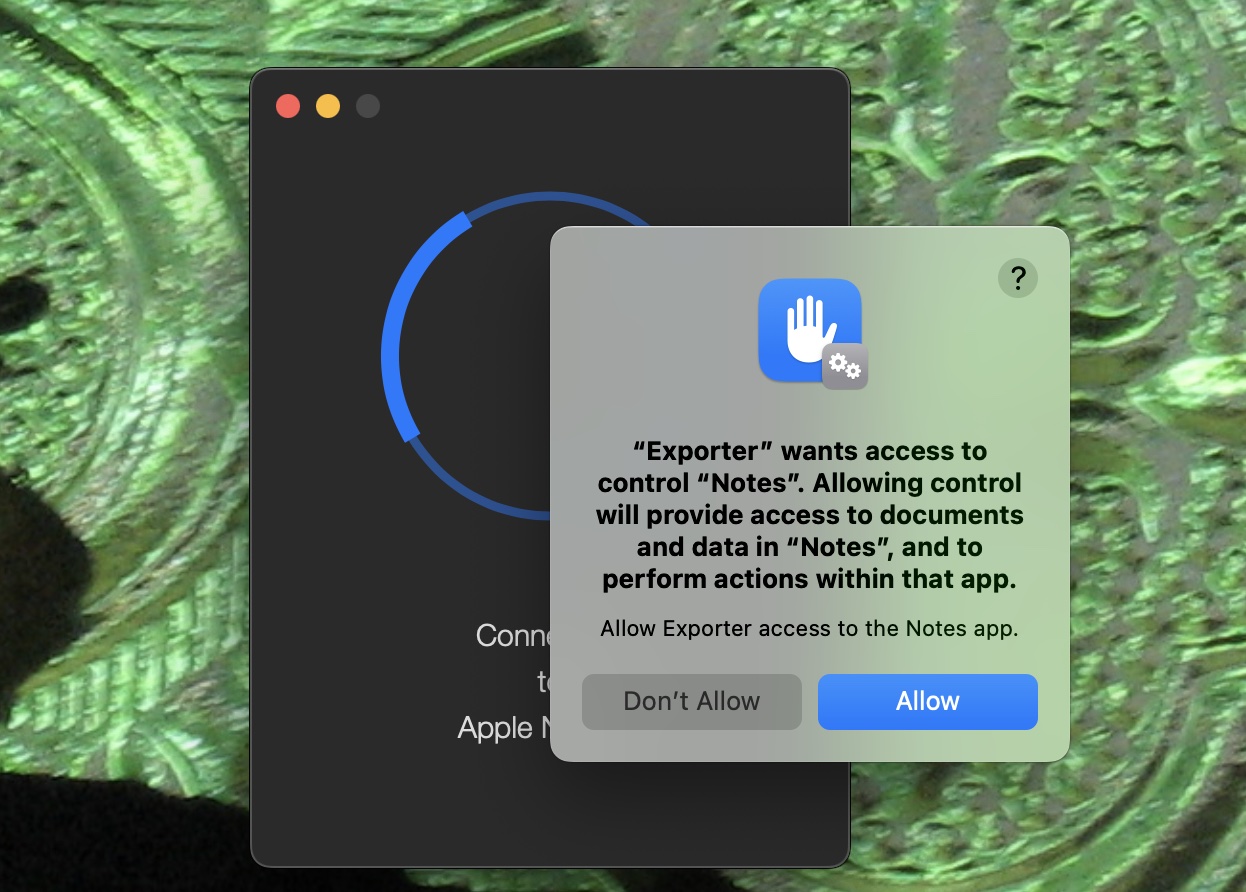
Download Exporter, and launch the application.
You'll be asked to provide access to your Notes—click Allow.
Now hit the big down arrow. You'll be asked where you'd like to export your notes to, after which the process will begin.
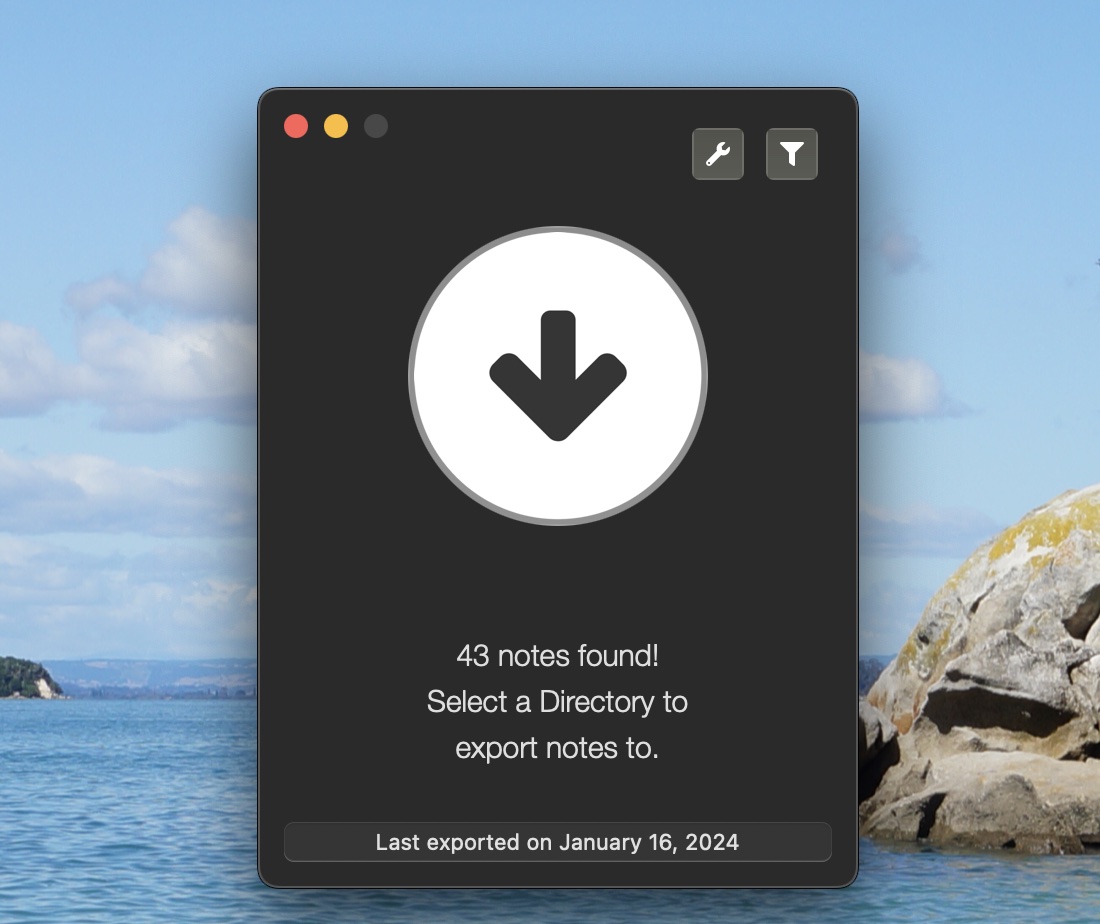


This could take a few moments if you have hundreds of notes, so just let the application run in the background while you get back to work (or watch YouTube videos—I'm not here to tell you what to do with your time).
When the process is done, you can find the notes. They're simple text documents formatted in Markdown, which is a simple way to store formatted text. (You can optionally get HTML files instead—just click Format > HTML before beginning the export process—but I've found these files less useful for importing to other applications).

Attachments will also come along with the notes, stored in a dedicated folder. Just note that only a handful of formats are supported: JPEG, PNG, GIF, TIFF, MBP, PDF, ICS, M4A, MOV, and MP3. That should cover most use cases, granted, but if you use some other format, this tool won't work for you.
You now have an archive of your Apple Notes that's easy to open on any computer. You can also take these notes with you to another note-taking app.
How to import Apple Notes to Notion
Notion makes it easy to import Markdown files, meaning you can easily import the files you just exported.
In Finder, create a ZIP file of your exported Apple Notes by right-clicking the folder and selecting Compress.
In Notion, click the Import option in the left-hand sidebar.
Click Universal import.
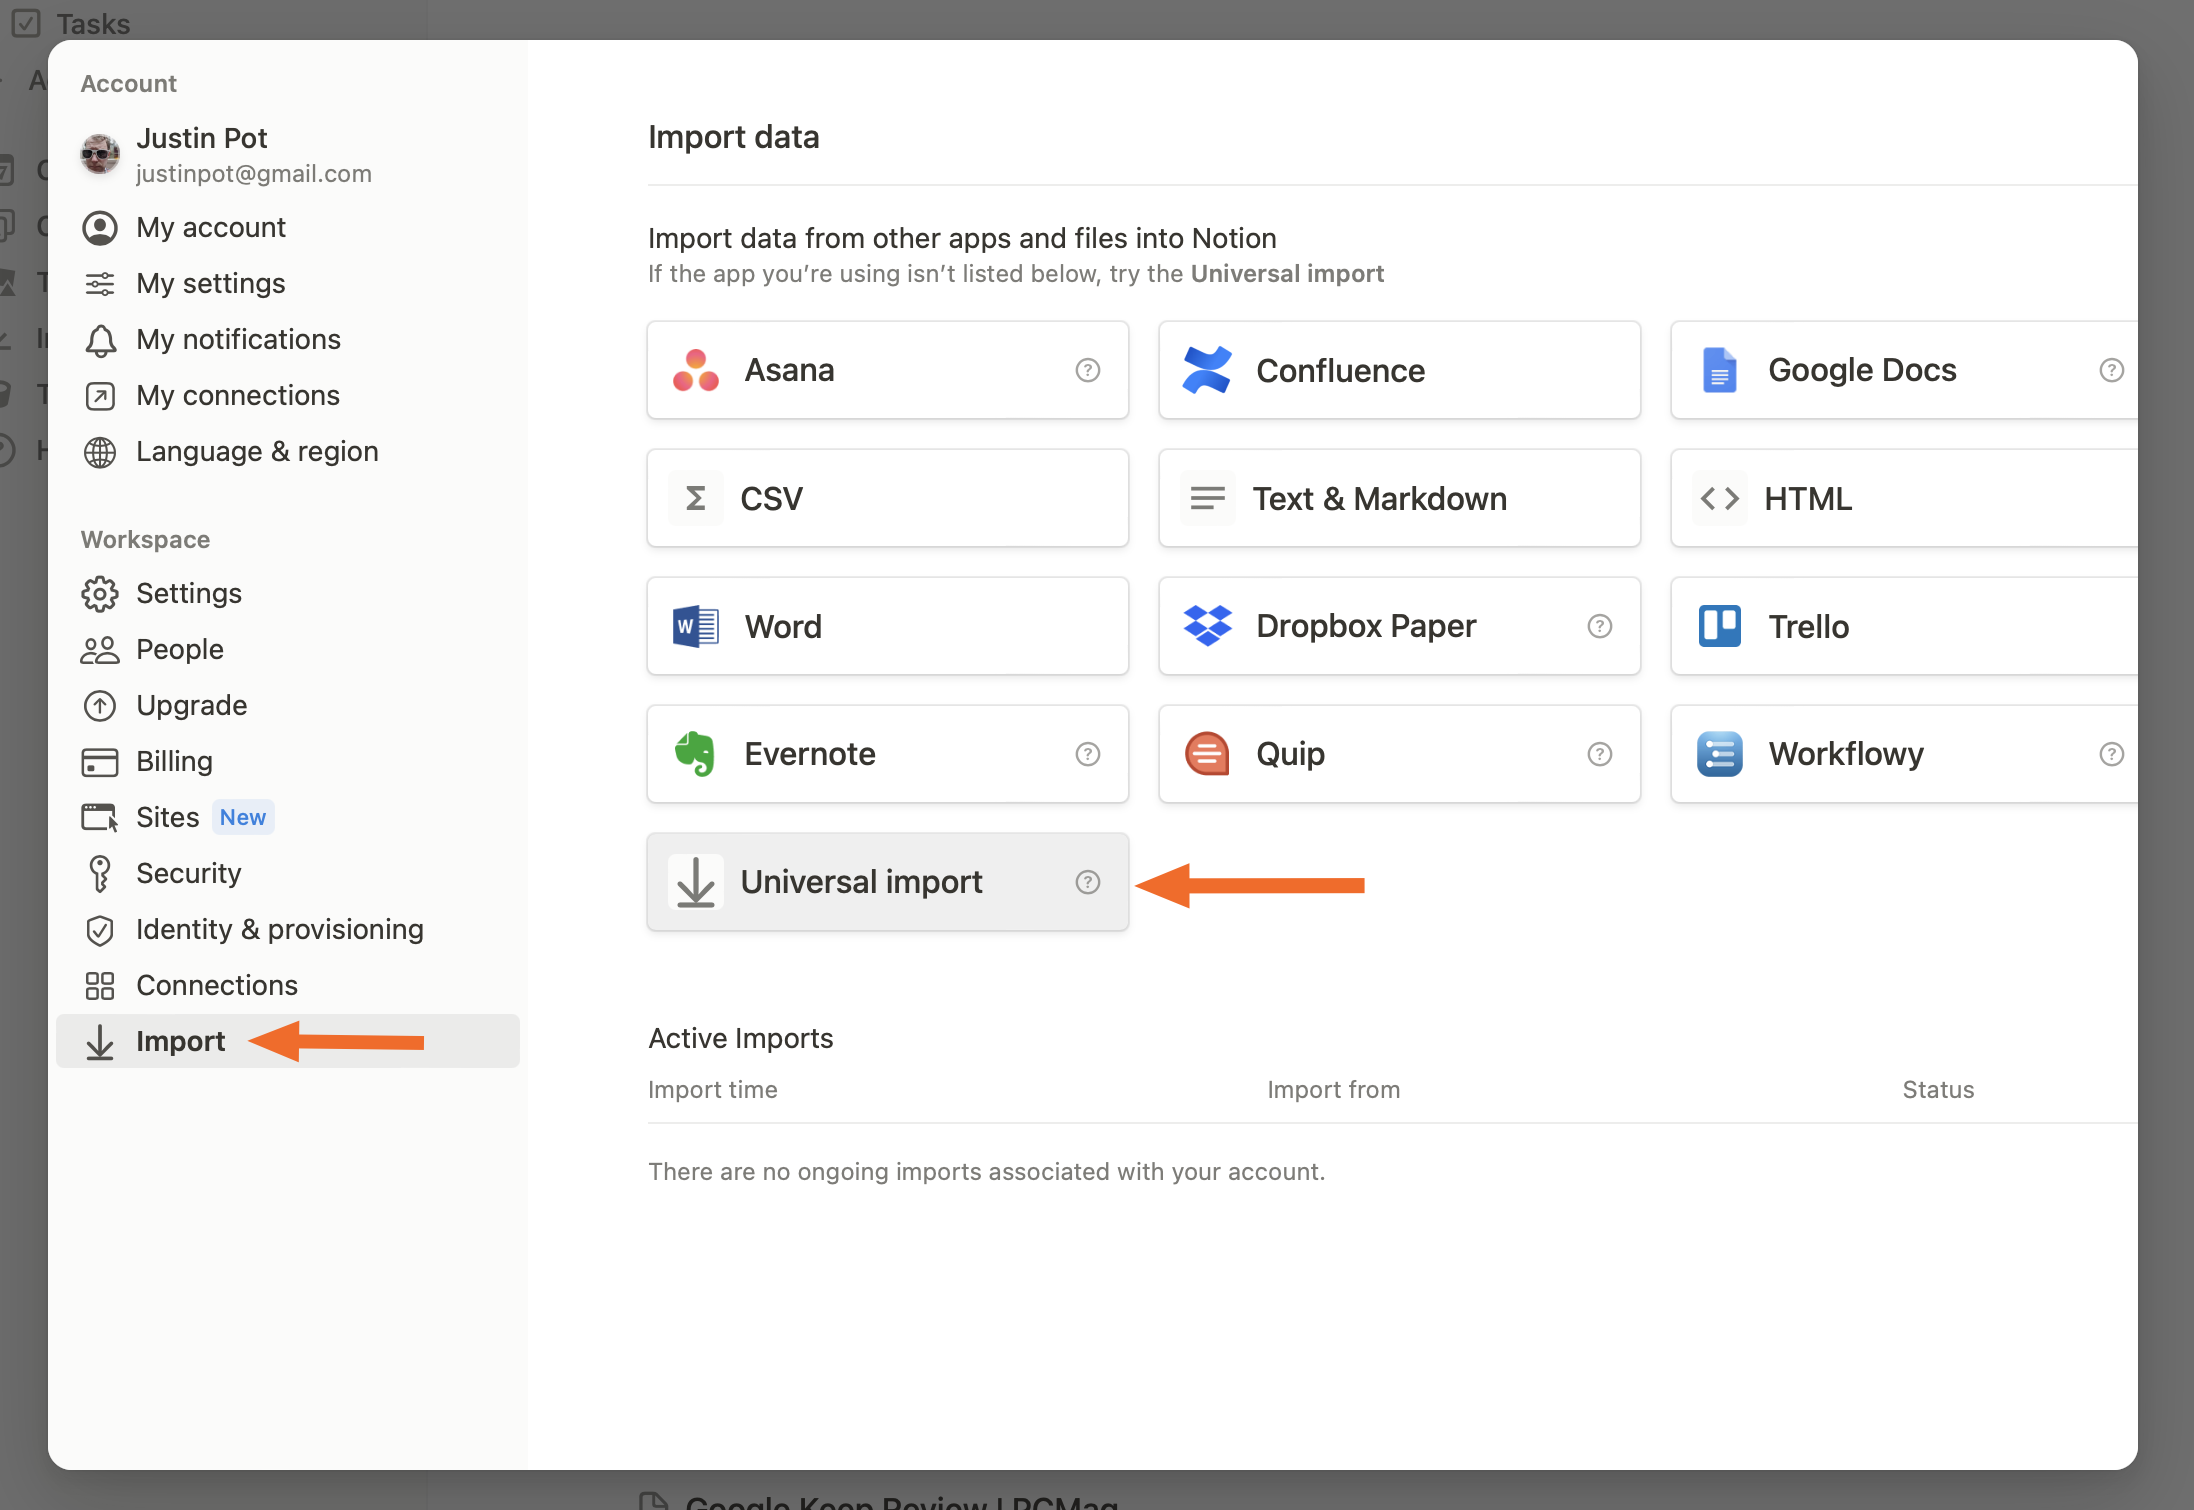
Upload your ZIP file.
Notion will scan the folder and upload all notes.

Note: I recommend making individual ZIP files for every notebook you had in Notes—otherwise, Notion will dump everything into one mess of a note.
How to import Apple Notes to Joplin
Joplin makes things even easier. Click File > Import > MD - Markdown (Directory). Everything will be imported cleanly.

How to export Apple Notes to Obsidian
For Obsidian, you can drag the folder you just exported into your current vault, but there's actually an easier way to get Apple Notes into Obsidian.
Obsidian offers an Importer that can grab your notes from Apple Notes directly.
Head to the Community Plugins section in your vault.
Install Importer, then activate it.
Click the new Import button in the left-hand sidebar, and you'll see a few options.
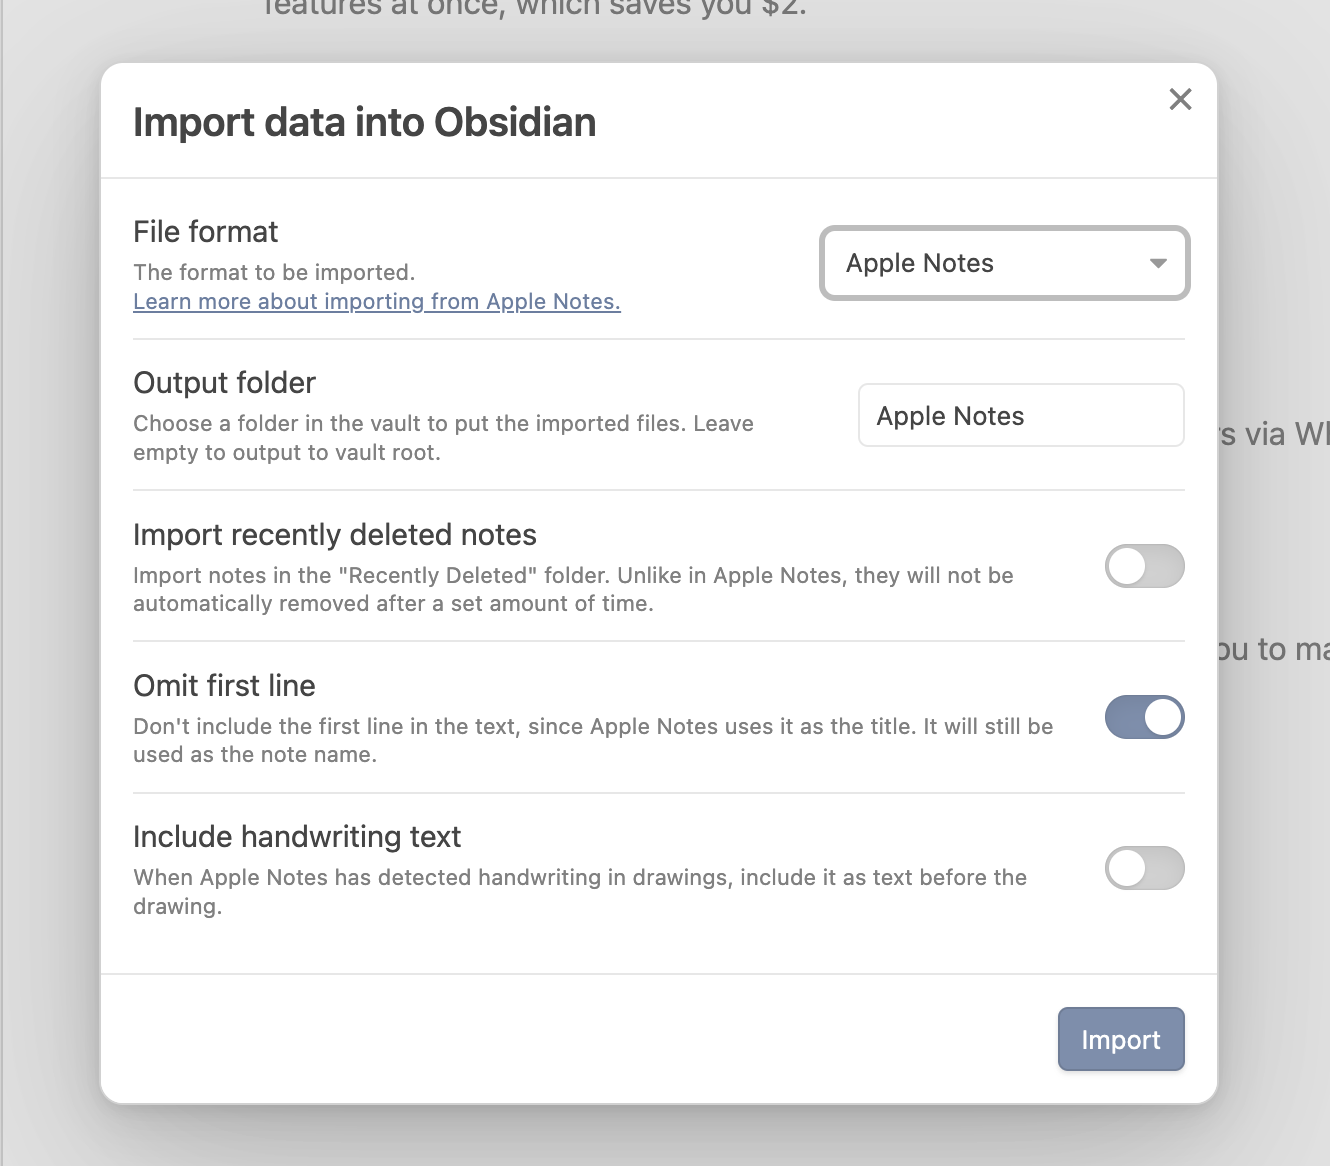
Select Apple Notes as your file format, then specify an output folder.
Check the settings, then click the Import button.
Confirm the security settings that pop up, and wait—your notes will show up, along with all attachments.


This is a great deal simpler than using Exporter because everything happens all at once. This method also allows you to grab versions of hand-written notes and supports all attachment formats. Obsidian stores all notes as Markdown-formatted text documents, too, meaning you have a future-proof copy of everything. It's a win-win-win, though one hard to recommend unless you're already using Obsidian.
Related reading:


