The thought of backing up site data can seem complicated or cumbersome, but on WooCommerce, it's a painless process. Here we'll explain how to back up WooCommerce easily—and for free.
Why Do You Need a Backup of Your WooCommerce Database?
When you have a long list of tasks ahead of you, backing up your site data usually takes a back seat to higher priorities. But it's only when you need a backup that you realize how much of a priority it really is. For eCommerce, you don't just lose design elements—you also lose customer registrations, product data, sales statistics, and all sorts of other valuable information.
So first and foremost, backups are important as insurance. No matter what happens to your site, whether a natural disaster hits the servers or a technical disaster hits your cyberspace, you're safe. One quick restore and you're back where you left off.
But backups also allow you to more freely experiment with new designs and styles. Site design and aesthetics have a direct impact on sales, and it may take a few tries before you find the right combination for your target customers. Backing up your WooCommerce site data allows you to experiment with new designs without sacrificing the original. It also allows you to conduct A/B tests, where you compare two different versions of your site to see which performs better. Without backups, you're stuck with only your latest iteration, for better or worse.
How to Back Up WooCommerce for Free
Backing up data refers to copying the files in a secondary, safe destination. As you can imagine, there are plenty of different ways to do this. But given the complexity of the documents, it's not always as simple as dragging and dropping.
The reason most people don't back up their files manually is that it's a bit roundabout. You need an FTP client for your account and some skill with cPanel, but you also need to know where to find your WordPress root folder. It's also a delicate process; for example, you have to back up your web files before your database files, or the data will be corrupt.
But there are simple solutions. Some hosting platforms offer backups and restores as part of their service packages. Check with your hosting provider first—you may already have backups of your WooCommerce site without even knowing it.
If your hosting provider doesn't back up automatically, or if you'd rather handle it on your own anyway, you can easily back up with a plugin. Because WooCommerce is for WordPress sites, you have access to a whole host of third-party plugins for backups, whether they specifically mention WooCommerce or not.
WooCommerce recommends Jetpack, a multi-purpose WordPress helper, but Jetpack only offers backups as part of their paid plans. For a free option, we recommend the free plugin UpdraftPlus. Although the paid plans offer extra features, the free plan has everything you need to successfully back up and restore your data.
The first step, of course, is installing the plugin. In the WordPress dashboard, in the left menu, click Plugins > Add New.
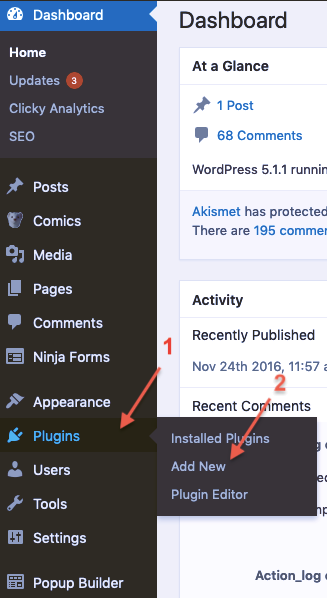
Now you're in the plugin library. Type UpdraftPlus into the search bar.

UpdraftPlus will appear in the upper-left as the first entry. Click Install Now in the top-right corner.
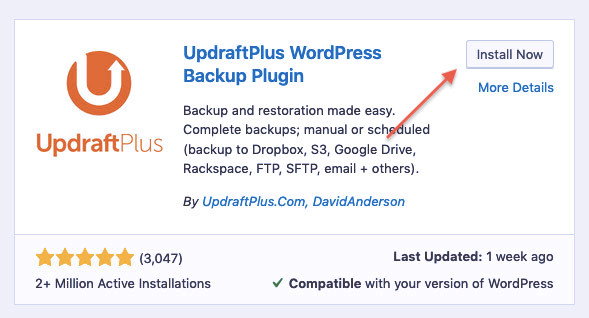
After a few moments for installation, the Install Now button becomes Activate. When it's ready, click Activate to finish setting up the plugin.
UpdraftPlus is now active in your WordPress site. To access its features, go to Settings > UpdraftPlus Backups.
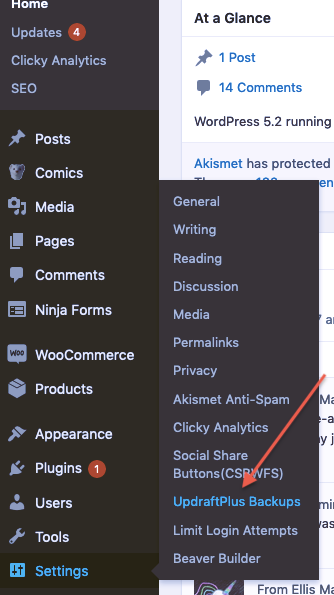
This is a lot like a dashboard just for UpdraftPlus. Here, you can back up your site manually any time you want. But first, you need to configure the settings since it's your first time using it. Go to the Settings tab.

The first option you have is to set up automatic backups. Click the dropdown menu, and choose the frequency you'd like. It's a good idea to synchronize backups of your files and your database to the same schedule.
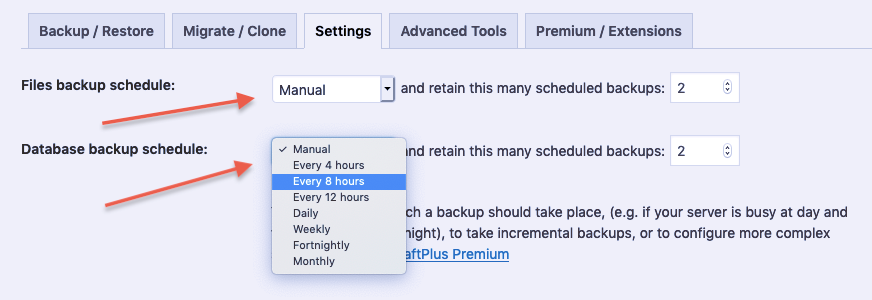
While you're here, you also want to set a destination for remote storage. The default is to save backups on the web server, but if your web server is the problem, those backups won't help you. It's best to copy backups to another destination, such as Dropbox, Google Docs, or OneDrive.
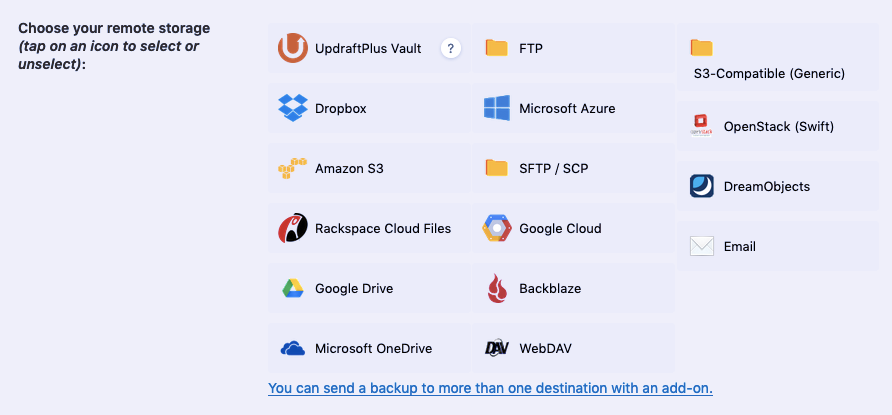
Once you select your top choice or choices, you'll need to authenticate them. Click the link in the appropriate section for each storage option.

When you're finished customizing your settings, don't forget to save them by clicking Save Changes at the bottom of the screen.

Now you can rest easy, knowing your WooCommerce site will always be safely backed up. You can also manually back up your site any time you want. In the Backup/Restore tab (the first tab), click Backup Now.

In the confirmation window, click Backup Now again.
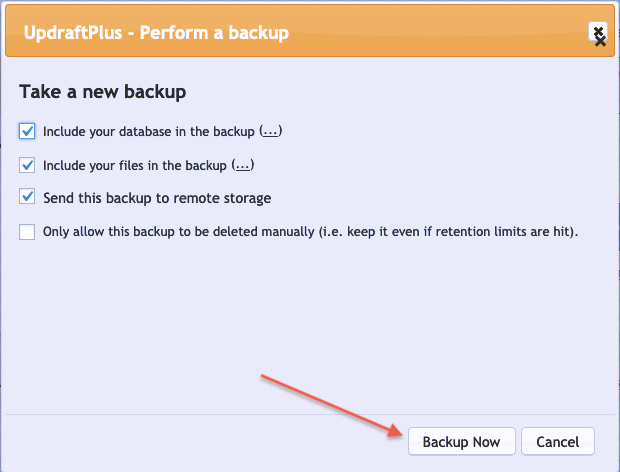
That's it—your site data is now safe.
How to Restore Your WooCommerce Backups
Restoring any of your saved backups is just as easy. Return to the Backup/Restore tab, and scroll to the Existing Backups section at the bottom. Click Restore on the backup version you want to restore.

For a more in-depth guide to WooCommerce, read our guide to How to Start a WooCommerce Store.

