Calendly is a simple yet sophisticated tool that takes the guessing game out of scheduling meetings. Tell Calendly your available times, create a meeting slot, and share the link. Your recipients can then book a time that's convenient for them and one where you're actually available. It's a 30-second interaction instead of multiple messages or emails.
But if you regularly forget to check your calendar or another team member schedules calls for you, just using Calendly might not be enough to ensure you know what's going on. With a Zap—our word for Zapier's automated workflows—you can get a Slack notification each time new Calendly events are scheduled so you stay on top of your calendar.
Zapier is the leader in workflow automation—integrating with thousands of apps from partners like Google, Salesforce, and Microsoft. Use interfaces, data tables, and logic to build secure, automated systems for your business-critical workflows across your organization's technology stack. Learn more.
Send Slack notifications for new Calendly events
Zapier lets you create automated workflows called Zaps, which send your information from one app to another. You can create your own Zap from scratch without any coding knowledge, but we also offer quick templates to get you started.
If you'd like to start with a template, click on the template below, and you'll be taken to the Zap editor. You'll need to create a Zapier account if you don't already have one. Then, follow the directions below to set up your Zap.
Set up your Calendly trigger
First, set up your trigger—the event that starts your Zap. If you're using the Zap template, the trigger app and event will already be selected for you. Otherwise, search for and select Calendly as the trigger app and Invitee Created as the trigger event. Click Continue.

Next, connect your Calendly account, if you haven't already, then click Continue.
In the Webhook subscription scope field, select user. Calendly also has an Organization subscription scope field, but that only applies if you're an admin or an organization owner for a Calendly account. As an individual user, the user setting will do.

Then, click Continue.
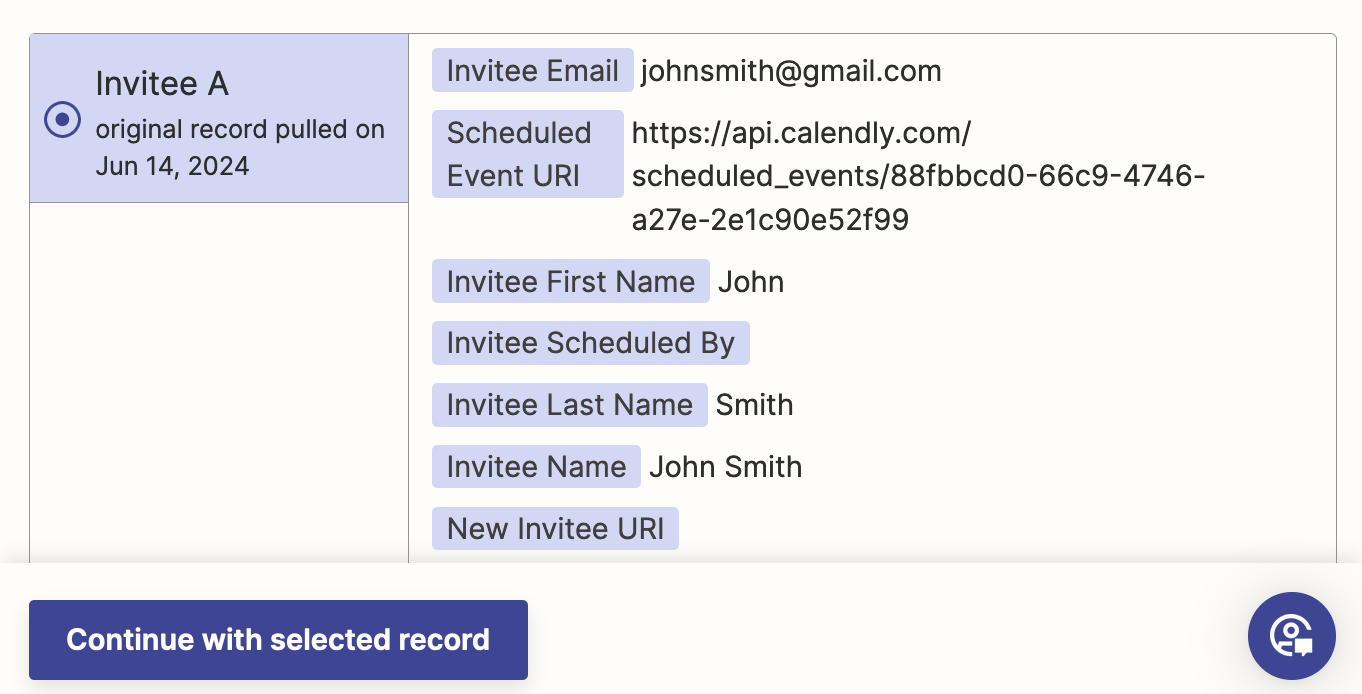
Next, test your trigger step. Zapier will pull in the most recent Calendly appointments in your account to set up the rest of your Zap. If you don't have any appointments in your account, add one now before testing.
Once you have at least one appointment, click Test trigger. Choose one of the appointments for this test, then click Continue with selected record.
Set up your Slack action
Now let's set up the action—the event your Zap will perform once it's triggered. If you're using the Zap template, the action app and event will already be selected for you. Otherwise, search for and select Slack for your action app and Send Channel Message for your action event. Then click Continue.

Next, connect your Slack account, if you haven’t already, and Click Continue.
Now, it's time to set up your action. Here, you can decide what the Slack message will look like and which details from your Calendly step will be included in the message. First, select the Channel where you want to post your Slack message.

Now you'll need to customize your Slack message. To add details from your previous Calendly step, click in the Message Text field and select data from the Insert Data dropdown.
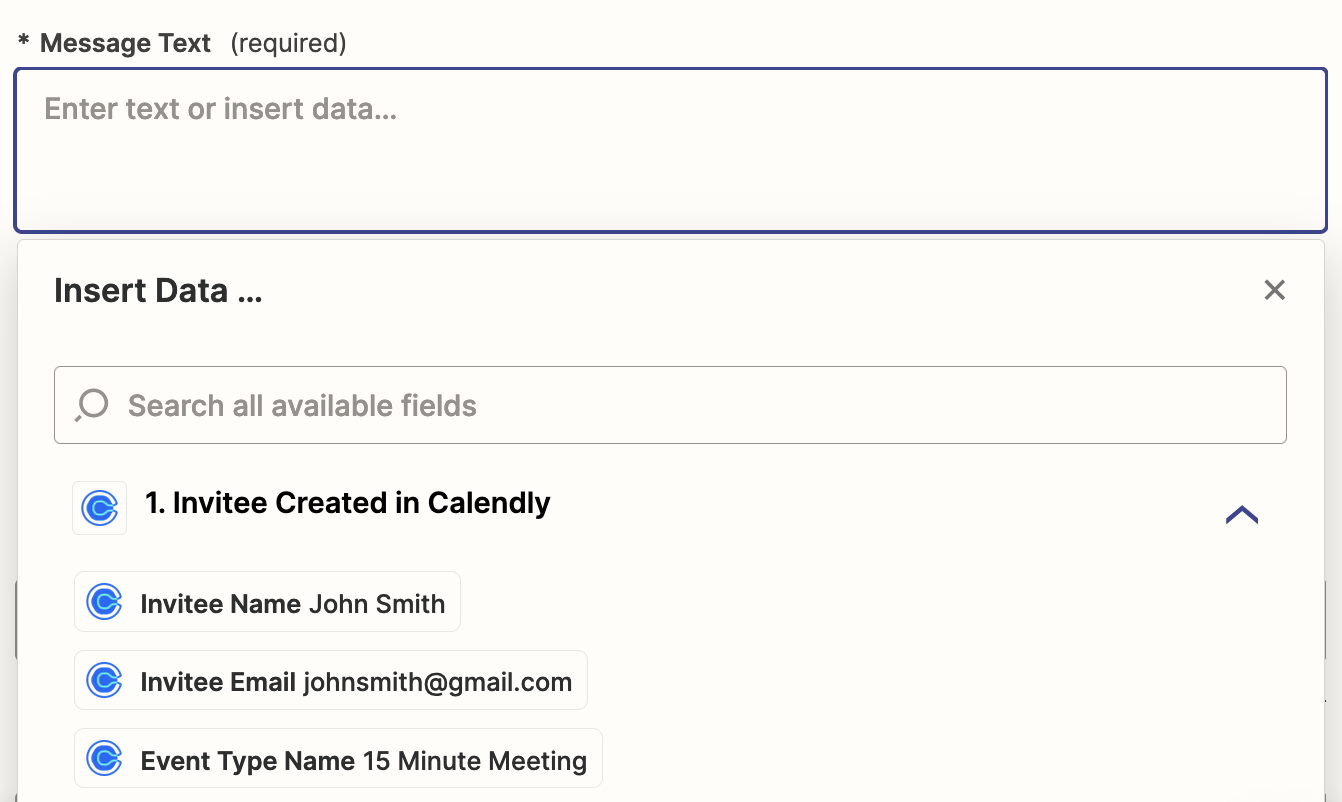
In addition to mapping data from your previous Calendly step, you can also add static text, which will show up the same way each time your Slack message is posted.
Learn how to format a Slack message in Zapier.
Some simple text formatting will go a long way in making the data more readable. For example, we added "Name:" before the invitee name from Calendly and "Duration:" before the meeting time.
Here's what our message formatting looks like.
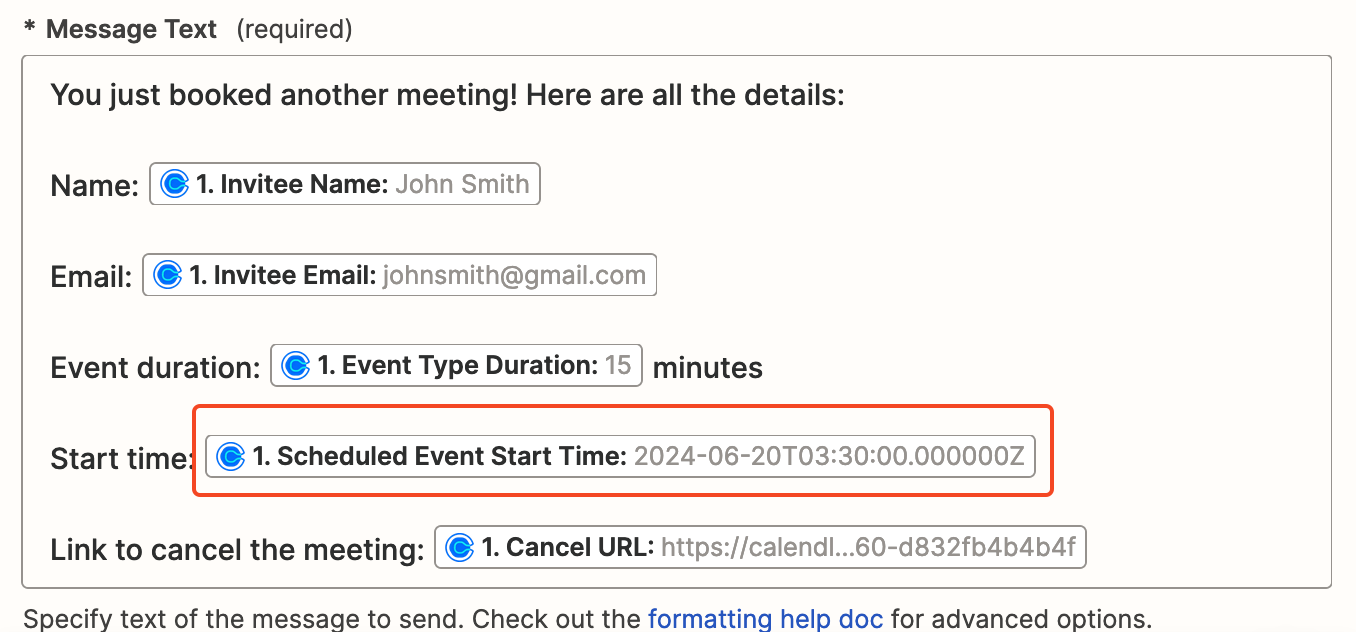
Depending on what information you add to your message text, you may want to do some additional formatting. For example, I want the date to be in a more readable format, but Calendly sends their event start time in a format I don't prefer. To fix that, I can add a formatter step in between my Calendly trigger step and my Slack action step to update that formatting.
To do that, click the + button after your trigger step to add a new step. Select Formatter by Zapier for your action app and Date/Time for the action event.
In the Values section, select Scheduled Event Start Time in the Input field, and select MMMM DD YYYY HH:mm:ss in the To Format field.
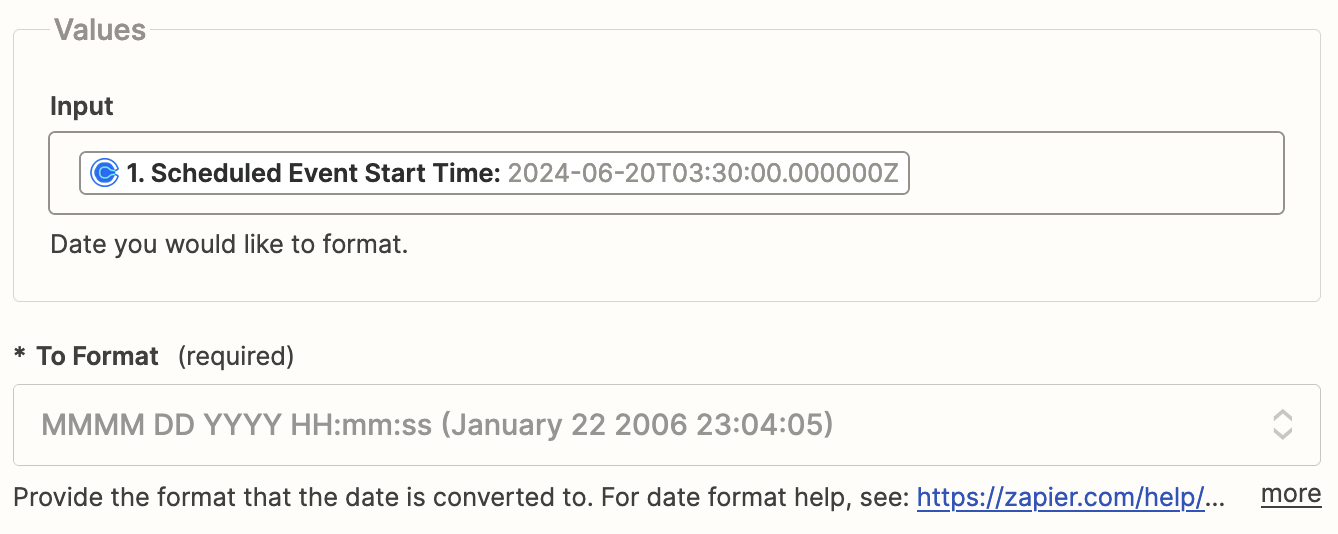
You can learn more about formatting text, dates, and time, in our detailed Formatter by Zapier guide.
If you've added a formatter step, you can then add in any data from that step to your Slack action step, like we did here:
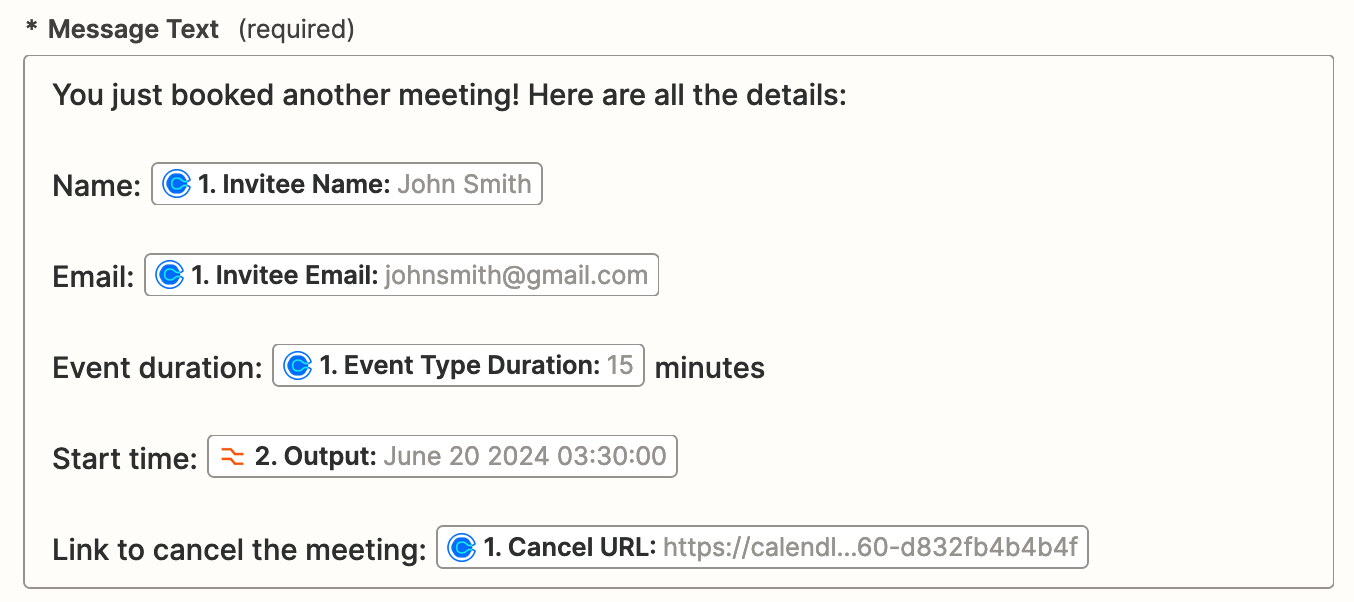
Next, give the bot a recognizable name in the Bot Name field and add an emoji for your Bot Icon. You can also decide if you want to include a link to the Zap within the body of your message by selecting Yes or No for Include a link to this Zap?.
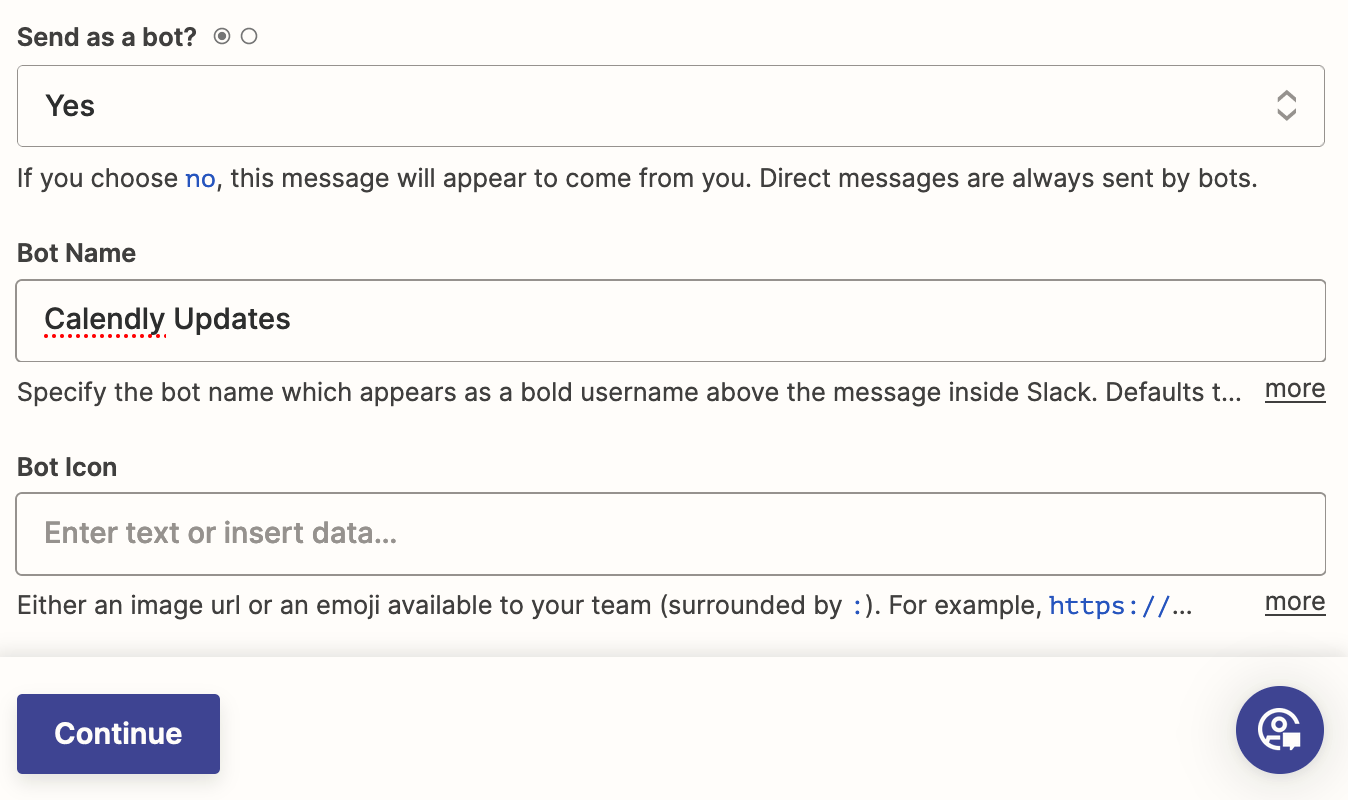
Once you're finished customizing your Slack message, click Continue.
Next, click Test Step to test your Zap. Open your Slack channel to see if everything looks as it should. Here's what it looks like for our test data.

Once you've confirmed everything looks the way you want it to, you're ready to use your Zap. Now every time you have a new Calendly meeting, you'll get a message in Slack with all the details you need.
Related reading:
This article was originally published in December 2022. It was most recently updated in June 2024.
