A haven for event managers and promoters, Eventbrite is a platform for selling tickets online. You can sell tickets for anything from Sesame Street Live to events that certainly aren't for children. If you're running an event and are struggling to get the seats filled, Eventbrite could be the game-changer you need.
Here, we'll explain how Eventbrite works, including how to sell tickets and manage your event. Click into the section you're looking for, or read on for a full Eventbrite tutorial.
Eventbrite Pricing: Selling tickets on Eventbrite has no upfront cost, but you're charged a percentage and fee for every ticket sold. The Essentials Package charges 2% + $0.79 per ticket, and the Professional Package charges 3.5% + $1.59 per ticket. For large events or special event organizations, contact Eventbrite. To see what features each pricing package offers, see the Eventbrite pricing page.
Connect Eventbrite to thousands of apps with Zapier's Eventbrite integrations.
How to Create an Event on Eventbrite
To sell tickets on Eventbrite, you'll need to first register for an account. Once you've done that, you can start the process of creating an event.
Click Create Event in the top menu.

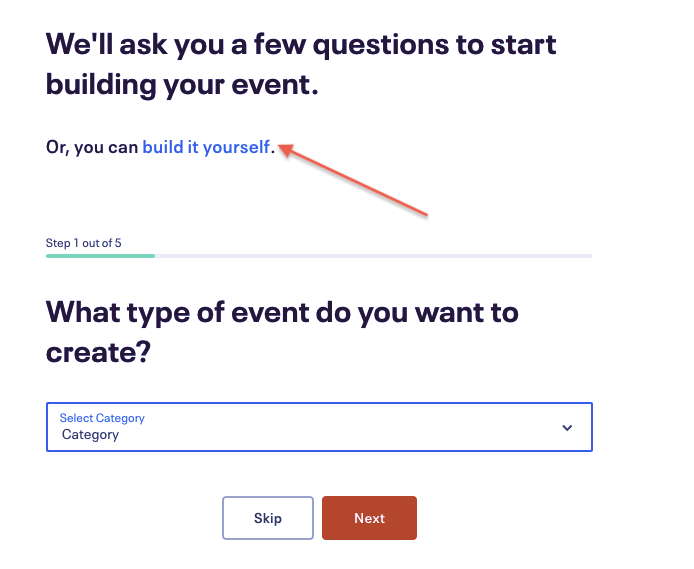
If it's your first time posting an event, you can participate in a five-step onboarding process to help guide you. Here, we'll walk you through the regular process, which you can access by clicking build it yourself.
In the event creation window, you'll fill in the basic information: event name, type and category, organizer name, address, and dates and times.
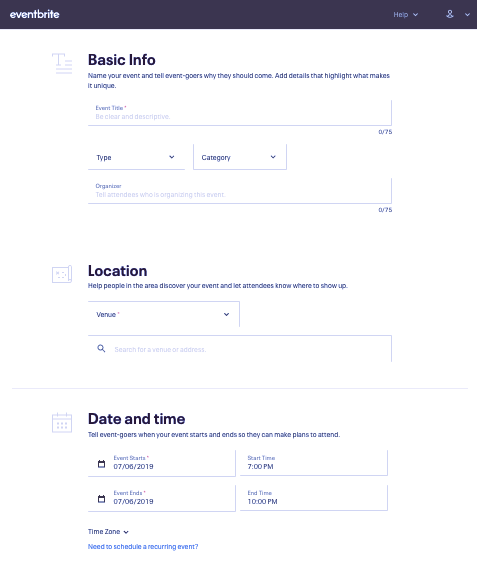
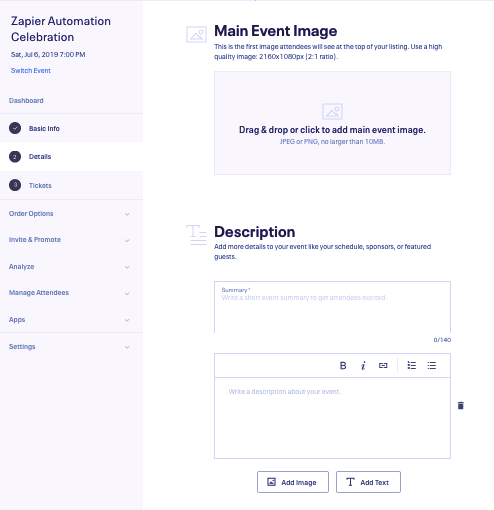
Once you've filled in the required fields, a new menu will appear at the bottom of the screen. Click Save & Continue, and you'll be brought to the event editor. Here, you'll enter in the details of your event, including a banner image and the textual description of the event.
When you're ready, click Tickets in the left side menu. Then click Create Ticket to open the ticket editor from the right side. Here, you'll set the ticket price (or whether they're Free/Donation), the quantity of tickets available, and the sales window.
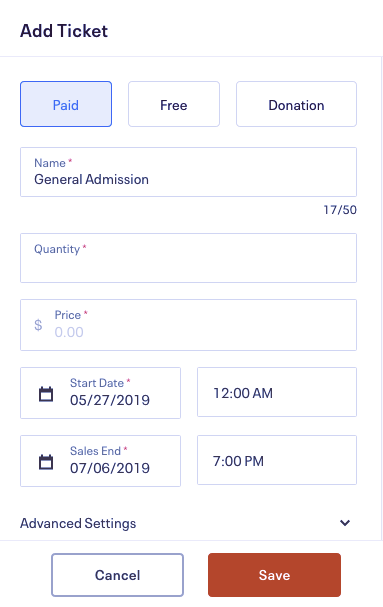
Under Advanced Settings, you can also add a textual description of the ticket, change visibility settings, set a minimum or maximum per order, or specify the sales channel as "everywhere," "online only," or "at the door only."
When you're done, click Save.
To fine-tune your event listing, there's an assortment of further customization options in the left sidebar:
Click Order Options > Order Confirmation to personalize your order confirmation email to fit your brand personality (or just change your reply-to email address).
Click Settings > Display to control whether the event times and number of tickets get displayed in your listing. You might want to do this to add urgency by showing how many tickets are left.
Click Order Options > Waitlist to enable the waitlist, which will then automatically turn on whenever a certain ticket type reaches capacity (not available with reserved seating).
Click Manage Attendees > Name Badges to prepare name badges for the event. In this section, you can set what's on the badges (your logo, a QR code, a specialized graphic, etc.) and what part of your attendees' information is displayed (first/last name, email, etc.), not to mention the size of the name tag itself.
Note: You can't choose your own event tags—these are generated automatically based on your location, event type, and topic. You can, however, fill your text description with search keywords to increase your event's visibility.
When you're ready, click Publish in the bottom right corner. This completes your event, posts it on Eventbrite, and takes you to your event dashboard, where you can monitor your event's progress.
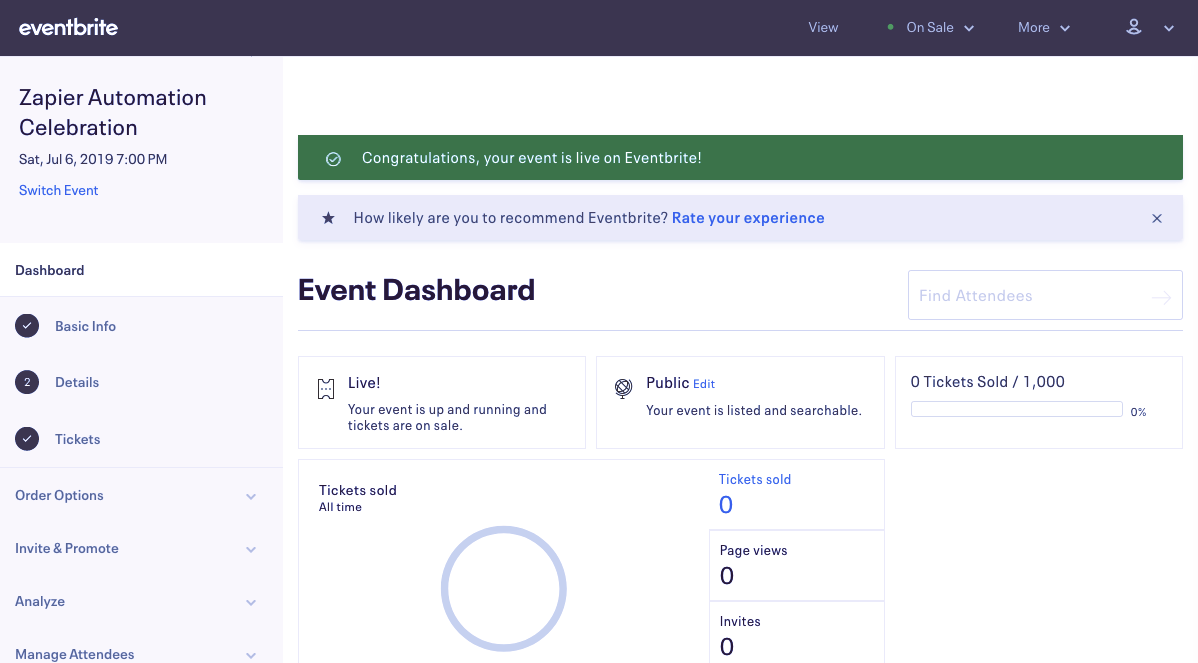
Once you've posted your event, you can edit it any time. All you have to do is click on your profile icon in the upper-right corner and select Manage Events. Then, find your event, and click Edit.
How to Add Discount Codes on Eventbrite
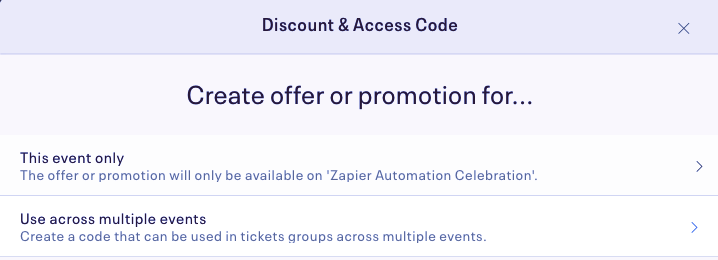
Also in the left sidebar of your dashboard, you have the ability to add discount codes. Click Invite & Promote > Discount & Access Codes, and then click (+) New Code to bring up the code creation menu.
Your first choice is whether the code applies to only this event, or multiple ones.
Next, you'll choose the type of code or discount.
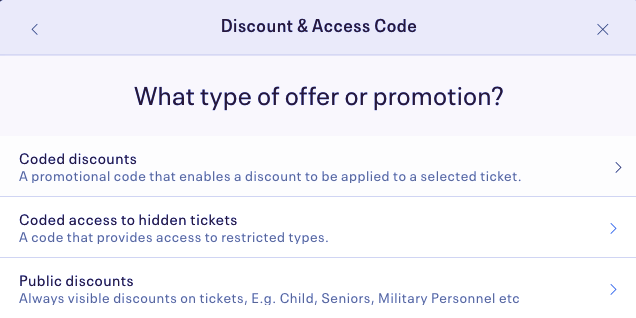
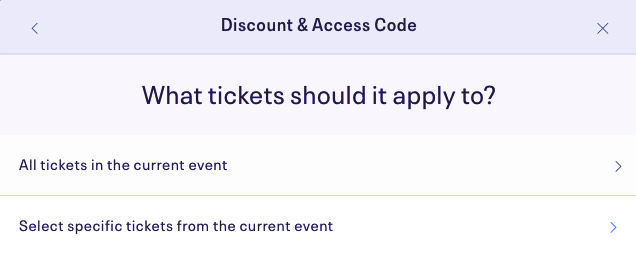
All three choices will give you the option to apply the promotion to either all tickets or select ticket types.
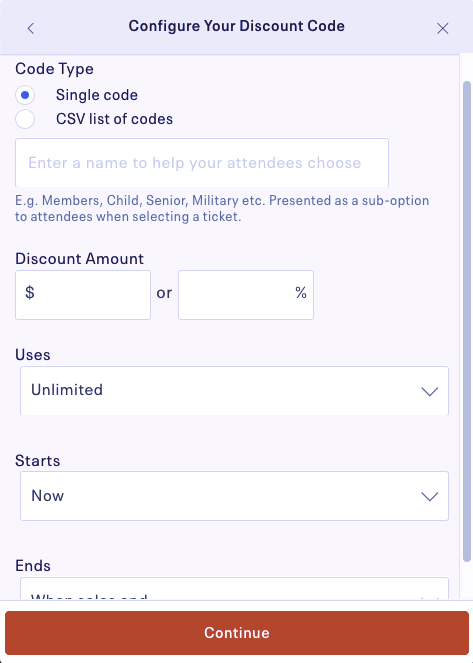
Next, enter the details. For codes, you can specify the actual code, what discount it provides, limitations on usage, and the dates the code is active. You can also upload a CSV if you have a large number of codes. Click Continue when you're ready.
You'll receive a confirmation window to review what you entered.
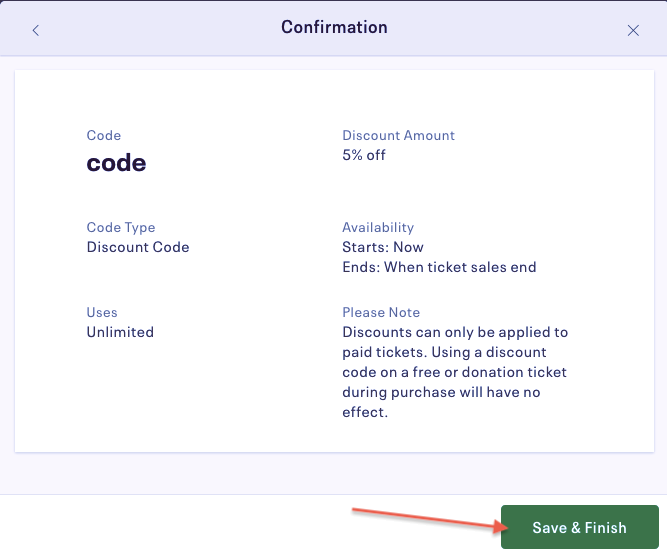
If everything is correct, click Save & Finish.
How to Email Attendees on Eventbrite
Event registration is a great way to collect email addresses from people that are definitely interested in what you have to offer. Using Zapier, you can automatically send all your attendees to your CRM or email marketing tool.
Add new Eventbrite attendees to ActiveCampaign lists
Add new Eventbrite attendees to Keap Max Classic as contacts
Add new Eventbrite attendees to Constant Contact lists
Create or update HubSpot contacts for new Eventbrite attendees
But you can also group-email all attendees about event updates or other publicity directly from Eventbrite. In the left sidebar of the event dashboard, click Manage Attendees > Emails to Attendees.
At the Email to Attendees page, you can write, edit, schedule, and delete group emails to your attendees. To edit an existing email, click its subject line from the list. To make a new one, click Create New Attendee Email.
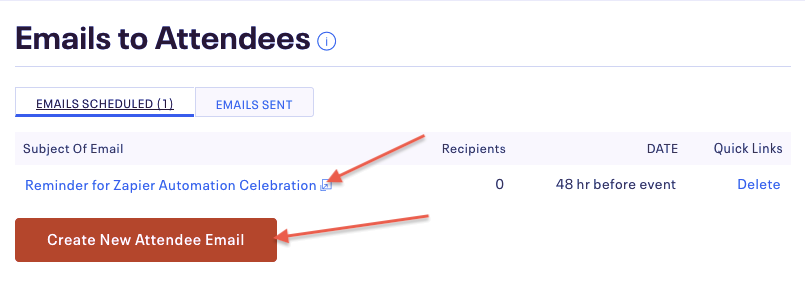
This opens a standard email editor, where you can compose right on the page. Options here include adding a special reply-to email, selecting who receives the email, testing messages, and scheduling messages.
When you're ready, click Send Now (or Save if you scheduled it to send in the future).
How to Check Your Analytics on Eventbrite
Eventbrite offers a handful of analytics to help you gauge and improve your performance. From the left sidebar of the event editor page, click Analyze to see your three options.
Analyze > Analytics
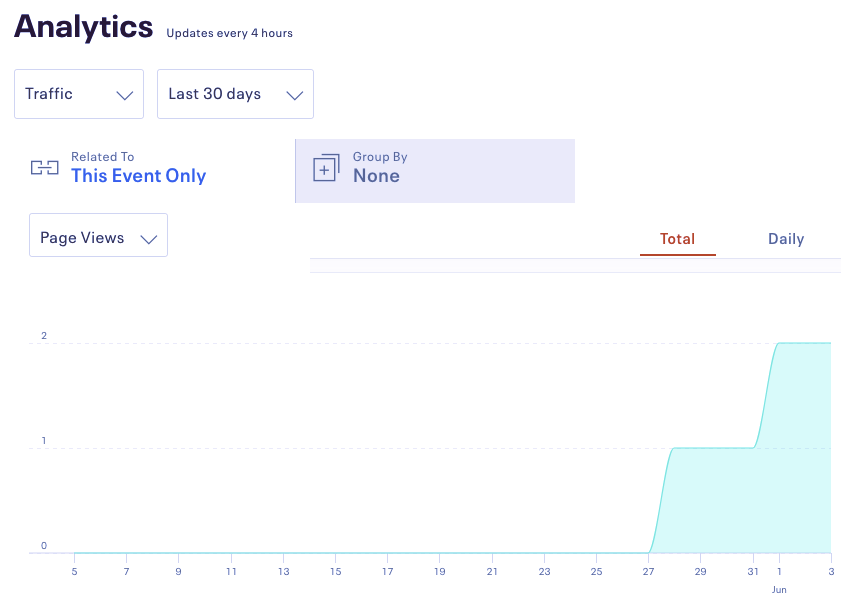
This is your standard analytics page, where you can track Sales, Attendees, Traffic, and Sales Channel. To switch between reports, click the dropdown menu in the top-right (with the default Sales) and select your field. You can also adjust the other parameters, such as time frame, and autogenerate graphs of your event's performance.
Analyze > Event Reports
More specific data on your event performance—even after the event—is available in Event Reports. This includes information on your attendees, discount codes, attendance vs. no shows, and much more. At the bottom of the page, you can also see an outline of your scheduled emails.
To see the complete list, click View All Reports.
Analyze > Tracking Pixels
To coordinate your event promotion across all your platforms, you can add tracking pixels on Eventbrite. Select the relevant platform, and click (+) Add new pixel.
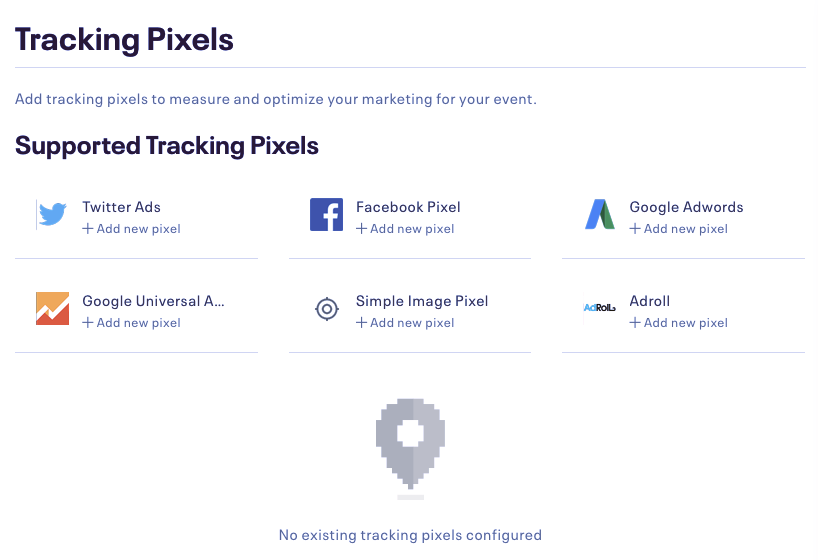
By adding tracking pixels, you can better understand where most of your conversions come from and which platforms work best for marketing.
Eventbrite helps bridge the gap between online marketing and building a real-life community. It incorporates all your social media and online advertising campaigns and gives them a single, consolidated point of sale—in a place where active people already gather.
Learn more:
To make the most of Eventbrite, connect it to thousands of other apps with Zapier's Eventbrite integrations.
