I've been a productivity junkie since I was 15. I read tons of books and productivity blogs on how I can tackle tasks efficiently and get more stuff done. So it makes sense that I've tried a lot of productivity apps to manage my workload. Color-coded calendars, mind mapping tools, project management software—you name it, and I've tried it.
My only hope? To find the holy grail of software and processes that could optimize my life.
But none of the tools I used worked to my satisfaction: they were either too complicated to use with overwhelming features or too simple with not enough customization. I wanted something that allowed enough room for personalization without going overboard. That's when, two years ago, I stumbled on Todoist.
I'm often asked how I work only five hours a day and get stuff done, and Todoist is a big part of the answer. Here's how I use it to create and achieve my monthly goals.
(I swear Todoist hasn't sponsored this post. I genuinely use the product and recommend their service. But if you're reading this, Todoist, please follow me on Twitter.)
Why I recommend Todoist: 5 features that make it stand out
At first glance, Todoist might not seem any different from your average to-do list app. You can create task lists, organize them into various projects, and sync your account activity across devices. But Todoist just offers...more. Here are five features that make it stand out.
1. Assigning priorities. Not all items on your to-do list are created equal: some require more urgency than others. Todoist has a feature that allows you to tag priorities on each task.

2. Flexibility. The best part about Todoist for me is the perfect balance of flexibility and structure. You want to keep things simple and just create a to-do list? Easy. You want to create a Kanban board for a long and complicated project? Also easy.
3. Excellent free version. Most to-do lists apps have great additional features but with a hefty price tag. I've stuck to Todoist's free version for over two years and never felt I needed more. There's a ton you can get out of the free version—especially if you want to use Todoist only for yourself.
4. Ability to add emails and websites as tasks. Have you ever encountered an important email you want to address later on? Or a website you want to revisit in the future? Todoist's browser extension and email plugins allow you to add web pages and emails as tasks with a few clicks.
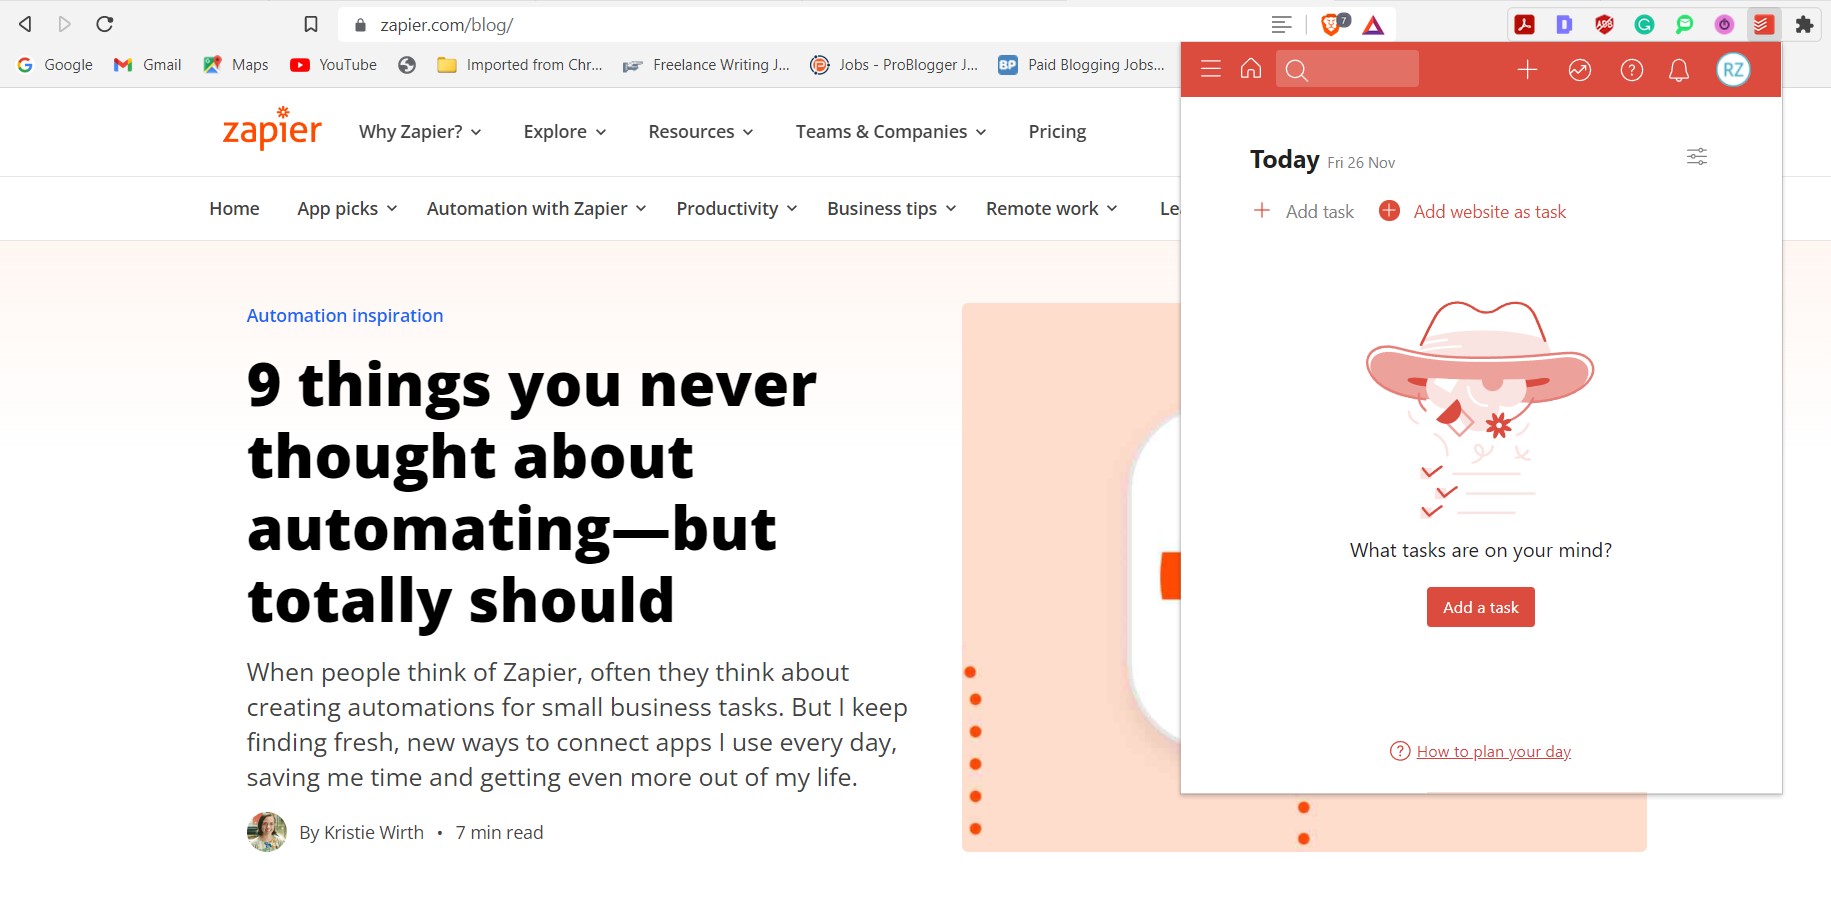
5. Ease of use. I despise using apps that require hours to learn. I want to be able to download the app and start using it in the next five minutes. Todoist is the most user-friendly app I've come across, with enough options to customize, but not so much that the app always remains underutilized.
Here's how I use these stand-out features on Todoist to accomplish my monthly goals.
How I use Todoist to achieve my monthly goals in 6 steps
Before we dig into the details, I want to acknowledge what works for me might not work for you. It took me months of trial and error to land on this system, so I'd encourage you to experiment and tweak the process.
For example, I prefer setting monthly goals for myself. Weekly goals were too overwhelming and rigid, leaving no room for spontaneity, and yearly goals were too far off into the future for my motivation to last. Monthly was the sweet spot—just the right amount of time for my goals to be achievable and malleable at the same time.
The same might not be true for everyone. Maybe weekly tasks or yearly goals work better for you to stay on top of things without feeling overwhelmed. Hopefully, my setup will get you thinking about how you might use Todoist—or any other system—to manage your goals.
1. Brain dump your goals into a list
Organizing your goals into various categories from the get-go can seem daunting. So I start by opening a Todoist list and doing a brain dump. I don't hold back at this stage—nothing is off-limits or unachievable. Whether it's pitching a dream client or reading fifty books a year, everything goes on the list. I do this exercise once a quarter.
Next, I take out my writer-hat and begin editing. In the first round, I make each goal as specific as possible—converting them to SMART goals. For instance, I'd rewrite "getting healthier" to "exercising four times a week." Why? Research has repeatedly demonstrated the importance of setting specific goals. You're much more likely to follow through on "exercise at 4 p.m. on M, W, F" than on the vague "get more exercise."
If a goal is big enough to require multiple smaller goals, I use subtasks to write them under one heading. For instance, "getting healthier" could also include "meal prep on Sundays for the week ahead."

In the subsequent editing round, I grab a fine-toothed comb and kill my darlings. Because you know the biggest barrier to achieving your goals? Your other goals. Psychologists call this goal competition. I ruthlessly eliminate the ones that I don't have the bandwidth to accomplish or those that aren't necessary.
The last step is setting priorities. Todoist makes this surprisingly simple—assign the priority to your goals from one to four depending on its importance.
My pro tip: If you have a lot in the #3 and #4 categories, it's likely those goals aren't important enough. Aim to make the total number in these two categories equal to or less than the number in priority #1.
2. Assign months and due dates to your goals
I divide these goals into three separate pages using Todoist's projects feature. For example, I'll do the brain dump exercise in December and set priority #1 goals for January, #2 for February, and #3 and #4 for March.

Next, I go to each month and set a due date for each task. Type the date, and Todoist automatically detects that and adds it to the task.

Why do I add due dates? Two reasons:
Deadlines help me ensure I finish a task by keeping me accountable under a timeframe.
Due dates dictate Todoist's "inbox" and "upcoming" views, which help me get an idea of what I have in store for the upcoming day and week in a jiffy.
For recurring tasks, like sending a status report to a client every week, I write "every Friday" as the due date. Todoist automatically resets the date for the next occurrence once I've completed it. (I repeat: this is all on the free plan.)

3. Make room for the unexpected
Plans seldom go so smoothly. Unexpected tasks come up much more than I'd like, and I want to stay prepared—which is why I connect Todoist to Gmail using Zapier. If I receive an email and star it within two days, Zapier automatically adds that email as a task on my Todoist.
Add new starred emails to Todoist as tasks [Business Gmail Accounts Only]
You can set up many similar workflows using Zapier—syncing Todoist with your calendar, team chat app, or thousands of other apps.
Zapier is a no-code automation tool that lets you connect your apps into automated workflows, so that every person and every business can move forward at growth speed. Learn more about how it works.
I also ensure my months (especially the last one of the quarter) aren't jam-packed. Leaving some space acts as the buffer for unexpected problems, opportunities, and rest. I set the cap at ten goals a month, but you can choose a different number depending on your workload.
5. Divide your monthly goals into categories
I use the sections feature on Todoist to divide my monthly goals into different categories. To continue our example, the goal "exercise M, W, F at 4 p.m." would go under a "personal" or "health" category. I often keep tweaking these sections based on my goals for the quarter.

You can go basic and divide your goals into personal and professional, or you can make these categories month-specific instead of quarter-specific. Maybe your main focus for January is hitting a financial milestone, but in February, it's getting more family time. Once you have your sections, you can view them in a list format or a board format (I prefer the board format because it allows me to view everything at a glance).
Want to skip this step? Todoist has a free goal tracker template you can steal to do the job for you.
5. Create milestones, labels, and more details for each task
How would you know if you've achieved your goal? What makes an item cross off the list?
In Todoist's description column, I add the outcome I'm expecting out of the goal, making it count as accomplished. Adding those kinds of milestones help me understand whether I'm at the starting point of a goal, in the middle, or near the end. Plus, milestones give me a nice dopamine spike of "Oh, I'm almost there!" that keeps you going (it's called the goal gradient effect).

I also use the "description" column to add any notes about the goal. For example, if I have to pitch and write a post for a publication in one month, I'll add the following details in the description:
Guidelines document
Editor's email
Potential topic ideas I can pitch
Pitching guidelines
Now, when I finally sit to pitch, I have all the information already waiting for me. It makes not procrastinating easier.
Lastly, I reassign priorities I had marked quarter-wise to month-wise. I also add a label to all my tasks at this stage. It helps me get a quick view of how my different task types are distributed throughout the quarter.

6. Monitor your goals
Everything goes well for the first few days, but you're stuck answering emails and maintaining spreadsheets by the third week of the month. You forget to take stock of where you're at, and by the 30th, you're nowhere near achieving your monthly goals. Sound familiar?
Here are different ways to monitor your goals regularly on Todoist:
Every Friday, I set 15 minutes aside to check my monthly goals. I see how far I've come, what I should plan for next week, and where I need to tweak things.
You can also do this via Todoist's activity log—track how many tasks you've updated, completed, and more.
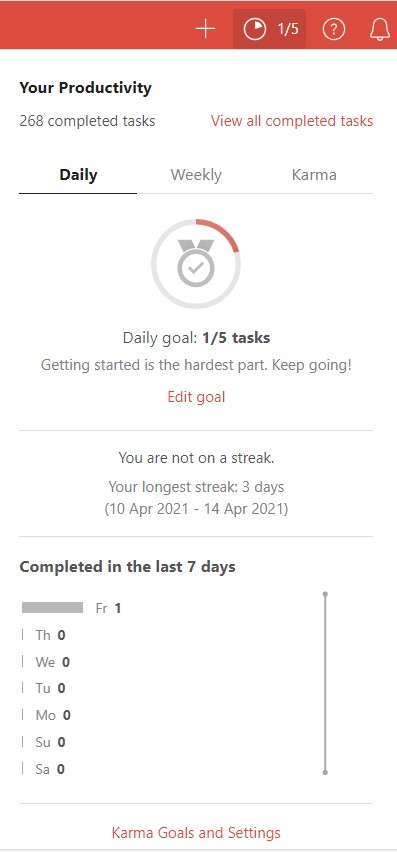
There's a Todoist "Karma" feature that gamifies your productivity. The more you use the app, the more points you earn. You can use the "vacation mode" to put a pause on your Todoist activities while you're away.

I recommend checking your monthly goals at least every two weeks to keep track of your progress. Regularly monitoring your goals increases the likelihood of achieving them.
Find and optimize your ultimate productivity app
The key to wholesome productivity is building a sustainable and straightforward system you can adhere to. So, I hope you adjust the process outlined here to suit your working environment, and let this be the stepping stone leading to your optimal productivity system.
Related reading:


