When you're in the throes of a product launch, new ideas come flying in from every direction, and each one could use a visual—a product concept, a quick mockup for a new feature—to rally the team around.
Generating those visuals in an AI tool like Gemini speeds things up, and because your prompt can bake in brand guidelines like color palette and style, every image can come out consistent. But writing that prompt from scratch every time and manually copying the results into the right Slack channel slows you back down.
In this tutorial, I'll show you how to use Zapier to automatically trigger Gemini image generation from a form submission, then post the resulting visual to Slack. You can also swap out these apps for the tools you prefer using, as it'll be a similar setup. Let's get started.
Zapier is the most connected AI orchestration platform—integrating with thousands of apps from partners like Google, Salesforce, and Microsoft. Use forms, data tables, and logic to build secure, automated, AI-powered systems for your business-critical workflows across your organization's technology stack. Learn more.
How to generate Gemini concept art and share it to Slack
You can create your own Zap from scratch—that's what we call an automated workflow—with our point-and-click Zap editor. But you can also get started with a template, if you'd like, by clicking the button below.
Send Slack notifications with AI-generated images from form submissions
Set up your Zapier Forms trigger
Create your trigger, choosing Forms as your trigger app and Form Submission Created as the trigger event. (Or use whichever form app you prefer.) If you started with the template, this will already be done for you. Click Continue.

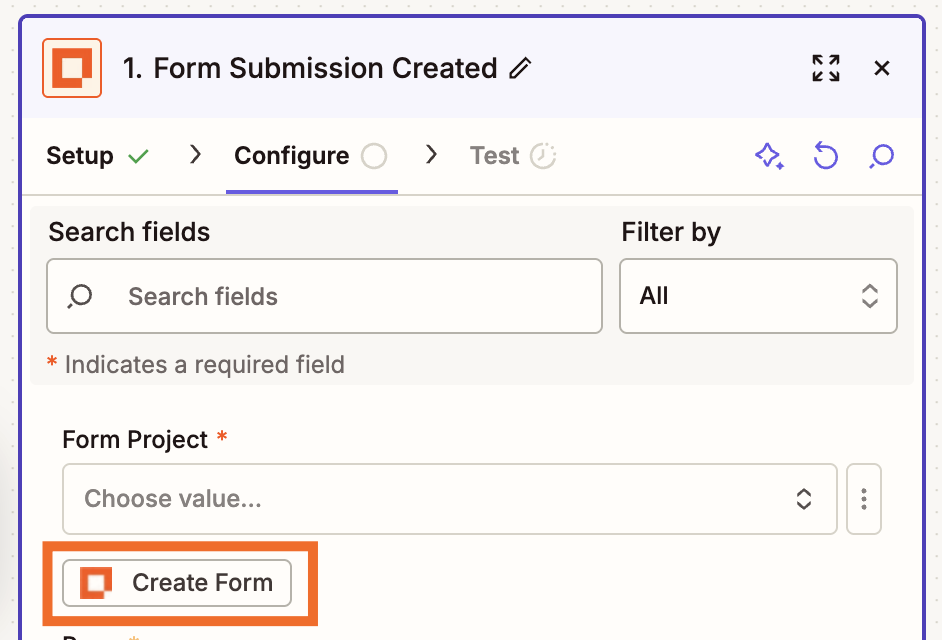
In the Configure tab, select the specific form project you want to use. If you haven't created anything yet, click Create Form.
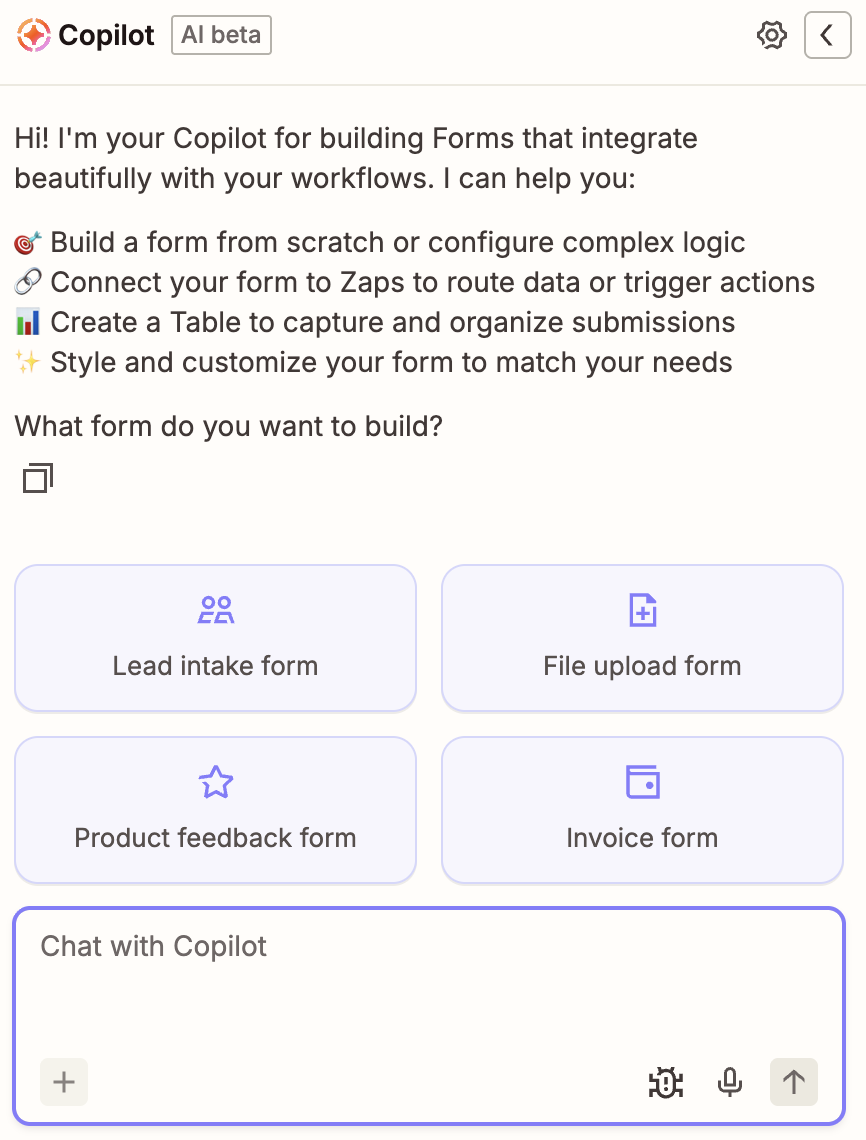
Open the form builder, then set it up to your liking. (If you're building with Zapier Forms, you can get step-by-step guidelines in our feature guide.) With Zapier Copilot, our AI assistant built into all our products, you can submit a natural-language description to whip up a form fast.
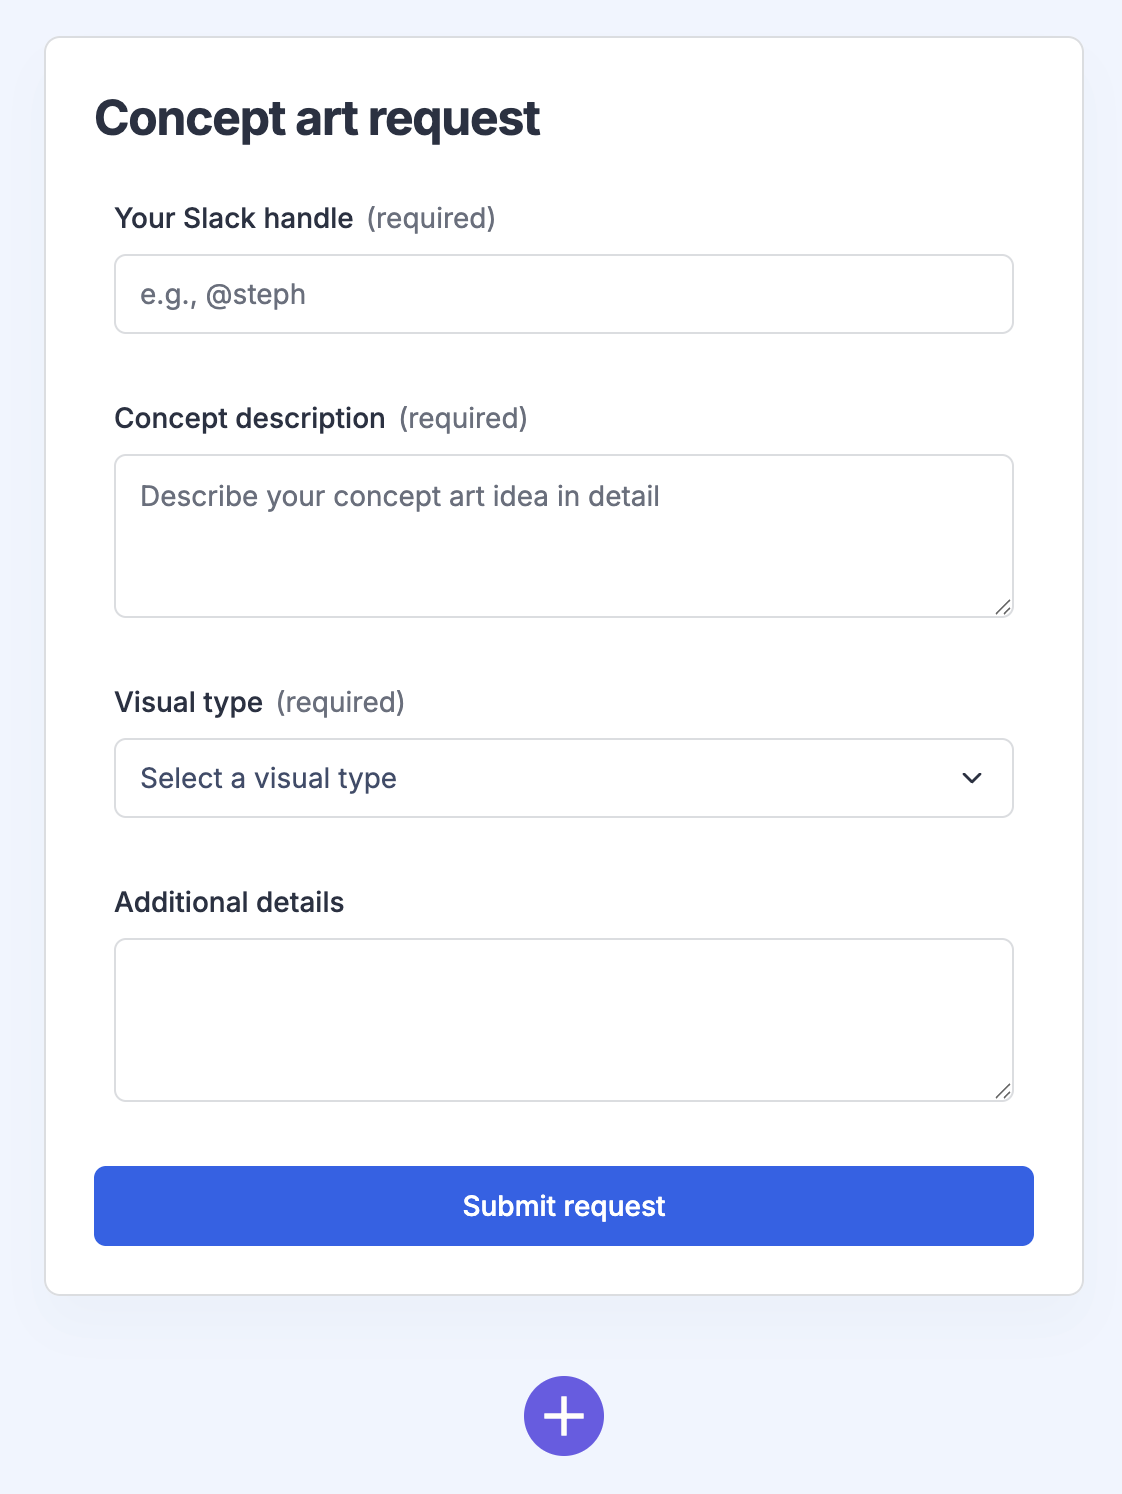
Here's a quick form I generated in 30 seconds using a Copilot prompt.
From here, adjust your form as needed. When you're done, return to the Zap editor, finish configuring the step, and click Continue.
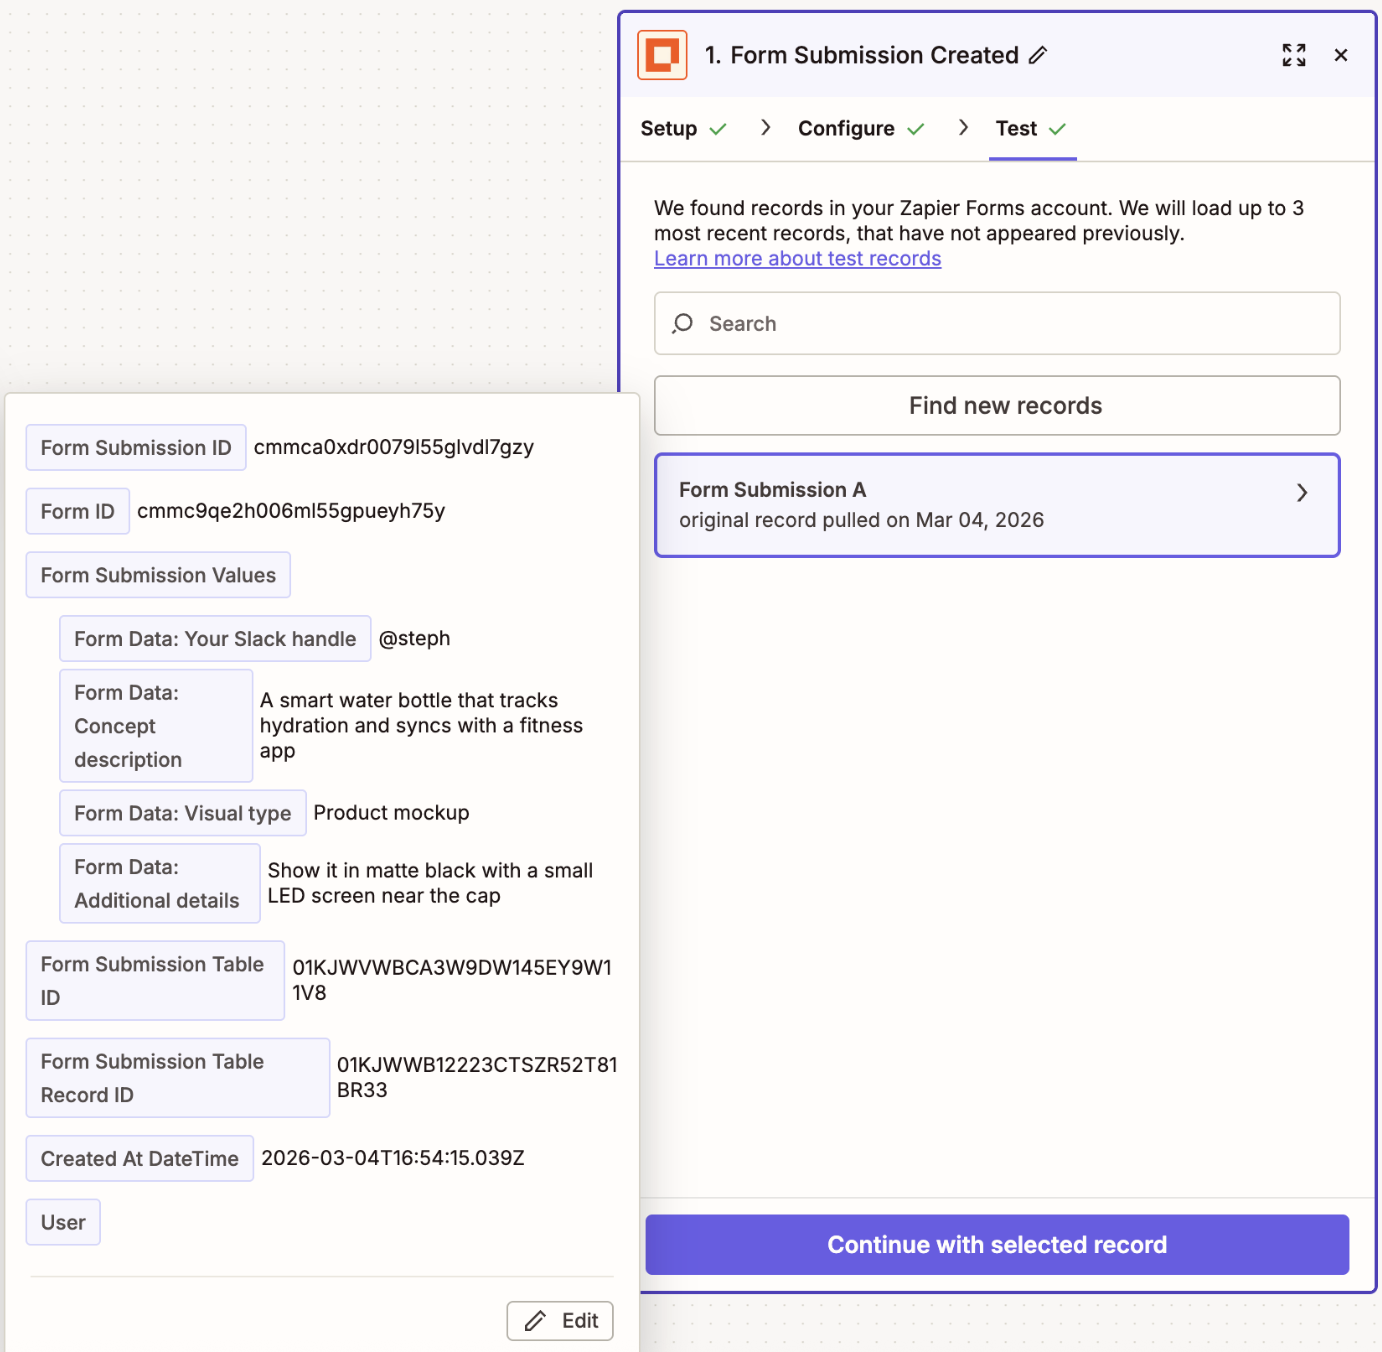
Now test your trigger to pull in a recent form submission. (If you just built the form, submit a test response first, so there's a record to work with.) Choose a submission and click Continue with selected record.


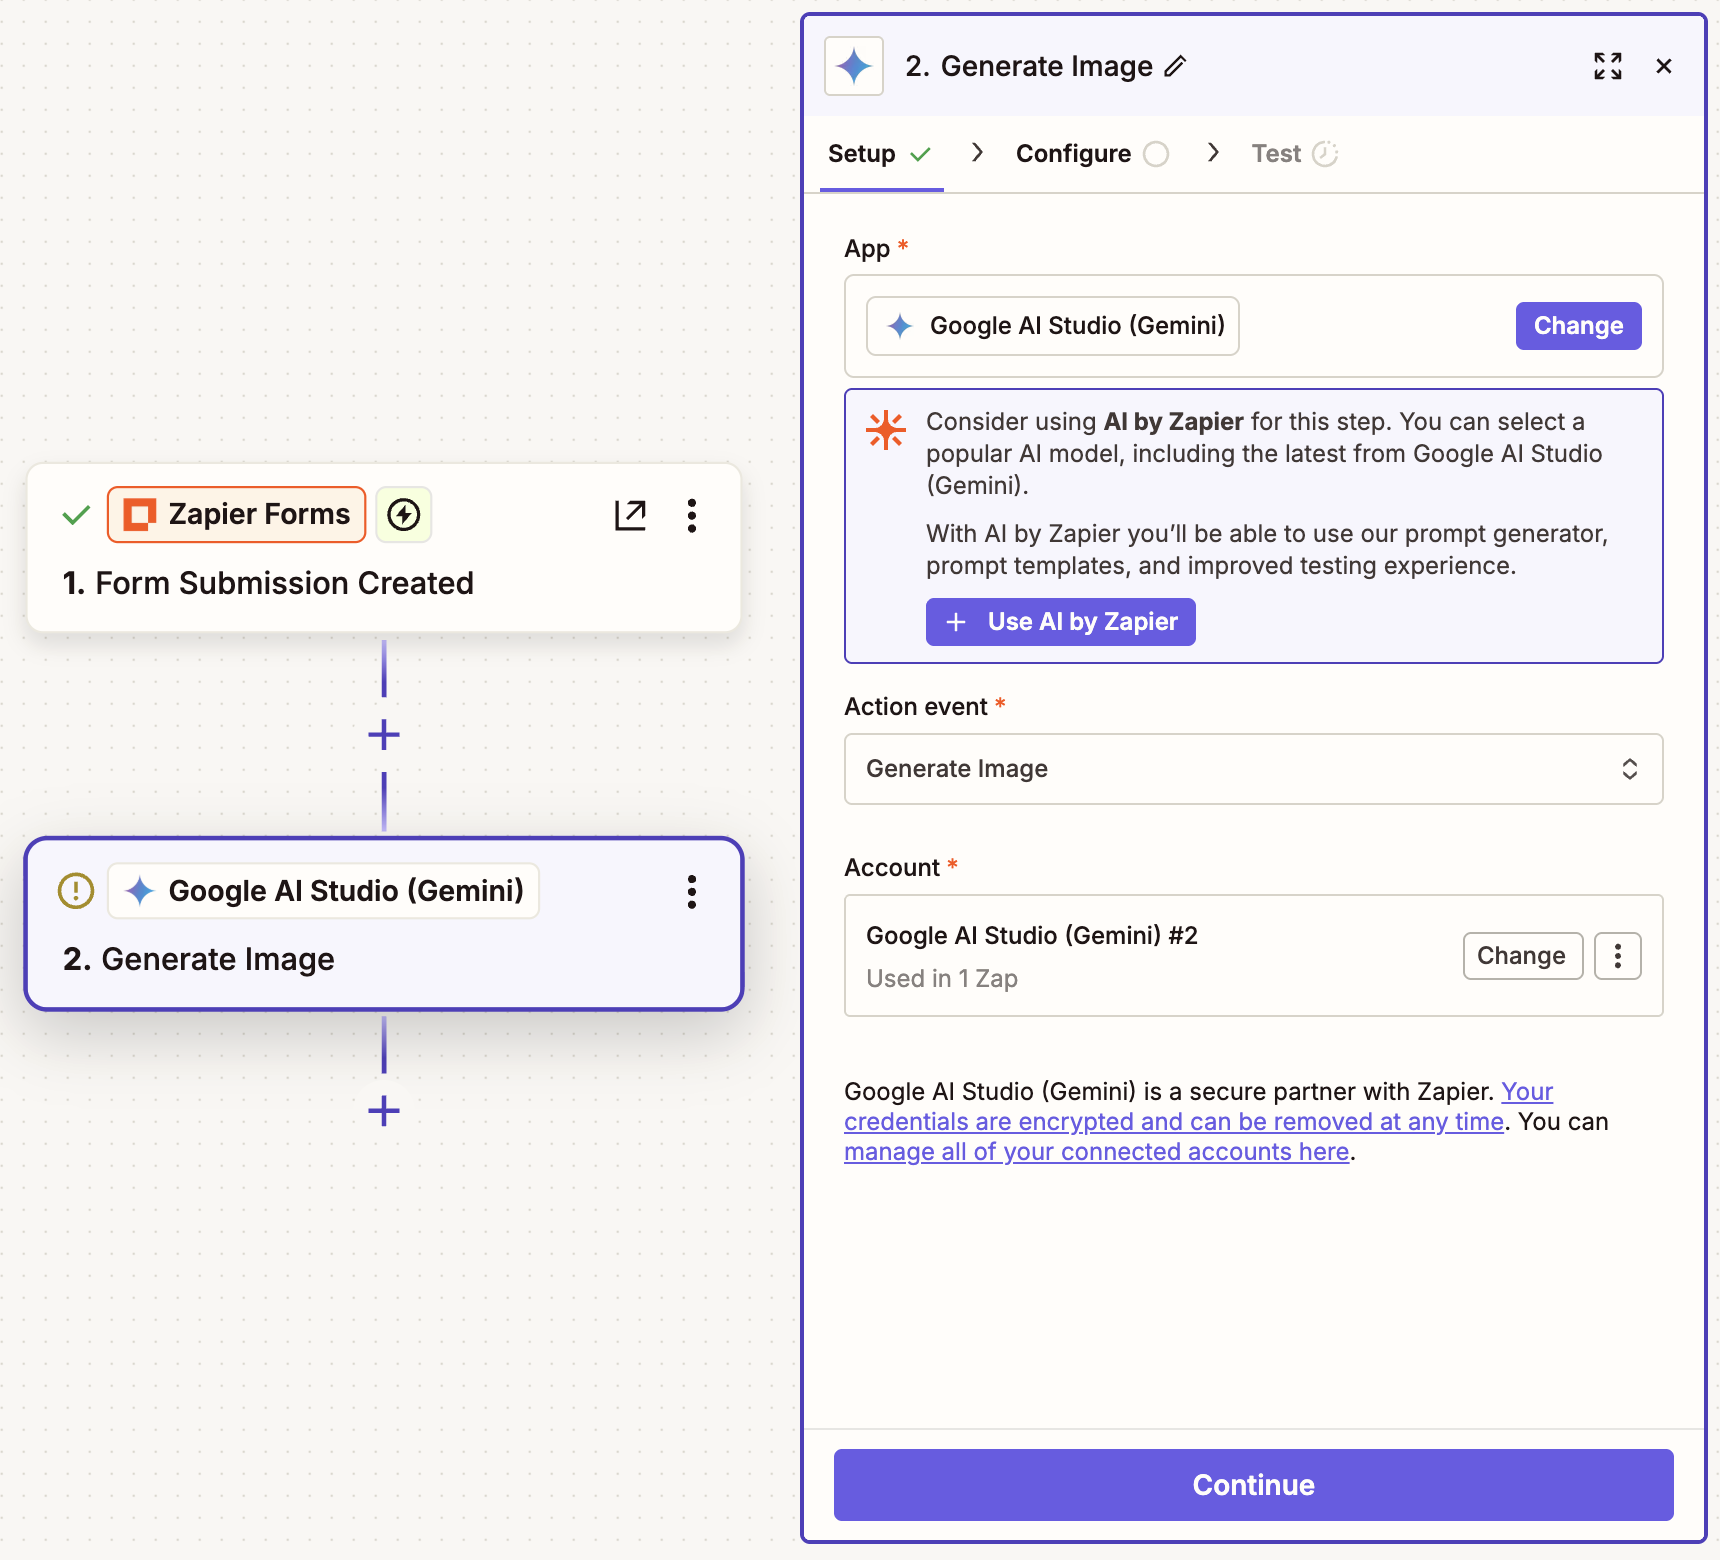
Set up your Gemini action
In your next step, choose Google AI Studio (Gemini) or your AI tool of choice as your app and Generate Image as your action event. Connect your account, then click Continue.
In the Configure tab, write your prompt. This is where the Zap really pays off. You only have to write your prompt once, and every form submission tied to this Zap will reuse it. Be sure to map relevant form fields into your prompt, and surround your prompt with your brand guidelines, describing details like your color palette and a style direction that you want to filter all your assets through.
To map data from your form step, just click the plus sign (+) or type a forward slash (/) inside the Prompt field and select the right data.
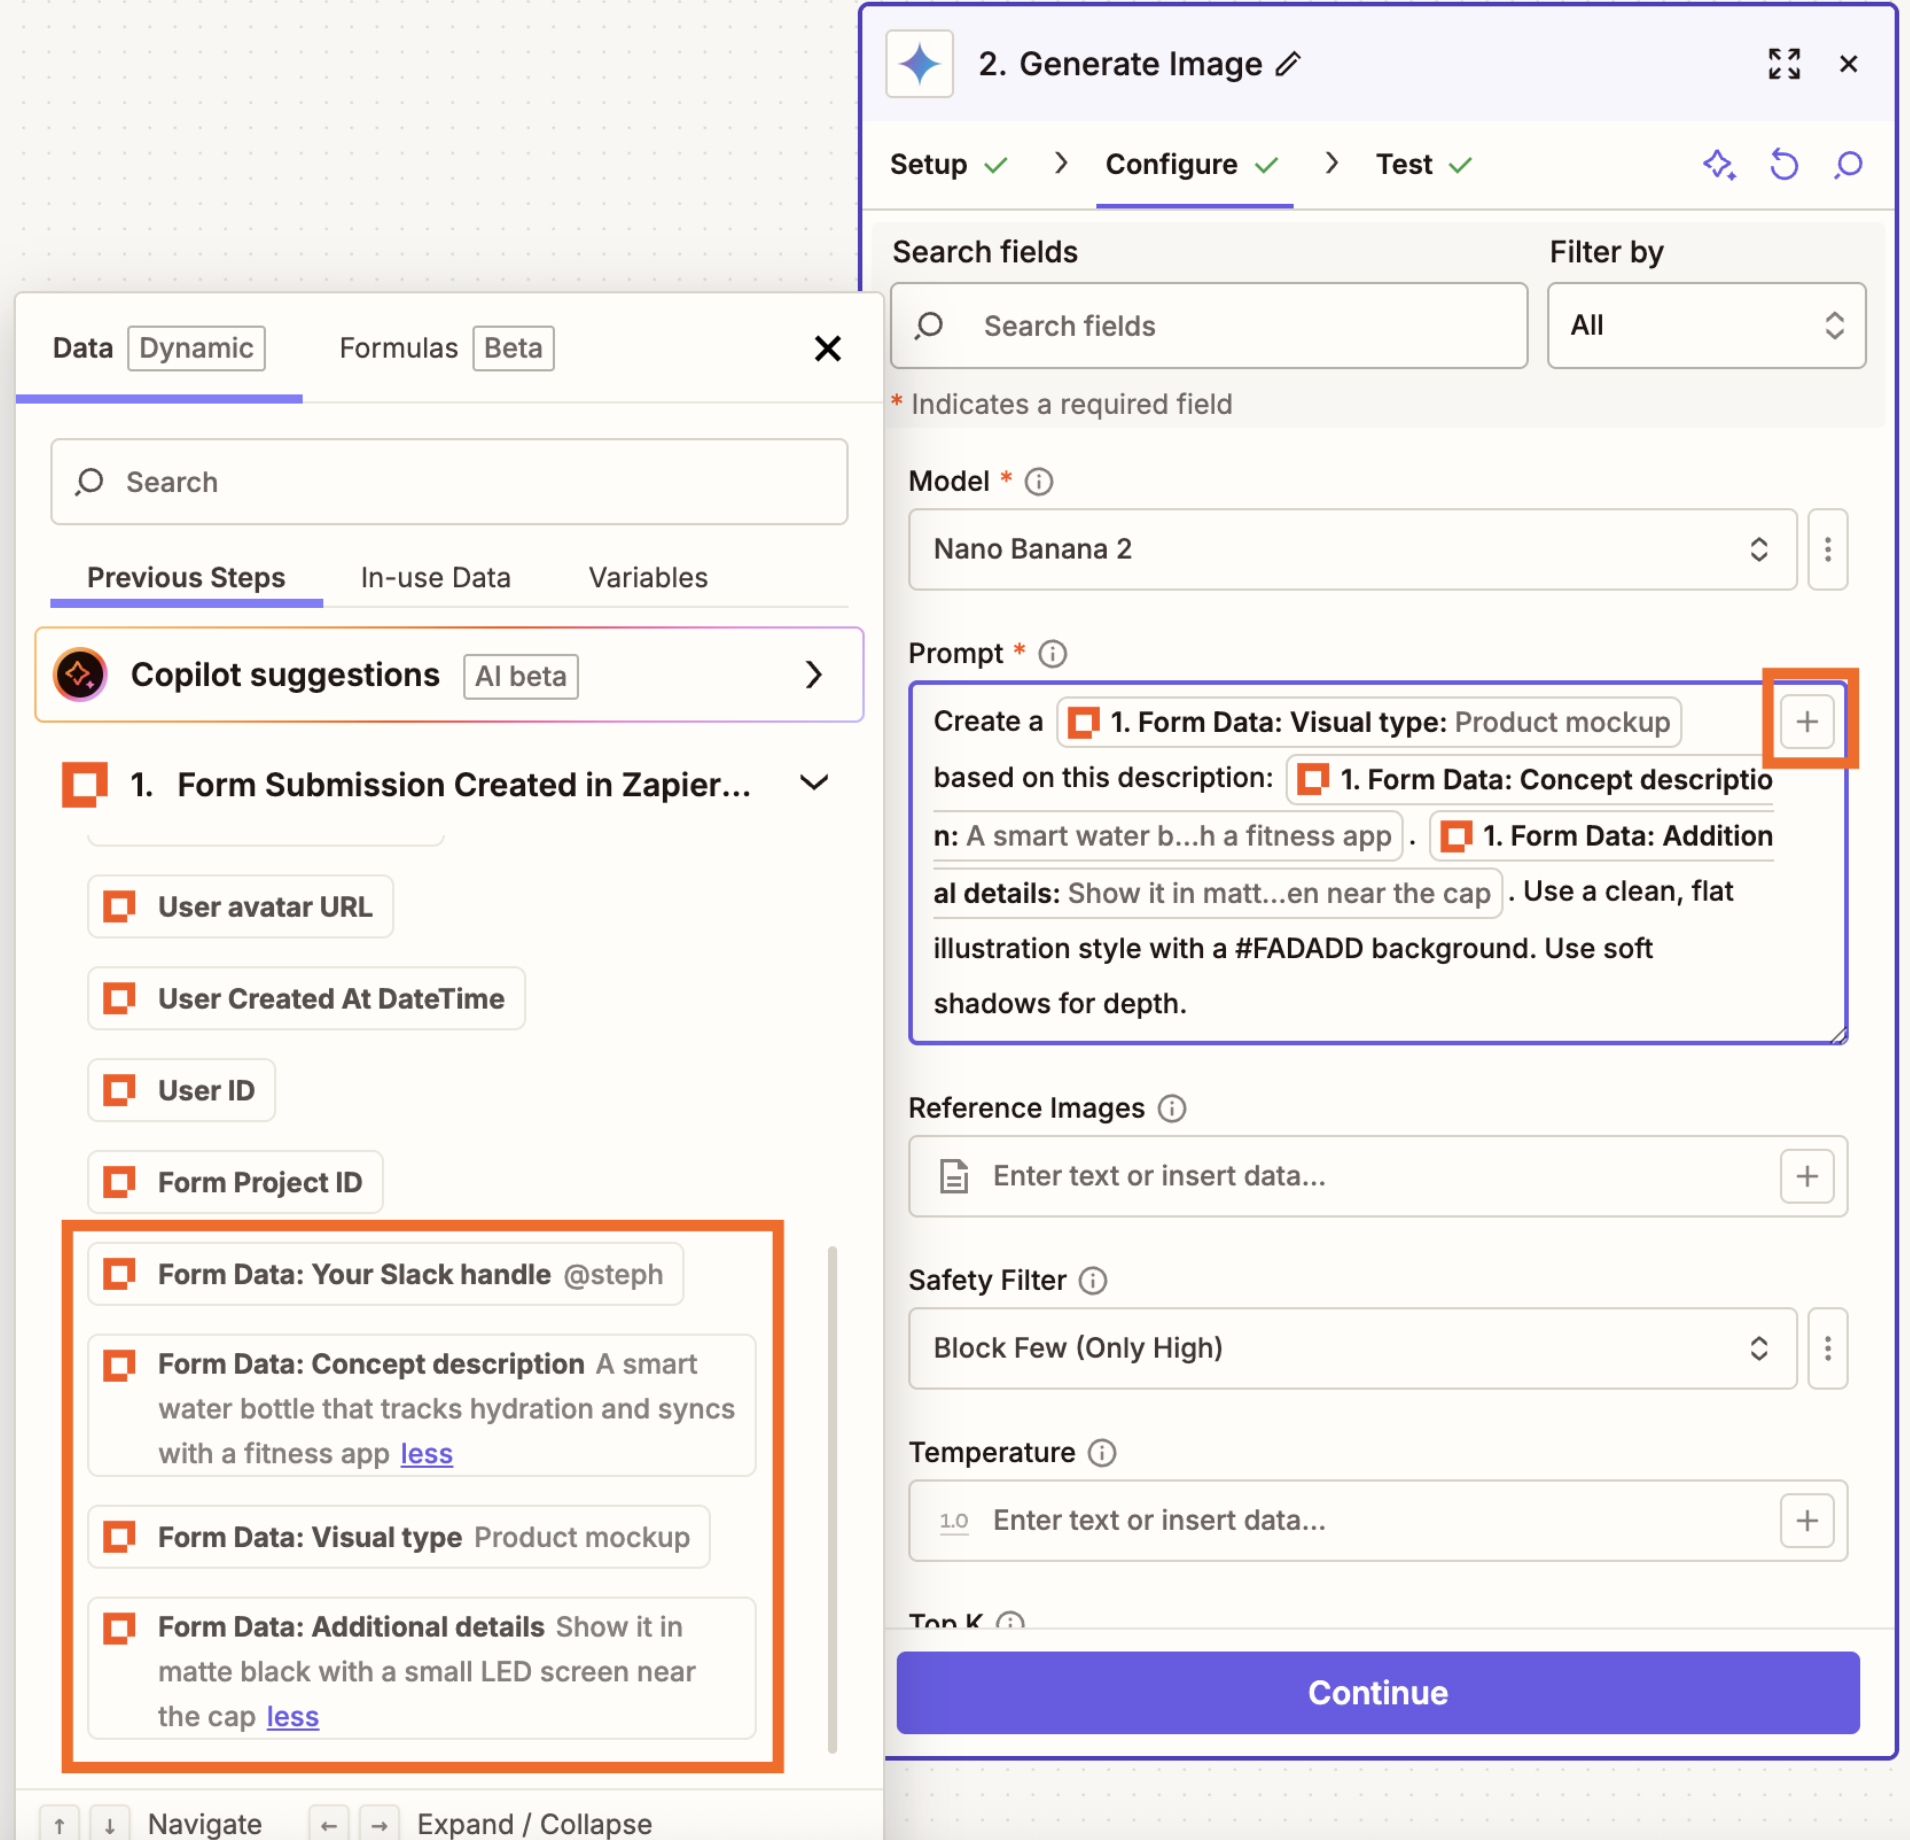
From this screen, you can also do things like select your preferred model, add reference images, and adjust the temperature (how creative your outputs will get). When you're done, click Continue.
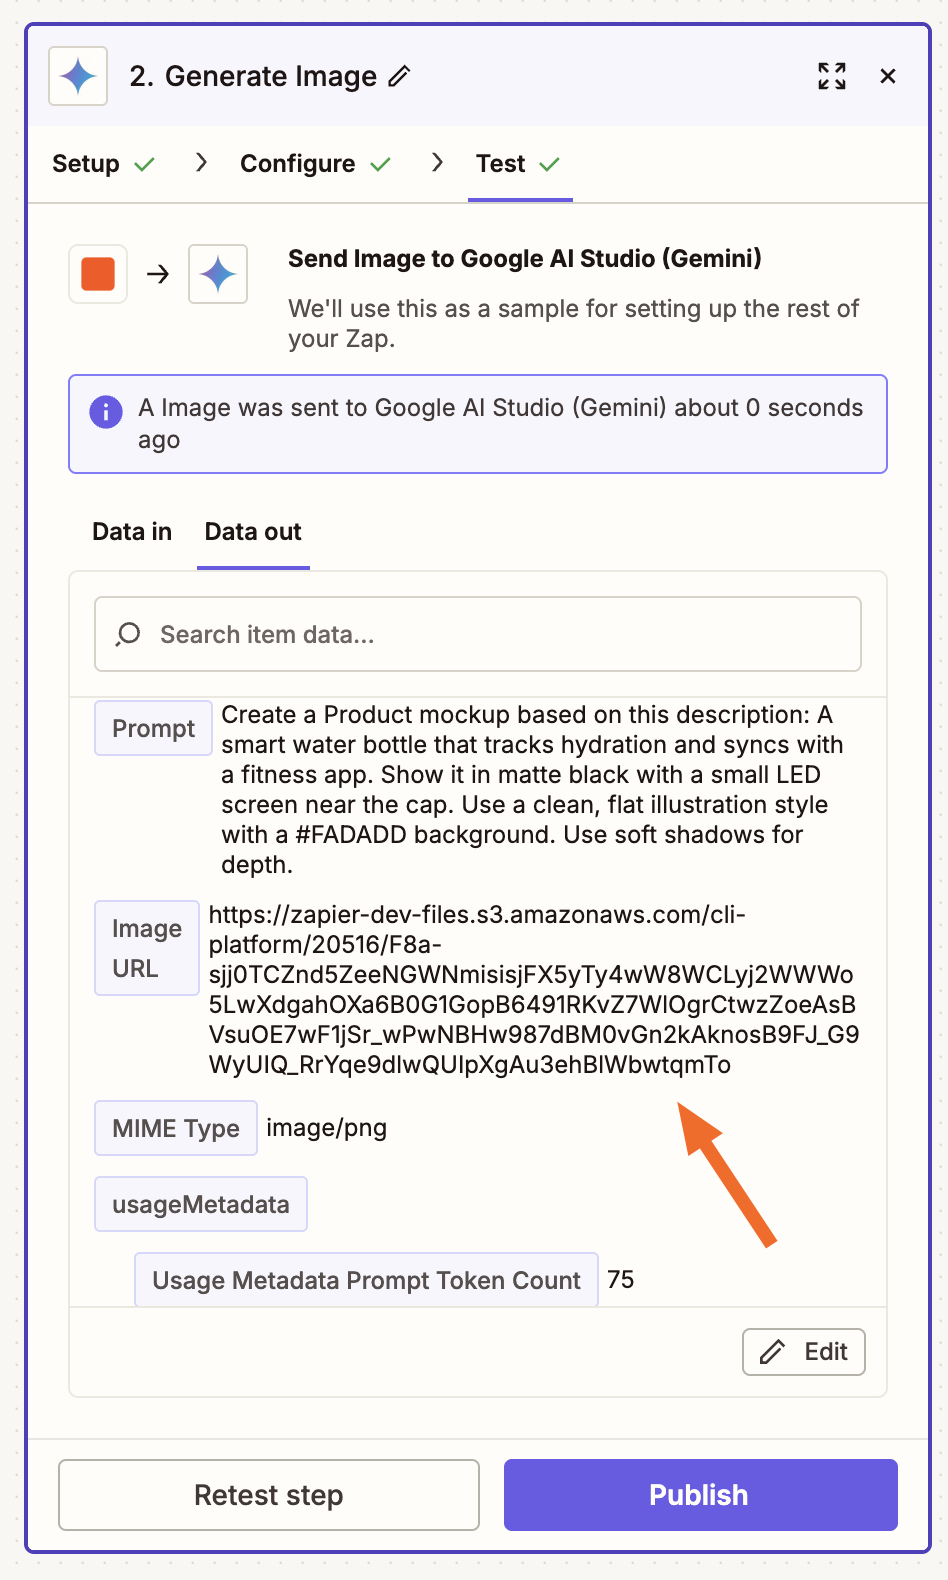
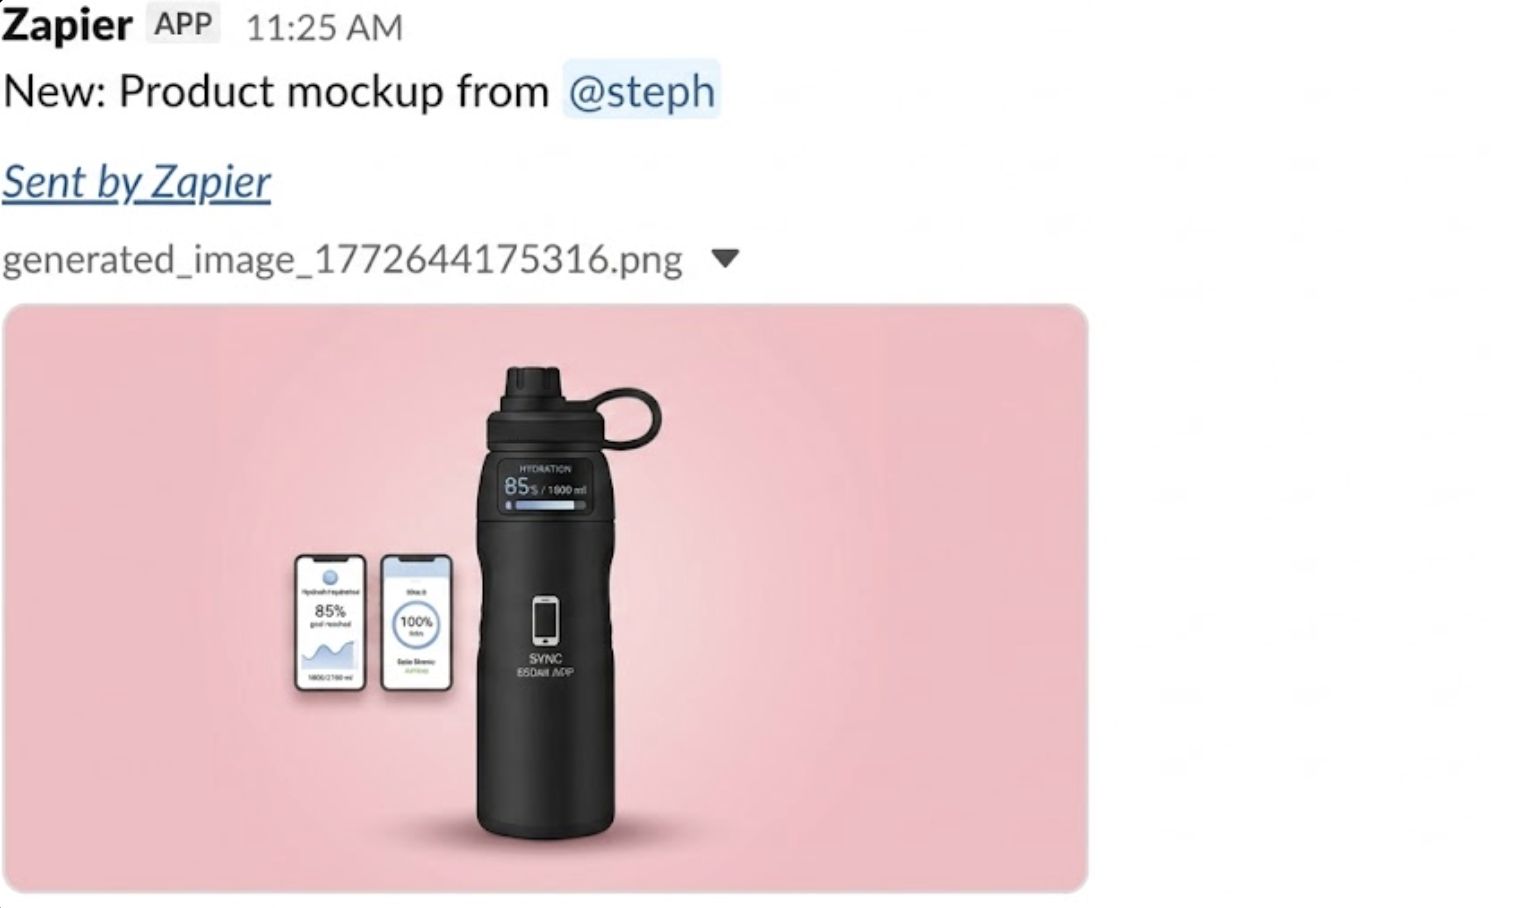
Test this step to confirm that Gemini will generate an acceptable image from your mapped prompt. In the test data, find the Image URL, and paste it into your browser to download the image that Gemini created.
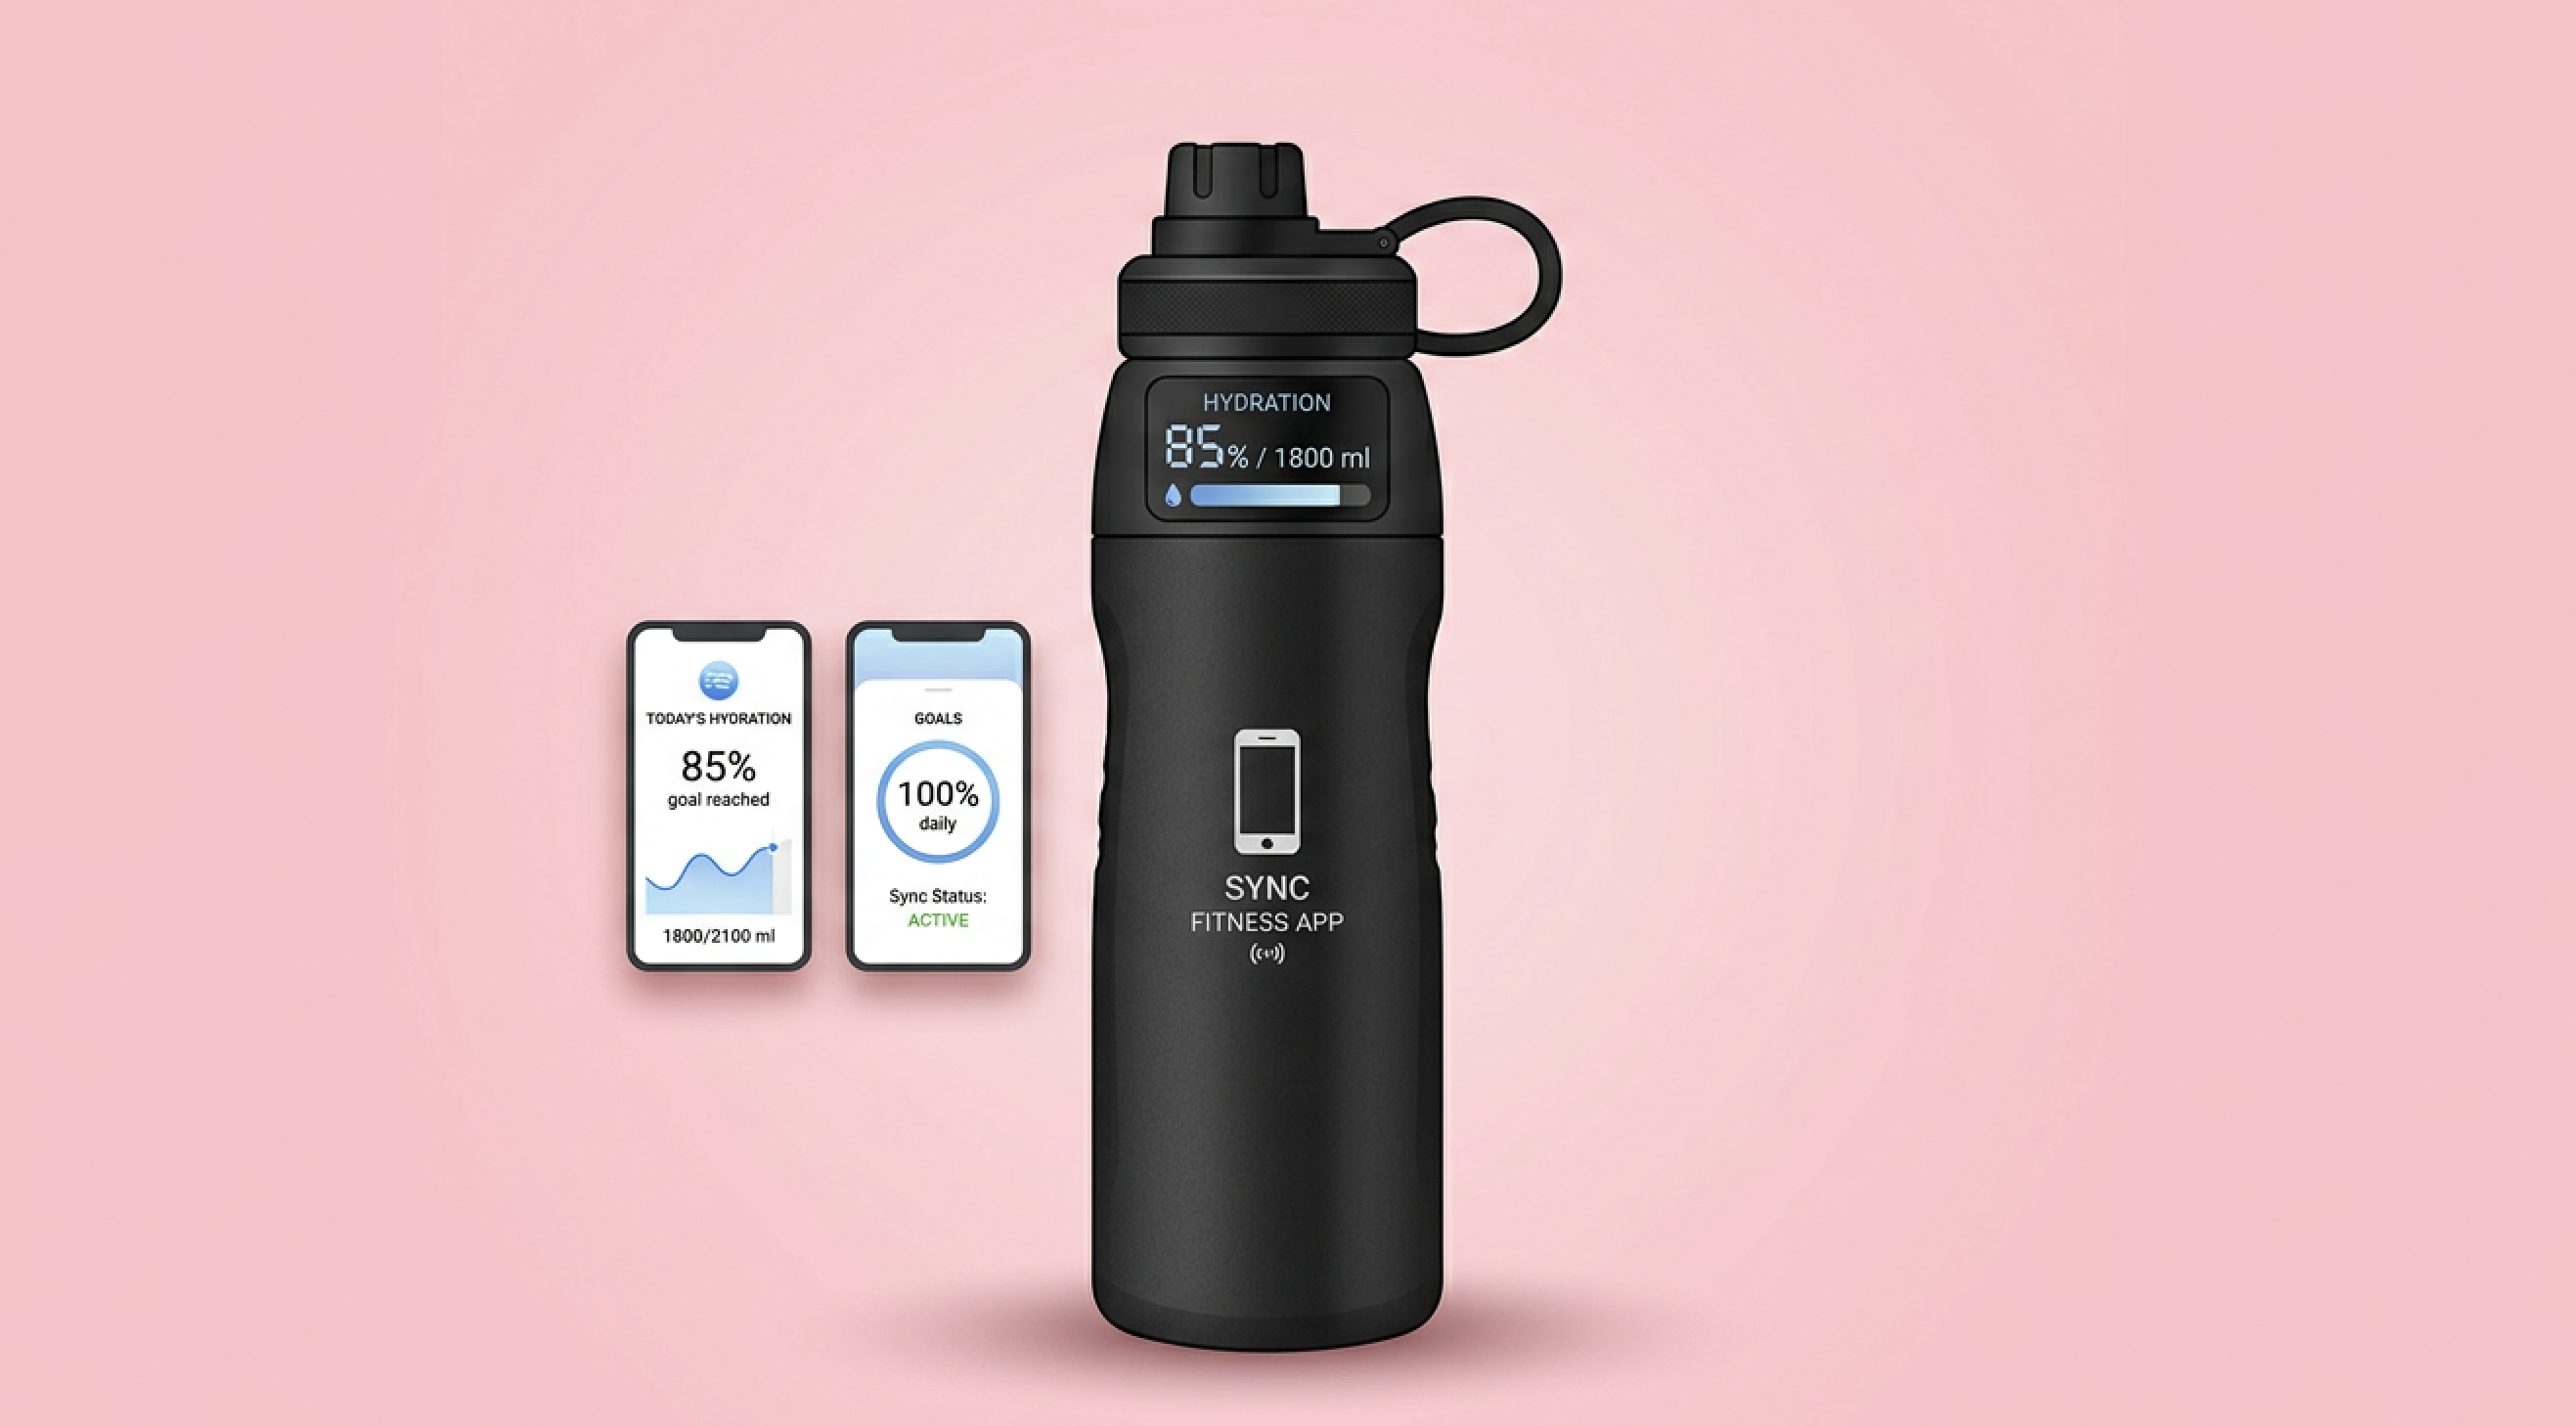
Here's the smart water bottle mockup Gemini produced for me—with soft shadows and a peachy background color, just as I requested.
Not quite what you expected? Go back and edit your prompt until the output is just right. You can also test this step with different form submissions to make sure the outputs stay consistent.


Set up your Slack action
Now, let's set up the final action. Add a new step, choosing Slack as your app and Send Channel Message as the action event—or go with whatever your team's chat app happens to be. Connect your account and click Continue.
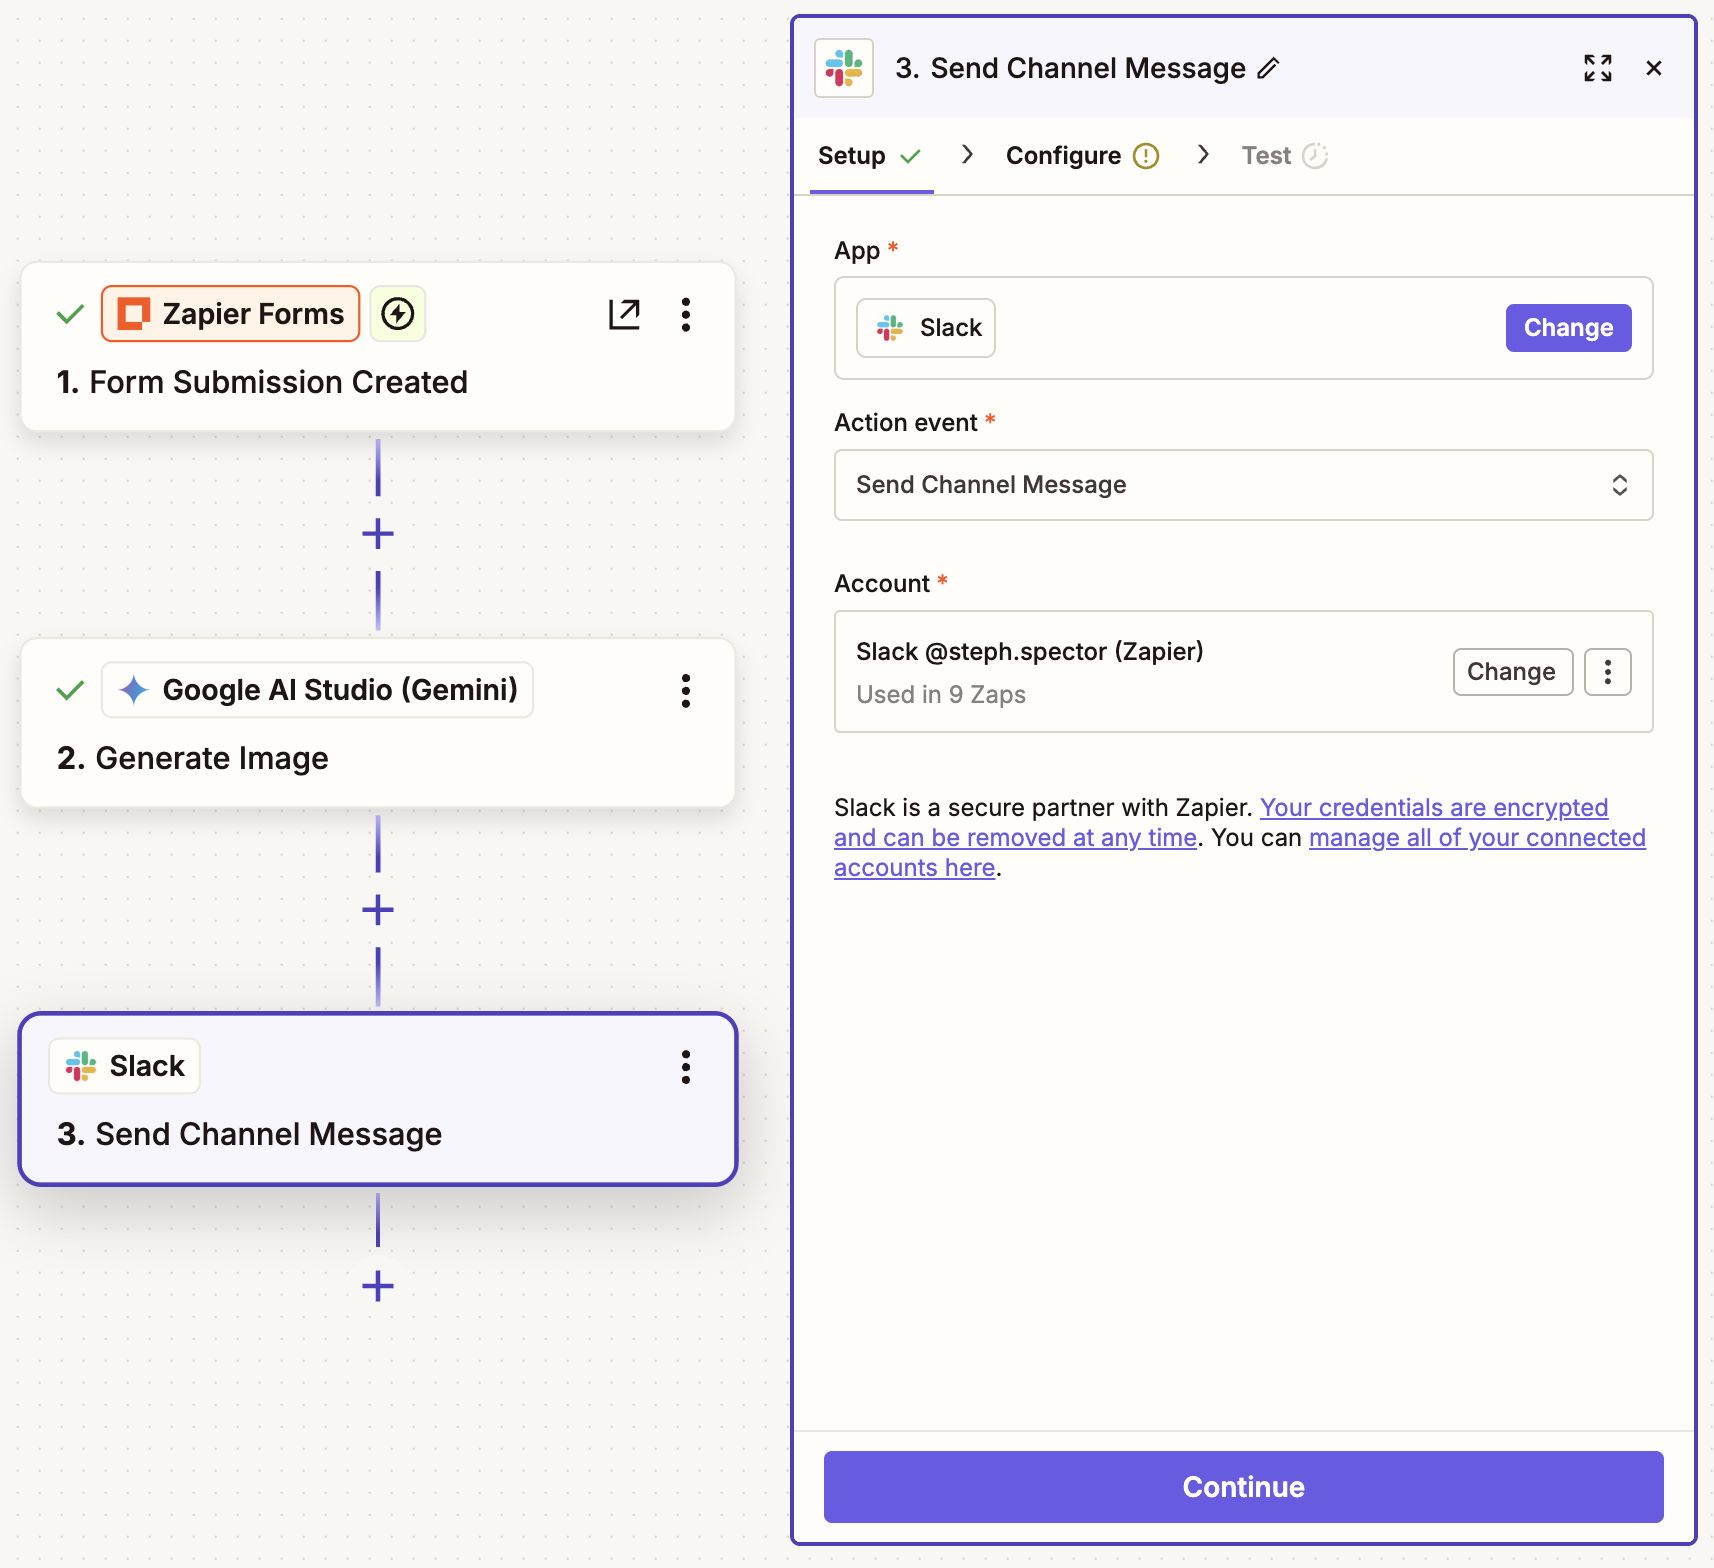
In the Configure tab, select the Slack channel where you'd like your concept art posted. In the Message Text field, add context for your team—like who submitted the idea and what the concept was. Map the image URL from the Gemini step into the File field, so it attaches directly to the message. You can also customize details like the bot name and icon if you'd like the messages to stand out in your channel.
Click Continue when you're done, then test your action. Now check your Slack channel to see if it worked!


If everything looks right, remember to click Publish in the Zap editor to turn your Zap on.
Share high-quality concepts with AI and Zapier
From now on, every time someone submits a concept through your form, Gemini will generate a brand-consistent visual and send it to your Slack channel of choice—no prompting, downloading, or uploading on your part. Your team can get right to discussing your concept art, and you can maintain a forward momentum on the launch.