
No one likes meetings, and I'm convinced a part of that is due to the headache of scheduling said meetings in the first place. If someone emails me with a request like, "Let me know when you're free to chat," I immediately begin to dread the inevitable coordination game.
Microsoft Outlook clearly understood this pain point, which is why they created Scheduling Assistant. It allows you to see when people in your organization are available to meet, so you can simplify your scheduling workflow. Here's how to use Scheduling Assistant in Outlook to seamlessly coordinate your next meeting.
Note: Outlook Scheduling Assistant is only available for users with a Microsoft 365 account, and you can only use it to coordinate meetings with other members of the same organization.
How to use Scheduling Assistant in Outlook to coordinate and book a meeting
Before we dive in, it's worth mentioning that there are many versions of Microsoft Outlook. I'm using Outlook for Microsoft 365, running on a MacBook Pro. Outlook may appear slightly different on your end depending on your device or if you're using the web app.
Go to outlook.office.com/calendar.
Double-click any date in your calendar, and a New event window will appear. (Don't worry—you'll be able to modify the event date in the next step.)

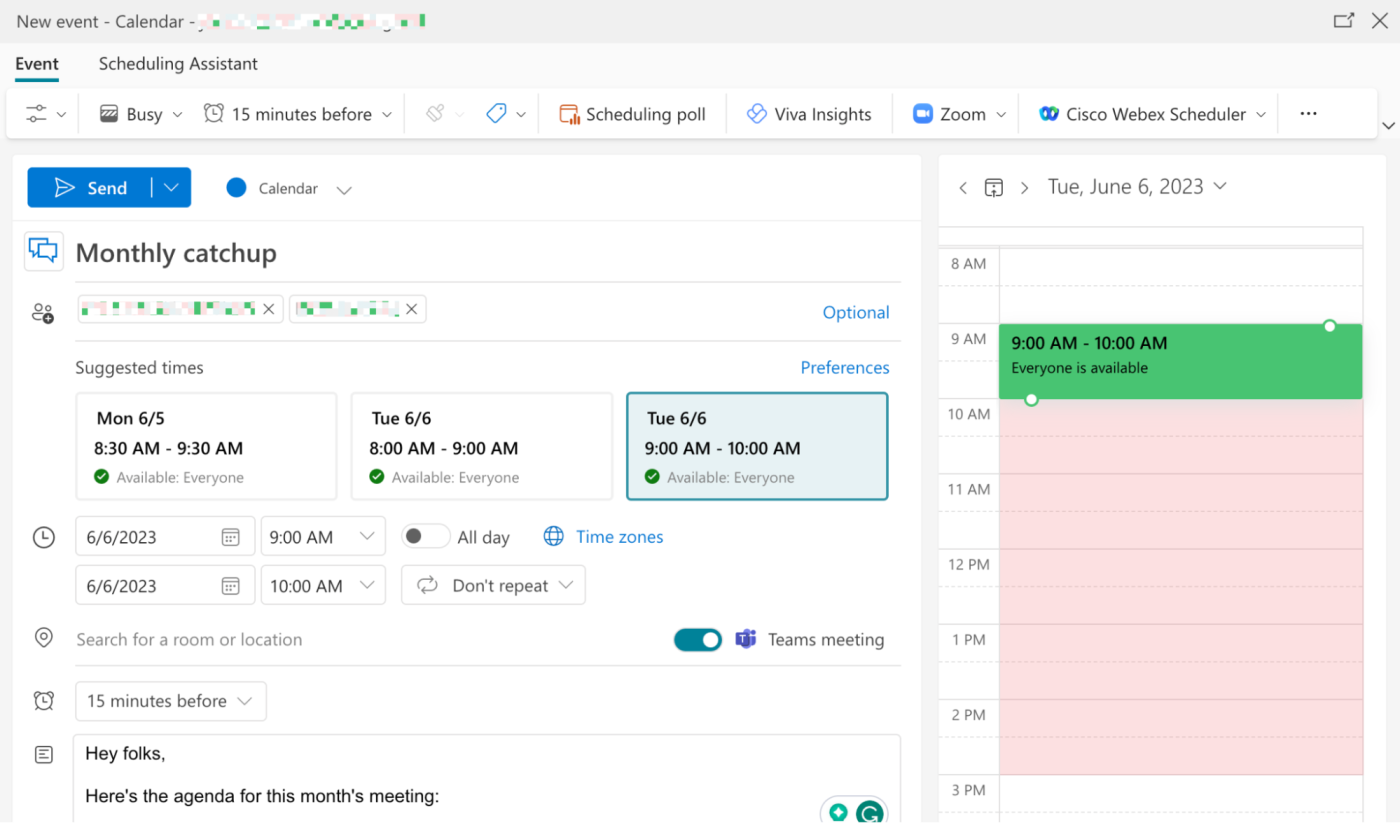
In the Invite attendees field, enter the email addresses of all your attendees. (You can also click Optional to invite optional attendees.)
By default, Scheduling Assistant will automatically suggest three of the earliest available, 30-minute time slots that work for everyone's schedule.

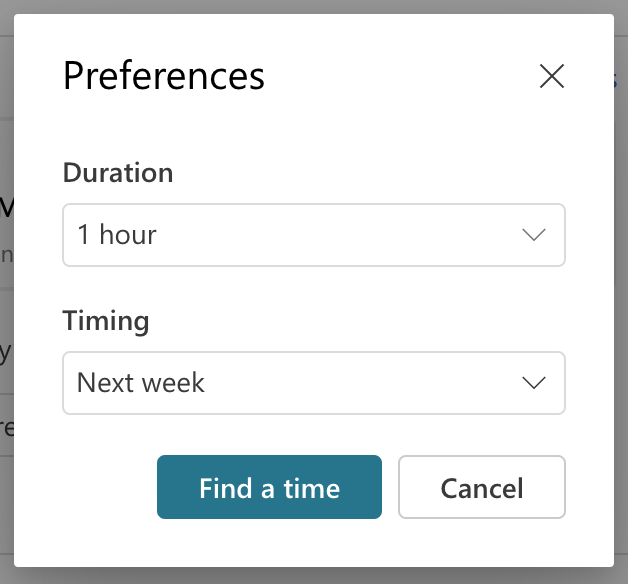
Let's say you need a one-hour time slot for next week instead. To modify the suggested times, click Preferences. In the Preferences window that appears, change the Duration (15 minutes, 30 minutes, or one hour) and Timing (earliest, this week, next week), and then click Find a time.
Click a suggested meeting time that works, and Outlook will update your event accordingly. (If none of the suggested times work for you, jump to the next section.) Fill in the rest of your event details, such as event name and location, and then click Send.


Tip: Cut down the length of your meetings. Use these asynchronous meeting tips to get the most out of our meeting—in less time. (You might find you don't even need a meeting after all.)
How to manually find meeting availability using Scheduling Assistant
There's one downside to using Scheduling Assistant in the Event tab: the three suggested meeting time options are the only ones you get. (There's no "regenerate" or "show more options" button, though I really think there should be.) But there are two easy ways you can manually find additional meeting times using Scheduling Assistant. Here's how.
Directly from a new event
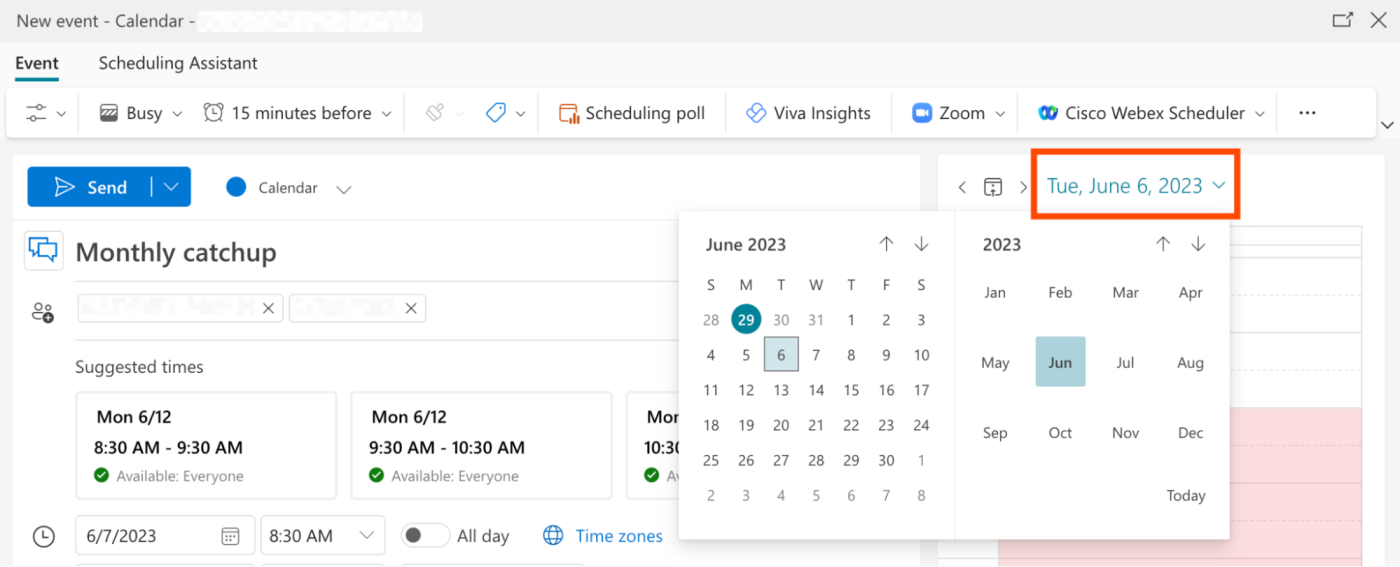
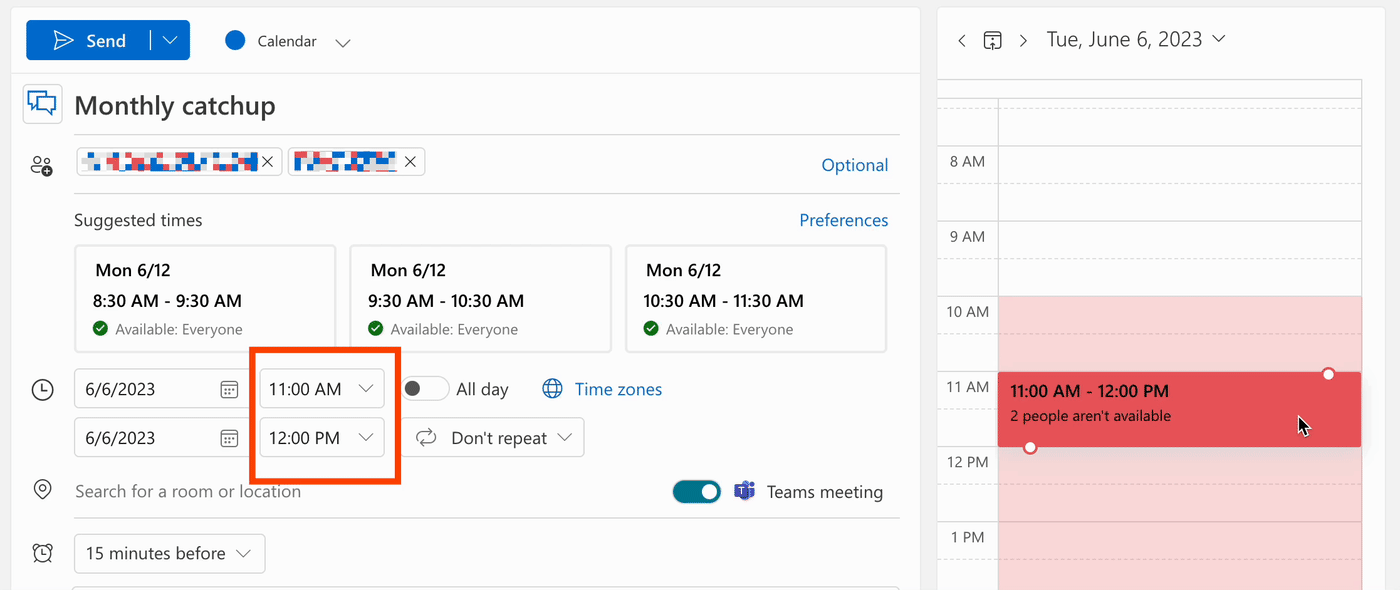
In the Event window, click the event date in the calendar panel, and then choose your preferred meeting date.
A red-shaded area will appear to indicate if any of your attendees aren't available. If you click on a specific time slot in this shaded area, it'll tell you how many people aren't available.
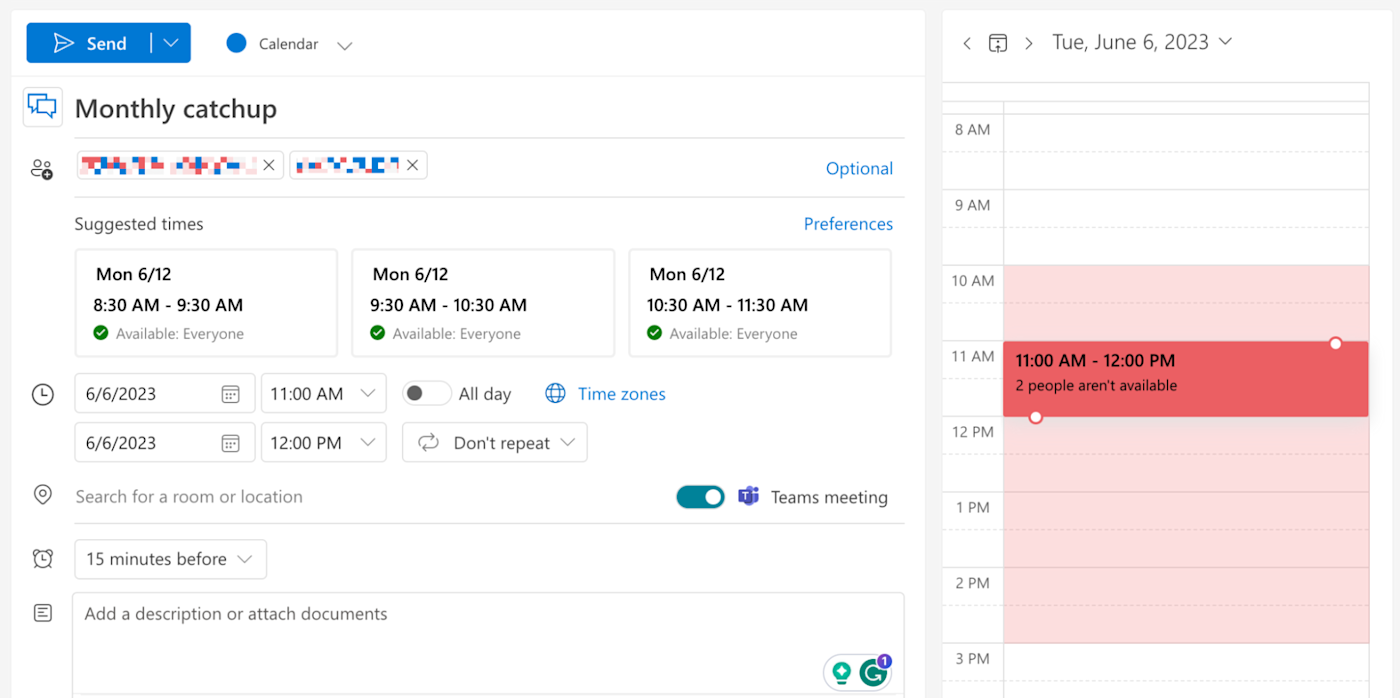
Click an empty time slot (i.e., one that's not shaded red) to pick your meeting time, and your event time will update accordingly.


This is a convenient way to understand everyone's meeting availability if your invite list is small (three or so attendees). If you have a large invite list, or you'd like to see a breakdown of everyone's availability, keep reading.
Directly from Scheduling Assistant
In the New event window, click Scheduling Assistant. A calendar grid will appear with bars to indicate the following:
Horizontal bars: These indicate when your attendees are unavailable.
Vertical bar: A red bar indicates at least one scheduling conflict. A green bar indicates a conflict-free meeting time.
If the vertical bar is red, drag it across the grid until it turns green. (Again, behind the scenes, your event time will update accordingly.)

Once you've found a meeting time that works for everyone, click Event, and then click Send.
Where is Scheduling Assistant in Outlook?
If Scheduling Assistant isn't working for you, or it isn't showing the availability for your attendees, here are a few common reasons why.
Scheduling Assistant isn't enabled. Make sure to enable Scheduling Assistant as an Outlook add-in and add it to your Outlook ribbon before creating a new event.
Attendees are outside of your organization. Outlook—and by extension, Scheduling Assistant—can't display or process scheduling information for people who are outside of your organization.
Your invite list is too large. Outlook has a limit on the number of attendees it can show meeting availability for. There's no clear indication of what this limit is, but when I tested Scheduling Assistant, I was able to see the availability of 15 attendees for one meeting. If your group is larger than this, though, it's probably better to dictate a meeting time versus finding one perfect time slot.
Automate your meeting-related tasks
Meetings—and all the time-consuming tasks that come with them—don't have to be groan-inducing events. With Zapier, you can connect Microsoft Outlook to thousands of your other go-to apps, so you can automate things like creating a meeting agenda and keeping track of action items.
Here are a few workflows you can automate right away, or learn more about how to automate Microsoft Outlook calendar.
Get messages in Microsoft Teams for upcoming Microsoft Outlook calendar events
Create Trello cards from new Microsoft Outlook events
Create a meeting agenda in OneNote for new Microsoft Outlook events
To get started with a Zap template—what we call our pre-made workflows—just click on the button. It only takes a few minutes to set up. You can read more about setting up Zaps here.
Related reading


