Introducing Shared Folders for Team Accounts

Earlier this year, we released Zapier for Teams to allow your company to automate everything, together. The vision for Zapier for Teams has always been to help your team be more productive and collaborate on ways to automate everyday tasks so you can get more done in less time—and today we're making teams even better!
For those who missed our announcement in May, Zapier for Teams lets you create a team, invite your teammates, and cover the cost of everyone's usage on a single invoice. It also gives all team members access to Zapier's premium features like Multi-Step Zaps, Autoreplay, and Premium apps. A team account lets all your teammates leverage the full power of automation without the worry of shared logins or the hassles of multiple invoices from individual employee accounts. Team members get their own account with a private workspace and a unique login—allowing your team to use two-factor authentication (2FA) for an extra layer of security.
Shared billing and individual workspaces were just the start of what we want to do with teams. When talking with customers, the most popular request we heard was for the ability to share Zaps with teammates or to be able to collaborate on Zaps together. Which is why we're excited to announce that shared folders are now included in all Zapier for Teams accounts!
With shared folders, team members now have the ability to:
- Create shared folders to help your team keep all your shared Zaps organized
- Add Zaps to any shared folder to share that Zap with the team
- View the Task History for any Zaps that are shared in your team account
- View, edit, or create a copy of Zaps within shared folders—even if you're not the owner or creator
- Share connected apps, such as a company Dropbox, Trello, or Typeform account, so other team members can use those company tools in their Zaps without the need for login credentials
- Move Zaps from your private folders to your team's shared folders—and vice-versa
Alright, are you excited? We're excited. So let's get into the details of how all this team sharing works.
Shared Folders
Shared folders function the same way that your personal folders do—except they're shared with your team. Create a folder by clicking the “+” icon beside the Shared Folders heading in the left sidebar on your dashboard. Name your folder something that clearly indicates the types of Zaps inside (such as the name of a department or function, like Marketing or Social Media).
And you're done! No, really. That's it.
Now, all you need to do is create a new Zap in this folder or move a Zap from one of your private folders. Once the Zap is added to one of your team’s shared folders, anyone on your team will be able to view, edit, or copy the workflow.
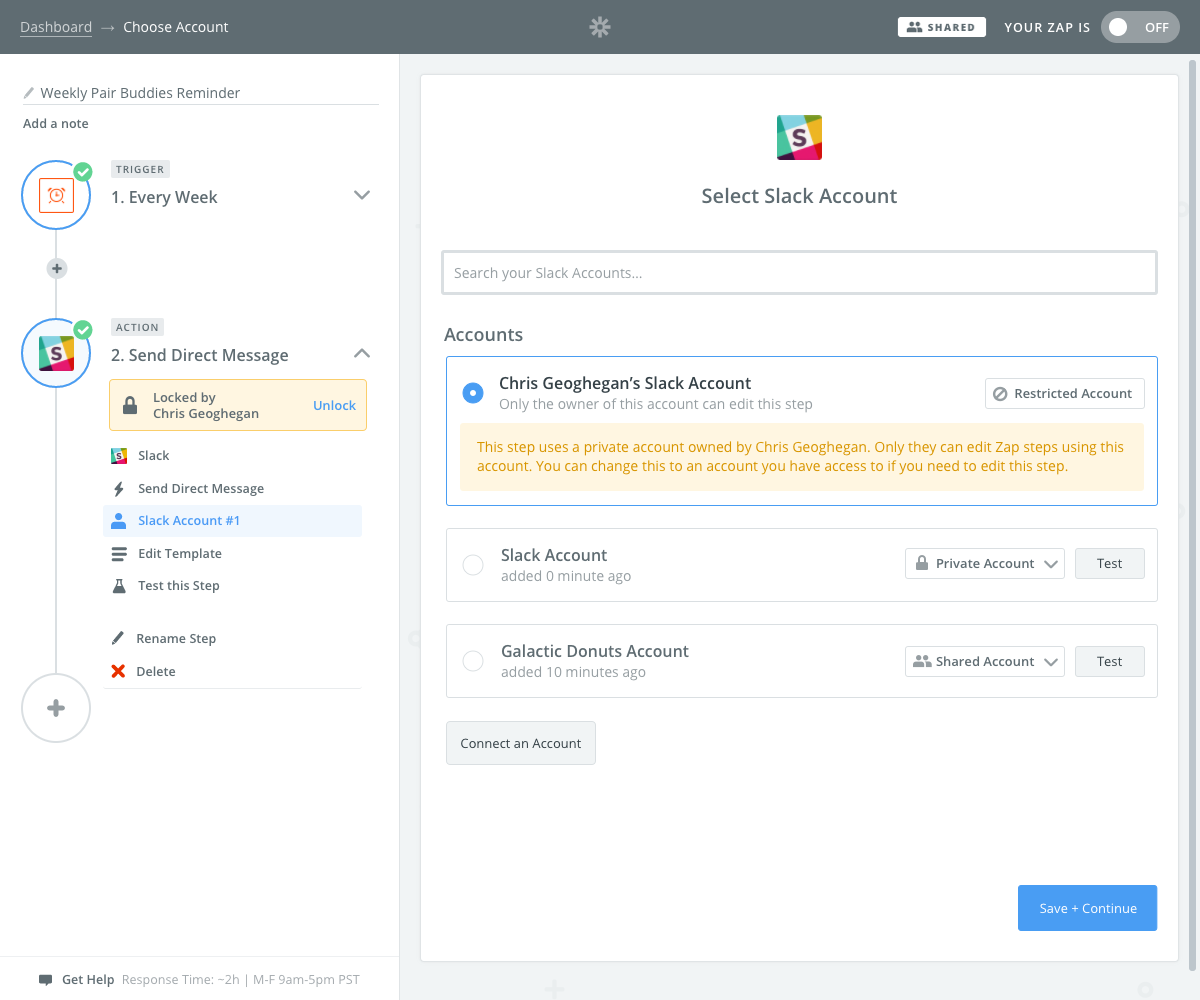
But what if the Zap uses my personal account to an app?
Ah, we're glad you asked!
Privacy and security has been one of the biggest concerns we've focused on when developing shared folders. When you share a Zap that uses your own personal account, such as Gmail or Slack, the Zap will continue to work as normal and your teammates will be able to view and edit the workflow. However, only you (as the owner of your personal Slack account) would be able to edit or update the step in the workflow that is using your Slack account.
This also applies when creating a copy of a Zap. If a teammate makes a copy of your Zap which uses your personal account, like Gmail, then the new copy of the Zap will not include your personal Gmail account. Instead, your teammate will be prompted to connect a Gmail account (either their own or an already shared account) when they setup the Zap.
Moving Zaps to Shared Folders
If you have Zaps in your private folders that you would like to share with the team, moving them to a shared folder is easy. Simply click the down arrow on the right of the Zap you would like to move. This will open the settings menu for the Zap. Select Move to Folder from the menu. This will display all of your folders—private and shared.
Expand the Move to Shared Folder menu to display your shared folders. Then select the folder you would like to move the Zap to. Your Zap will be moved from your private folder to the shared folder you selected and your teammates will now have access to your Zap.
Viewing & Updating Zaps in Shared Folders
Zaps in a shared folder are accessible by anyone on your team which means they will have the ability to view, edit, or copy the Zap. However, only the owner will be able to move the Zap from a shared folder into their own private folder (or otherwise unshare the Zap). If a team member doesn't own the Zap, they will be able to move to a different shared folder, but not to their own private folder.
Ownership of a Zap is indicated in dashboard by displaying the avatar of the owner on the Zap. If the account of the owner doesn’t have an avatar setup, then their initials are displayed instead.
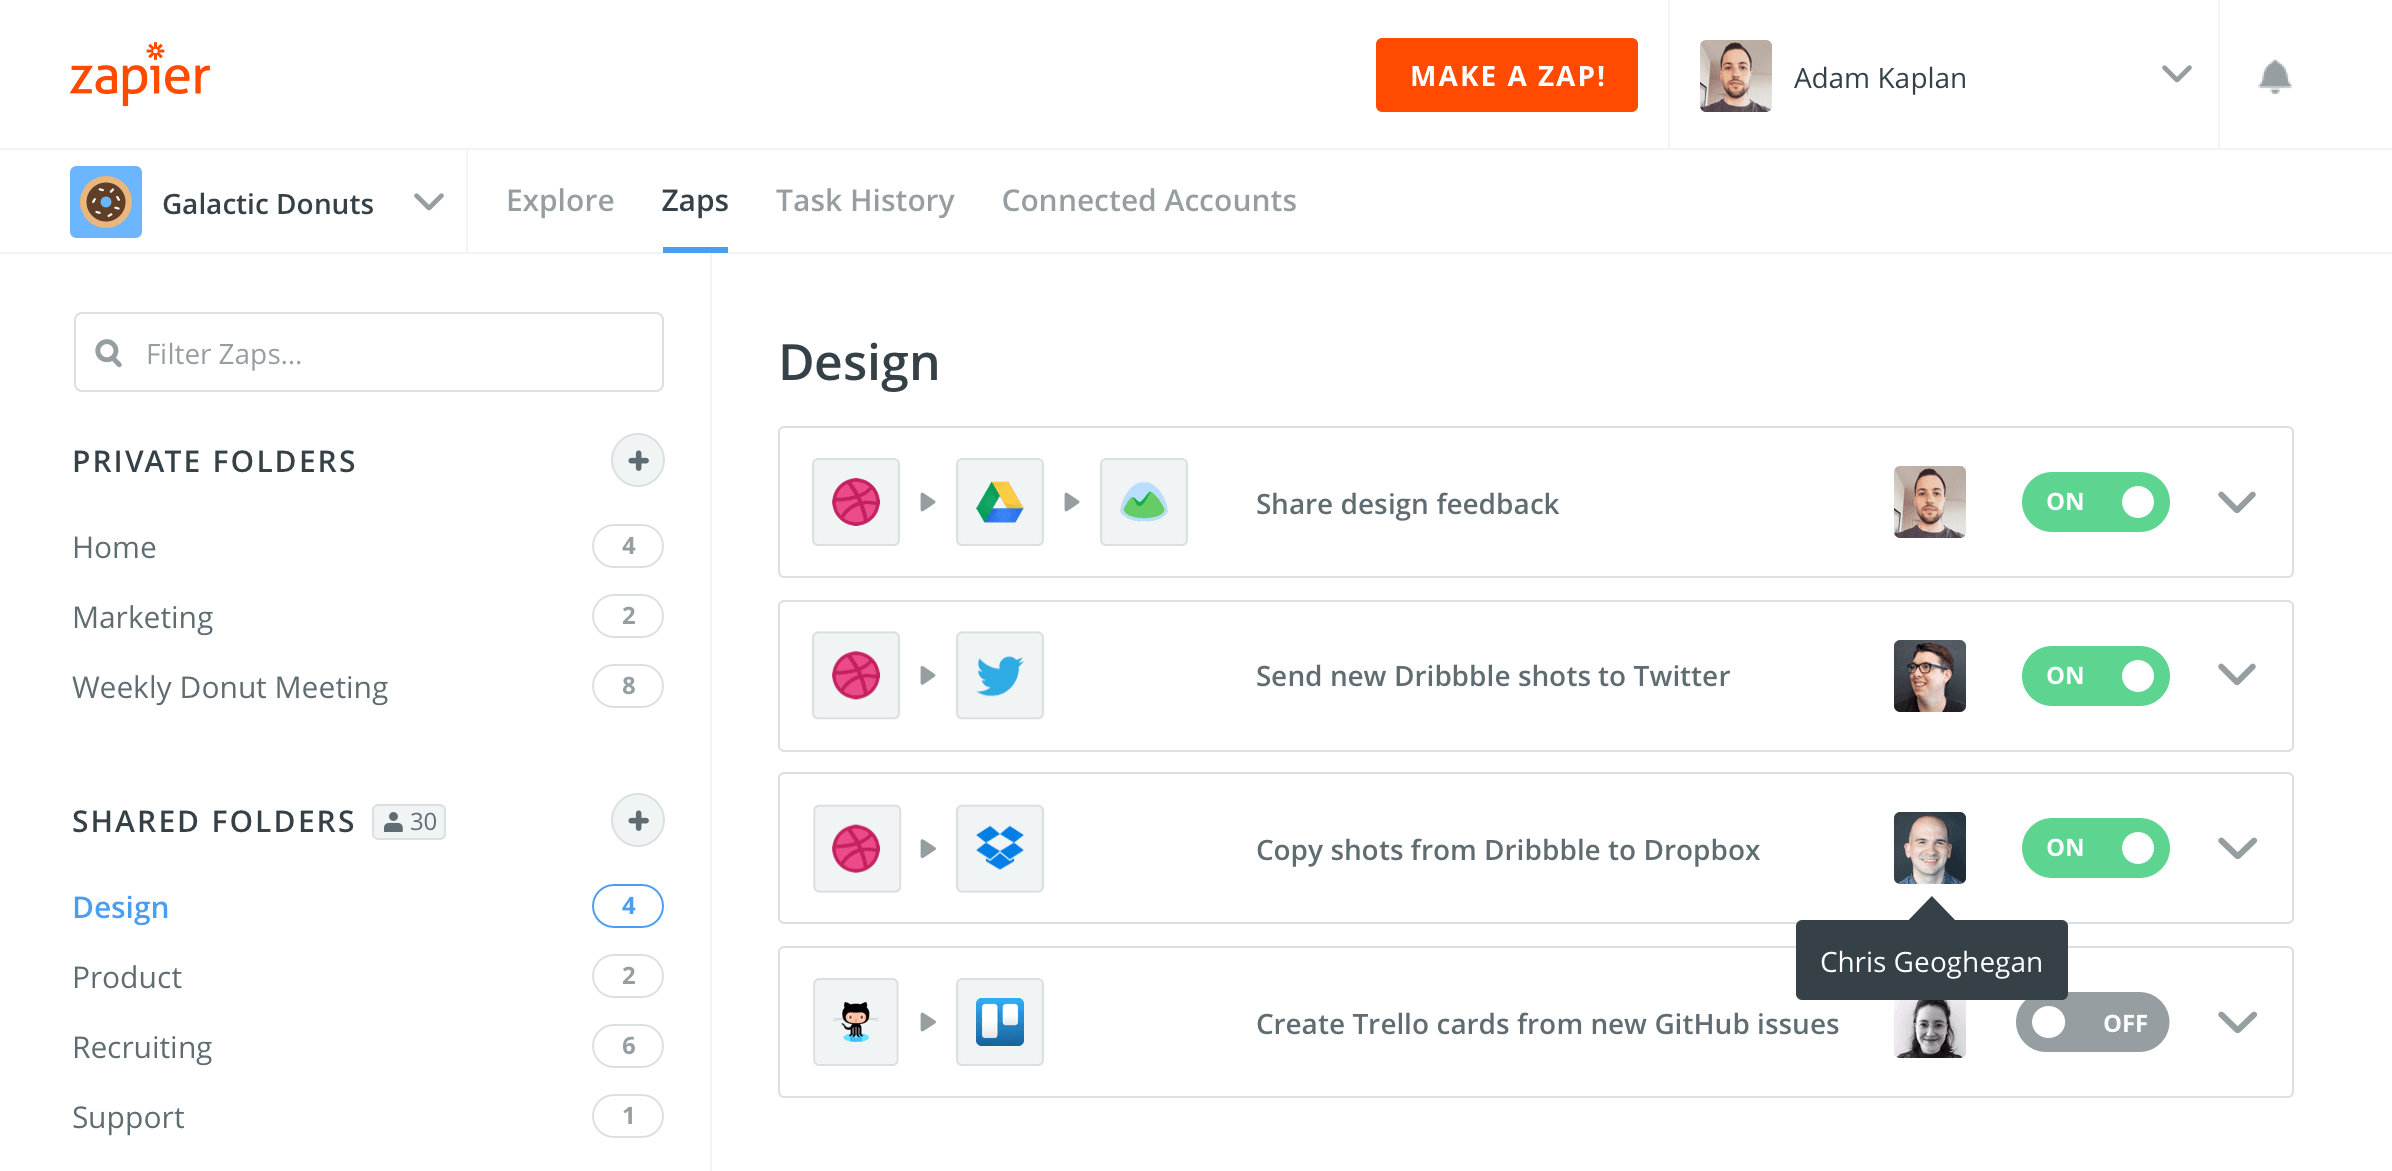
Any team member can view a Zap in a shared folder, however, only one member can view the Zap at a time. When someone is currently viewing or editing a Zap, it will become locked for others to view or edit. Once the person is done editing the Zap, it will become unlocked and available for anyone else on the team to view or update.
Duplicating a Zap
One of the handy uses we see for Zaps in a shared folder is the ability to create copies of useful workflows. Think of it like creating templates to Zaps that your team can use. Have a great personal workflow that saves you time? Add the Zap to a shared folder and others will be able to create a copy of the Zap and update for their personal use. This not only allows team member to help inspire others with productivity workflows but also help make onboarding new teammate with their own workflows easier.
To create a copy of a Zap, click the down arrow to the right of the Zap to open the settings menu and click Copy. You'll instantly see a new copy of the Zap which you can rename and update.
Sharing Connected Accounts
Folders aren't the only thing you're able to share with your team. Previously, if you wanted to connect an app or service, like Typeform, Intercom, Pipedrive, or Webmerge, you would need to get the login credentials and add to your Zapier account.
With Shared Connected Accounts, one person from your team can add an account, like Typeform, and then anyone on the team would be able to use the team’s shared Typeform account in their workflows—no login credentials needed!
This makes it easy for teams to add and manage the common tools and apps your team uses with Zapier.
Task History
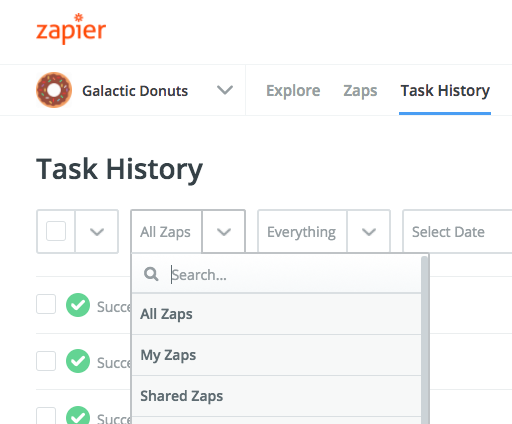
Now that you’re able to access many more workflows that your teammates have been using, the Task History is going to be a lot more active. To help you find the Task History for the workflows you’re interested in, we’ve added some new filters.
When you visit your Task History, you’ll notice the dropdown which previously only let you filter a specific Zap, has two new options: My Zaps and Shared Zaps.
My Zaps will filter the Task History to only show you the history for Zaps that are in your personal account and not in a shared folder.
Shared Zaps will filter the Task History to only show you the history of Zaps that are in shared folders and shared with your team.
Inviting Team Members
Invites for teammates also got an update. Previously, if you wanted to invite new team members to your team, you would need to invite each person one-by-one. This wasn’t ideal for larger teams so we’ve added the ability to invite multiple team members at once.
You can use a comma-separated list to enter multiple emails so you can more easily invite your entire office to join your Zapier team.
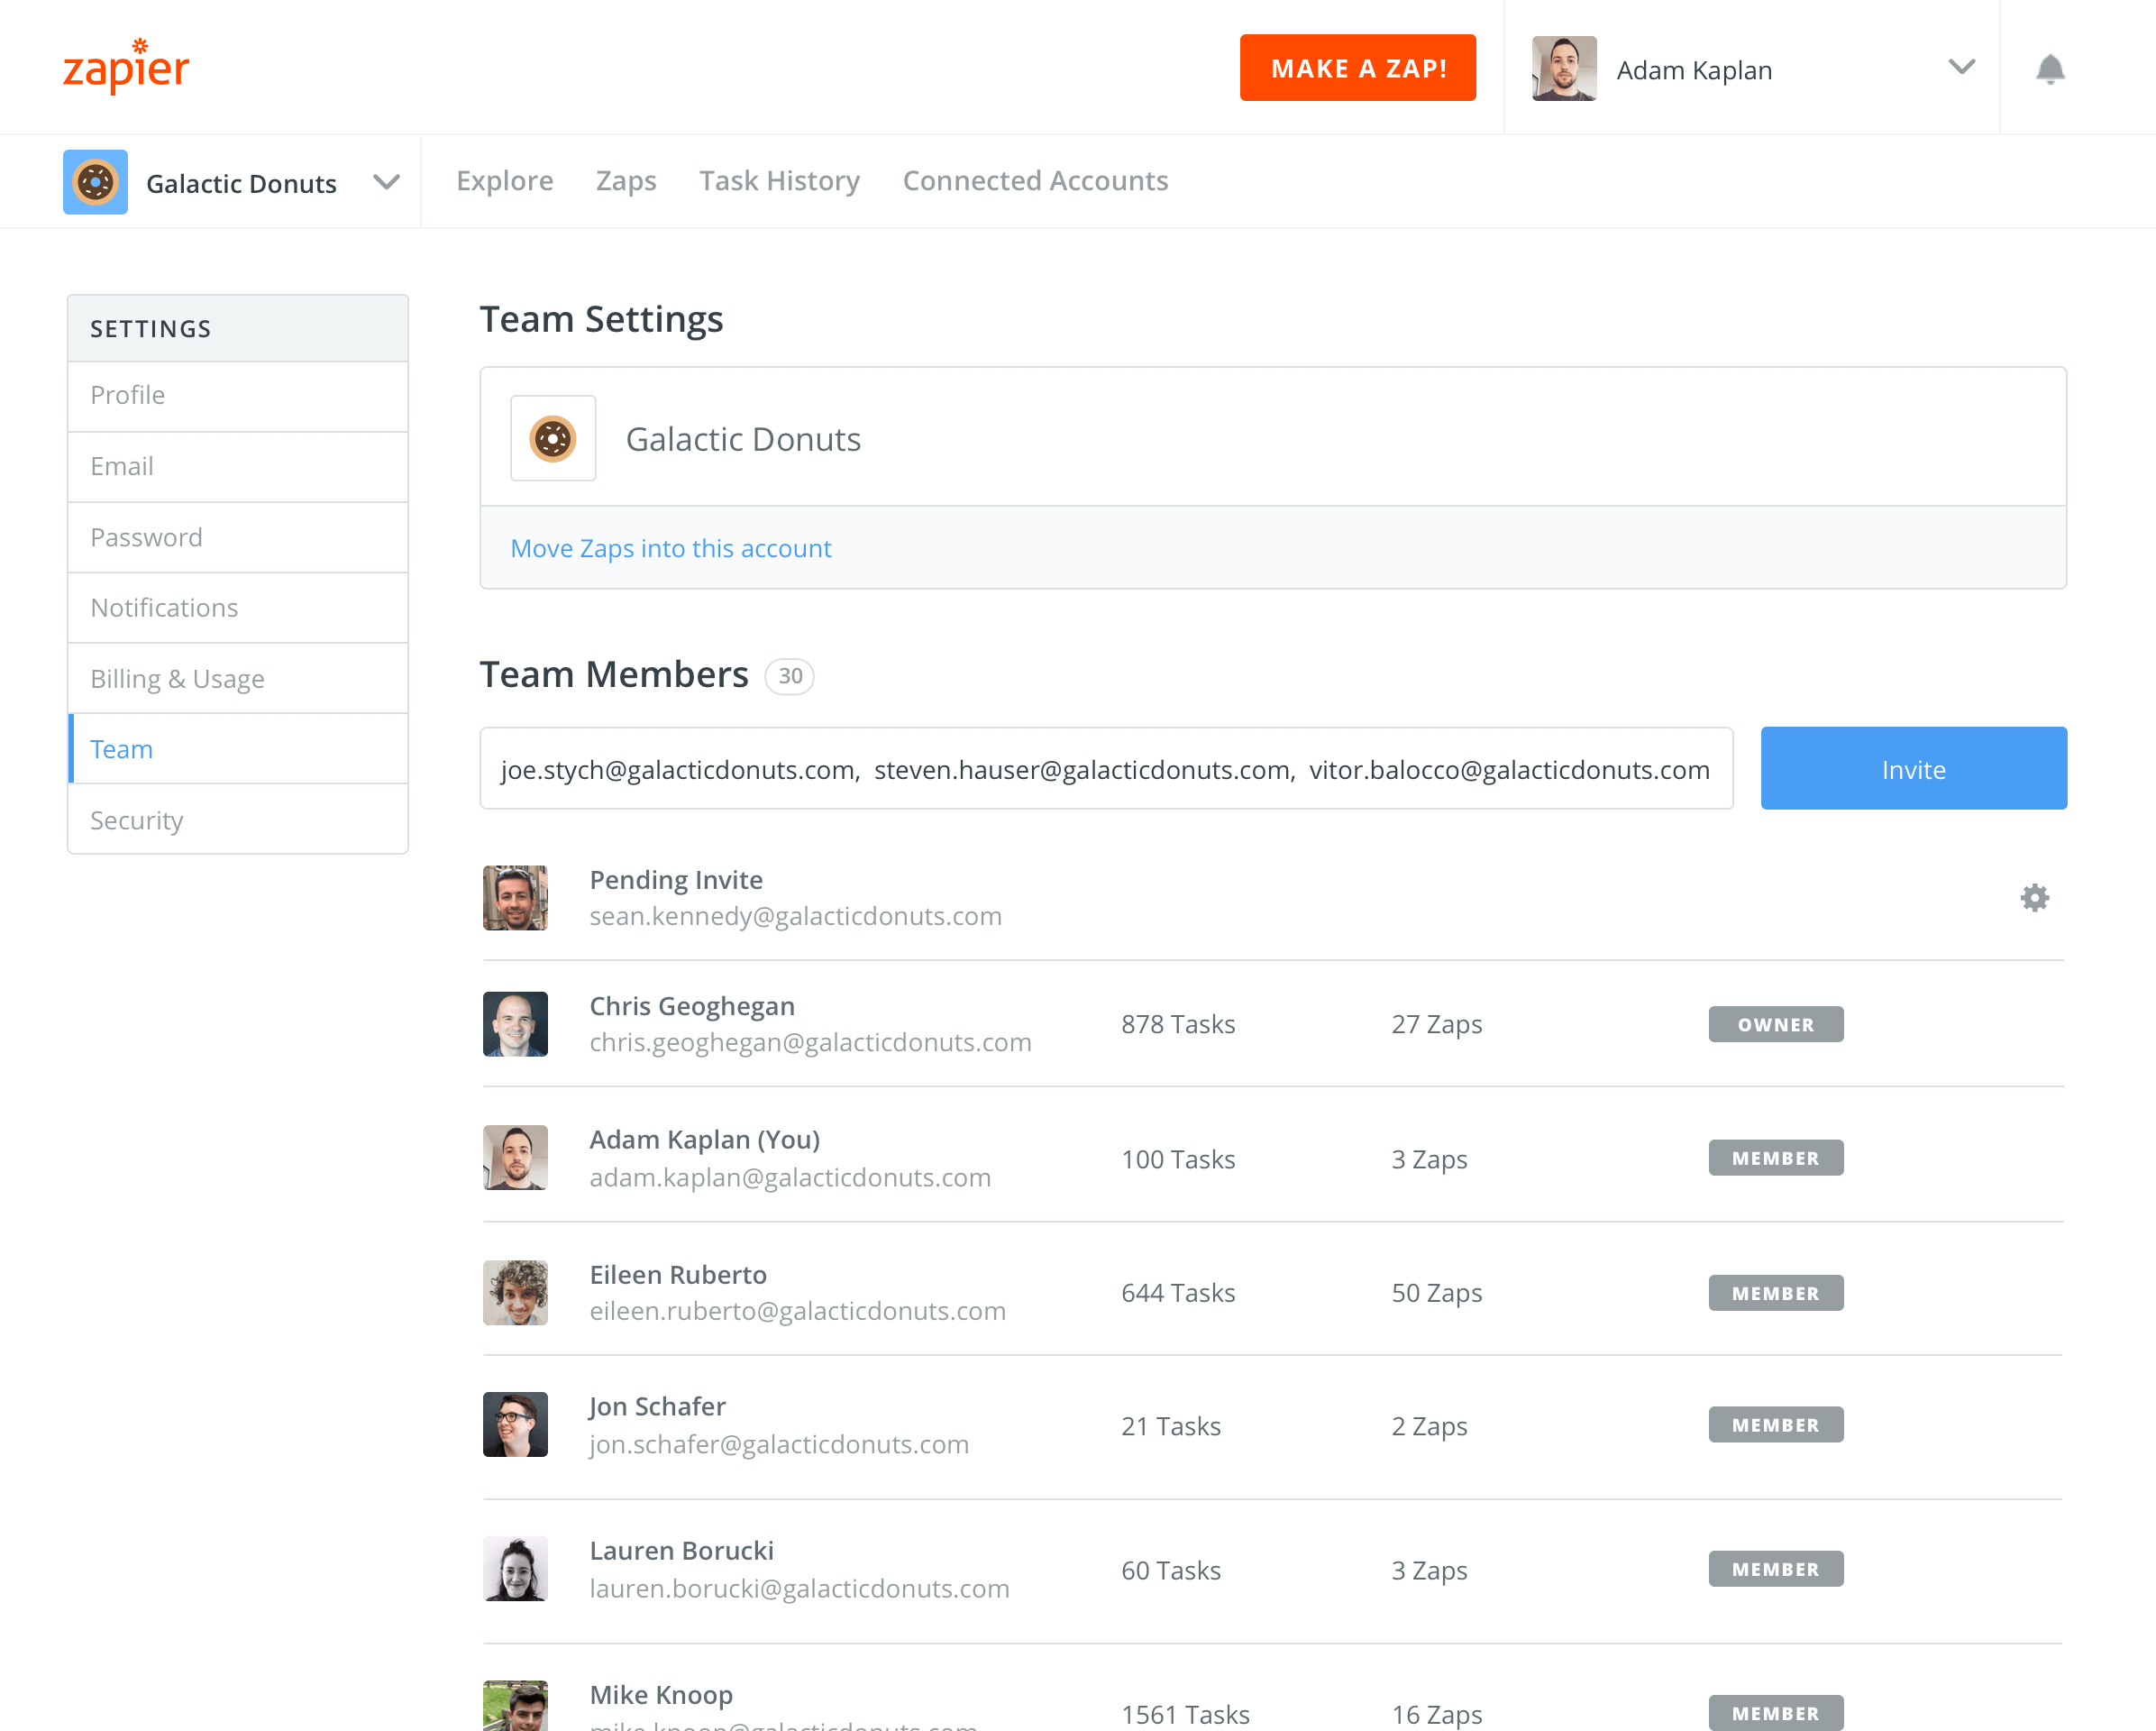
Transferring Team Ownership
Another update we’ve made to team management is the ability to transfer ownership of a team. After you create a team and invite team members, as the owner of a team you’ll now have the ability to transfer your ownership to a team member. Once you transfer ownership, your account will become a regular member of the team and all owner access, including billing, will be given to the new team owner.
We're working on adding more features and improvements to team accounts so if you have any feedback or questions, please let us know at contact@zapier.com.
Ready to assemble your team? Get started by visiting our Zapier for Teams page for more info or using the button below to create your team.
Want to learn more about using shared folders with Zapier for Teams? Here are some handy resources to check out:
- Zapier for Teams: Visit our teams page for more details.
- Help Docs & FAQ: Read our help documentation for help getting started and answers to common questions on Zapier for Teams.
- Announcing Shared Folders: Read our blog post on ways you can use a team account to help your team get more done in less time.
About the Author
Sean Kennedy is a Sr. Marketing Operations Analyst at Zapier and helps manage email and marketing operations. He lives in Kelowna, BC with his wife, two kids, and 3 cats.