Trello, Asana, Evernote, Todoist, Slack, and Google Inbox are all some of the very best productivity tools. They're each focused on a different function—from task management to email—but they're also each well-designed and intuitive. And they just so happen to be packed with a ton of hidden features.
You likely know how to add tasks in Asana and Todoist, format text in Evernote notes and Inbox emails, and send comments to your colleagues in Slack and Trello. But do you know how to export Trello cards to a spreadsheet, get rid of distractions in Slack, or only show emails from social networks one day a week in Inbox?
Here's how to do that and more, with over 50 hidden tools in Trello, Asana, Evernote, Todoist, Slack, and Google Inbox.
Trello: Hidden Features
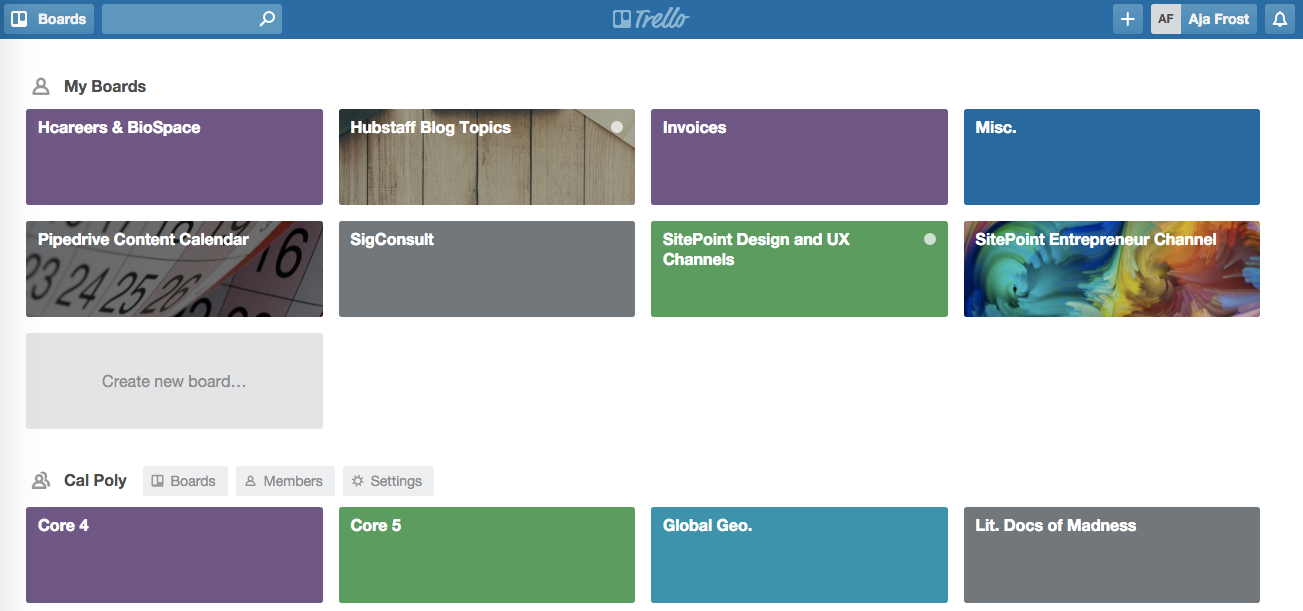
Trello is a project management tool that uses Kanban boards to help you organize your tasks visually. Its strength lies in its simplicity: It’s essentially a digital bulletin board with your tasks in visual cards.
Once you’ve mastered Trello’s basic functionality—which isn’t hard—here are some advanced tricks to help you be even more productive
a. Use Keyboard Shortcuts: Memorizing a few of these will save you a ton of time. While the list is extensive (and worth checking out in full), here are my personal favorites:
Press "e" while hovering over a card to open quick edit mode
Press "enter" to open the selected card
Use the arrow keys to navigate from card to card
Press "n" to insert a card below your selected one
Press the space key while editing a card to assign it to yourself
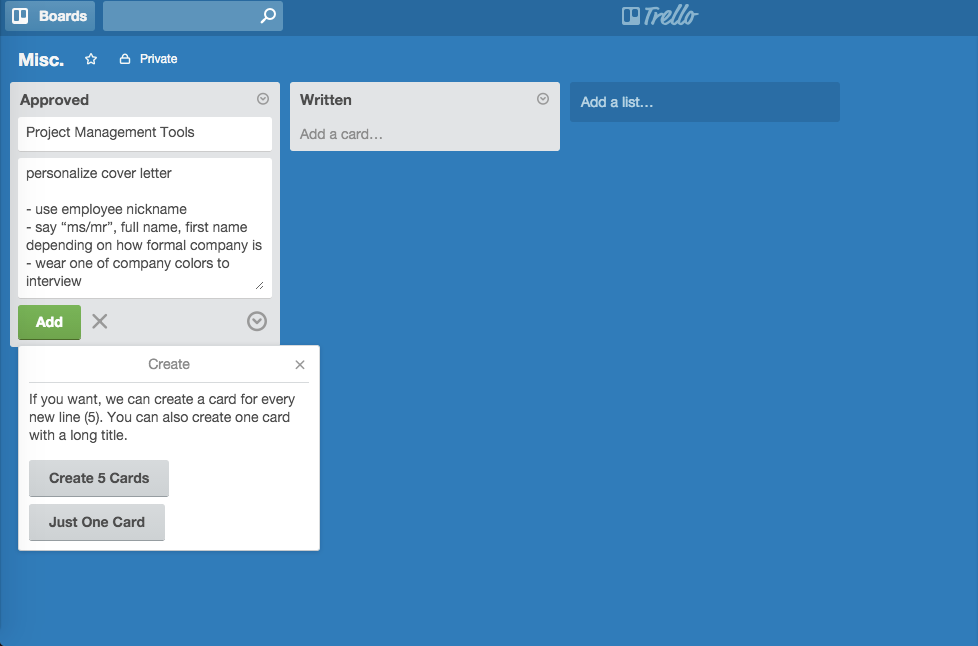
b. Copy and Paste Multiple Items: Let’s say you’ve got a list in Excel or Word, and you want each line to be a separate card. Copy the list, open up a new card, and paste—each line will become its own card.
c. Format Text: Want to quickly add bold, italics, links, lists, headers, images and code blocks to your cards' description? You can with Markdown, an easy-to-learn syntax for text formatting. Add asterisks for bold, brackets for links, and 4 spaces before each line of code.
d. Turn Emails into Cards: If you get emails that you need to turn into cards, save time by having them automatically transferred to your boards.
You can do this by going to your board, opening the sidebar menu, choosing the "Email-to-Board Settings," and copying and pasting the board’s unique email address into your email contacts. Then, when you receive a message that you’d like converted to a card, send it to your board.
Or, you can use Zapier to automatically create Trello cards whenever you receive an email in Office 365, add a specific label to an email in Gmail, or CC a Zapier email address when sending a new message.
e. Enable Power-Ups: Trello includes extra hidden features, called power-ups, including these three which come with the free version of Trello:
Calendar: This gives you the option to view your scheduled cards on a calendar. It makes keeping track of deadlines much easier—and it’s especially good for visual thinkers.
ii. Card Aging: With this power-up, cards that you haven’t opened or updated in awhile will slowly fade away, making it obvious which cards have been worked on most recently. iii. Voting: Turn this on to enable voting on your cards, so your team can upvote the ideas you should work on first.
Or, if you have a Business Class plan, there's 3rd party power-ups to add video chat, package tracking, Tweets and more to your cards.
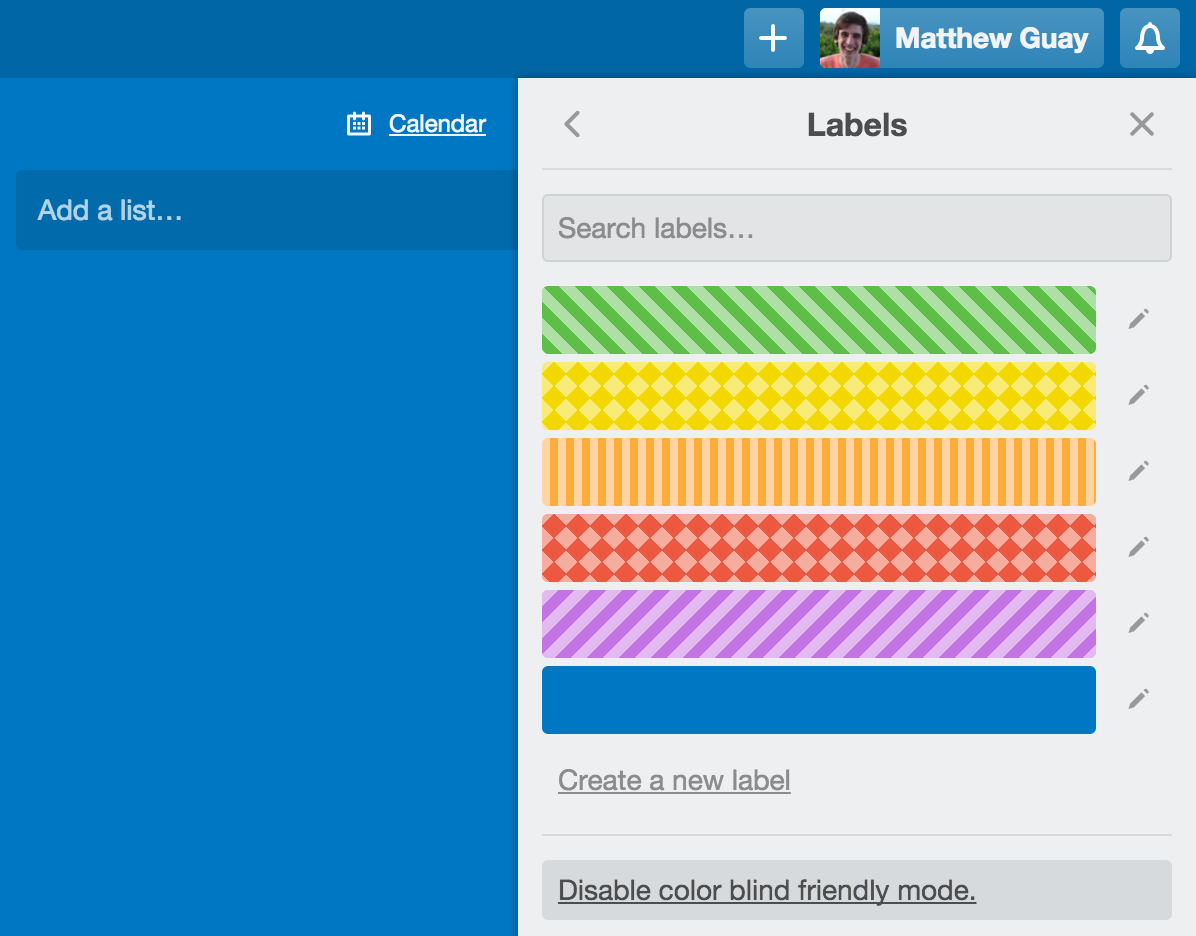
f. Turn on Color-Blind Friendly Mode: This setting, which adds patterns to your labels, is obviously helpful if you’re color-blind. But it’s also just a fun way to add visual interest to your boards.
g. Export to Excel: Exporting a board to Excel is a great way to take a snapshot of your project’s status—whether you’ll use it for your own records or send it to someone else. And if you’re working with someone who doesn't want to try a new app, this is a good workaround!
With Business Class, you’ll automatically get the Excel export feature. If you’re using the unpaid version, this Chrome extension will give you the same feature for free. Then if you need to add in new cards from the spreadsheet, just use trick b. to paste them in together.
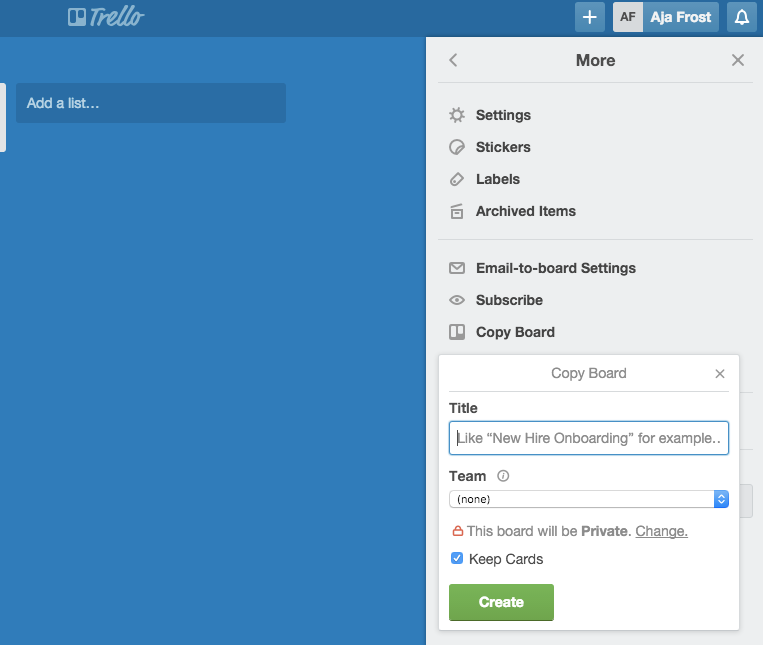
h. Clone Boards: When you’re working on projects with the same structure as your existing Trello boards, save time setting them up by cloning the first one. You can even keep the cards to give you a jumpstart on your new project.
i. Get inspiration: For up-to-date tips and tricks, join the official Trello Resources board. To see how others are using Trello, check out the Inspiration page, with tons of unqiue Trello boards that can help you come up with great ways to use it on your own.
For more info about Trello's features and pricing, check out our Trello review.
See Trello integrations on Zapier
Bonus: Learn more secrets about Kanban apps like Trello with Zapier's Guide to Kanban apps, then learn to automate tasks in Trello with Zapier's guide to 28 ways to Maximize Your Work in Trello.
Asana: Hidden Features
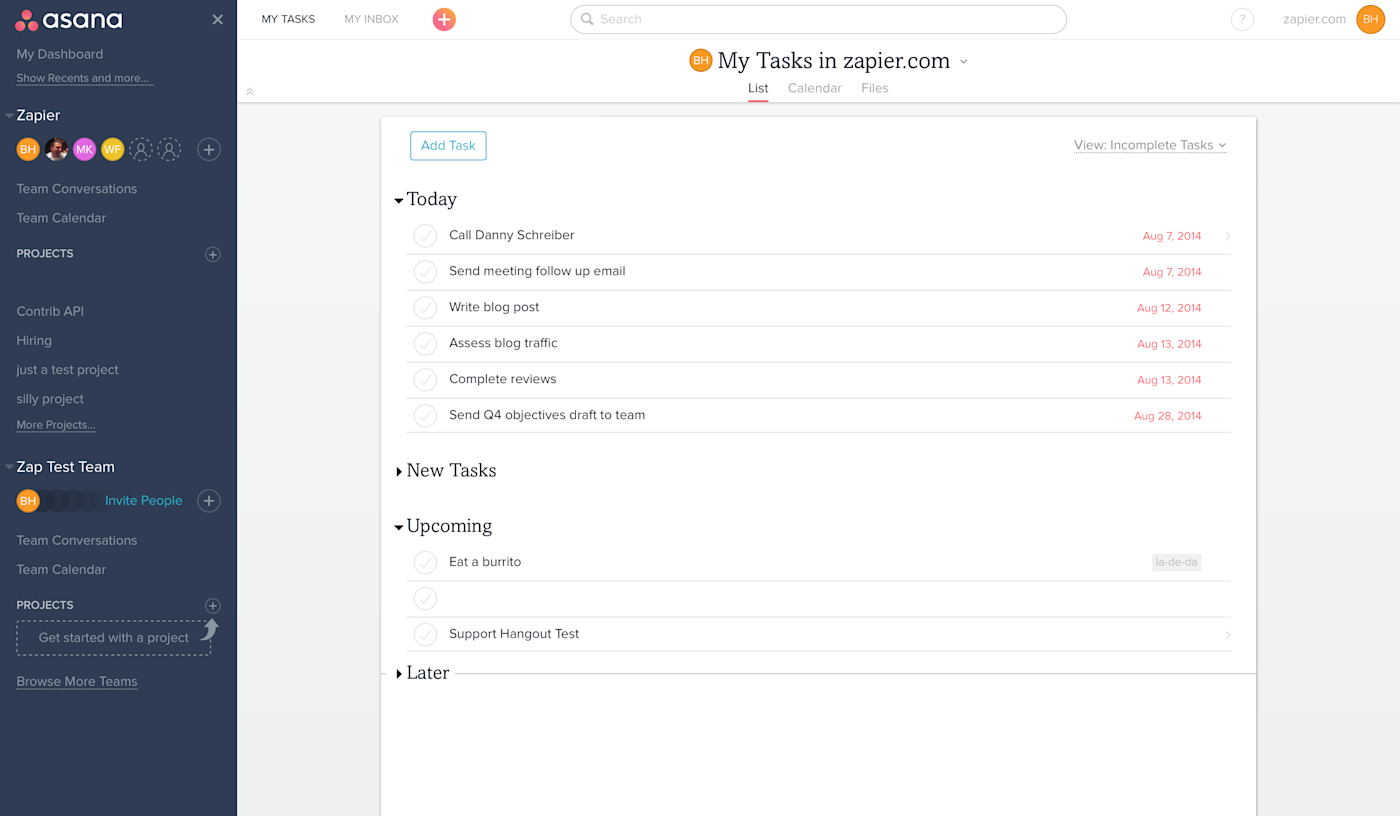
Asana is another project management tool, one focused more on traditional projects and to-do lists. It's perfect for teams to work on group projects and personal tasks in one place, since everyone has their own separate dashboard with responsibilities and deadlines. It’s also easy to see what the other members of your team are working on and how far along they are.
Once you've got your tasks and projects set up, here are some extra features to help you get more out of Asana.
a. Email Tasks: Instantly convert emails into to-dos on your "My Tasks" list by sending them to your x@mail.asana.com. The email subject line will become the task name, the body will become the task notes, and whoever’s CCed will be subscribed to the task. Attachments will be sent to Asana, as well.
Or, you can use Zapier to send Gmail emails automatically to Asana whenever you add a specific label to them.
b. Add Tasks While Browsing the Web: With the Asana Chrome extension, you can quickly add tasks from your browser. Asana will turn the page's name into your task, add the link as a note, and let you type your own description if you want.
c. Track Your Time: The Paydirt extension records how much time you’re spending in Asana—and not just total time, but minutes per project. You can even retroactively start the timer, perfect for when you start working and forget to "clock in."
It's a useful way to see how long you spend on your tasks, and is particularly helpful for freelancers logging time working for clients.
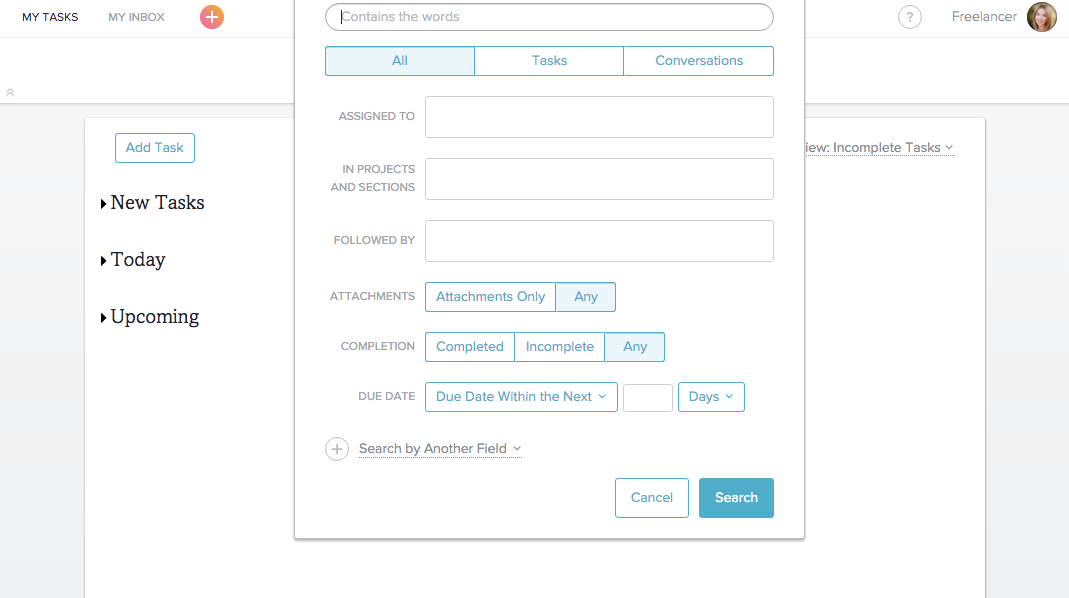
e. Run an Advanced Search: You’re probably familiar with Asana’s basic search functions. However, there are a couple lesser-known search parameters in its advanced search, which you can use to find attachments or tasks within specific due dates.
f. Shift Multiple Deadlines: When the deadline of your entire project changes, there’s no need to manually shift each task deadline. Open the View menu, choose "Tasks by Due Date," use Click + Shift to select multiple tasks, then use Command (or Ctrl on a PC) + the arrow keys to adjust the due dates a day at a time.
g. Assign Tasks to Multiple Projects: Use this feature to assign the same task to overlapping projects. Once the task is open, click the pencil icon. Then choose the "+" icon and add the other project(s).
h. Show Archived Projects: Perhaps you need to reference an old project while working on a current one. Scroll to the bottom of your projects in the sidebar and click "Show more projects…", then scroll to the bottom again and select "Show Archived Projects".
i. Gather Feedback: If you want to quickly get your team’s feedback, create an "Ideas" project. Every time you’ve got new suggestions, add them as tasks—and then ask your team members to "heart" the ones they like. You'll quickly know what to work on next.
j. Use Emoji: Emojis aren’t just fun—they make your online communication friendlier and less vulnerable to misinterpretation. Luckily, Asana supports all popular emojis, so you can add color to your tasks, descriptions, comments and more.
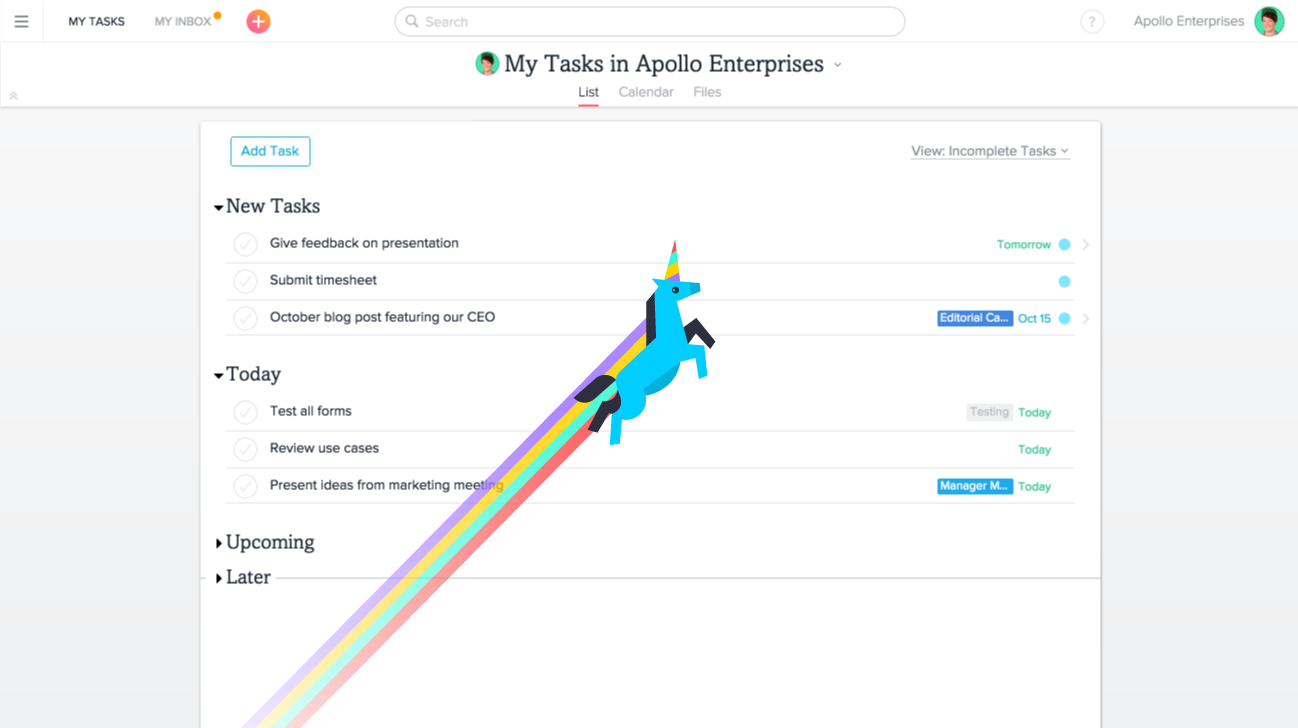
k. Enable Unicorns: Do you want unicorns to fly across your screen every time you complete a magic number of tasks? Of course you do.
Go to "My Profile Settings," find the "Hacks" tab, and enable "Celebration Unicorns."
l. Minimize Distractions: While you’re in the Hacks tab, enable "Inbox Snooze." This feature allows you to turn off messages for an hour while you power through your to-do list.
m. And one more… Enable the "Team Celebration Box." This shows you which tasks your team members have completed, so you can recognize their hard work together.
For more info about Asana's features and pricing, check out our Asana review.
See Asana integrations on Zapier
Learn more great ways to use Asana in our peek at how a startup accelerator uses Asana to review 1000+ applicants.
Evernote: Hidden Features
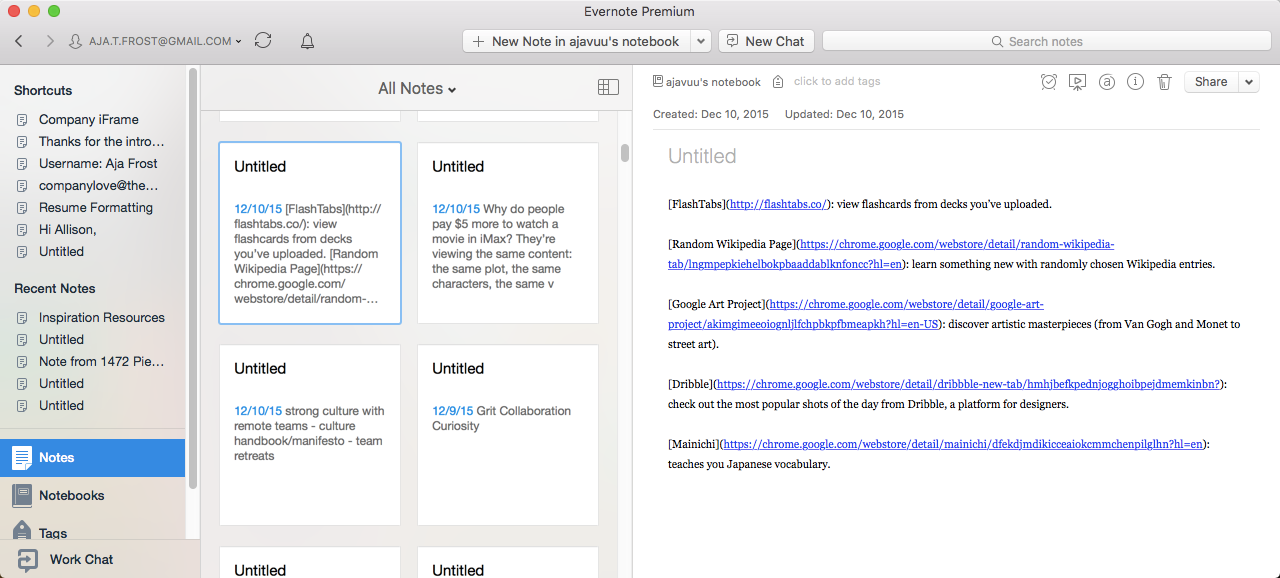
You’ve probably heard of—if not used—Evernote, the ubtiquous digital notebook app. It’s designed to collect your thoughts, pictures, audio, videos, and webpages across devices. And it's packed with tons of features to help you do more with all those notes.
a. Browse by Location: To sort through your notes by where you composed them, click "Atlas" in the left sidebar. You'll get a list of all the different places where you've added notes–handy to find that little restaurant you wrote a note about but can't seem to locate.
b. Make a Table of Contents: You probably have at least one overwhelmingly full notebook. Make it easier to browse by creating a "Table of Contents" note.
First, open up an individual notebook. Then, choose "Edit" > "Select All." Evernote will give you the option to make a table of contents automatically.
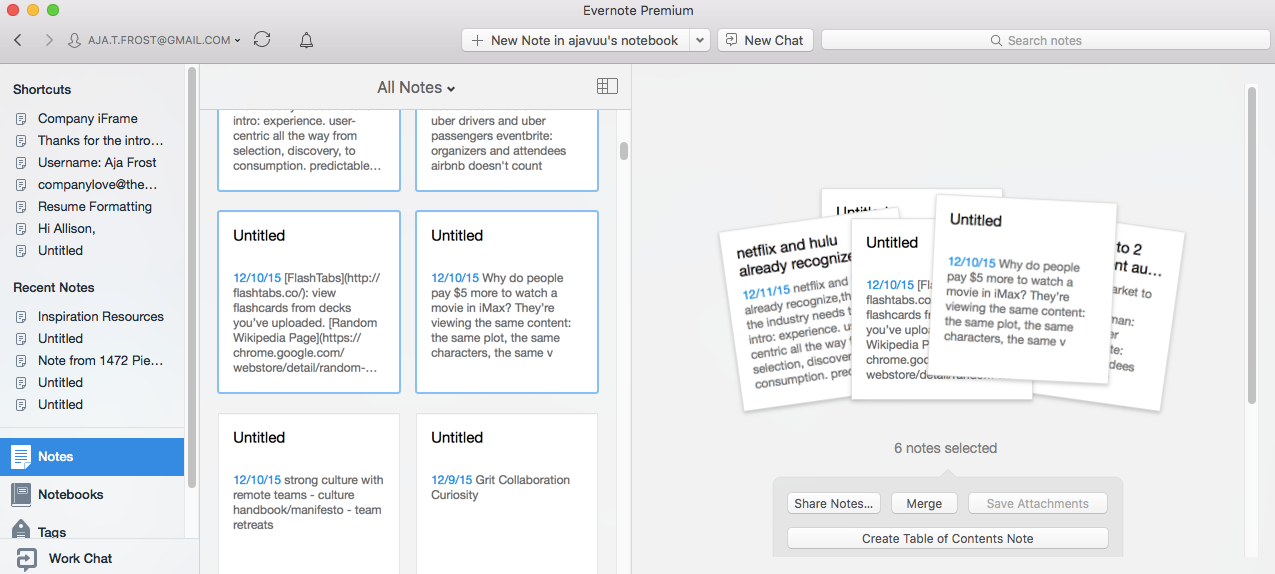
c. Merge Notes: This feature is ideal if you’ve got a bunch of scattered notes you want to consolidate. Rather than copying and pasting the content, use "Shift + Click" to highlight two or more notes. A window will pop up with a "Merge" option among other tools, and just click that to pull all the notes into one.
d. Use Checkboxes: When you want to indicate a pending task, add a checkbox to a task. To find every note with an open checkbox, search for todo:true. Searching todo:false will show you every note with a checked off task, so you can see what you've done. Or for more full-featured tasks, add a reminder to the note to get notified when its tasks are due.
e. Digitize Your Business Cards: Next time someone hands you a business card, don’t just stuff it in your wallet. Take a picture of it—either with the camera app (and then add the photo to Evernote later) or using Evernote’s camera (which saves it to Evernote automatically). Not only will Evernote will grab the text from the card, it’ll take the most relevant, up-to-date information about your contact from LinkedIn and display it alongside his or her contact details if you have a Pro account.
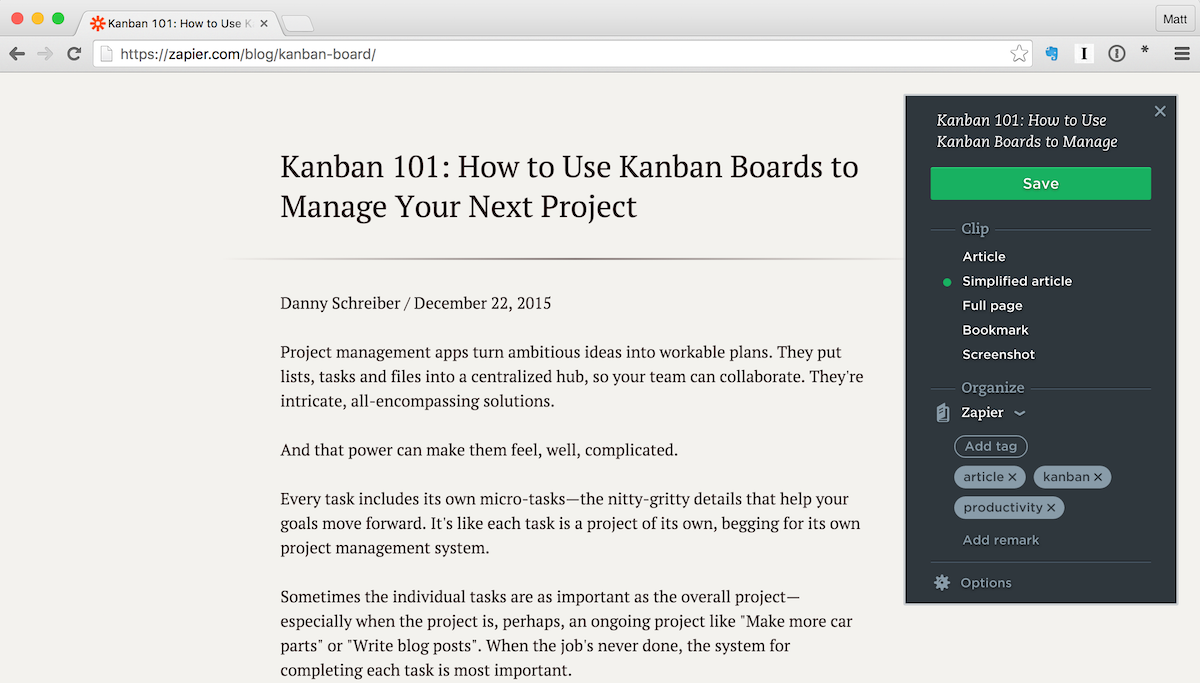
f. Optimize Evernote Web Clipper: Are you taking full advantage of Evernote’s web clipper extension? It's a great way to save sites to your notebook, but the web clipper has extra features you should explore. I recommend using the simplified simplified article view, to save just text and images without all the extra clutter. The annotation and highlight features are also useful to point out just what you wanted to remember on a page.
g. Make Stacks: If you have two or more related notebooks, you can group them into a "Stack." Just drag and drop one notebook onto another, and they're paired for life.
h. See Previous Versions of Notes: Premium users can see past versions of their notes. Click the "information" icon, then choose "View Past History."
Not only will this allow you to revert back to old versions of notes, if necessary, but it’s also a great way to track your progress over time. I keep a running list of accomplishments; to see what I’ve achieved in the past, say, five months, all I have to do is open the version of my "Accomplishments" note from five months ago.
For more info about Evernote's features and pricing, check out our Evernote review.
See Evernote integrations on Zapier
Looking for another notes app—or perhaps a companion app to Evernote to sketch handwritten notes on your tablet? Check out our roundup of the 12 best notes apps for some great options.
Todoist: Hidden Features
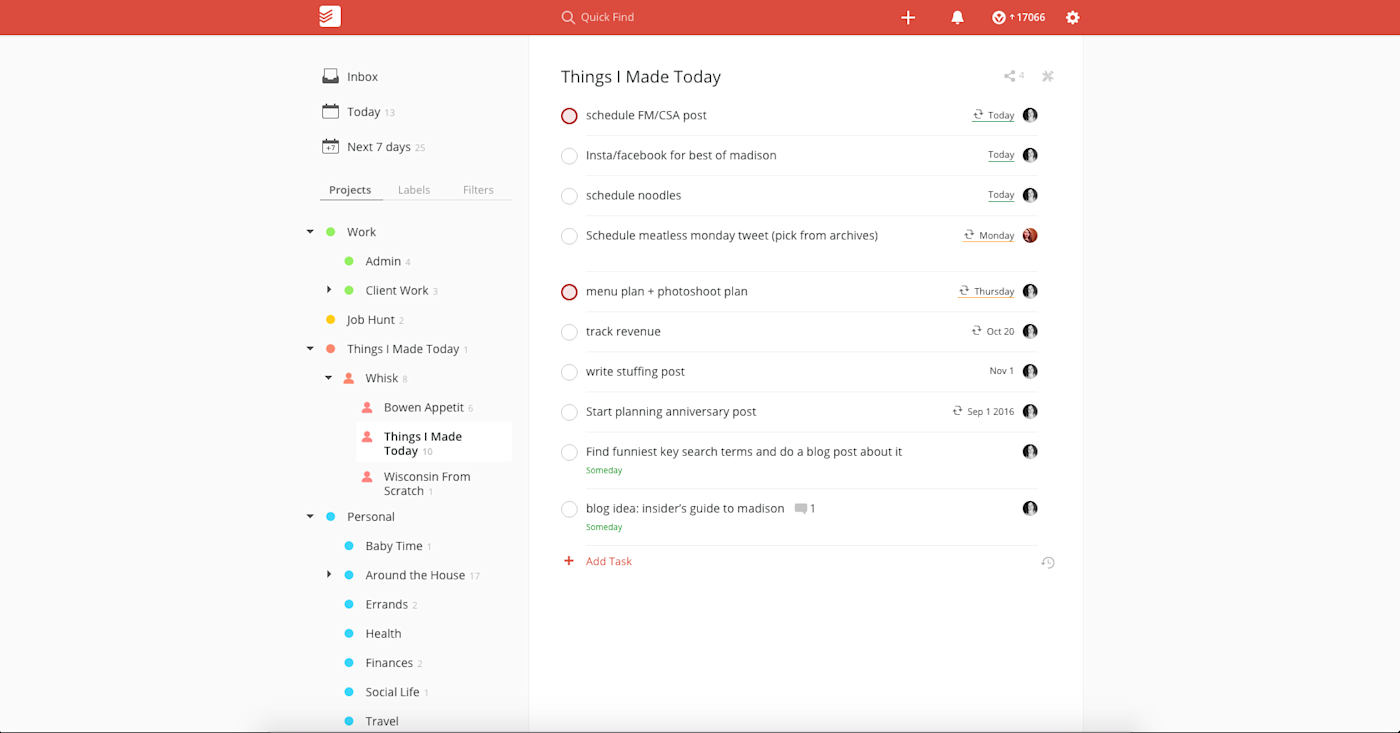
If you’re always creating to-do lists, you’ll love Todoist. You can create all the task lists (or "projects") you need, then populate them with tasks and sub-tasks. Then, Todoist will motivate you to get more done, and help you manage your tasks better with these tricks.
a. View Your Karma: Every Todoist user should be familar with "karma," Todoist’s system that awards points for every task completed.
It's more than just a number, though. Click on the karma icon in the top right corner to view your productivity trends, browse completed tasks, and set yourself daily and weekly tasks quotas.
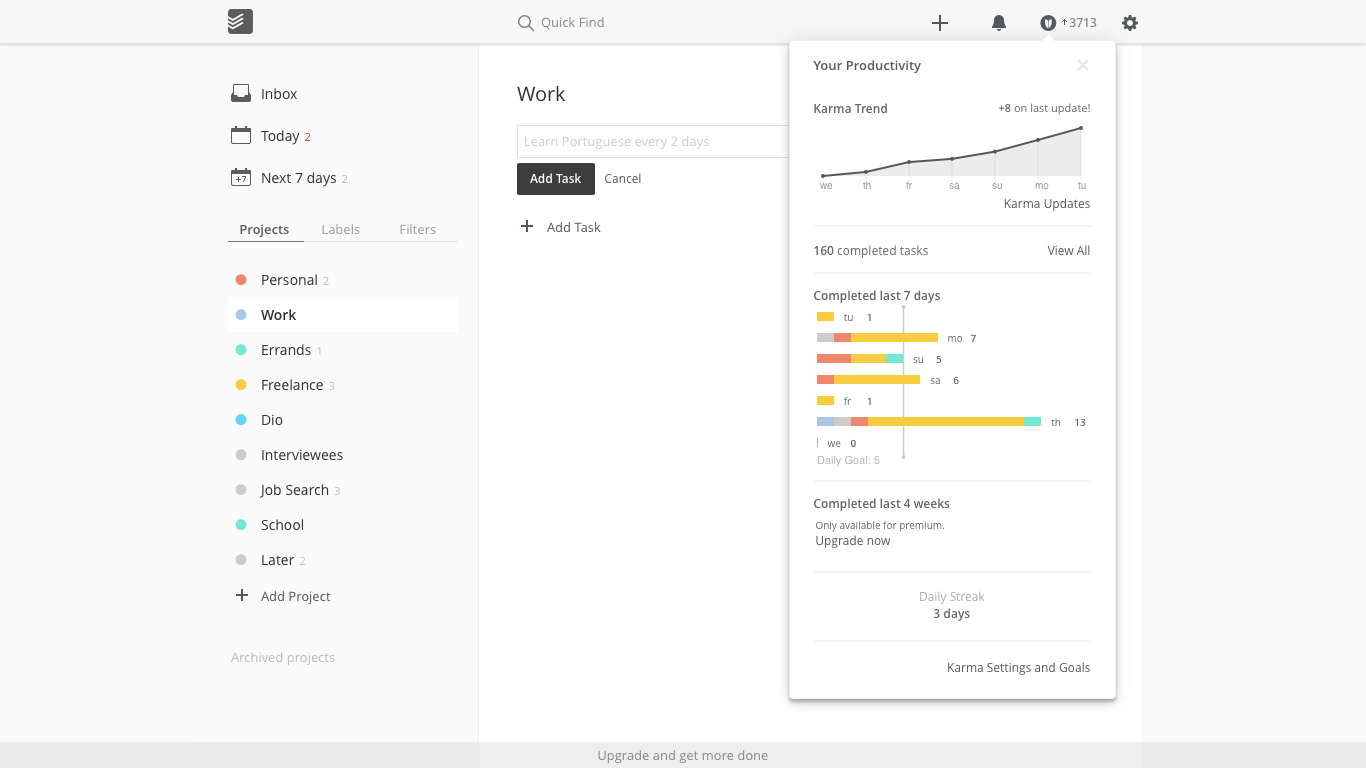
b. Turn On Vacation Mode: Turn off your task quotas by going into your karma info, scrolling to "Karma Settings and Goals," and clicking "Disable karma: I am on vacation." That way your score won't take a hit while you're taking time away from the office.
c. Quickly Assign Priority: Tasks in Todoist have five levels of priority, from 1 to "no due data." When creating a task, write p1, p2, p3, or p4 to set its priority automatically, and the text will be deleted once you submit the task.
d. Change Your Theme: To switch up the app’s color scheme, click the gear icon, select "Todoist settings," open the General tab, then choose a color that suits your mood.
e. Create Uncompleteable Tasks: Why on earth would you want to make a task that can’t be completed? Well, maybe you want to give yourself a daily reminder, i.e. "Don’t waste time on Facebook." You might also want to protect a task from being accidentally deleted.
To make an uncompletable task, begin it with an asterisk (*). And if you ever want to make it completable, simply erase the asterisk.
f. Type the Due Date: Todoist is smart enough to convert due dates in the task’s text into deadlines.
For example, typing "Call Susanne by Sunday" will transform into a "Call Susanne" task with the deadline being that Sunday.
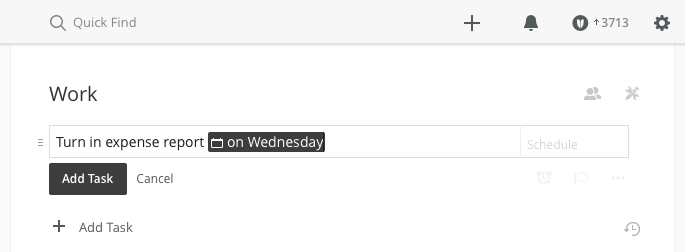
g. Change the Recurring Date: Imagine you set a recurring deadline for "every week, beginning January 1st." The next deadline will be the 7th, and the one after that will be the 14th, and so on. However, if you add an exclamation mark after "every," (for example, "every! week, beginning January 1st") the deadline will reset for one week after you complete the task. So if you complete the task on January 5th, your next deadline will be January 10th.
h. Make a "Waiting" Folder: Everyone has pending tasks at work they can’t complete until someone else gets back to them. Add these tasks to a "Waiting" list—you can keep track of them without being reminded about work you can’t do yet.
For more info about Todoist's features and pricing, check out our Todoist review.
See Todoist integrations on Zapier
Still can't get your todo list under control? Check out 5 Ways to Master Your Todo List.
Slack: Hidden Features
Slack's the chat app that's taken the world by storm, thanks to its simple real-time messaging, and a fun design with tons of extra features. Whether you're working in the same office or spread around the world, these Slack tricks will help your team be more productive while chatting.
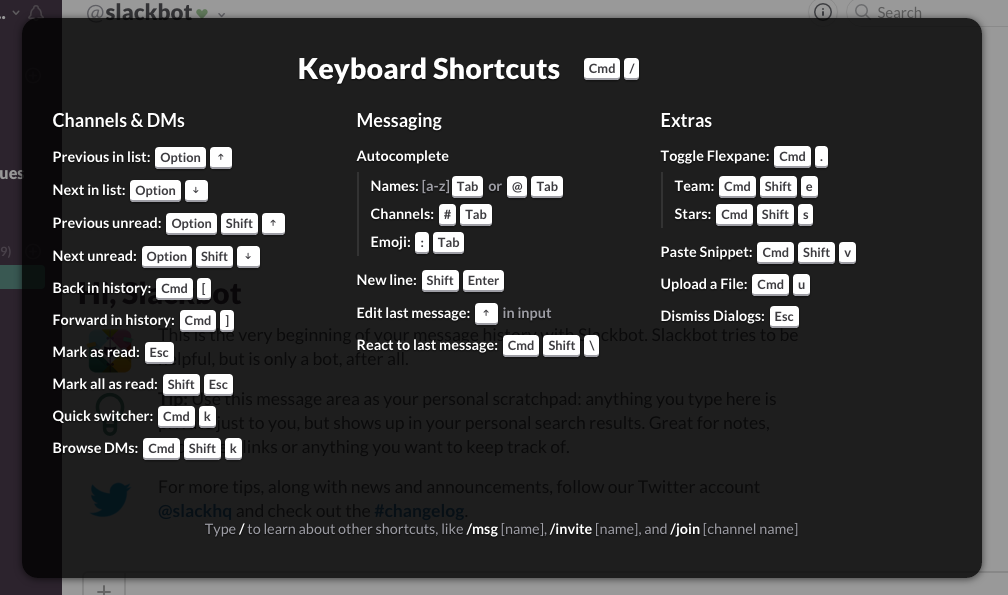
a. Use Keyboard Shortcuts: Like any well-designed app, Slack has a ton of keyboard shortcuts. While you should browse the complete list, here's a preview of the most popular ones (which you can view any time by pressing Command+/ (Mac) or Ctrl+/ (PC)).
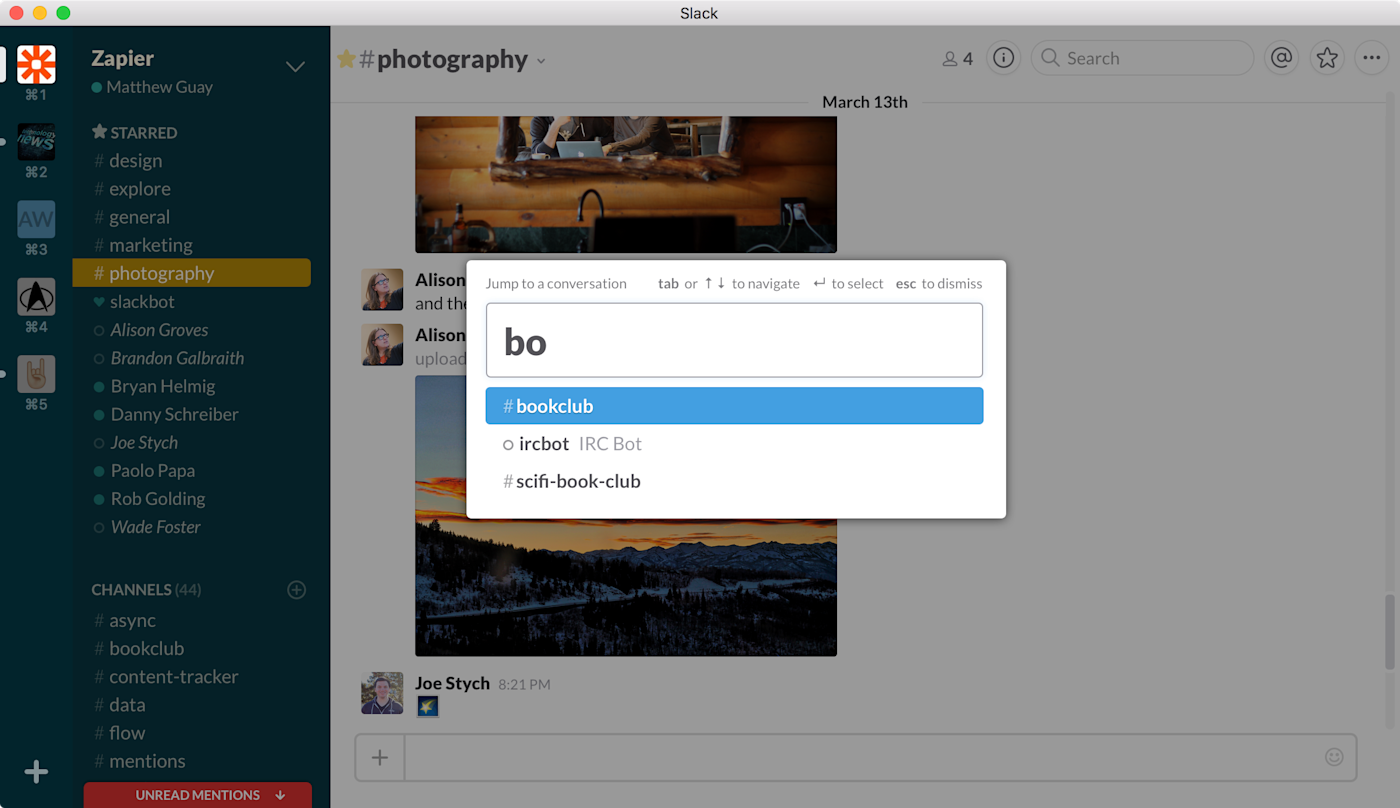
b. Quickly Toggle: Press Command+K (Mac) or Ctrl+K (PC) to open the Quick-Switcher and type a name to jump to a different channel, direct message, or group.
c. Customize: Make Slack your own by uploading custom emojis (I suggest starting with that hilarious picture of your boss from last year’s retreat.) To find this option, go to [teamname].slack.com/customize/emoji in your browser.
d. Change the Sidebar Theme: While you’re at it, customize the sidebar theme for each of your groups. If you’re in multiple groups, this can help you visually keep track of your current one. This will only change your own personal Slack account, so don't worry about messing it up for others.
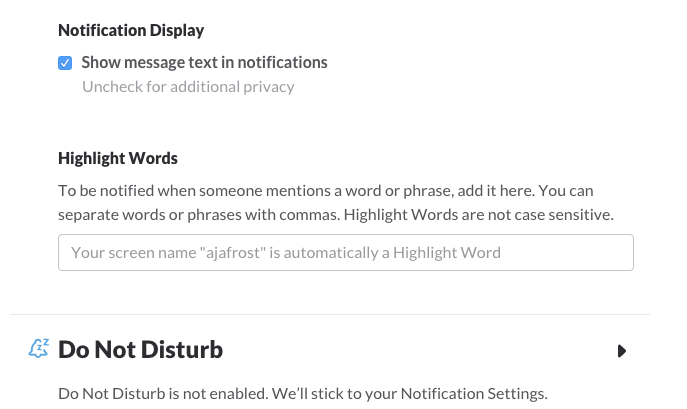
e. Highlight Words: Under Preferences, you can set alert notifications for specific words or phrases. This feature is useful for keeping up with channels that are really active; for example, maybe you want to be a part of every conversation about growth hacking, so you include "growth hack" and "growth hacking" in your highlight words. Slack will then notify you when those are mentioned, so you don't have to read every message.
f. Go Up to Edit: To quickly edit your last message in the conversation, press the Up arrow key, then type the edits and press Enter to re-submit it.
g. Create Auto-Replies: You can use Slackbot to create automatic replies. My groups have taken advantage of this feature for both inside jokes and FAQs.
h. Close All Visuals: People love inserting GIFs and pictures into Slack, but that can slow down your computer (and make your eyes hurt). Make them go away by typing "/collapse".
i. Run an Advanced Search: You can find almost any message using Slack’s Advanced Search parameters. Add usernames, a timeframe, and channel, and you'll be sure to find the message you need.
j. Notify Everyone: If you want to alert everyone in your Slack account, include @everyone in your message. @channel and @group will do the same for those in your channels and groups, respectively. Use @here to notify everyone who’s currently active on the desktop app, so you won't bug those who are away.
k. Pin Files: This feature allows you to keep important files front and center in their associated group. Just share the file (or find it in your group history, if it’s already been shared), choose "More Actions" and "Pin to Channel."
l. React With Emoji: For a quick, visual response to messages, mouse over a message, click the smile icon, and choose the emoji you want—perhaps thumbs-up to "like" a message, or frown when something makes you sad.
m. Quote Messages: Easily fill in your team members by quoting previous messages. Hover over the message you’d like to share, select the "copy" chain icon, then paste the URL into a new post.
n. Use the Forward Slash: Press / while you’ve got any channel open to access a ton of quick commands, including /topic (to change the conversation), /away (to change your Away status), and /shrug (to add a shrugging guy to your message).
o. Build Slack Bots: To get even more out of Slack, you can build your own forward slash command-powered Slack Bots to create files, start projects, lookup data, and more. There are pre-made bots in the Slack App Directory, or check Zapier's guide to building Slack Bots for a detailed tutorial on building bots for anything you want.
For more info about Slack's features and pricing, check out our Slack review.
See Slack integrations on Zapier
Slack's incredibly powerful, so be sure to check out our guide to Slack Everything and use Slack to manage emails, organize projects, and much more.
Google Inbox: Hidden Features
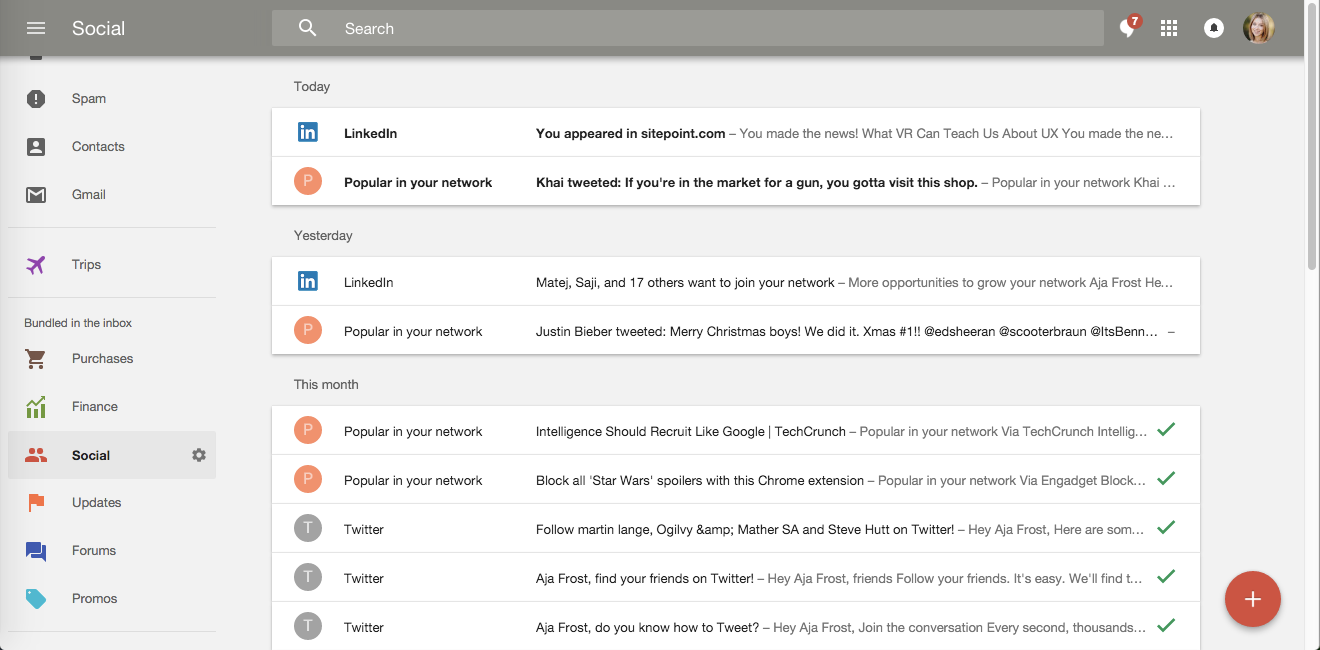
If you’re used to the traditional email apps, Google's new Inbox app for Gmail can be a bit jarring. But it’s got a ton of smart features that make the learning curve worth it.
a. Use Bundles: Bundles group related messages together. Inbox comes with six default Bundles: Purchases, Finance, Social, Updates, Forums, and Promos.
If any of these categories aren’t very important to you, disable it by finding the bundle name in the left menu bar, clicking the gear icon, and toggling the "Bundle" option to "Off." Then, you can enable any of your Gmail labels as bundles to customize Inbox.
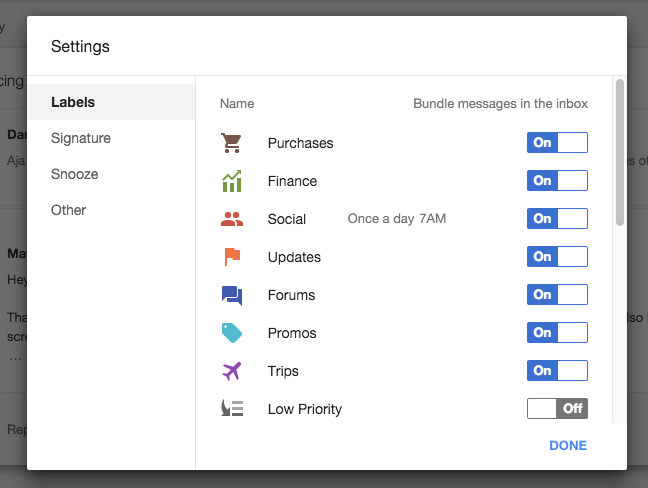
b. Show Bundles at Specific Times: Let’s say you get a lot of "Social" emails, but you don’t want to get distracted by seeing them pop up in your inbox. While you’ve got the Social Bundle settings open, select "Show Bundle" > "Once a day."
You can also choose "Once a week" if you'd really like to cut back on Facebook.
c. Create Personalized Bundles: Maybe you want to bundle all the messages from your boss, or from three specific coworkers, or even from your friends. Scroll down to the bottom of the left menu bar, choose "Create new…", pick your bundle name (i.e. "Boss"), then add the details of the emails you’d like included in this bundle.
d. Swipe Right: If you’re using Inbox on a touch screen, swiping right on a message marks it as "Done". This action will move the email out of your inbox into a "Done" folder.
It’s a really useful feature for keeping your inbox uncluttered. I recommend swiping right on emails after you’ve responded to them, followed whatever instructions they contained, or both.
e. Mark Bundles as "Done": You can also swipe right on bundles. I do this all the time; for example, when I get a bunch of shopping promotions I’m not interested in, I’ll swipe right on the "Promos" bundle to get rid of them all.

f. Click Done: If you’re using the desktop version of Inbox, archive messages and reminders by clicking the small checkmark in the right corner.
g. Pin Messages: To keep an important message in your inbox, click the push-pin icon. Then, just click it again when you don't need that message in your inbox anymore.
h. See Only Pinned Messages: In the right corner of the navigation bar, you’ll find a push-pin toggle. Sliding it to the right will show you every pinned message in your inbox. Slide it back to see everything else again.
i. Sweep Your Inbox: Sometimes you just need to start fresh. When that’s the case, you have two options: sweep your entire inbox, or sweep an individual bundle.
Whether you go with the first or the second choice, every unpinned message in your inbox or that category will be moved to the "Done" folder. Pinned messages won’t be affected.
j. Snooze Emails: To temporarily move a message out of your inbox, select the clock icon in the right corner.
There are several uses for the snooze function. First, you can use it to schedule follow-up emails. Second, you can use it to get the message out of sight while you complete some necessary action. Third, you can use it when you don’t have the time or desire to immediately respond.

k. Set Reminders: You can incorporate your to-do list into your inbox by setting reminders.
First, click on the red "Compose" button in the lower right-hand corner, then click the blue "Reminder" button. If you want to be reminded at a specific moment, press the clock icon and select your date and time. You can also be reminded at a certain place.
m. Send In-Line Photos: Rather than sending someone a ton of images they need to individually download, include your photos in the body of your email.
Just click the paper-clip icon, select your files, and press "Open." Your photos should automatically appear in-line.
However, if you want to include them as attachments instead, click the small button on the photo’s top right corner, and choose "Send as attachment."
For more info about Gmail's core features, check out our Gmail review.
See Gmail integrations on Zapier—each of which work perfectly with Google Inbox
Want to stick with the traditional Gmail interface? Check out our guide to optimizing Gmail for over 30 tips and tricks to get the most out of Google's email app. And check out our free eBook, The Ultimate Guide to G Suite, to learn how to roll out Gmail or Google Inbox to your entire team.
There you go: over 50 tips to help you get the most out of Trello, Asana, Evernote, Todoist, Slack, and Google Inbox. Jot your favorites down, start using them in your work, and you might be surprised how much time you save just by using these extra little features.
Want to master more apps? Check out these other Zapier app guides for more tips and tricks:
Supercharge Google Calendar: 30 Tips, Tricks, Hacks and Add-Ons
Google Sheets 101: The Beginner's Guide to Online Spreadsheets
Got a favorite hidden app tip we missed? We'd love to hear about it in the comments below!
