
The quickest way to start a never-ending email thread is by asking, "When's a good time to meet?" After a few back-and-forth responses, you'll eventually land on a mutually convenient date. Then you get to go back and forth a few more times to hammer out whose virtual meeting room you should join.
It's a game no one should play.
Instead, if someone wants to meet, you can send them a link to your Calendly booking page where they can view your availability, book a meeting, and automatically get event notifications. If you're tired of playing scheduling Tetris, here's everything you need to know about how to use Calendly.
What is Calendly?
Calendly is a popular meeting scheduler app—and for good reason. It's reliable, easy for everyone to use, and you get access to all the necessary scheduling features on a free plan.
Once you create your Calendly booking page, all you have to do is share the booking link, so invitees can view your availability and schedule time with you. Whenever a new meeting is booked, Calendly automatically populates the event details in your calendar and takes care of sending event reminders.
How to set up Calendly
Here are the basic steps to setting up your Calendly account. With the exception of creating your account and identifying your role at work (last step), you can skip most of the steps and edit them later. But I find it easiest to set everything up right from the start.
1. Create your Calendly account
If you don't already have one, here's how to create a Calendly account.
Go to calendly.com.
Sign up with your Google or Microsoft account. This allows you to easily sync Calendly with relevant apps like Google Calendar and Microsoft Outlook calendar. You can also use your email address and connect these apps later.
If you signed up using your Google or Microsoft account, follow the security prompts to connect your Calendly account.
2. Create your Calendly URL
Once you've set up your account, you'll be prompted to create your Calendly URL (you can always change it later). This is the address invitees will see in their browser's search bar.

In the Create your Calendly URL section, enter the ending for your URL. I recommend choosing a concise and memorable name like
calendly.com/winston-woofs. It makes sharing the link to your booking page that much easier.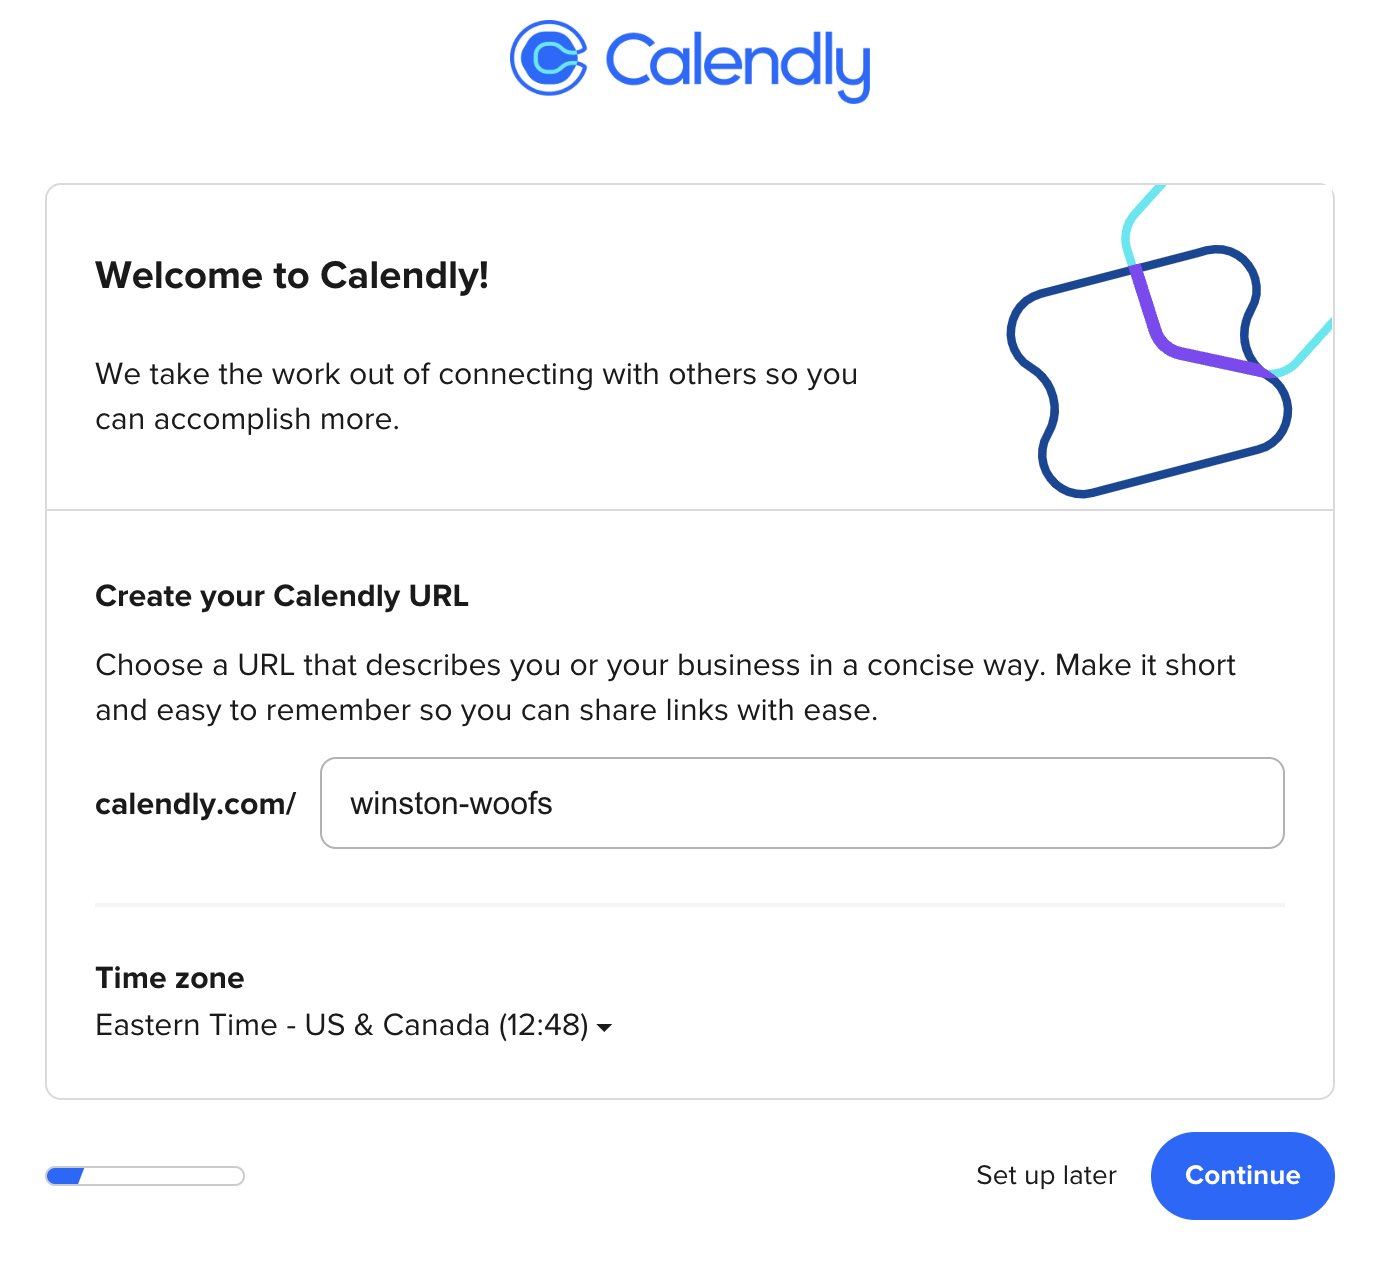
Note: Be sure to separate words in the URL with a hyphen. This makes it easier for humans and assistive devices to read.
Choose your time zone.
Click Continue.

3. Connect Calendly to your apps
Calendly offers a lot of practical features, but the ability to auto-check my calendars for busy times and update them with Calendly meetings might be my favorite. That's why I recommend connecting your calendars right away.
All you have to do is click the calendar apps you use to schedule your day. Then follow the security prompts to connect your selected calendars.

4. Set your availability
Set your general availability, and then click Continue. If you want to modify your working hours or set custom availability for specific events, you can do that later on.

5. Personalize your Calendly experience
Calendly asks about your work duties to help personalize your customer support, should you need it. Select the role that's most applicable to you. Then click Finish.

If you want to further customize your Calendly account, click Account from your home page, and then click Settings.

From your Personal settings page, you can do things like add a profile picture or company logo, modify your Calendly URL, and update your availability.
Now you're ready to move on to the fun stuff.
How to create an event or meeting in Calendly
Creating an event in Calendly is kind of like navigating a Choose Your Own Adventure book, which is to say that there are 13,519 ways to create and customize an event. Instead of detailing every possible option, I'll guide you through the general setup.
Note: When you create an event or meeting in Calendly, you're not actually creating an event. Instead, you're setting up a booking page for people to schedule a meeting with you.
How to create and customize one-off events
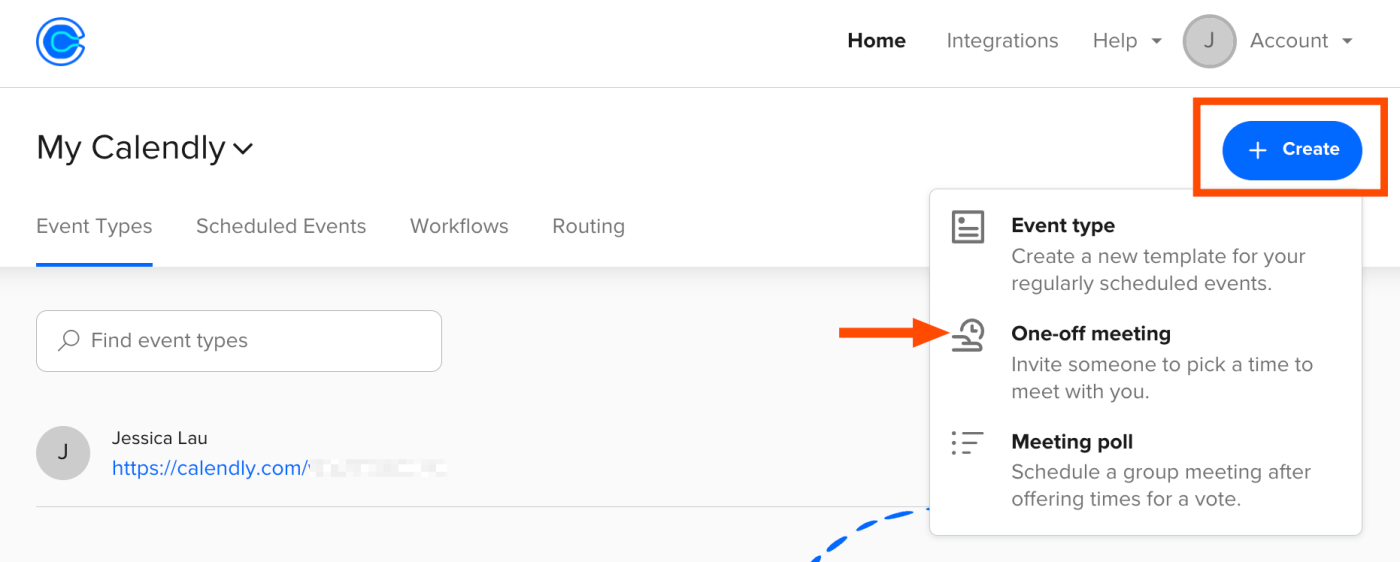
Let's say someone messaged you on LinkedIn to schedule an informational interview. Or an old friend who moved overseas wants to catch up virtually. Calendly makes it easy to share a booking page for these one-off events.
On your Calendly home page, click + Create. Then select One-off meeting.
Now you have to customize the event duration and time slots you want to offer your invitee.
Event duration: By default, the event duration is set to 30 minutes. But it's easy to change this. In the Meeting settings side panel, under Duration, click the down caret (
∨). Then select the desired time or enter a custom length.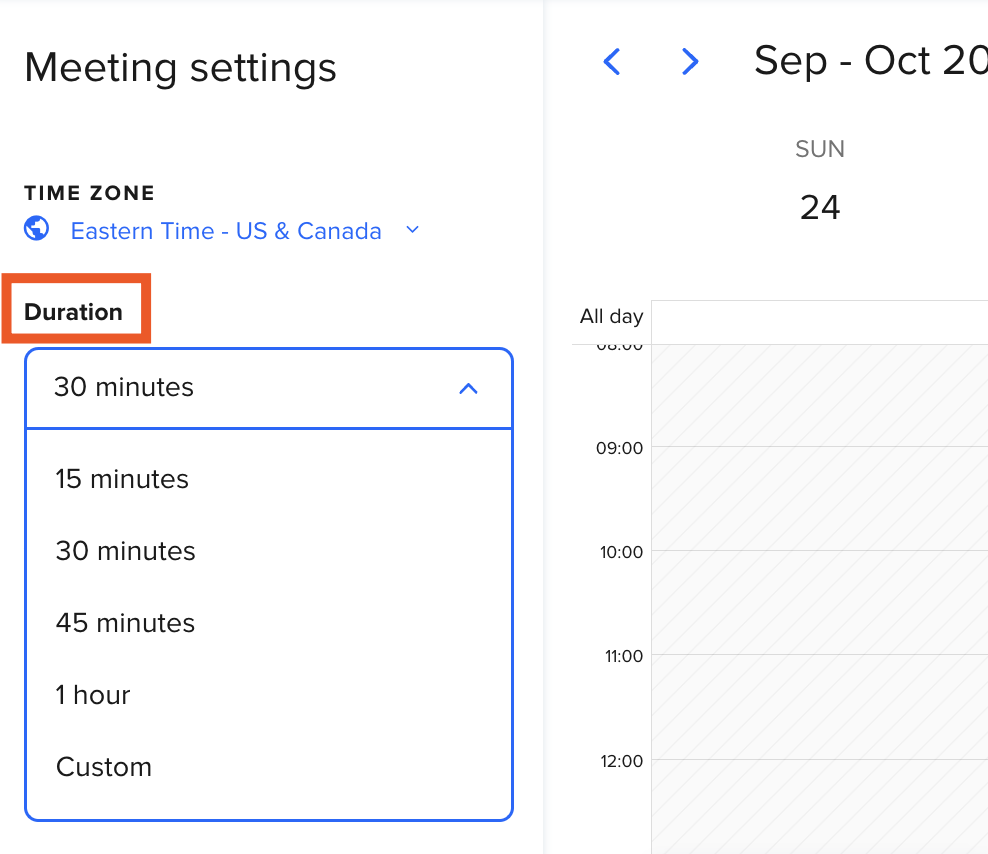
Time slots: Click the time slots you want to offer (up to 40) directly on your calendar. If you want to view the added times in a list, click the down caret (
∨) beside /40 times selected.
If you want to make every available time slot in a day open to booking, there's an easy way to do this: click + Add times below the date you want to include. To remove all booking options from a specific date, click Clear times.

Click Next.
Edit the meeting details, including the meeting name and location.

Note: If you want to host a virtual meeting in Zoom, you'll need to add the Zoom integration to Calendly.
Click Publish meeting.
In the pop-up window that appears, click Copy Link.


Now you can share the booking page with your invitee.
Anyone who gets the link will have access to your booking page, where they can view your availability and schedule a meeting. Here's an example of what the page looks like.

Once a meeting has been booked by your invitee, the scheduling link will expire—never to be used again.
Need to edit a one-off event? You can't. Instead, you'll have to create a brand-new event. (For how simple and intuitive Calendly is generally, this limitation baffles me.)
How to create and customize events for regularly scheduled meetings
I teach virtually at a local college, so I keep virtual office hours for student meetings. The easiest way for me to allow students to book multiple meetings with me is to create an Event Type. Think of Event Types as a template for a meeting you'll host regularly.
There are four Event Types to choose from: One-on-One, Group, Round Robin, and Collective. The steps to create your booking page vary slightly depending on the chosen Event Type. Since One-on-One is a common option—and the only one available on a free plan—I'll show you how to create a booking page using that event type.
Note: Users on a Basic Calendly account can only have one active Event Type. You can still create multiple Event Types, but only one can be turned on.
On your Calendly home page, click + Create. Then select Event type.
Select your desired event type: One-on-One, Group, Round Robin, and Collective.

In the Who will host this one-on-one event type? window that appears, choose the host (by default, it's set to you).
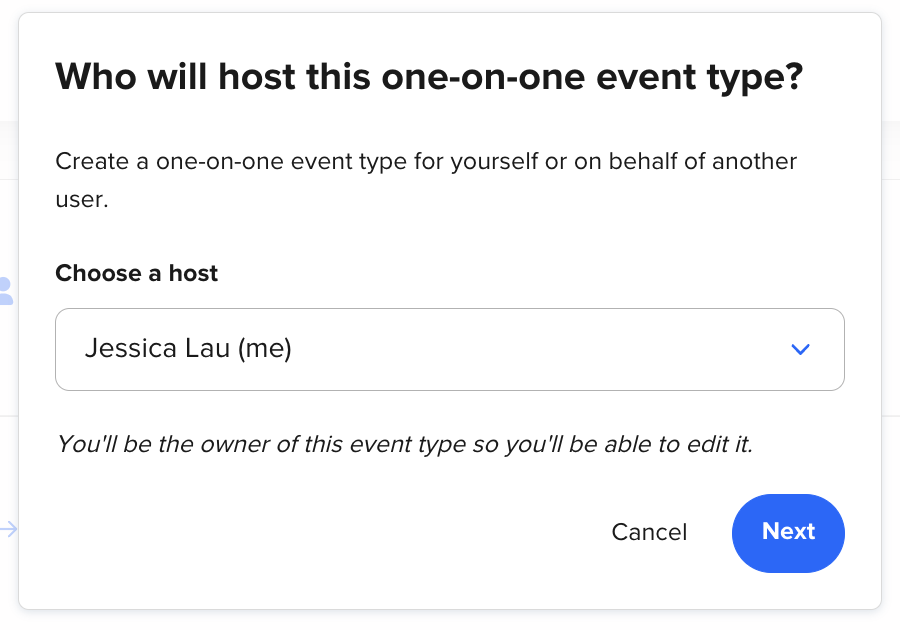
Click Next.
Edit the meeting details, including the event name, location, and event link. For group events, you'll be prompted to specify the maximum number of attendees who can book that time slot.
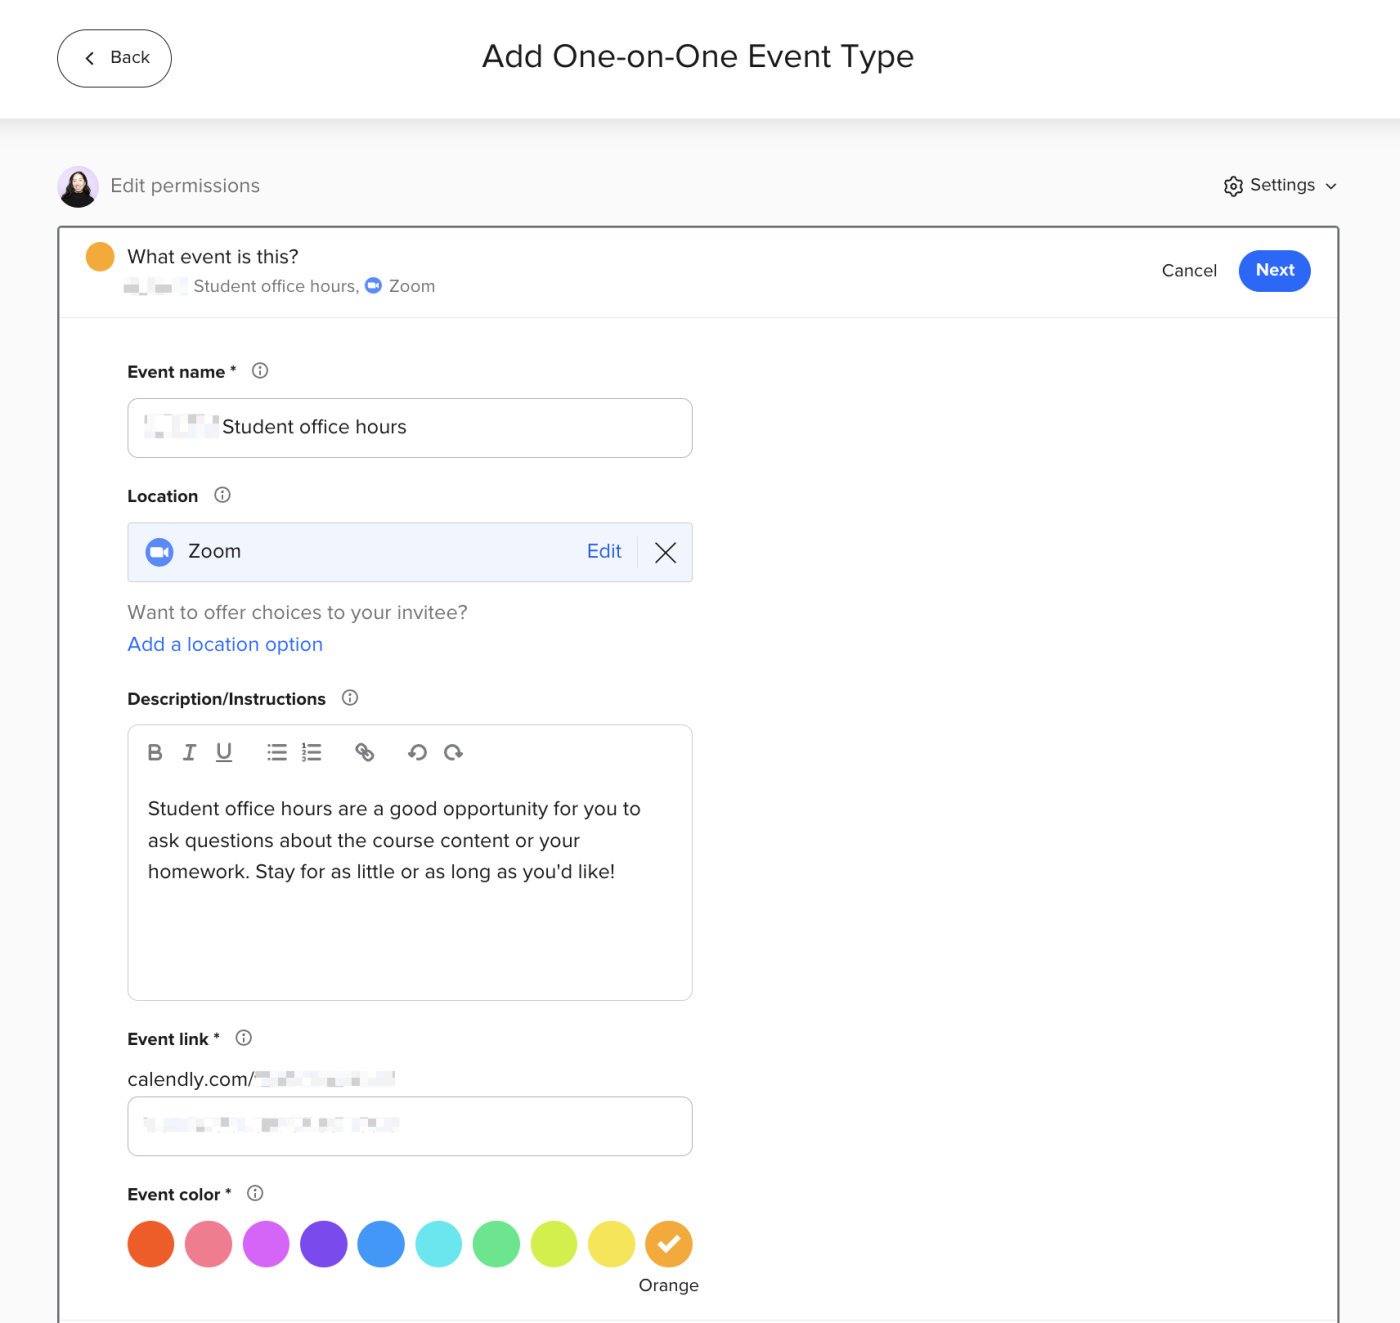
Note: By default, Calendly will make the event link the same as your event name, separated by hyphens. For example, if my event name is
Student office hours, the Calendly URL will includestudent-office-hours. If you want to change this, enter a different end to your URL in the Event link section.Click Next.
Edit when people can book this event. Here, you can modify things like the date range, duration, and custom availability. You can even add buffers between events.
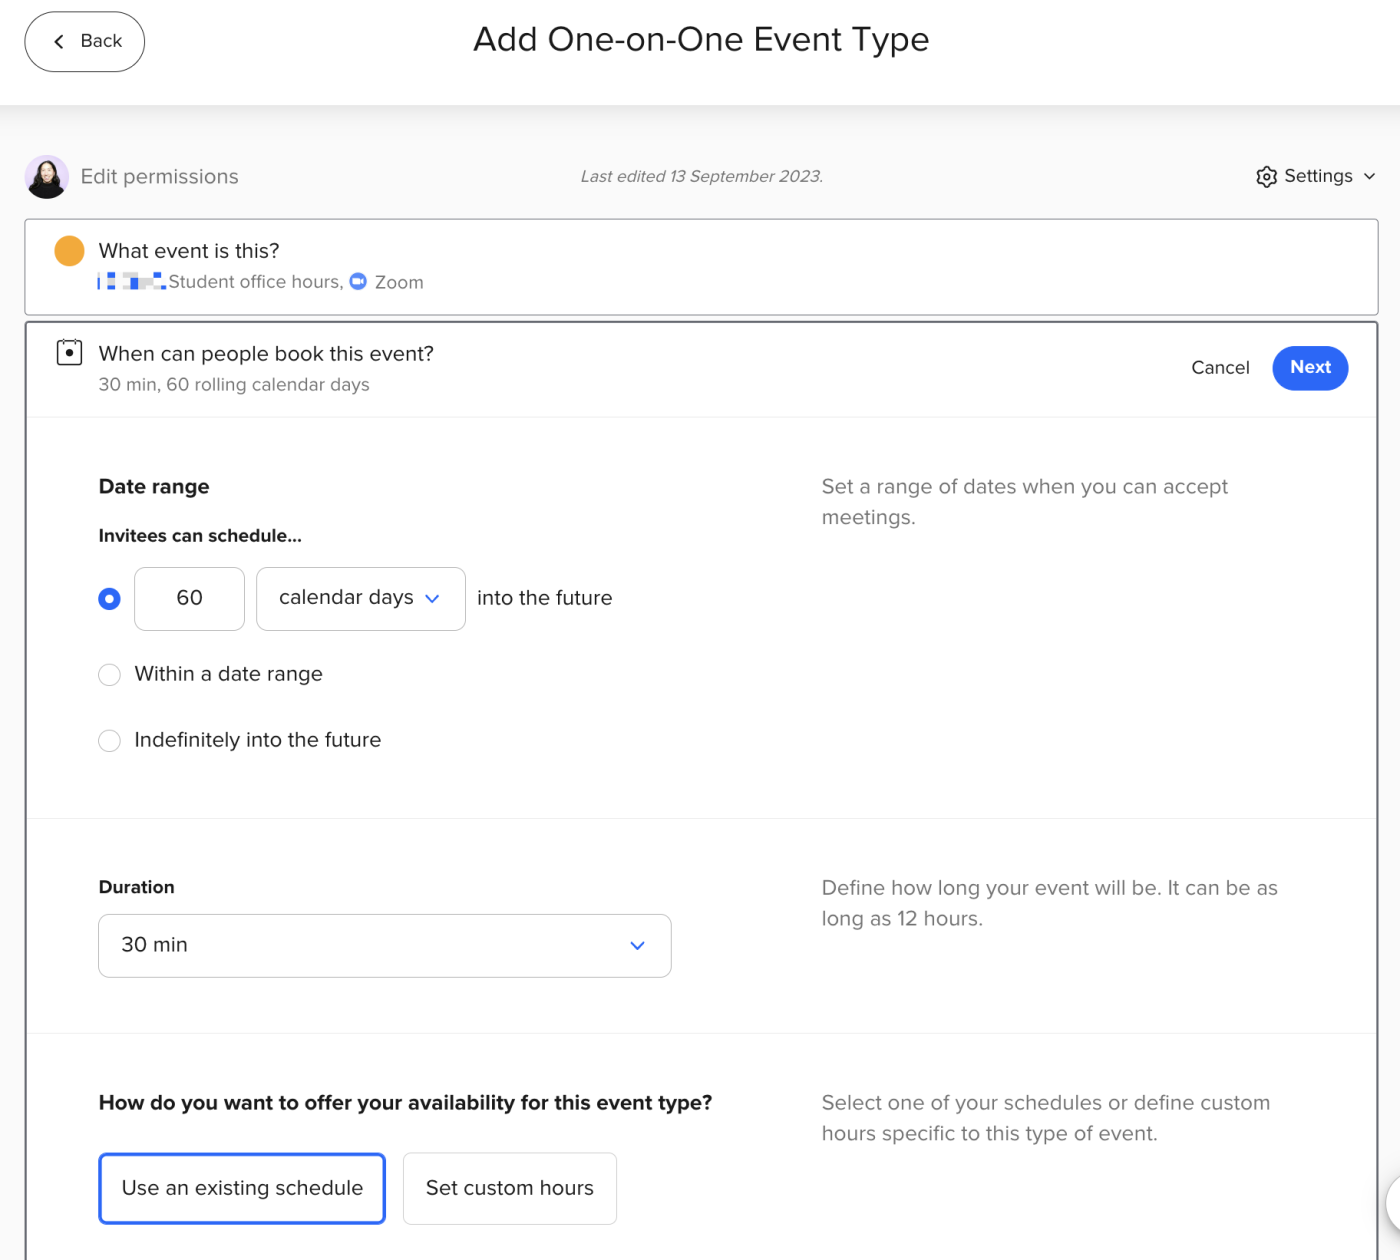
Click Next.


You're all set!
If you want to share a link to your booking page right away, click the Copy link icon, which looks like a chain link, and share it as you normally would.

This article focuses on the basics of setting up events in Calendly. If you want to play around with more advanced settings, like creating secret events and embedding your booking page to your website, check out these hidden Calendly settings.
How to share your Calendly event
Immediately after you've created an event—whether it's a one-off or a recurring one—Calendly makes it obvious how to share a link to that event (it appears in a pop-up window at the end of the setup process). What's less obvious is how to find the link after you've closed that initial pop-up window.
How to share a link to a one-off event
Unlike links to Event Types, links to one-off events are more or less hidden. Here's how to find them.
Go to your Calendly home page.
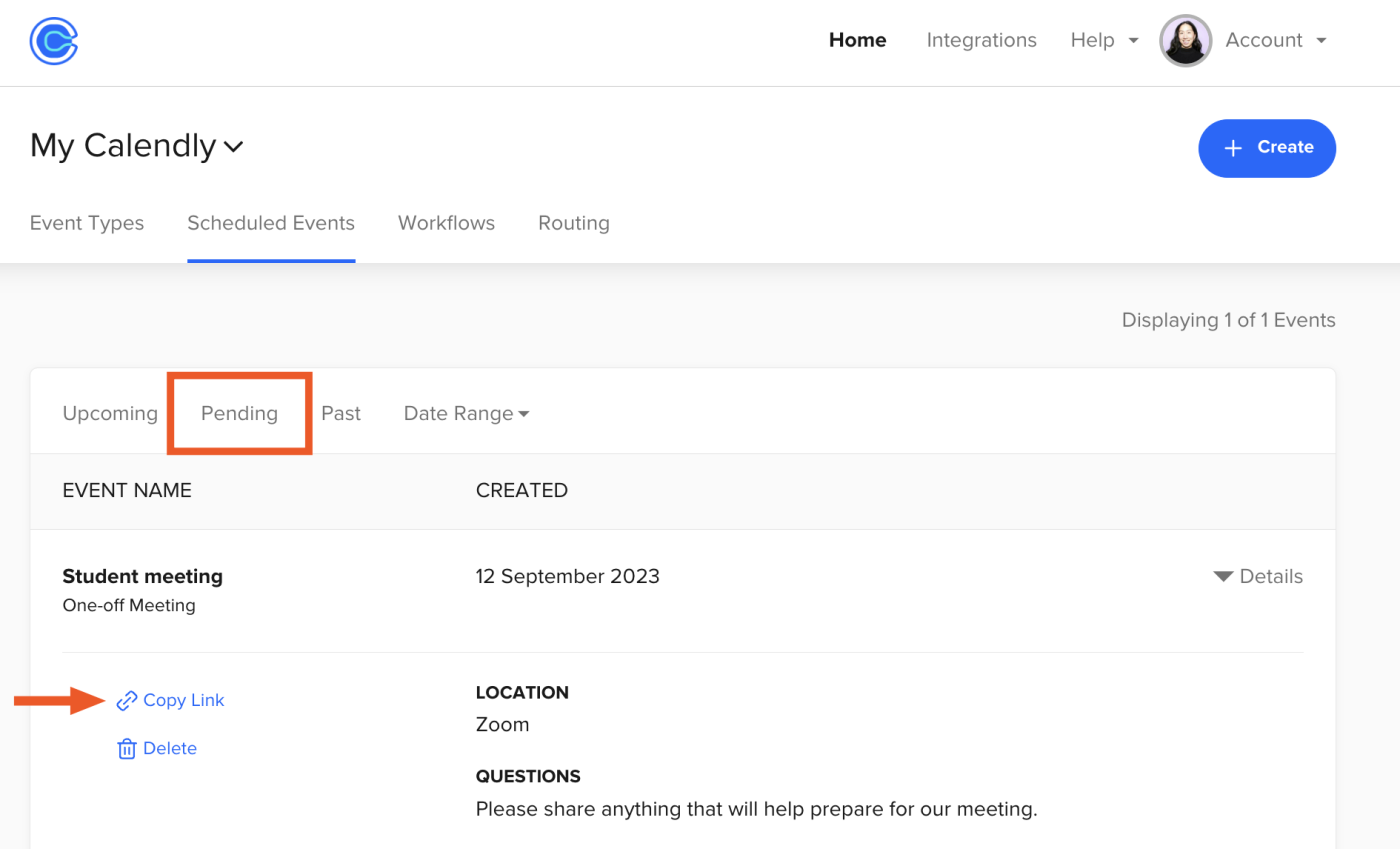
Click Scheduled Events.
Click Pending.
Select the event you want to copy the link to, and then click Copy Link.
Paste the link in whatever app you use to communicate with your invitees.

How to share a link to an Event Type
Here's how to find and share a link to a specific Event Type.
Go to your Calendly home page.
Find the Event Type you want to share the link to, and then click Copy link.

Share the link as you normally would.

How to share your entire Calendly booking page
Let's say you have multiple Event Types. You can let invitees choose which one they book time with you for by sharing your Calendly booking page, which displays all public Event Types. Here's the easiest way to find and share your link.
Go to your Calendly home page.
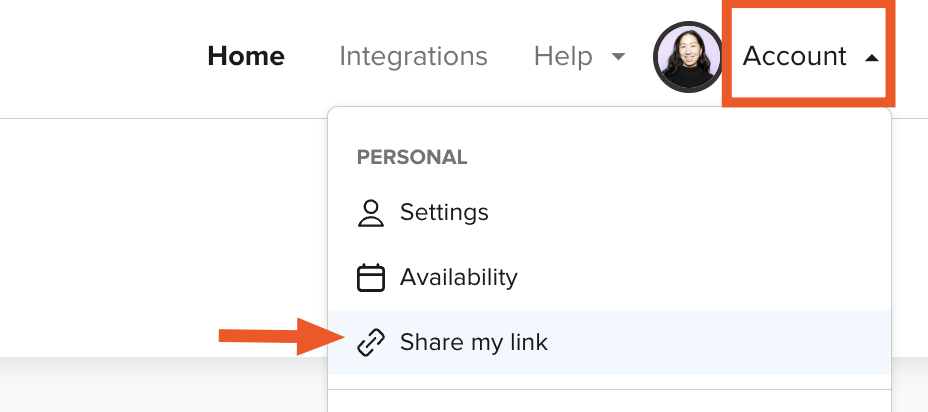
Click Account, and then select Share my link.
In the Share Your Link window that appears, click Copy link URL.
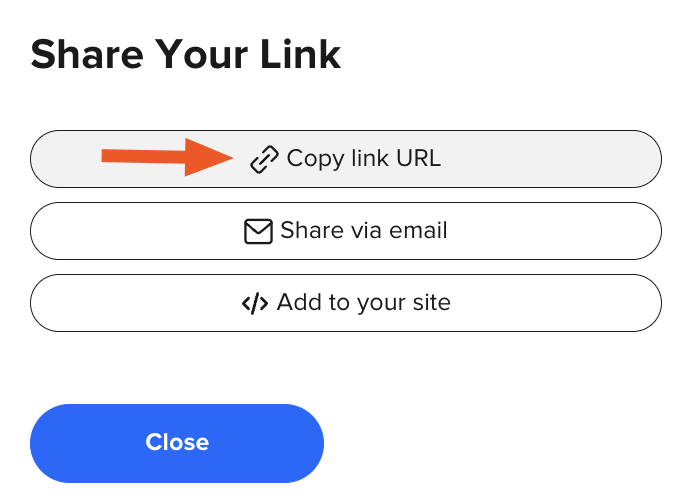
Click Close.
Share the link as you normally would.


When the invitee goes to your public Calendly booking page, they can choose from any of the Event Types, and then book an available time slot for that specific event. Here's an example of what that might look like.

Note: If you created a secret Calendly event, it won't be visible on your public booking page.
How to edit Event Types in Calendly
If you need to make modifications to an Event Type, it's easy to do. (Which, again, begs the question: why isn't it just as easy to edit a one-off event?)
On your Calendly home page, click the Meeting settings icon, which looks like a gear, for the Event Type you want to edit. Then select Edit.

If you want to edit the event details, click What event is this? If you want to modify the booking page settings, click When can people book this event?

Automate Calendly
Calendly lets you take a hands-off approach to scheduling meetings—from coordinating meeting times to sending confirmation emails. But what if you want to add new attendee details in your CRM? Or set a reminder to prepare notes for an upcoming meeting? With Zapier, you can connect Calendly to thousands of your go-to apps, so you can automate these meeting-related tasks.
Learn more about how to automate Calendly, or take a look at these workflows to get you started.
To get started with a Zap template—what we call our pre-made workflows—just click on the button. It only takes a few minutes to set up. You can read more about setting up Zaps here.
Update your CRM or email list with new contacts.
Add or update ActiveCampaign contacts for new Calendly invitees
Create Mailchimp subscribers from new Calendly invitees
Create HubSpot CRM contacts from scheduled Calendly invitees
Add a task to your to-do list or task management app to prepare for the meeting.
Create Google Sheets rows from new scheduled Calendly events
Related reading:
This article was originally published in June 2019 by Matt Ellis. The most recent update was in September 2023.


