
I teach part-time at a local college. One thing they don't tell you about the gig is that there's way more spreadsheet work than you might think. Most of it involves consolidating grade sheets from various apps and organizing it all in one mega Excel spreadsheet. It doesn't sound like much, but when you're left with a mess of data, including mysterious blank rows scattered all around, it can mess with your data.
If you need to remove blank rows in Excel, here's how to do it in both the desktop app and online.
Table of contents:
How to remove blank rows in Excel (desktop)
If you're using the Excel desktop app, congratulations—deleting blank rows is going to be simple. (If you're using Excel online, jump ahead. The process is more manual.)
Note: If you have a mix of completely blank rows and rows with some empty cells, you're better off filtering for blank rows and then deleting them yourself. Otherwise, Excel will delete the entire row that contains the empty cells, which you probably didn't want.
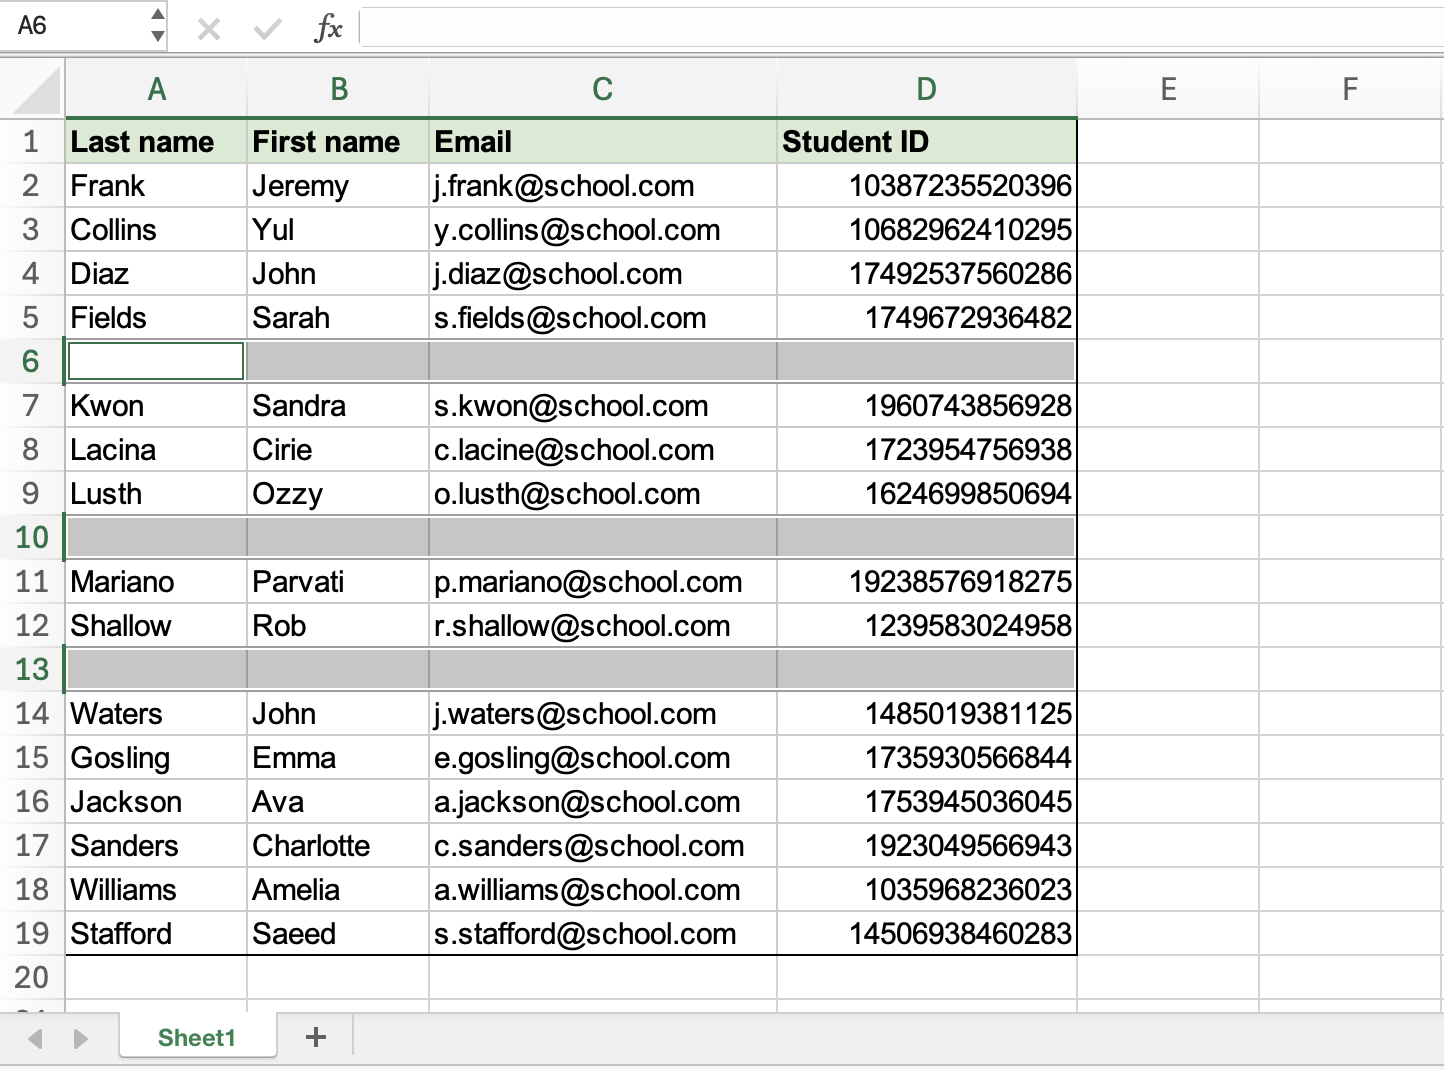
With all that, let's delete some blank rows. We'll remove blank rows from this student roster as an example:

With your Excel workbook open, highlight the cell range that you want to edit. If you want to delete blank rows from your entire workbook, you don't have to do this.
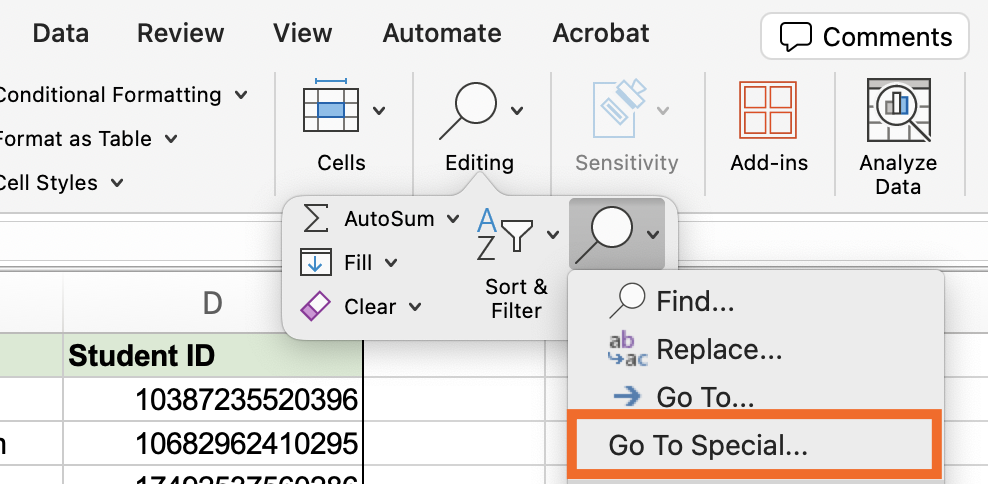
From the Home tab, click Editing > Find & Select > Go To Special.
In the Go To Special popup, click Blanks, and then click OK.
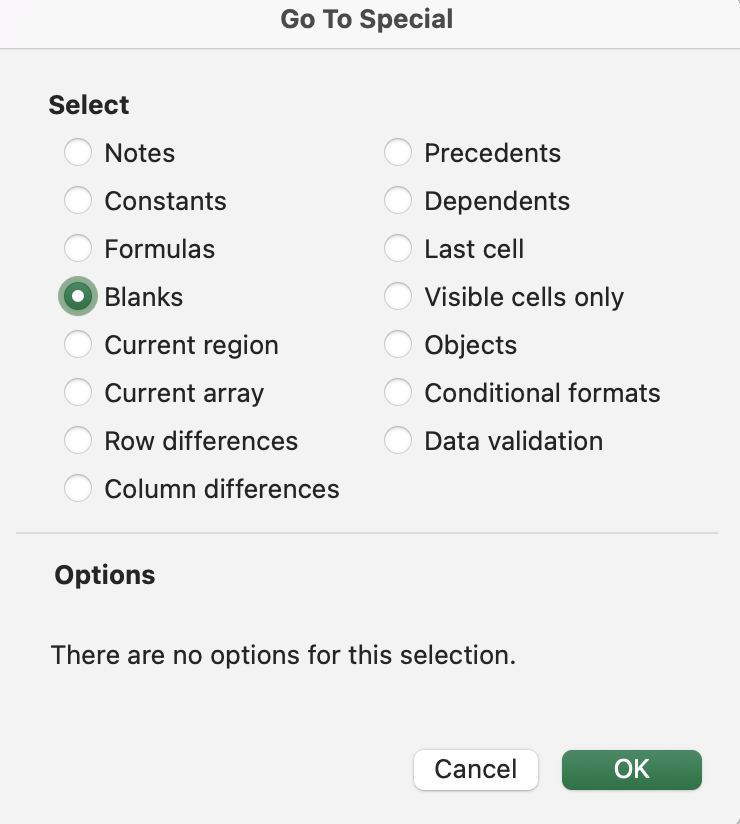
Excel will automatically highlight all blank rows and cells.
From the Home tab, click Cells, and then select Delete.


That's it.
How to remove blank rows in Excel online
For some reason, Microsoft doesn't give you the same (Go To) Special powers in Excel online as it does with the desktop app. If you want to remove multiple blank rows at once, you'll have to use a filter to identify all the blank rows and then delete them yourself.
This method also works if you have a mix of fully blank rows and rows with some blank cells, but you want to delete only fully blank rows. Here's how to do it.
With your Excel workbook open, highlight the data range you want to modify.
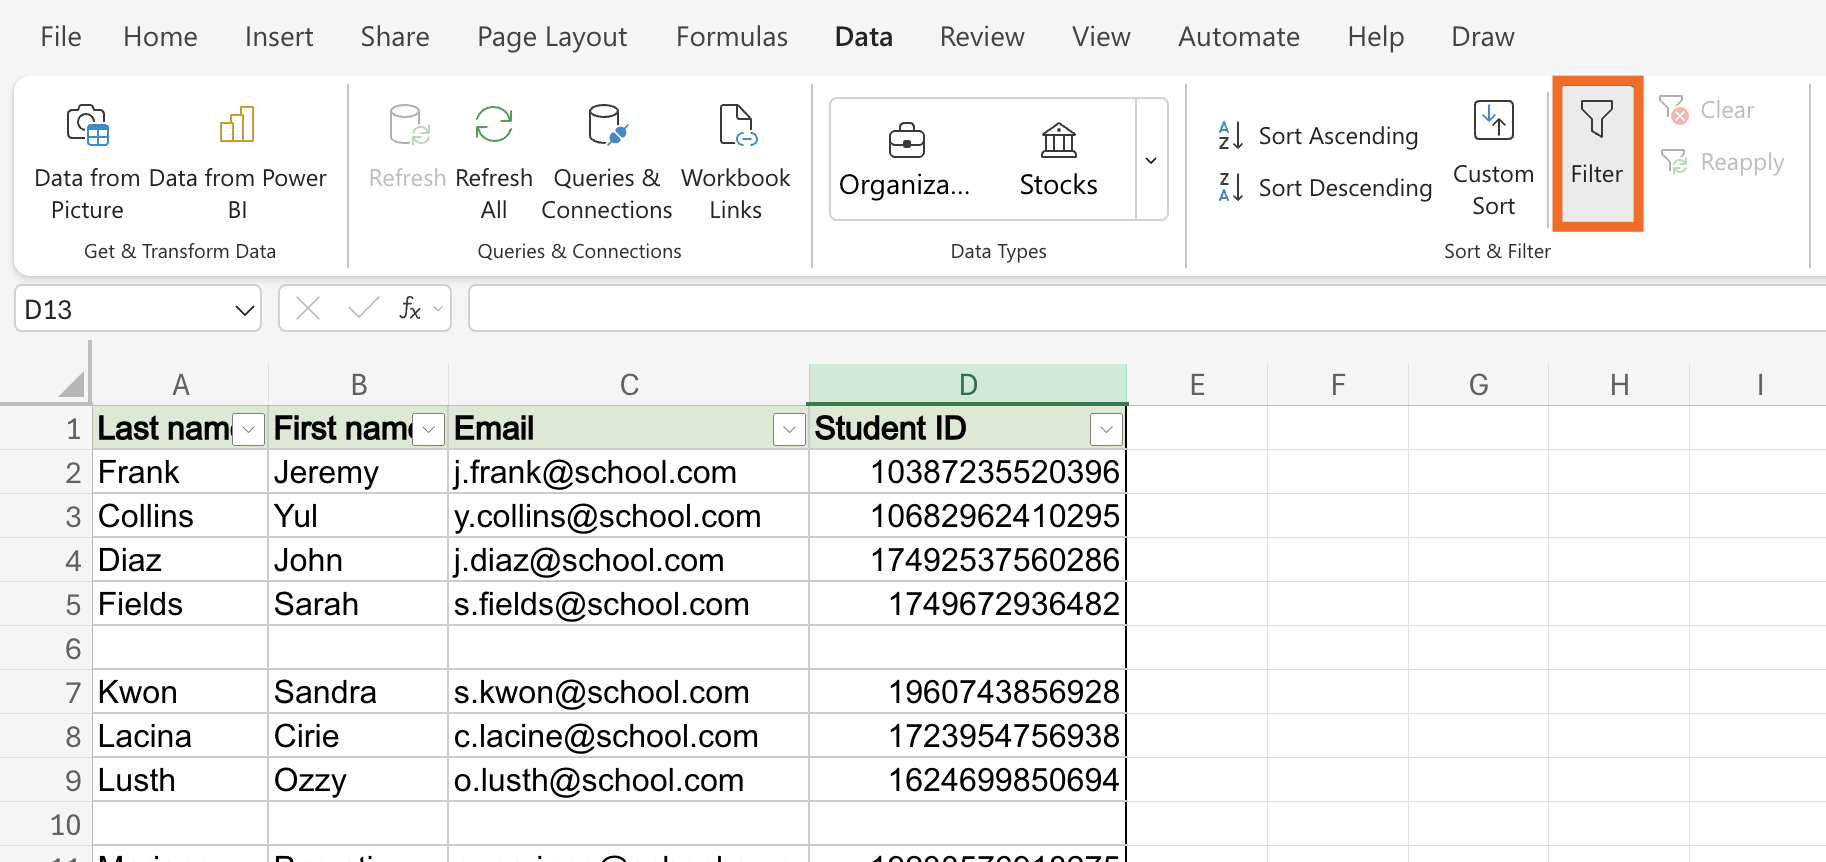
Click the Data tab, and then select Filter.
Dropdowns will appear next to every column header.
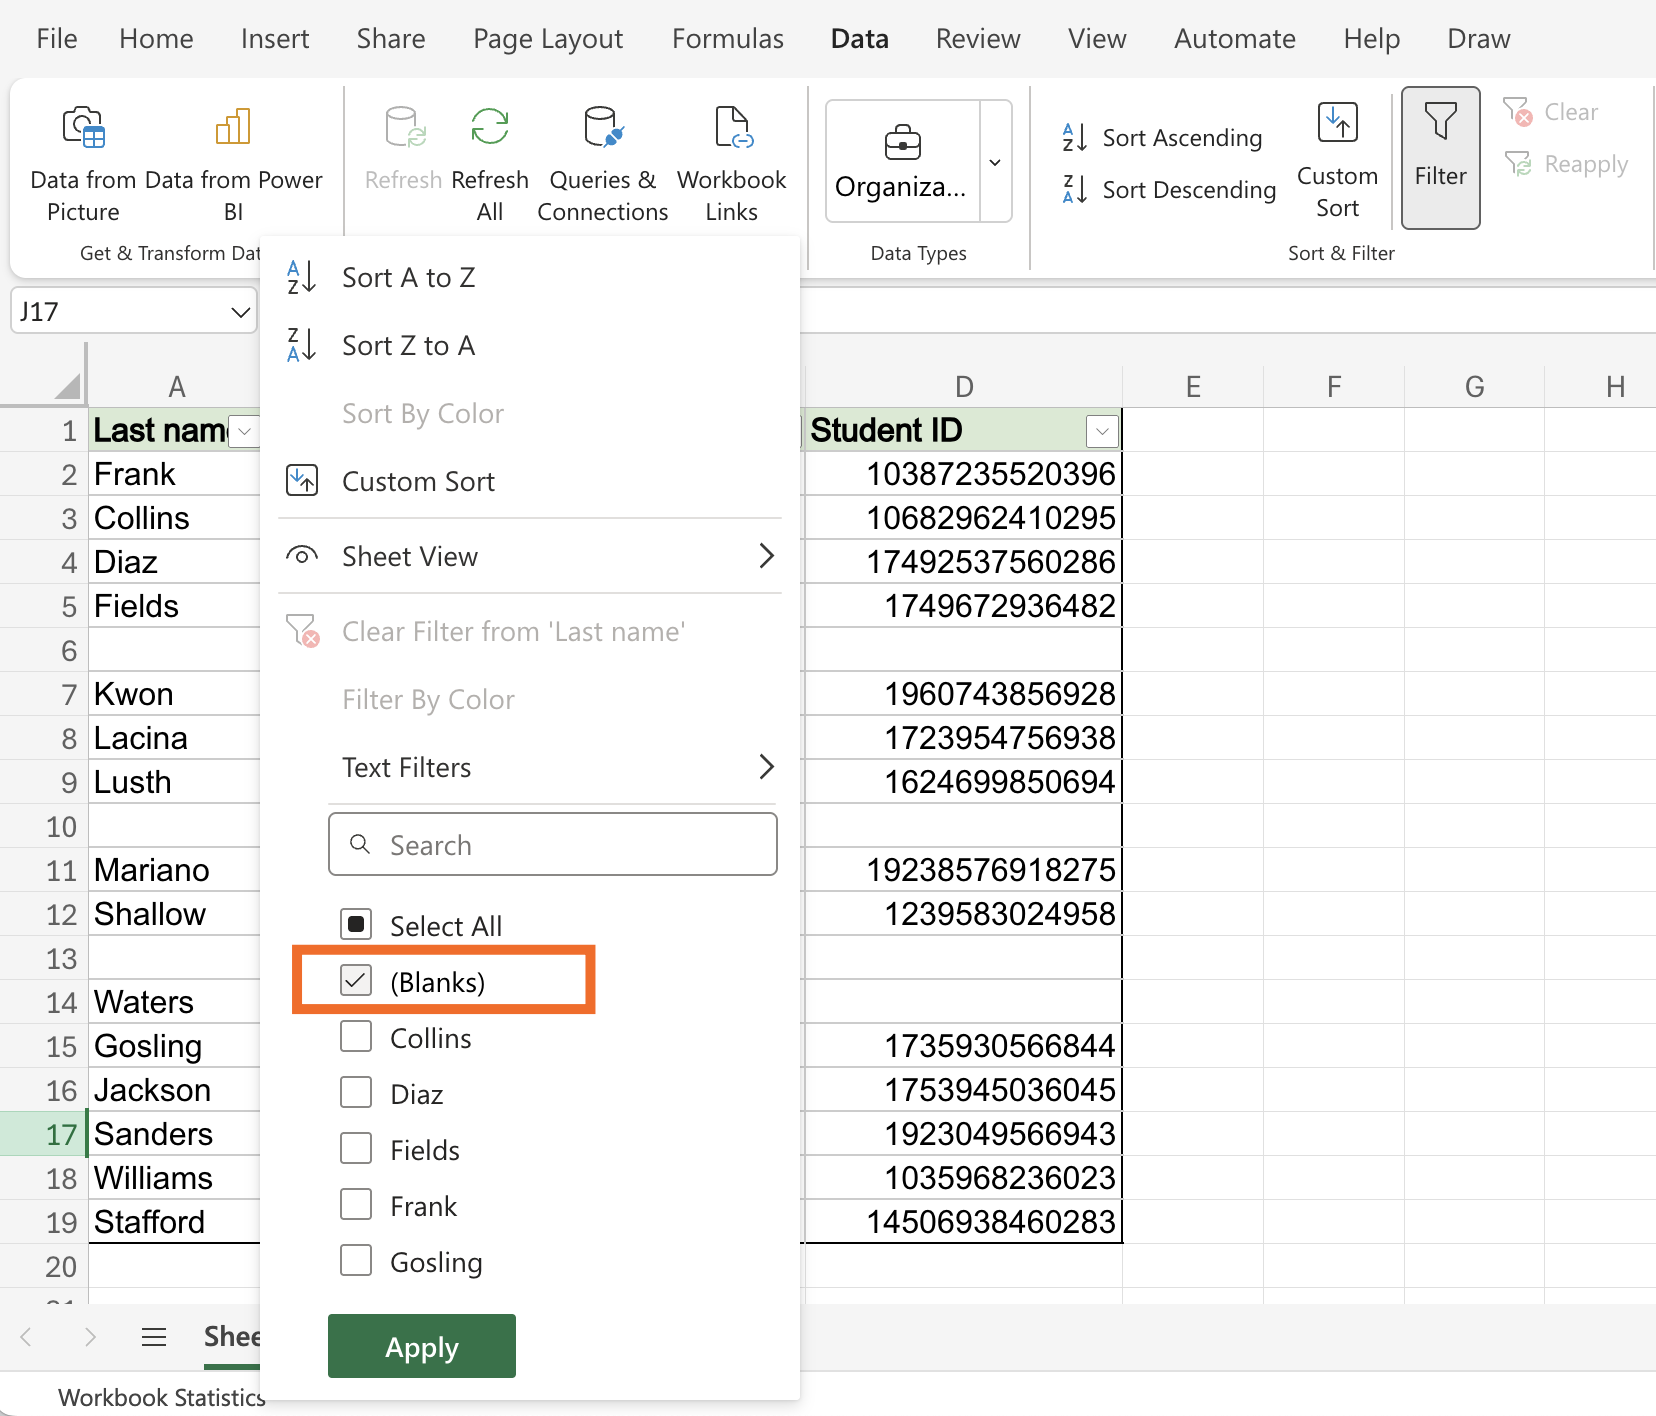
Click the dropdown next to any header.
At the bottom of the dropdown that appears, deselect Select all, and then click (Blanks).
Click Apply.
You should see only blank rows now. Select those rows, right-click your selection, click Delete, and then click Rows [row numbers selected].

To change the view back to see all of your remaining data, click the dropdown next to any column header.
Click Select All.
Click Apply.


You'll notice that row 11 in my example, which contains some blank cells, is still visible. Meanwhile, all the fully blank rows have been removed.
How to remove blank rows in Excel individually
If your spreadsheet is filled with blank rows, but you want to delete only specific ones, it's easy to do. I'm using the desktop app, but you can do the same in Excel online.
With your spreadsheet open, hold
command(Mac) orCtrl(Windows), and select the rows you want to delete.From the Home tab, click Cells, and then select Delete. Or right-click your highlighted selection and click Delete.

Automate Microsoft Excel
Now that you're the proud owner of a pristine spreadsheet, keep it working for you. Connect Excel to Zapier, so you can automatically do things like send data to your Excel workbook from other spreadsheets, databases, or any other app you can imagine. Learn more about how to automate Excel, or get started with one of these pre-made workflows.
Add new Jotform submissions to Excel spreadsheet rows
Add new Jotform submissions to Excel as rows in a table
Add new Jotform submissions to Microsoft Excel as rows
Zapier is the most connected AI orchestration platform—integrating with thousands of apps from partners like Google, Salesforce, and Microsoft. Use interfaces, data tables, and logic to build secure, automated, AI-powered systems for your business-critical workflows across your organization's technology stack. Learn more.
Related reading:
This article was originally published in May 2019 with contributions from Justin Pot and Melissa King. The most recent update was in April 2025.


