In the early days of teaching part-time at a local college, I assumed it would be enough to group all my course files—class presentations, test banks, assignment outlines, student submissions, and gradesheets—into their own course folders with a few subfolders.
But once I had more than one class under my belt, I had to rely on memory gymnastics to pull up any given document, which worked about as well as you can imagine.
That's why I don't rely on folders alone to organize my files anymore—I also add tags. Tags add another dimension to your filing system to help you make sense of the digital chaos. Here's how to create a file tagging system to organize your files.
Table of contents:
How to create a file tagging system
Here's a step-by-step guide to help you build your own file tagging system.
1. Choose your tagging categories
The best file tagging systems aren't built for your ideal self—the one who remembers every file name and updates folders religiously. They're built for real life, where you're juggling multiple projects and can only vaguely remember that the file you want has the word "presentation" in it.
Start by narrowing your tagging categories down to three to five categories max. For example:
Status
Content type
Department or team
Date or quarter
Once you feel good with your groupings, come up with the tags for each category. These should be words your most disorganized self is likely to remember. Here are some examples based on the categories above:
Status—Draft, Final, and In review
Content type—Invoice, Contract, Deck, and Template
Department or team—Marketing, Ops, and HR
Date or quarter—Q2_2025, 2025_10_11, or July_2025
You don't need to tag for everything—just the dimensions that actually help you find and understand your files.
2. Pick your tagging method
Once you know what kind of tags you need, the next step is to decide how to apply those tags. There are a few ways to go about this, but I like to keep this as simple as possible.
Add tags to file names: By adding tags directly to your file name—for example,
MarketingStrategy_Q12025—you keep all the important information in plain sight. This is also the most flexible option because it works no matter where you store your files.Use built-in tagging tools: Your computer has built-in tools that make it easy to tag files—for example, on a Mac, you can add color-coded tags in Finder.
No matter the method, the goal is the same: create a consistent way to layer in helpful context without cluttering things up.
3. Create a consistent tag naming convention
If you're the only one managing your files, you have full control over how you tag things. But chances are, you'll eventually share a file with a client or stakeholder—and when that happens, you don't want them wondering what "v3_FINAL_FINAL2" means.
Set a simple, consistent tag naming convention that's easy to understand at a glance. Here are some quick tips:
Use hyphens or underscores instead of spaces to make your file name easier to read—for example,
Q2_2025instead ofQ22025.Pick a consistent capitalization style—for example, title case (This is Title Case) or sentence case (This is sentence case).
If you're adding tags to the file name, stick to a consistent order—for example,
Project_Status_Type_Date.pdf.
You don't need to over-engineer it—just aim for clarity. If a file lands in someone else's inbox, they should know what it is without needing a decoder ring.
If you're working with a team, consider creating a tagging guide so everyone's labeling and tagging files the same way.
4. Tag your existing files
Now comes the fun part (especially if you were also the kind of kid who was way too jazzed to receive a label maker for their eighth birthday): tagging the files you already have.
You don't have to tackle everything at once. Start with the files that matter most to your current work—things you reference often, active projects, or anything you plan to share.
From there, treat it like a rolling clean-up. As you revisit older files, add tags where it makes sense. Over time, your system will feel more organized without needing a full overhaul.
5. Revisit and refine your file tagging system
As your work changes, your tagging system should keep pace. What felt useful a few months ago might now be outdated or unnecessary. Take stock every now and then to make sure your system still reflects how you actually work.
Here are a few questions to help you determine what is and isn't working:
Are your tags still helping you find files quickly?
Are there any you're no longer using?
Are things starting to feel cluttered or repetitive?
A few small tweaks can go a long way in keeping your file tagging system clean, useful, and something you won't immediately abandon the next time things get busy.
How to use your computer's built-in file tagging tools
Your computer has built-in tools to help you stick to your new file tagging system. Here's how to use them on a Mac or a PC.
How to tag files in Windows
Windows File Explorer (on Windows 10 or later) has built-in tagging features, but you have to dig a little to find them.
Right-click on the file you want to tag, and select Properties.
Click the Details tab.
Click the empty space next to Tags, and enter the tags you want to add, separated by semicolons.

When you need to retrieve a file, enter tag: [tag name] in the File Explorer search box.
How to tag files on a Mac
Mac is more tag-friendly than Windows (+1 to them in the rivalry, I guess). There are three ways to tag files on a Mac, but here's the most straightforward way.
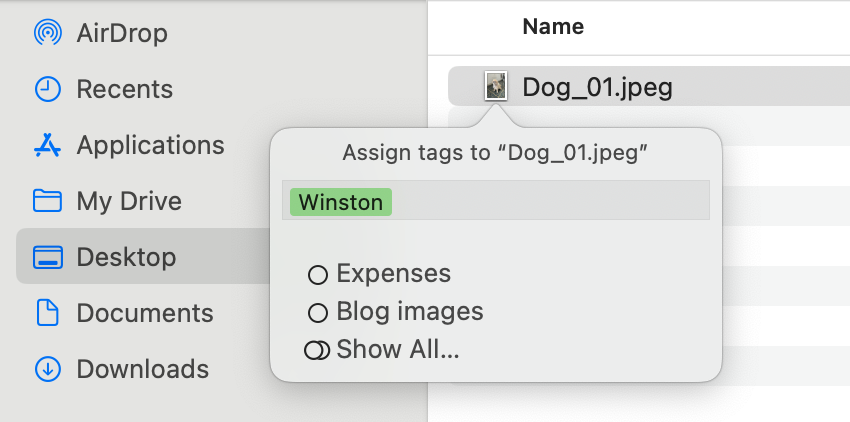
Open Finder.
Right-click the file you want to tag.
Click Tags.
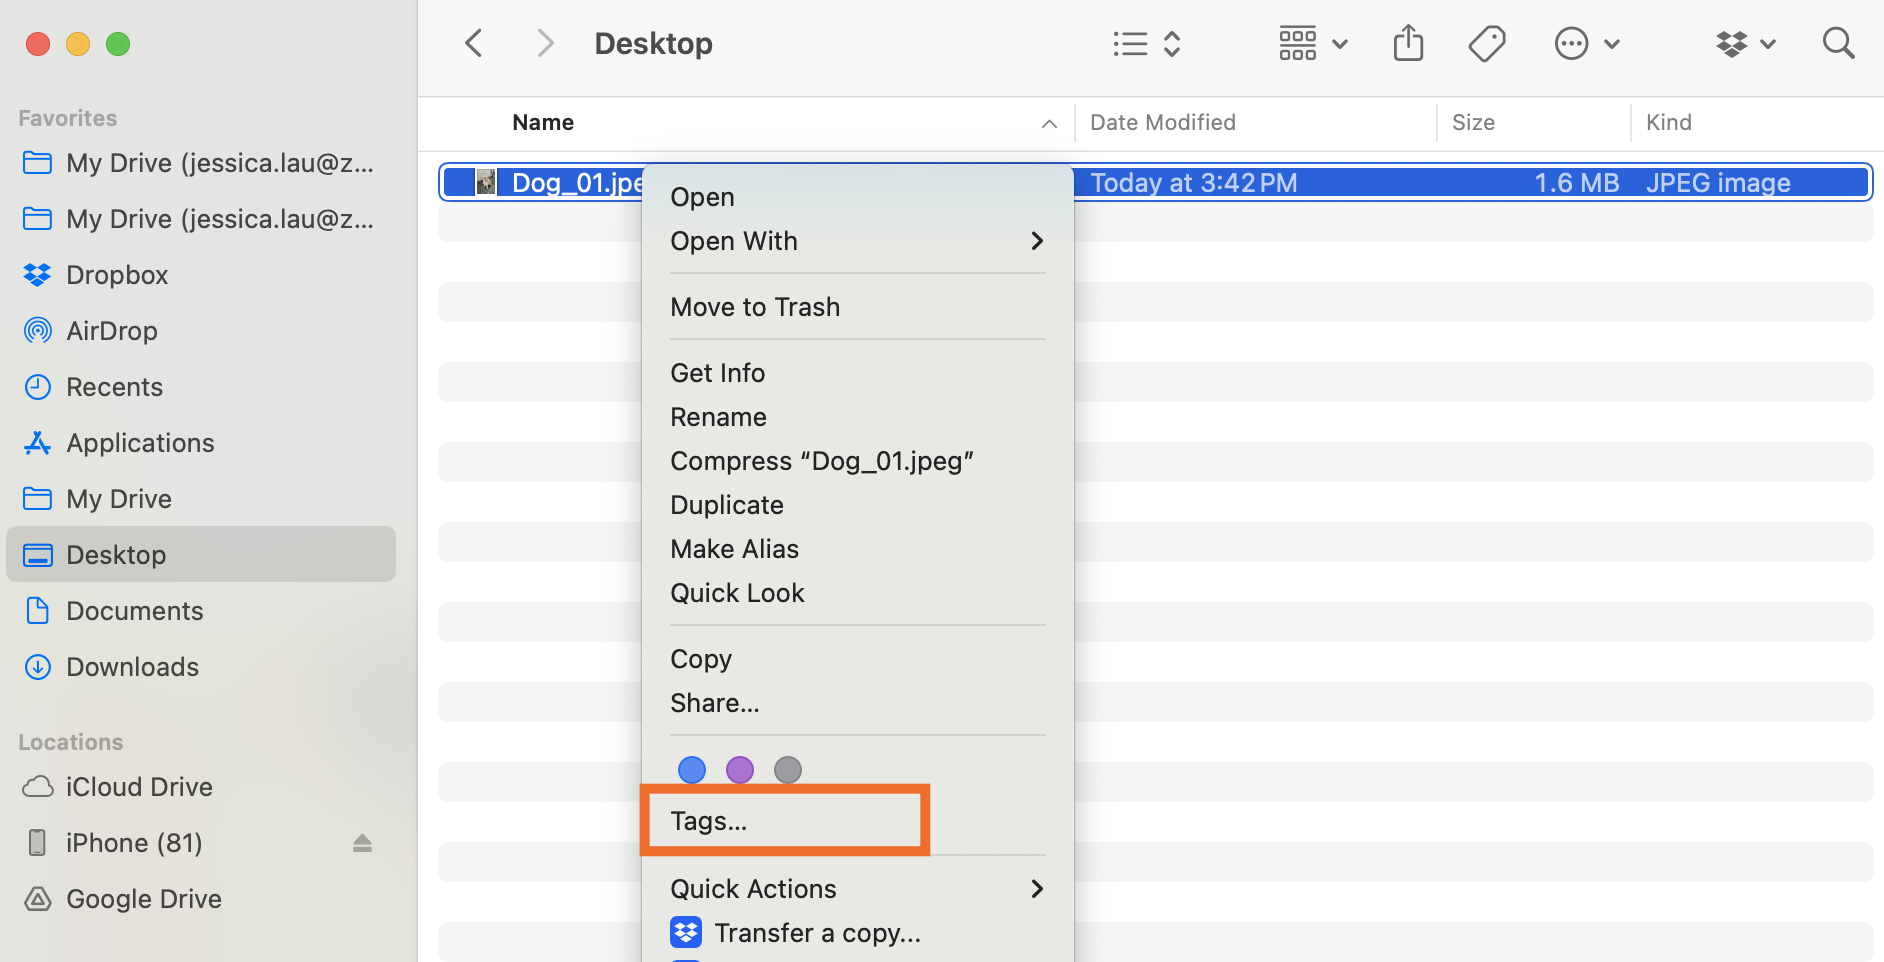
In the Assign tags popup, click the tags you want to add or enter new ones, separated by commas.
If you have your files displayed as Gallery or as Columns, you can also click the file you want to tag, scroll to Tags (after image details), and add your tags.

Automate your file organization
Sticking to your new file tagging system takes a bit of manual work, so I strongly recommend balancing the scales by using Zapier to automate the other half of your file organization workflows.
With Zapier, you can connect your cloud storage app with thousands of other apps so you can automatically move files to the right folder or get notified when new files have been added. Learn more about how to automate your cloud storage app, or get started with one of these pre-made templates.
More details
Zapier is the most connected AI orchestration platform—integrating with thousands of apps from partners like Google, Salesforce, and Microsoft. Use interfaces, data tables, and logic to build secure, automated, AI-powered systems for your business-critical workflows across your organization's technology stack. Learn more.
Related reading:
This article was originally published in June 2019 with contributions from Aja Frost and Melissa King. The most recent update was in April 2025.