Discord is so helpful in both my professional life and my personal life—which is why I've written about it so much. Hopefully folks like me talking about Discord have inspired you to check it out. If so, you'll want to start with the basics—which is exactly what I'll cover here.
Table of contents:
What is a Discord server?
A Discord server is a community space where you can chat over text and voice with members of that server. Despite the name, you don't have to host your own server to make one—Discord handles that for you. Every server mainly consists of text and voice channels that you can organize by the topics you choose. If you know how to use Slack, think of it like a Slack workspace.
What can you use a Discord server for?
A Discord server's classic use is to create a community for friends, studying, or gaming. But thanks to recent community and business-centered features, you can use it for additional purposes like:
Building a community for your creator business
Coordinating with colleagues (basically, using Discord as an alternative to Slack)
Promoting your brand to potential customers by building a community for your brand
Basic Discord server setup
Before you can play with Discord's features, you need to create an account for yourself and start your server. Here's how to perform that initial setup.
Make a Discord account
If you don't have an account yet, sign up for one on Discord's registration page. You'll just need to enter your email, a username, a password, and your date of birth. If you prefer a different display name than your account's username, you can pick it here, too.

You can also make an additional account for managing servers if you already have one. This strategy can be helpful if you plan on managing multiple servers.
Create a new server
Now that you have an account, open Discord in your browser or the Discord app. Start creating your server by clicking the + icon on the left side of your screen, below the icons of the servers you follow.

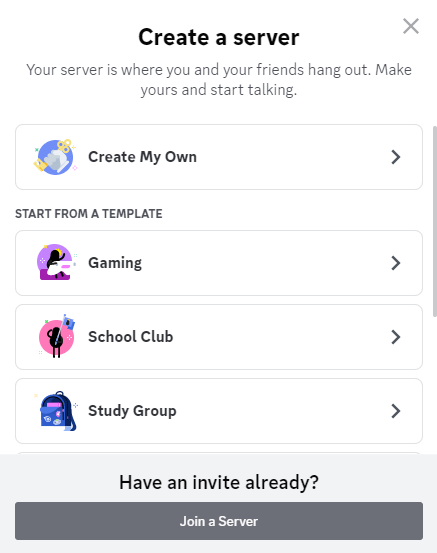
Discord will prompt you to choose a template or start from scratch. Templates provide a ready-to-go list of channels. If you see one that sounds similar to what you want to do, go ahead and choose it, but it's totally fine to start blank, too.
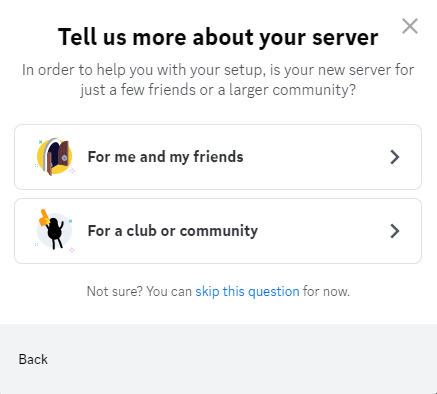
The same rule goes for when Discord asks if you want to build your server for friends or a greater community. Choose whichever choice matches your server purpose more closely, or skip the question.
For the final touch, Discord will prompt you to upload a server icon and choose a server name. Your server icon will appear in your server members' list of servers they follow.
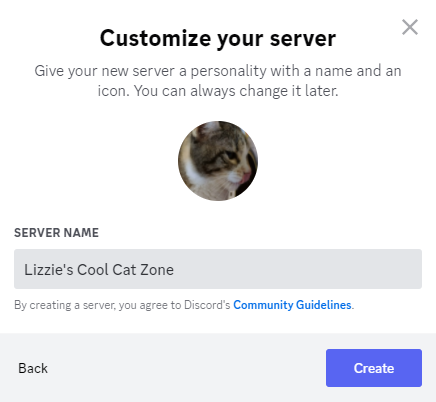
With all those steps completed, you'll have a brand new server to work with.
[Optional] Switch to a Community server
If you plan on opening up your community to the public, consider making your server a Community server. This server mode adds a variety of features for easier community management on a larger scale, such as:
Announcement channels that other server owners can publish in their channels
Stage channels where a small group of members can speak to listeners
An onboarding process that introduces your server to new members
Server insights that provide analytics about member behavior and your channels
A built-in rules screening process that requires new members to agree to rules before posting
The option to join Discord's discovery network so people searching for new servers can find you
If these features sound helpful, go to your server settings to find the Community server menu. Click on your server name in the upper-left corner of your screen, then go to Server Settings.

From there, click Enable Community under the Community header to turn your server into a Community server.

Discord will walk you through the steps required. I also wrote more details on the process in my article on Discord server monetization.
Advanced Discord server setup
Now that you have a server, you can add the components necessary to build a thriving community. Here's how to manage the finer details of your Discord server.
Create and edit your roles
Discord roles let you organize your community members' appearance, what they can do on your server, and what channels they can access. To create and manage your community's roles, go to Roles in the first section of your Server Settings menu.

In Discord's role settings, you can:
Create new roles that have unique settings for all of the features below
Change each role's name color and how they appear in the online users list
Edit permissions for actions like posting and creating threads
You can also tweak channel-specific permissions for your roles in a variety of user management techniques. My article on managing Discord roles explains tons of use cases that make managing a Discord server easier and more fun.
Set up your channels
Channels are the spaces where you'll communicate over text or voice. Discord has multiple channel types, some of which you can only use on a Community server:
Text channels: Here, you can communicate through text-based messages, images, GIFs, and emoji.
Voice channels: These channels act like voice calls where you can also talk over video or share your screen.
Forum channels: This new channel format works like a classic forum where you can post threads about topics and reply to them.
Announcement channels (Community servers only): An announcement channel works kind of like an RSS feed for your server. You can post announcements in one of these channels that people from other servers can automatically share in their servers.
Stage channels (Community servers only): If you need more focused voice chat for an event featuring speakers, use this channel type to make sure only approved members can talk.
To create a channel, click the plus sign next to a channel category. You can also click your server name, then Create Channel. Organize those channels into categories by choosing Create Category in your server name's menu and dragging channels under their corresponding categories.

Edit each channel's settings by clicking on the gear icon that appears when you hover your mouse over a channel's name. This menu offers plenty of ways to manage your channel, such as changing its description or managing integrations that post in it.

I want to specifically highlight the Permissions options here. These settings let you determine what different roles can do in each channel, giving you control over how different people use your server.
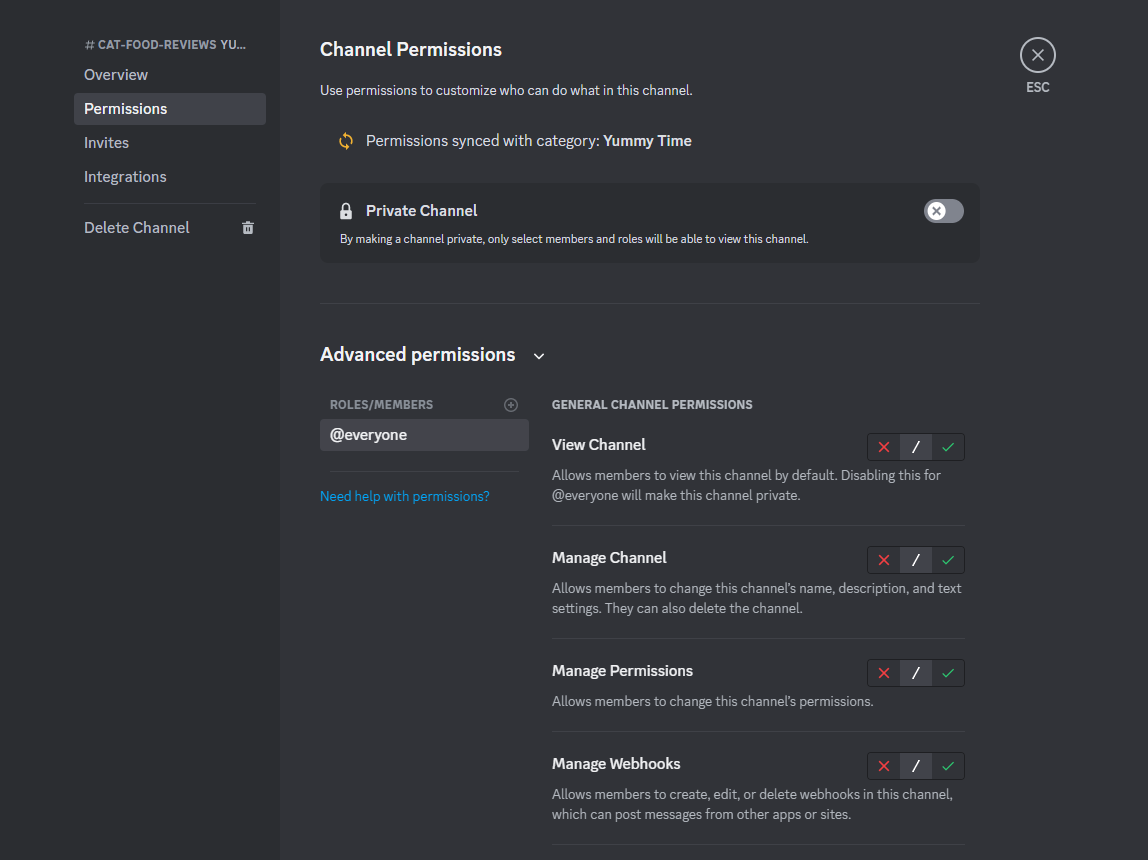
You can visit a similar menu for categories by right-clicking the name of the category you want to edit and going to Edit Category. The permissions settings you create for a category automatically sync with the channels within it unless you specify otherwise.
Design your welcome experience
This step goes hand-in-hand with creating roles and channels. Build a welcome experience that serves as a foundation for your community's interactions and atmosphere.
While Community servers have a welcome screen option, I'm talking about everything that makes your community's new members familiar with it. This experience could include a rules channel, an introduction to your server, or a guide to your server channels.
The ideal welcome experience for your server will depend on the environment you want to promote in your community. This guide will provide more details and examples to get you started.
Add bots and apps
You can add a variety of digital doodads to Discord to automate your server's daily operations. Click on your server name and go to the App Directory to find bots and integrations for your server. The Discord community creates apps for all sorts of purposes, including fun games and easier server moderation.

When Discord's existing apps don't offer what you're looking for, Zapier can connect thousands of apps to Discord through a DIY bot. You could automatically send your new YouTube videos to a channel on your server, for example, among tons of other possibilities. Learn more about how to automate Discord, or get started with one of these pre-made templates.
More details
Zapier is a no-code automation tool that lets you connect your apps into automated workflows, so that every person and every business can move forward at growth speed. Learn more about how it works.
Invite members
Once your server is filled with channels, roles, and a community vision, it's time to reveal it to the world! Click on your server name and choose Invite People to create an invite link, or invite people from your friend list.

You can also direct invitees to a specific channel by right-clicking the channel name and choosing the Invite People option.
Click Edit invite link below your server invite link to change parameters like how long it'll be active and how many new members you can invite with it. These limits make it easier when you want a specific group to join your server versus the general public.
Take your server even further
Once you get the hang of building and managing your own Discord server, try going the extra mile with these business-boosting features:
Server monetization: Monetize your community by visiting the Monetization section of your main settings menu. You'll get the chance to sell exclusive subscriptions, roles, and digital products.
Server insights: Click your server name and choose Server Insights to see what your members are doing with your community.
Server boosts: Ask your members to boost your server using their Nitro subscription or an individual payment to get features like custom server banners and role icons.
Related reading:
This article was originally published in April 2023. The most recent update was in March 2025.
