Adding columns and rows in Google Sheets can be a two-click process. Open your spreadsheet, and follow along below to see how it's done.
How to add columns in Google Sheets
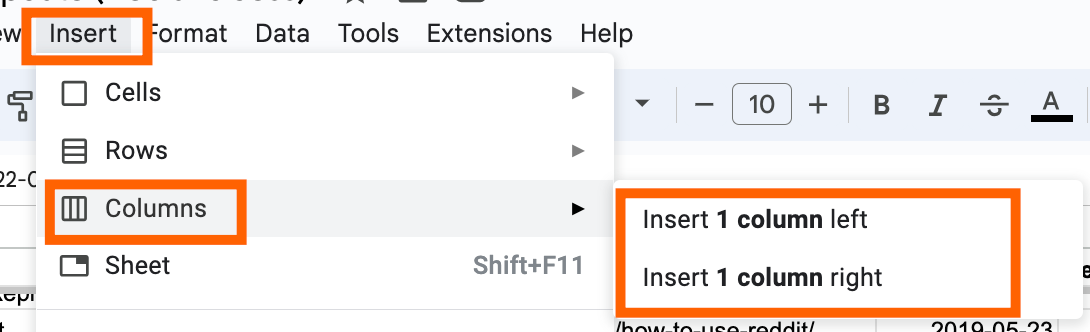
Here's how to add a column in Google Sheets:
Click anywhere in the column that's next to where you want your new column.
Click Insert in the toolbar.
Click Columns, and then select either Insert 1 column left or Insert 1 column right, depending on where you want your new column.
That's it! Your new column will appear.
How to add columns in Google Sheets using right-click
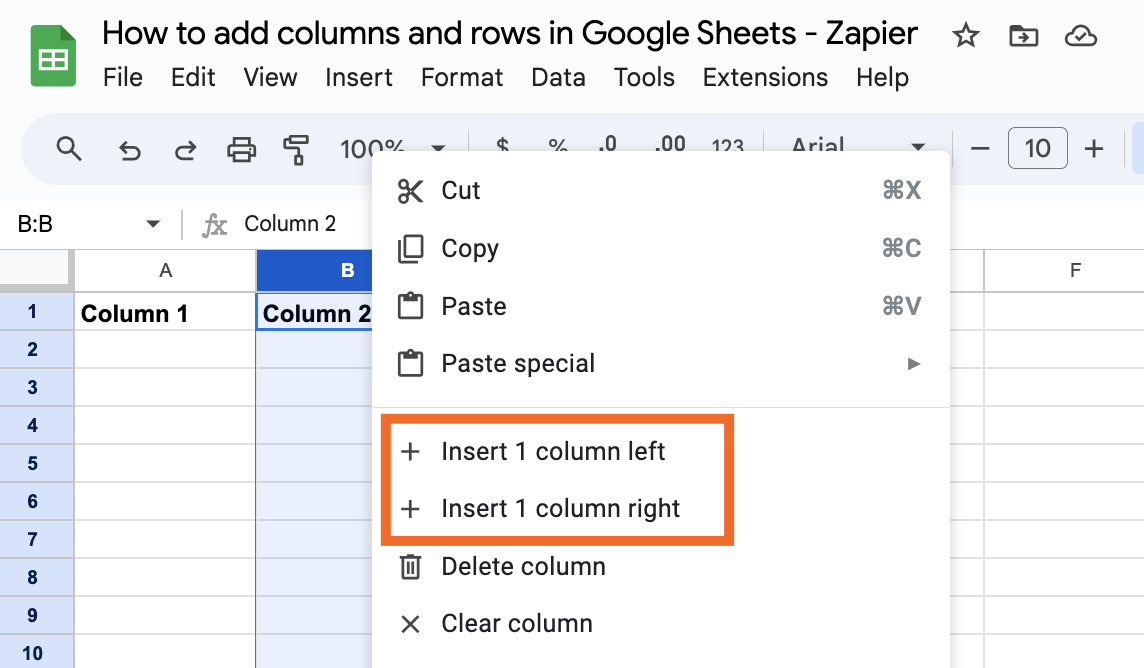
You can achieve the same effect without the toolbar by using the right-click function on your mouse or trackpad.
Instead of just clicking into the column, you'll need to select the entire column next to where you want your new column. Do this by clicking the letter at the top of the column.
Right-click anywhere in that column, and then select either Insert 1 column left or Insert 1 column right.

How to add multiple columns in Google Sheets
If you want to add multiple columns, you can follow the same process, but—whether using the toolbar or the right-click method—start by highlighting the number of columns you want to add.
For example, if you want to add two columns, highlight the two columns next to the columns you want to add. (You can do this by clicking on the letter at the top of the first column and immediately dragging across to highlight more.) If you want to add ten columns, highlight the ten columns next to the columns you want to add. And so on.

How to add rows in Google Sheets
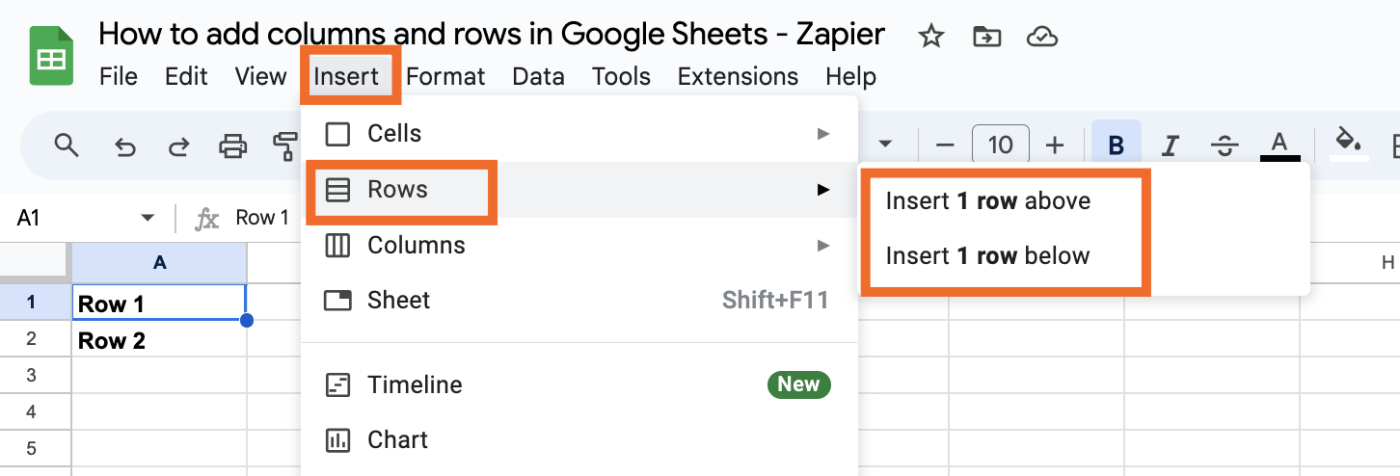
Here's how to add a row in Google Sheets:
Click anywhere in the row that's either above or below where you want your new row.
Click Insert in the toolbar.
Click Rows, and then select either Insert 1 row above or Insert 1 row below, depending on where you want your new row.
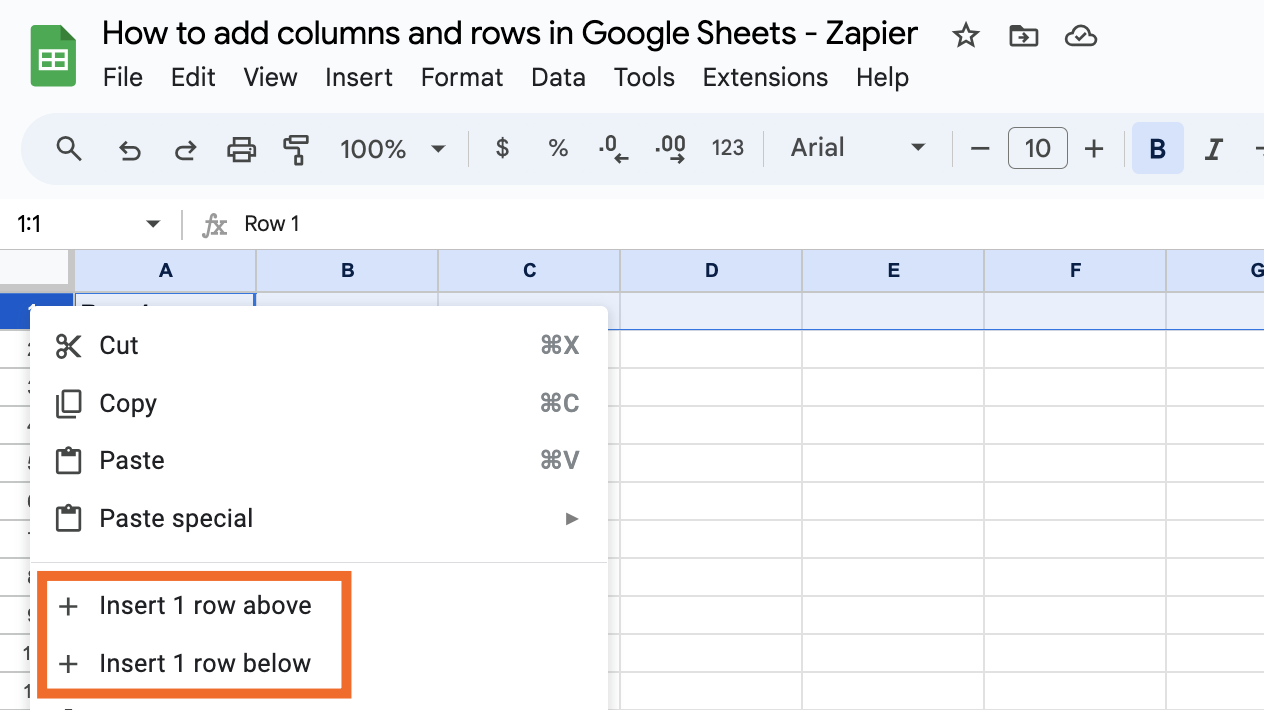
How to add rows in Google Sheets using right-click
Same as with columns, you can achieve the same effect with a right-click.
Select the entire row above or below where you want your new row. Do this by clicking the number to the left of the row.
Right-click anywhere in that row, and then select either Insert 1 row above or Insert 1 row below.
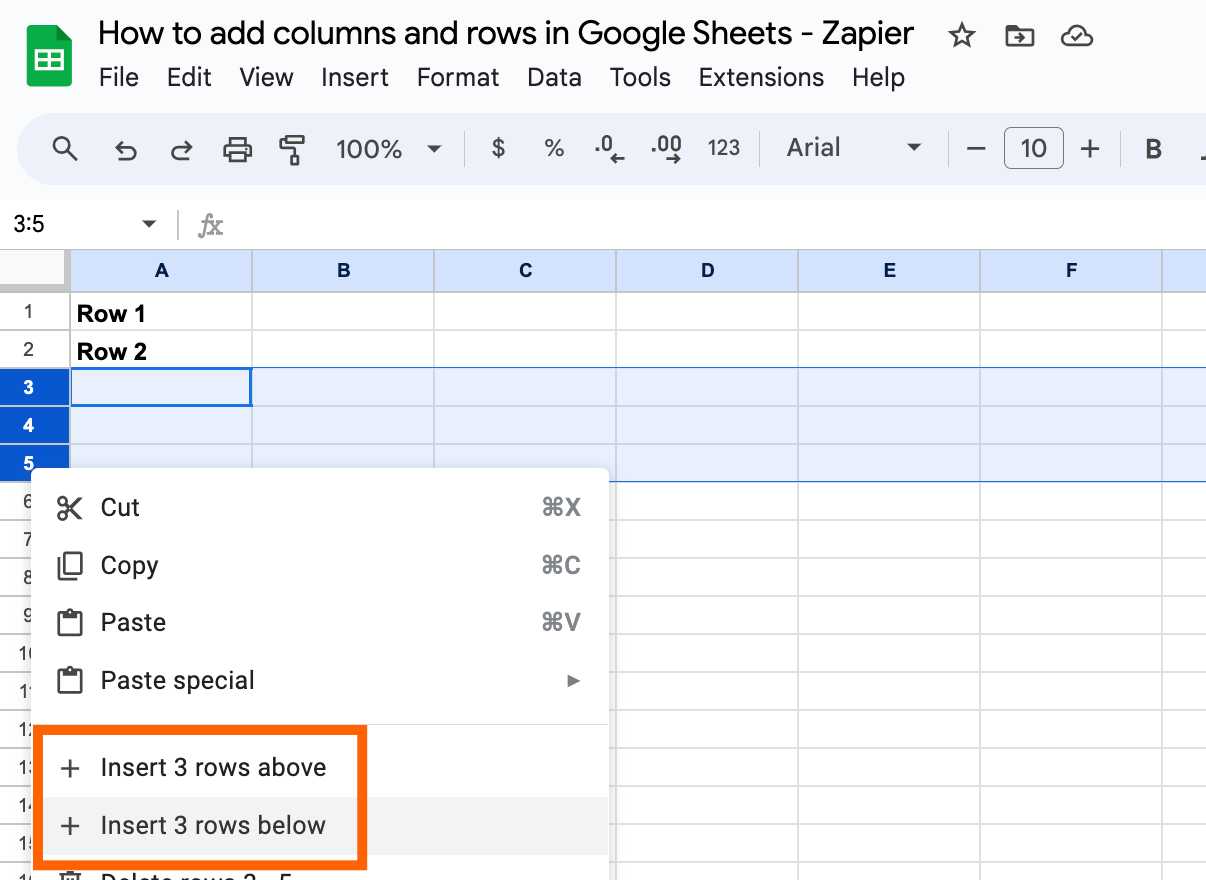
How to add multiple rows in Google Sheets
Broken record time. If you want to add multiple rows, you can follow the same process, but—whether using the toolbar or the right-click method—start by highlighting the number of rows you want to add.
For example, if you want to add two rows, highlight the two rows above or below the rows you want to add. (You can do this by clicking on the letter next to the first row and immediately dragging down to highlight more.) If you want to add ten rows, highlight the ten rows above or below the rows you want to add. And so on.
If you want to add a large number of rows to the bottom of your spreadsheet, scroll all the way to the bottom and you'll see the option to add any number of rows. Type the number of rows you want, and click Add.
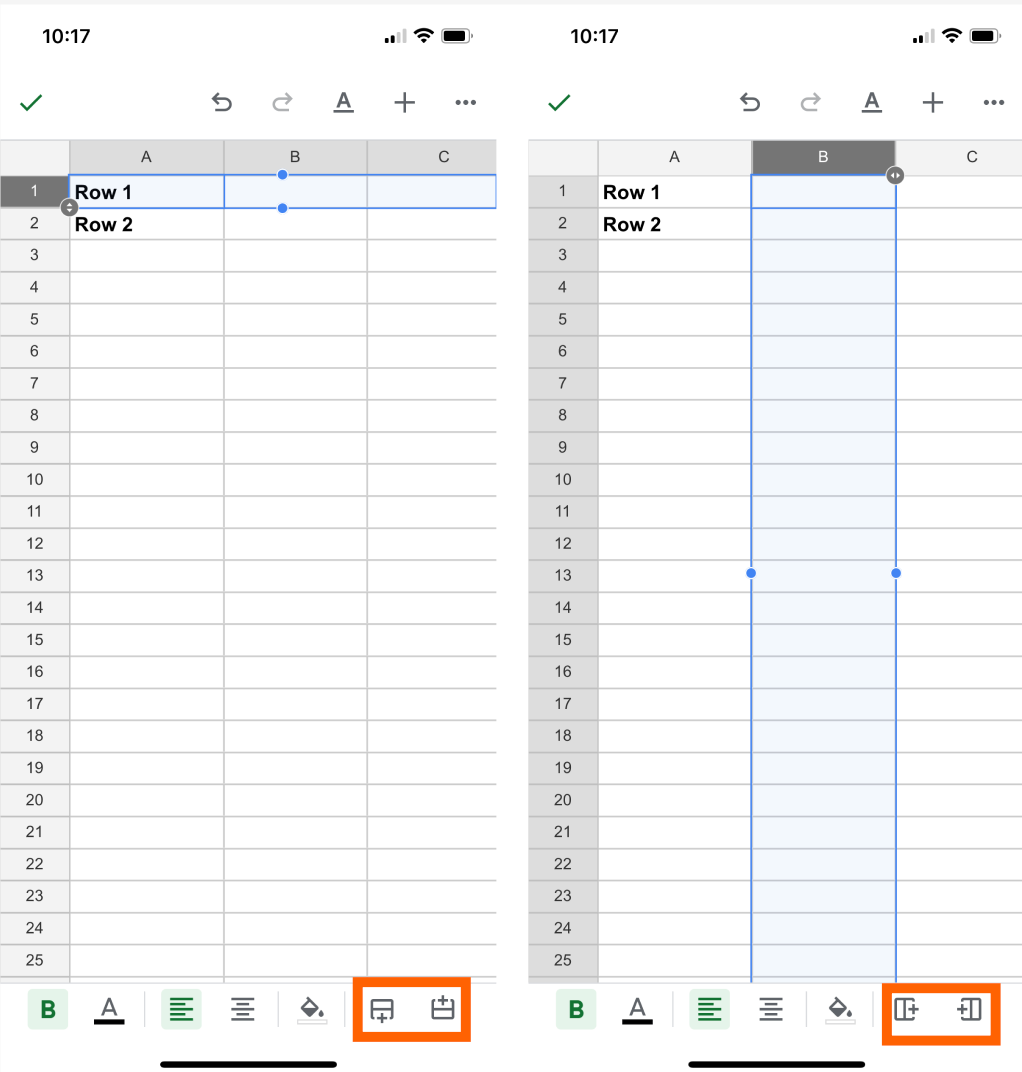
How to add rows and columns to Google Sheets on the mobile app
There are a few ways to add a column or row on the Google Sheets app, but here's the easiest way.
Tap the number of the row or column next to where you want your new row or column.
Tap the icon at the bottom-right of the screen indicating where you want the new row or column to go.
For rows, the plus signs on the top and bottom indicate where the new row will be added. For columns, the plus signs on the left and right indicate where the new row will be added.
Automatically add rows to Google Sheets
You can automatically add rows to Google Sheets based on activity in other apps, like Gmail, Typeform, or Shopify. Just connect Google Sheets to Zapier, and then set up your no-code workflow. Learn more about how to automate Google Sheets, or get started with one of these pre-built templates.
More details
More details
Zapier is a no-code automation tool that lets you connect your apps into automated workflows, so that every person and every business can move forward at growth speed. Learn more about how it works.
Related reading:
This article was originally published in May 2019. The most recent update was in March 2024.